
You sir aren’t going to run out of fuel anytime soon. Tempted to get a 10l to complement my 2 20l’sMoar awesomeness from Canadian friend
View attachment 2057801
Navigation
Install the app
How to install the app on iOS
Follow along with the video below to see how to install our site as a web app on your home screen.
Note: This feature may not be available in some browsers.
More options
You are using an out of date browser. It may not display this or other websites correctly.
You should upgrade or use an alternative browser.
You should upgrade or use an alternative browser.
Builds DRANGED's GX470 build/ownership thread (2 Viewers)
- Thread starter DRANGED
- Start date
-
- Tags
- build build thread
This site may earn a commission from merchant affiliate
links, including eBay, Amazon, Skimlinks, and others.
- Thread starter
- #342
xactly!You sir aren’t going to run out of fuel anytime soon. Tempted to get a 10l to complement my 2 20l’s
two 20s and a 10 for myself... and same set-up for a couple friends

Last edited:
- Thread starter
- #343
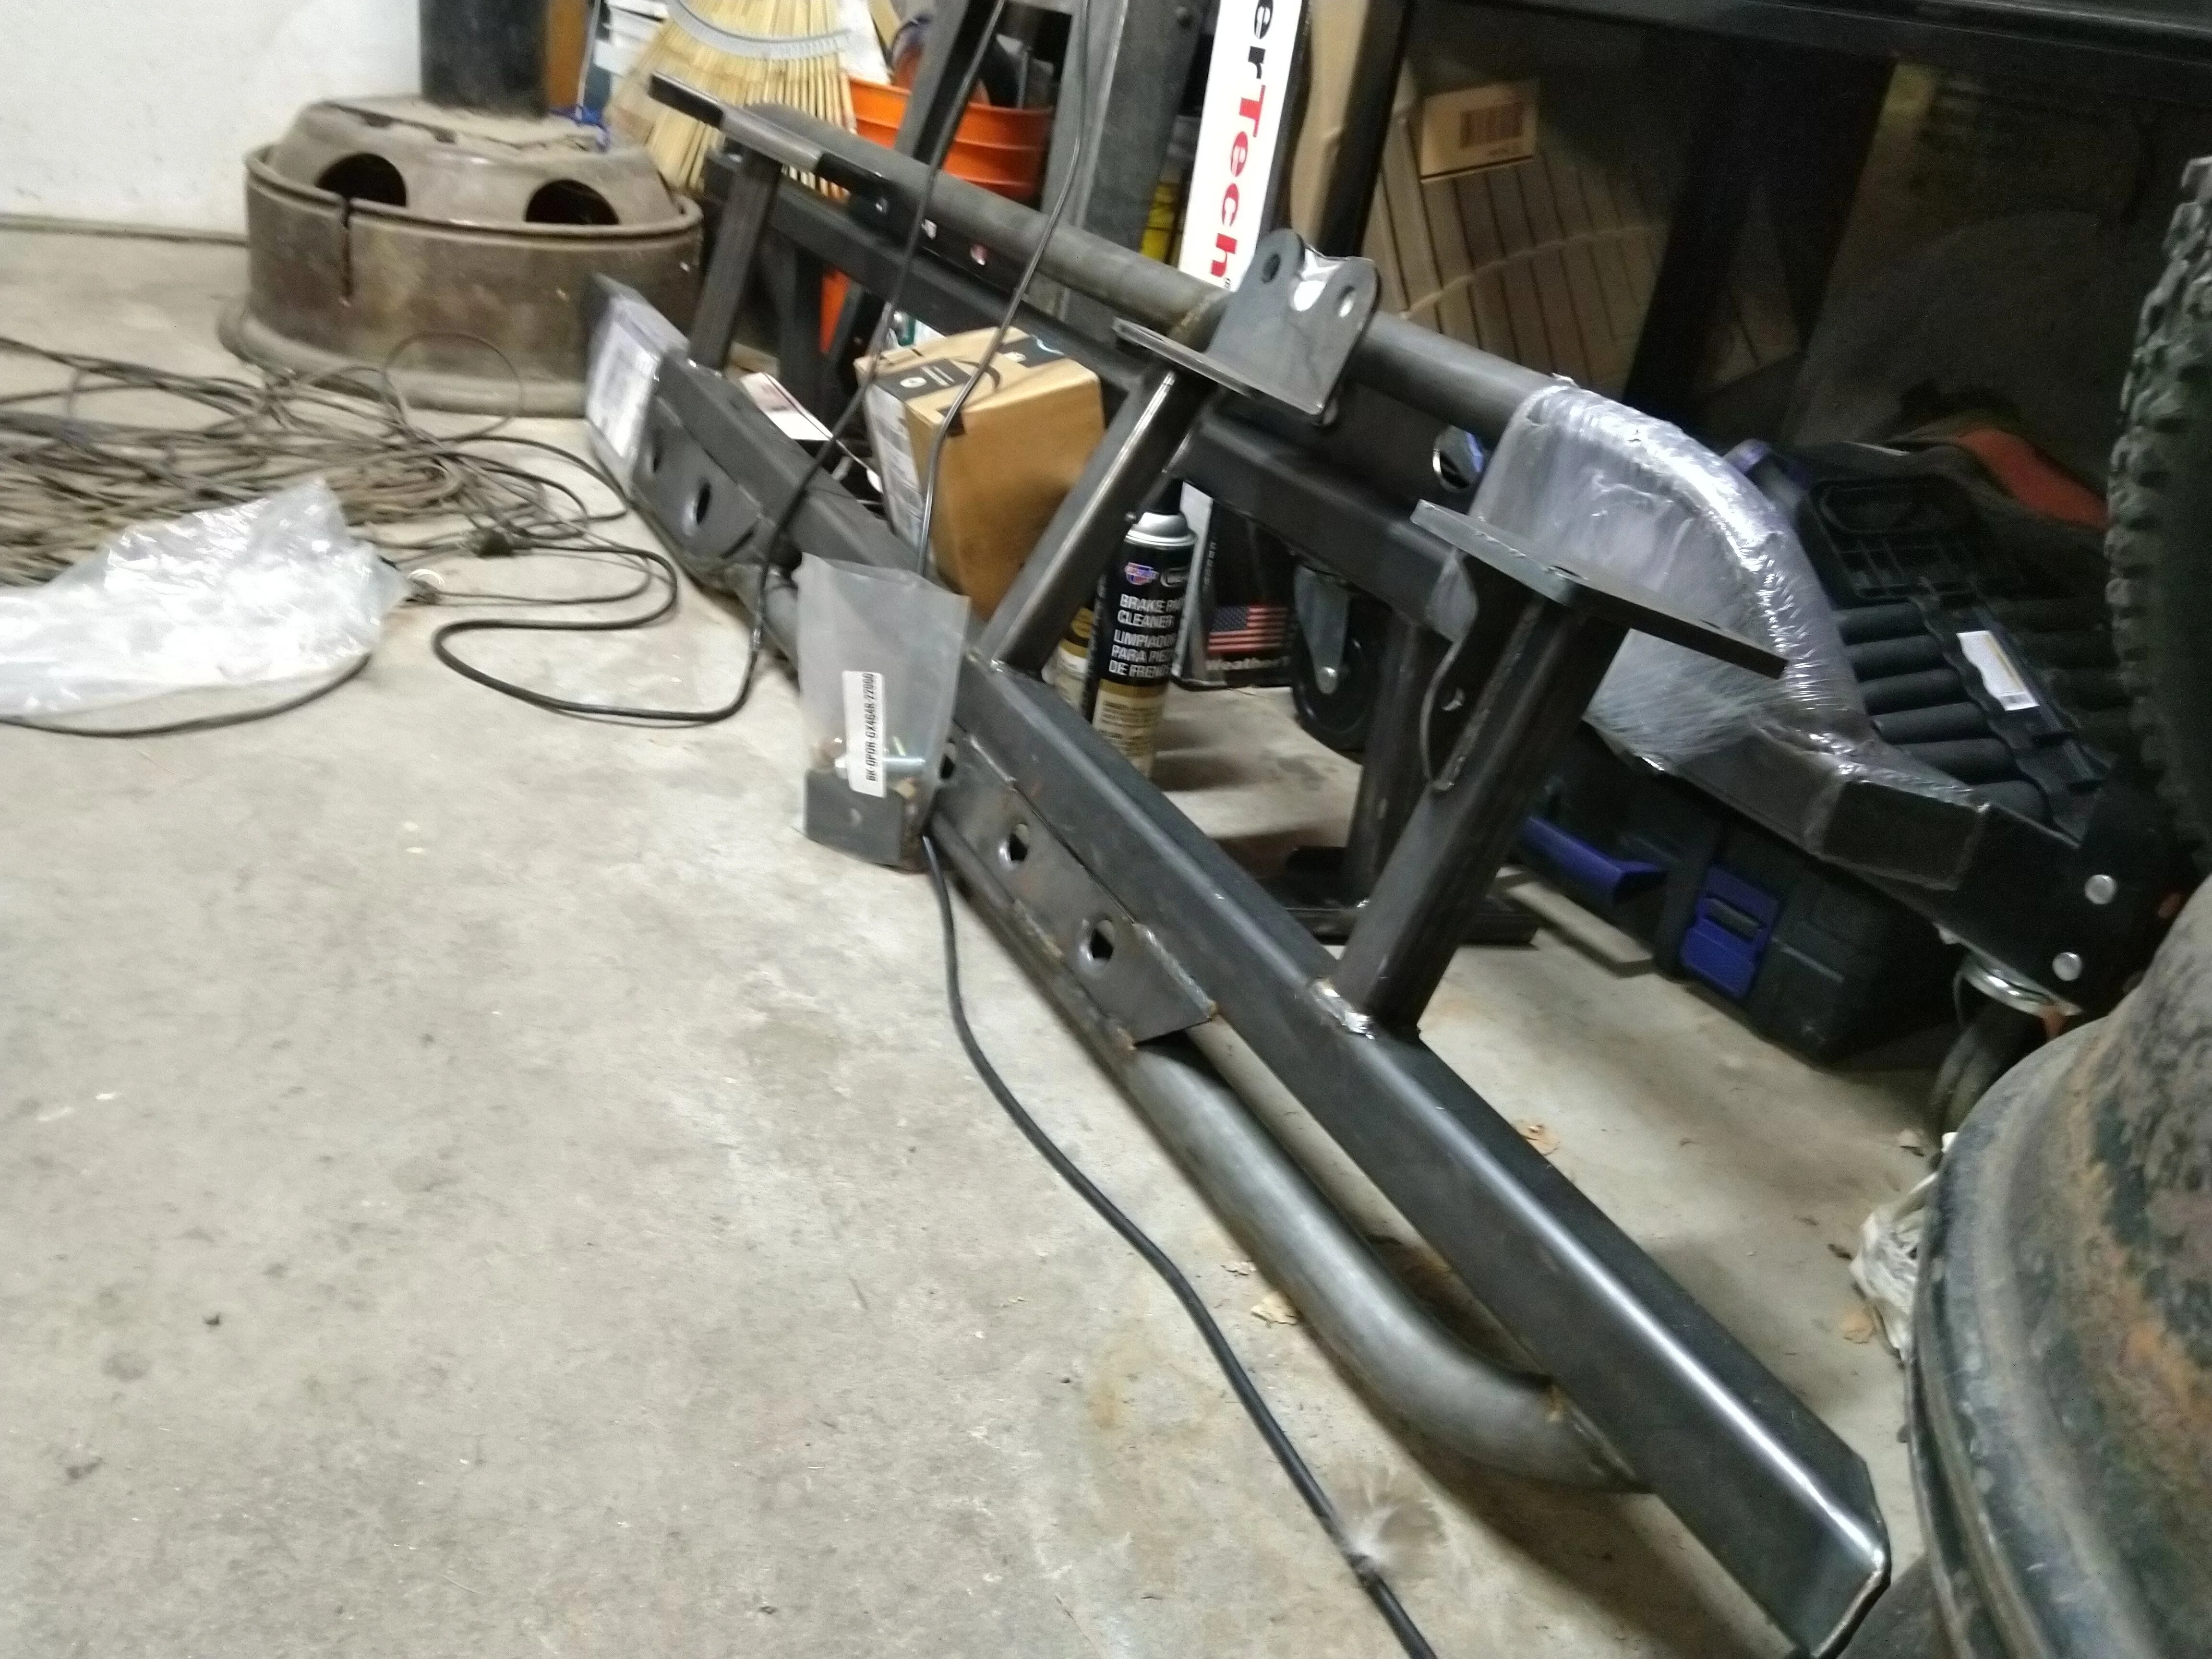
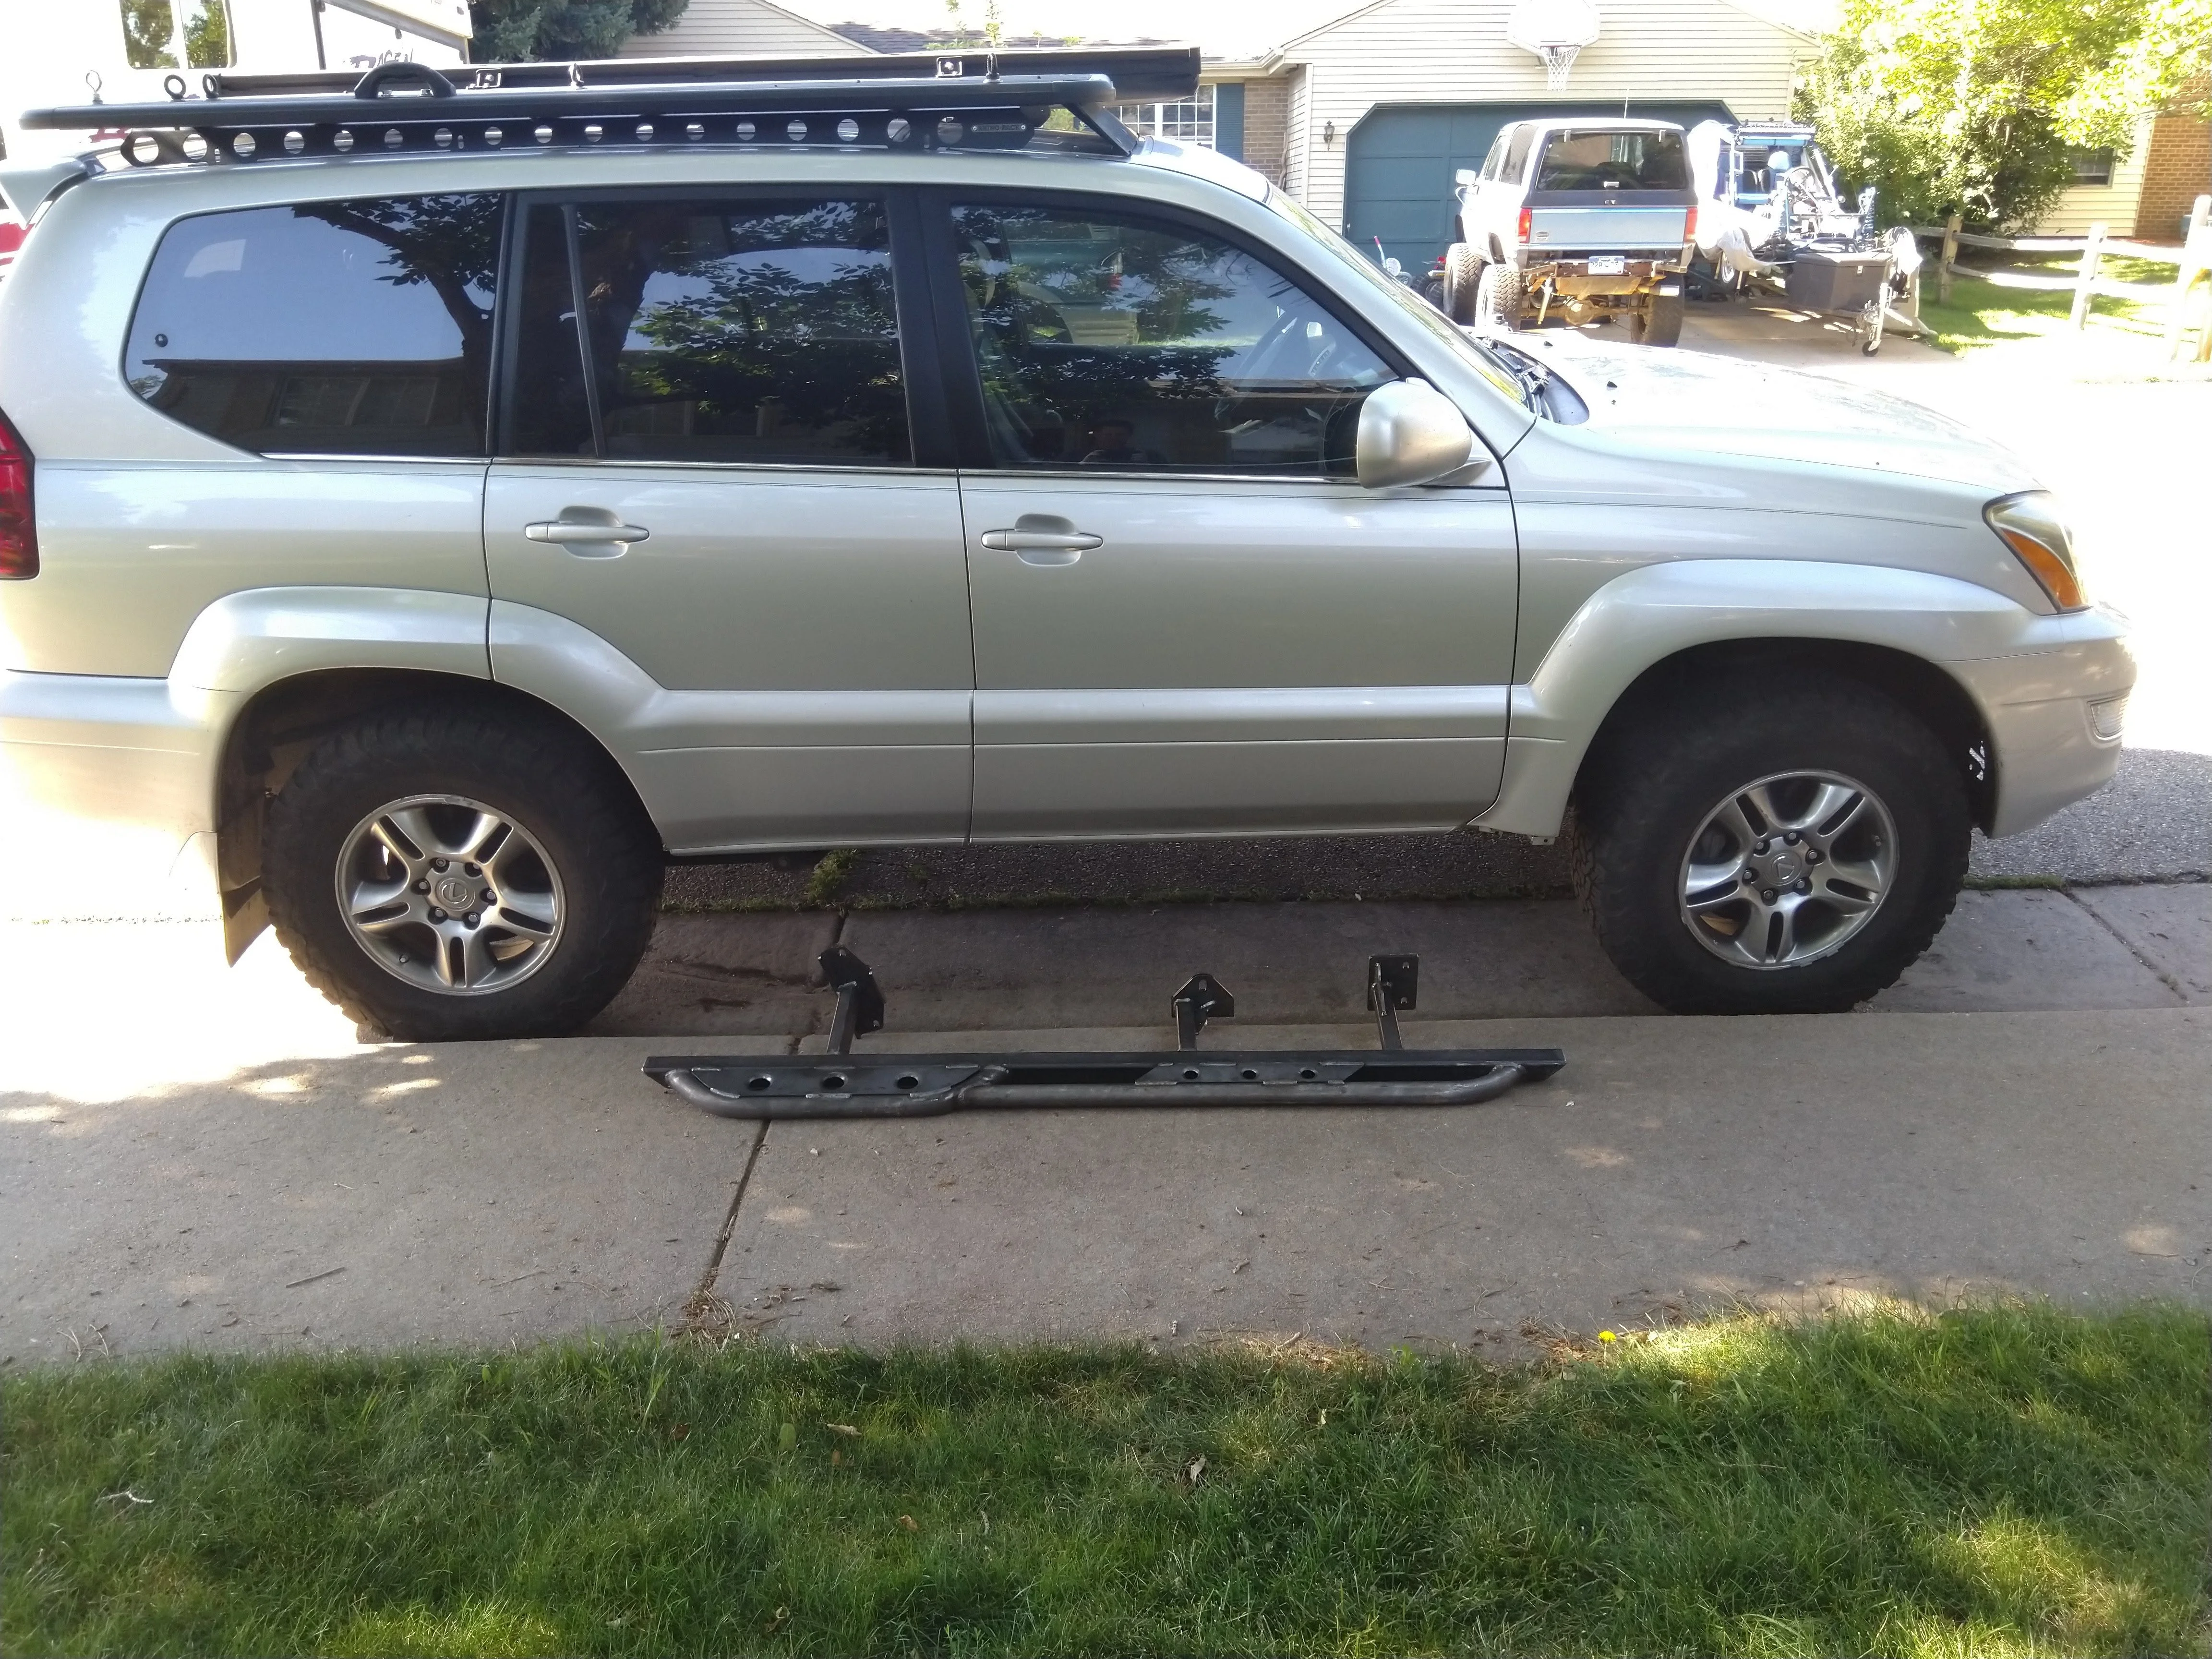
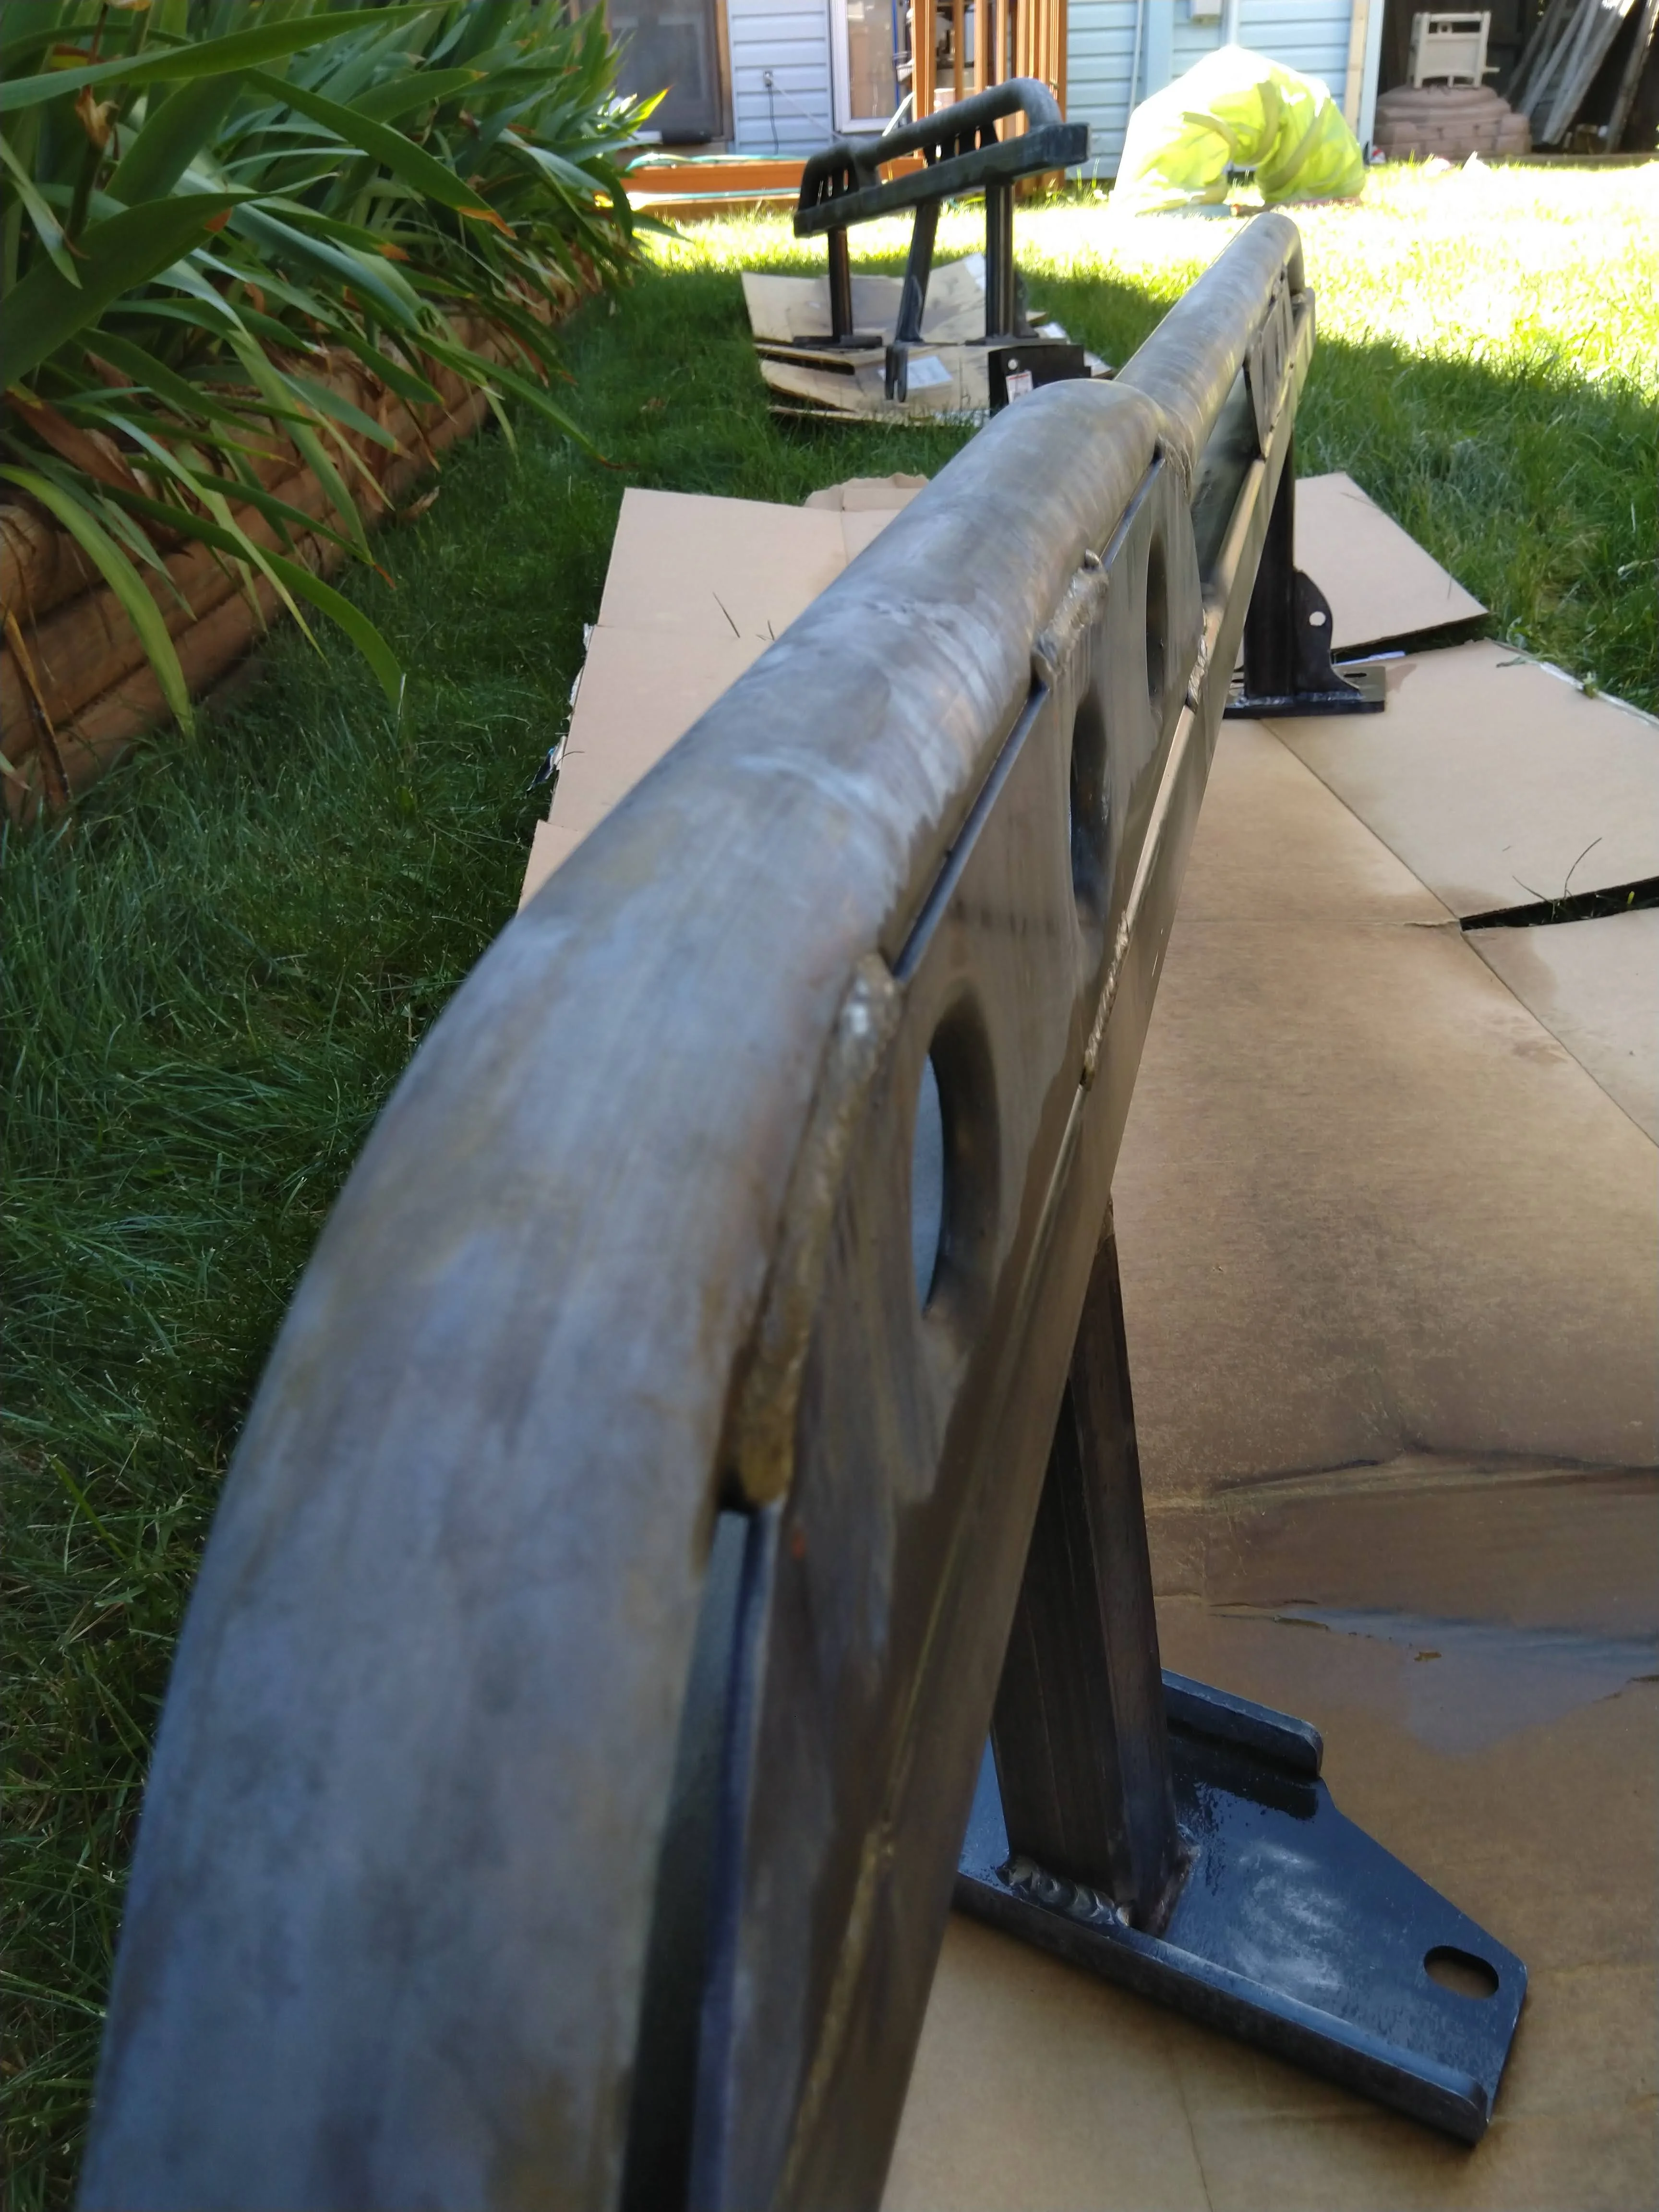
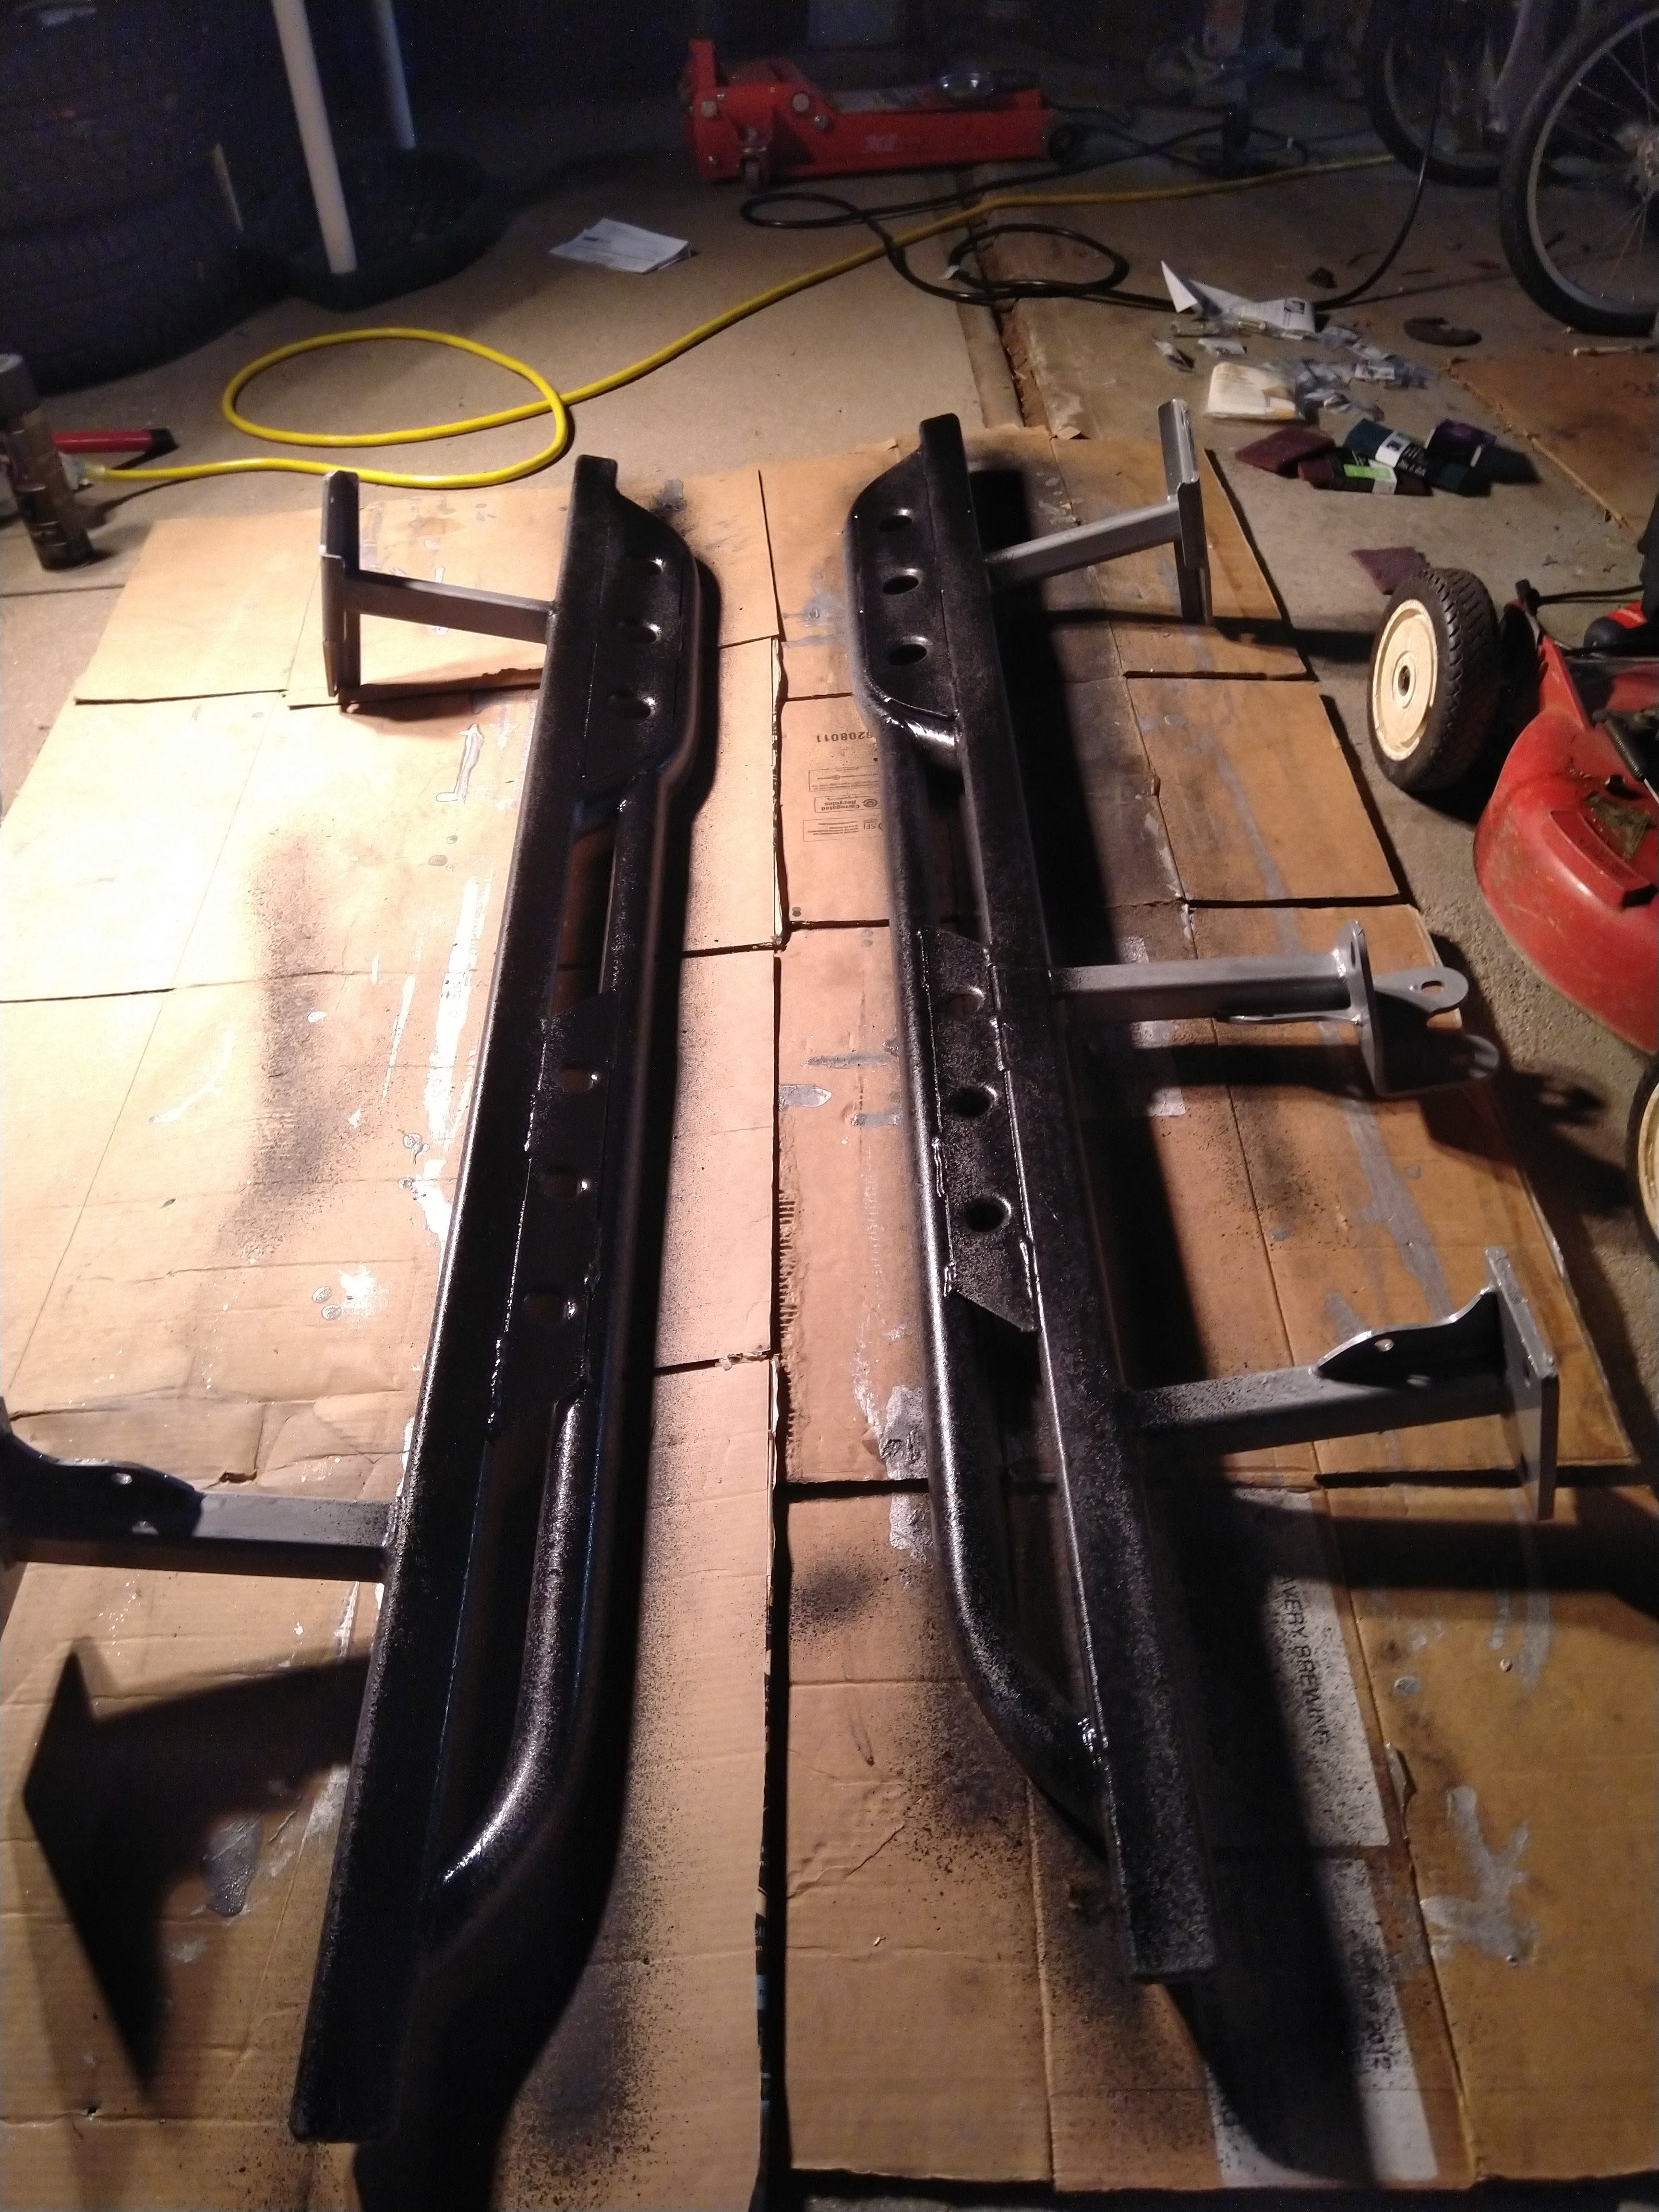
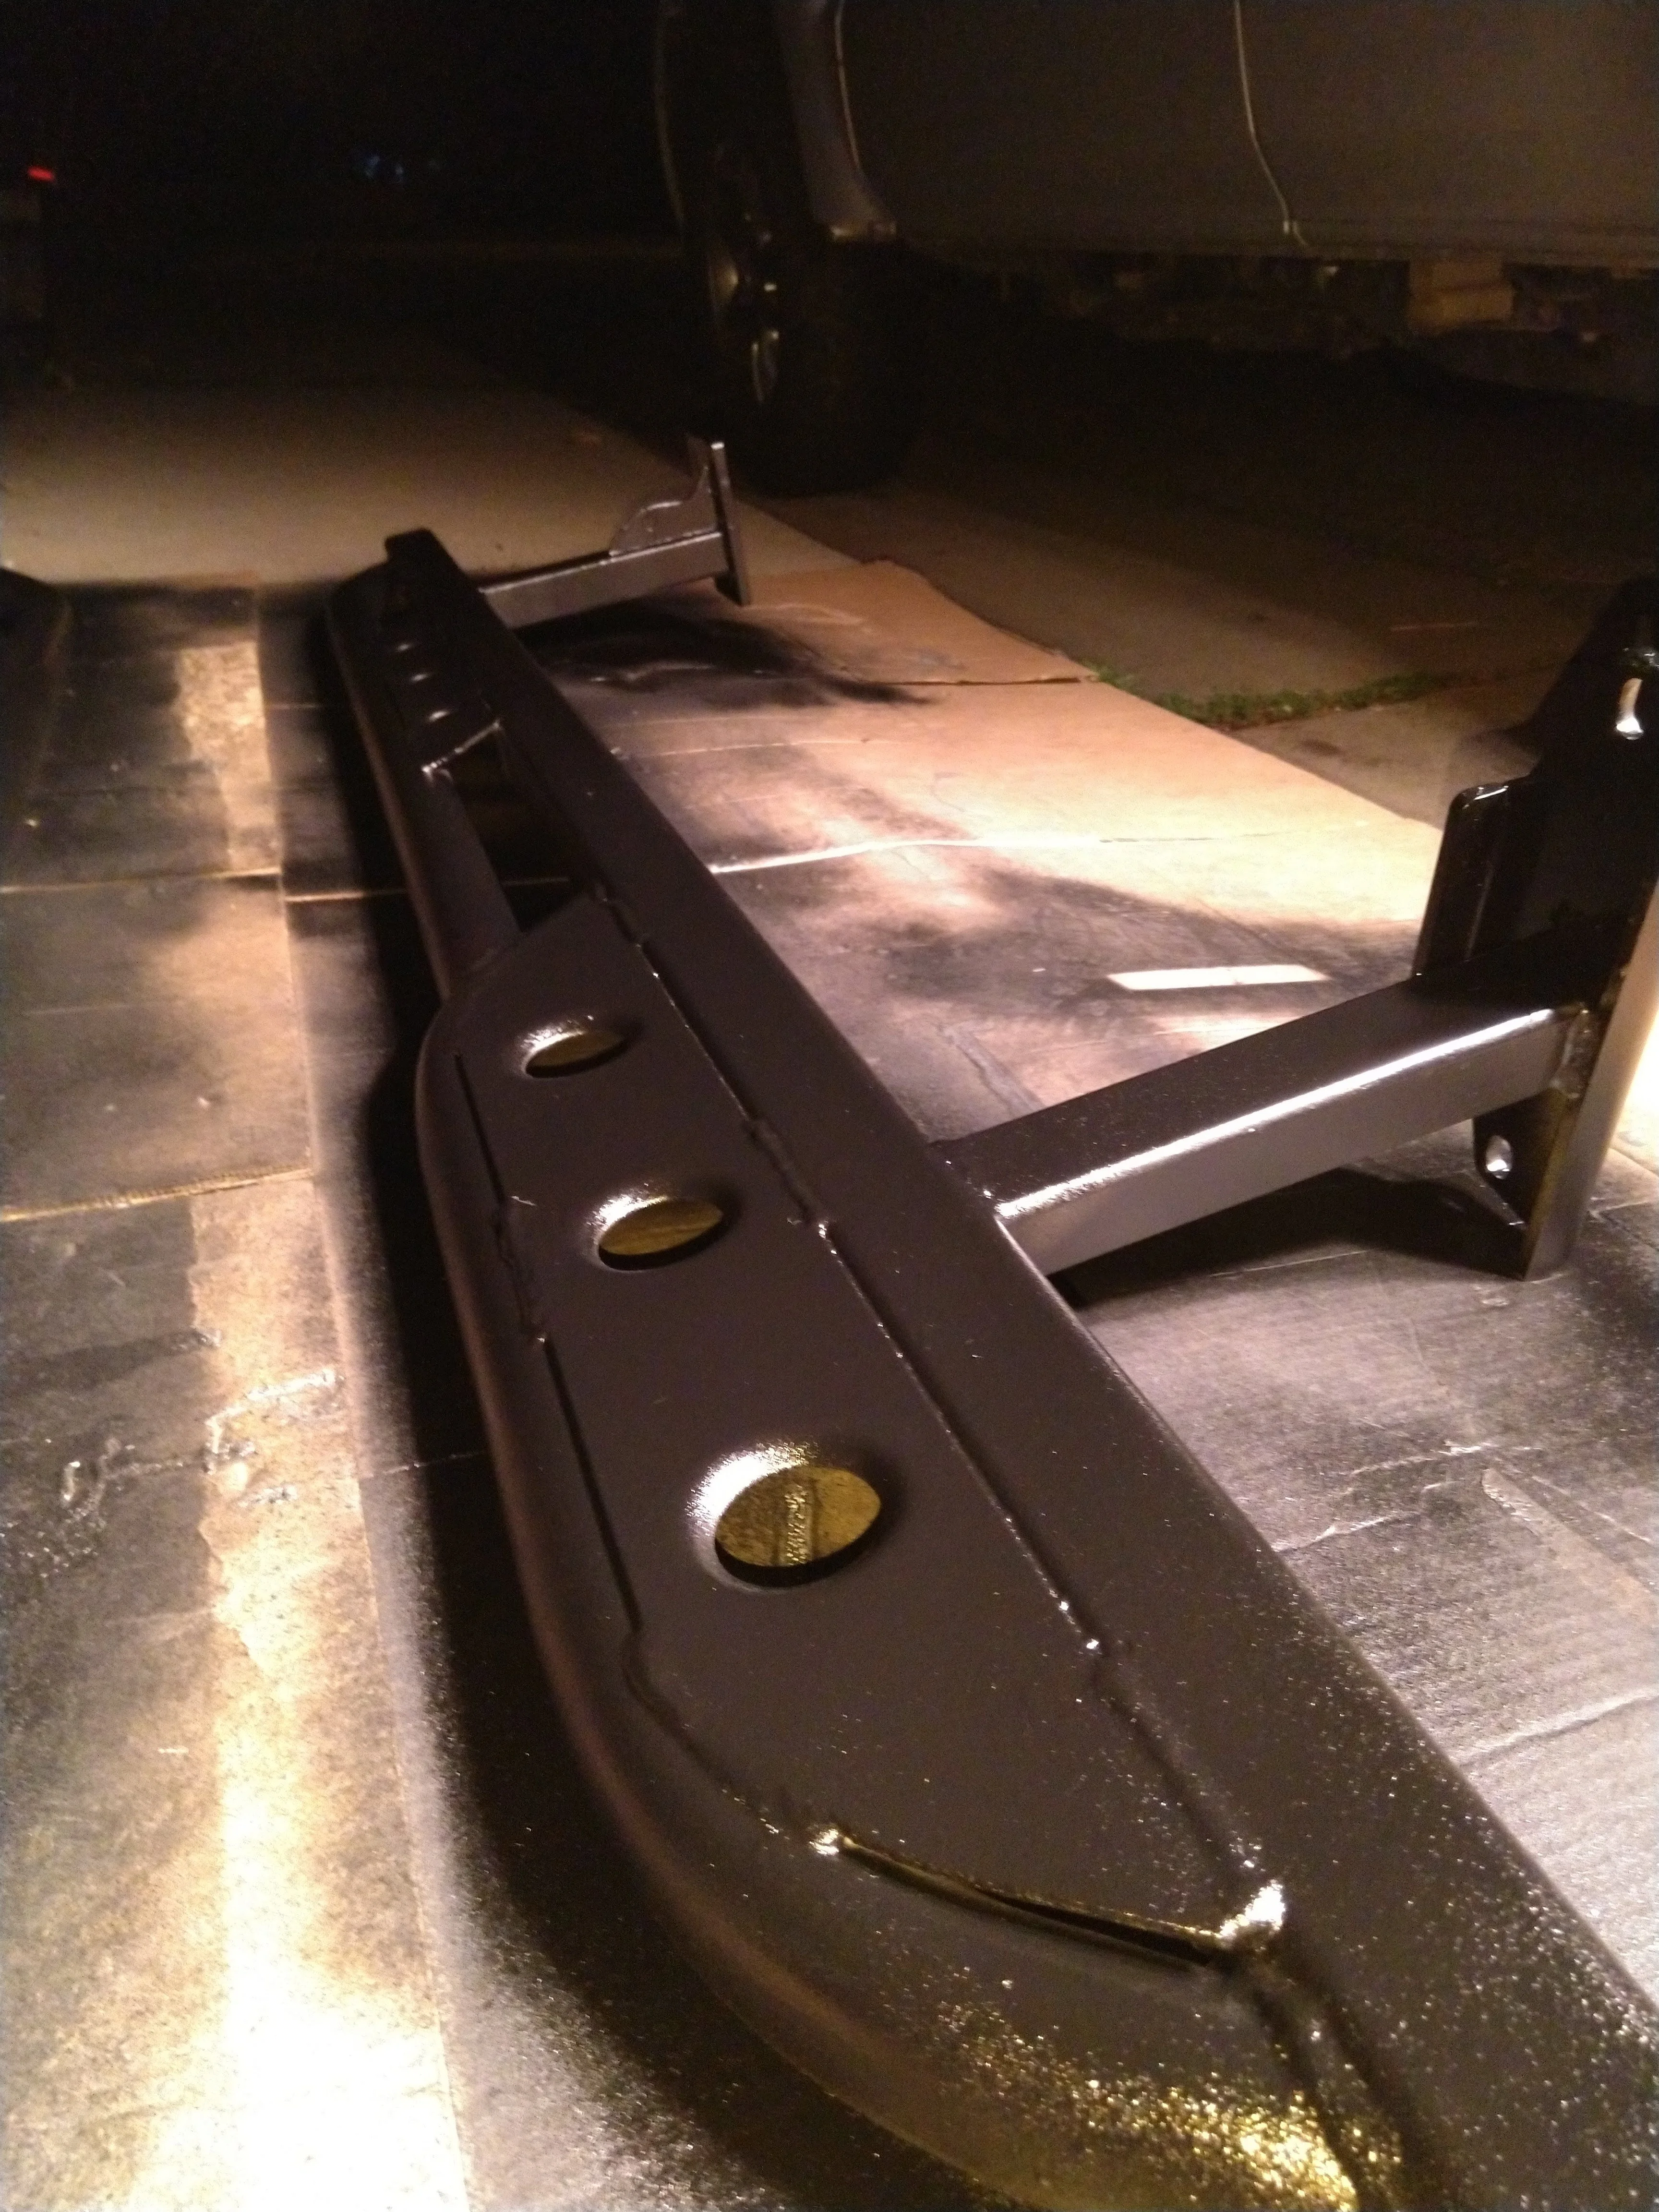
I finally got around to prepping and mounting my MT/OPOR GX KDSS-compliant sliders ... 10 weeks after they'd delivered! 

I've posted elsewhere, but it needs to be in the build thread too.
Caveat, My GX slider expereince is limited to WNO and MT/OPOR. I've mounted white knuckle's to a friend's KDSS GX and now the MT/OPOR to my KDSS GX. The WNO are WAAAAAAAY easier!!! IMO, each slider has its pros and cons.
@Bluetribal drafted a great install thread, which was revived and added to by other users through time and has good tips and tricks.
White knuckle Off road ($595+ shipping in DOM, bare steel, no deck, KDSS)
For the GX, these are OPOR (Outpost Off road) vs Metal Tech sliders. MT's are known, tried and true, burly sliders! OPOR gets to use MT trademark design and are a little less burly (2x2 main slider vs 2x3 or 2x4 boxed main rails....compare to 80s, 100s, 200s, 5th gen 4R for visual) but were the first to come out with KDSS-compliant sliders for GX and 4R, so also tried and true!
I've posted elsewhere, but it needs to be in the build thread too.


Caveat, My GX slider expereince is limited to WNO and MT/OPOR. I've mounted white knuckle's to a friend's KDSS GX and now the MT/OPOR to my KDSS GX. The WNO are WAAAAAAAY easier!!! IMO, each slider has its pros and cons.
@Bluetribal drafted a great install thread, which was revived and added to by other users through time and has good tips and tricks.
White knuckle Off road ($595+ shipping in DOM, bare steel, no deck, KDSS)
- 3/16″ thick x 2″ x 3″ rectangular tube main rub rail for greater foundational strength
- 3/16″ thick x 1-1/2″ square tube legs to limit flexing while traversing obstacles
- 0.120″ thick x 1-3/4″ outer rub rail with kick-out at rear to assist in pushing away from obstacles
- 3/8″ thick heavy duty mounting plates
- 1/4″ thick gussets for added strength
- can come flat or slightly angled up (10 deg?)
- 2x3 main slider tube
- can be fully decked - diamond plate
- clean, one-tube design with kick, cross-bar supported
- come up a little short of wheel wells; advertised @ 68-1/2″
- mount with U-bolt front and rear, 2-legs each side
- support bars/feet are 1.5" wide? (I need to measure for precision)
For the GX, these are OPOR (Outpost Off road) vs Metal Tech sliders. MT's are known, tried and true, burly sliders! OPOR gets to use MT trademark design and are a little less burly (2x2 main slider vs 2x3 or 2x4 boxed main rails....compare to 80s, 100s, 200s, 5th gen 4R for visual) but were the first to come out with KDSS-compliant sliders for GX and 4R, so also tried and true!
- 2 x 2 x 0.188 box tube with mitered ends as the main slider body
- 1.5 x 1.5 x 0.188 box tube for support legs
- custom laser cut mounting feet made out of 1/4" plate with a gusset that acts as a secondary mount for rock lights!
- Our rub rails are made out of 1.75 x 0.120 wall DOM SRA tube
- only flat
- 2x2 main slider tube
- come with partial decking @ doors: perforated 1/4" steel which acts as support, i.e. no tube supports b/t slider and rub-rail
- rub-rail is two-tube design (took me a little time to accept), also a support design to rub rail
- Better wheel well to wheel well fit; mine measured @ 71.5"
- U-bolt rear legs (no gusset, but leg is rotated slightly on main slider for diamond vs square support
- 2 legs driver side to accomodate KDSS plumbing and pump
- 3 legs passenger side
- front legs use threaded 8mm bolt and rivet nut (I used stick nut to bolt to frame, no rivet nus)
- passenger middle leg uses long bolt and plate steel to bolt through frame rail and rivet nuts (I sleeved upper bolt-through and used nuts welded to plate for bottom bolts.

Last edited:
- Thread starter
- #344
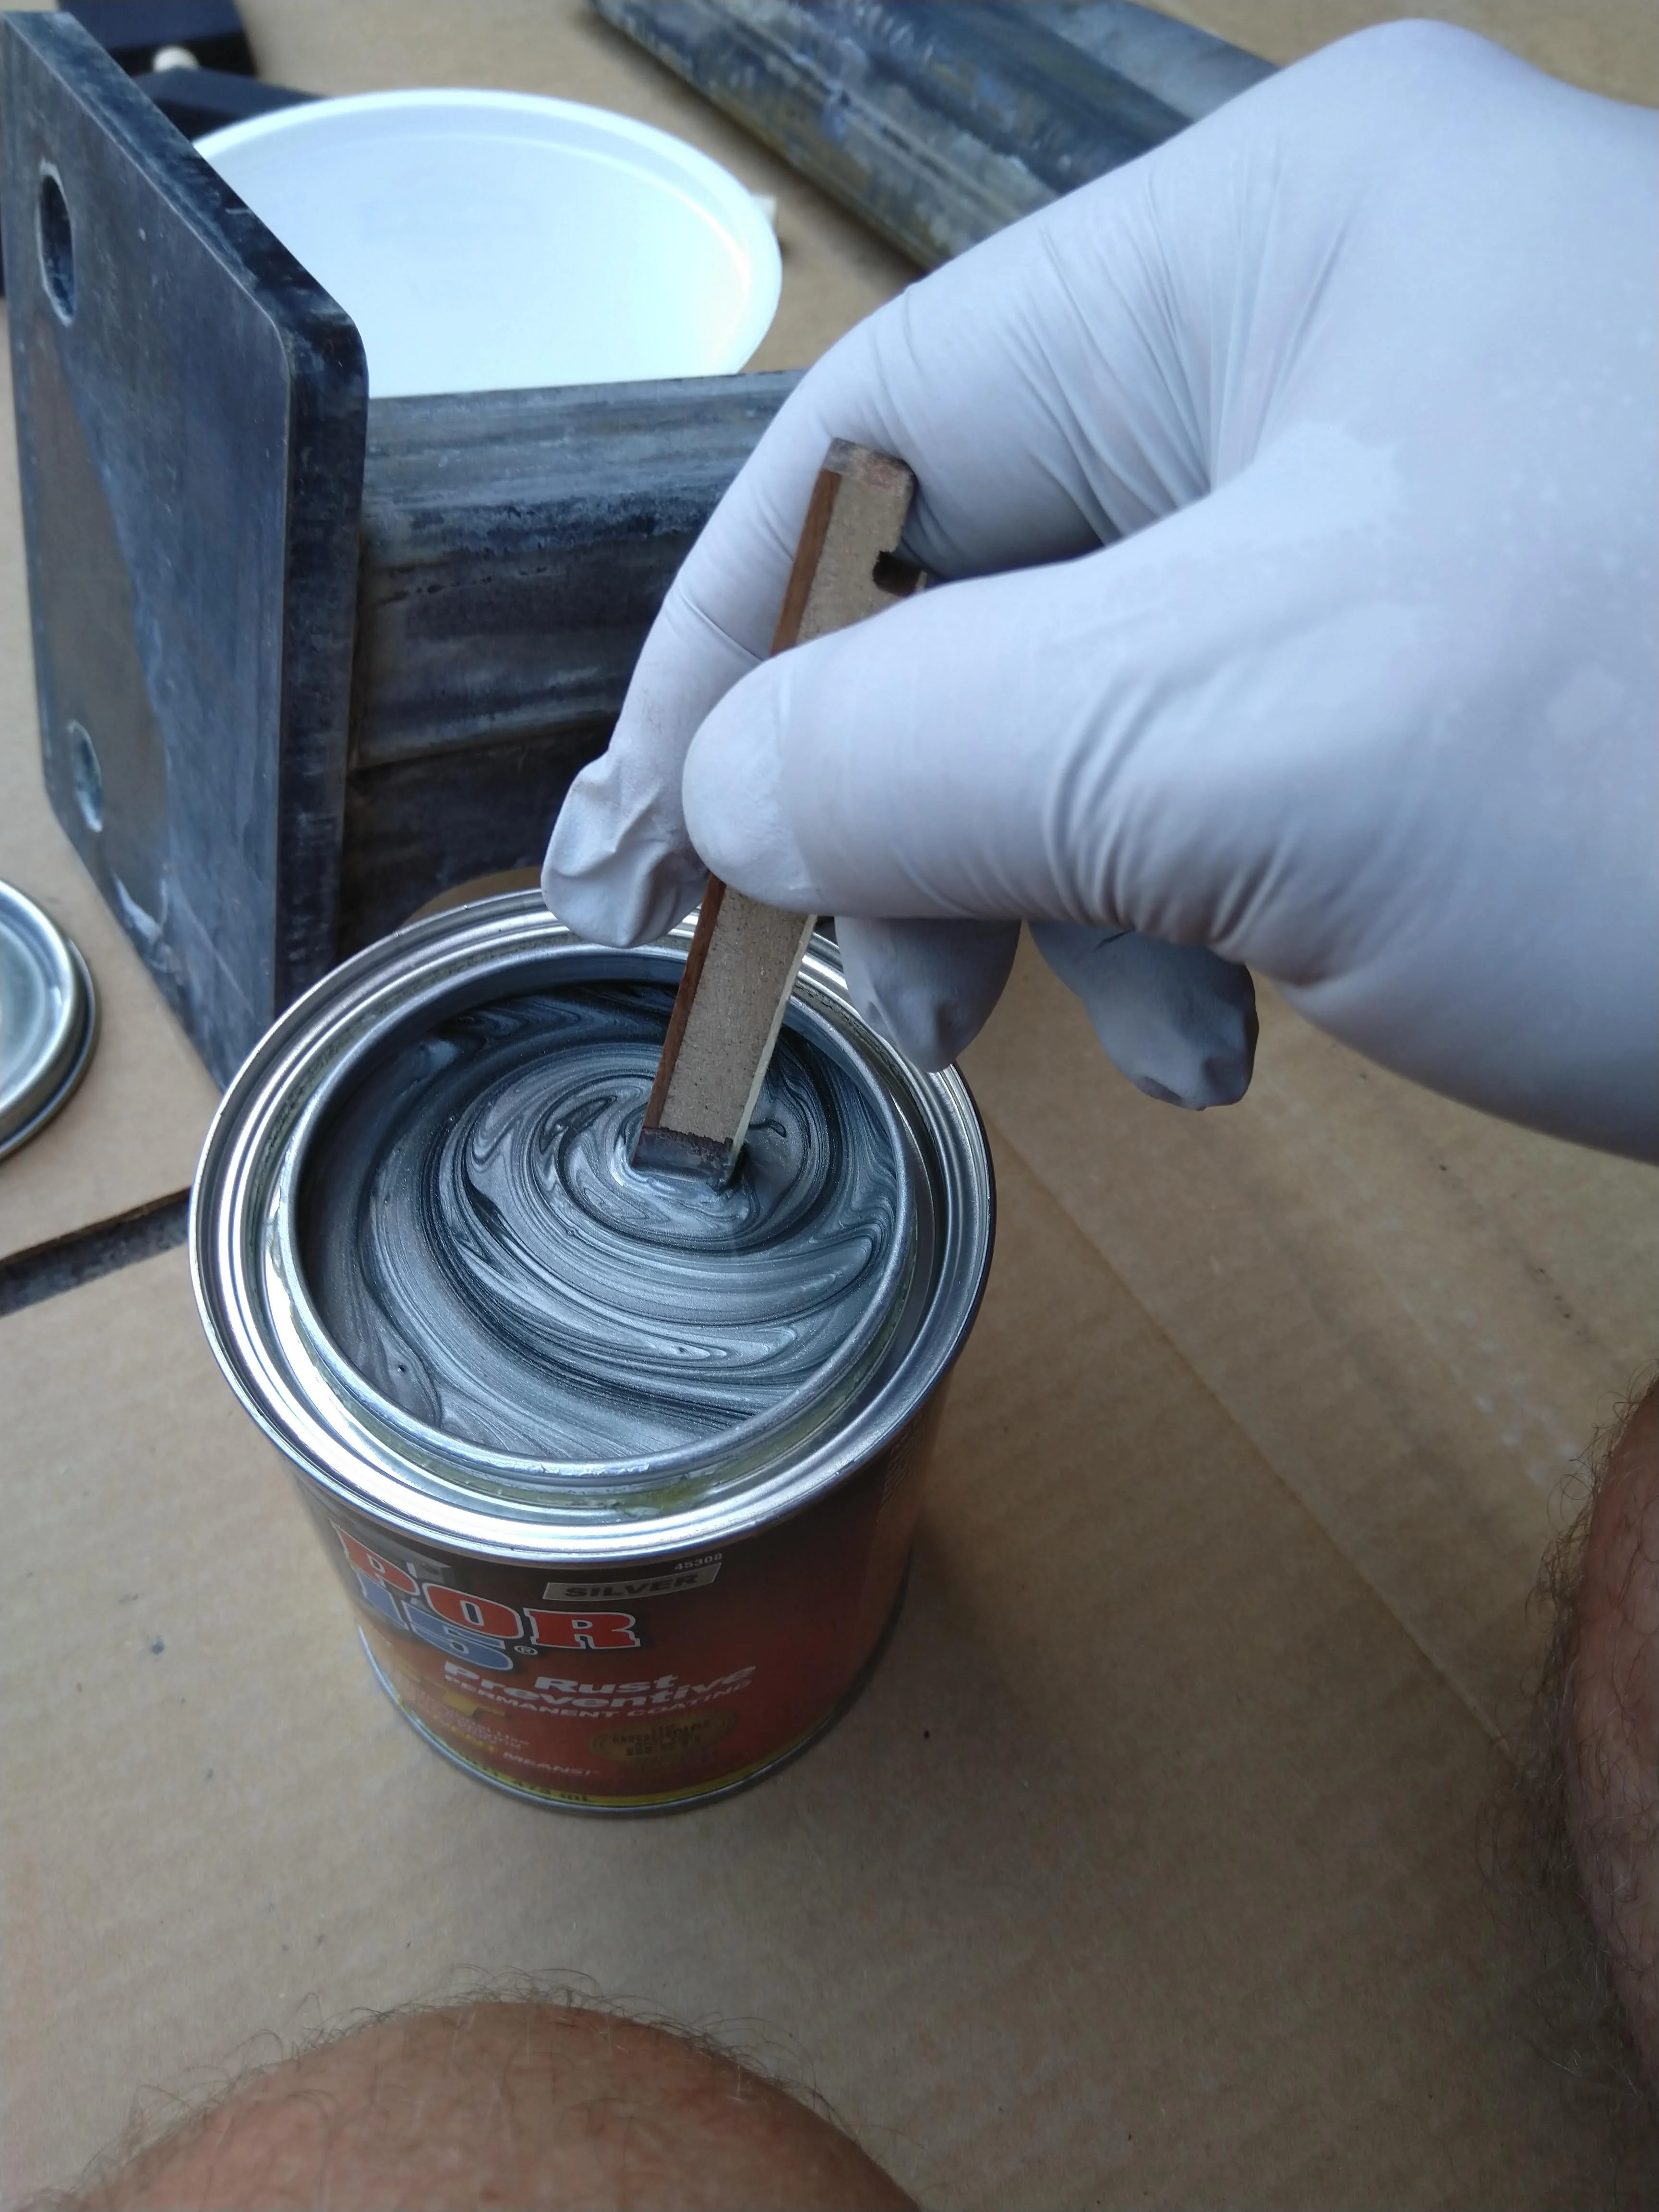
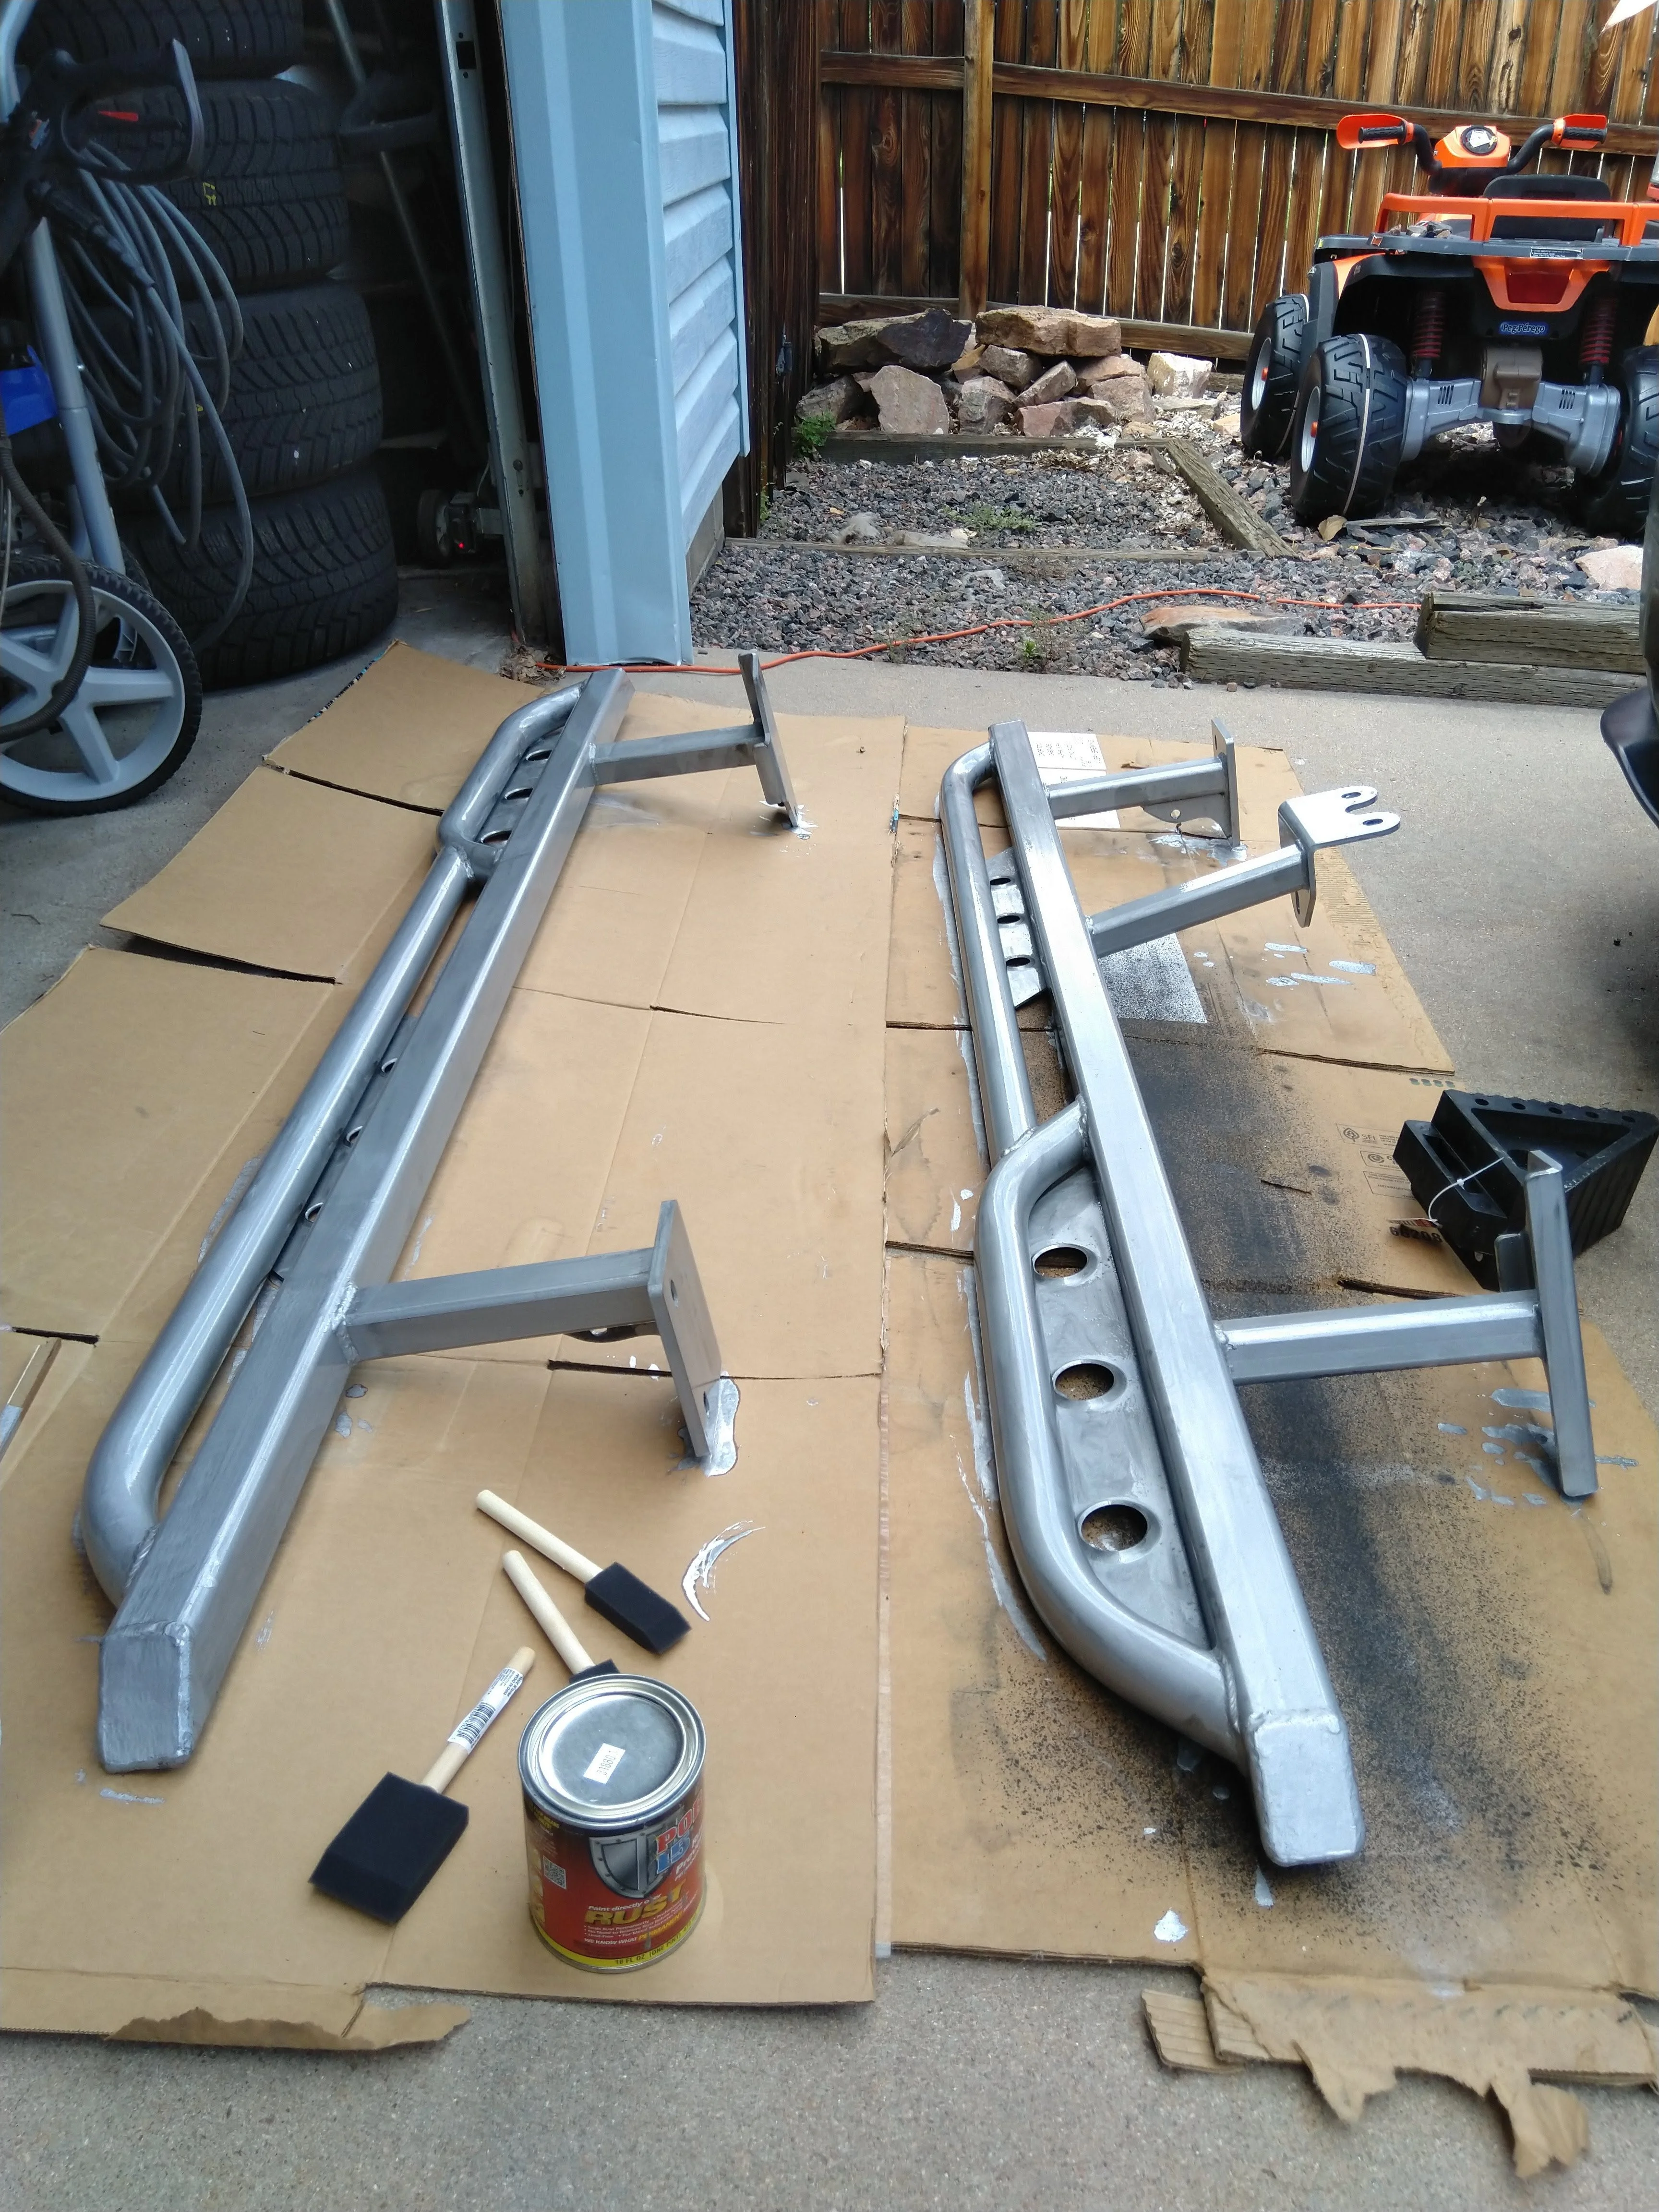
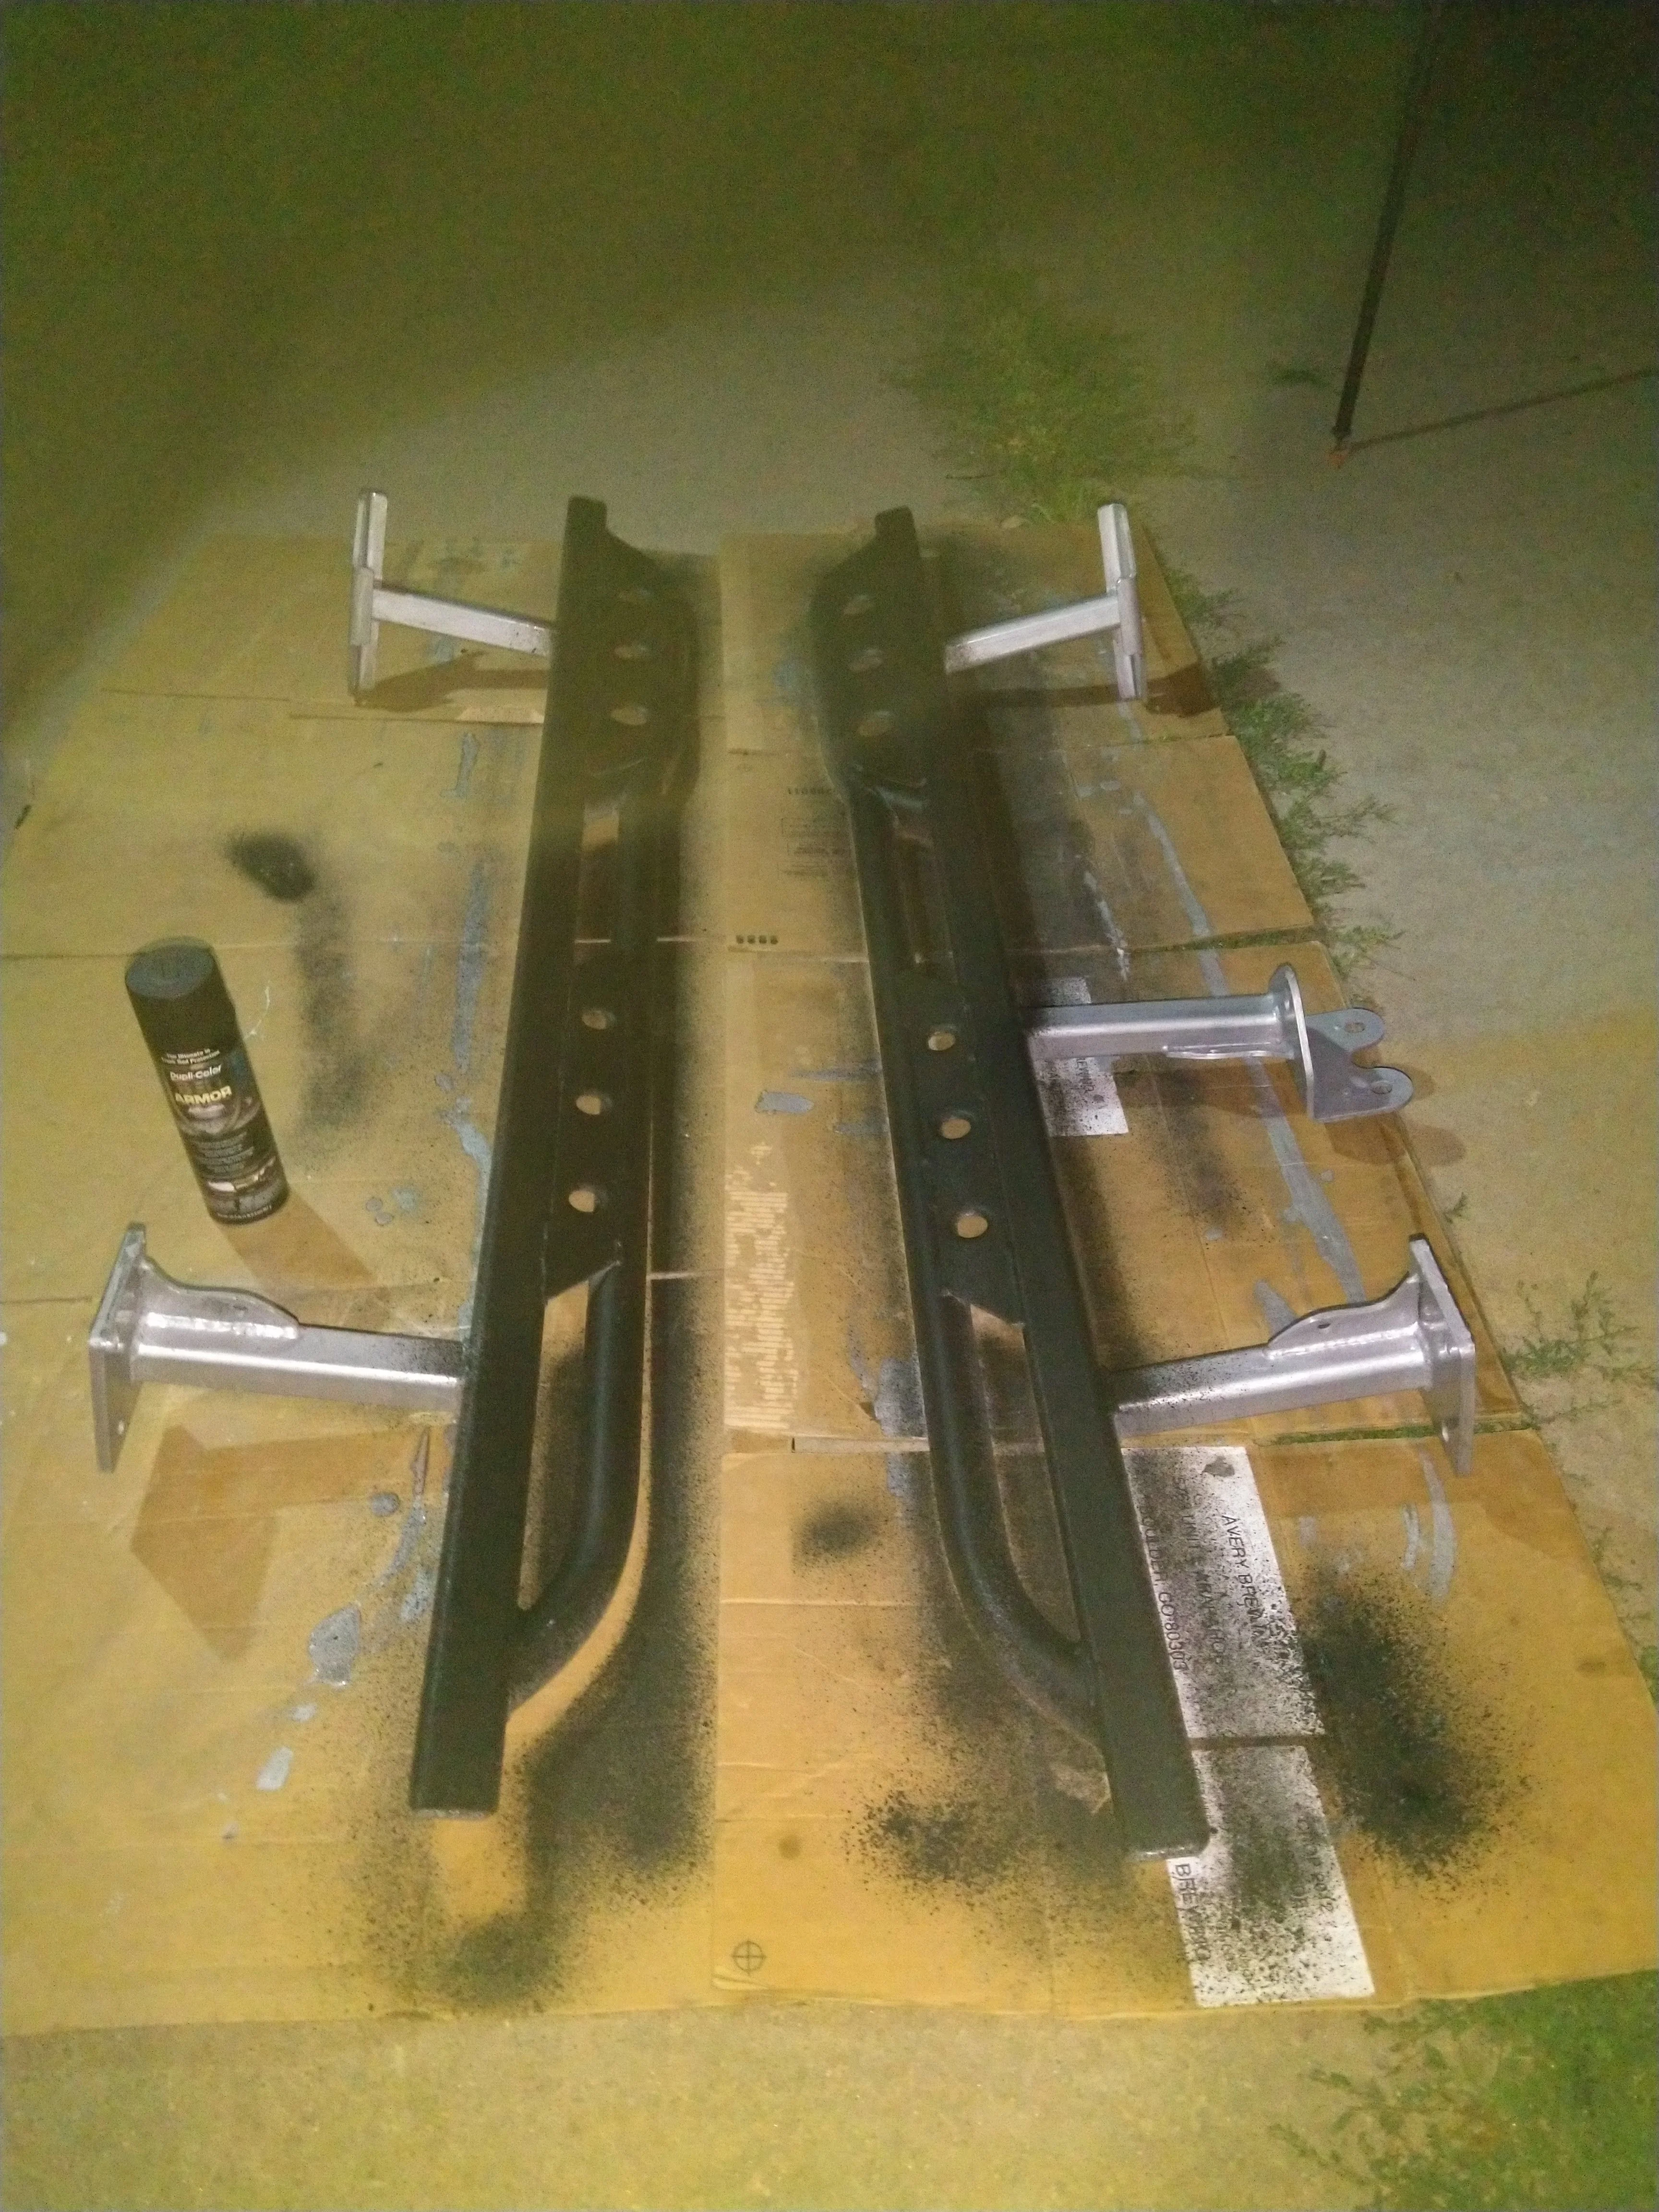
Somewhere I got wind of POR-15 as a metal prep layer. As my first experience with the stuff, I was quite disenchanted BUT it does leave a hard coat on the properly prepped steel! It takes 2-6 hours between coats with I think 3-4 recommended and it needs 2 processes of prep before you can apply the POR-15 itself. I used a wire wheel to remove surface rust and scale then brake cleaner to de-grease and clean the raw sliders. i then followed direction (keeping wet for 30 minutes_ for the POR metal prep and it took about a whole quart for the two sliders. Then for the POR-15 itself (I'd purchased a pint, and used about 2/3 - 3/4 of that), I used a 2" bristle brush (cheap ones still suck and drop bristles) because the (cheap) sponge brush just wasn't quite up to it. I started on the bottom and applied two coats letting it dry to a tacky finger-drag (it'll make sense when you're there) for 2-4 hours between coats. I must've been a bit heavy with my coats as the runs happen (turns out, it's the nature of the beast on tube...). On the top side, I kocked the hardened runs down with a wire wheel and applied two coats to the top, again a little thick perhaps, and waiting at least 2 hours between coats. As such getting to 2 coats top and bottom of POR-15, after wire-wheeling, de-greasing and POR prep, it took about 9 hours. THEN, you're supposed to use 350 grit sandpaper to scuff the hadened POR-15 prior to to-coating. I used 220 grit with a variable orbiting sander and a mouse sander, hand-sanding and red scotchbrite and thought i cut the shine appropriately...but in hind-sight i should've used a wire wheel or abrasive disk.


- Thread starter
- #345
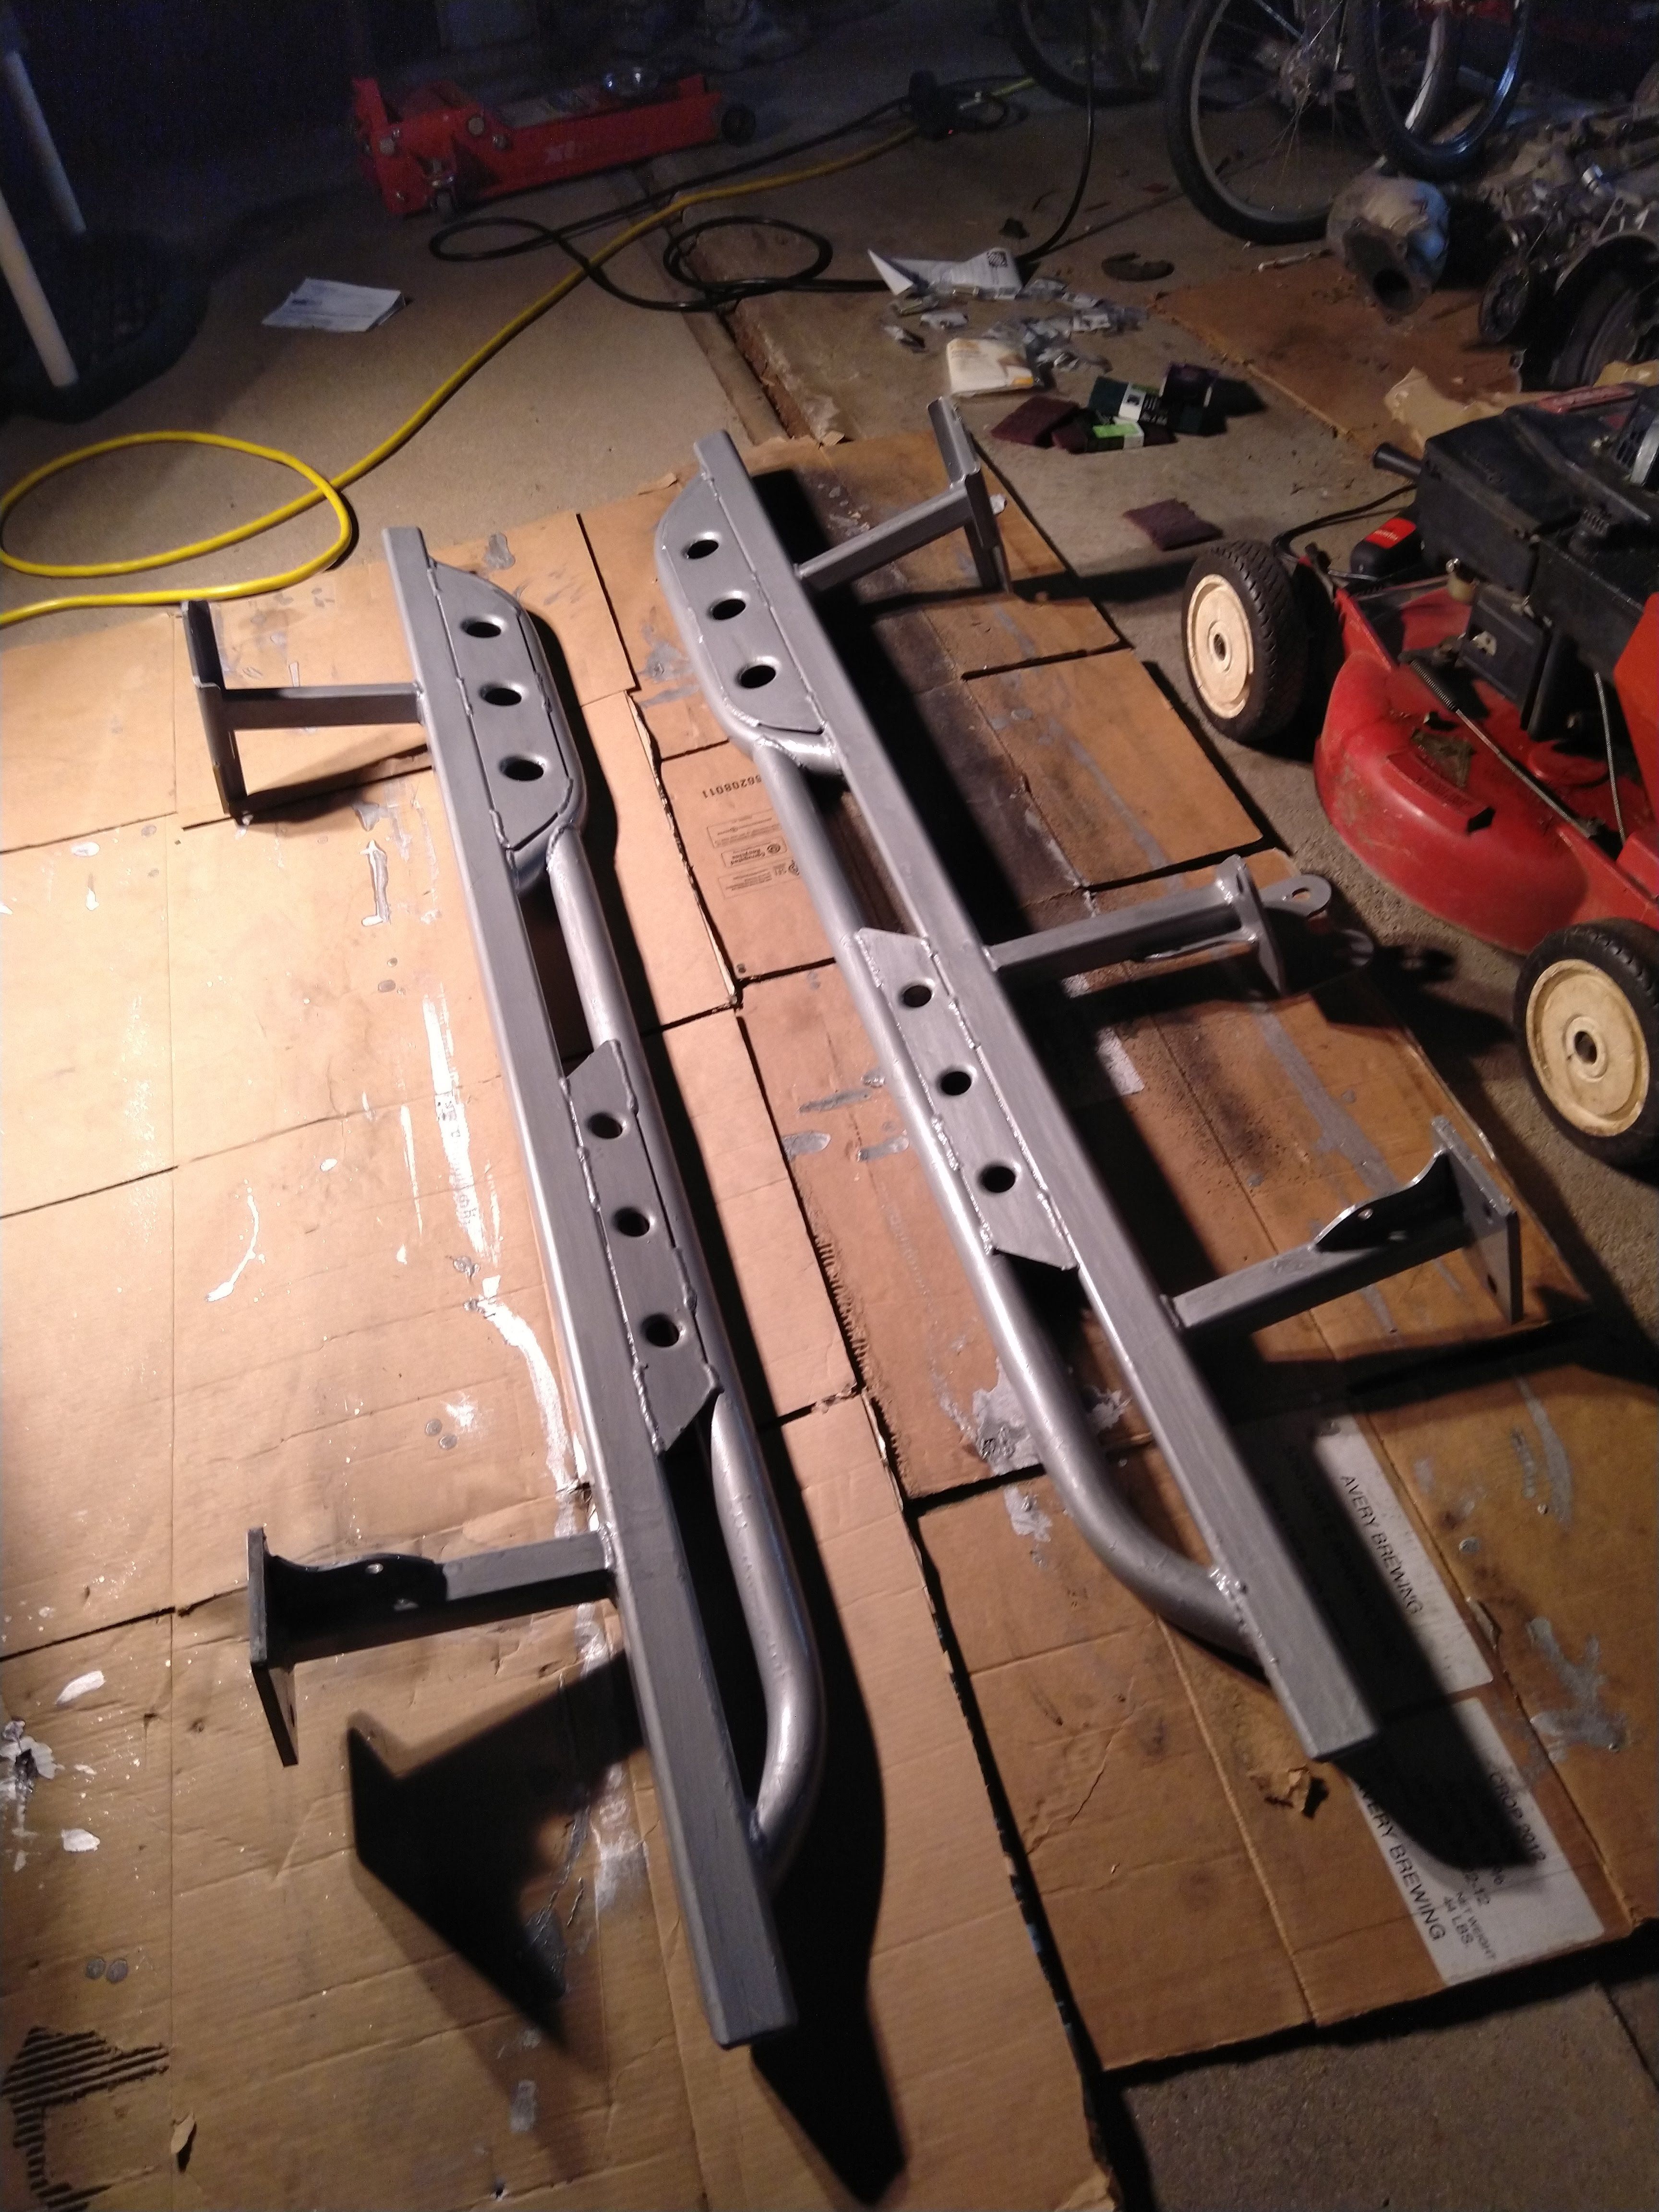
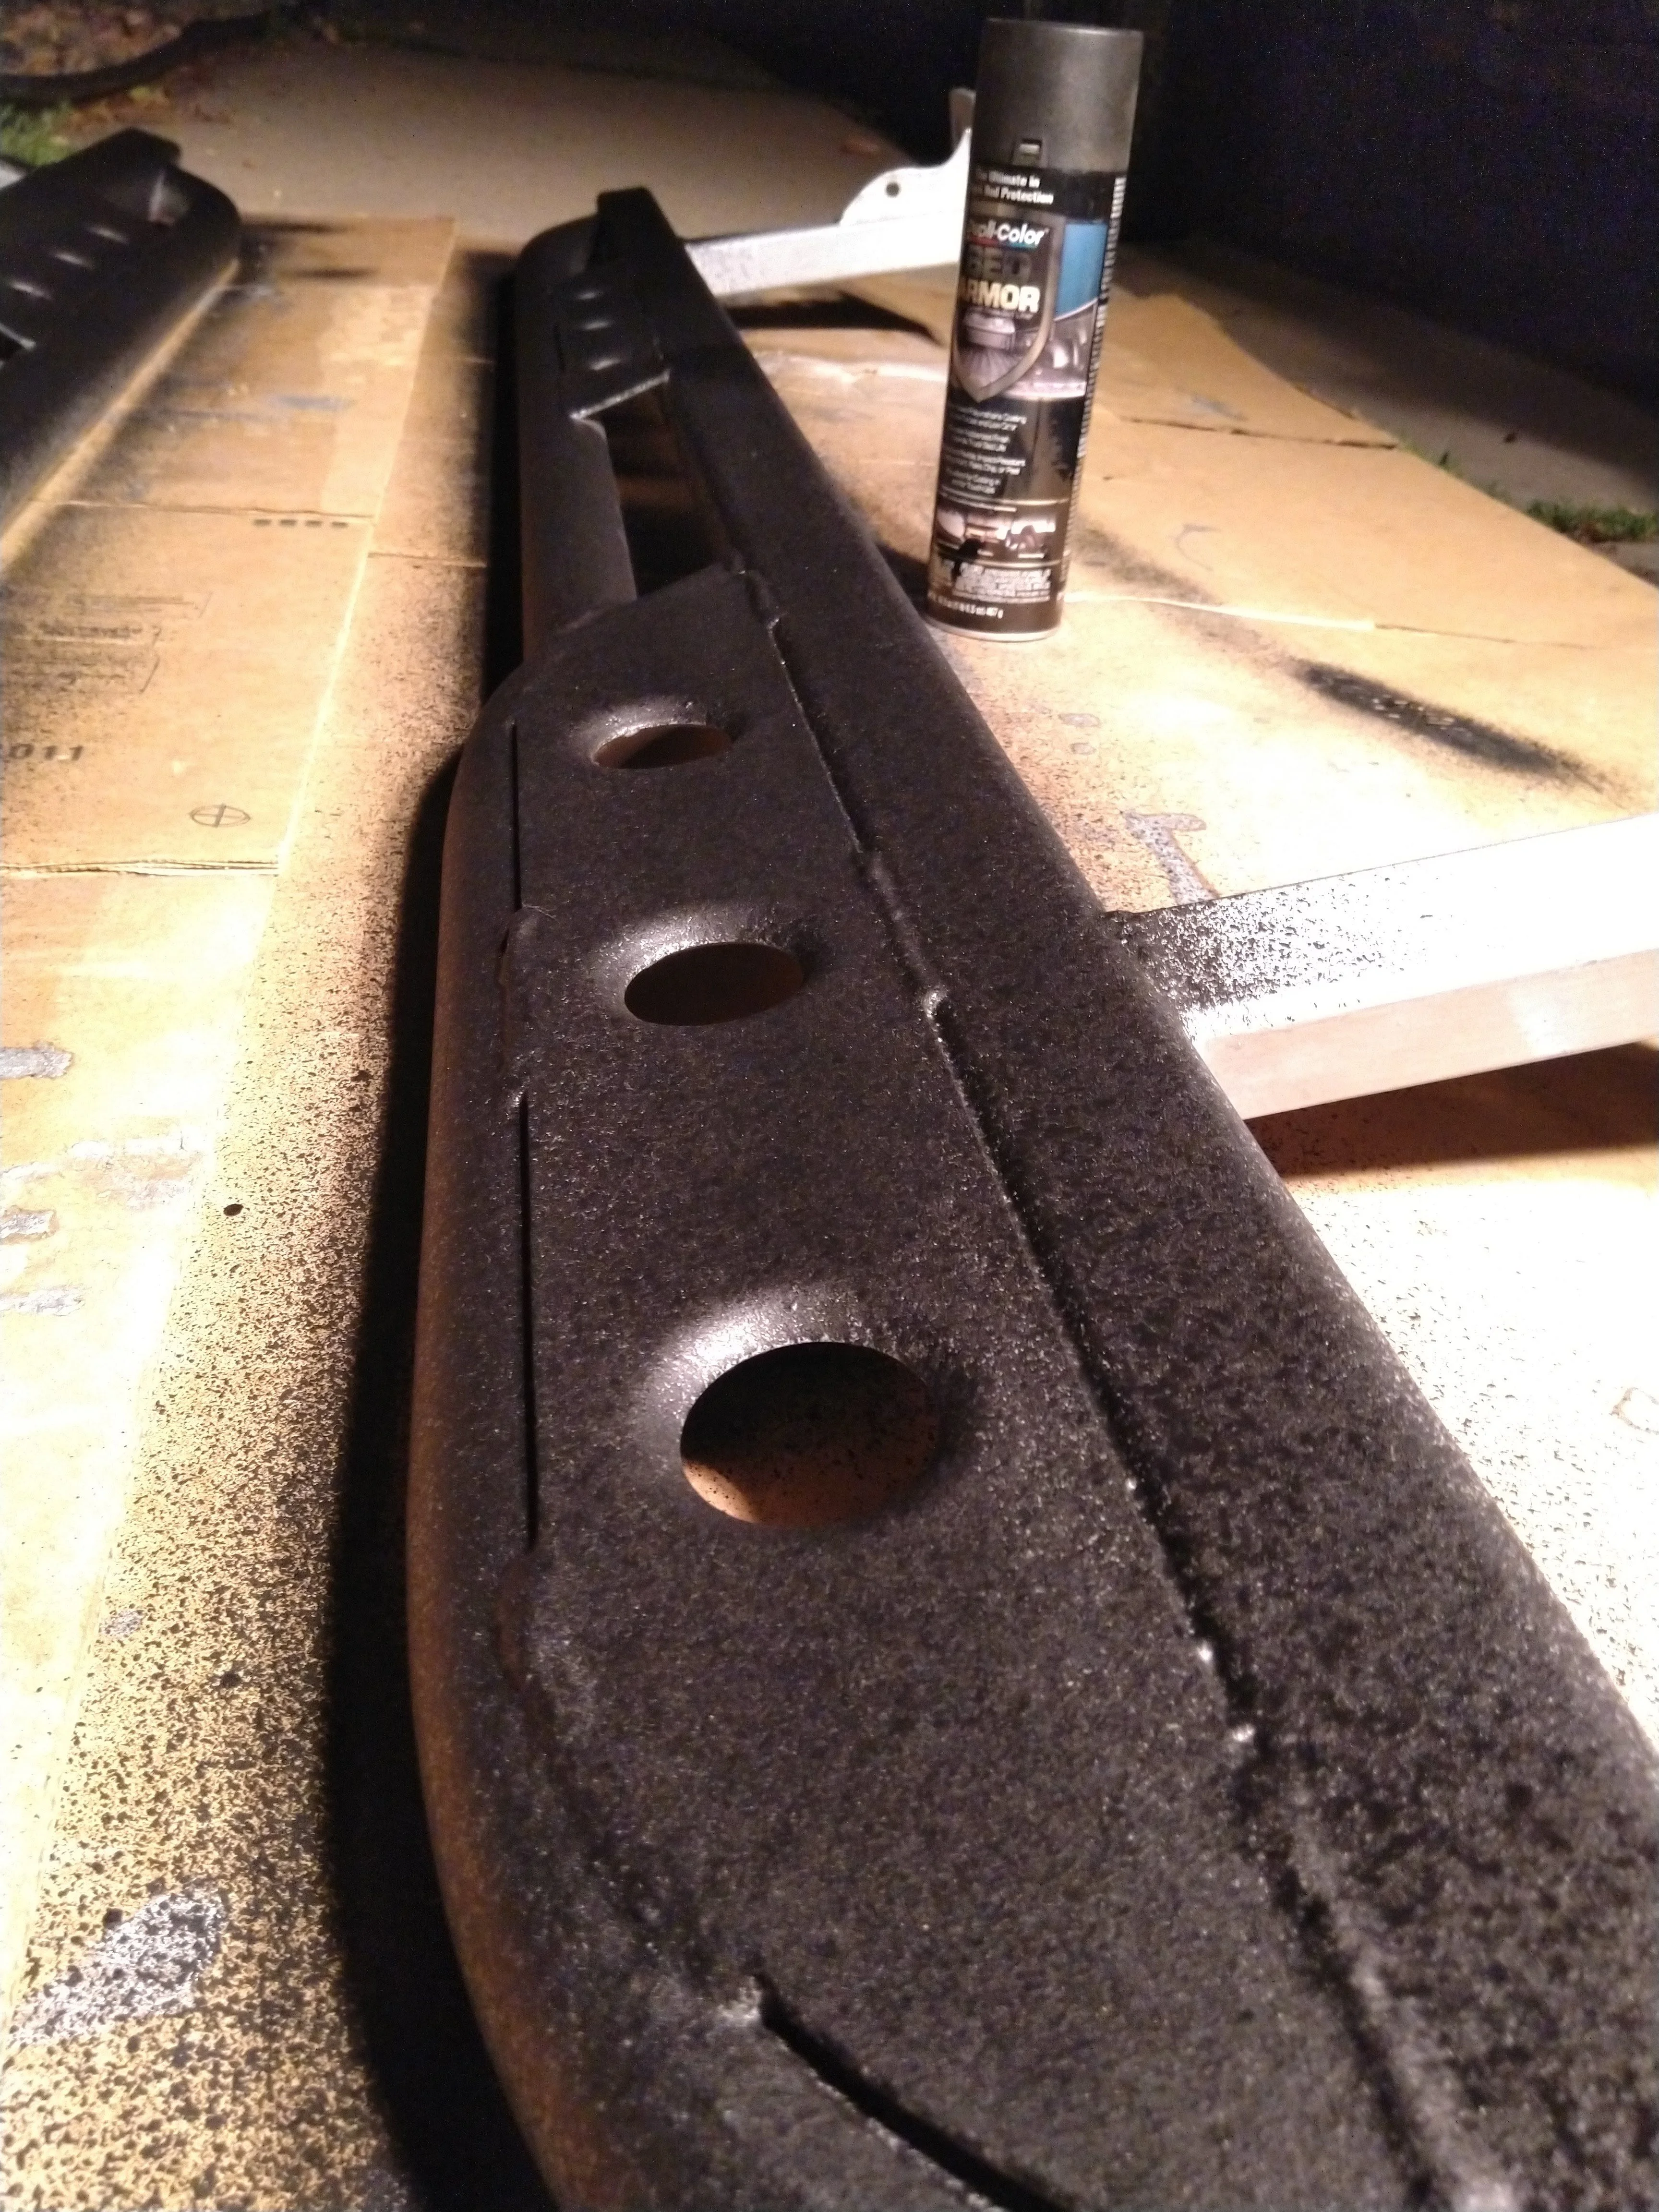
I then used an armor liner bed liner, thinking I'd get some texture for step friction. I applied 5 coats waiting at least 20-30 minutes between coats, then 30 minutes (ergo over 2 hours in bed-liner application) before applying the Rust-Oleum paint top coat. I applied 2 heavy coats to the top and bottom sides @ 30 minutes between coats (ergo 2+ hoursa in paint time) and I'm pretty sure the bed liner wasn't fully cured (I think it said 2 hours to handle but 24 hr to cure) and perhaps it hadn't fully adhered to the POR-15 because of inadequate post POR-15 set and pre top-coat prep.


- Thread starter
- #346
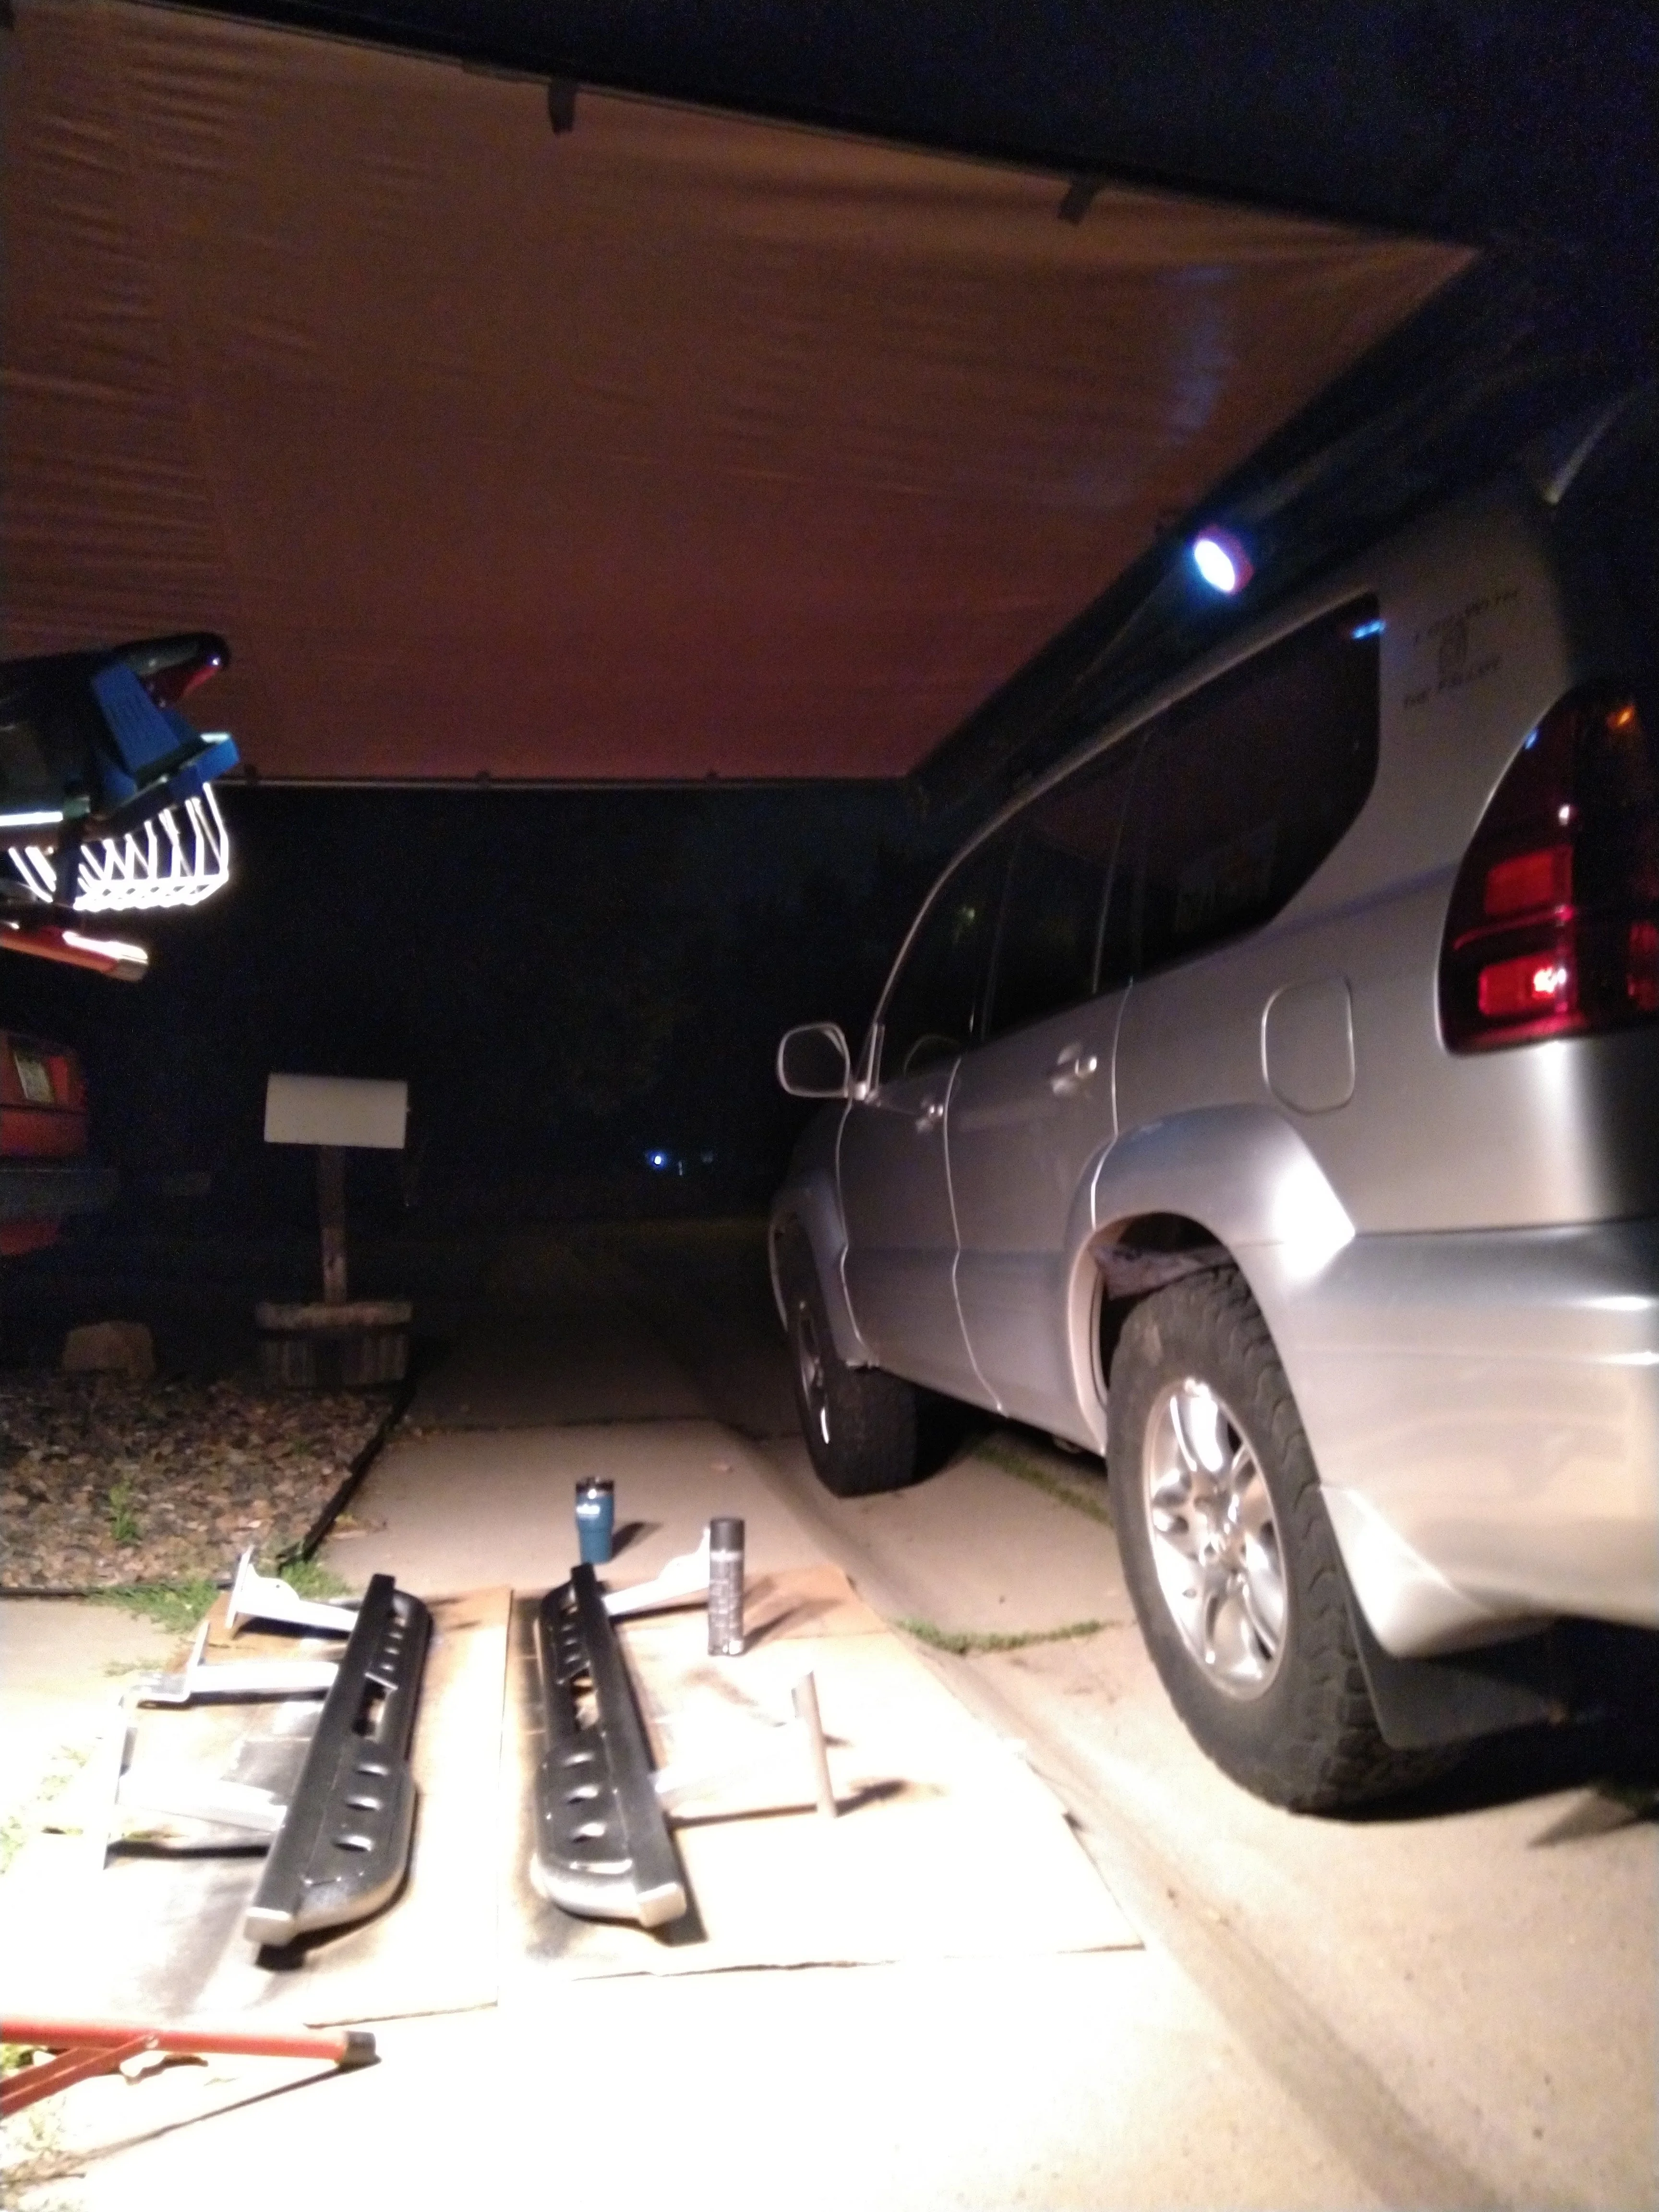
Then there was the install day. . . . . .
@Bluetribal's install thread (referenced above) has a bunch of tips and tricks for the install.
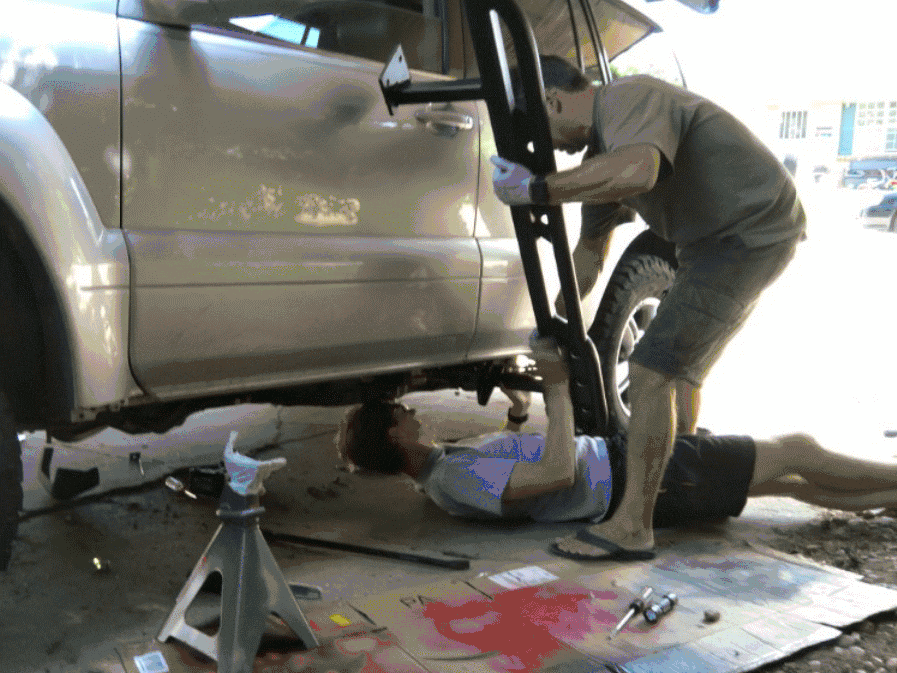
One thing not mentioned AT ALL is how to negotiate the driver rear leg under the brake line but above the KDSS lines. We unbolted the entire KDSS pump assembly (5, or 7 bolts?) and one rear KDSS line bracket and two brake line brackets.
then with one person laying under the rig to negotiate the rear leg, another person while holding the slider angled up rotated the slider forward to pivot the rear foot between those different lines, WHILE taking care to not cause body damage or scratch the doors or body cladding....
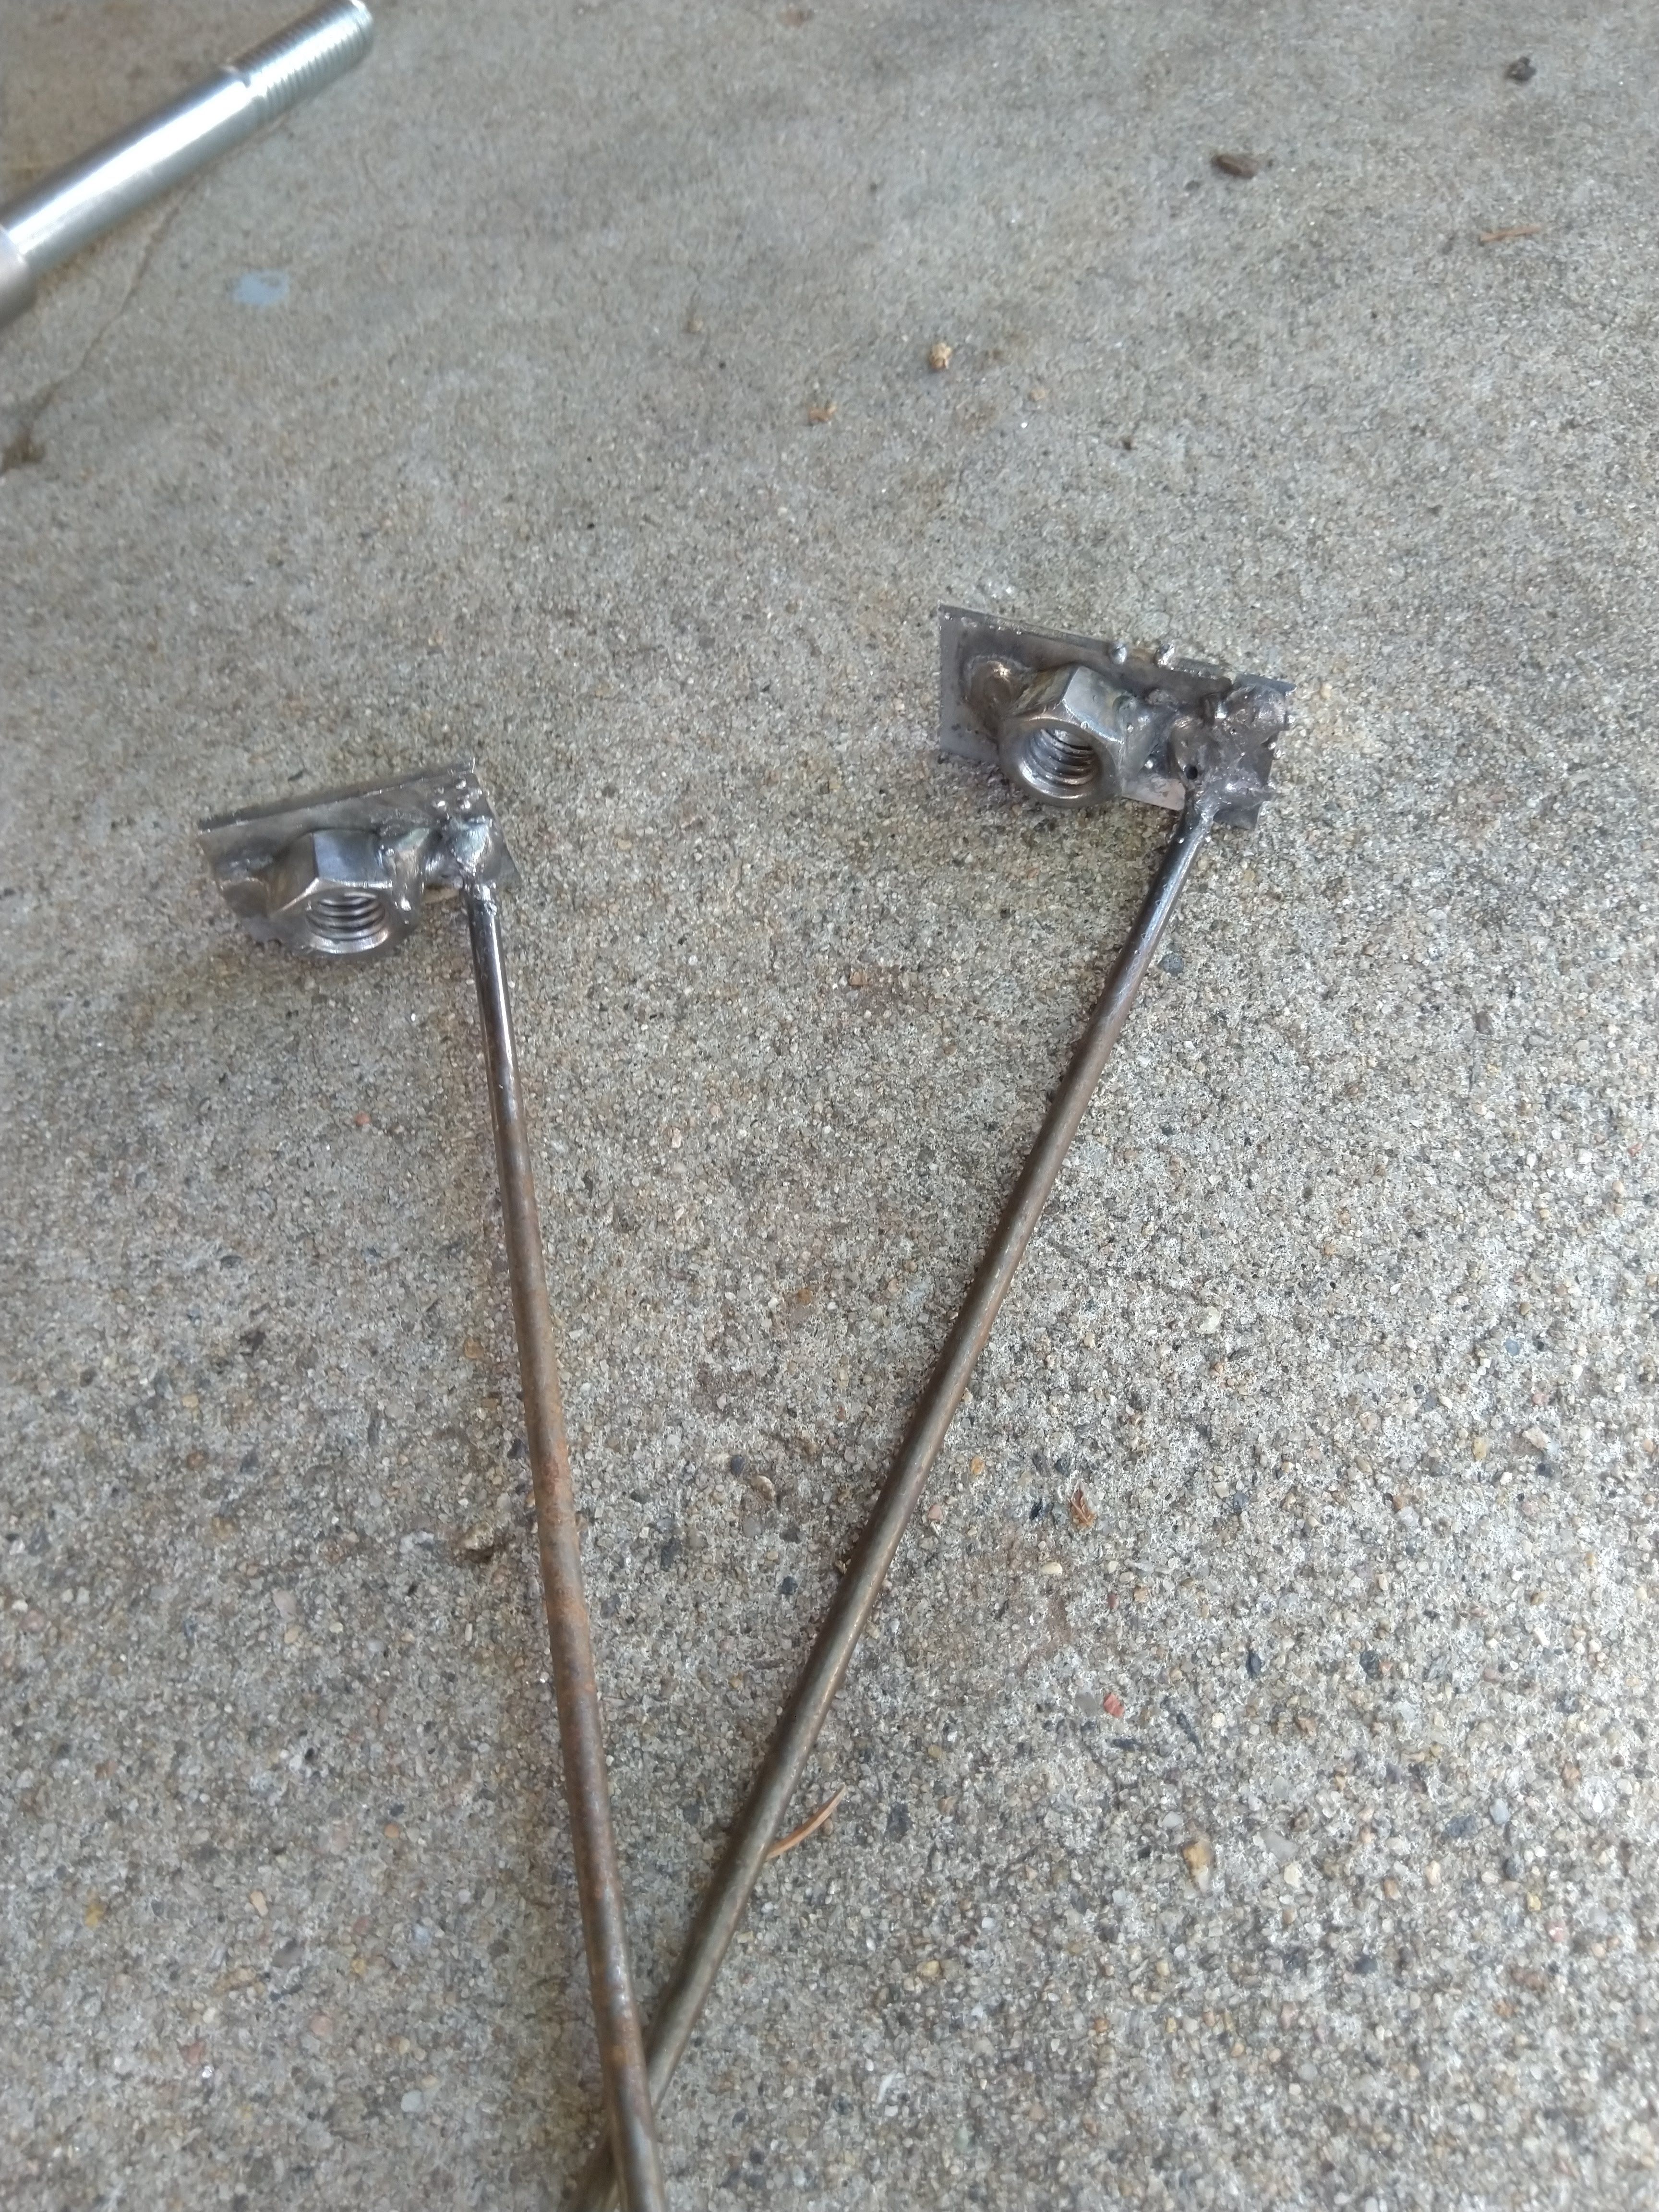
Taking heed from all the users' experience with rivet nuts, I decided to avoid that entirely and opted for making tab-nuts/stick-nuts/nuts on wires.
I think we U-bolted the rear legs loosely then wrestled with mounting the fronts.
I'd appropriately cleaned and tapped the front legs' upper holes and bolted those in with the supplied 8mm bolts, spring washers and washers. Then, beginning on the passenger side, I fed the stick nut into an access hole (bending it appropriately to get a flush seating against the inside of the frame) on the in-board side of the frame rail.

@Bluetribal's install thread (referenced above) has a bunch of tips and tricks for the install.
One thing not mentioned AT ALL is how to negotiate the driver rear leg under the brake line but above the KDSS lines. We unbolted the entire KDSS pump assembly (5, or 7 bolts?) and one rear KDSS line bracket and two brake line brackets.
then with one person laying under the rig to negotiate the rear leg, another person while holding the slider angled up rotated the slider forward to pivot the rear foot between those different lines, WHILE taking care to not cause body damage or scratch the doors or body cladding....
Taking heed from all the users' experience with rivet nuts, I decided to avoid that entirely and opted for making tab-nuts/stick-nuts/nuts on wires.

I think we U-bolted the rear legs loosely then wrestled with mounting the fronts.
I'd appropriately cleaned and tapped the front legs' upper holes and bolted those in with the supplied 8mm bolts, spring washers and washers. Then, beginning on the passenger side, I fed the stick nut into an access hole (bending it appropriately to get a flush seating against the inside of the frame) on the in-board side of the frame rail.
Last edited:
- Thread starter
- #347
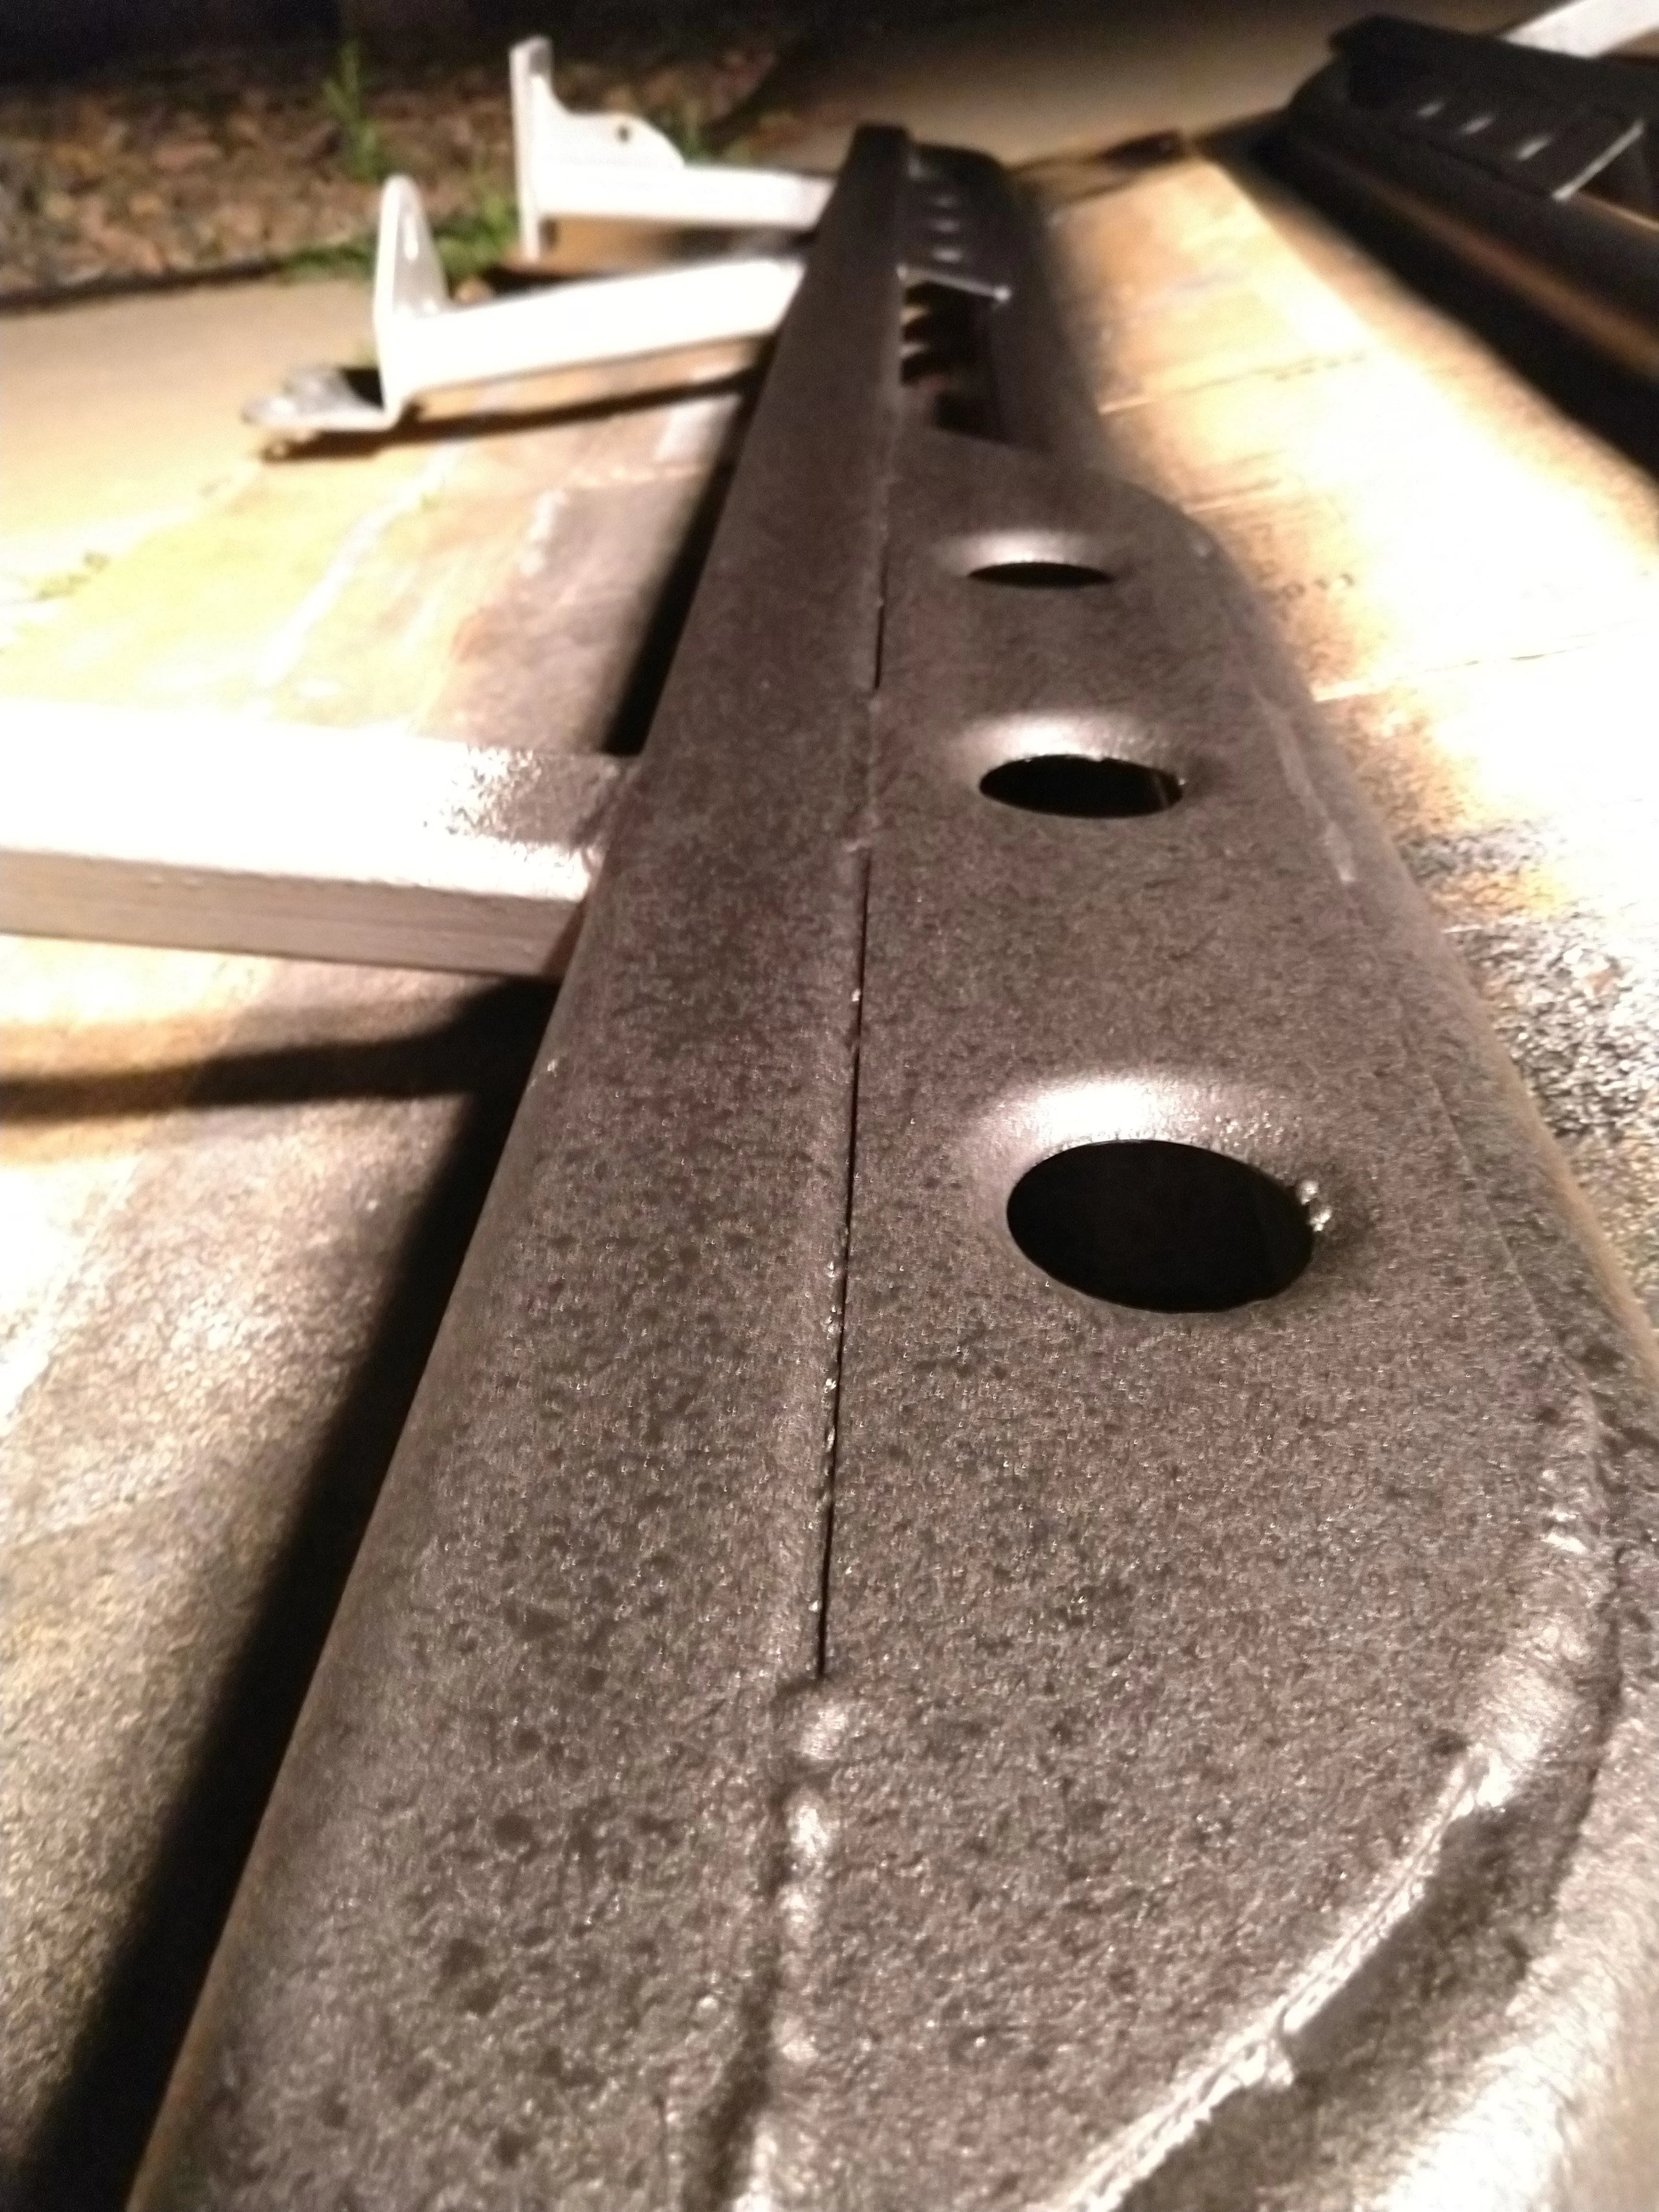
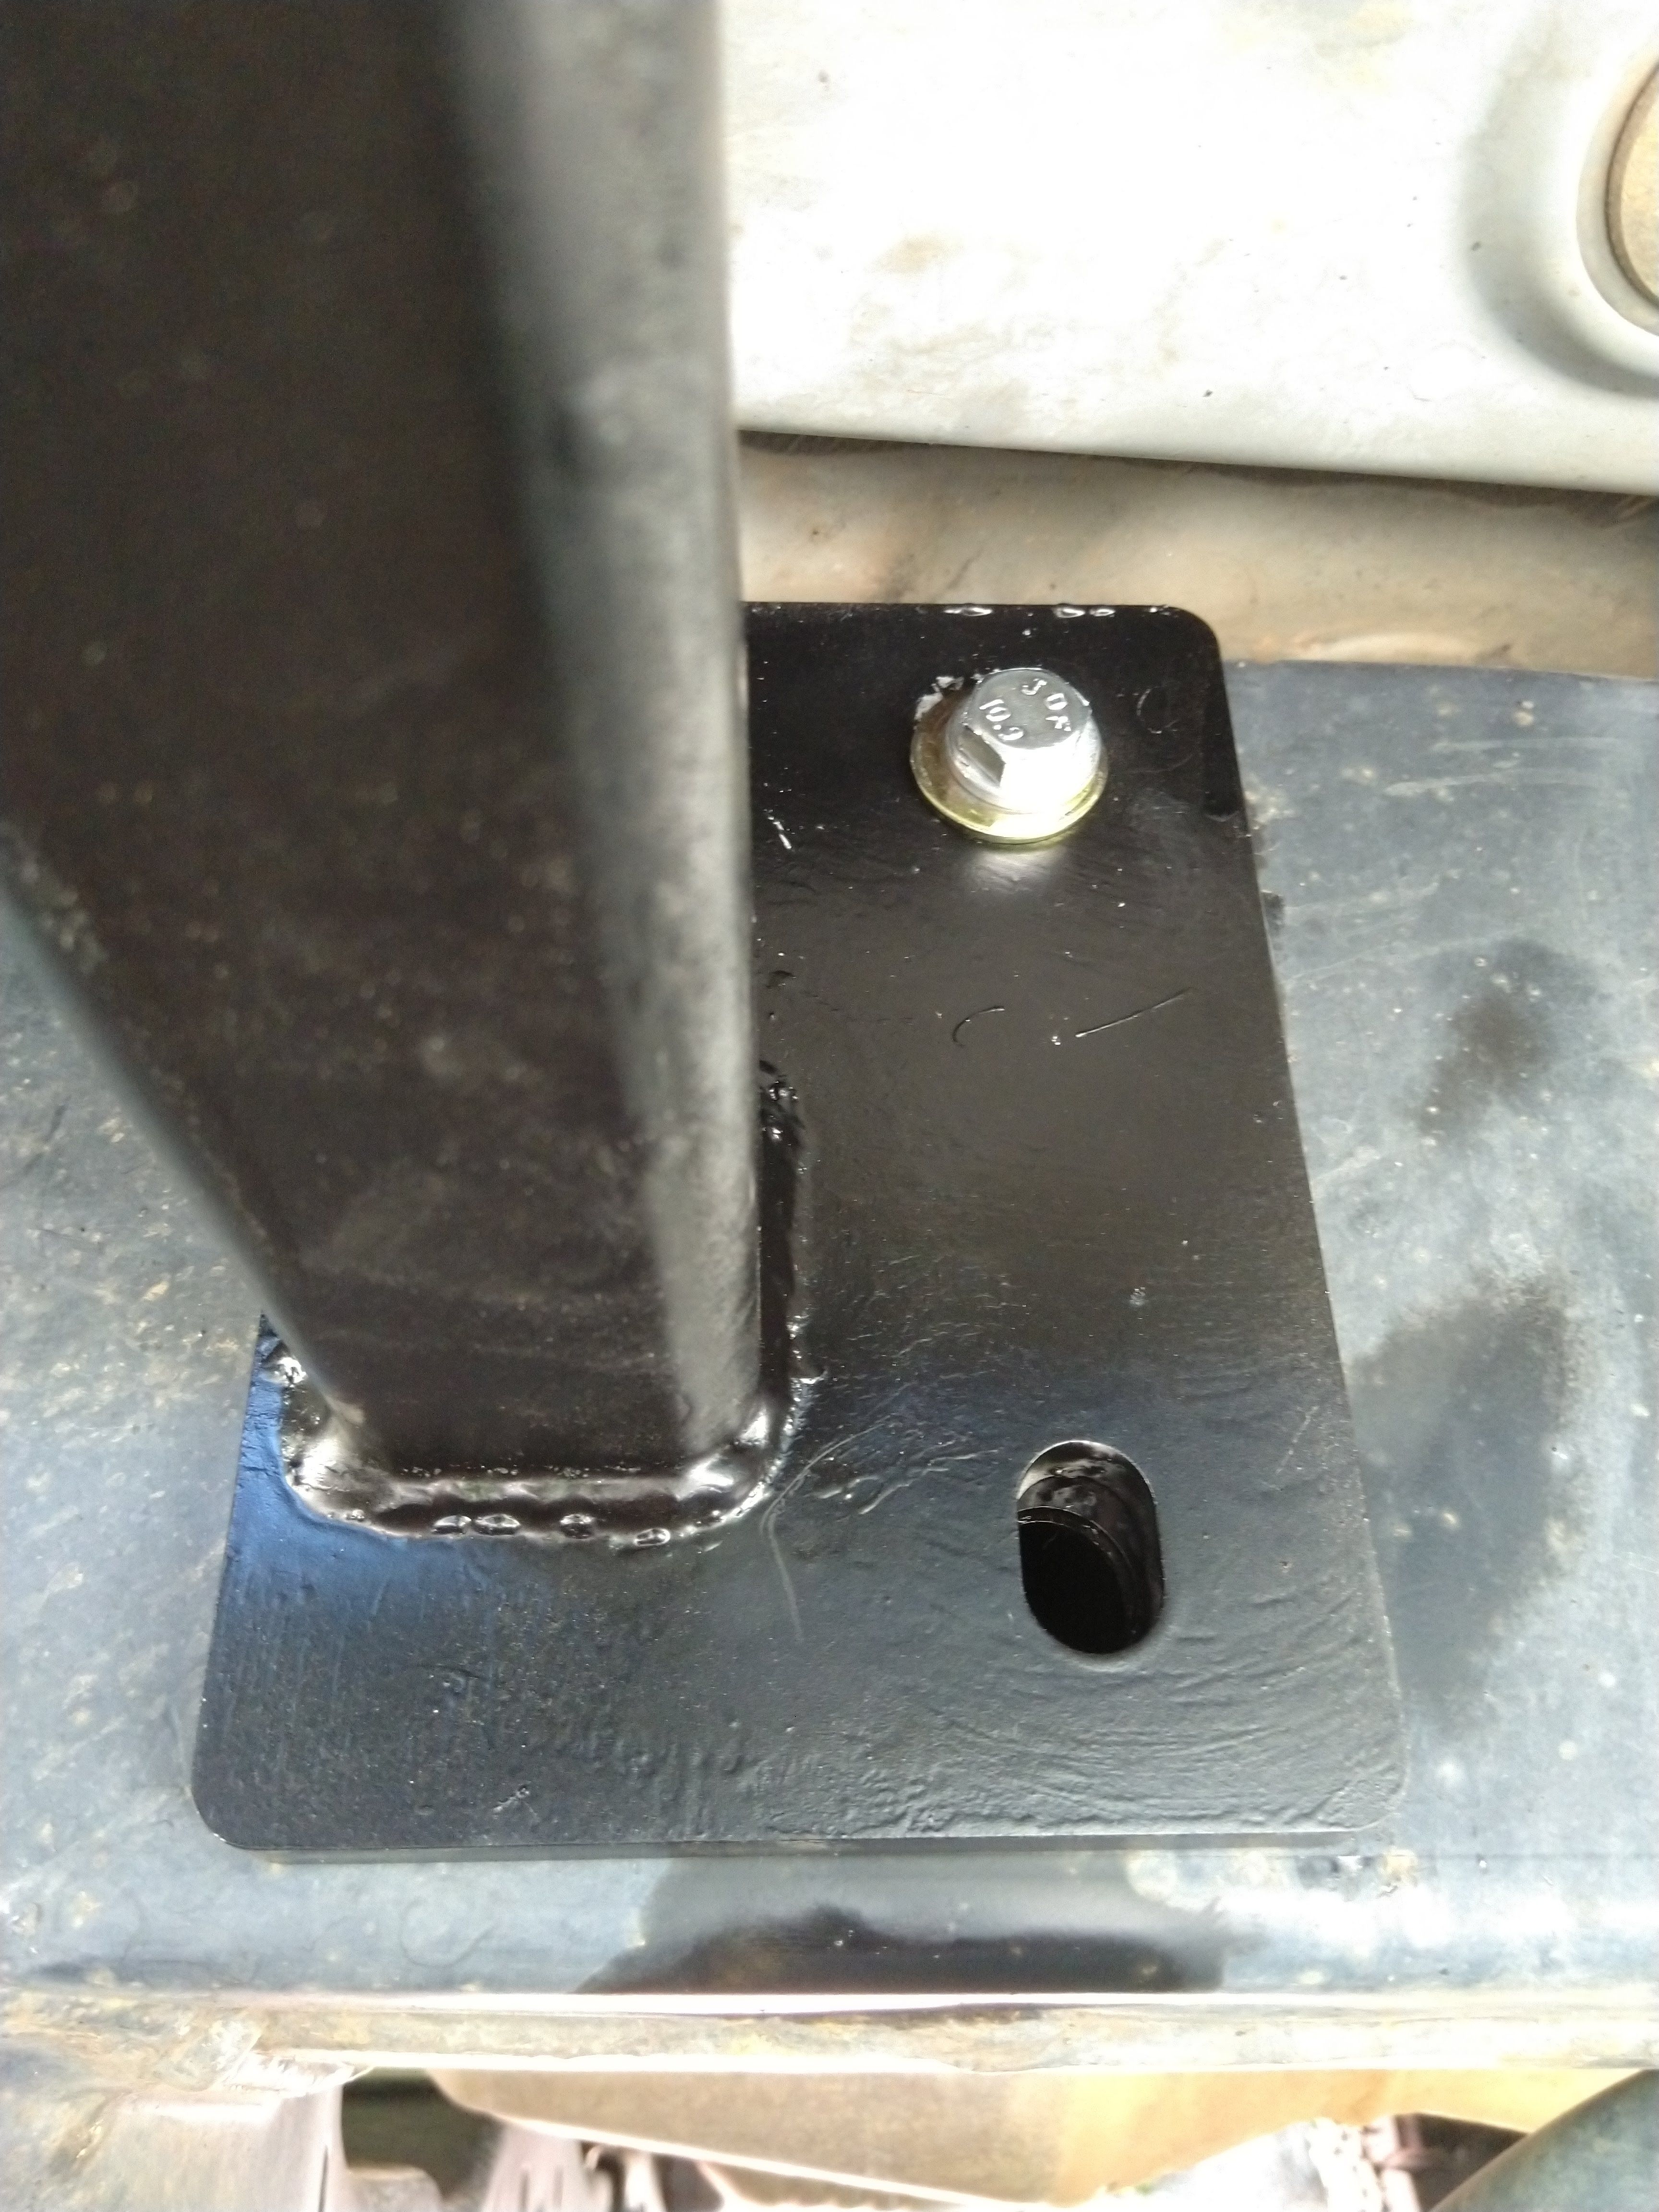
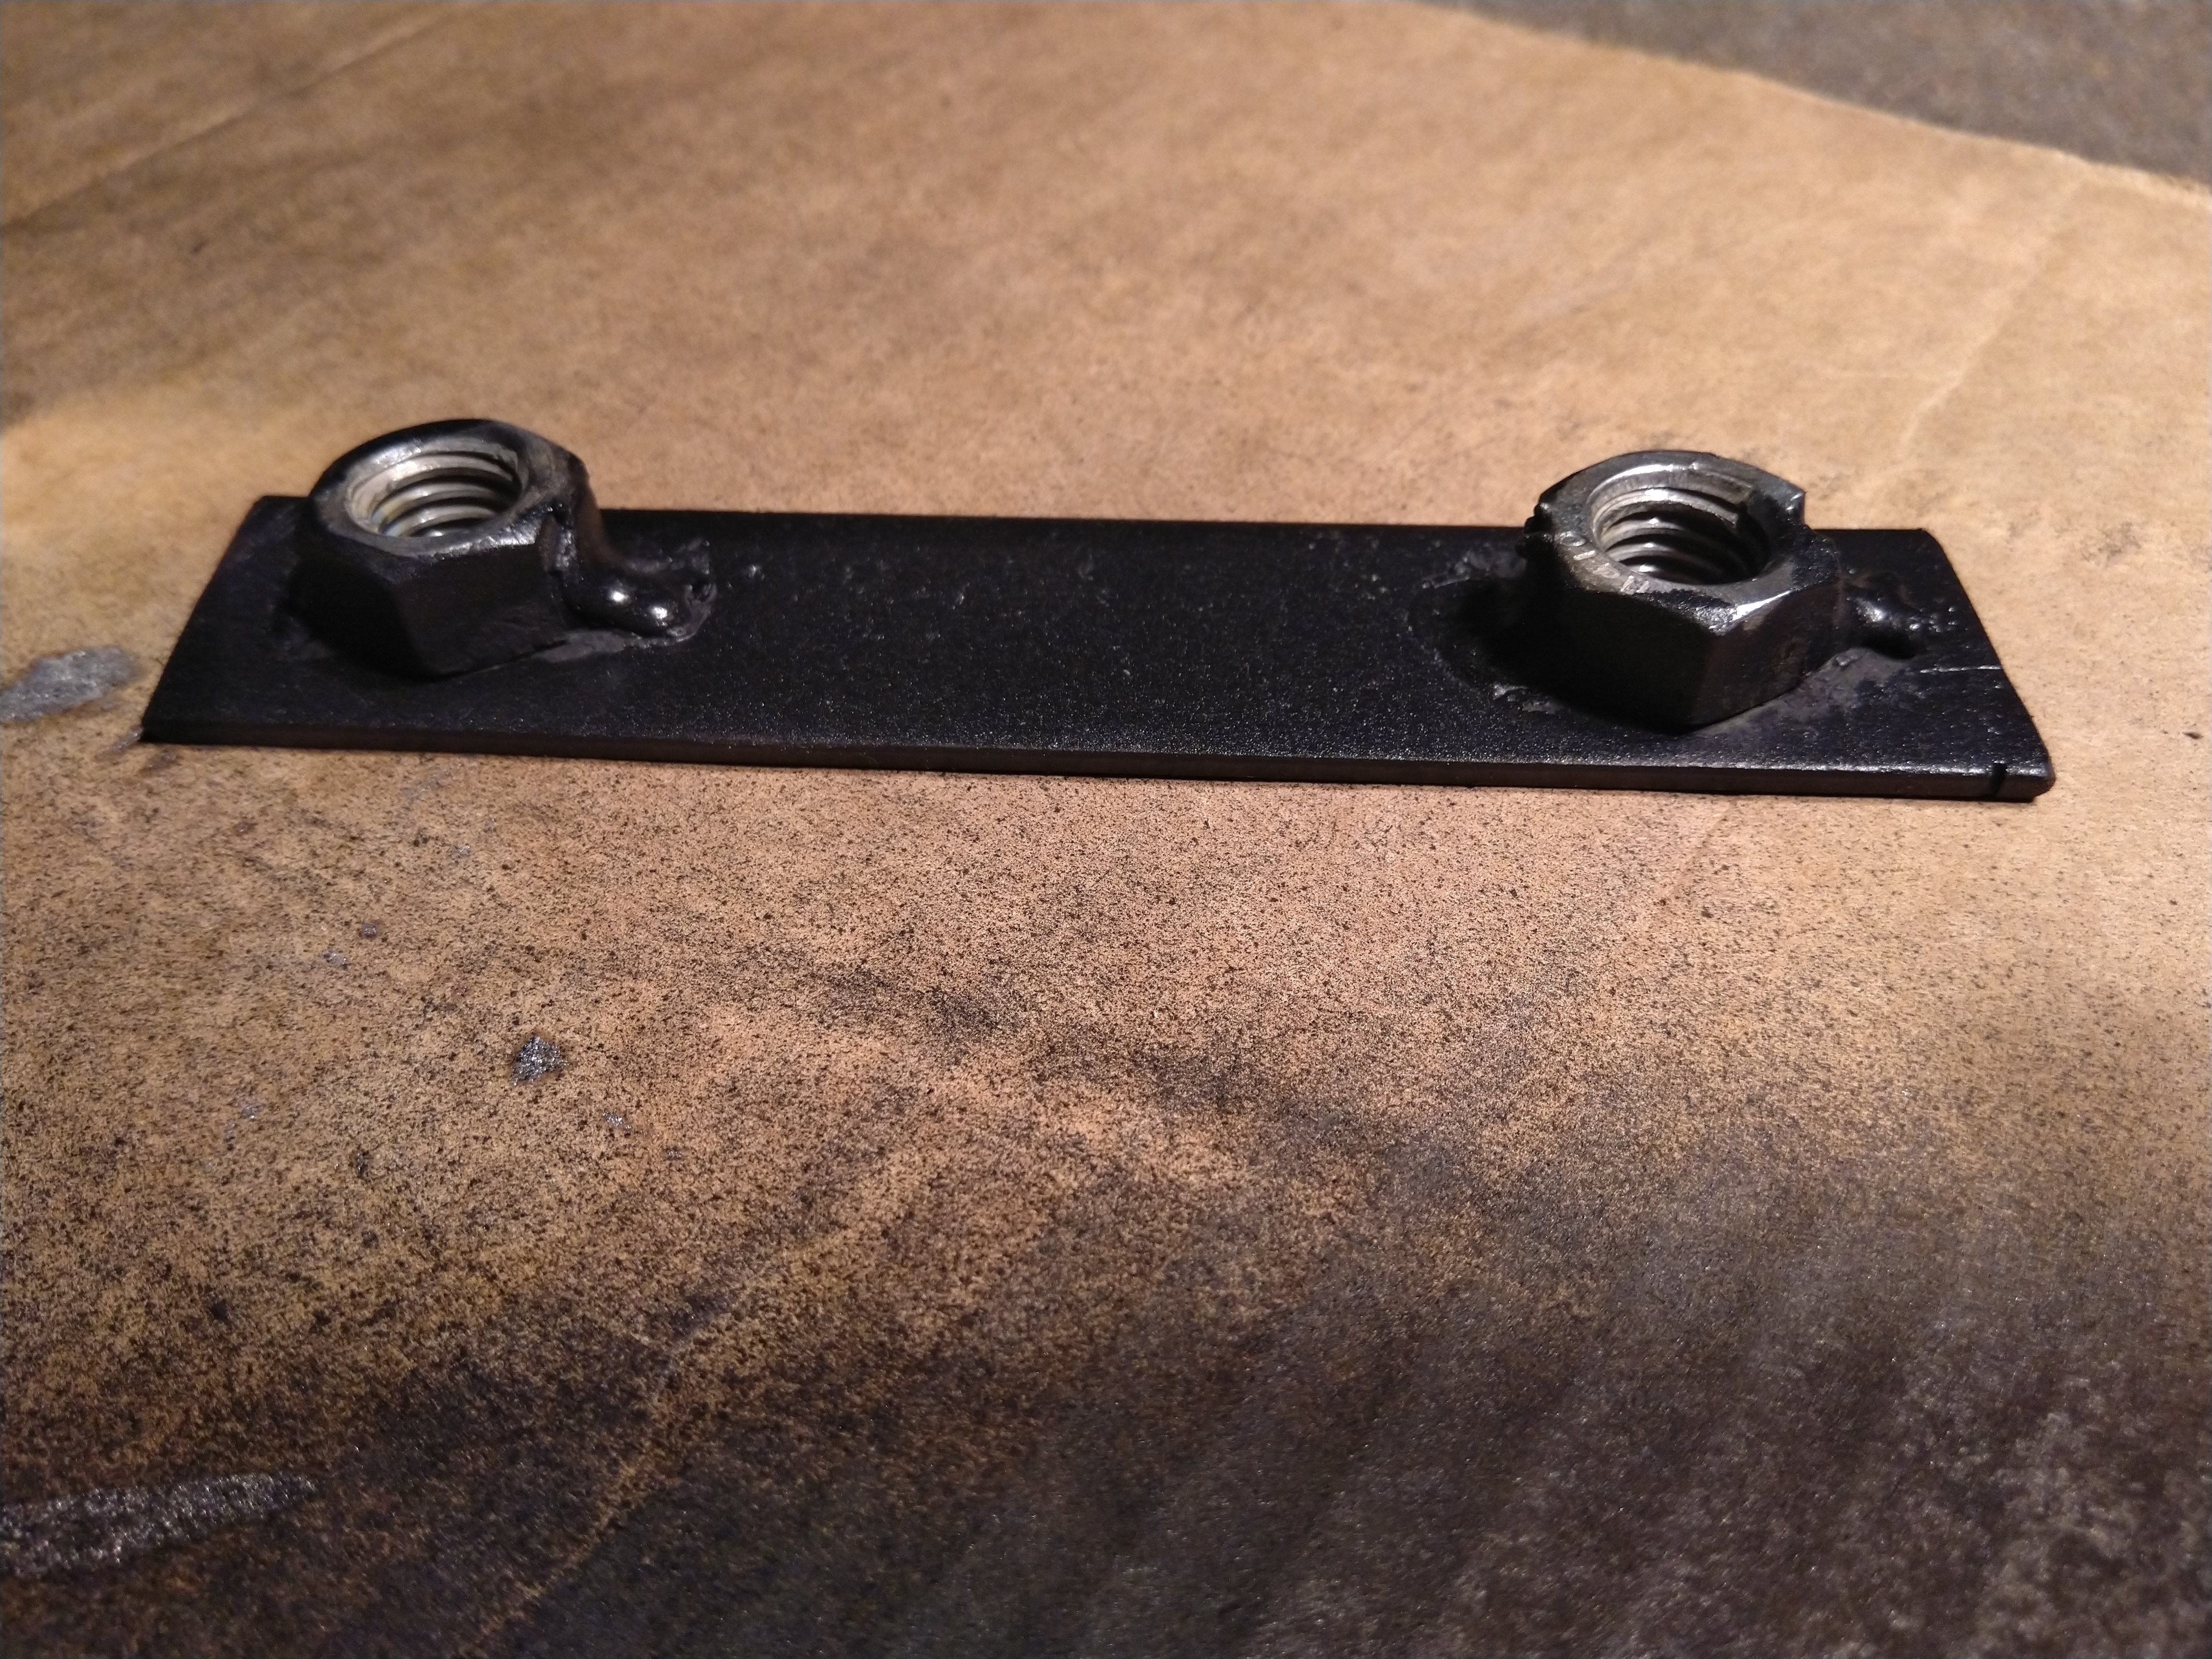
Passenger middle leg:
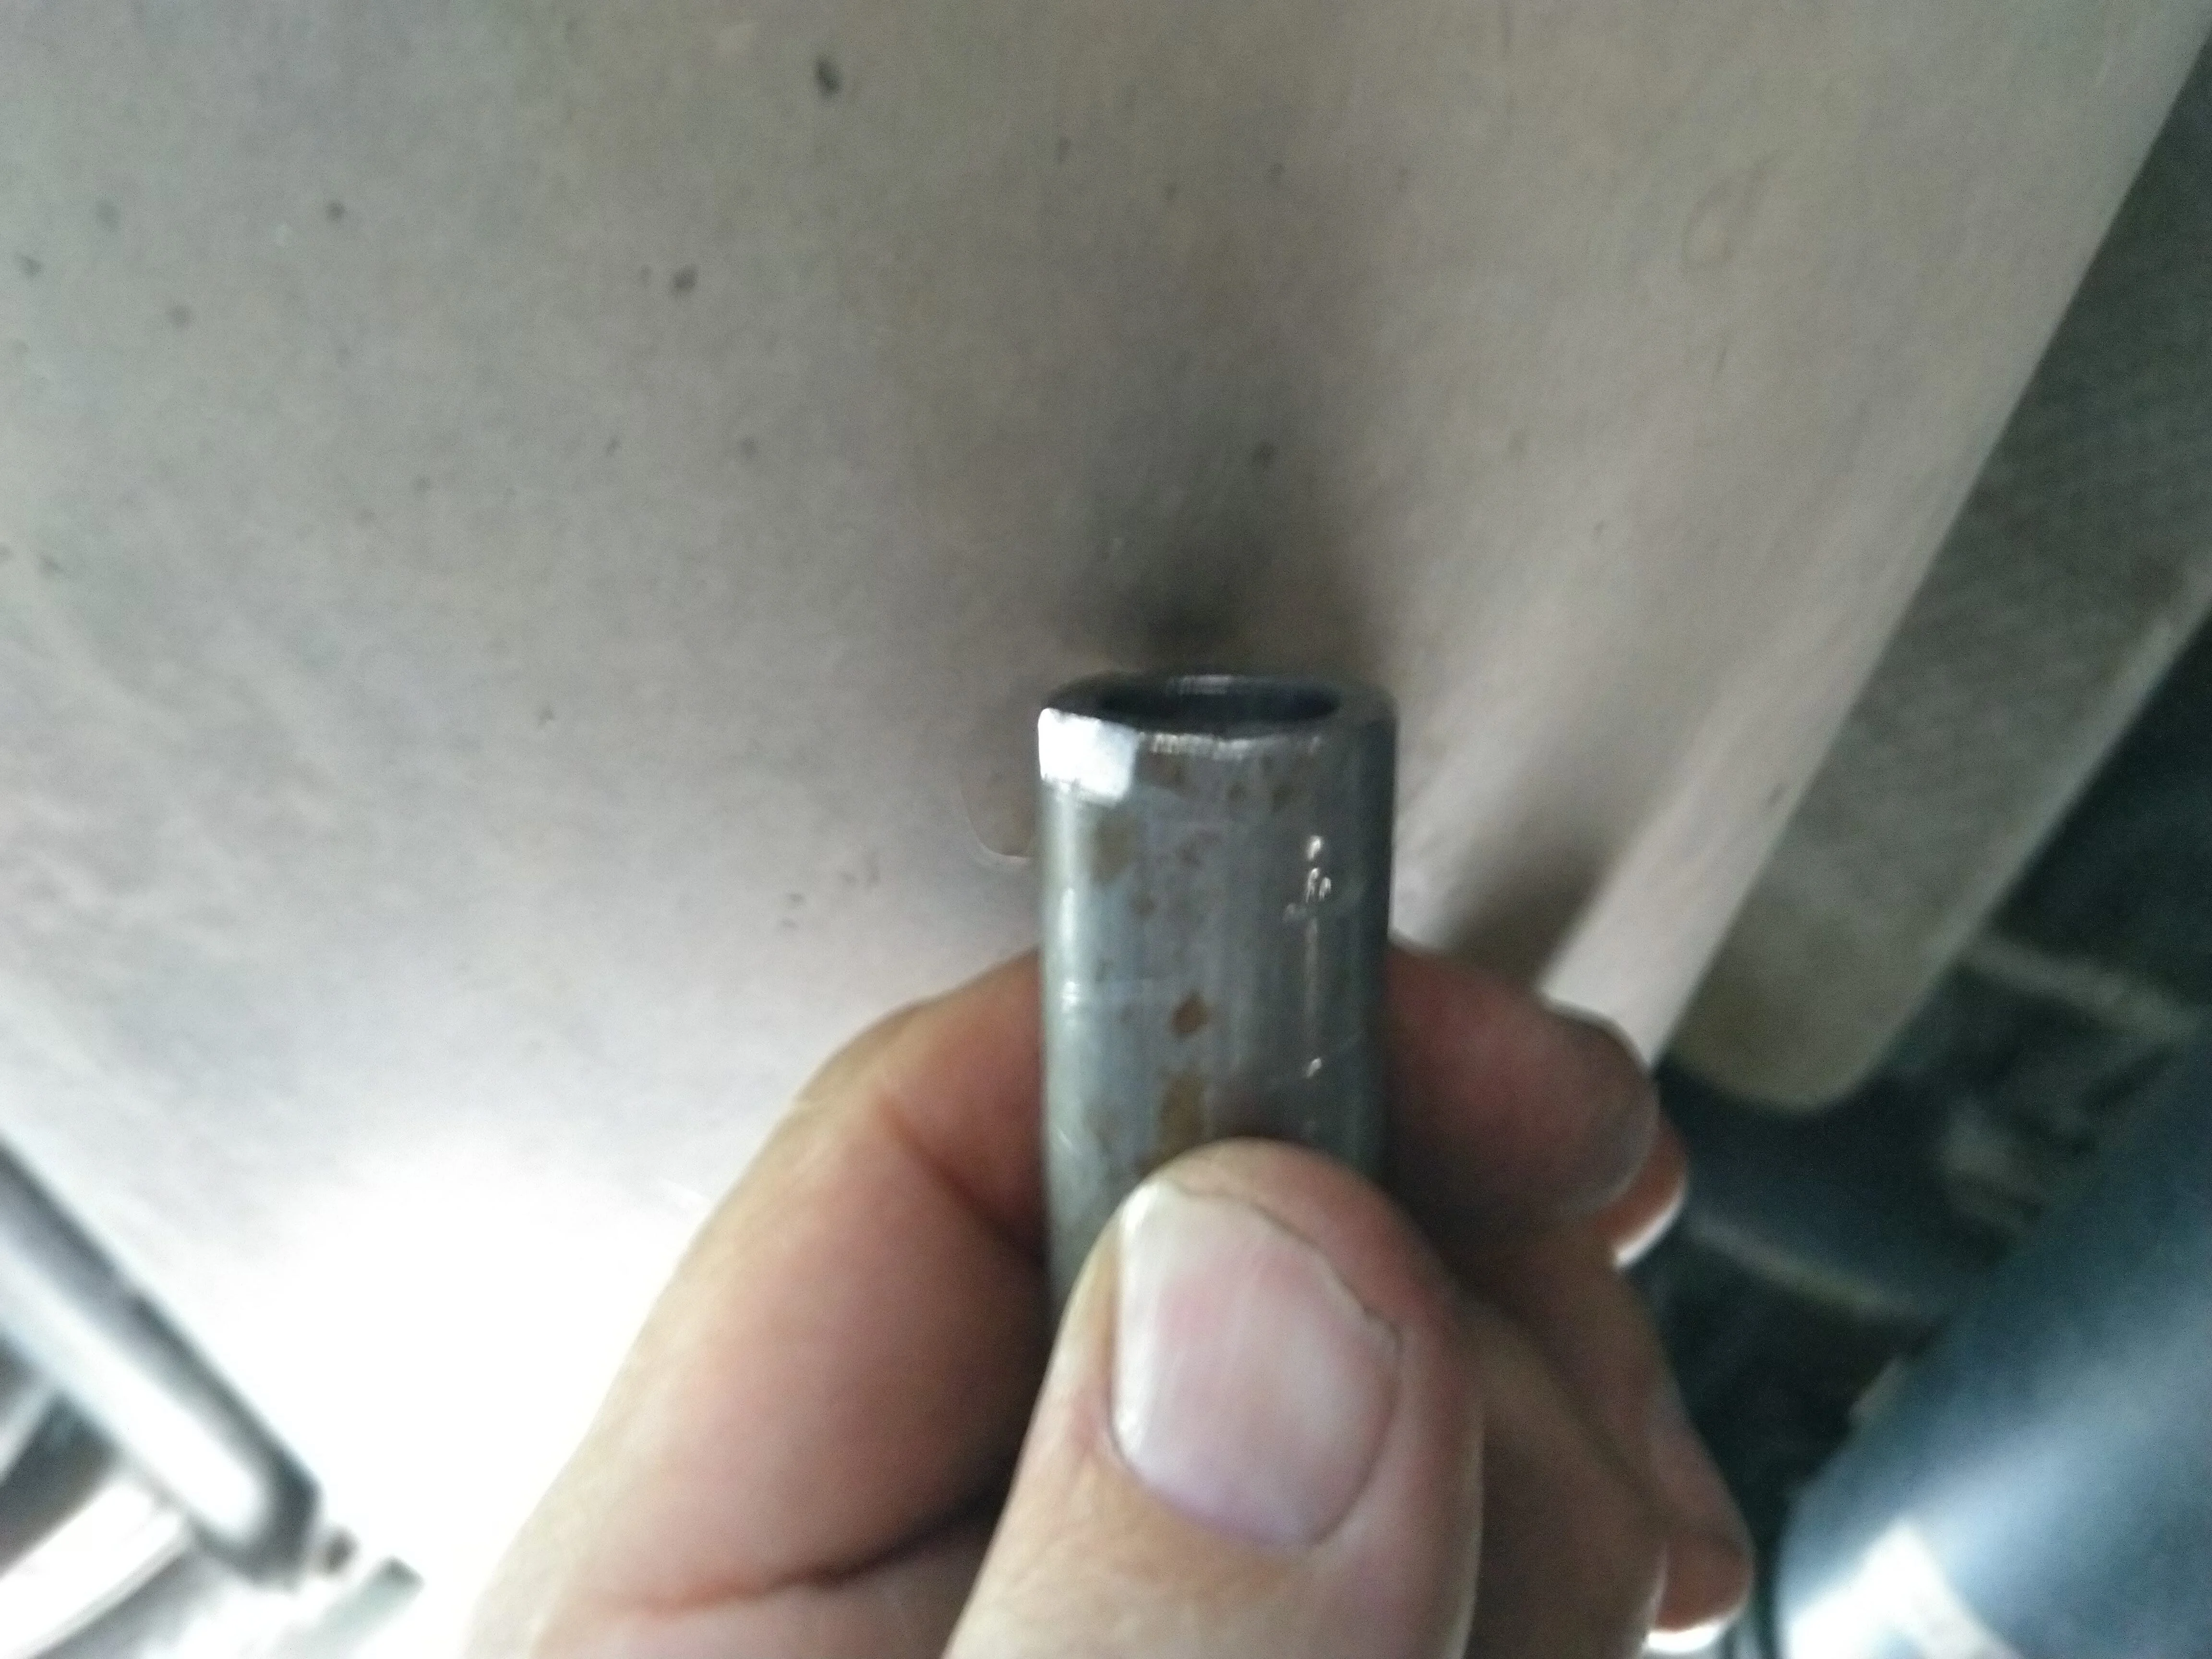
I was afraid of the potential to crush the frame box by through-bolting the upper bolt of the passenger middle leg (it's easy to do). So, rather than bolting the 6" long bolt through the frame, using the supplied plate, I opted to sleeve that hole with some 0.5" ID DOM tube (no weld seams), approx 1/4" thick? For the rectangular outside hole, I had to shave a little off the tube so the flats would seat in the rectangle and otherwise it's a good OD size for the inside's larger rectangular hole.
This brace is L-shaped and wraps under the frame rail. There is an extant hole which the instructions have you open up to install a 5/8 river nut. I opened the hole for my 11/16" grade 8 bolt. I still need to drill out the rear hole in my frame but when I made this stick nut, I welded two nuts to a plate and dropped that into the frame. So the front hole bolts right up and ther is now a nut in the frame awaiting my procrastination to drill out the rear hole and finish bolting it up.

I was afraid of the potential to crush the frame box by through-bolting the upper bolt of the passenger middle leg (it's easy to do). So, rather than bolting the 6" long bolt through the frame, using the supplied plate, I opted to sleeve that hole with some 0.5" ID DOM tube (no weld seams), approx 1/4" thick? For the rectangular outside hole, I had to shave a little off the tube so the flats would seat in the rectangle and otherwise it's a good OD size for the inside's larger rectangular hole.
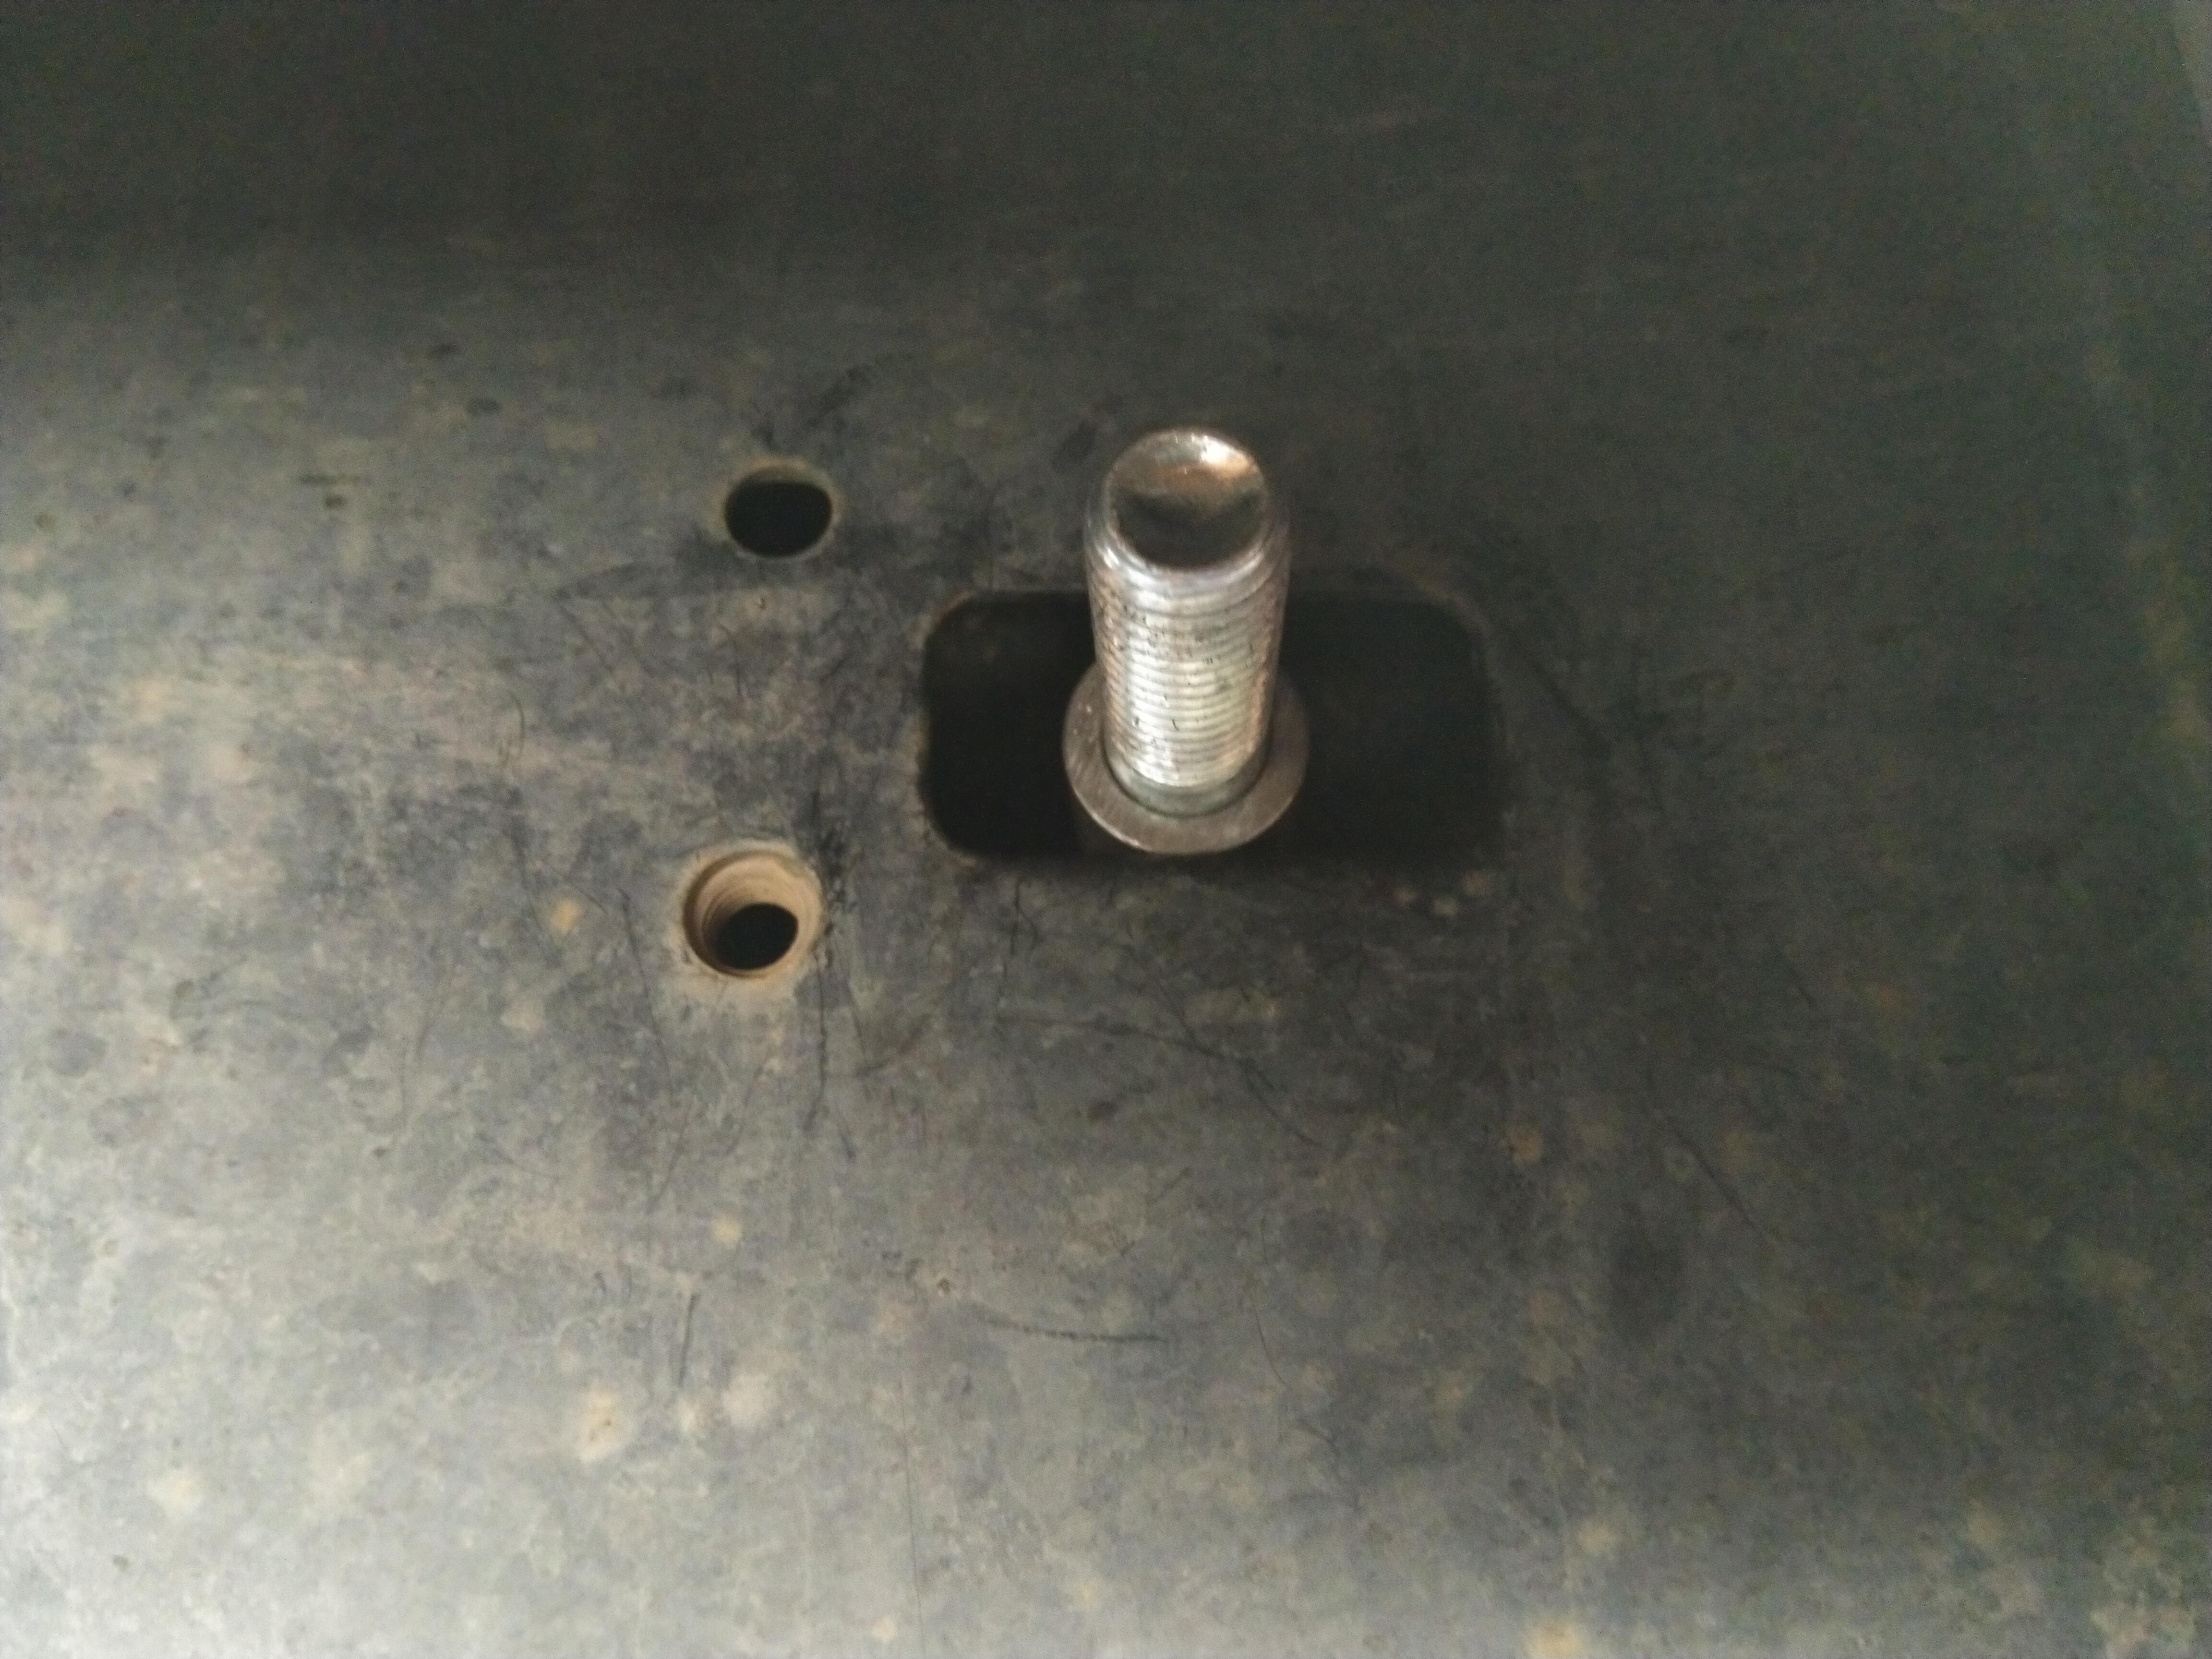

This brace is L-shaped and wraps under the frame rail. There is an extant hole which the instructions have you open up to install a 5/8 river nut. I opened the hole for my 11/16" grade 8 bolt. I still need to drill out the rear hole in my frame but when I made this stick nut, I welded two nuts to a plate and dropped that into the frame. So the front hole bolts right up and ther is now a nut in the frame awaiting my procrastination to drill out the rear hole and finish bolting it up.
- Thread starter
- #348
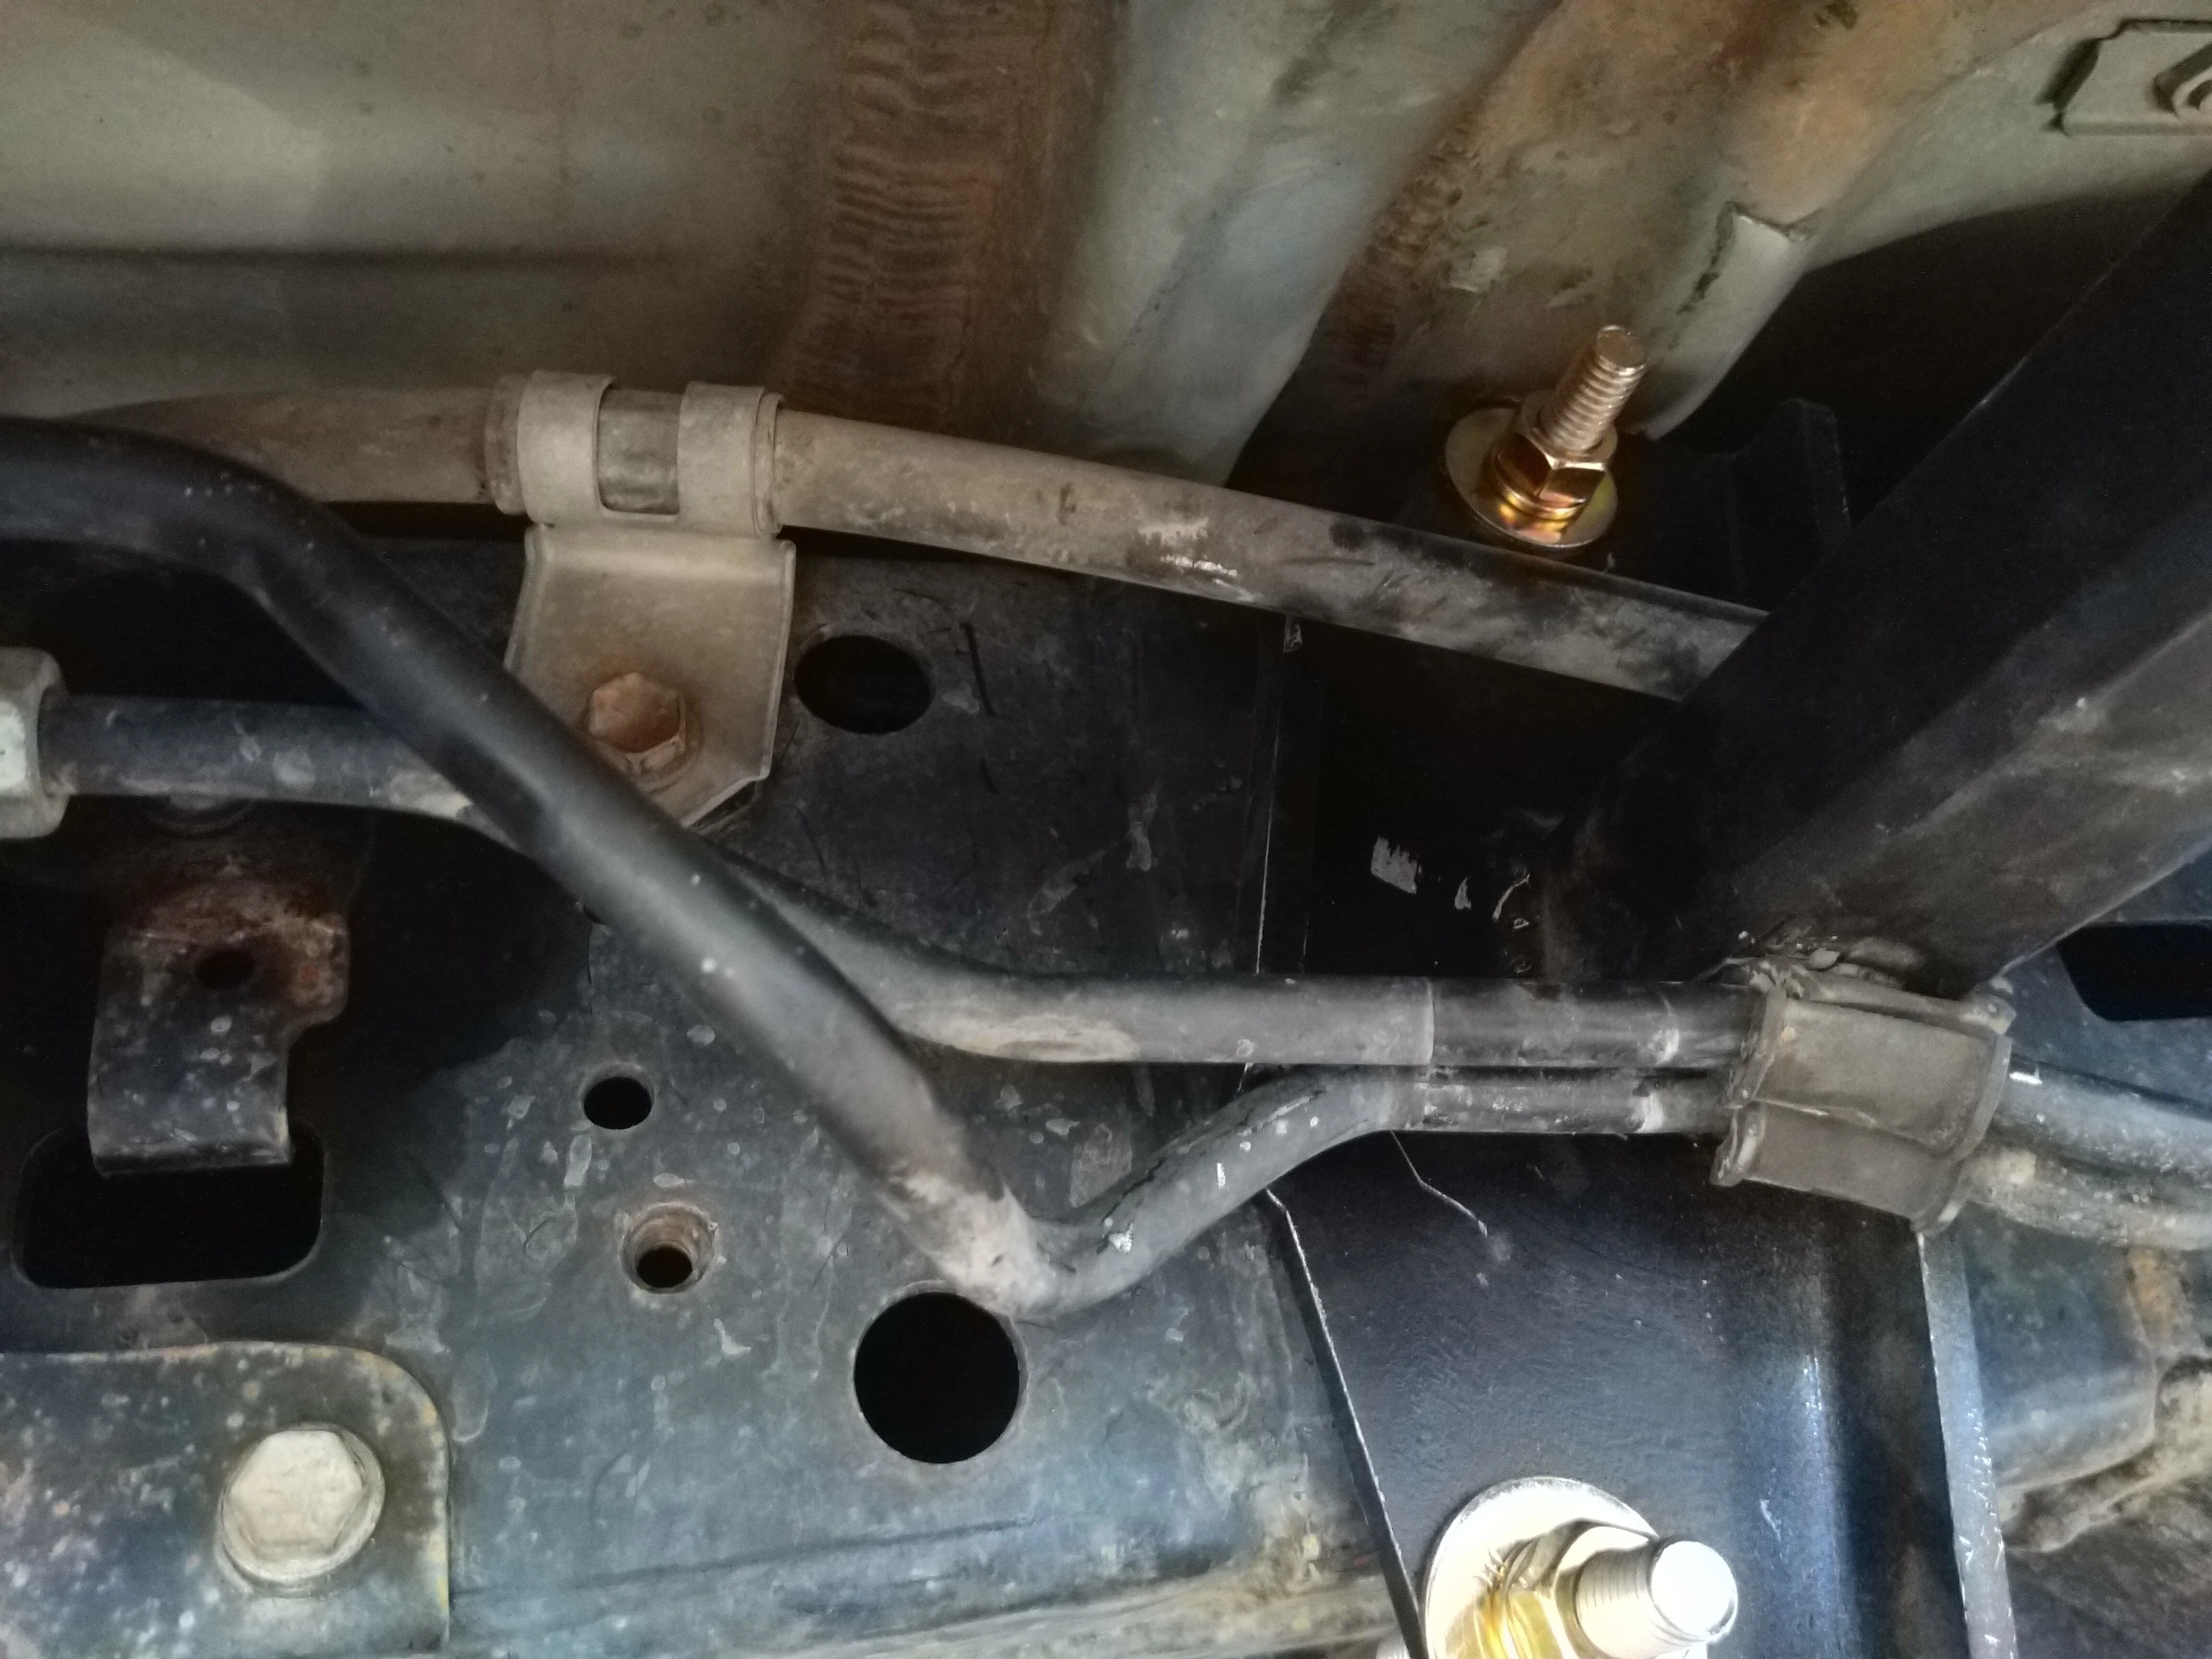
Then the Driver's side.
So the front leg's access hole for the stick nut is partialy obscured by a KDSS pump skid plate and a pair of KDSS hydraulic lines.
So that was ANOTHER exercise in patience....after all the above.
and here s a shot of the driver side rear leg with the various lines to deal with there...thus the gymnastics gif above.
So the front leg's access hole for the stick nut is partialy obscured by a KDSS pump skid plate and a pair of KDSS hydraulic lines.

So that was ANOTHER exercise in patience....after all the above.
and here s a shot of the driver side rear leg with the various lines to deal with there...thus the gymnastics gif above.
- Thread starter
- #349
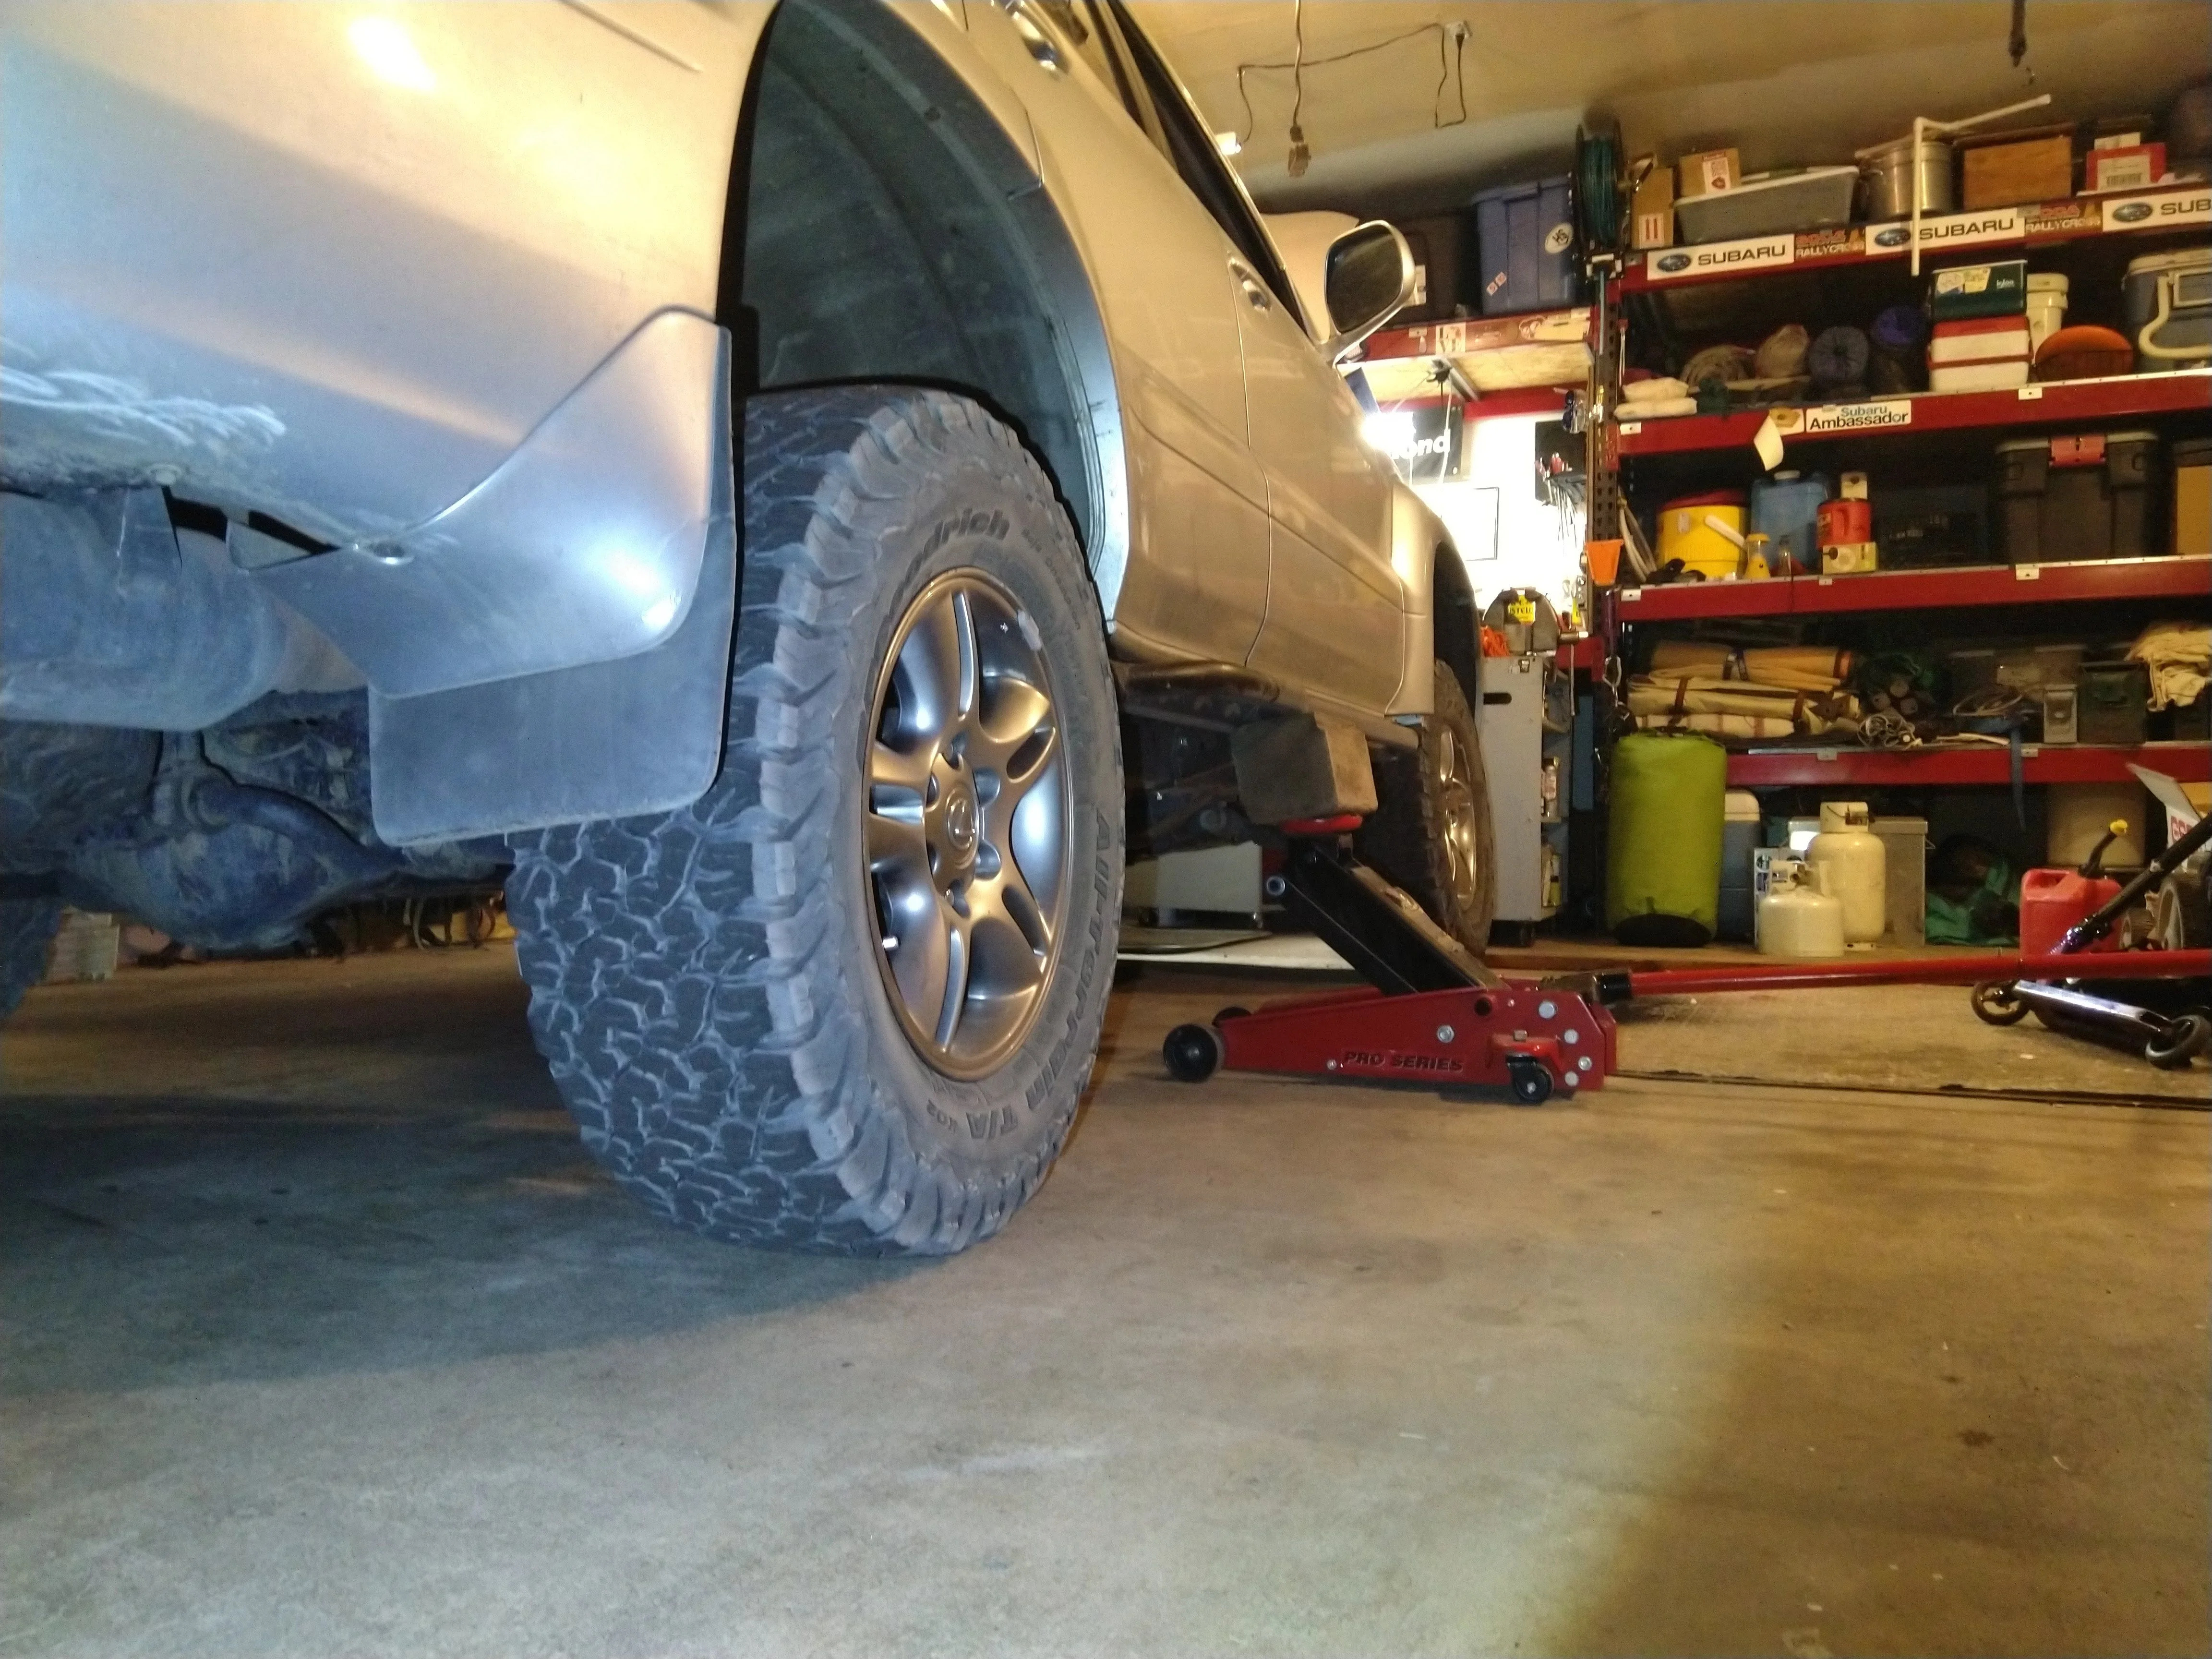
I did a jacking test tonight.
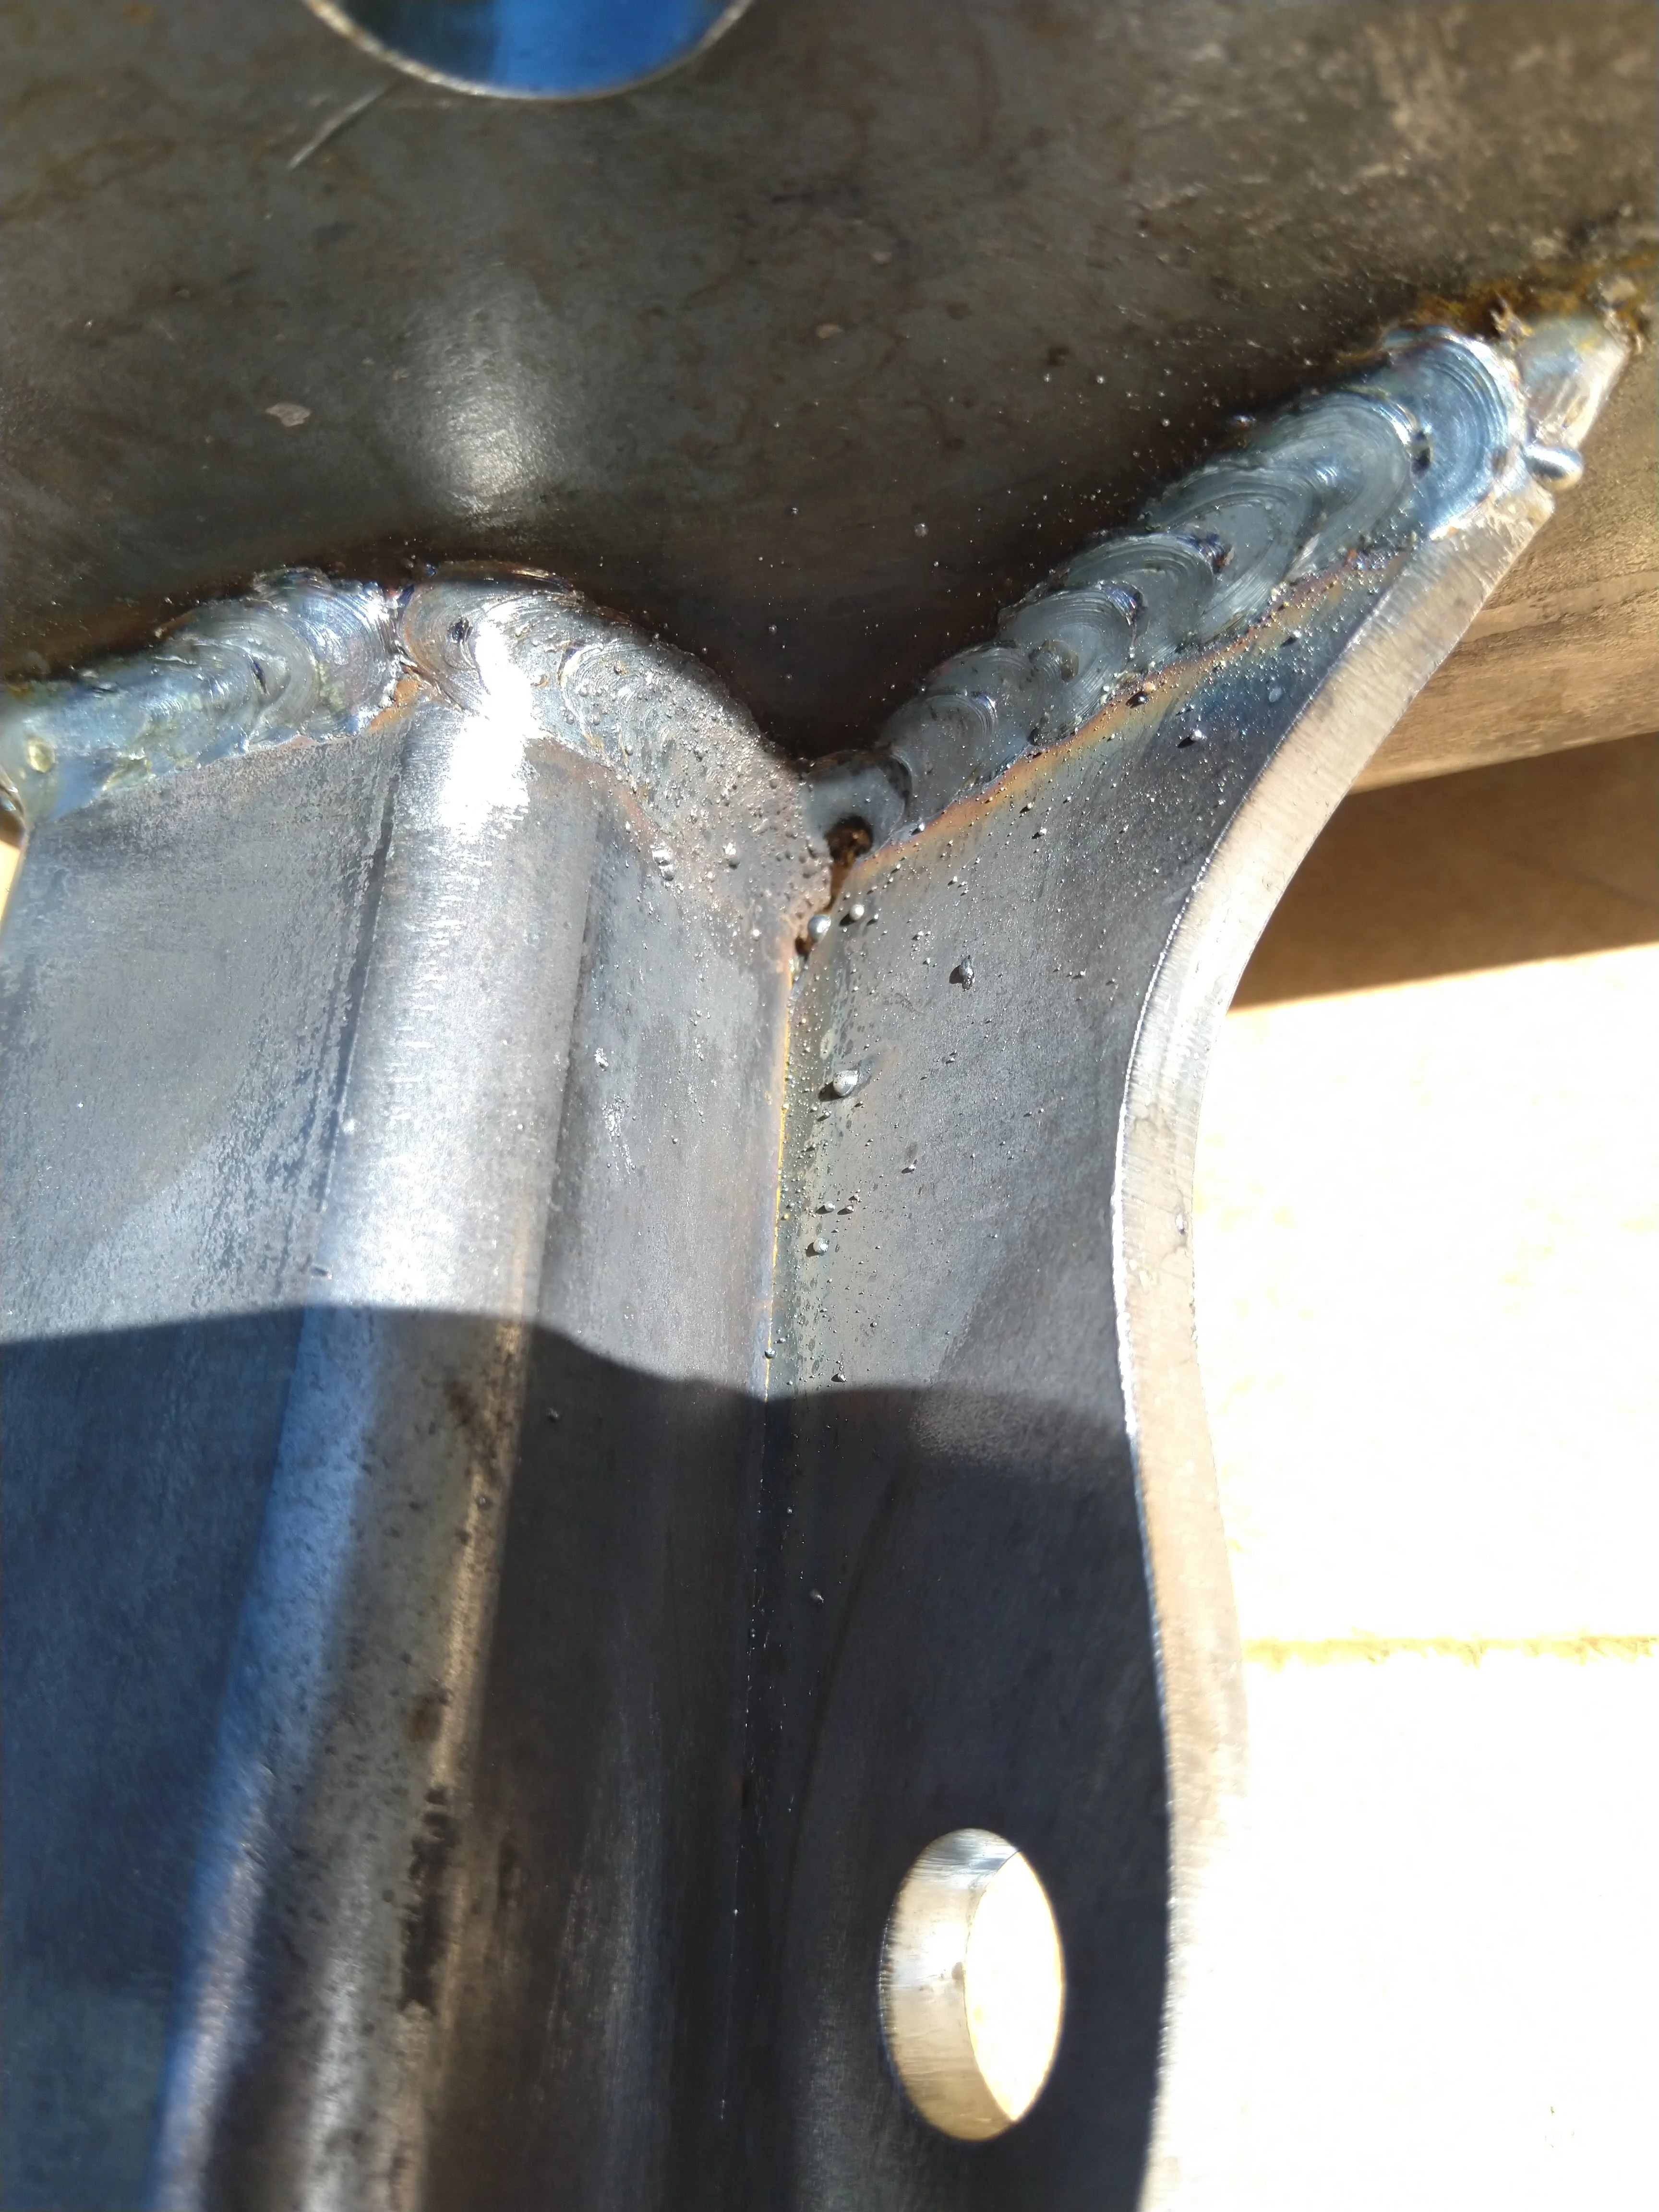
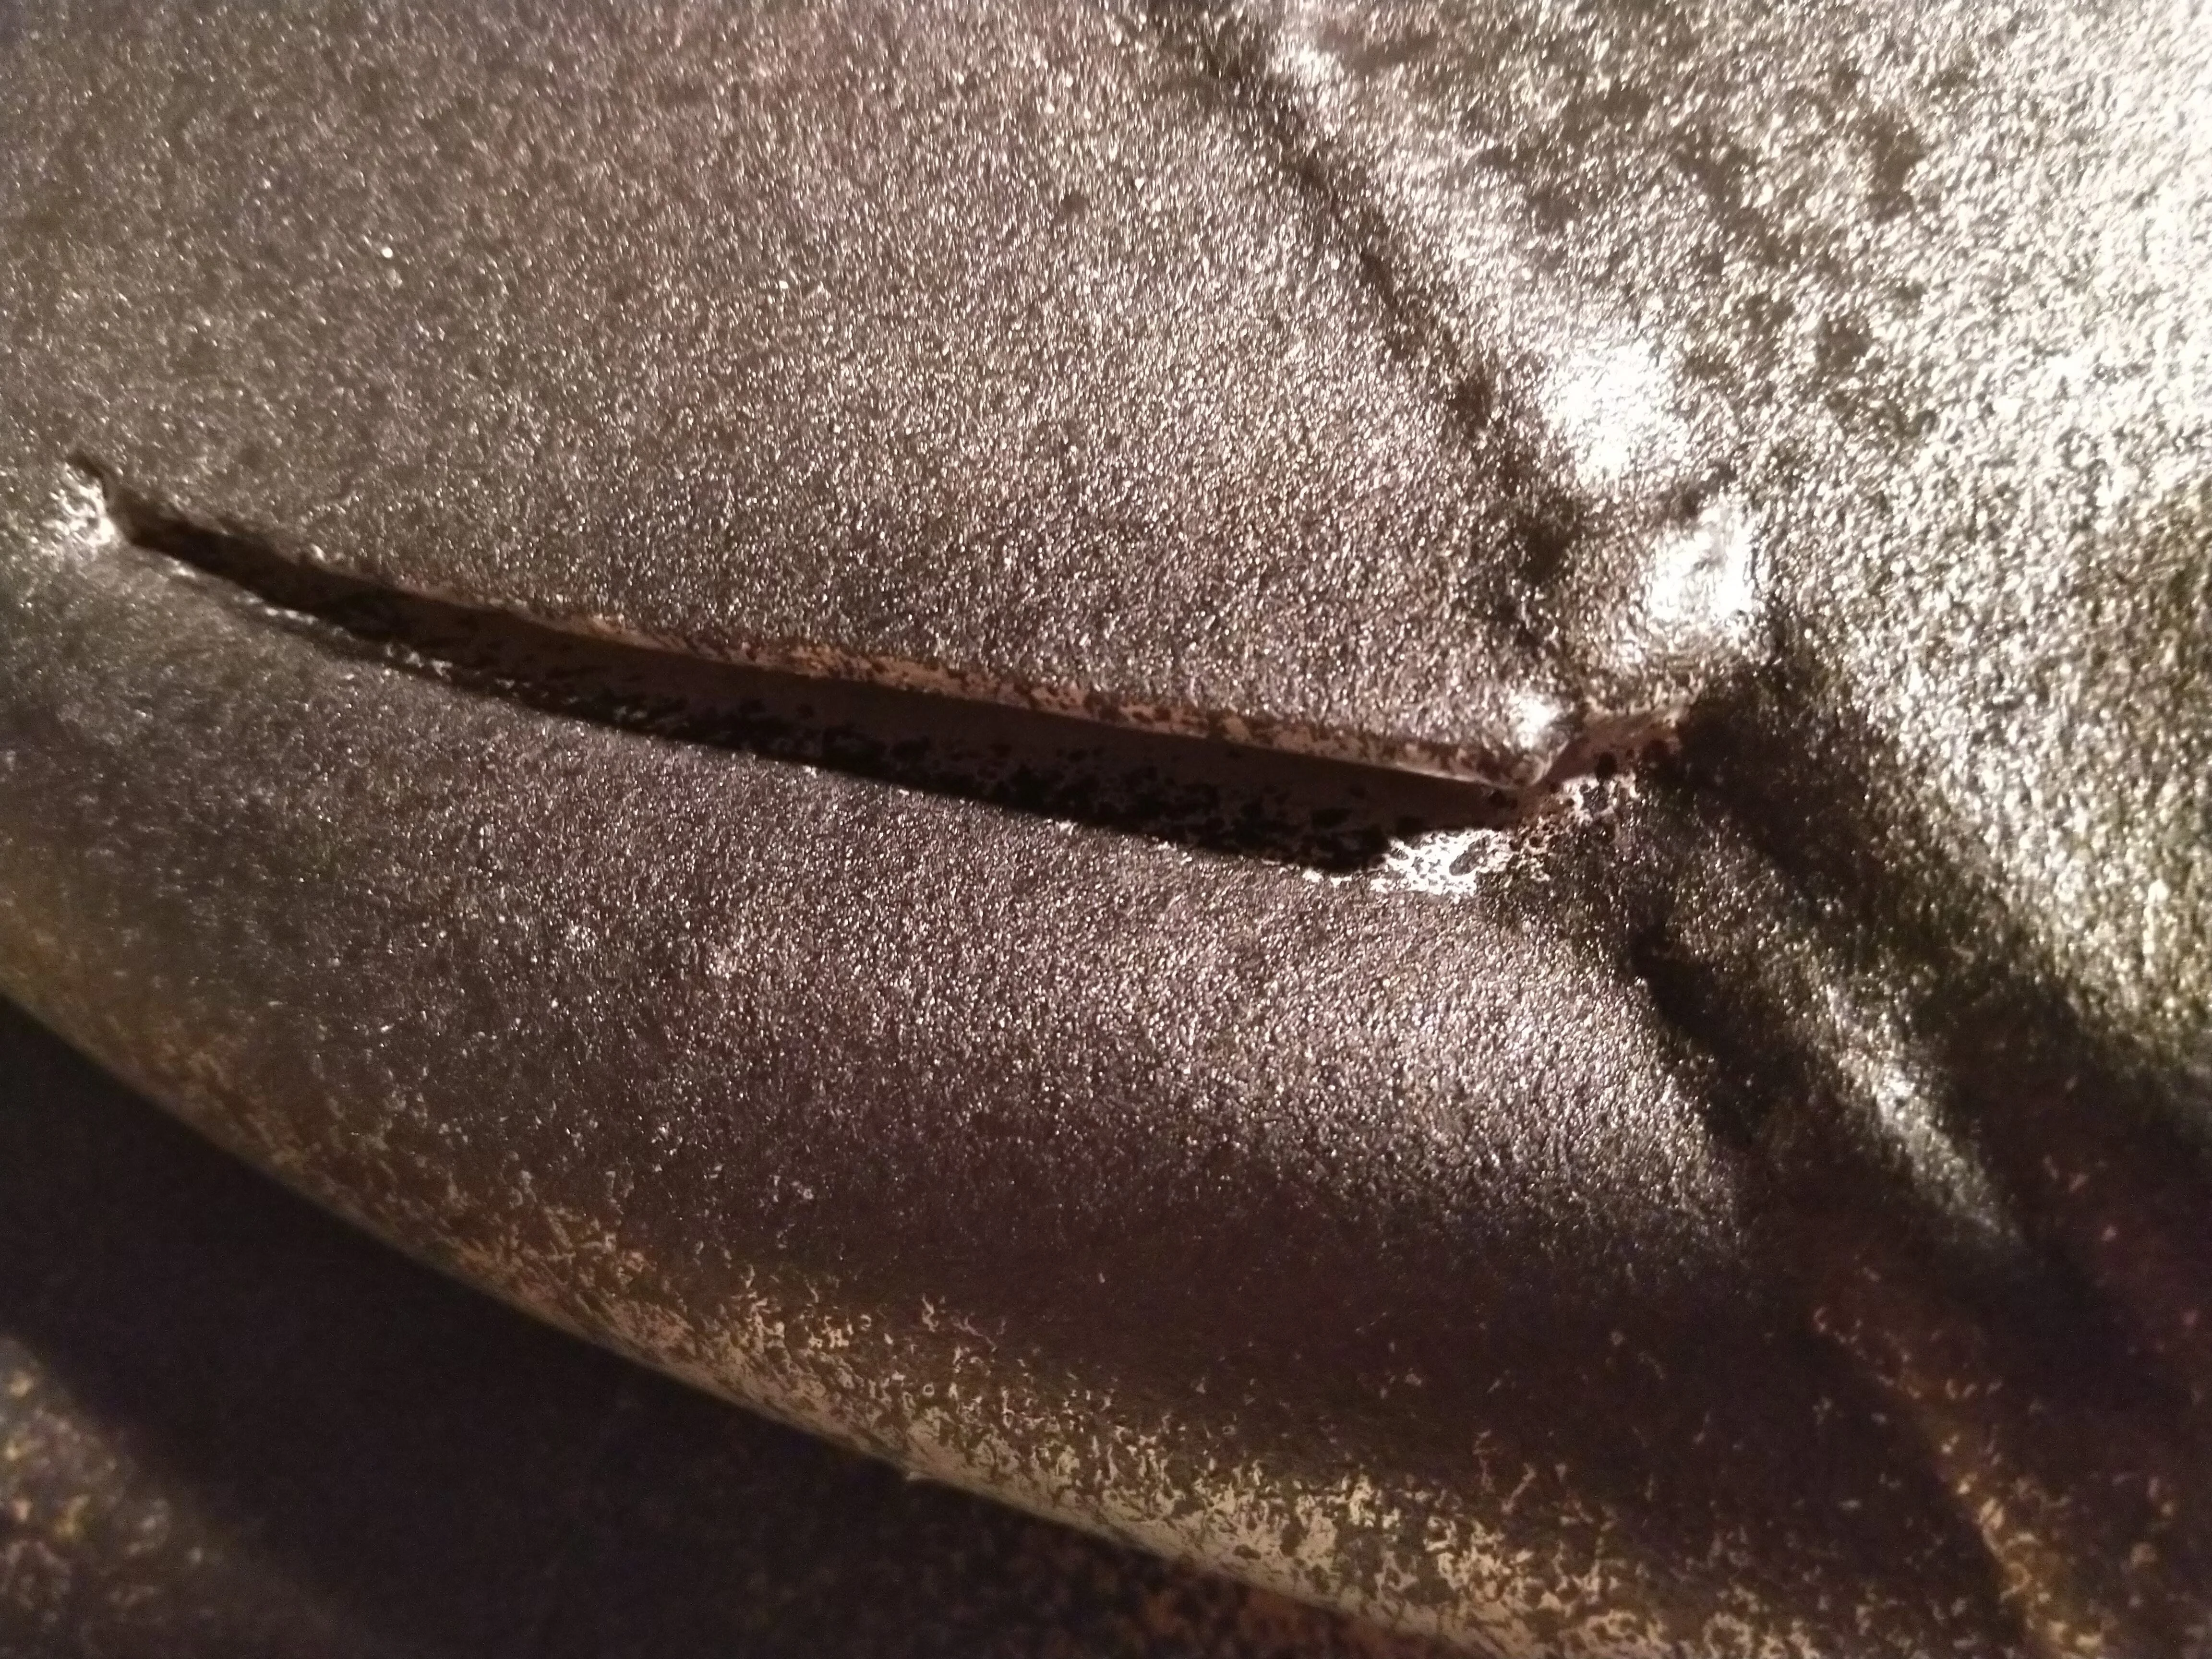
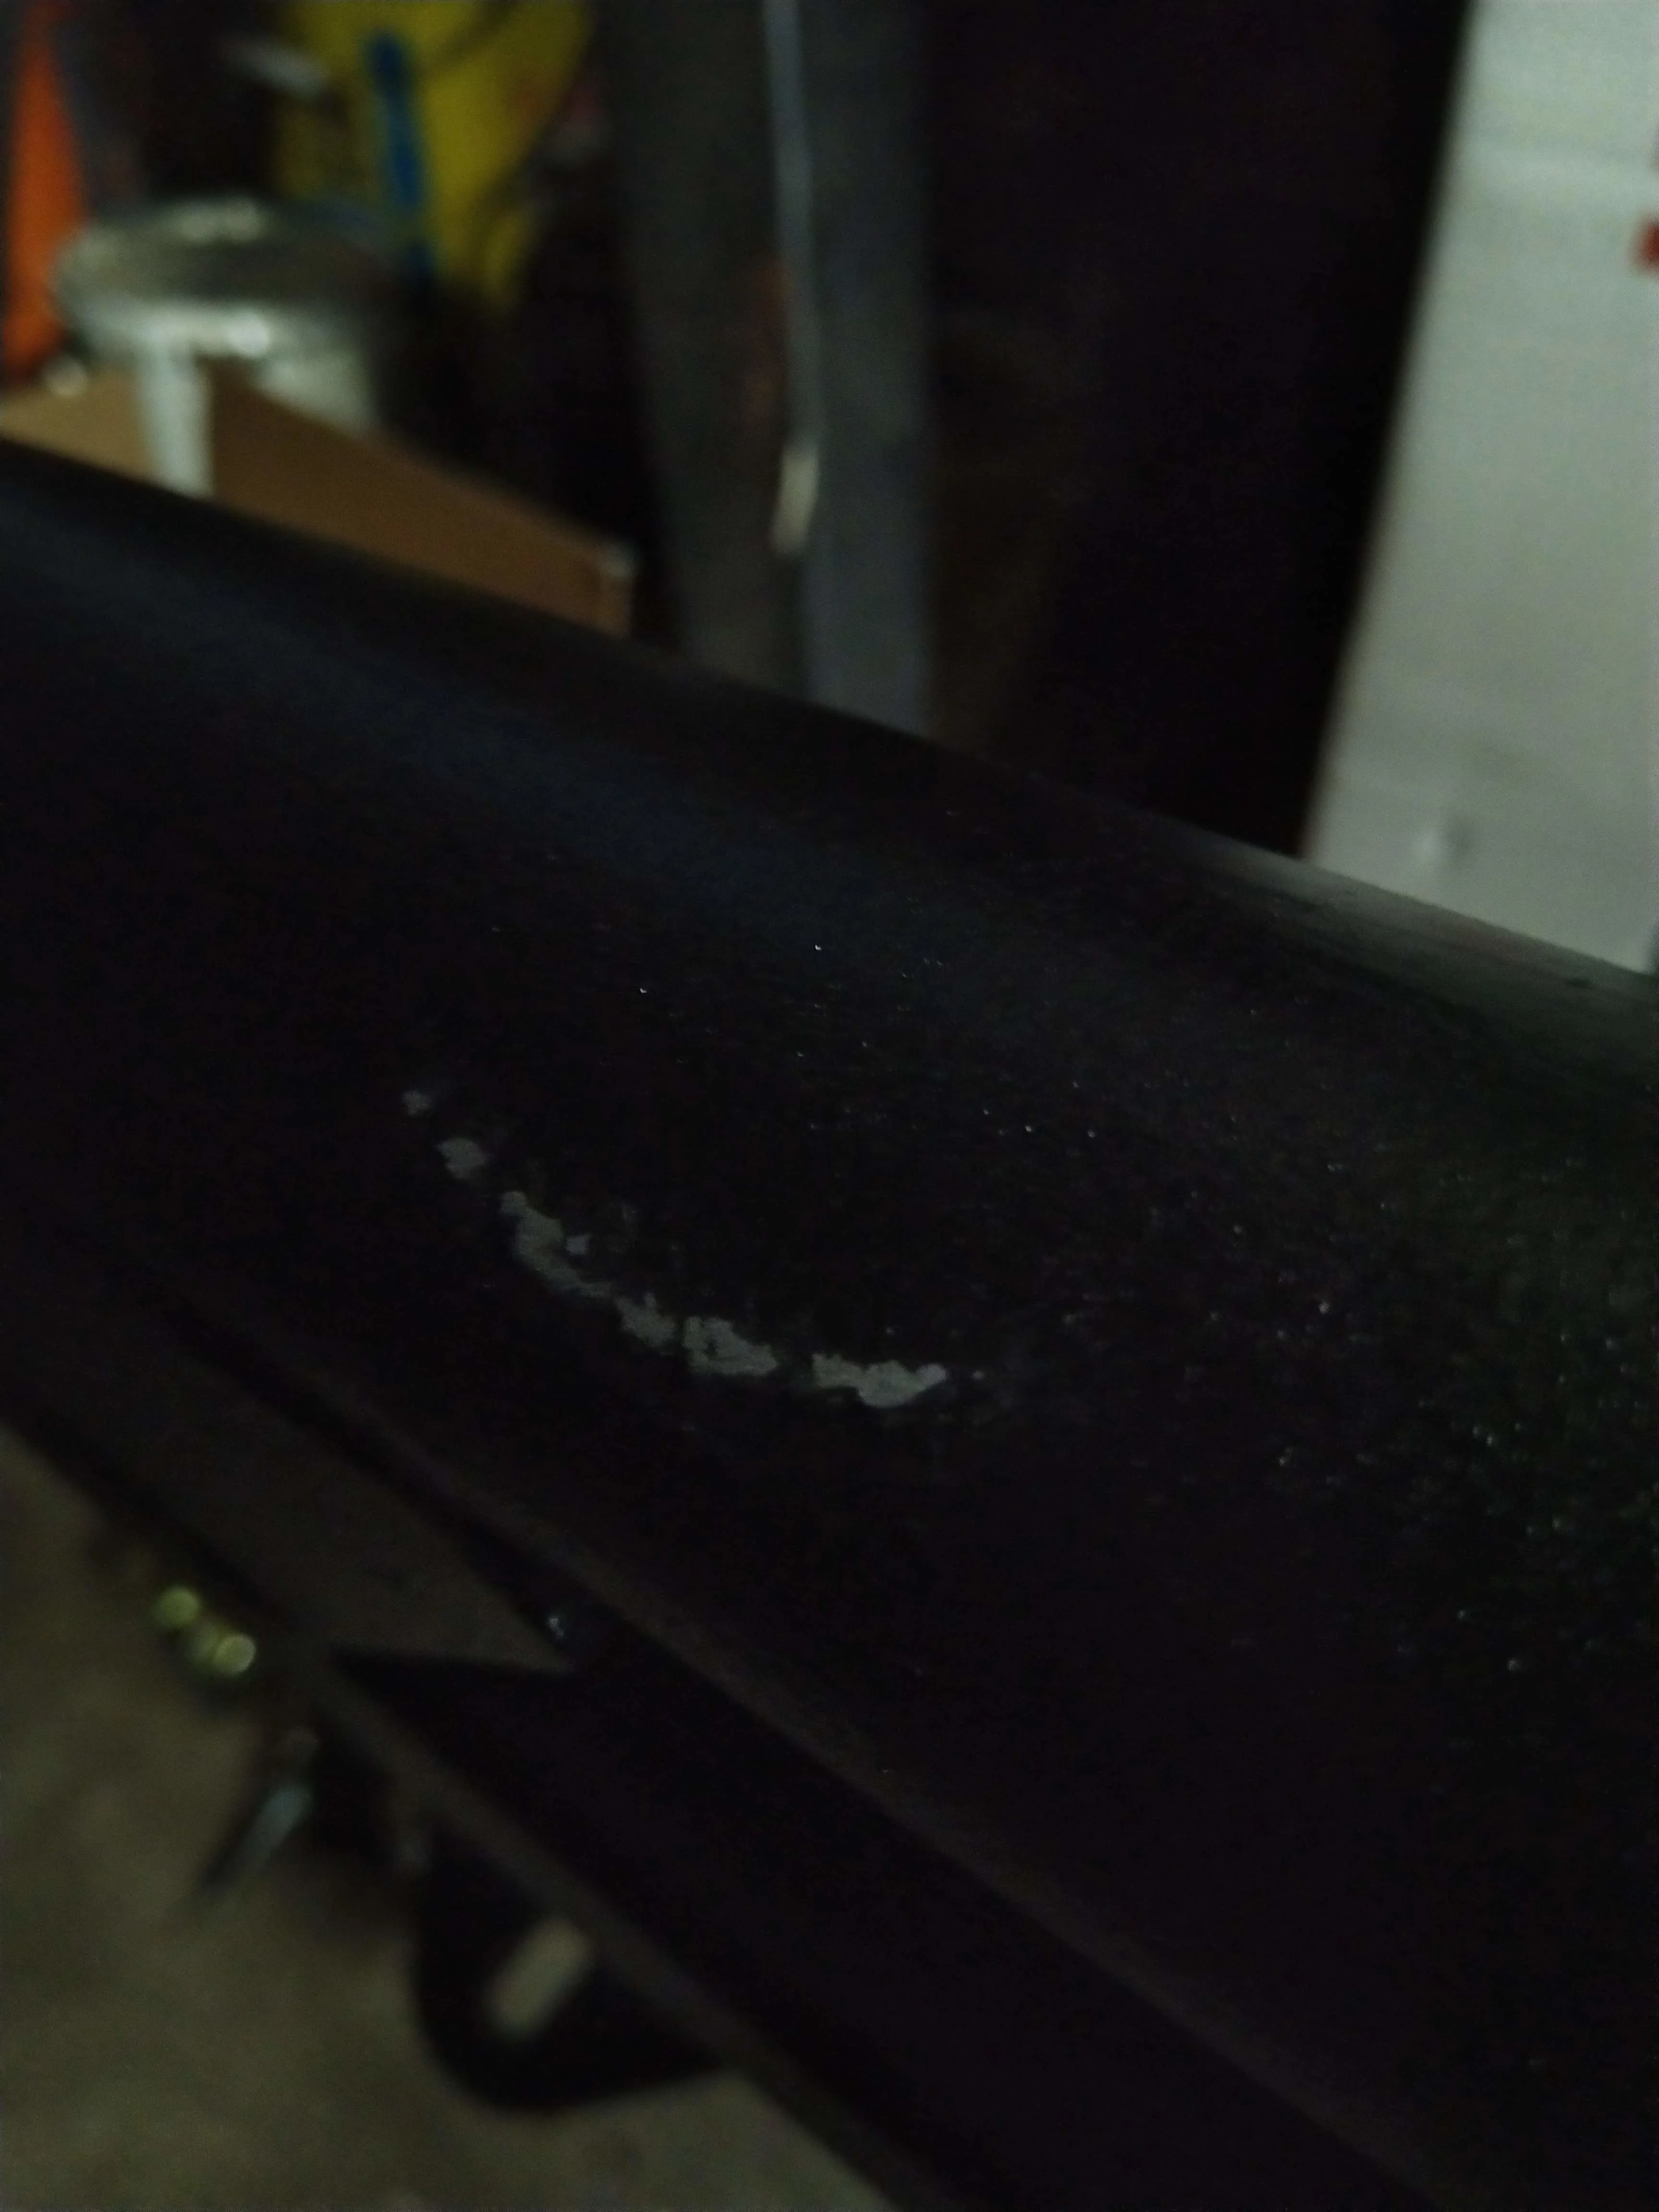
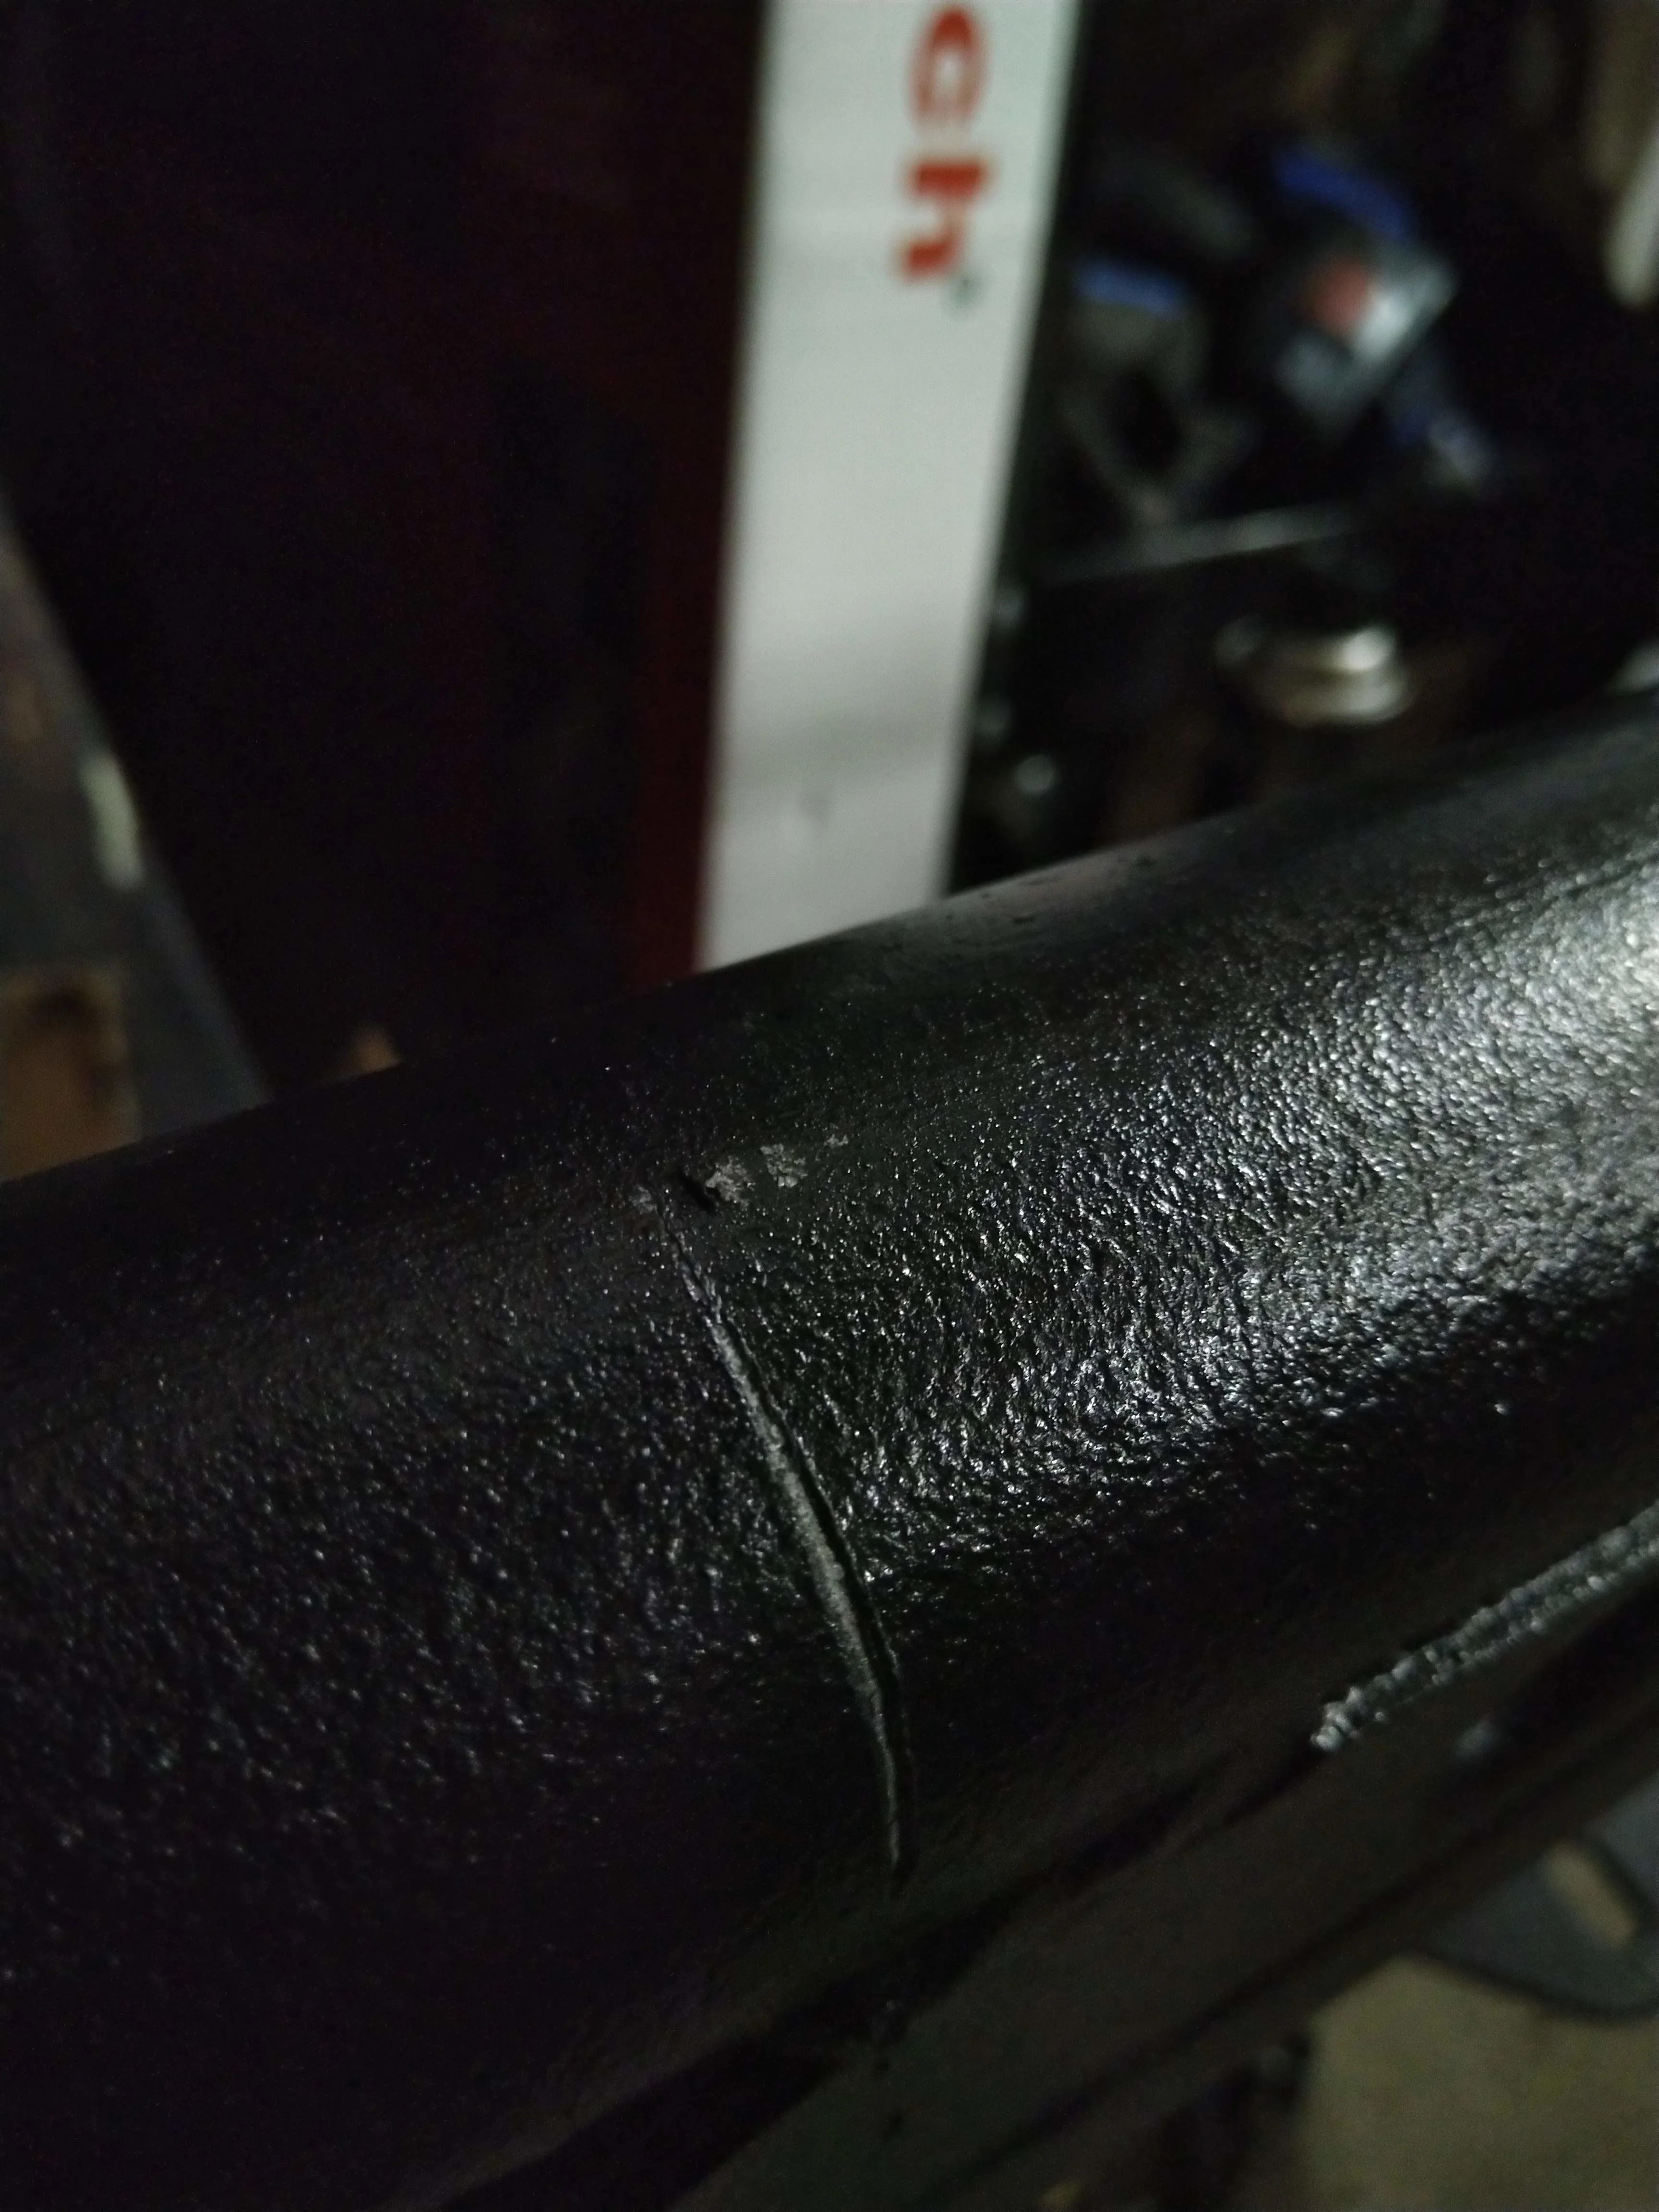
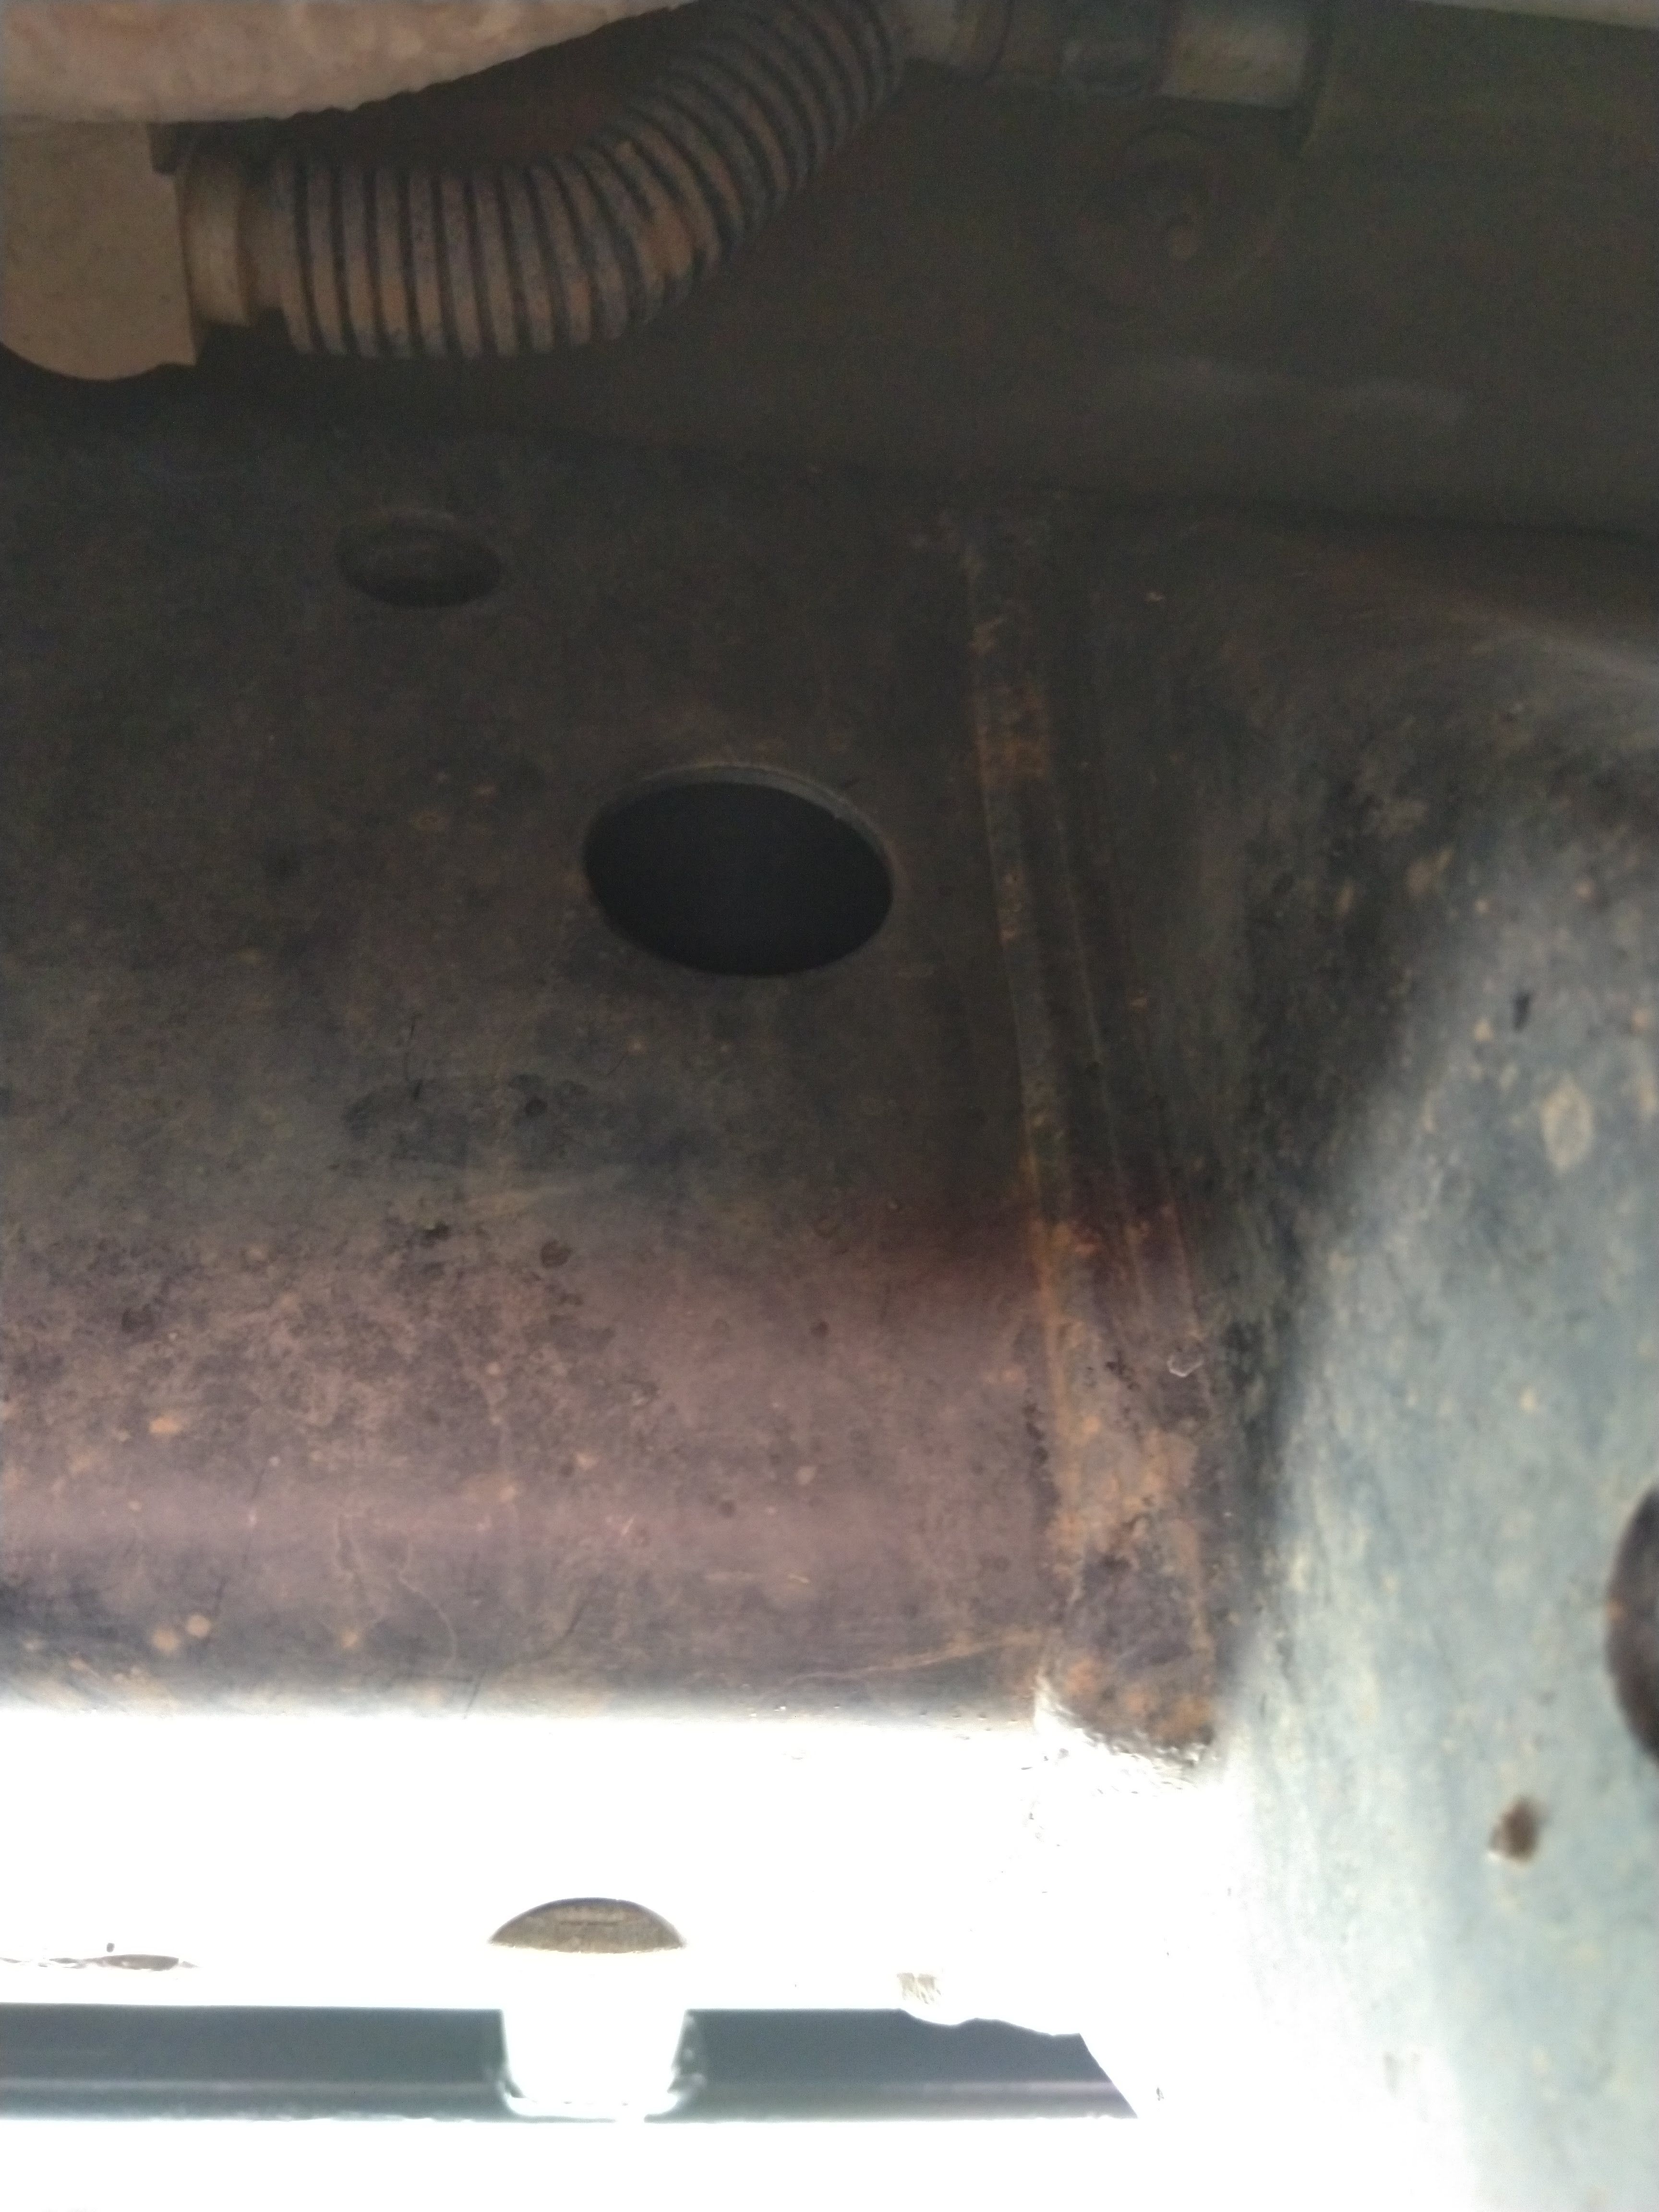
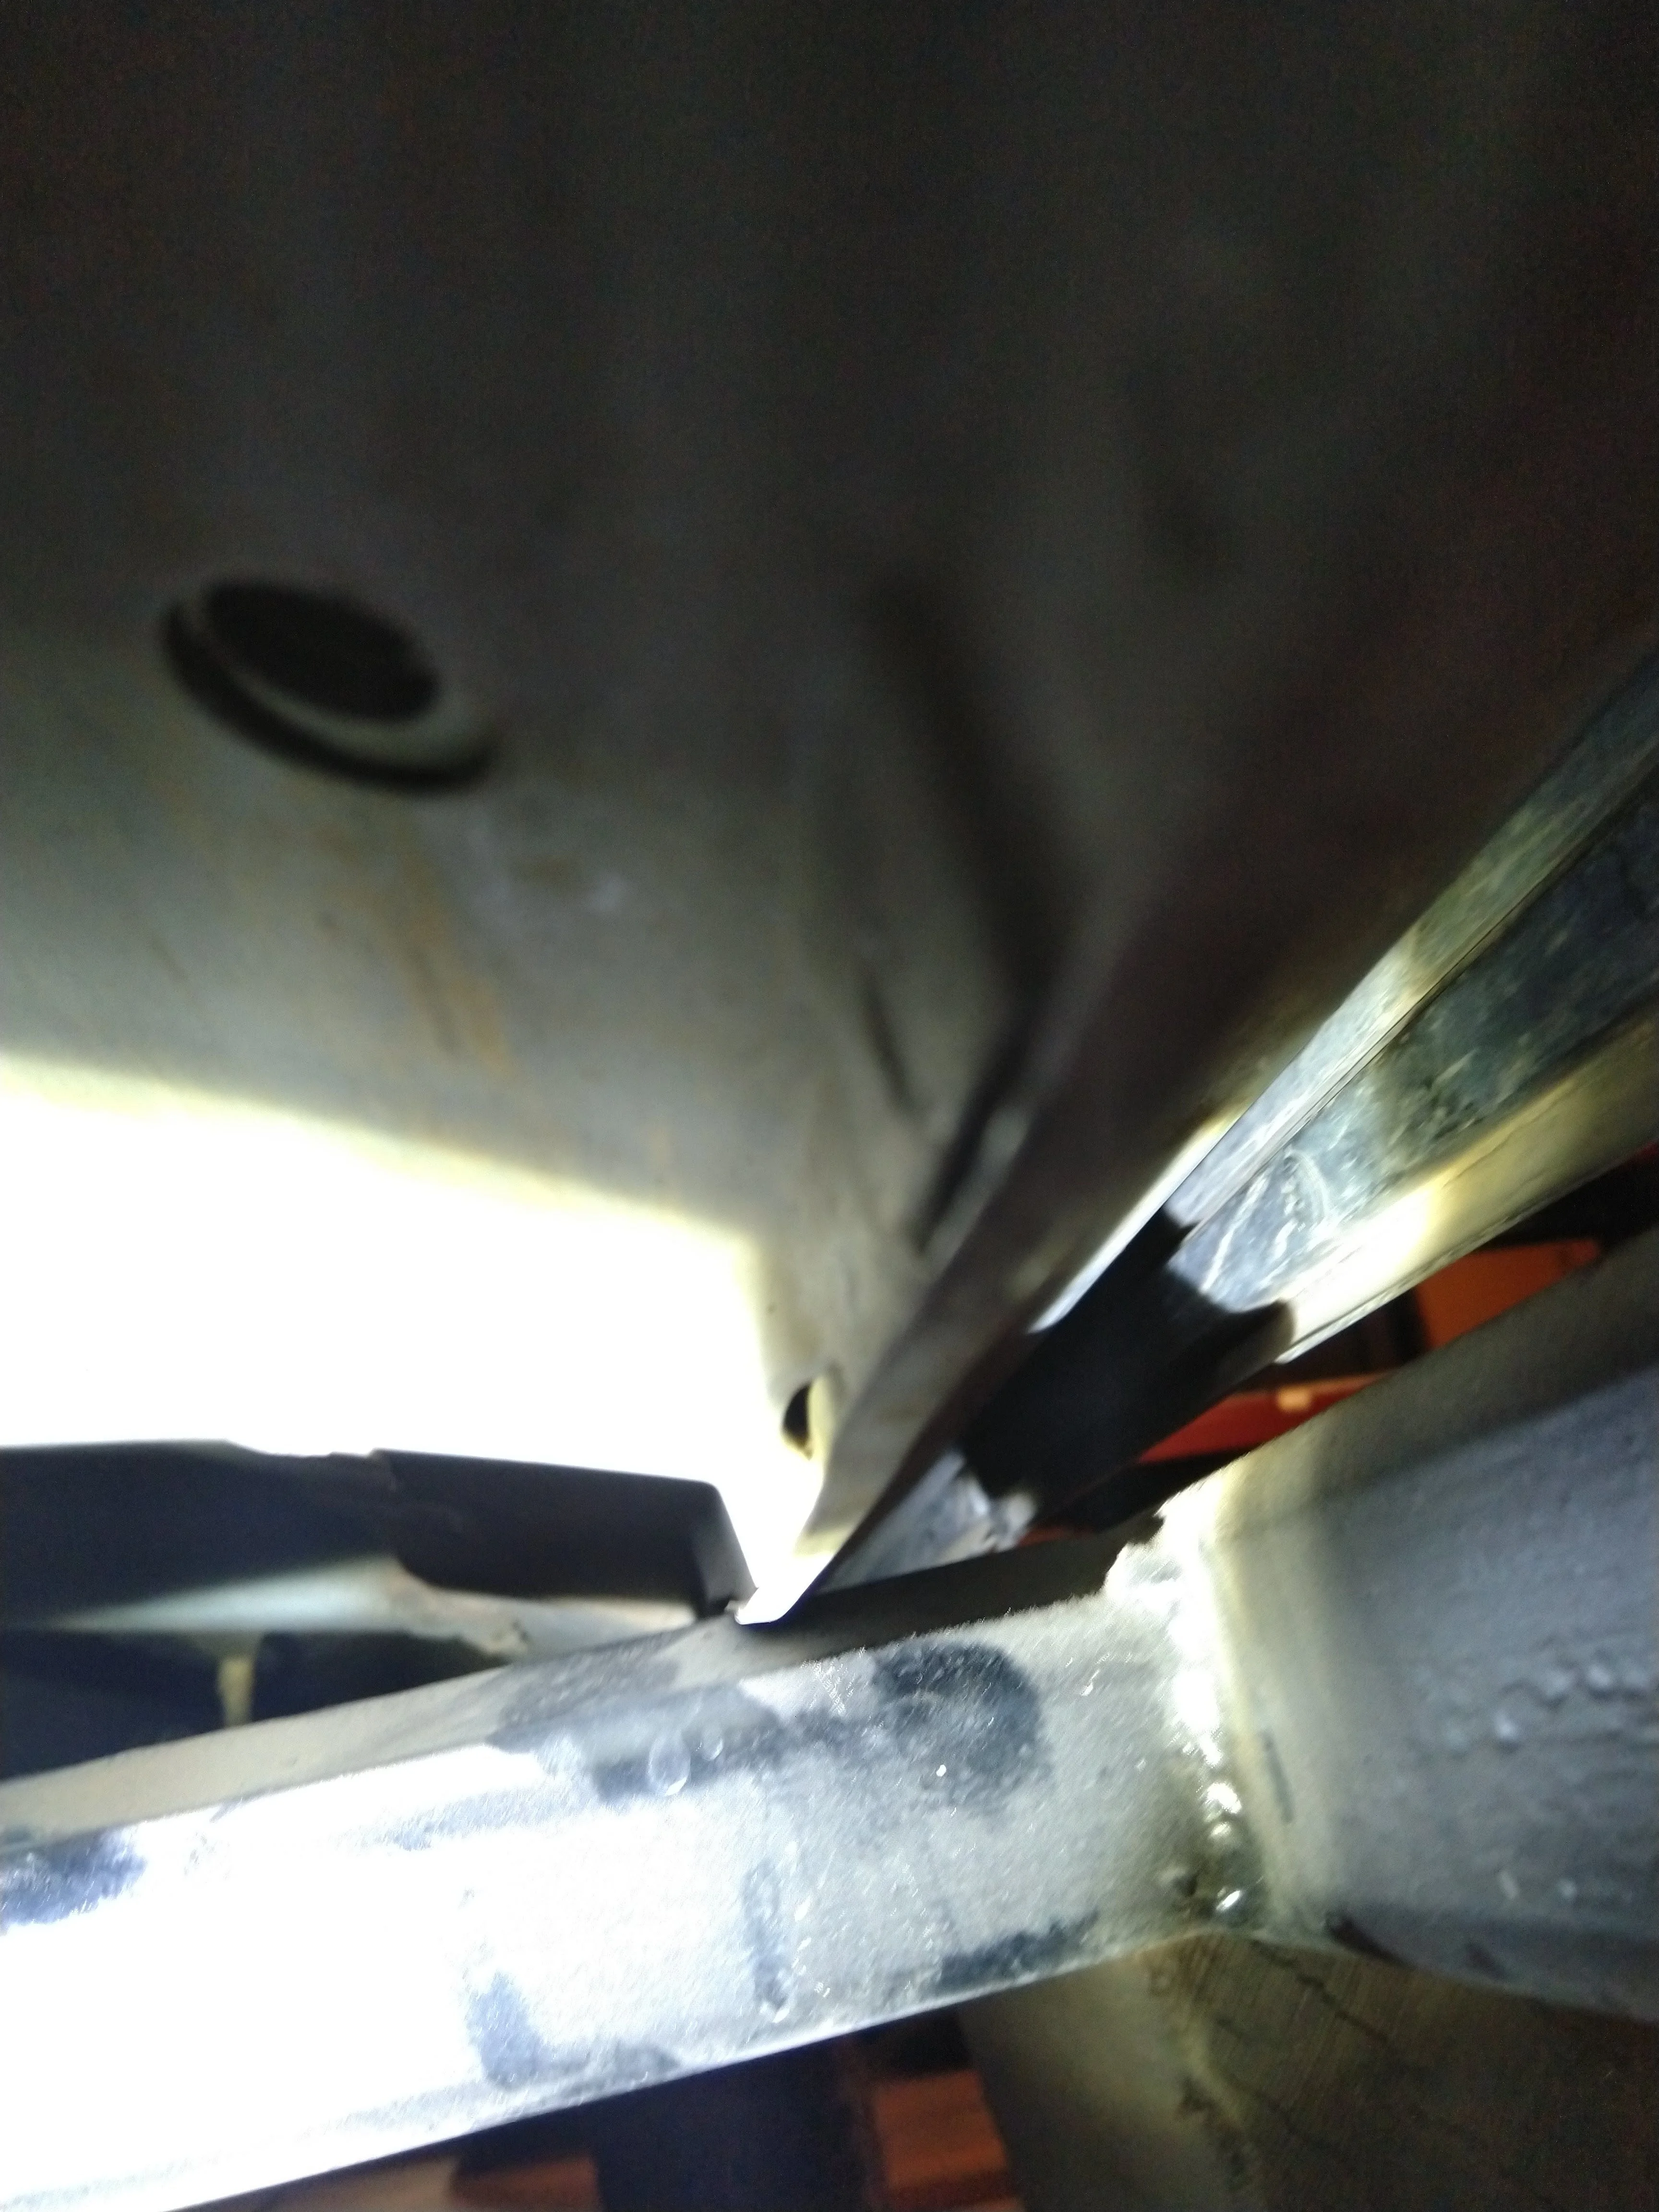
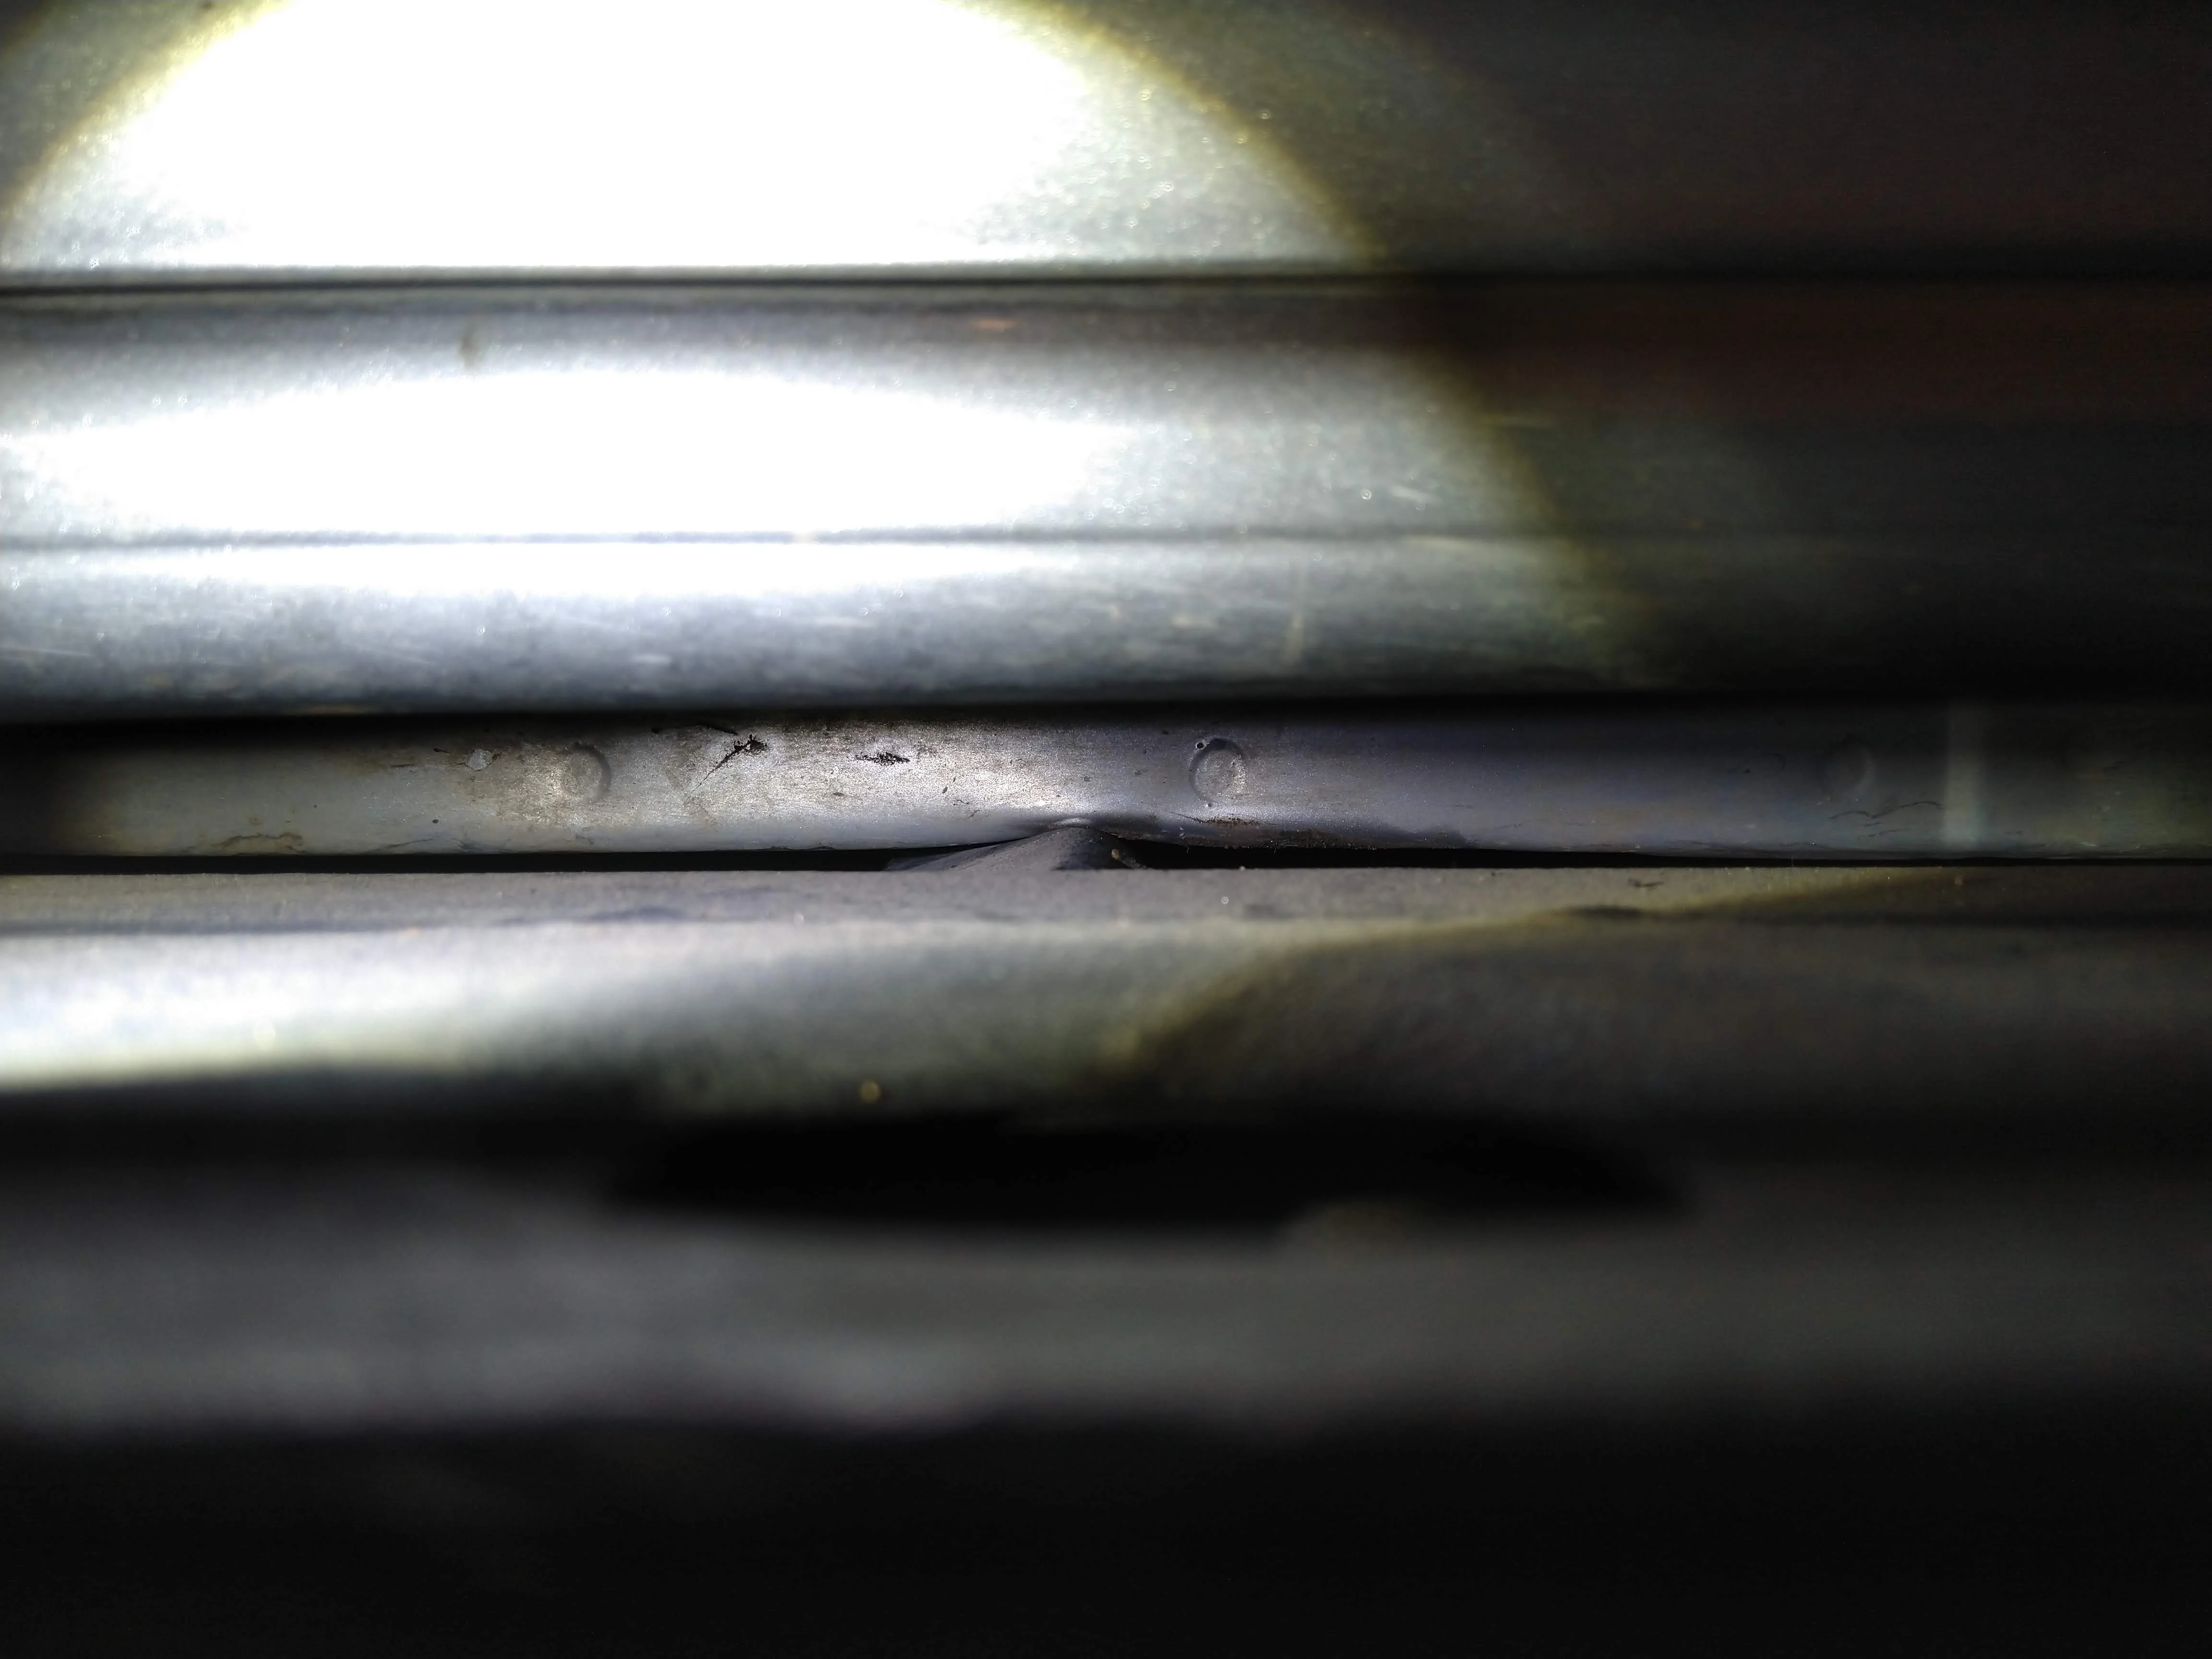
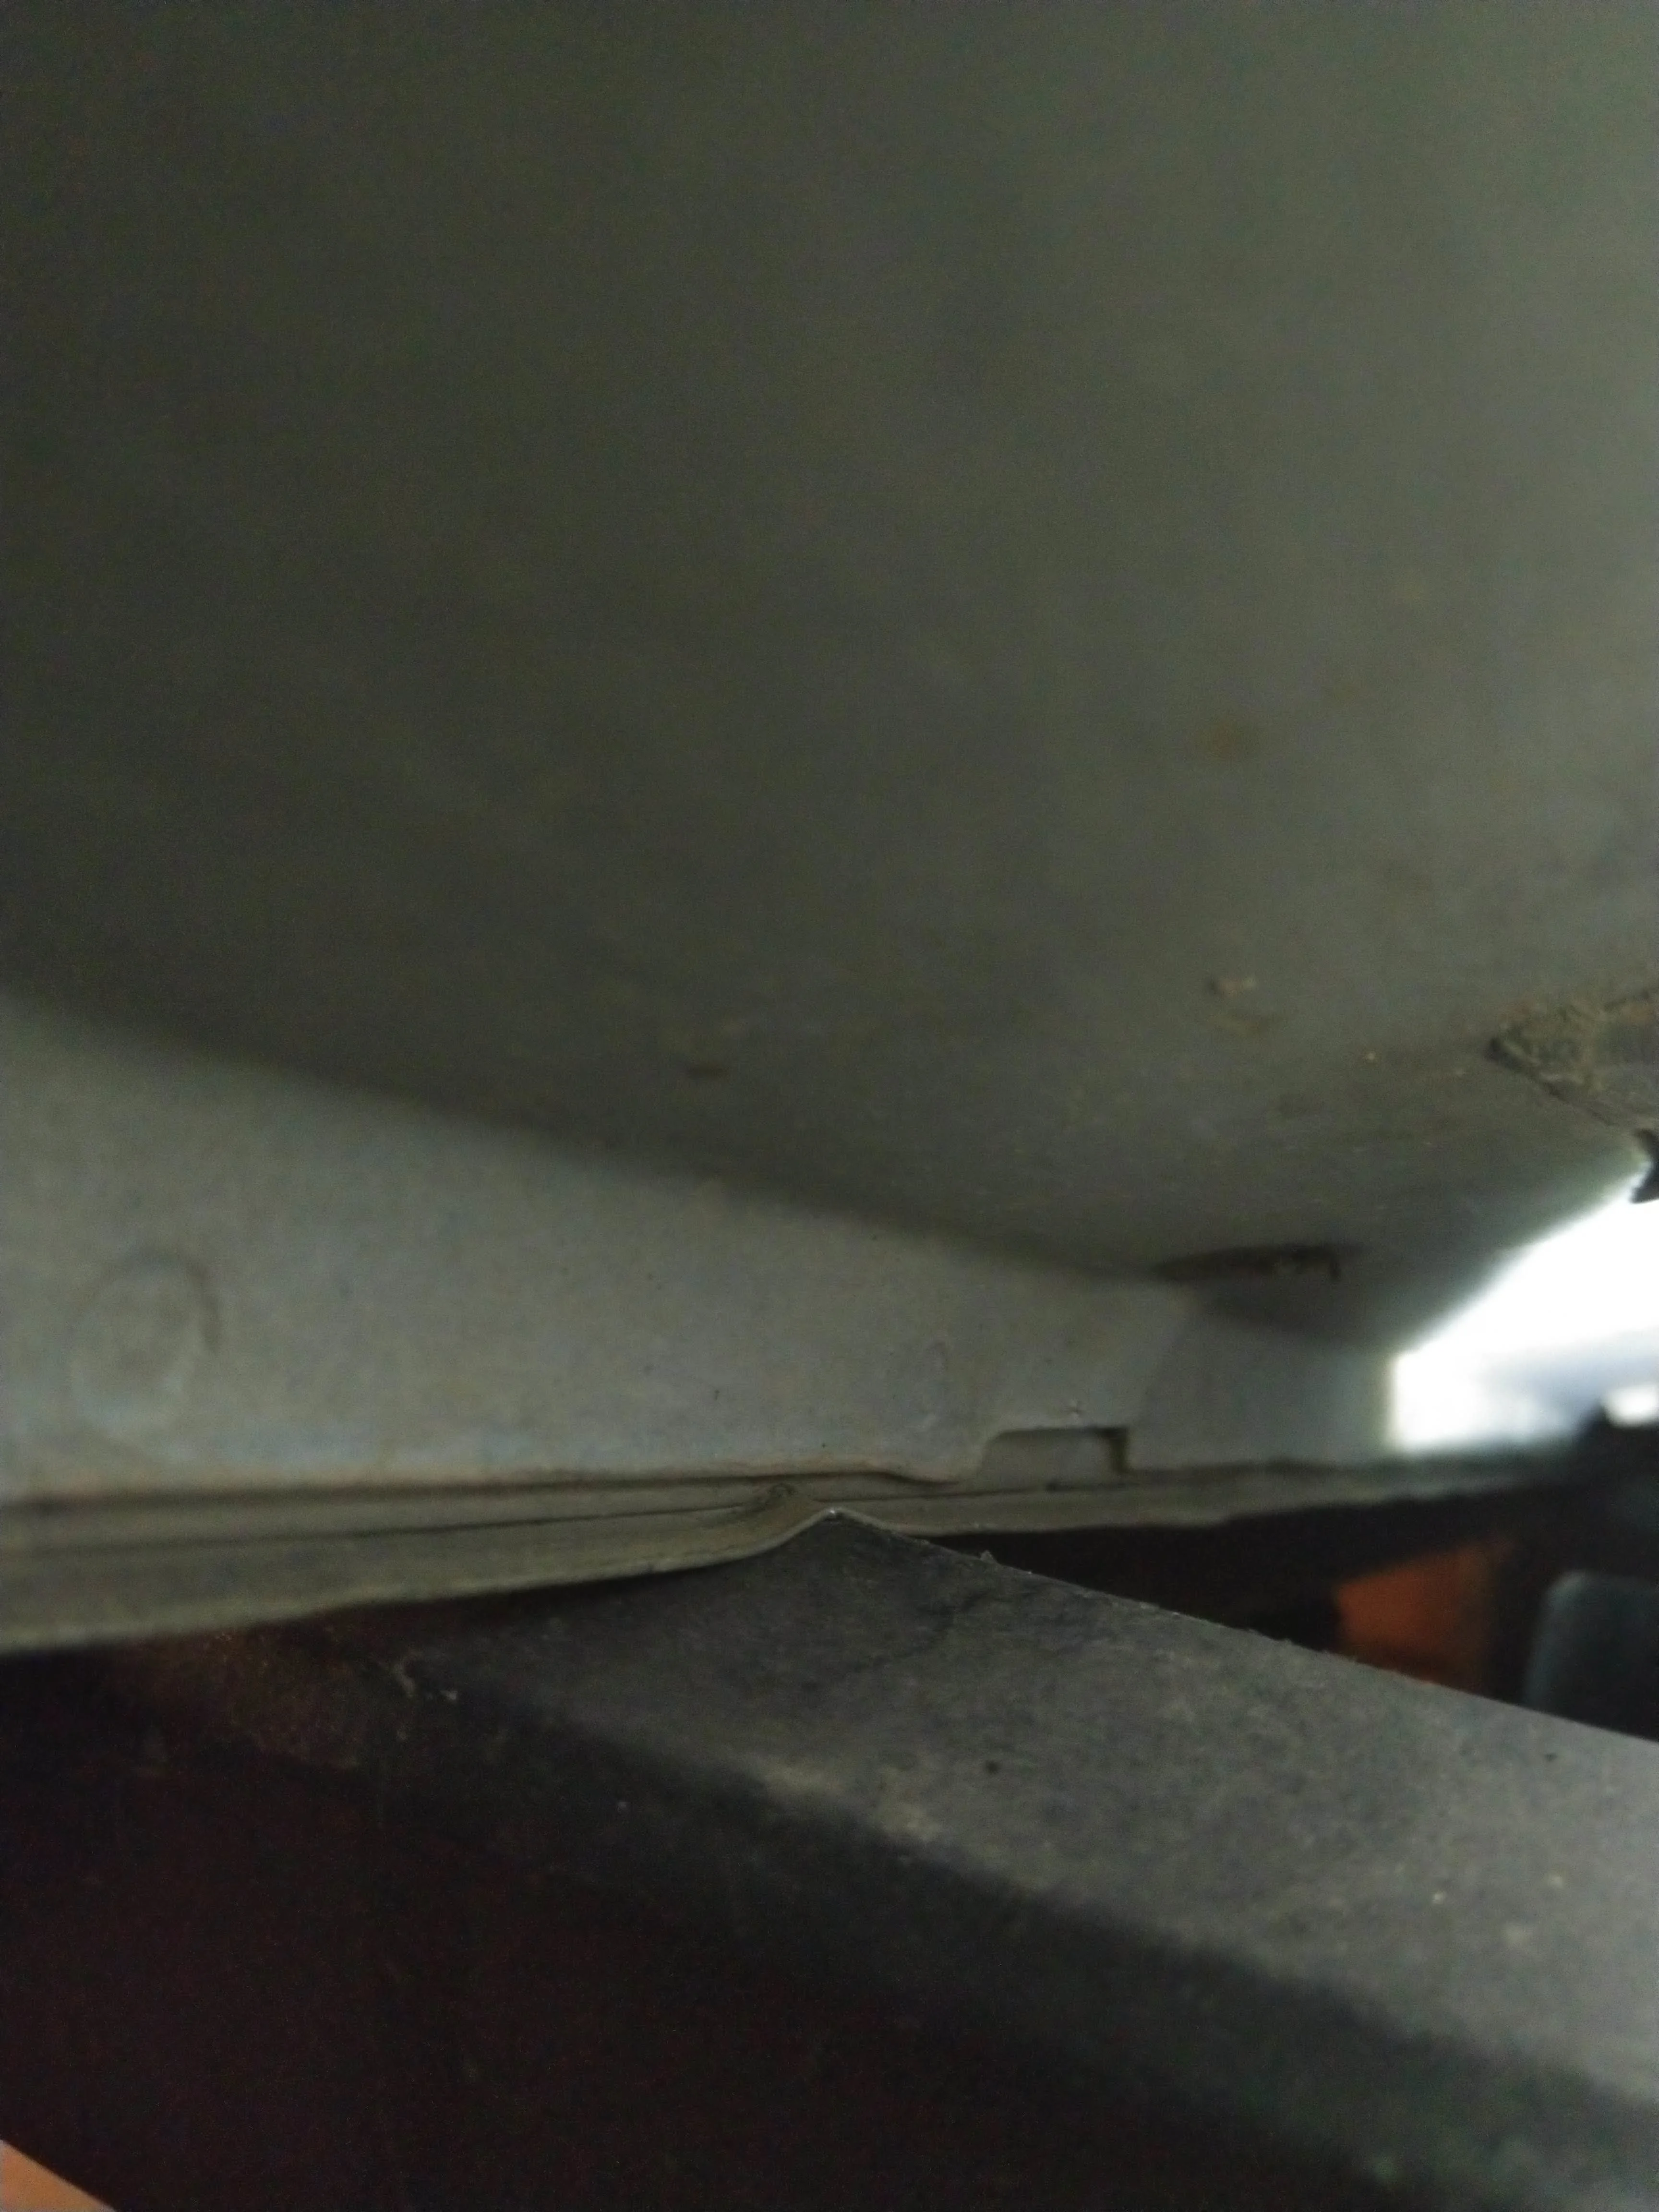
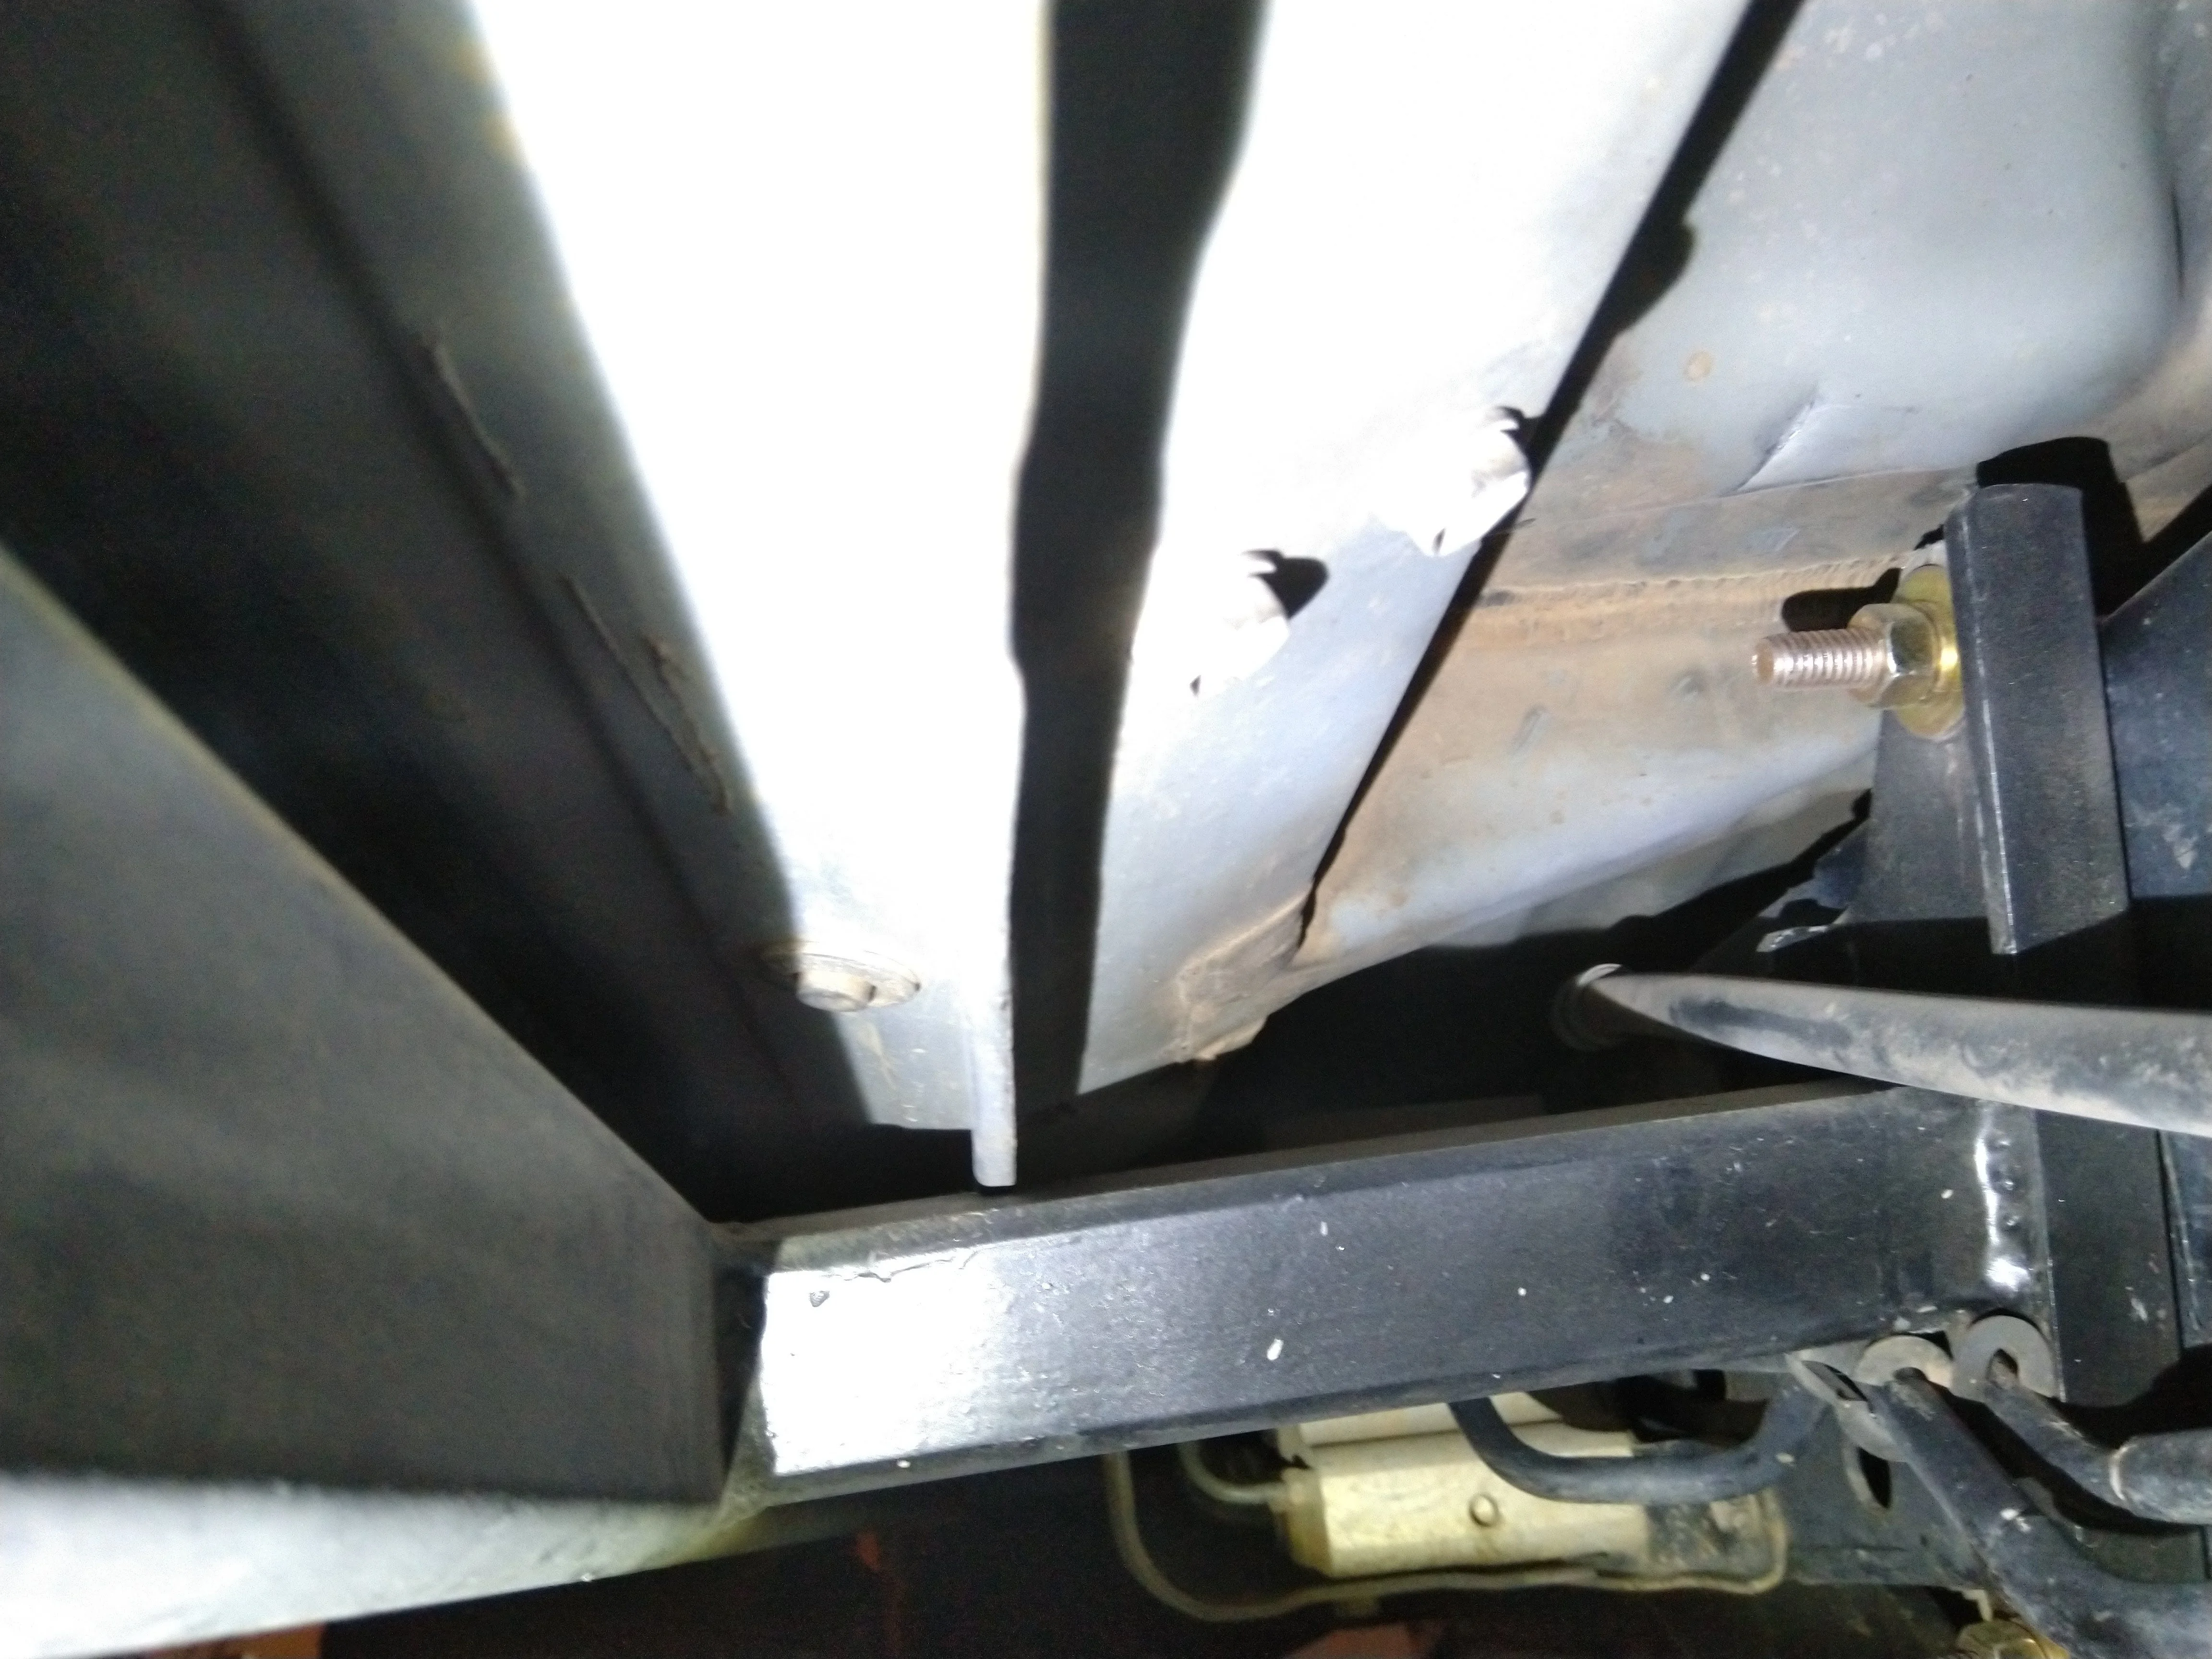
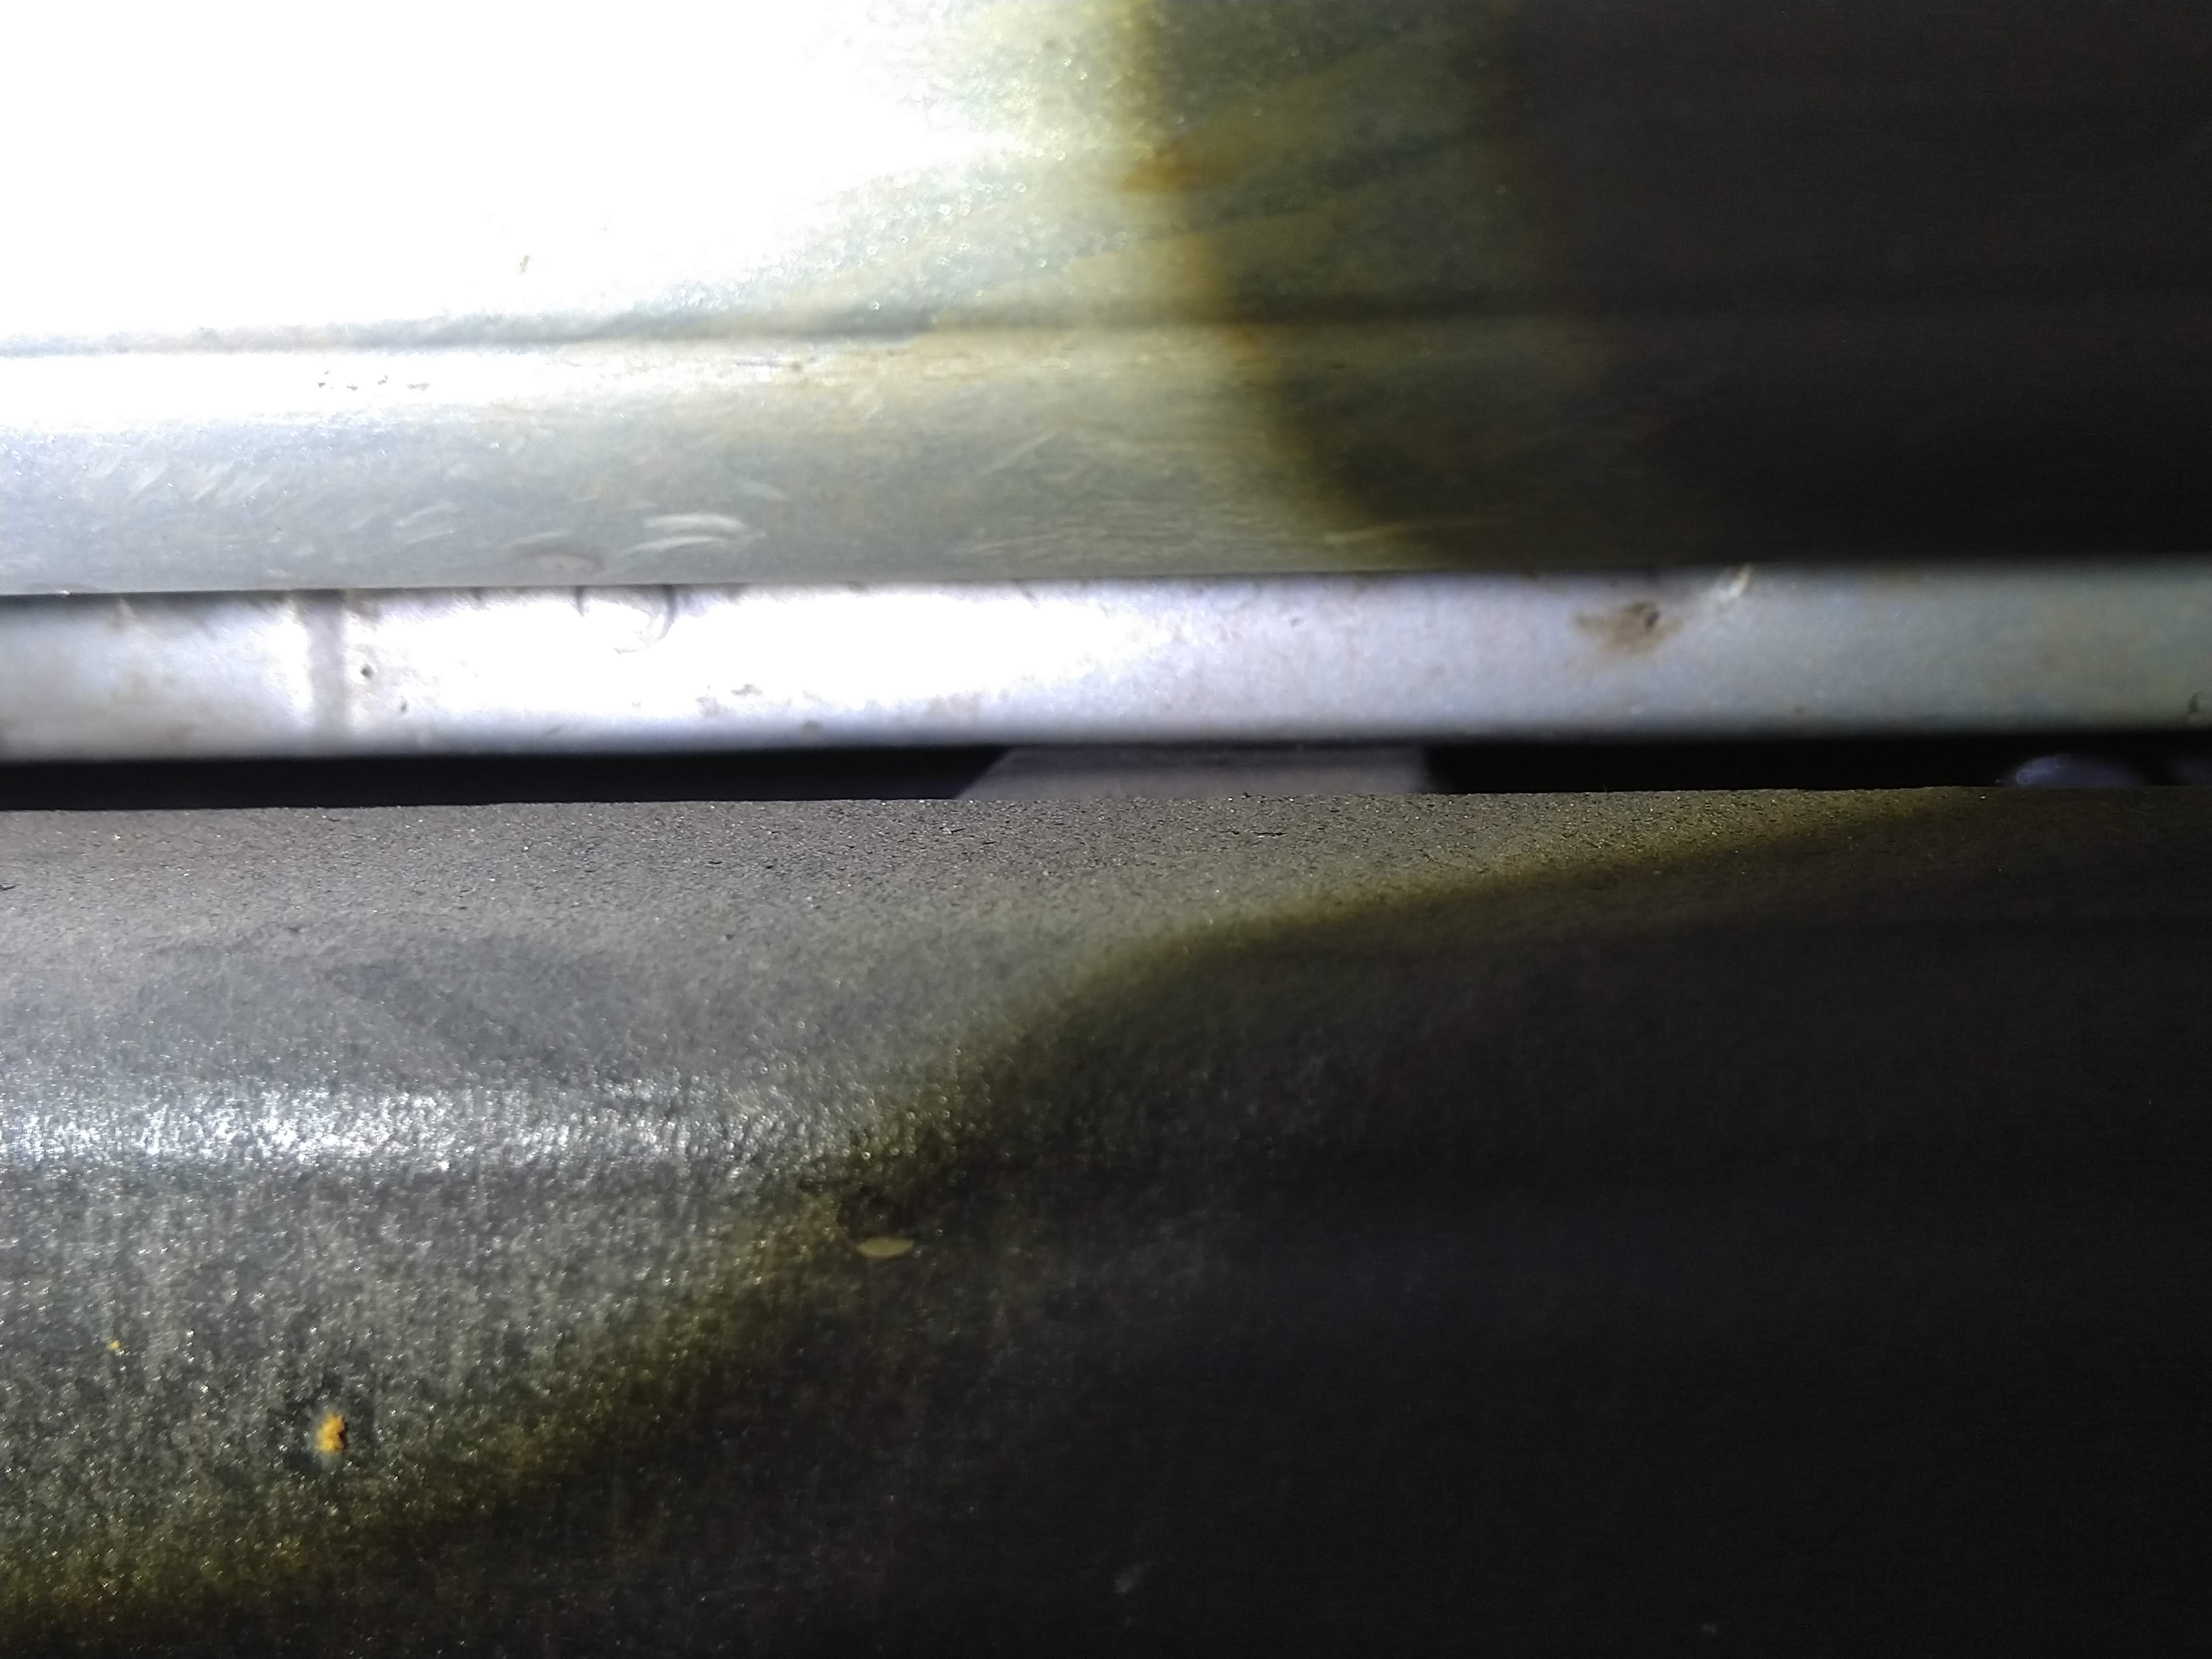
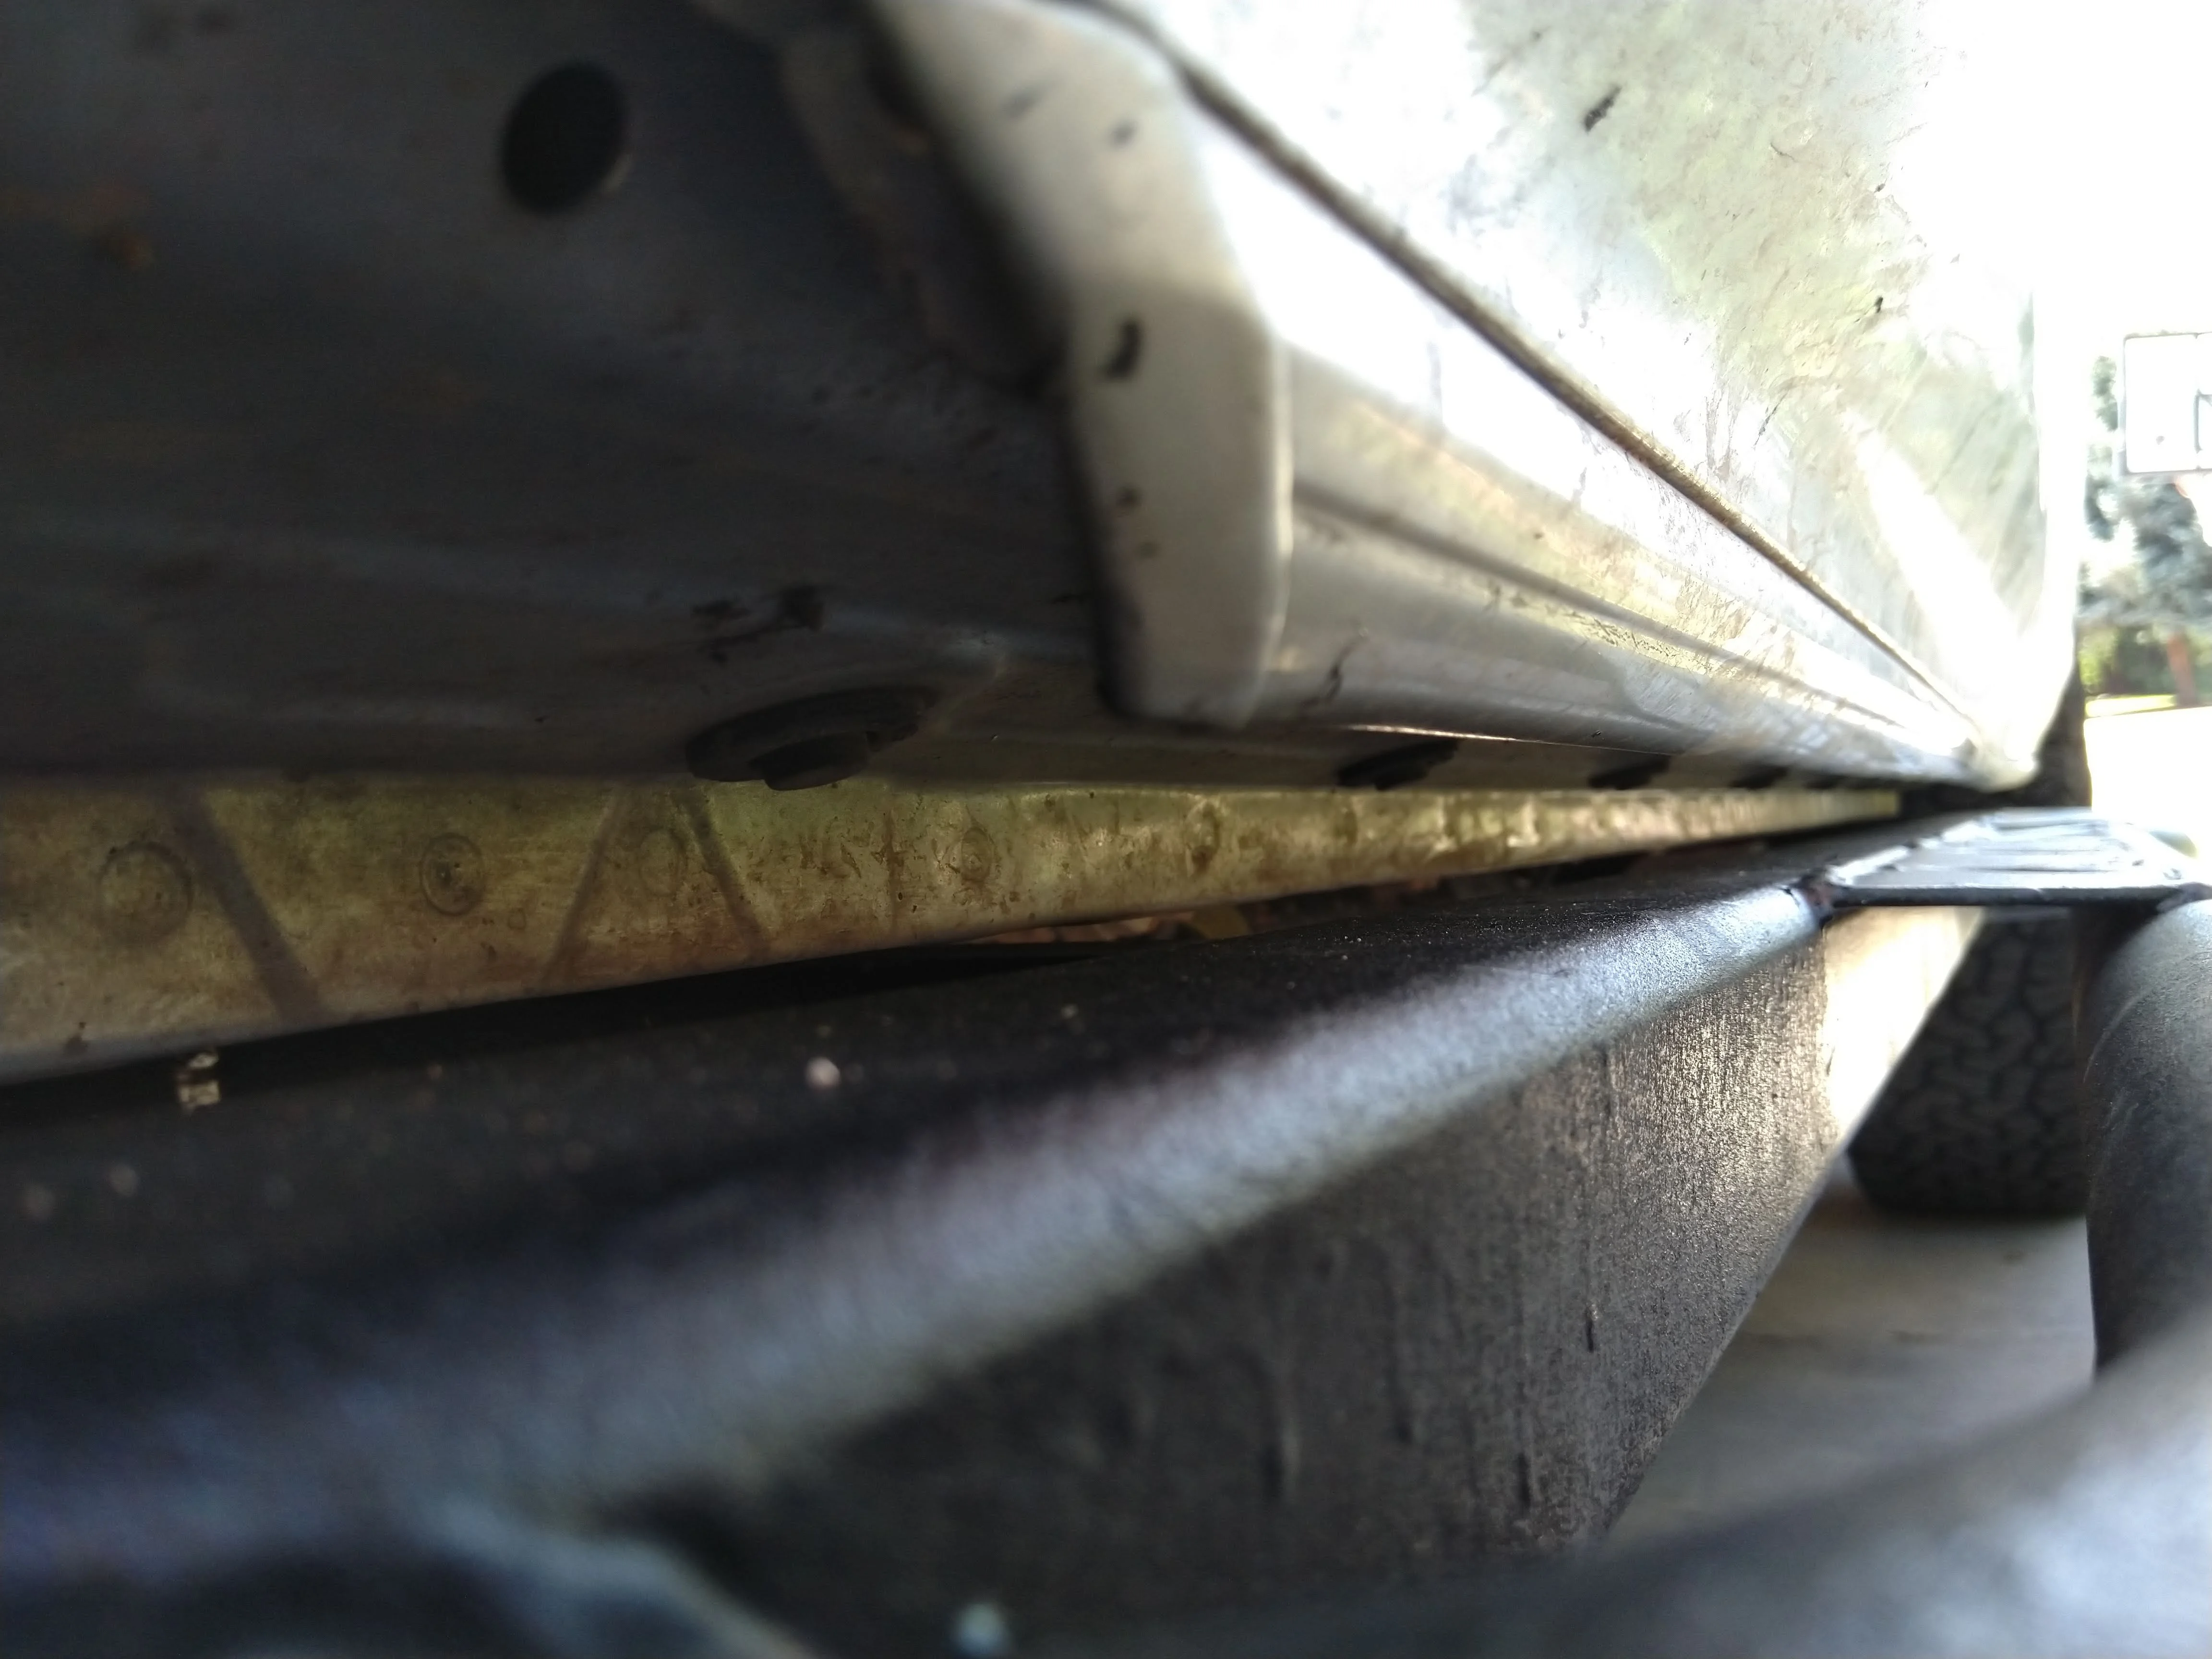
While the rear leg is rotated to give additional strength vs a square mounting, I think it could still use gusseting for appropriate strength. I noticed what looked like a tiny bit of deformation in the pinch seam above the rear leg after running a trail this week, suggesting body movement on the mounts which occurs wheeling, allowing contact between the pinch seam and the rear slider leg.
So when I had it jacked up (not completely off the ground either), i noticed contact between the pinch seam and the rear leg but the gap was retained between the front (gusseted leg) and the pinch seam...
passenger:
Driver:
and here is the gap after install, no trail drives
*EDIT*
After an off pavement drive today 9/7/19, this minimal clearance and pinch seam contact makes a HORRIBLE rattle, more so on driver rear leg, none from passenger rear leg, when driving on corrugations/washboards on dirt roads. I'm going to loosen all slider mounting bolts (maybe drill out the passenger middle leg's rear hole and finalize that mounting), and try to wedge/cam the rear mounting leg to reclaim more space and match the front's 1/4" gap b/t the support leg and the pinch seam.
While the rear leg is rotated to give additional strength vs a square mounting, I think it could still use gusseting for appropriate strength. I noticed what looked like a tiny bit of deformation in the pinch seam above the rear leg after running a trail this week, suggesting body movement on the mounts which occurs wheeling, allowing contact between the pinch seam and the rear slider leg.
So when I had it jacked up (not completely off the ground either), i noticed contact between the pinch seam and the rear leg but the gap was retained between the front (gusseted leg) and the pinch seam...
passenger:

Driver:


and here is the gap after install, no trail drives

*EDIT*
After an off pavement drive today 9/7/19, this minimal clearance and pinch seam contact makes a HORRIBLE rattle, more so on driver rear leg, none from passenger rear leg, when driving on corrugations/washboards on dirt roads. I'm going to loosen all slider mounting bolts (maybe drill out the passenger middle leg's rear hole and finalize that mounting), and try to wedge/cam the rear mounting leg to reclaim more space and match the front's 1/4" gap b/t the support leg and the pinch seam.
Last edited:
Great write up! Your GX is really coming along nicely!I did a jacking test tonight.
While the rear leg is rotated to give additional strength vs a square mounting, I think it could still use gusseting for appropriate strength. I noticed what looked like a tiny bit of deformation in the pinch seam above the rear leg after running a trail this week, suggesting body movement on the mounts which occurs wheeling, allowing contact between the pinch seam and the rear slider leg.
So when I had it jacked up (not completely off the ground either), i noticed contact between the pinch seam and the rear leg but the gap was retained between the front (gusseted leg) and the pinch seam...
passenger:
Driver:
and here is the gap after install, no trail drives


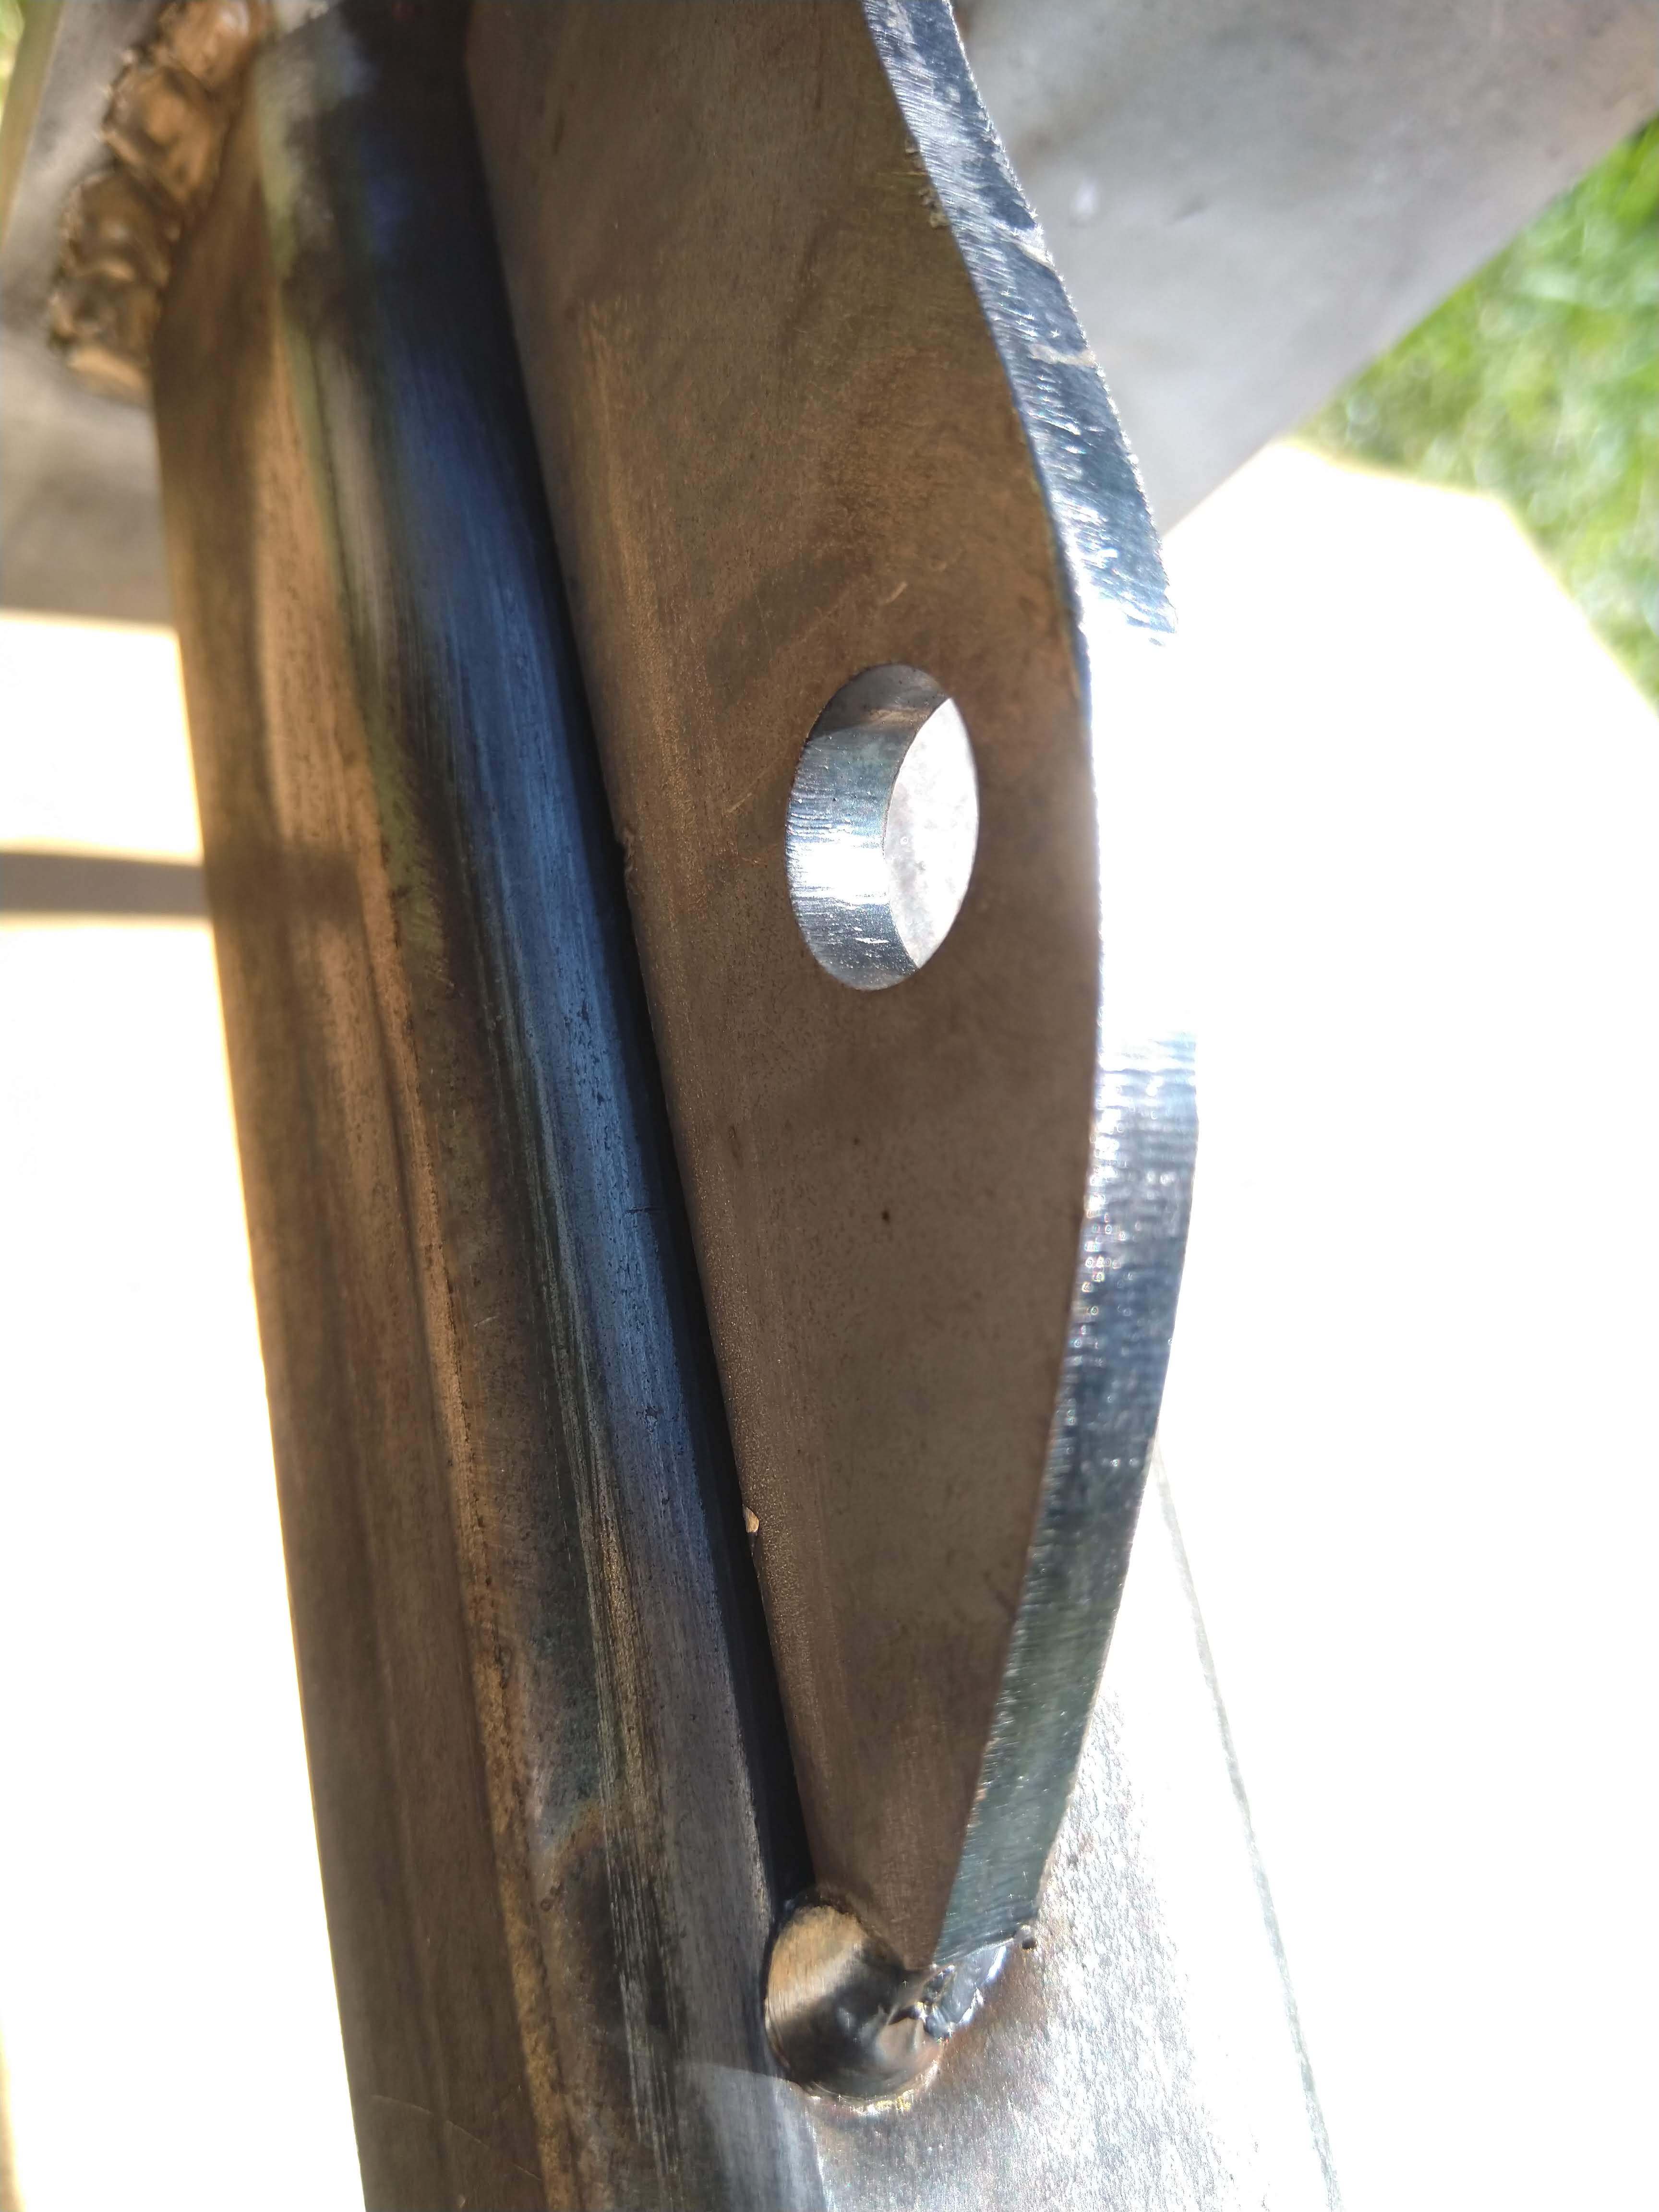
What size is the square slider legs? Crazy how they don’t have a gusset on the back leg and that gusset on the center leg isn’t doing much if anything.
- Thread starter
- #353
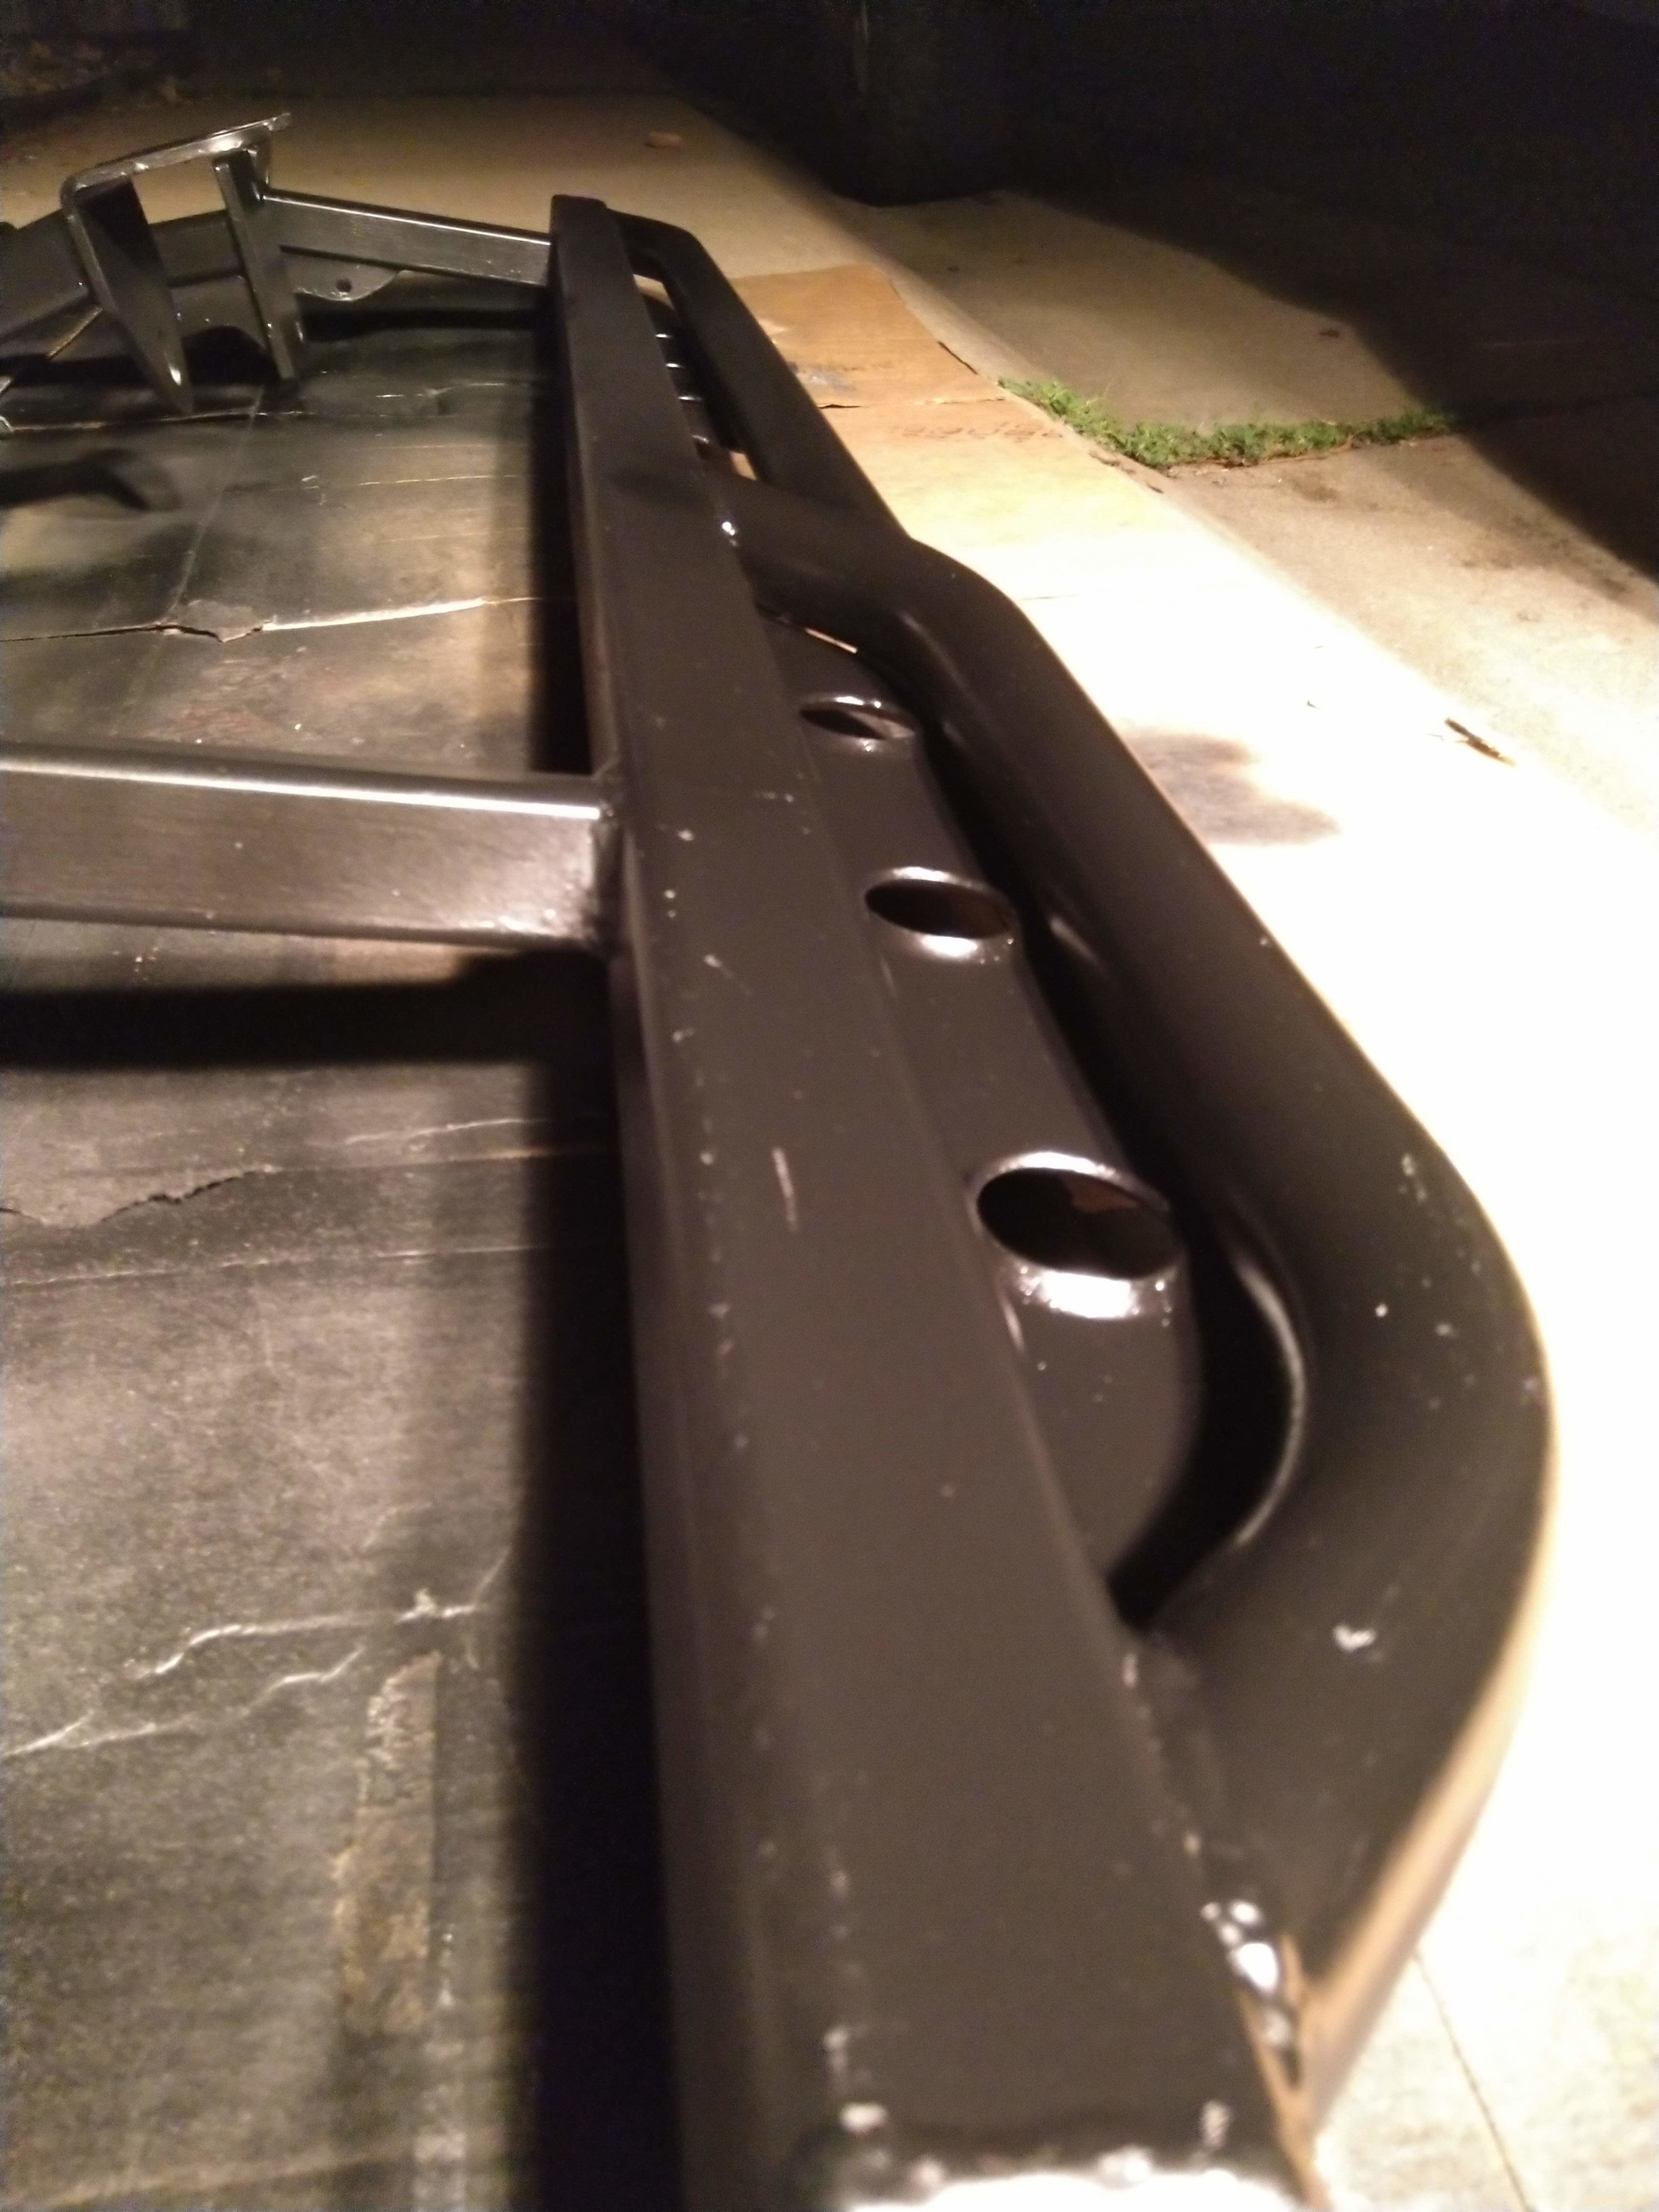
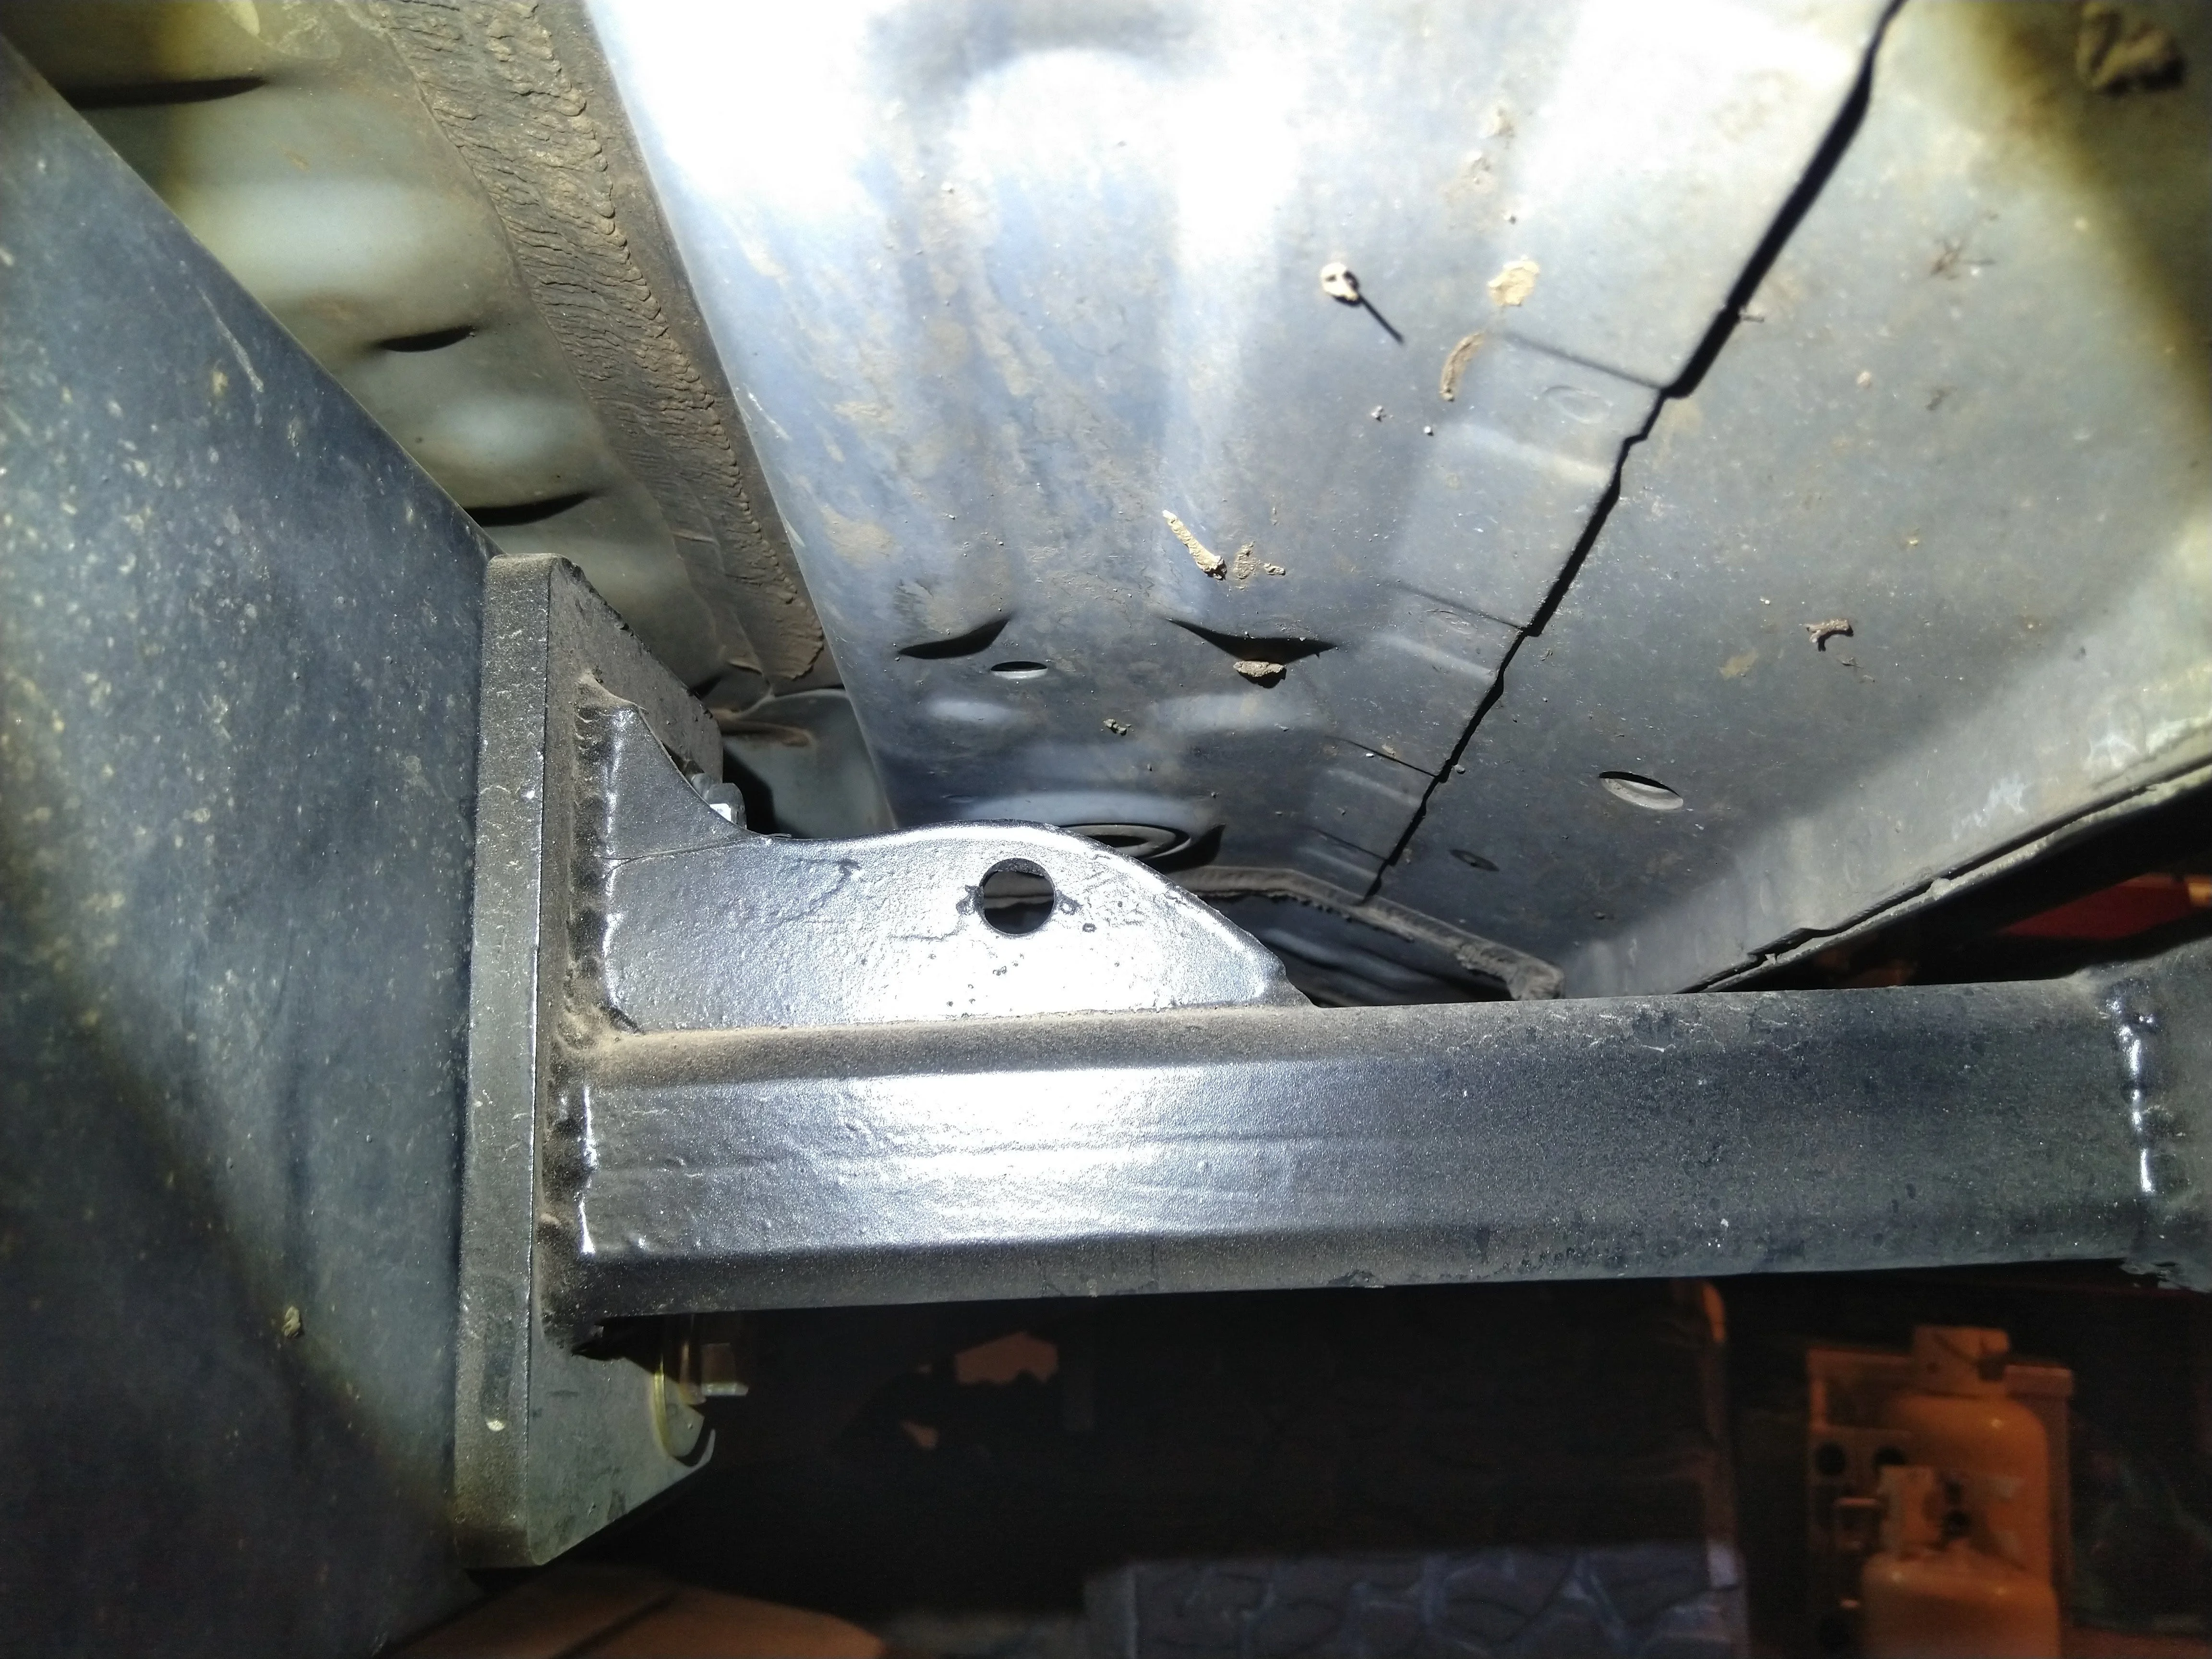
1.5" square all legs. Pass middle leg has no gusset either. The rear foot with the rolled edges may act like a slight gusset, or at least more support than a flat T-weld....What size is the square slider legs? Crazy how they don’t have a gusset on the back leg and that gusset on the center leg isn’t doing much if anything.
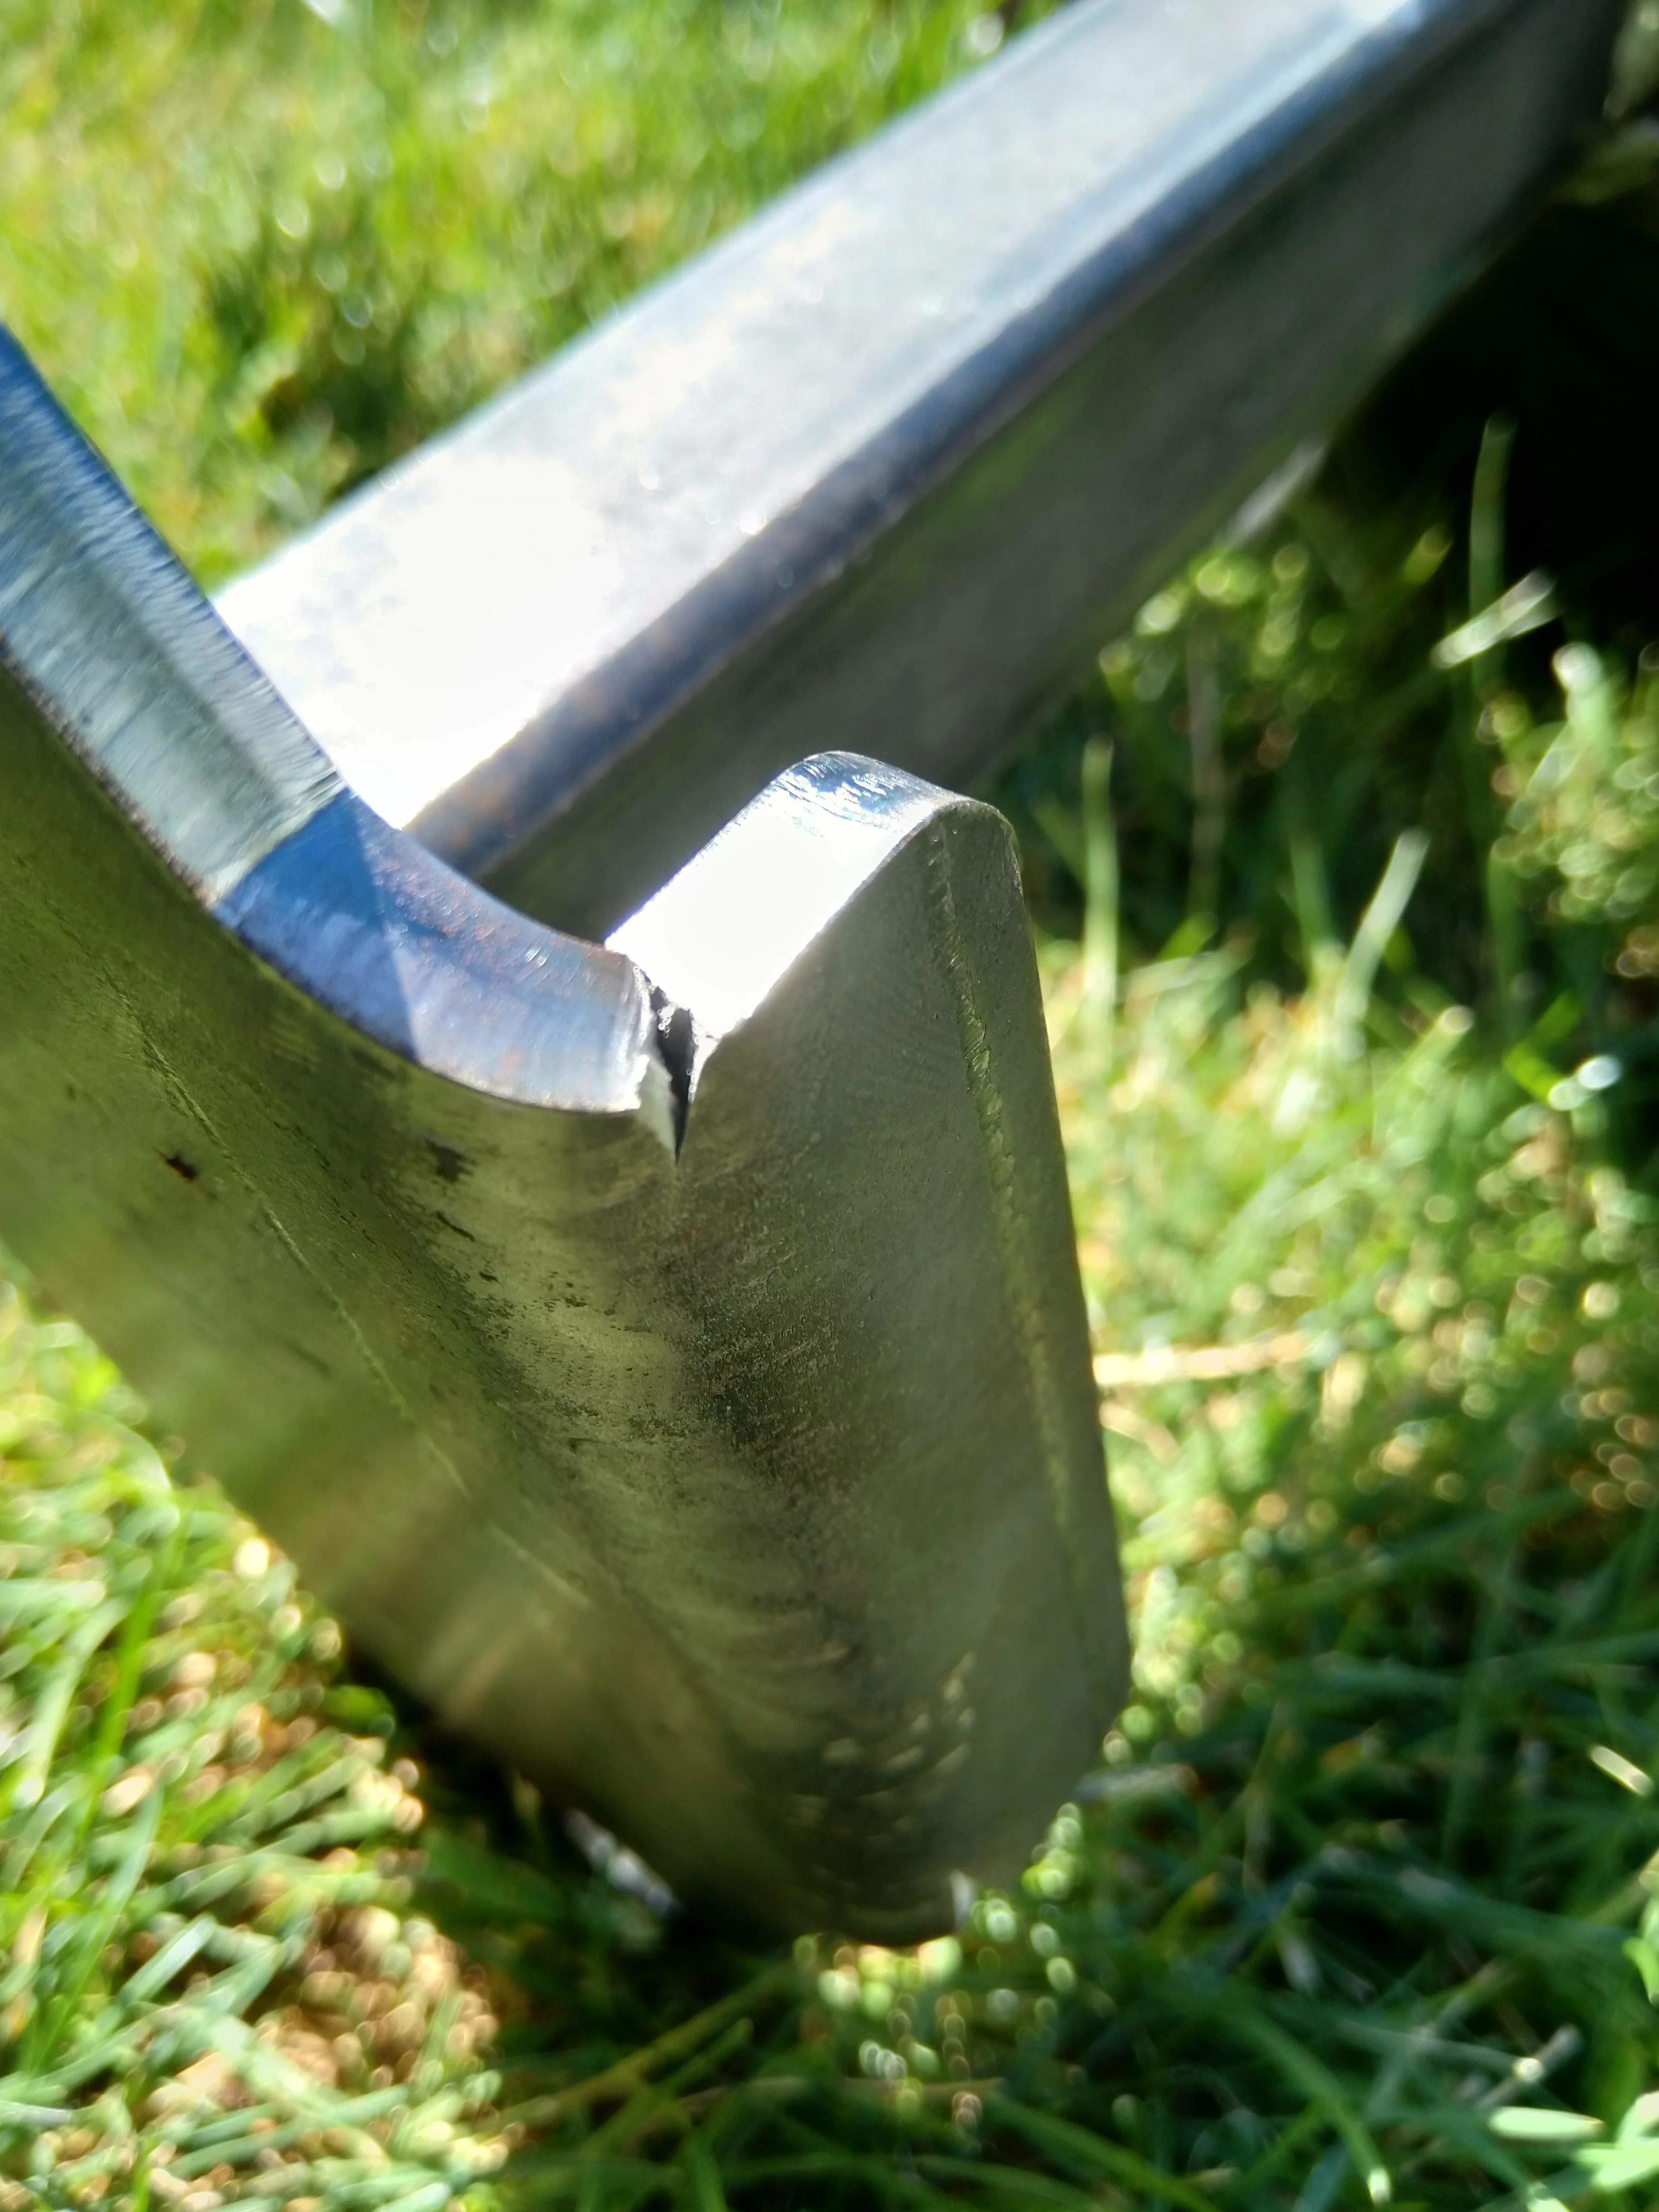
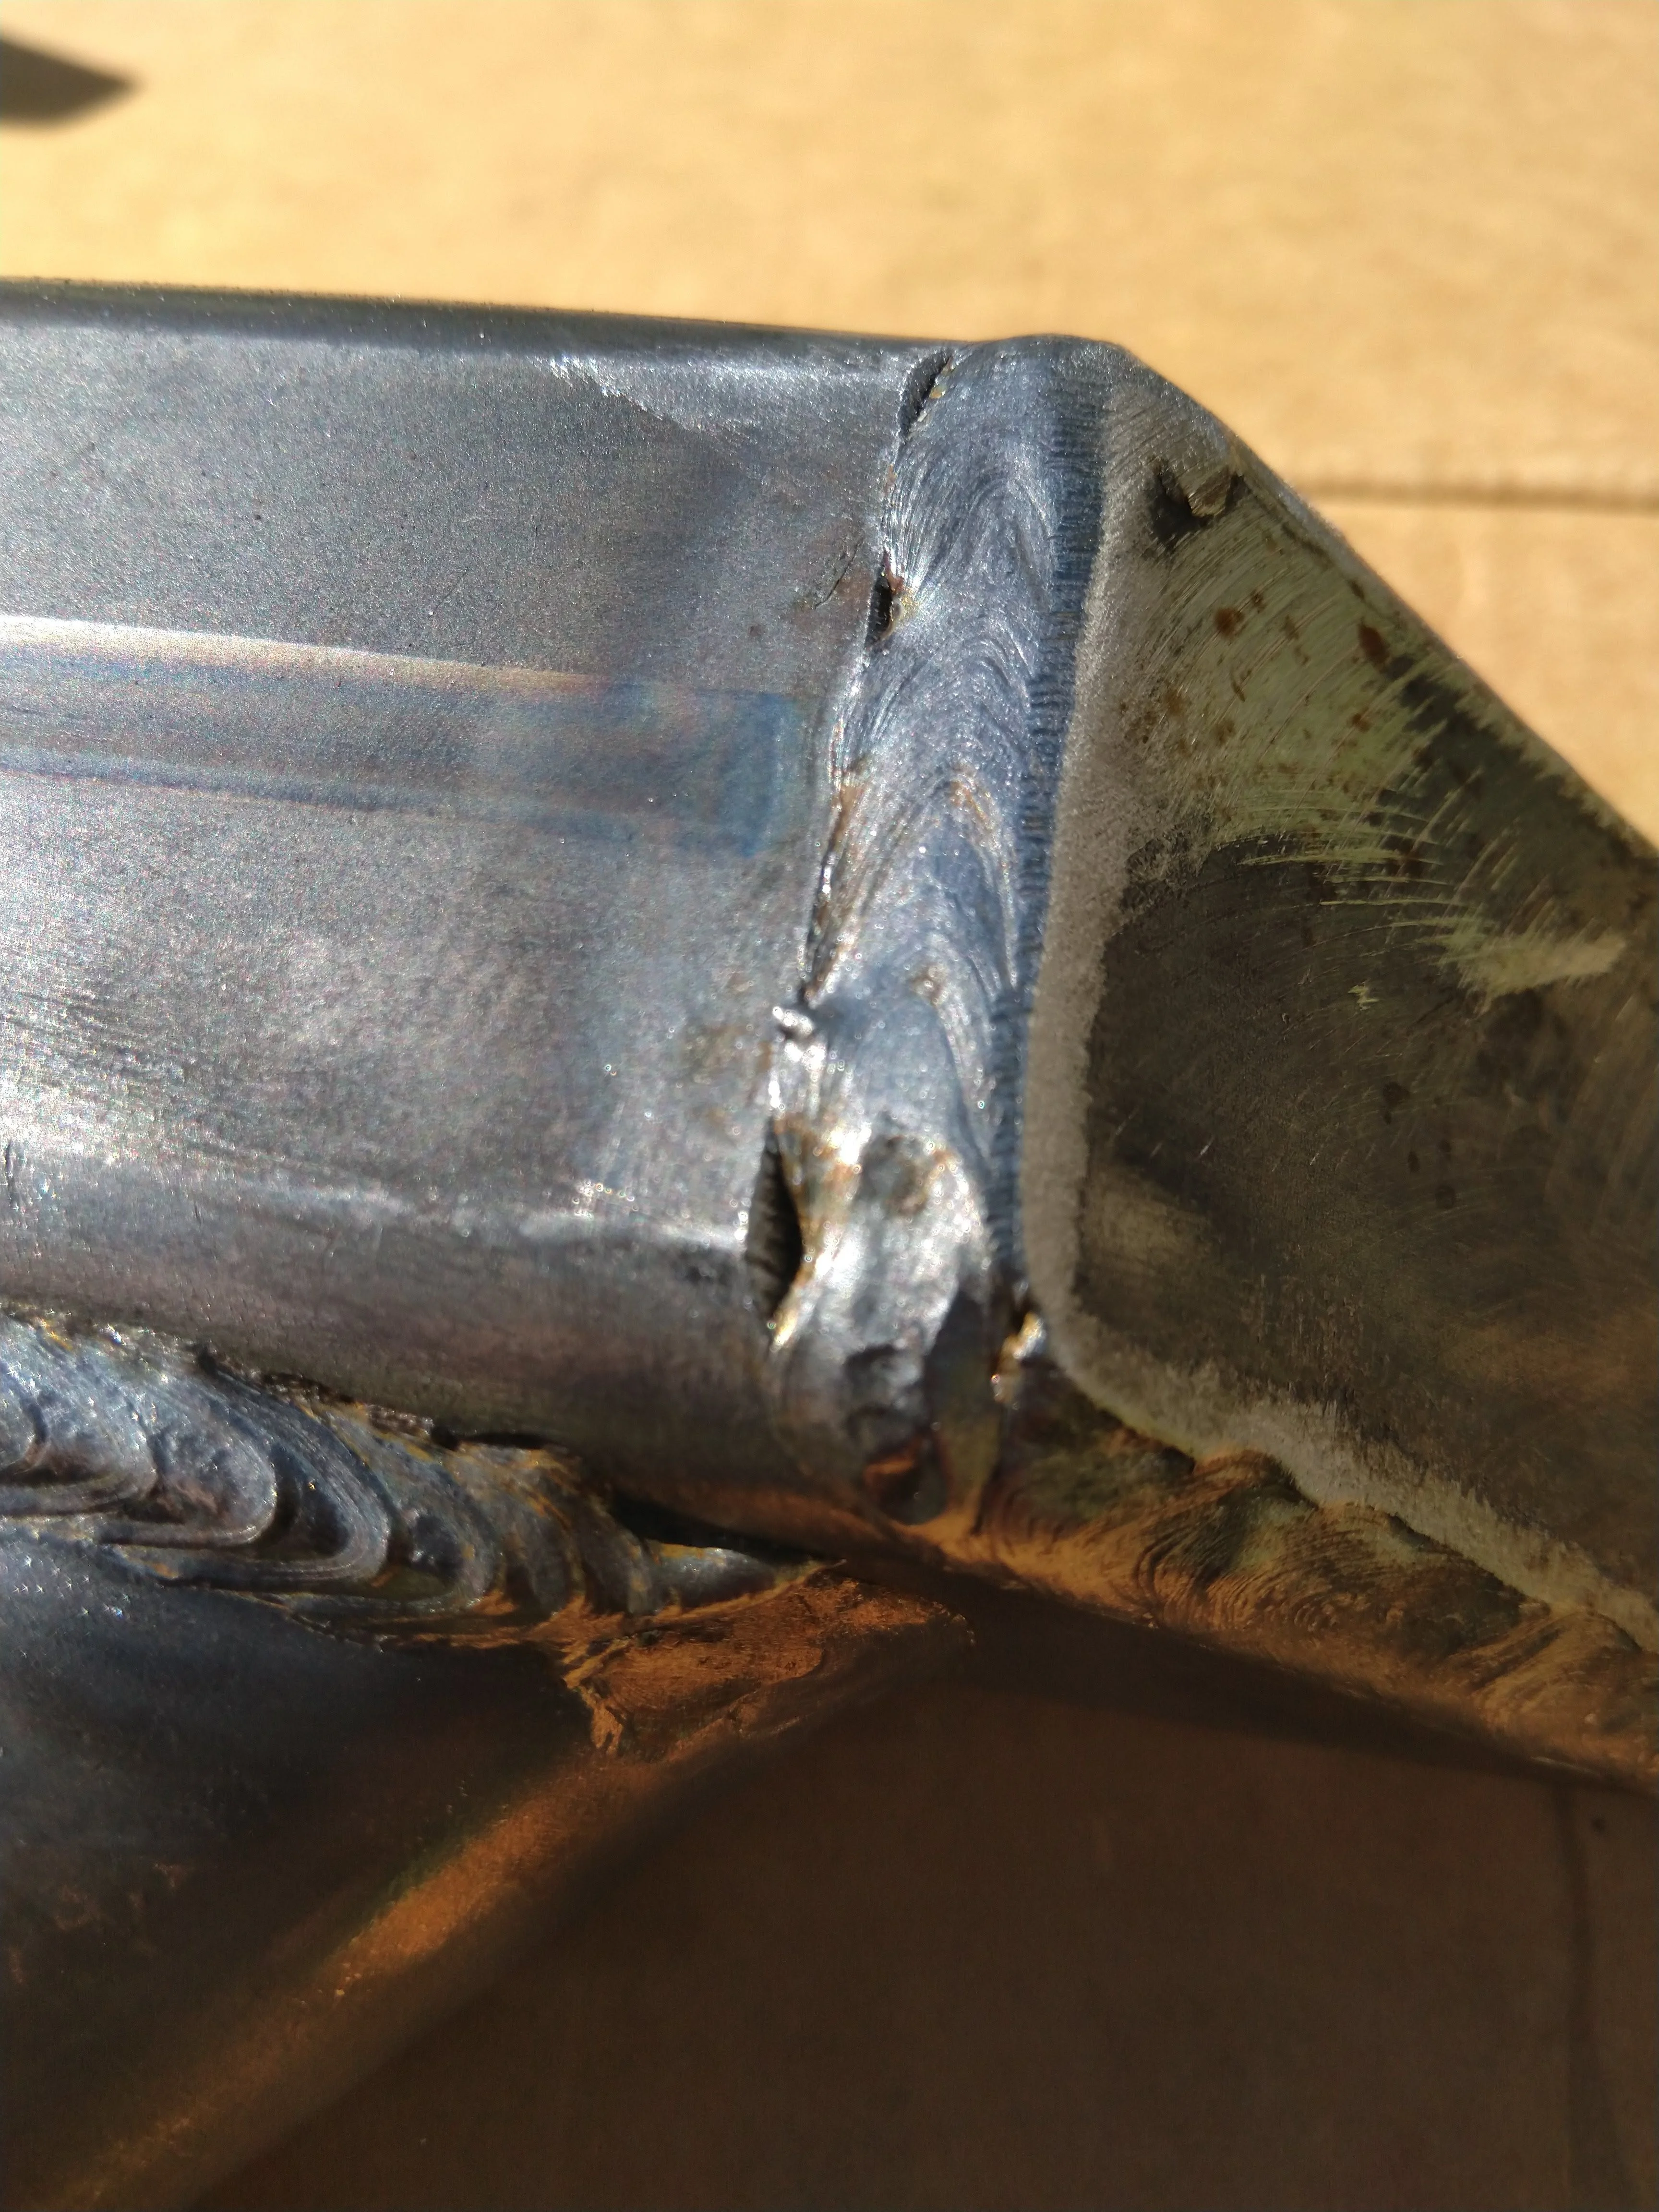
Rear leg and slight rotational placement on slider rail.

Rear foot
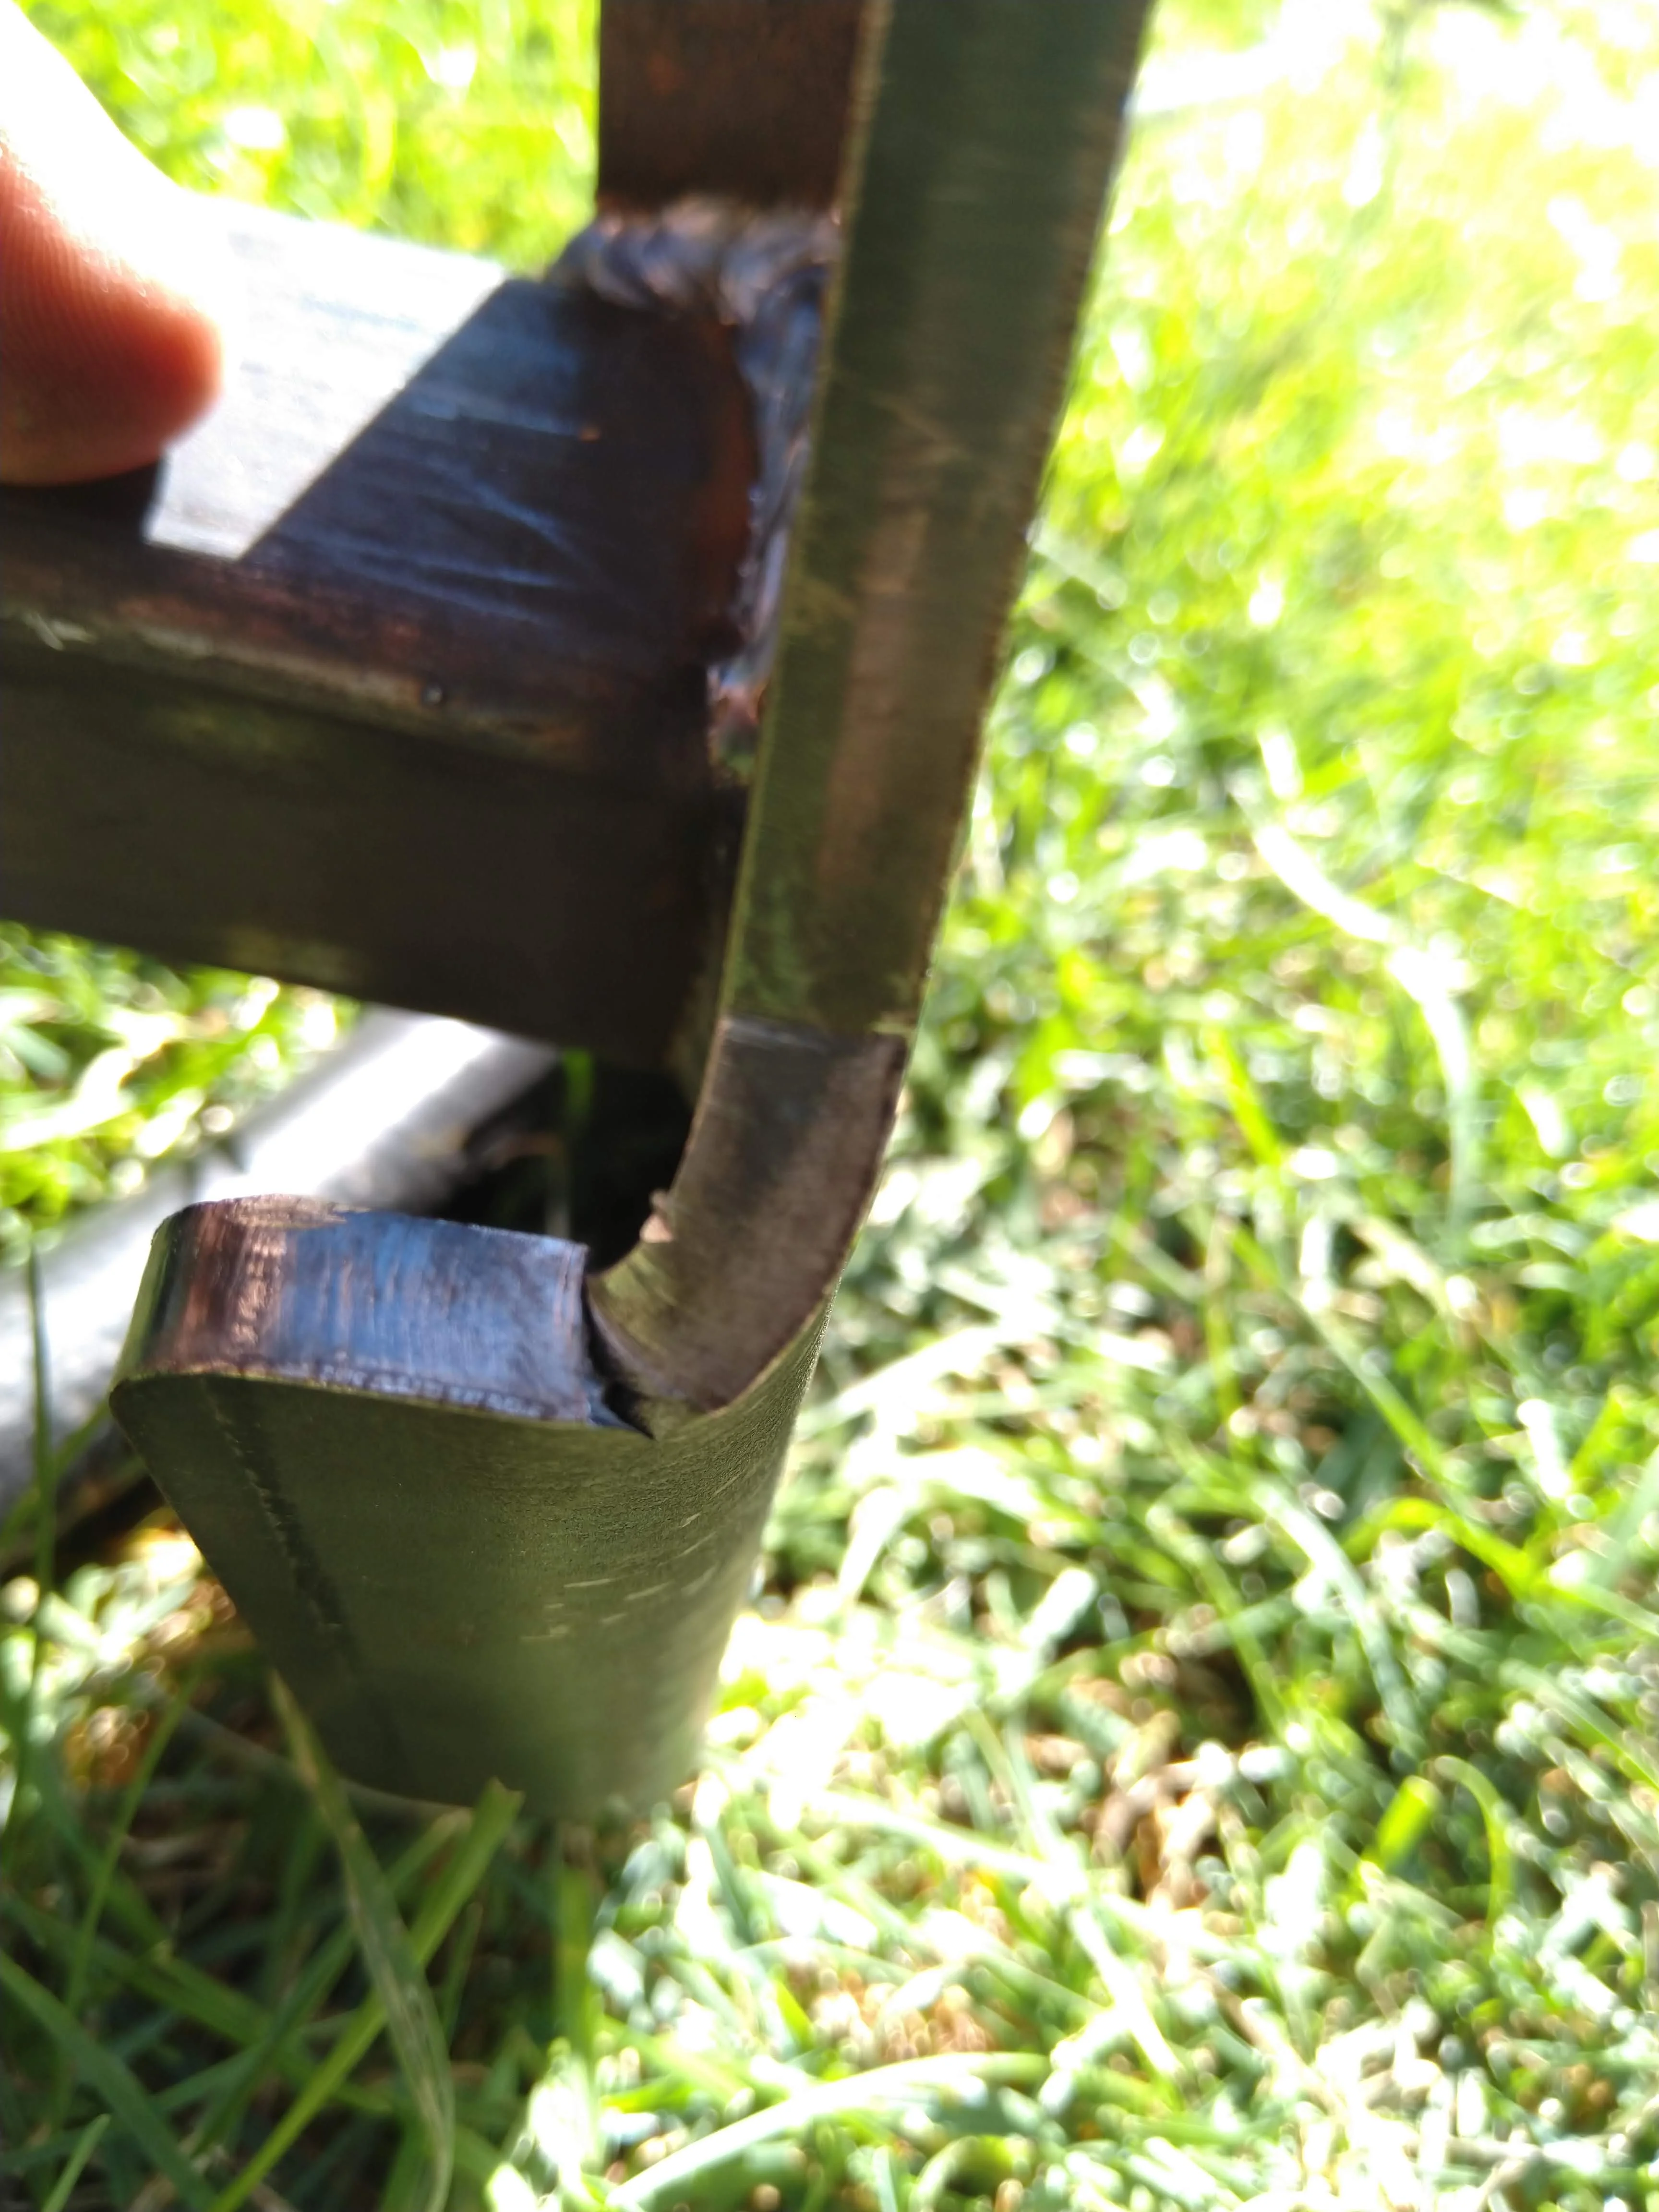
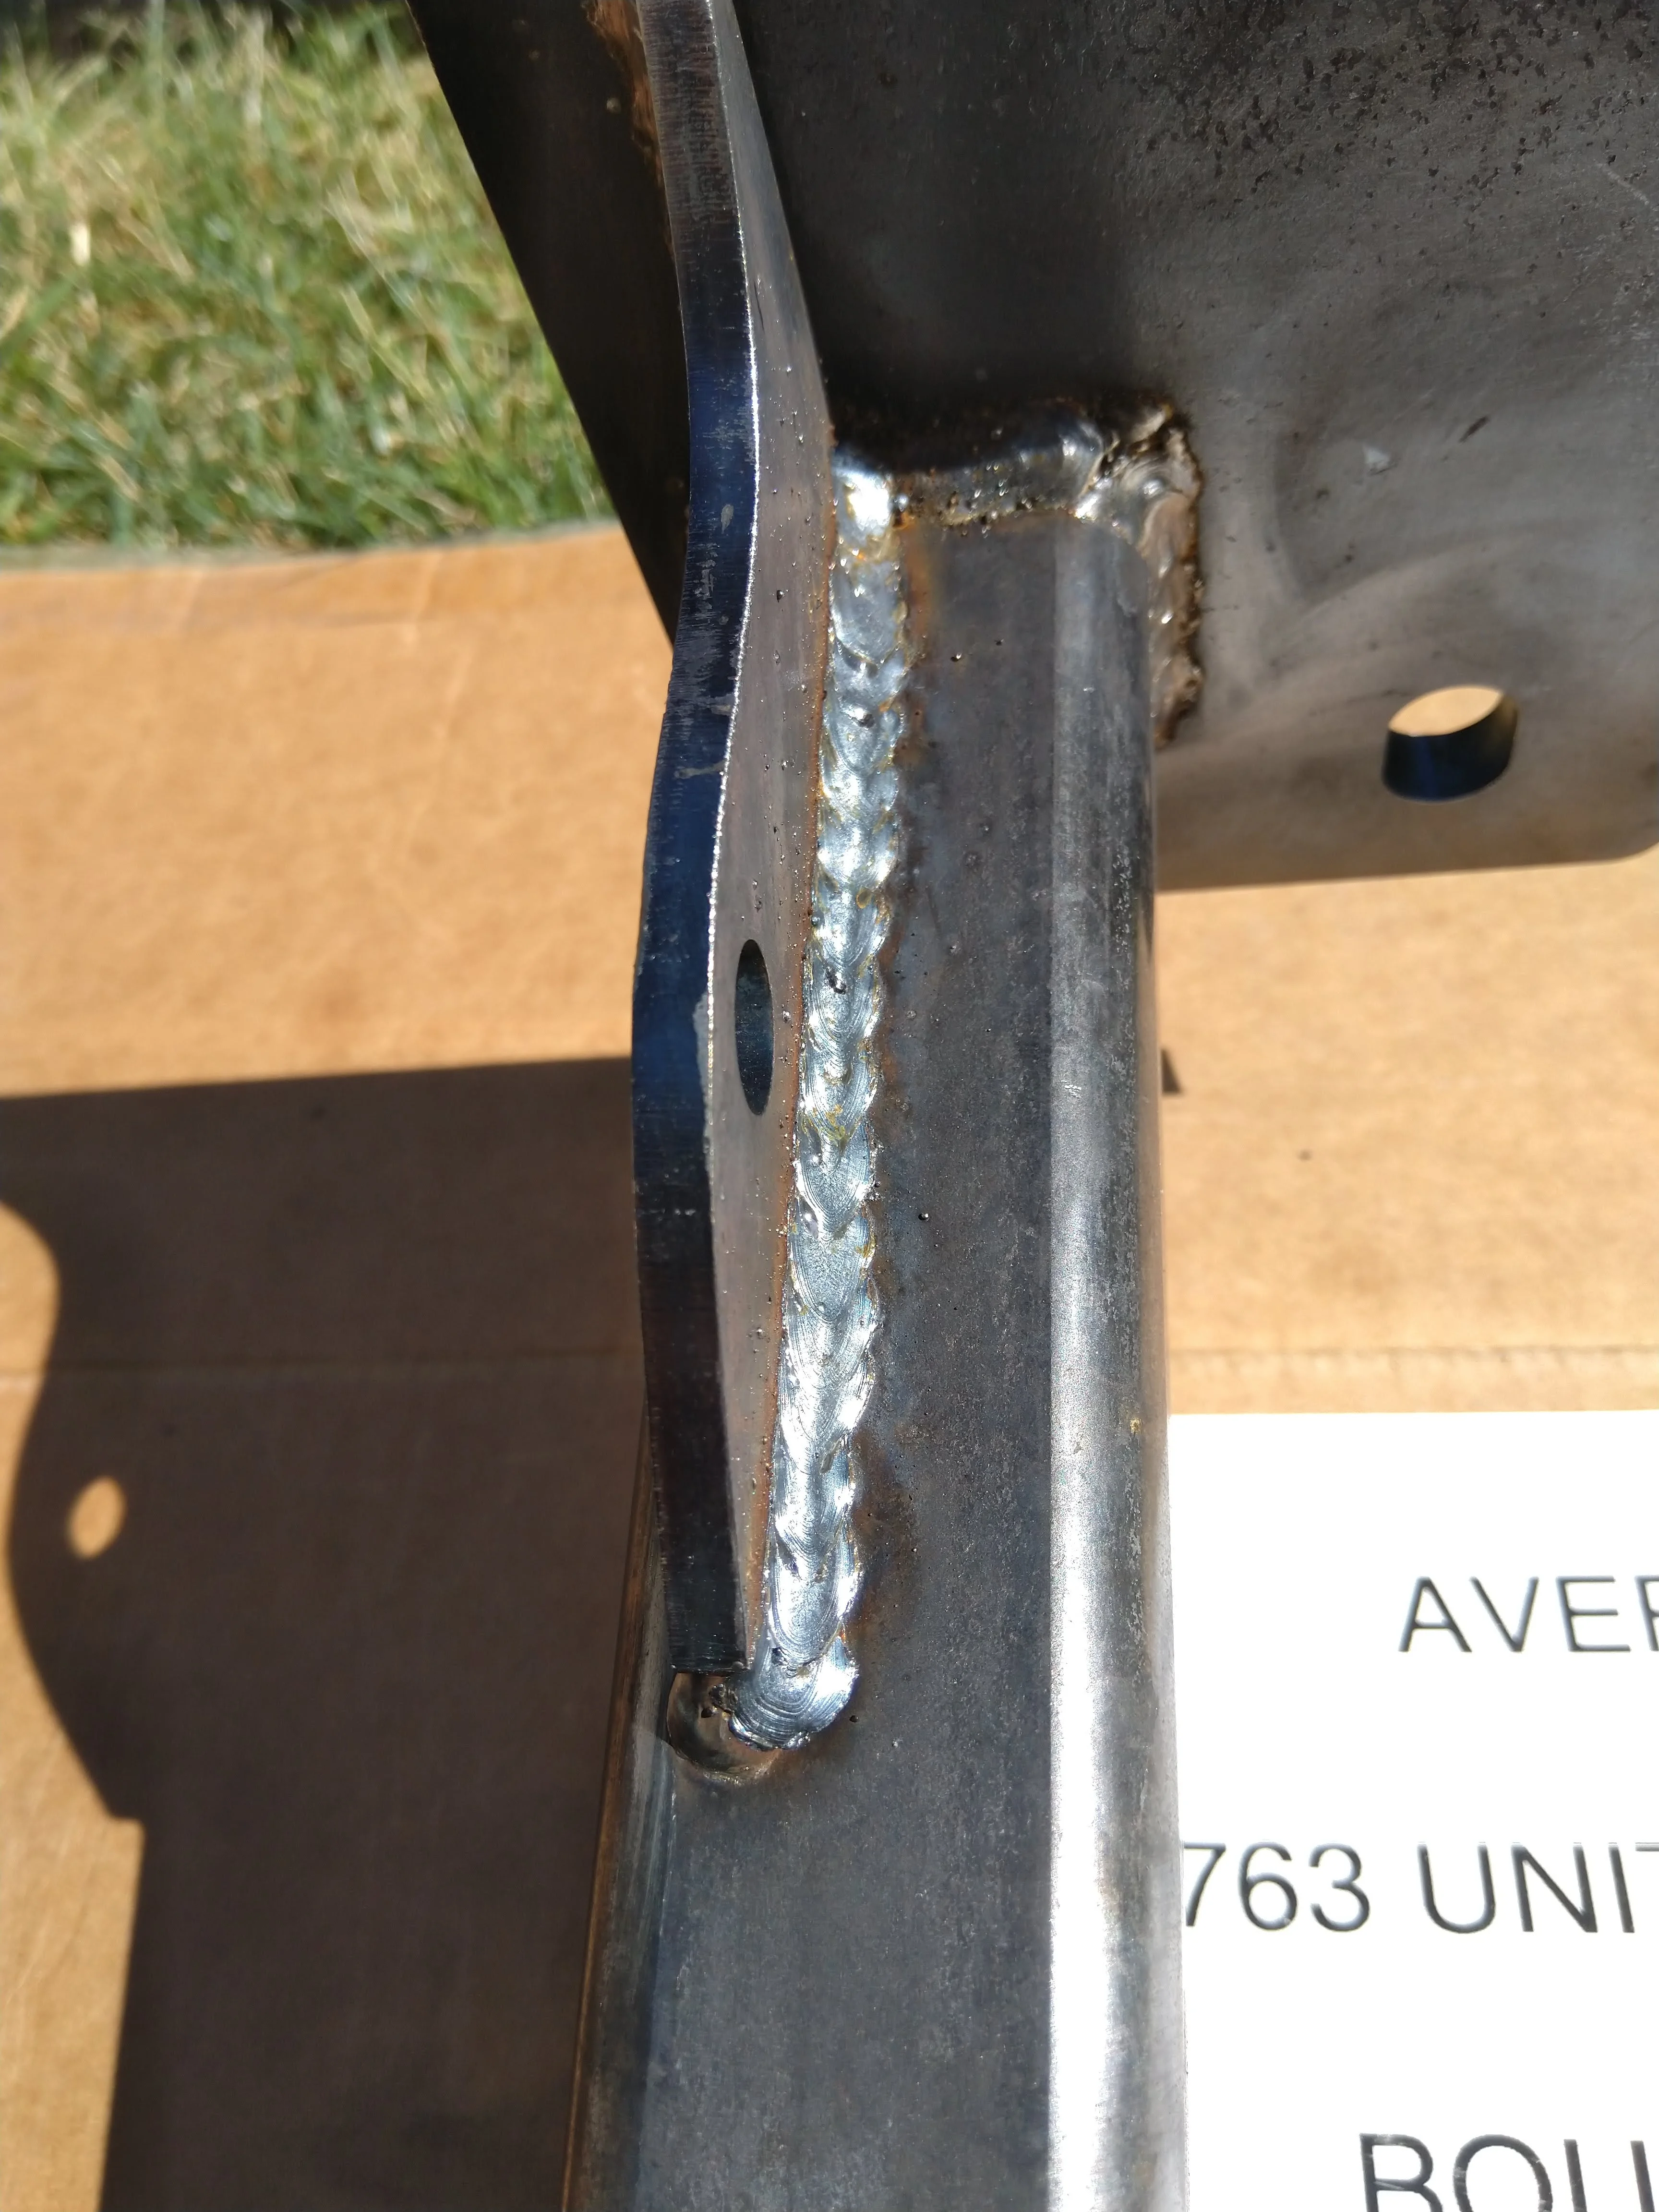
Middle leg and foot, no gusset
Last edited:
I need to find me a Canadian friend! Jelly on those gas cans.
Moar awesomeness from Canadian friend
View attachment 2057801
- Thread starter
- #355
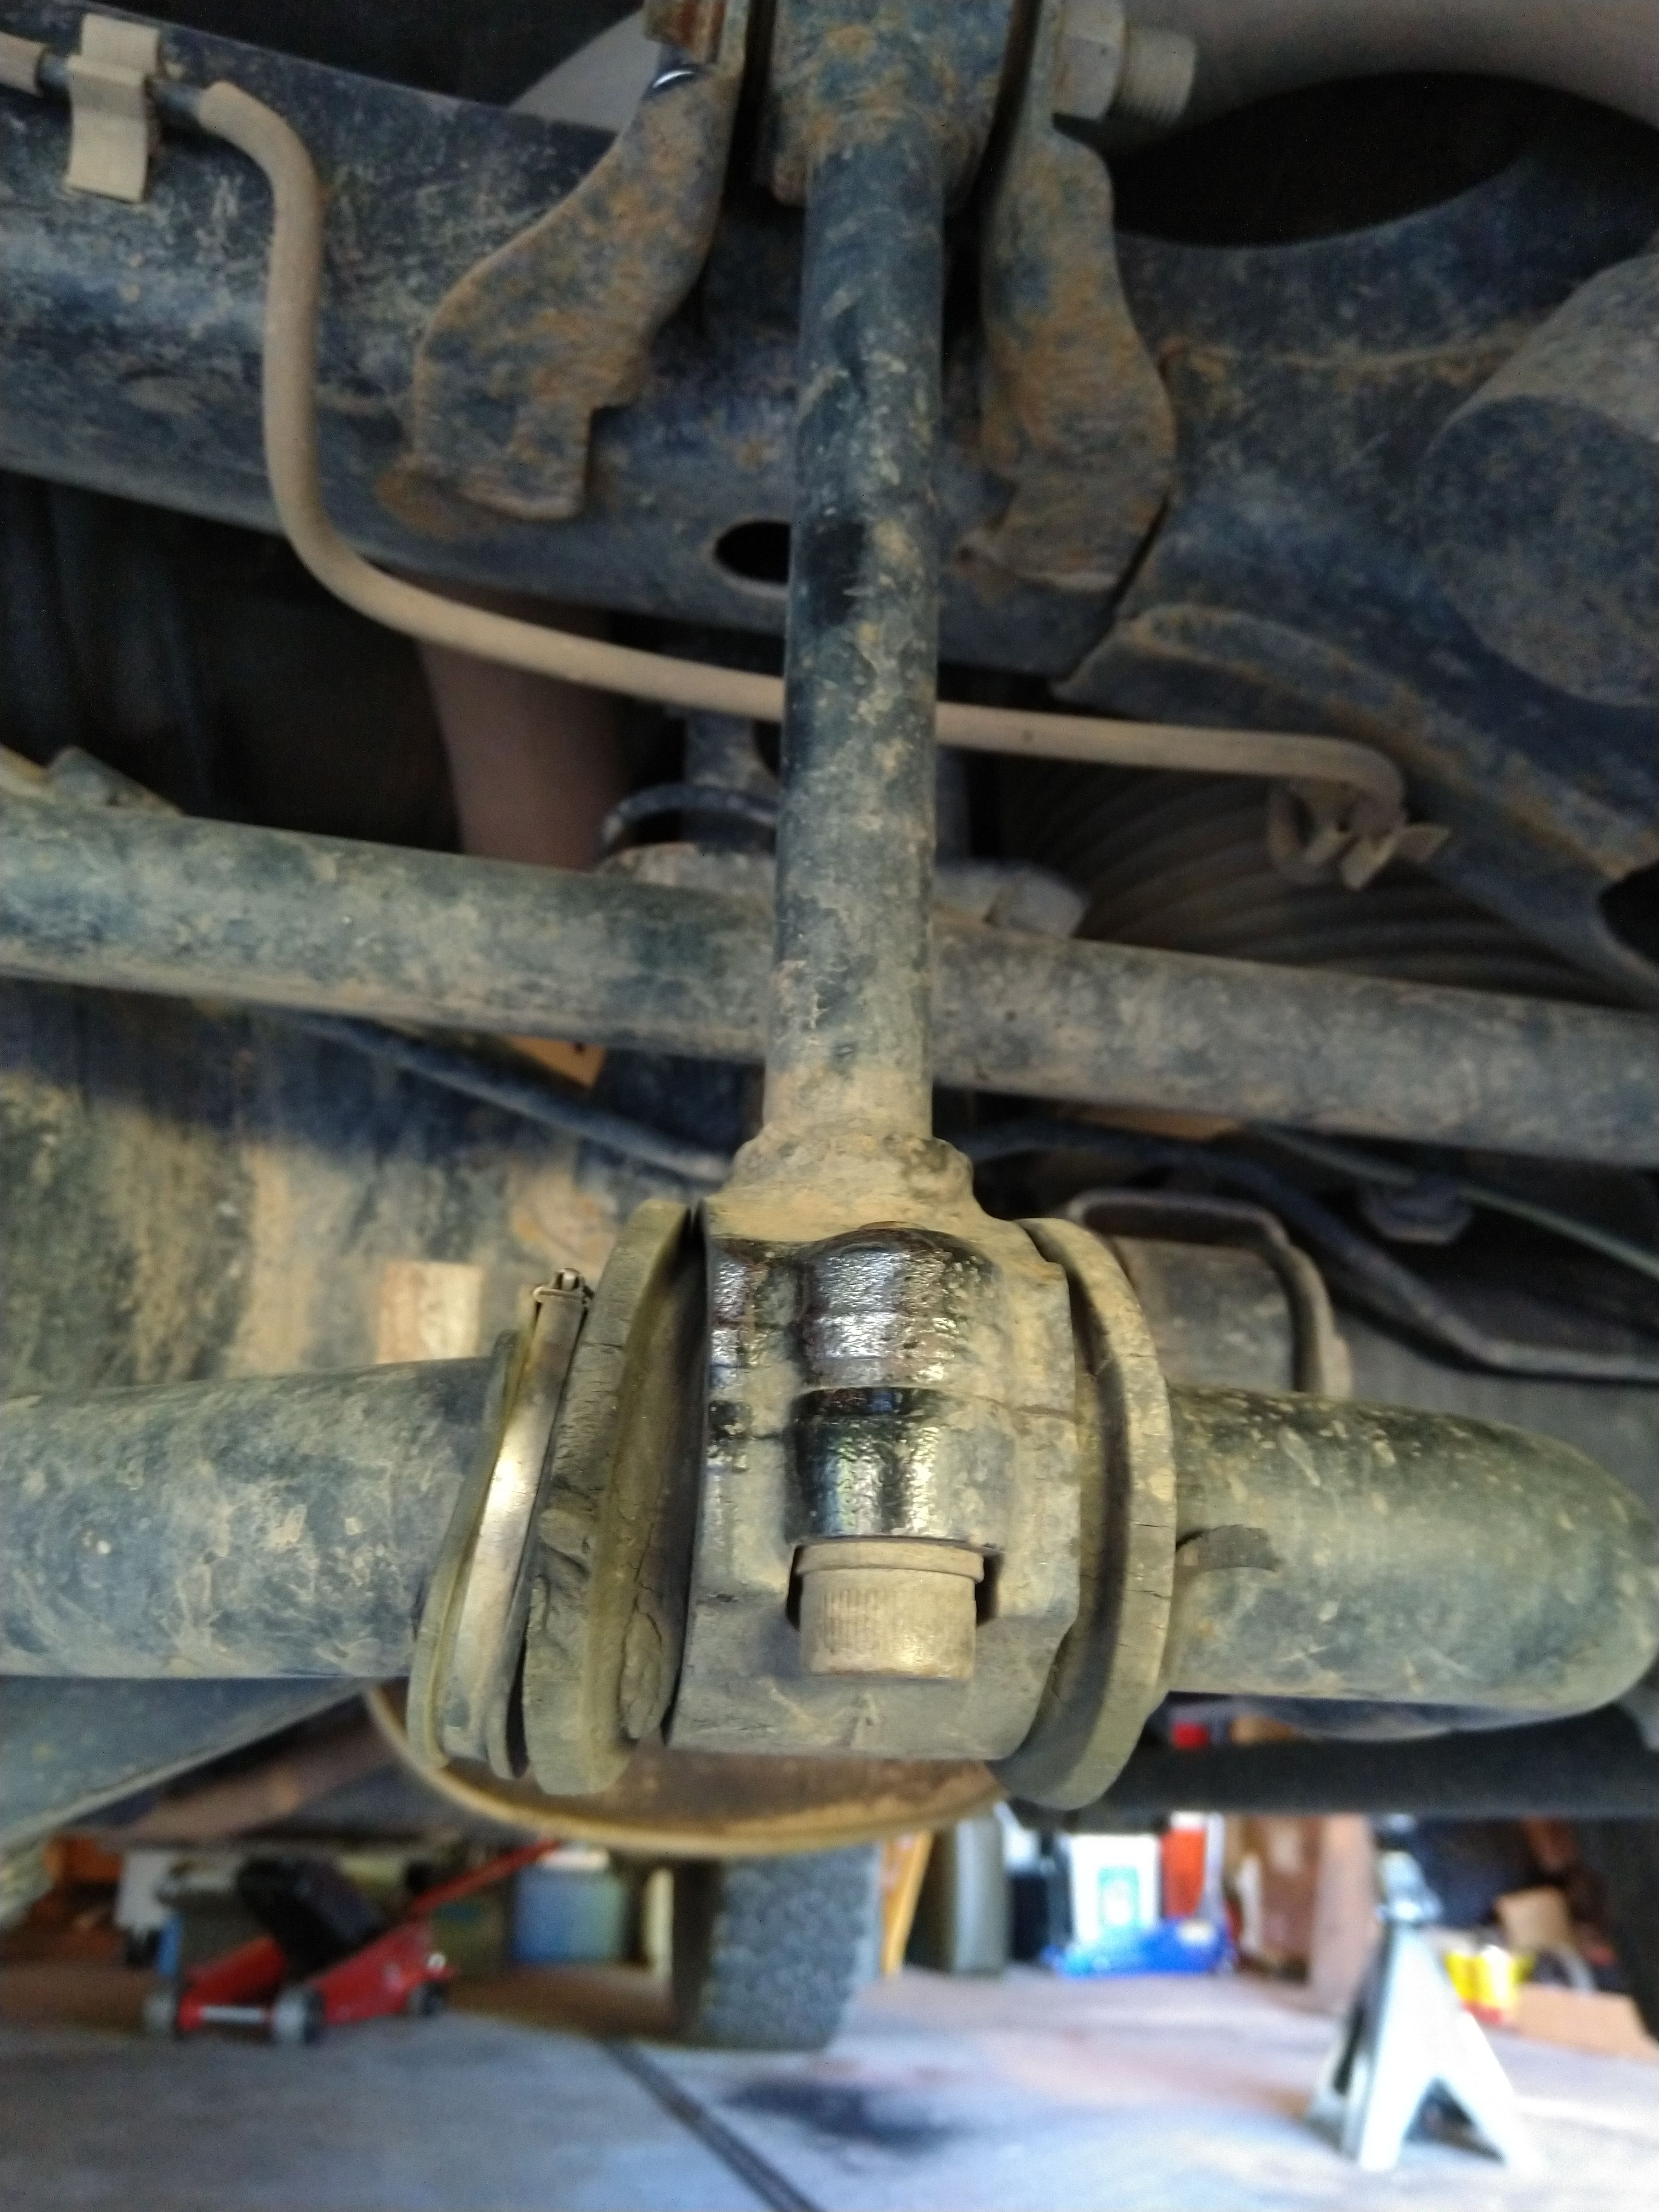
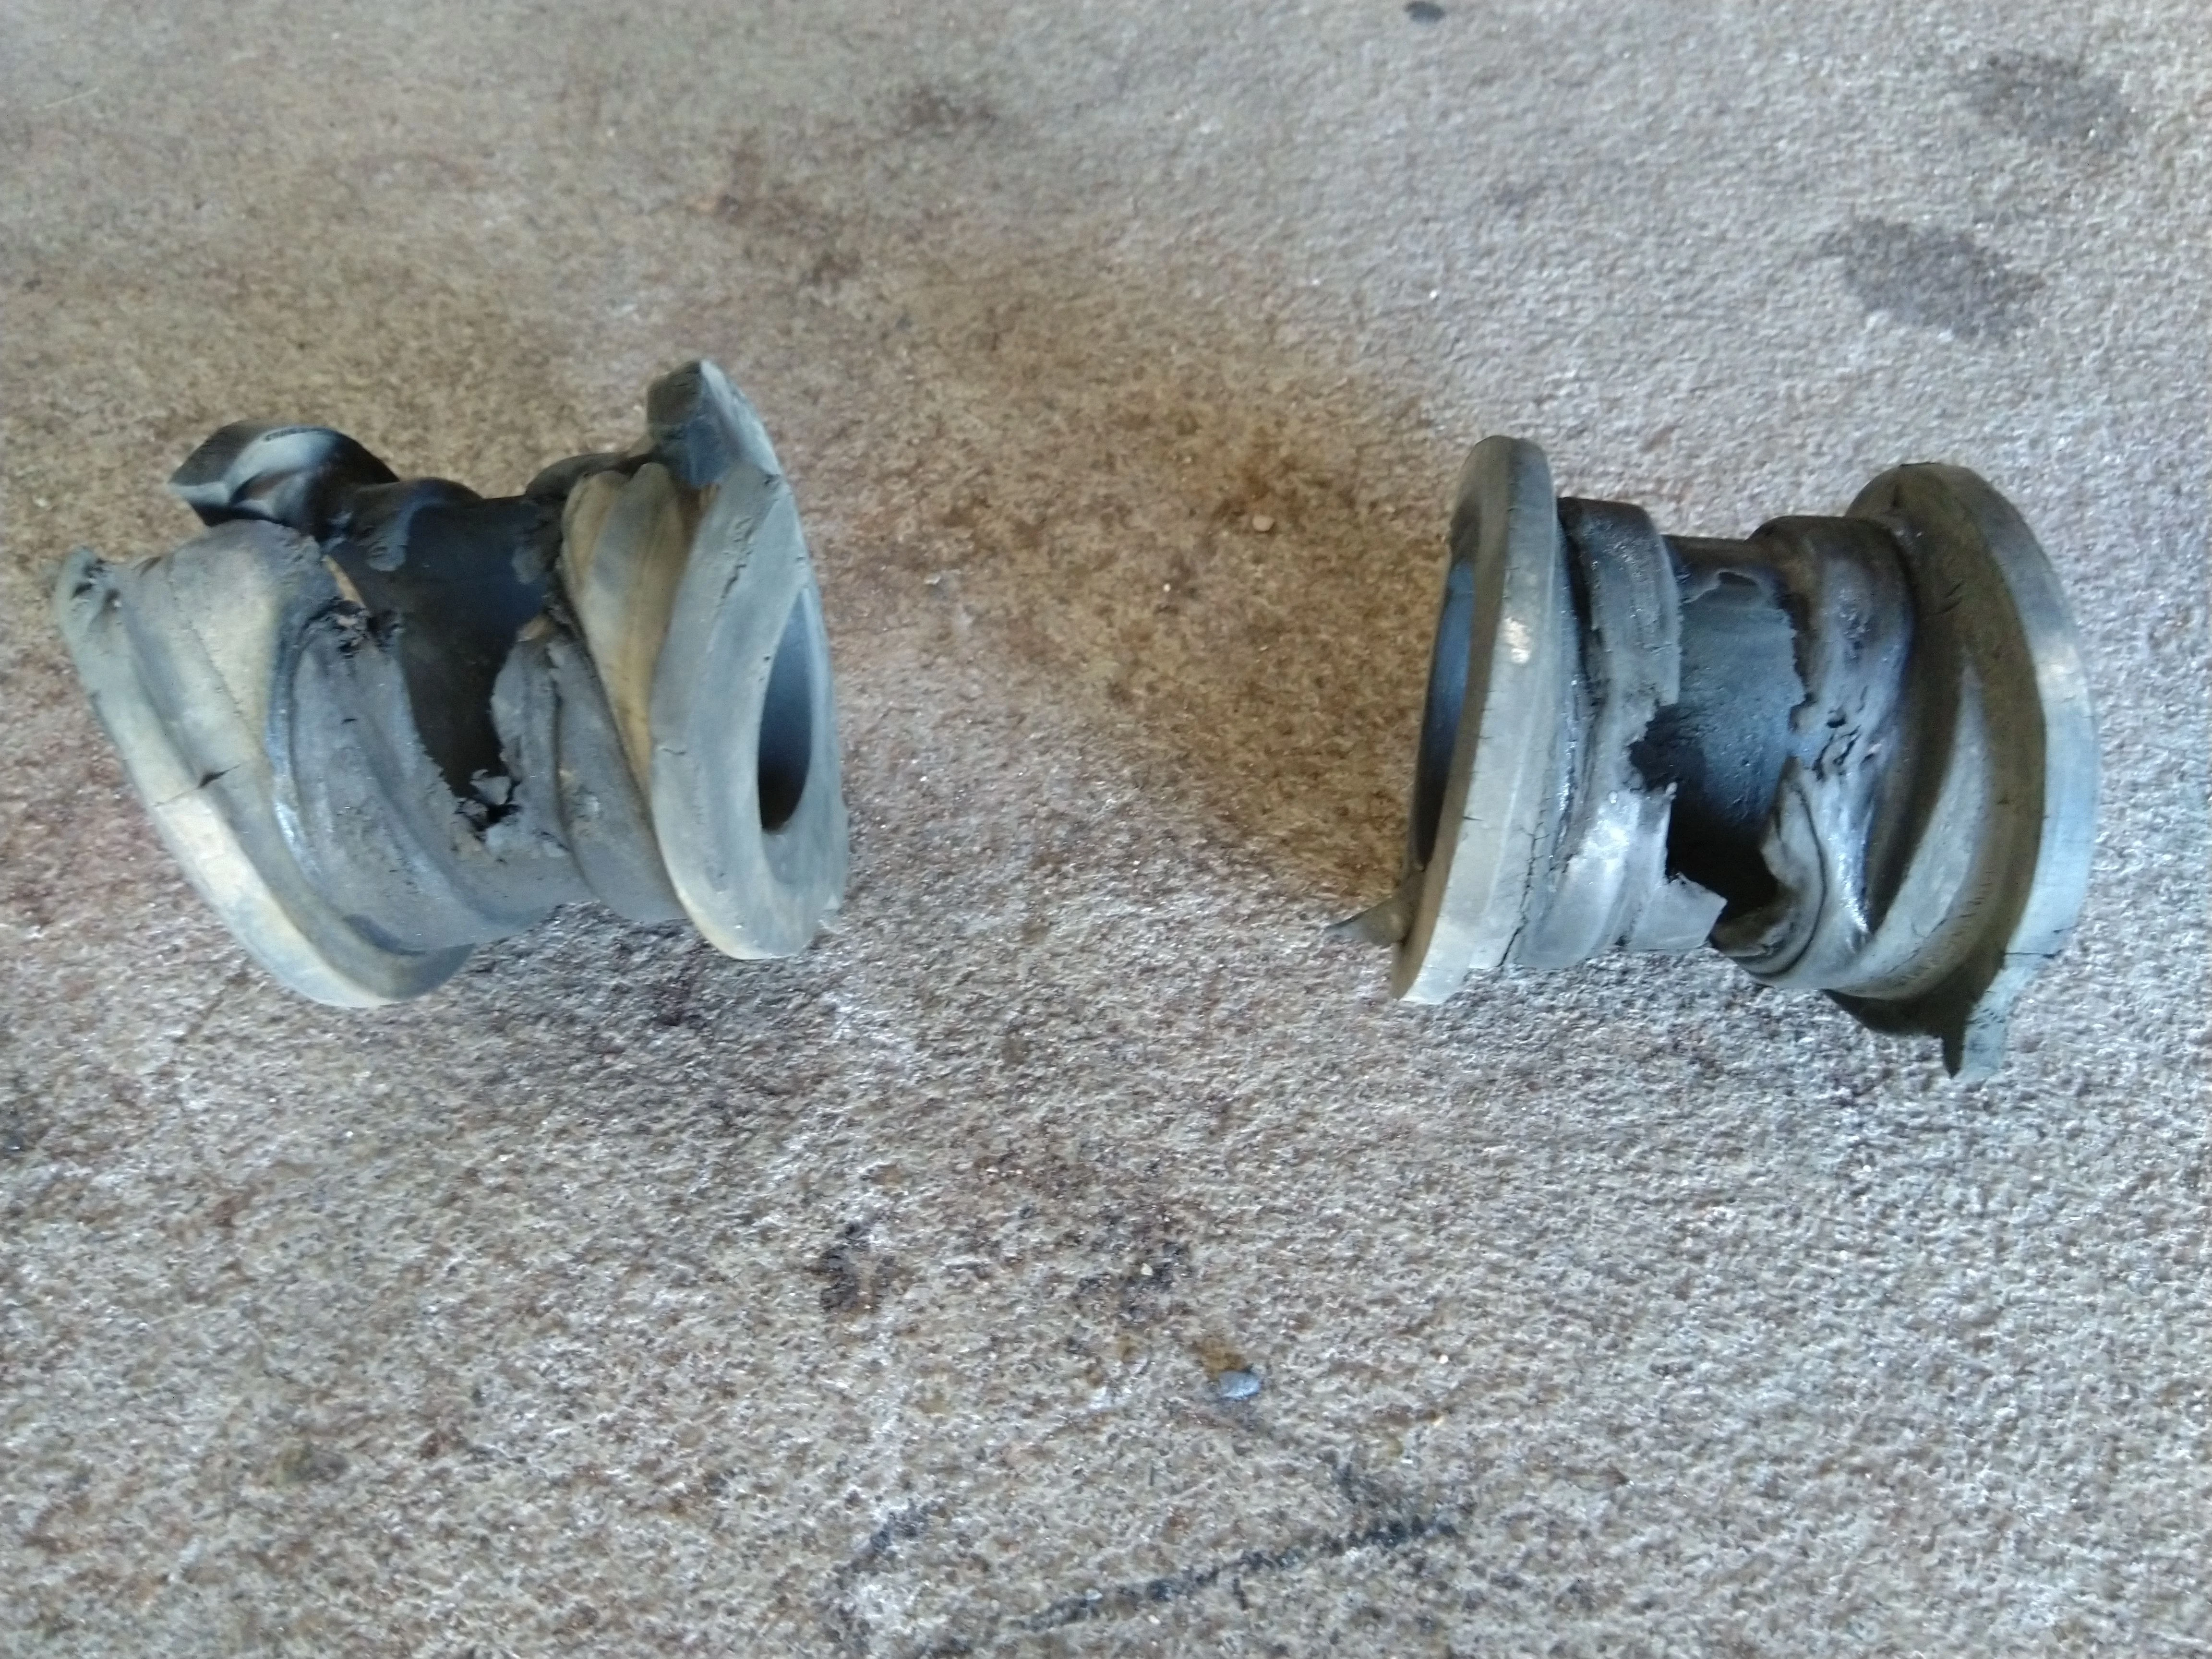
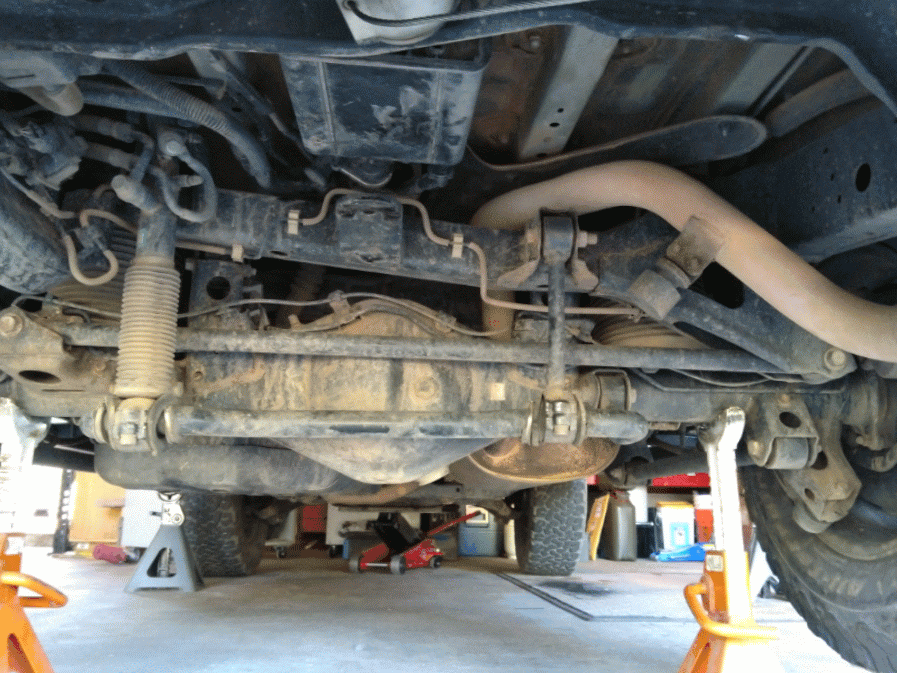
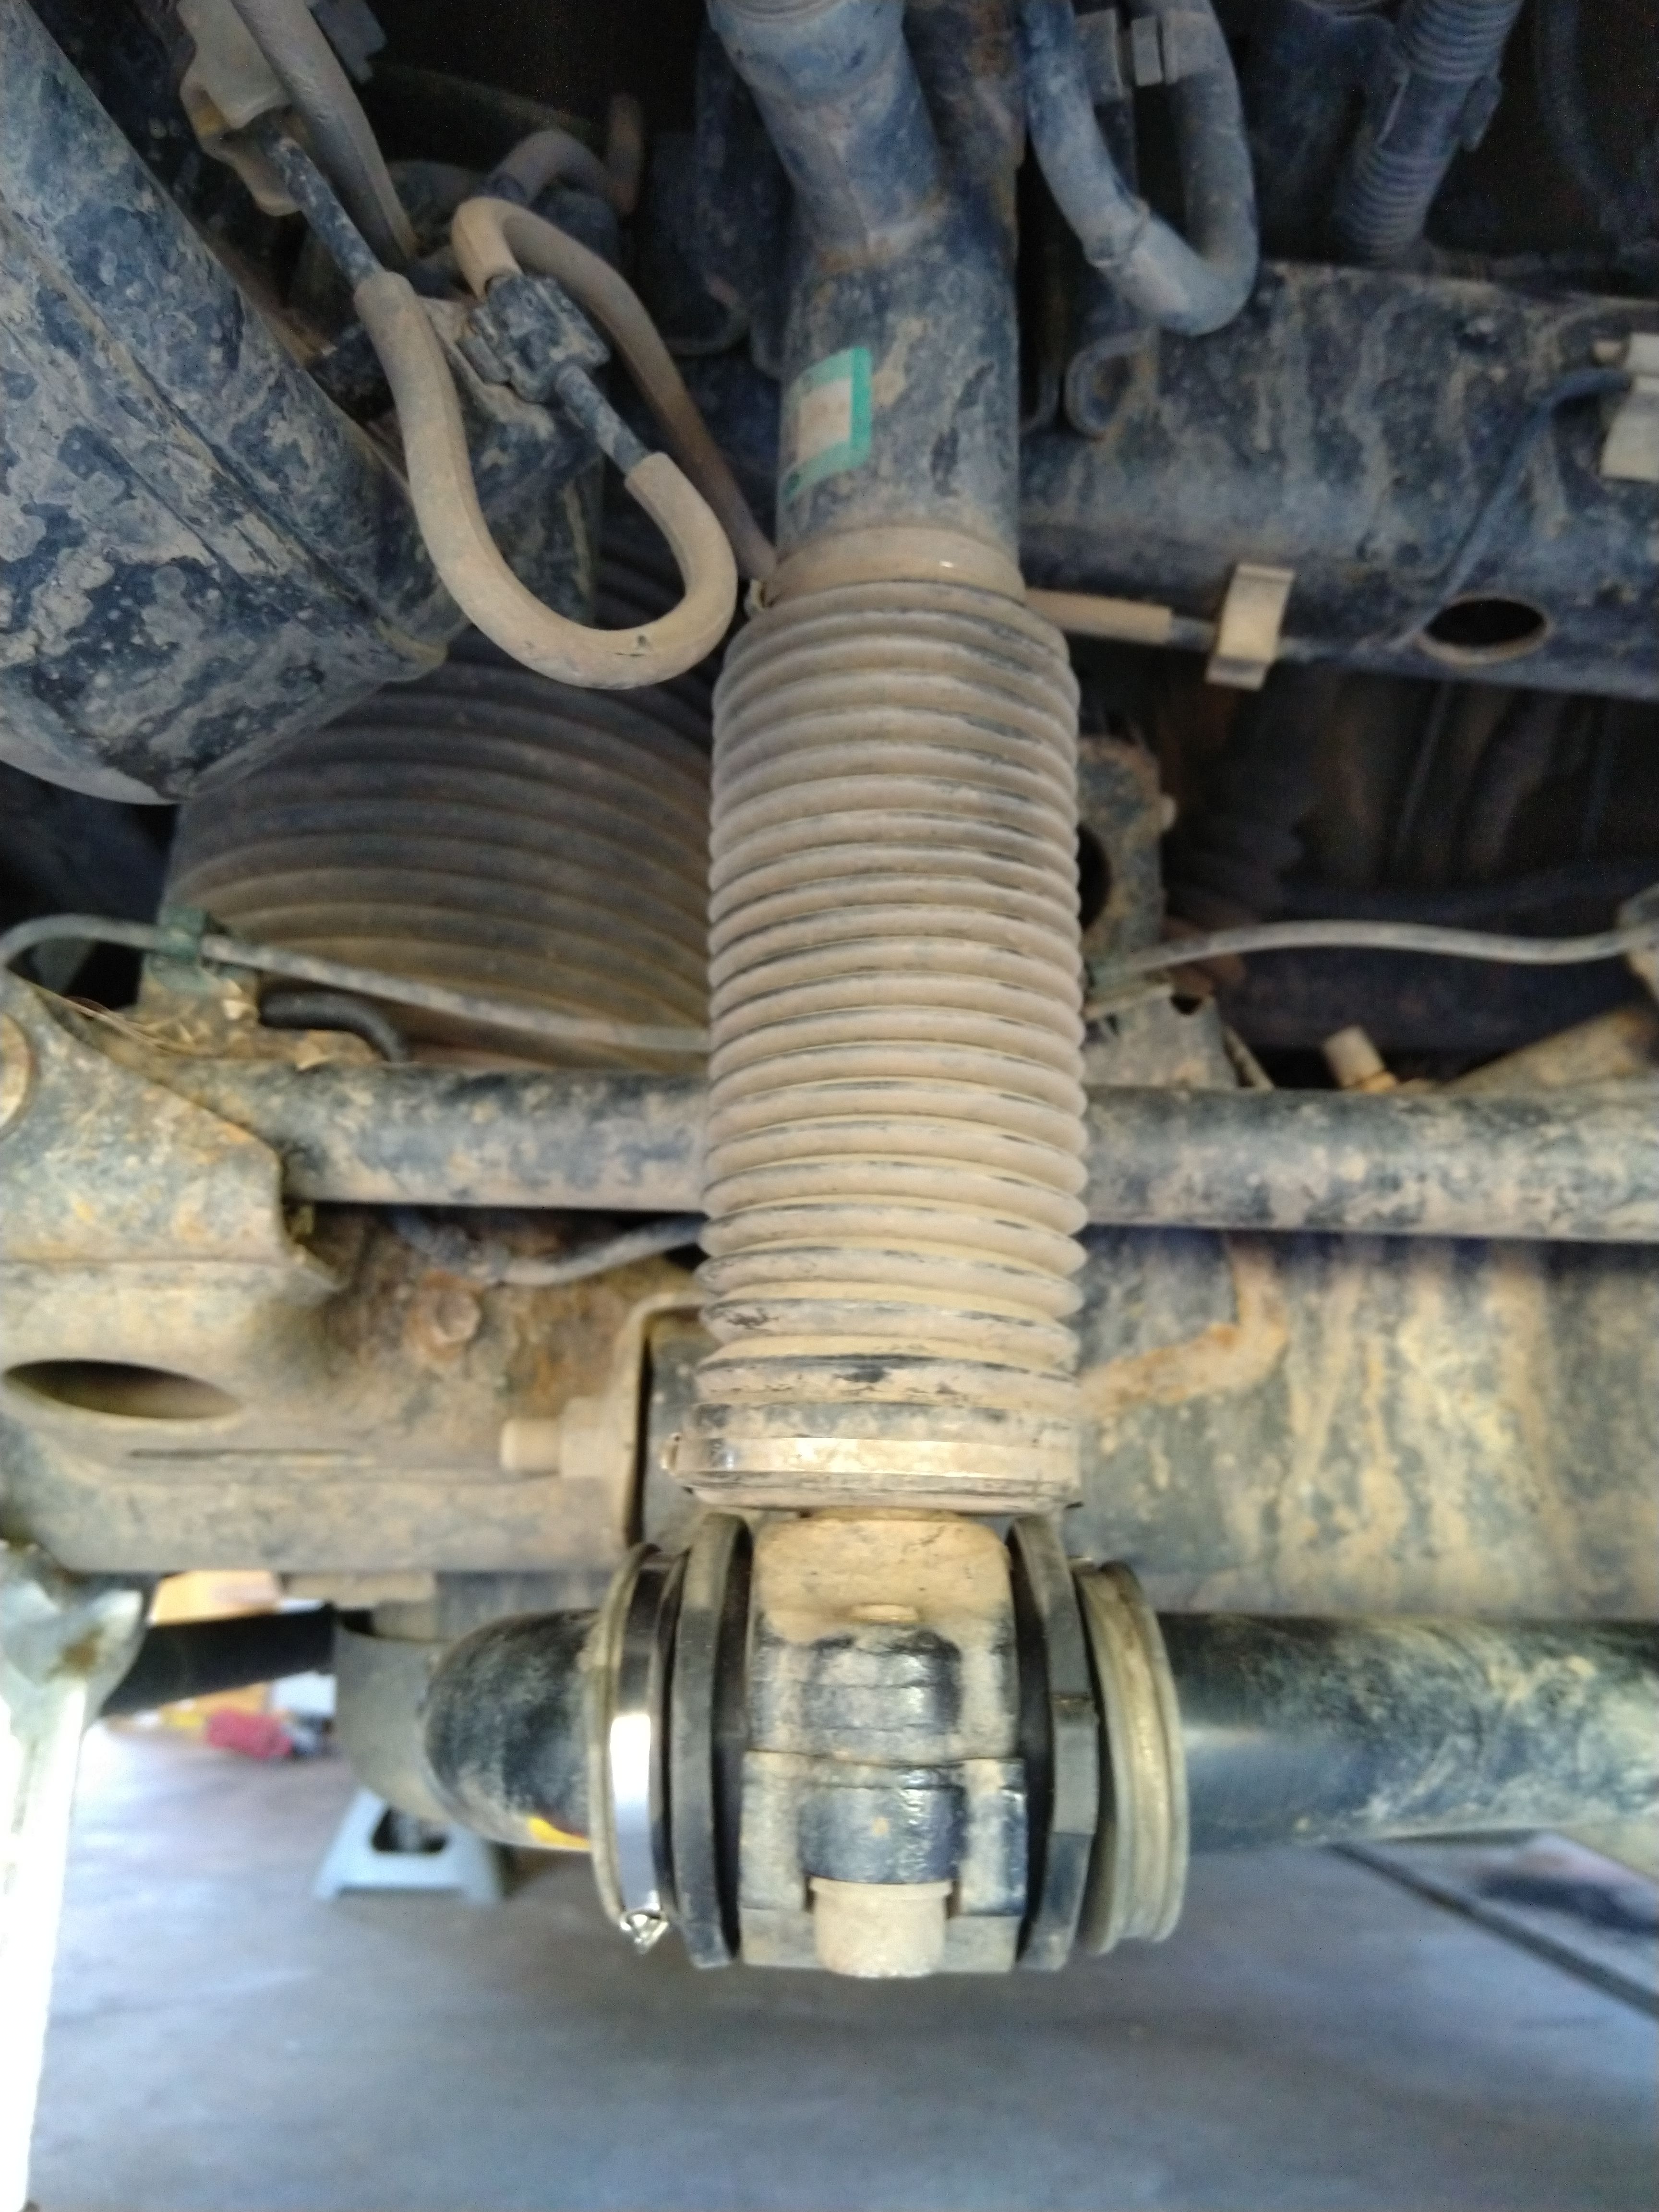
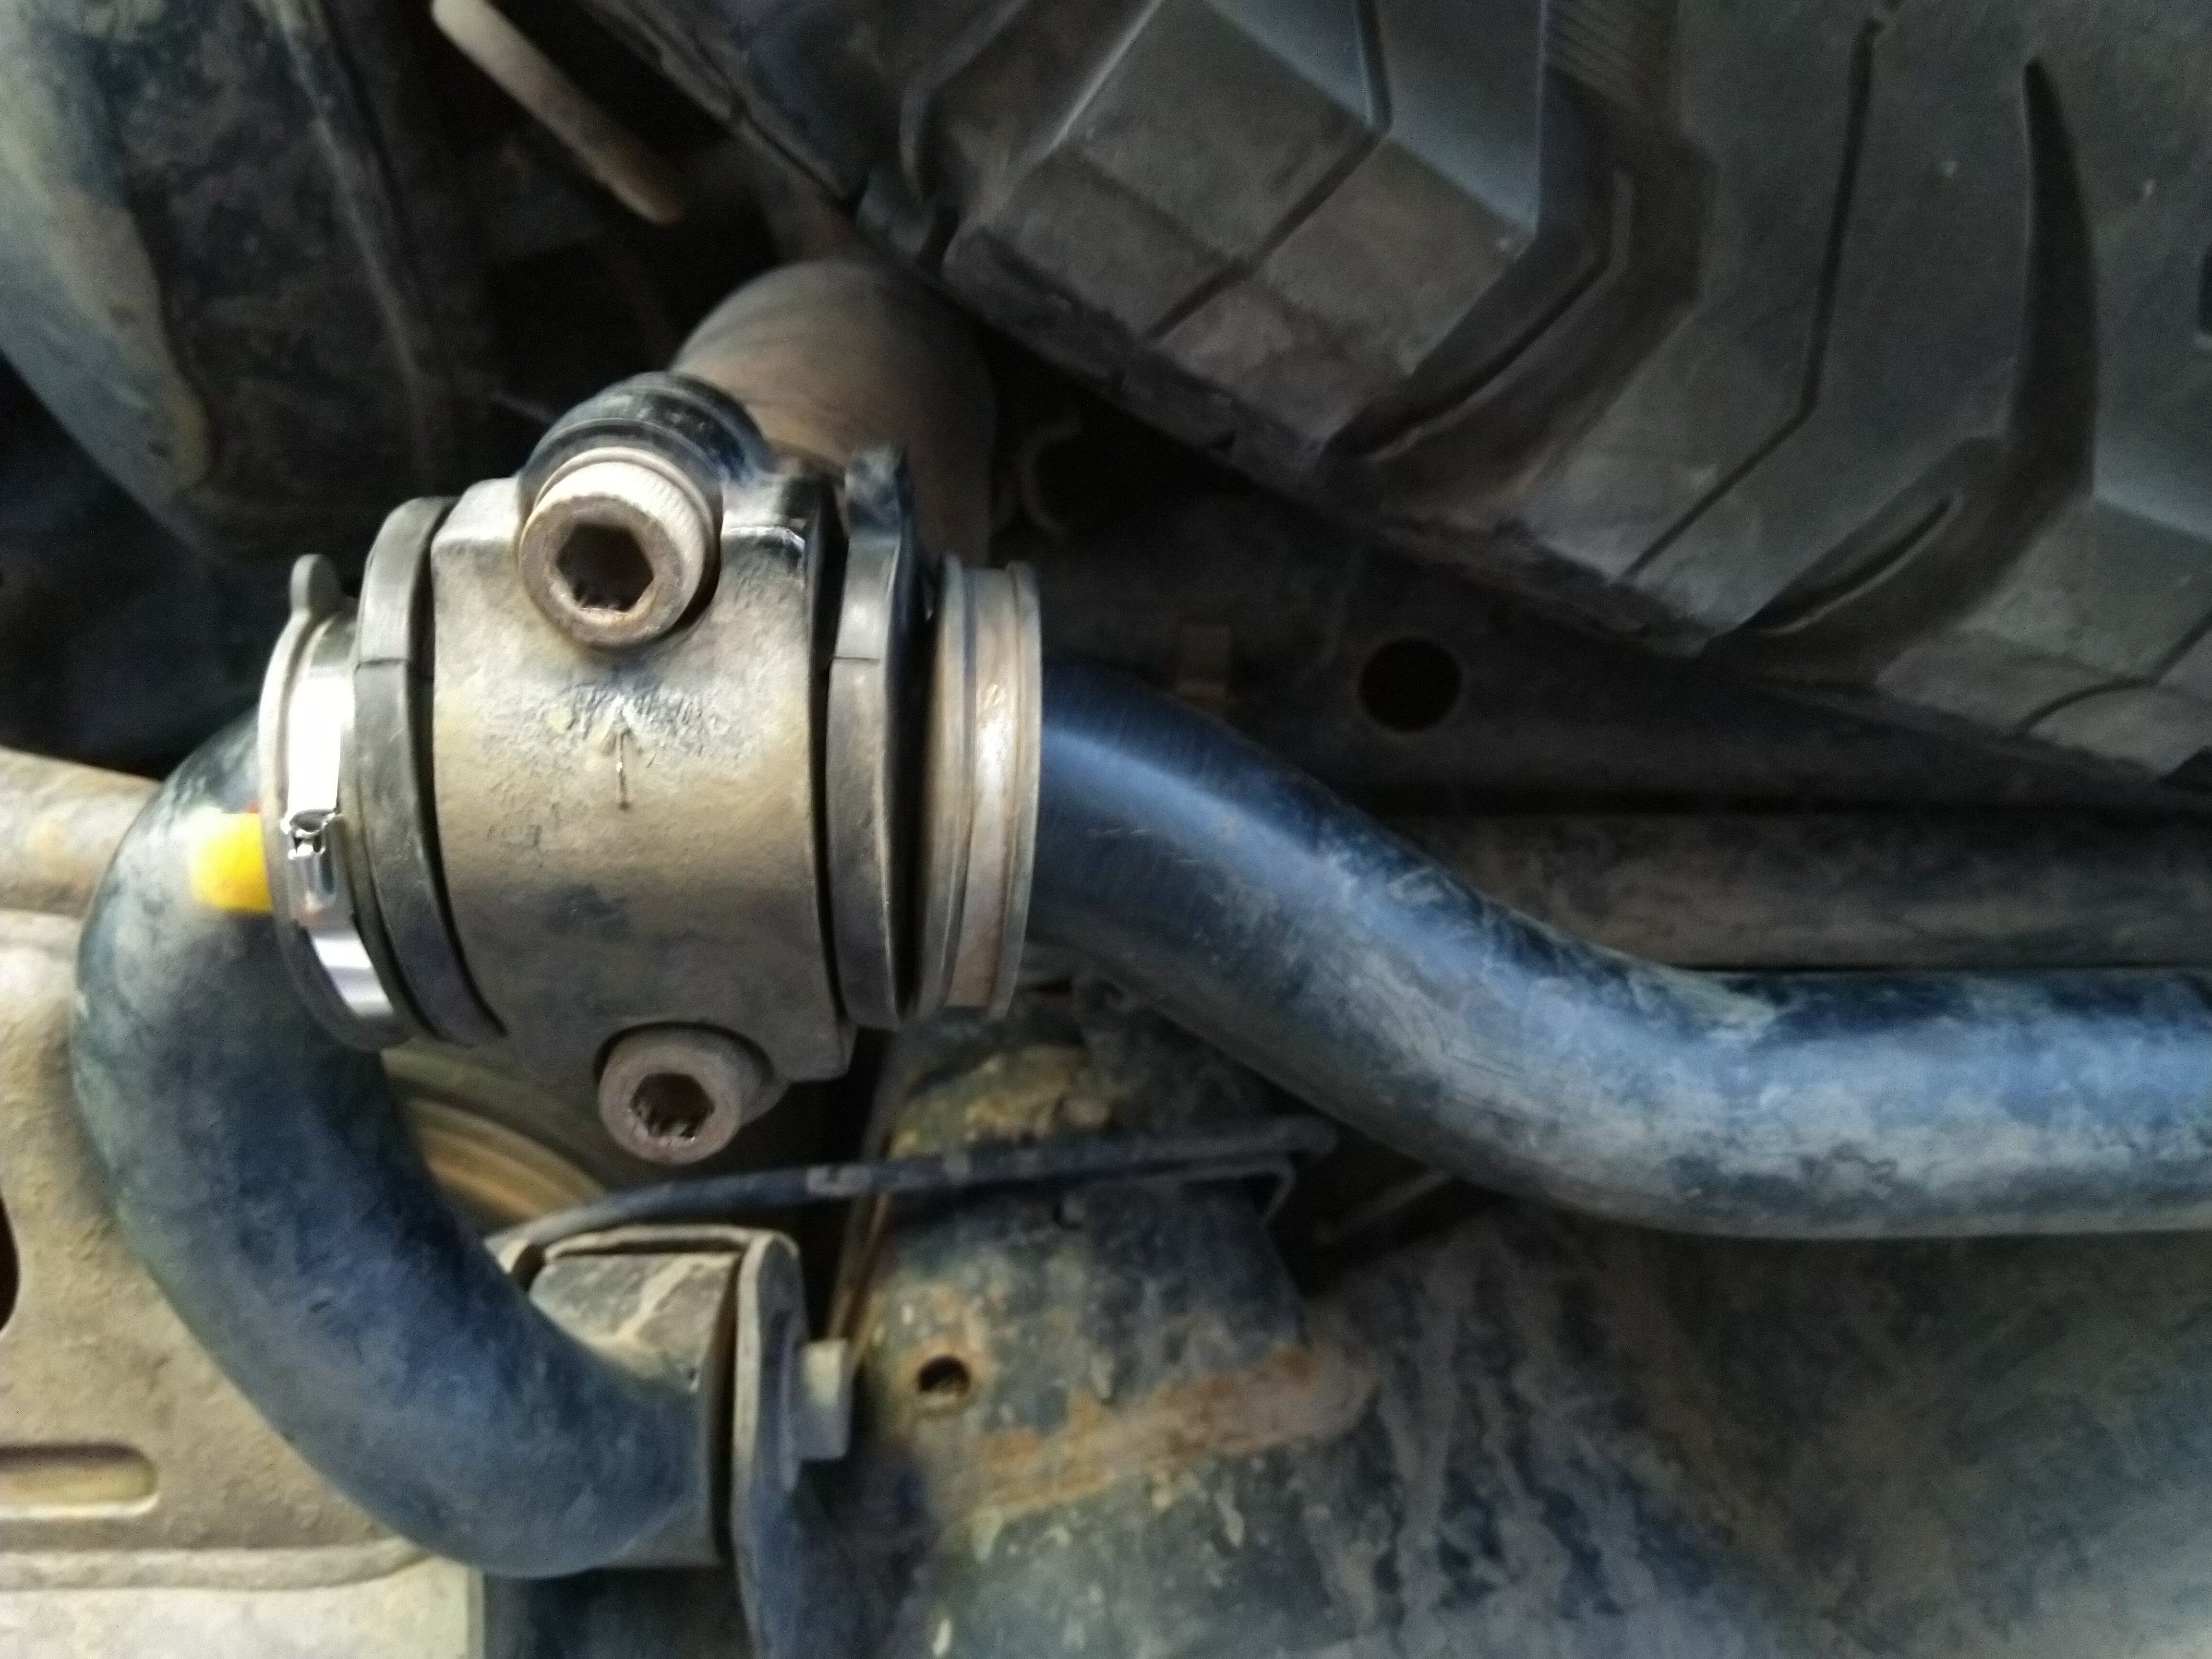
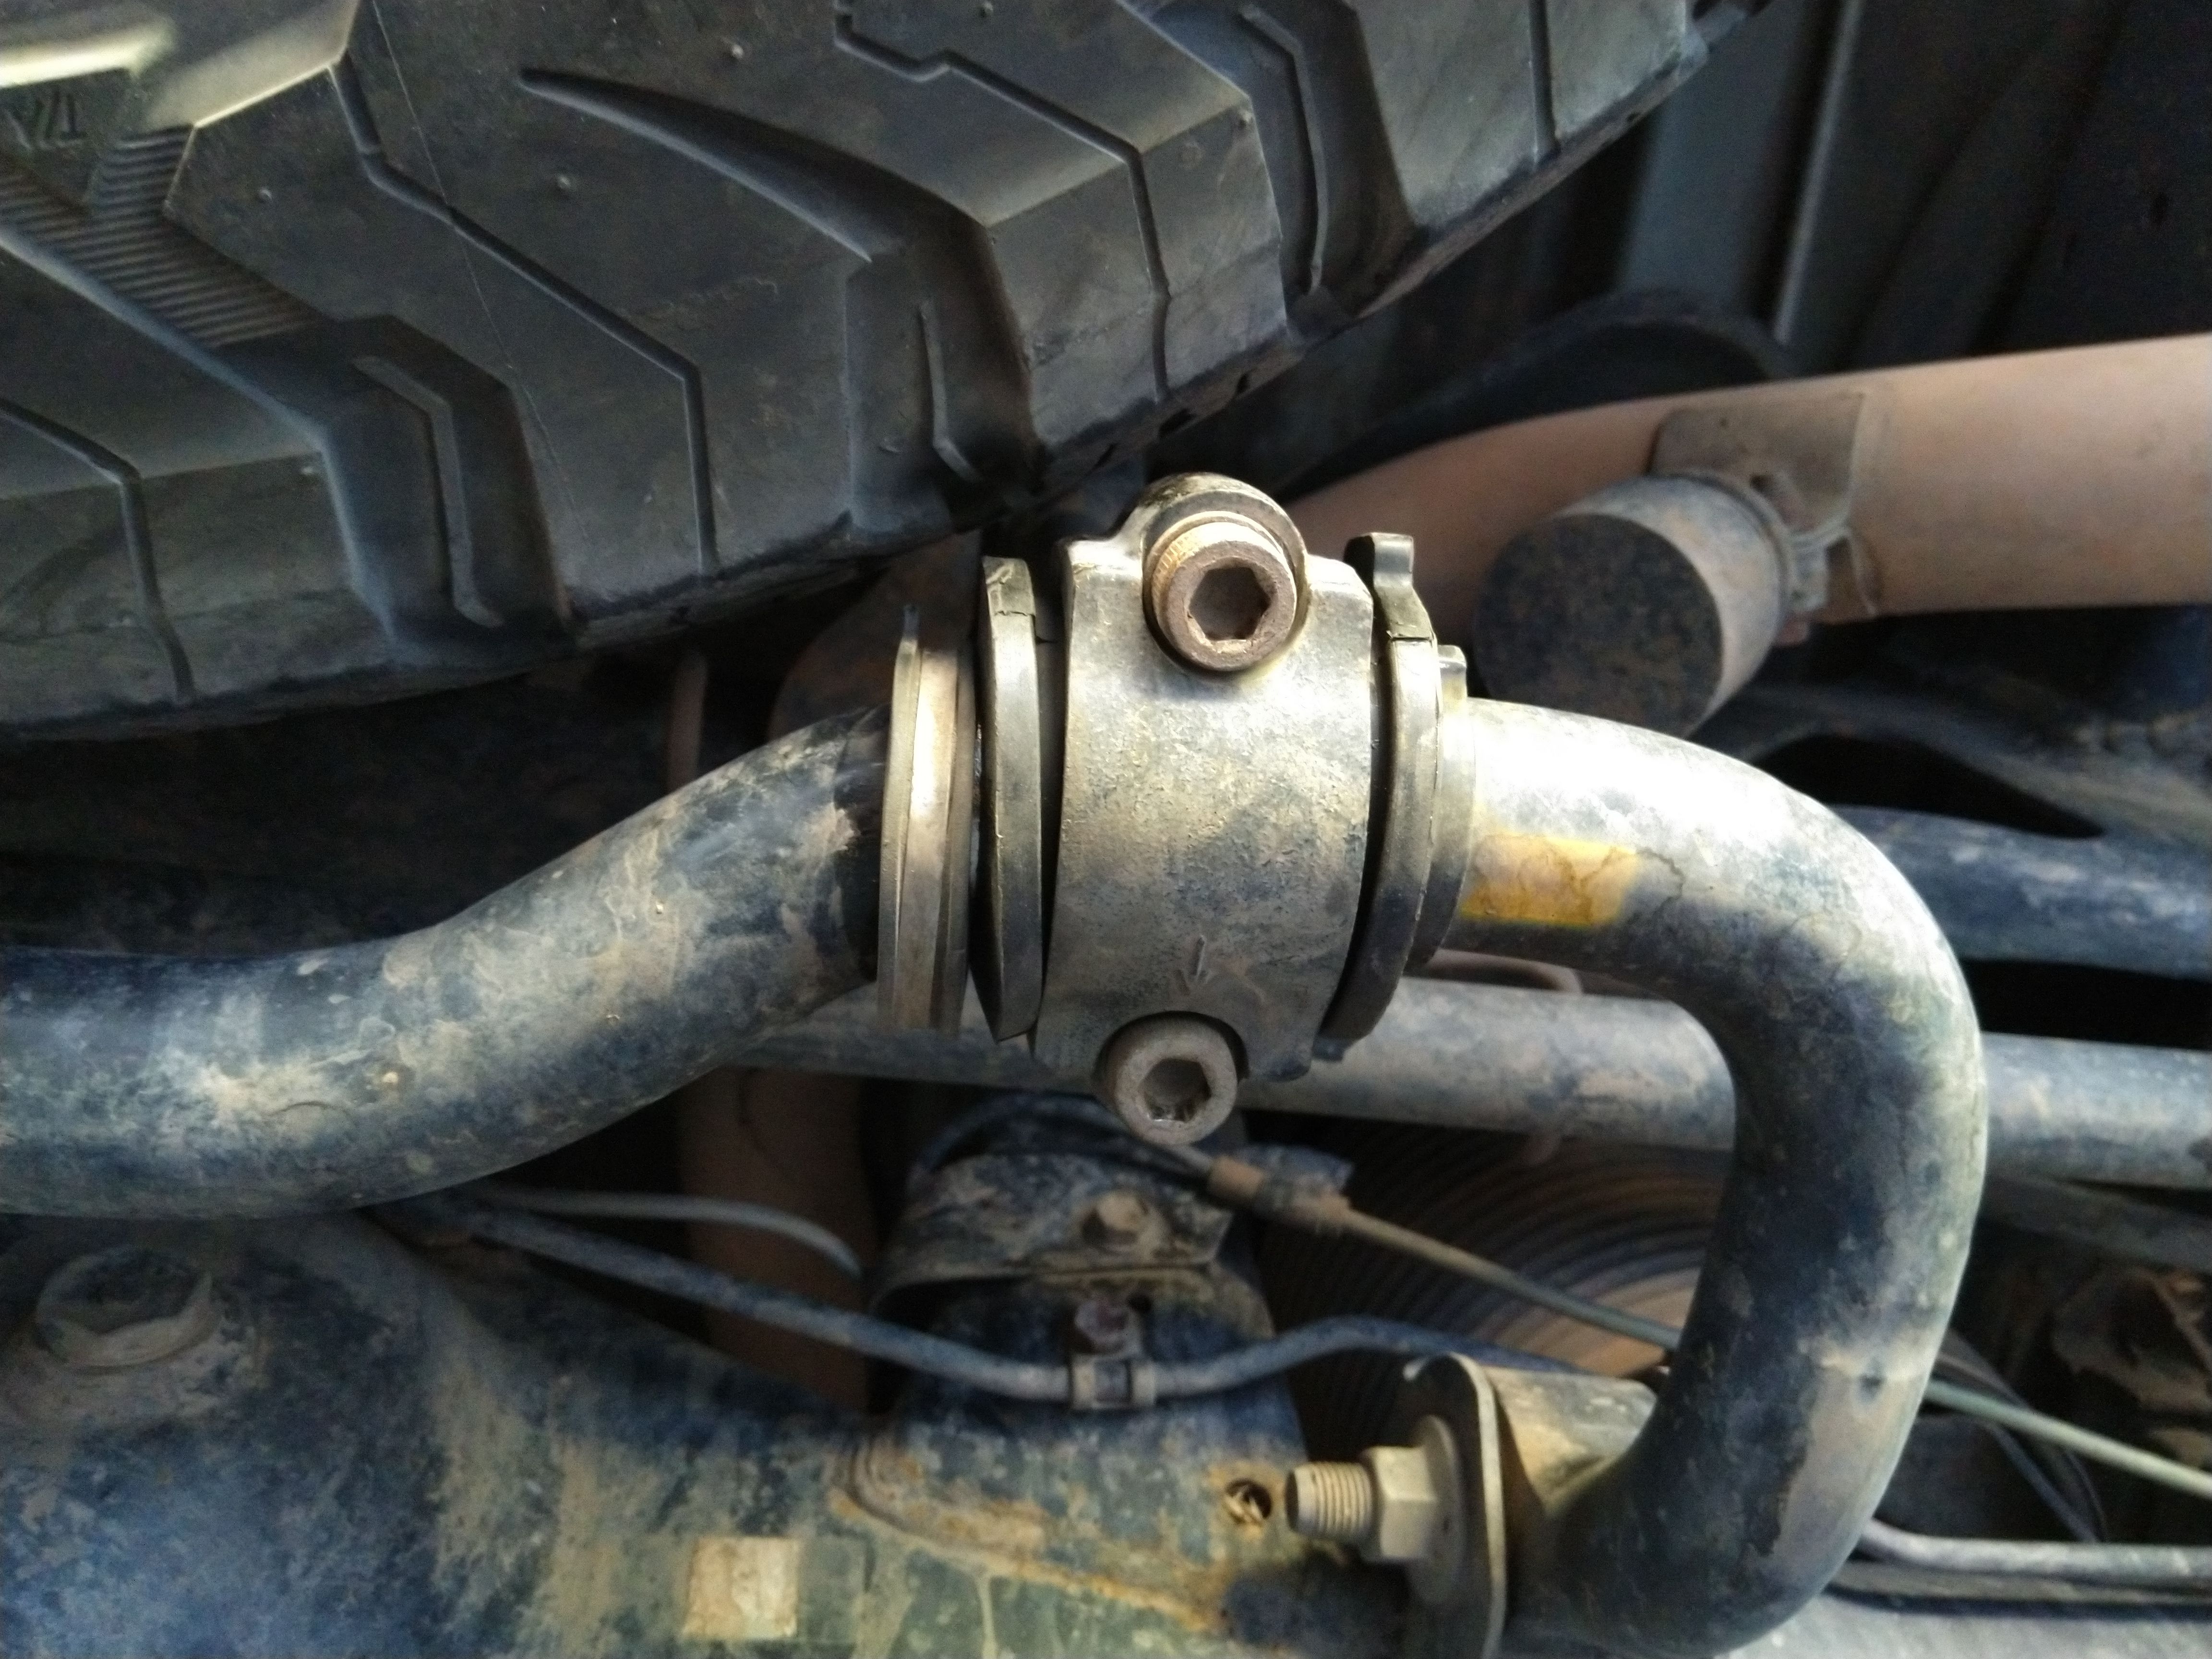
Finally got around to changing my rear KDSS bushings (I did the fronts in July?)
They Were THRASHED!!!! I'd had the 'yota dealer do them 3 years ago when I noticed a rear clunk upon purchase in 2016.
I suppose them Febest ones just aren't quite like OE rubber, especially when now using the articulation of the suspension.
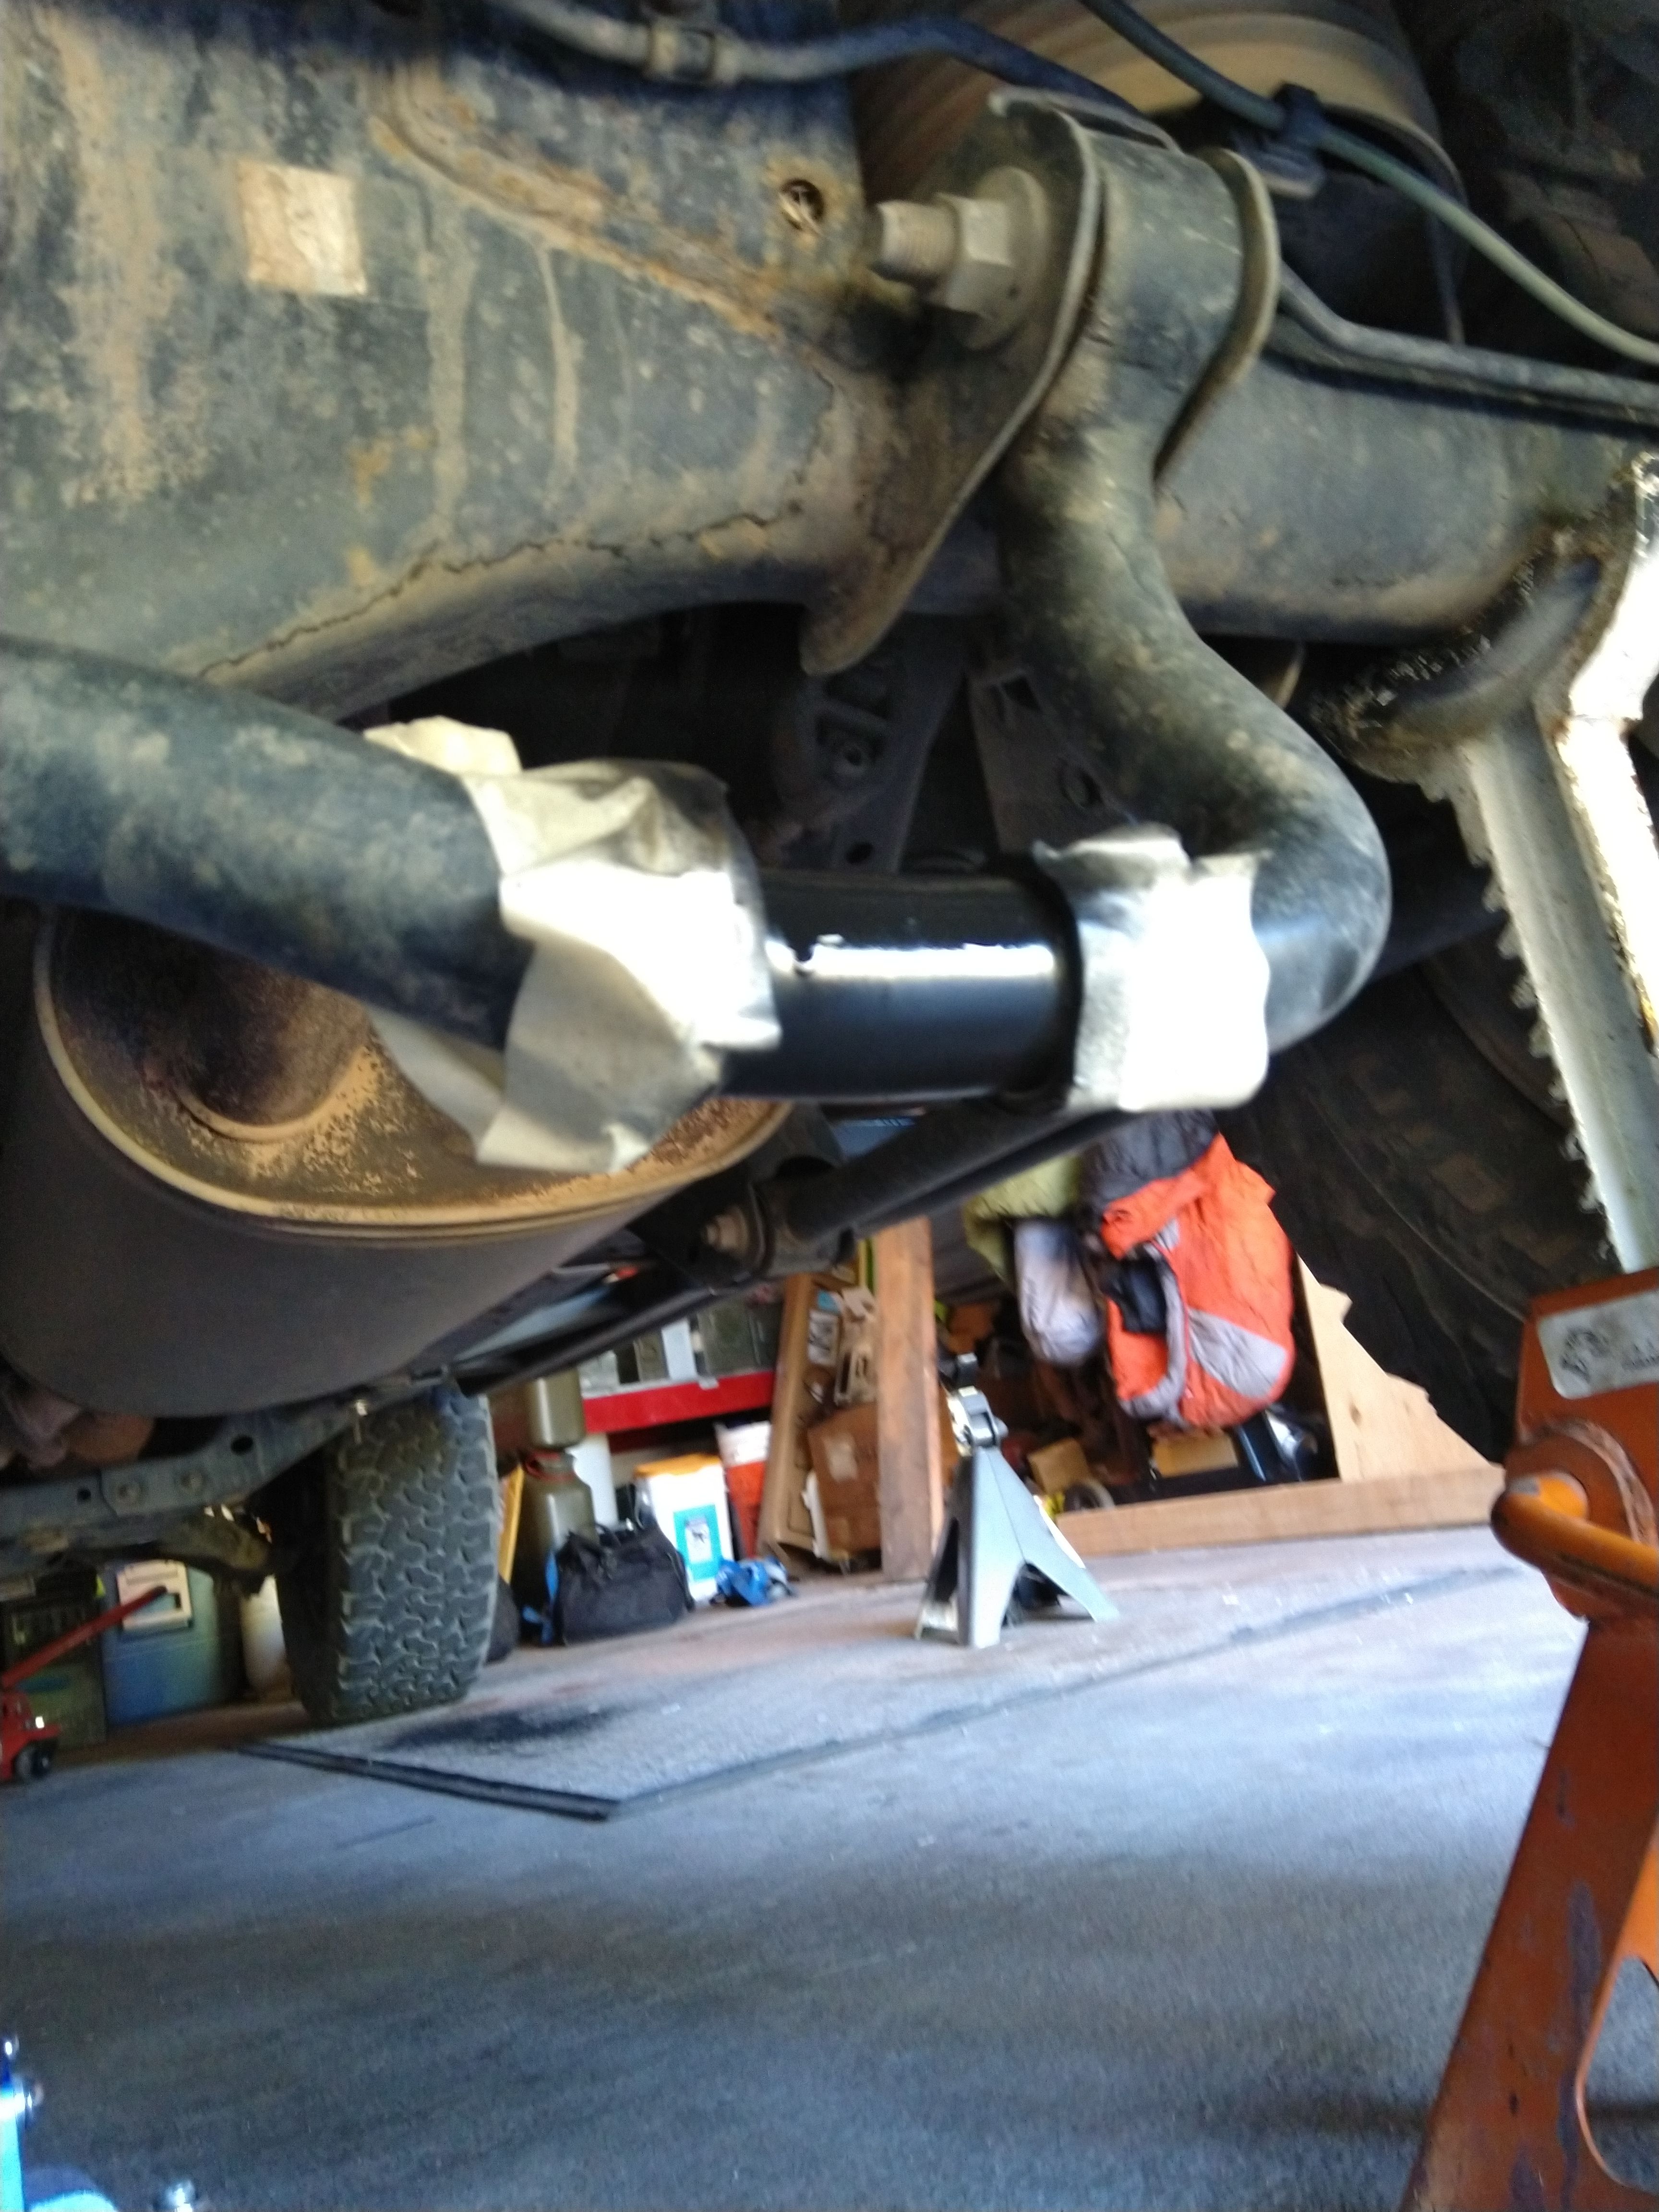
You can see how the 265x70 17 BFG AT/KO2 LTE has rubbed the KDSS RSB brackets some.
Removal takes an 8mm allen key
I think the flaying of the bushing may be more an artifact of how they've failed than potential spare tire contact with the sway bar's movement. It looks like the bushings just grenaded at the top of the bar...
The passenger side KDSS arm has mobility in the fixed point as the fulcrum for the KDSS arm's movement. Ergo, it's not pivoting on the passenger side bushing, that stays rigidly clamped on the RSB
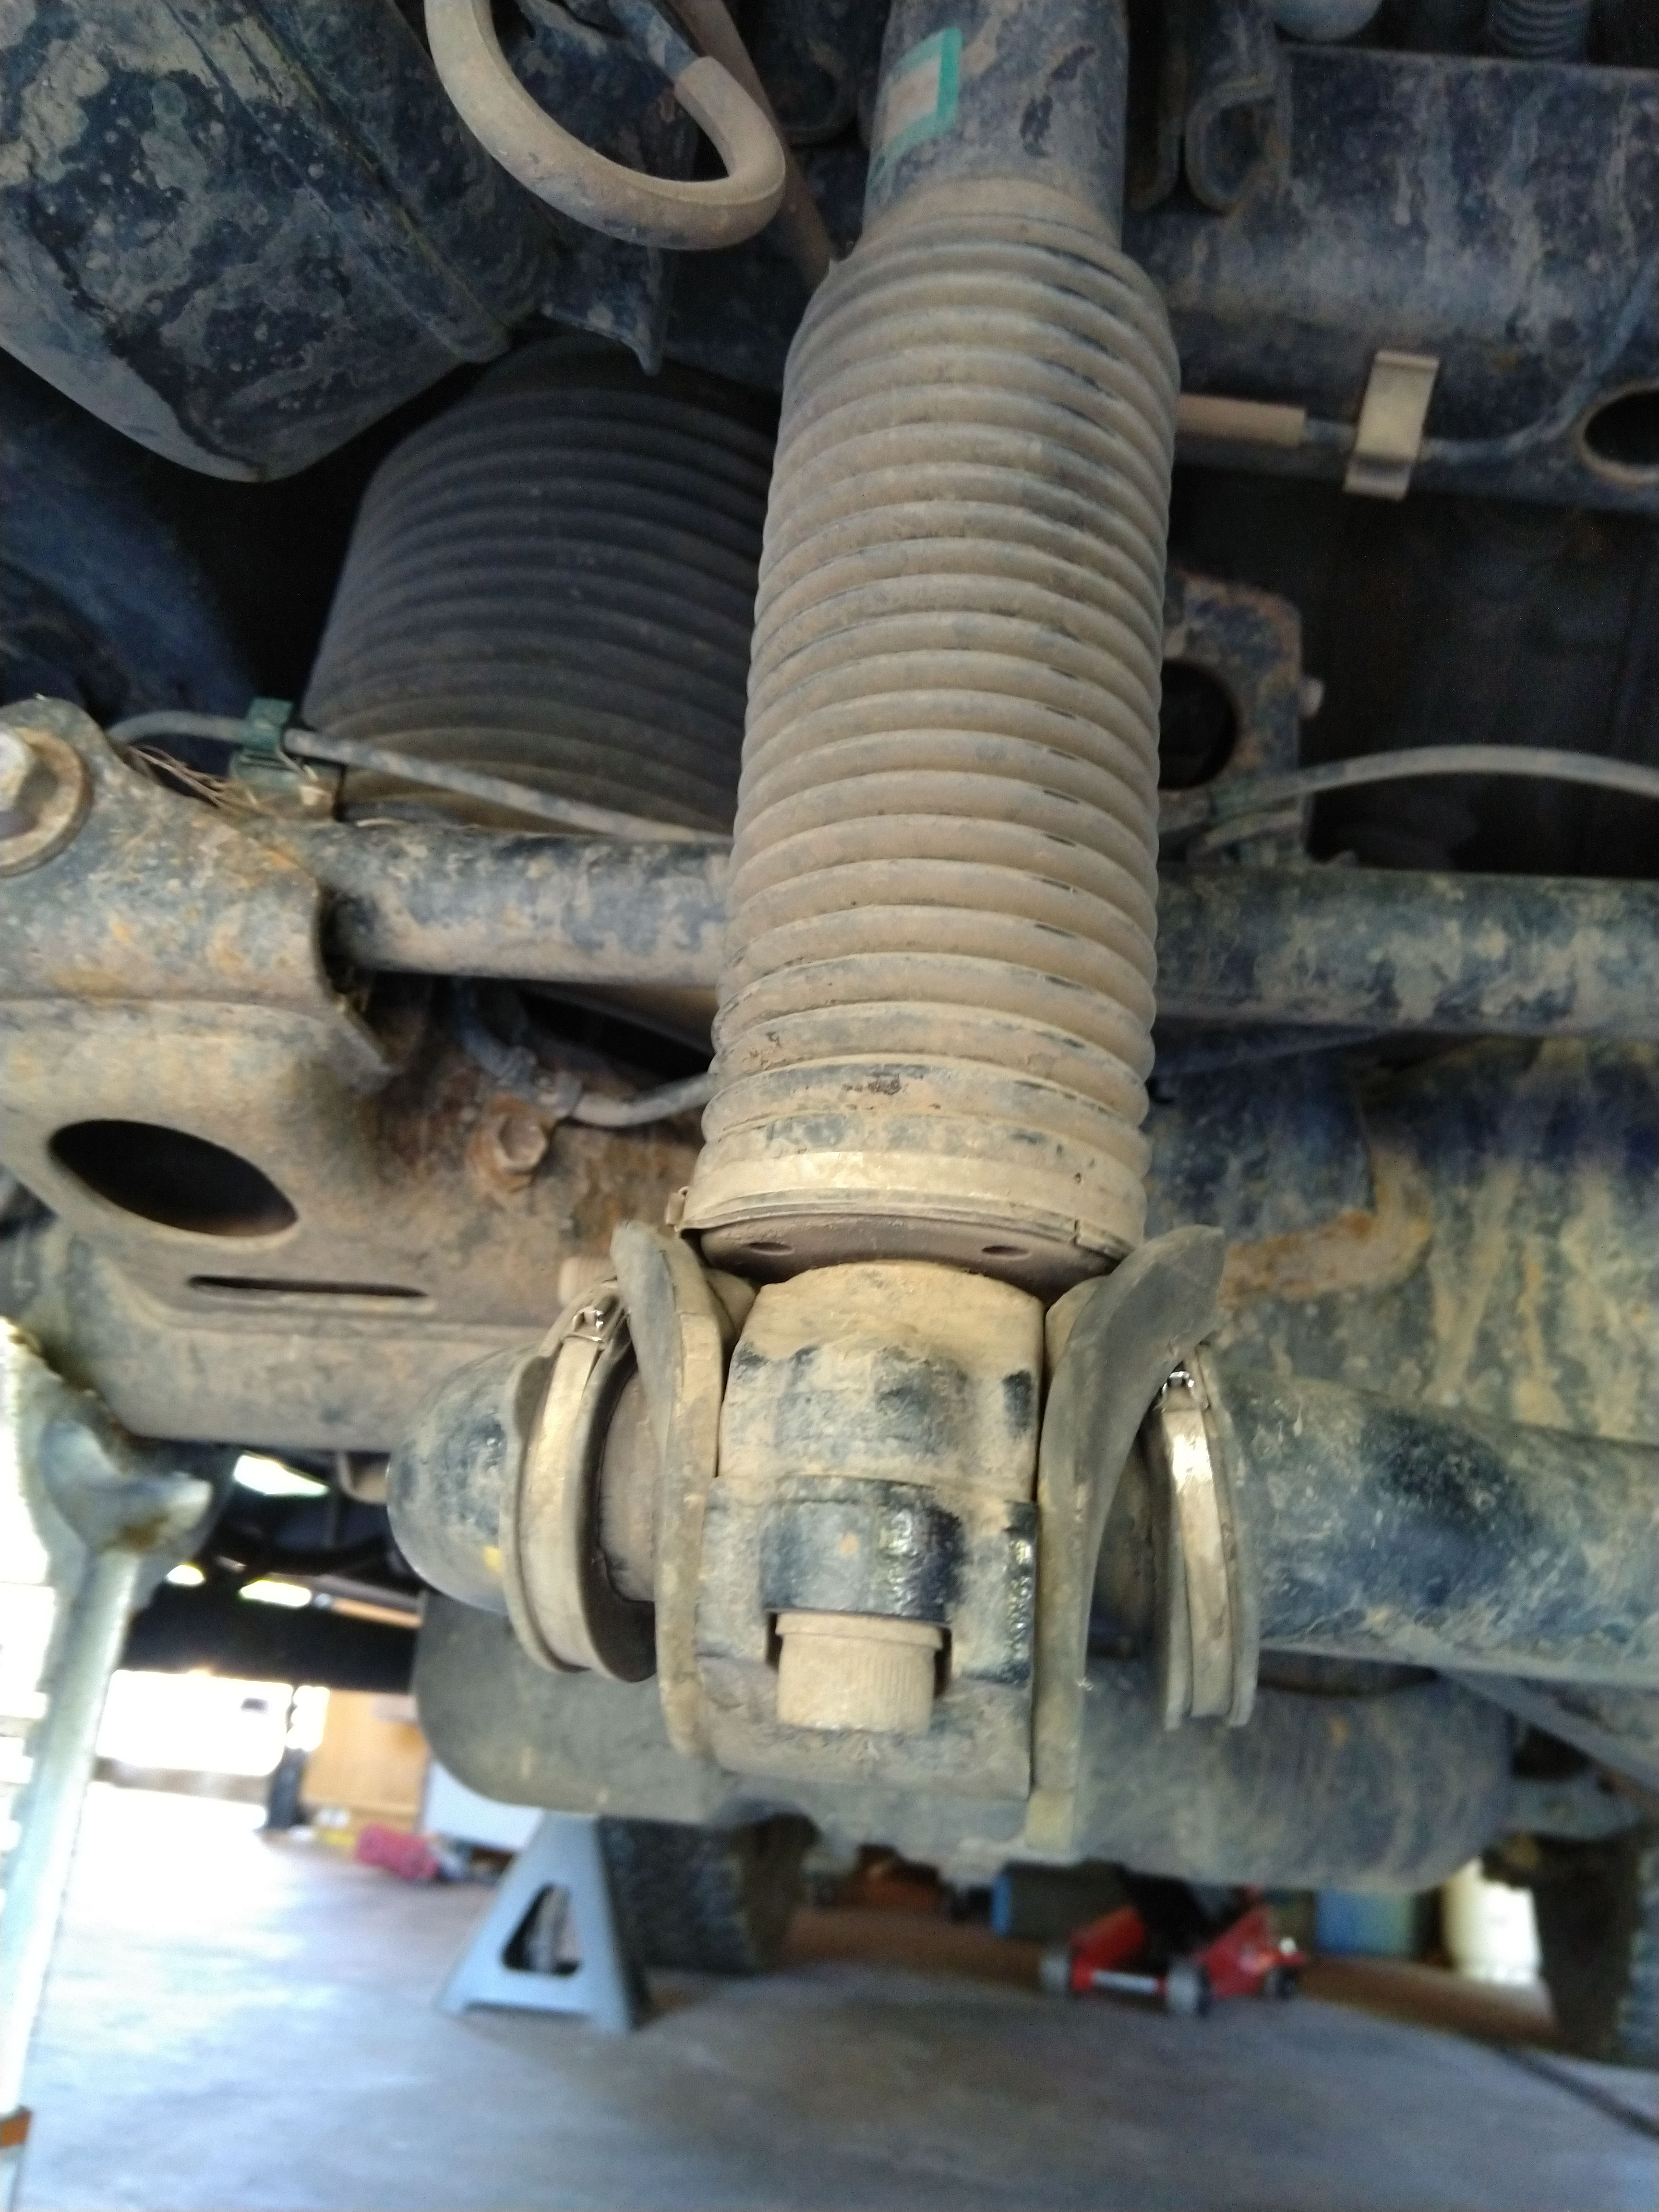
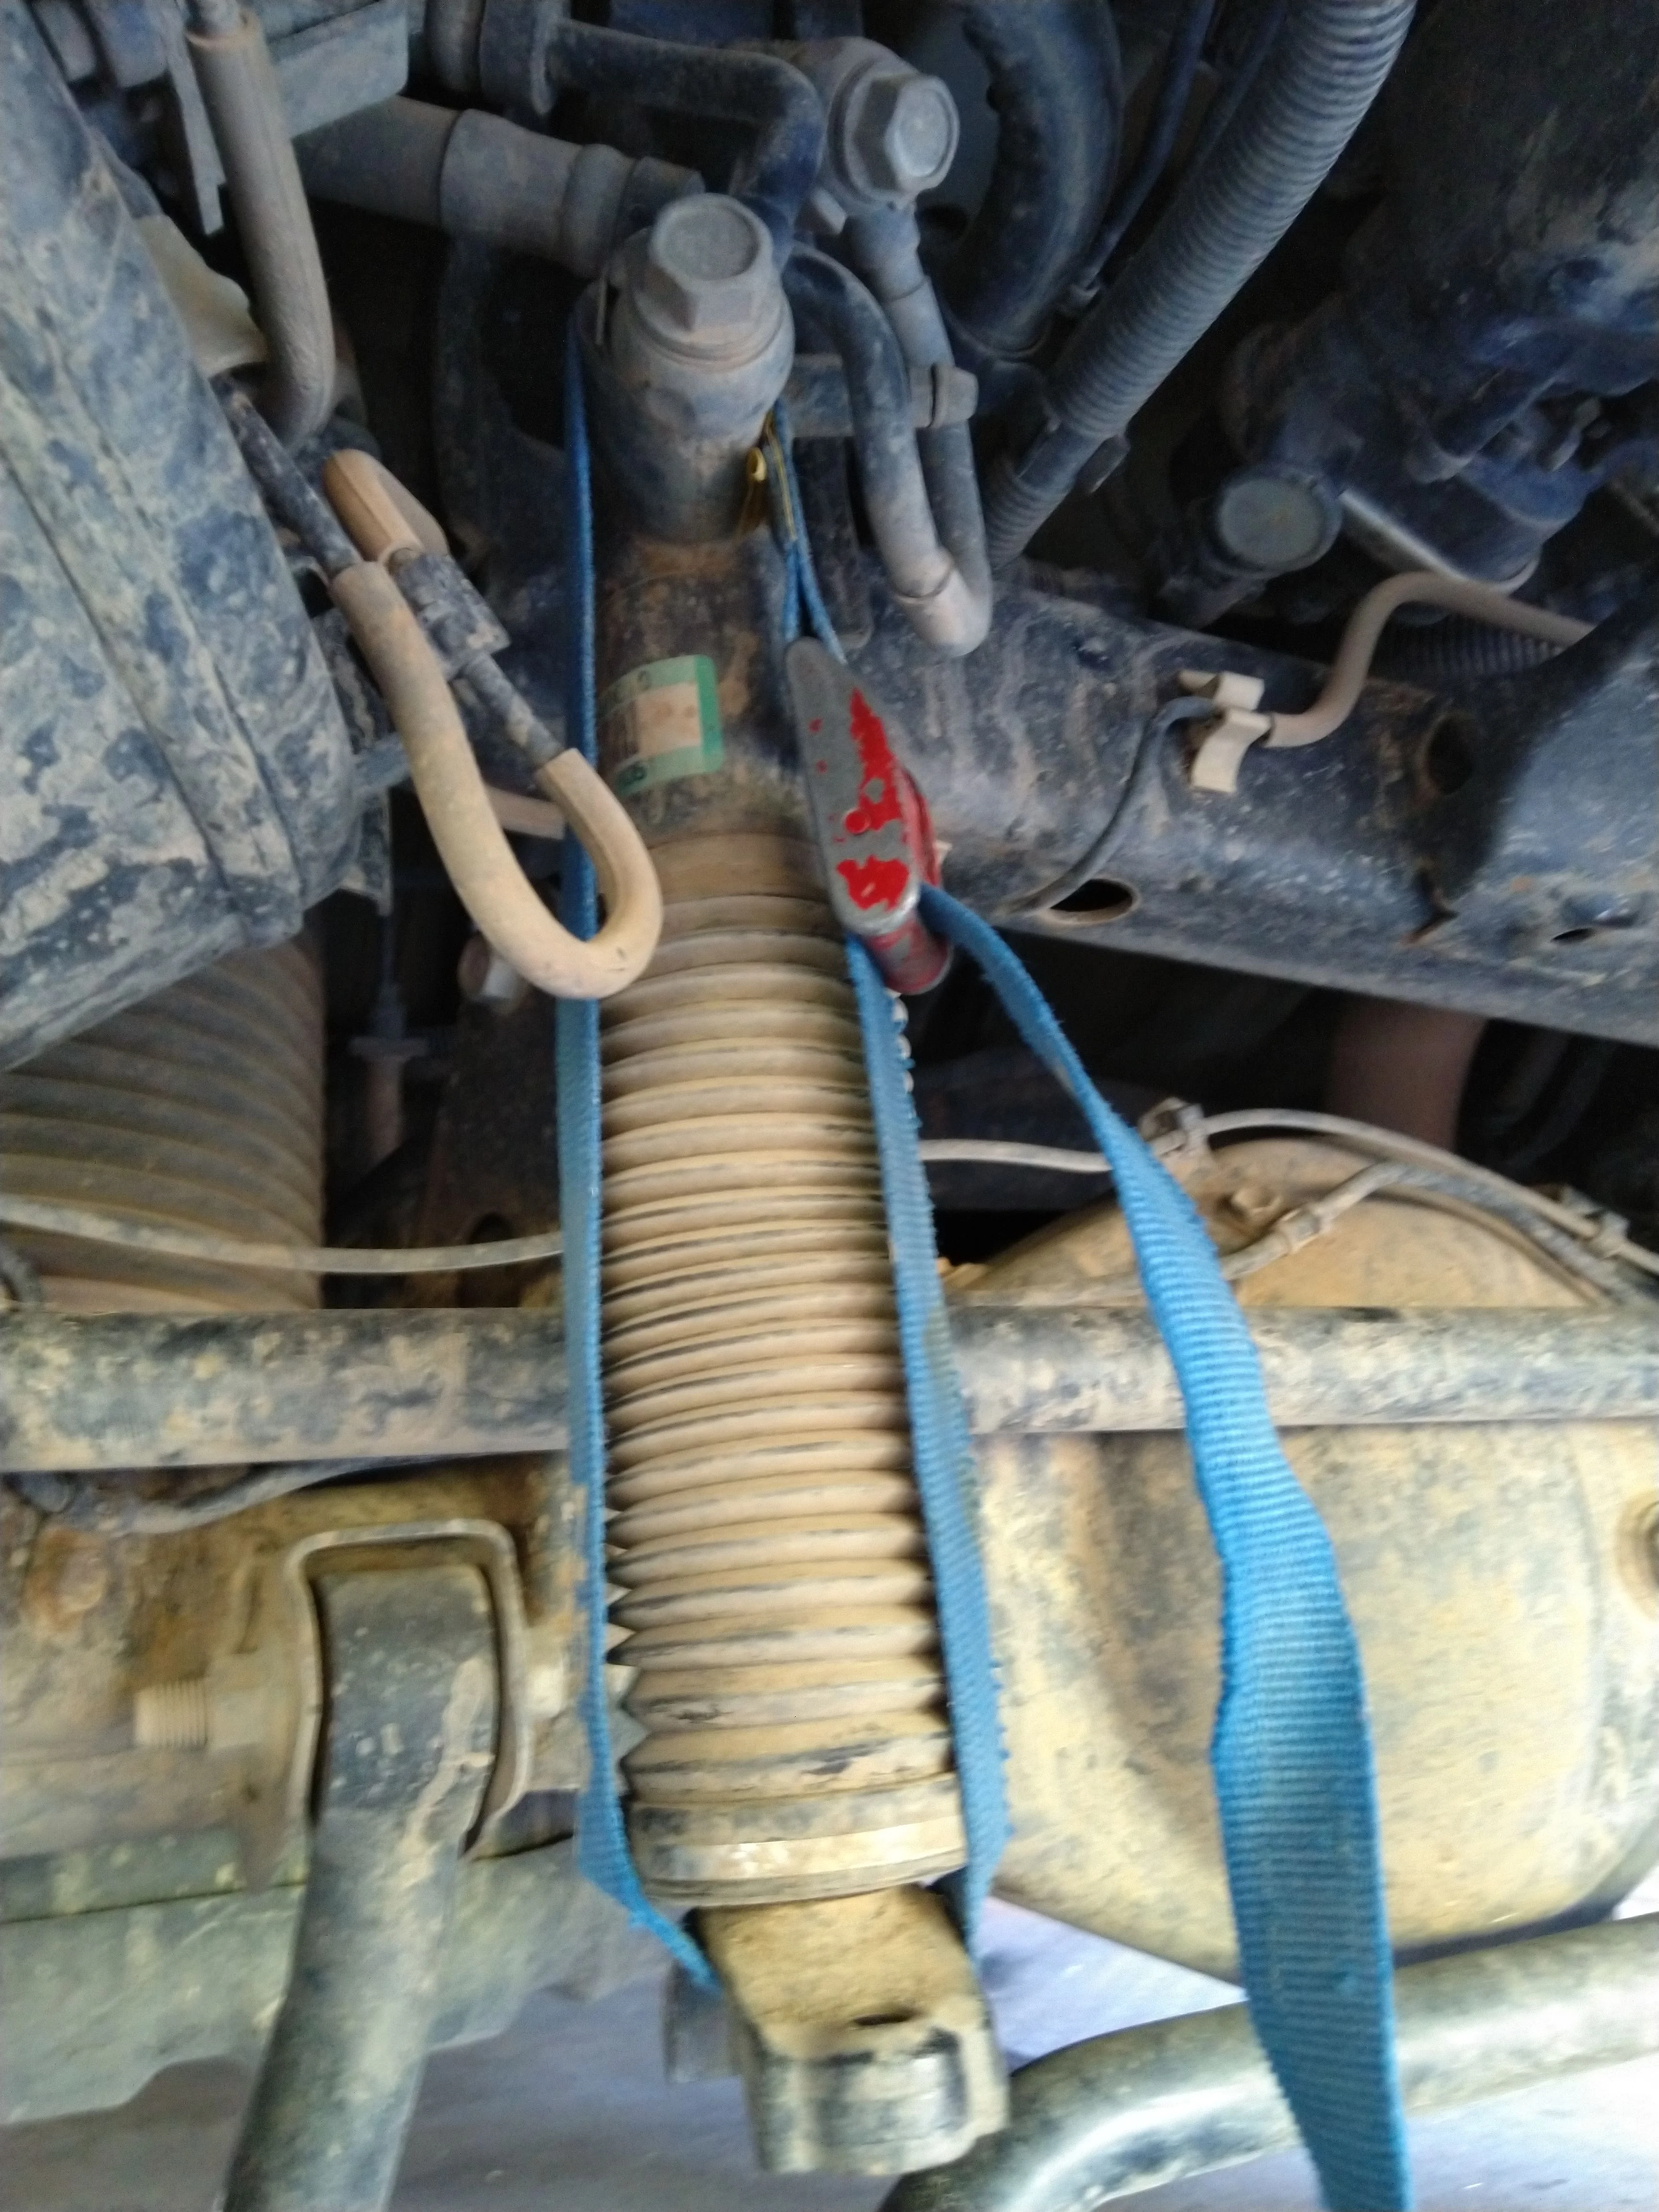
I scuffed and rattle-canned the SB where the paint had been rubbed off.
I supported the sway bar with a floor jack and wrangled a cam-strap into the KDSS piston to keep it compressed so I could lower the sway bar to prep and paint it and fit the new bushings on after the bar dried.
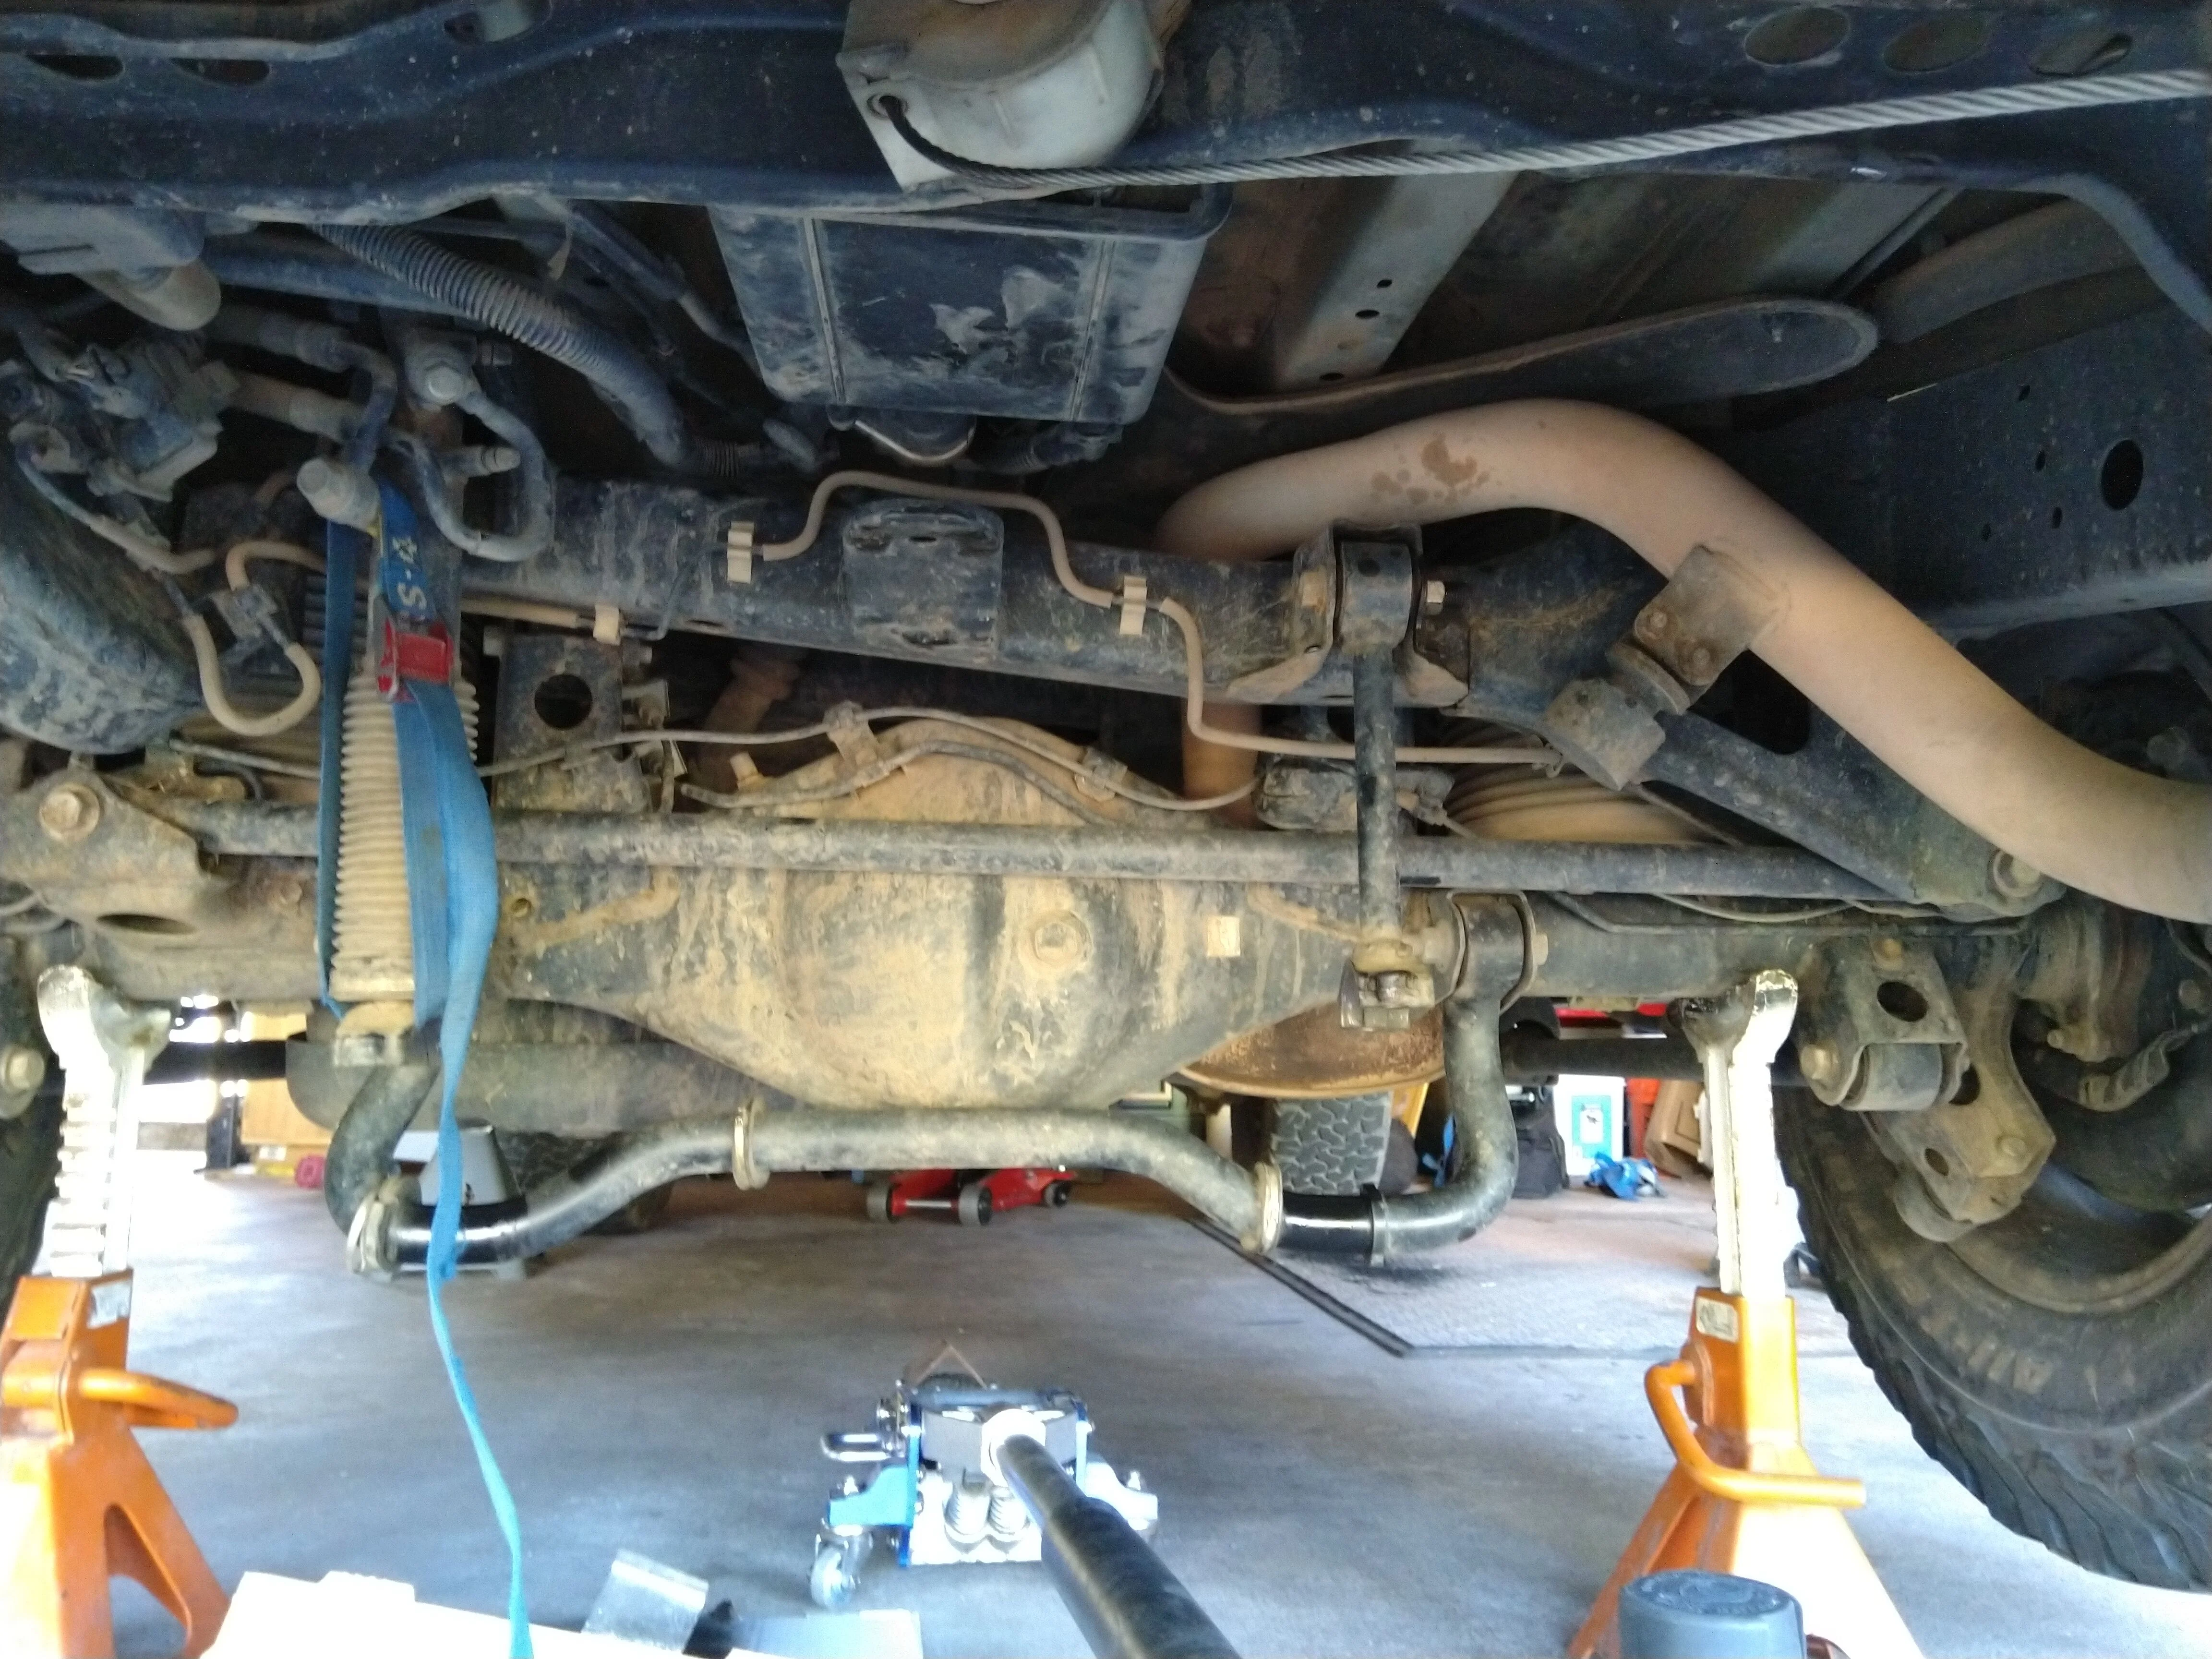
With the new bushings in place, I repositioned the lateral keeper bushings. I had to replace one of the metal wire ties on the driver outer, but otherwise I was able to keep the rest and just slide them out of the way then back into place.
They Were THRASHED!!!! I'd had the 'yota dealer do them 3 years ago when I noticed a rear clunk upon purchase in 2016.
I suppose them Febest ones just aren't quite like OE rubber, especially when now using the articulation of the suspension.
You can see how the 265x70 17 BFG AT/KO2 LTE has rubbed the KDSS RSB brackets some.
Removal takes an 8mm allen key
I think the flaying of the bushing may be more an artifact of how they've failed than potential spare tire contact with the sway bar's movement. It looks like the bushings just grenaded at the top of the bar...

The passenger side KDSS arm has mobility in the fixed point as the fulcrum for the KDSS arm's movement. Ergo, it's not pivoting on the passenger side bushing, that stays rigidly clamped on the RSB

I scuffed and rattle-canned the SB where the paint had been rubbed off.
I supported the sway bar with a floor jack and wrangled a cam-strap into the KDSS piston to keep it compressed so I could lower the sway bar to prep and paint it and fit the new bushings on after the bar dried.
With the new bushings in place, I repositioned the lateral keeper bushings. I had to replace one of the metal wire ties on the driver outer, but otherwise I was able to keep the rest and just slide them out of the way then back into place.
Last edited:
- Thread starter
- #356
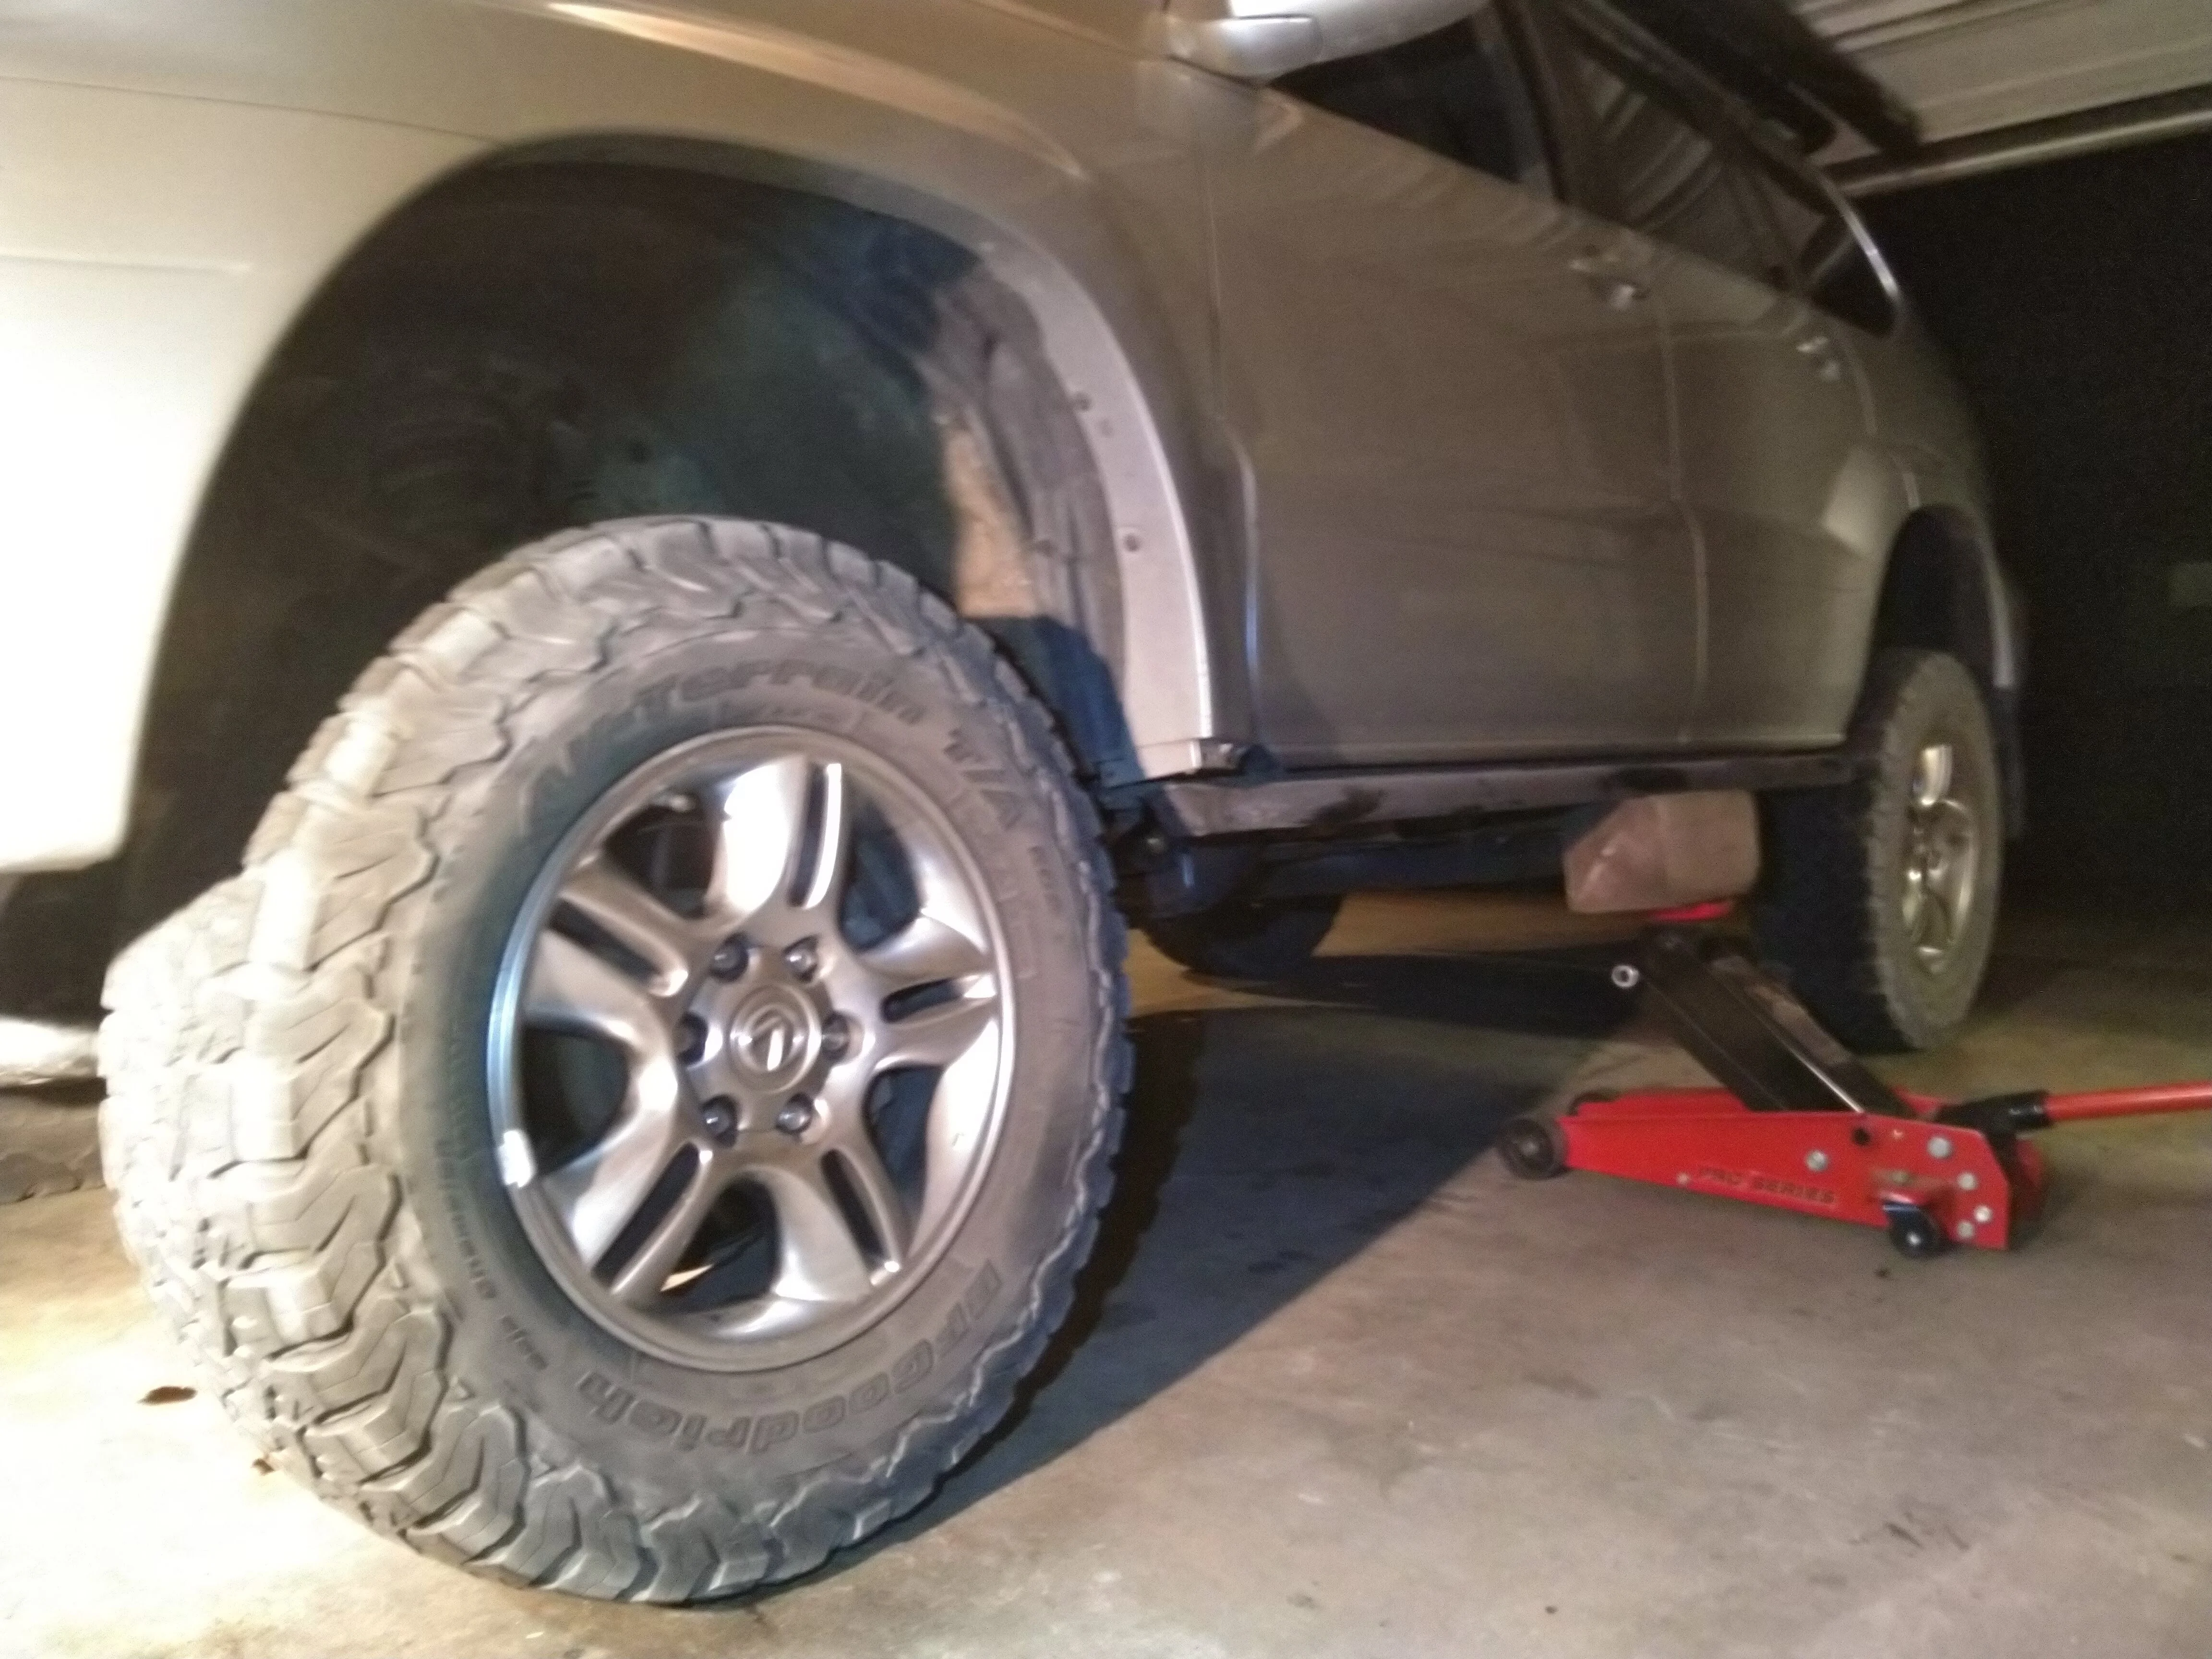
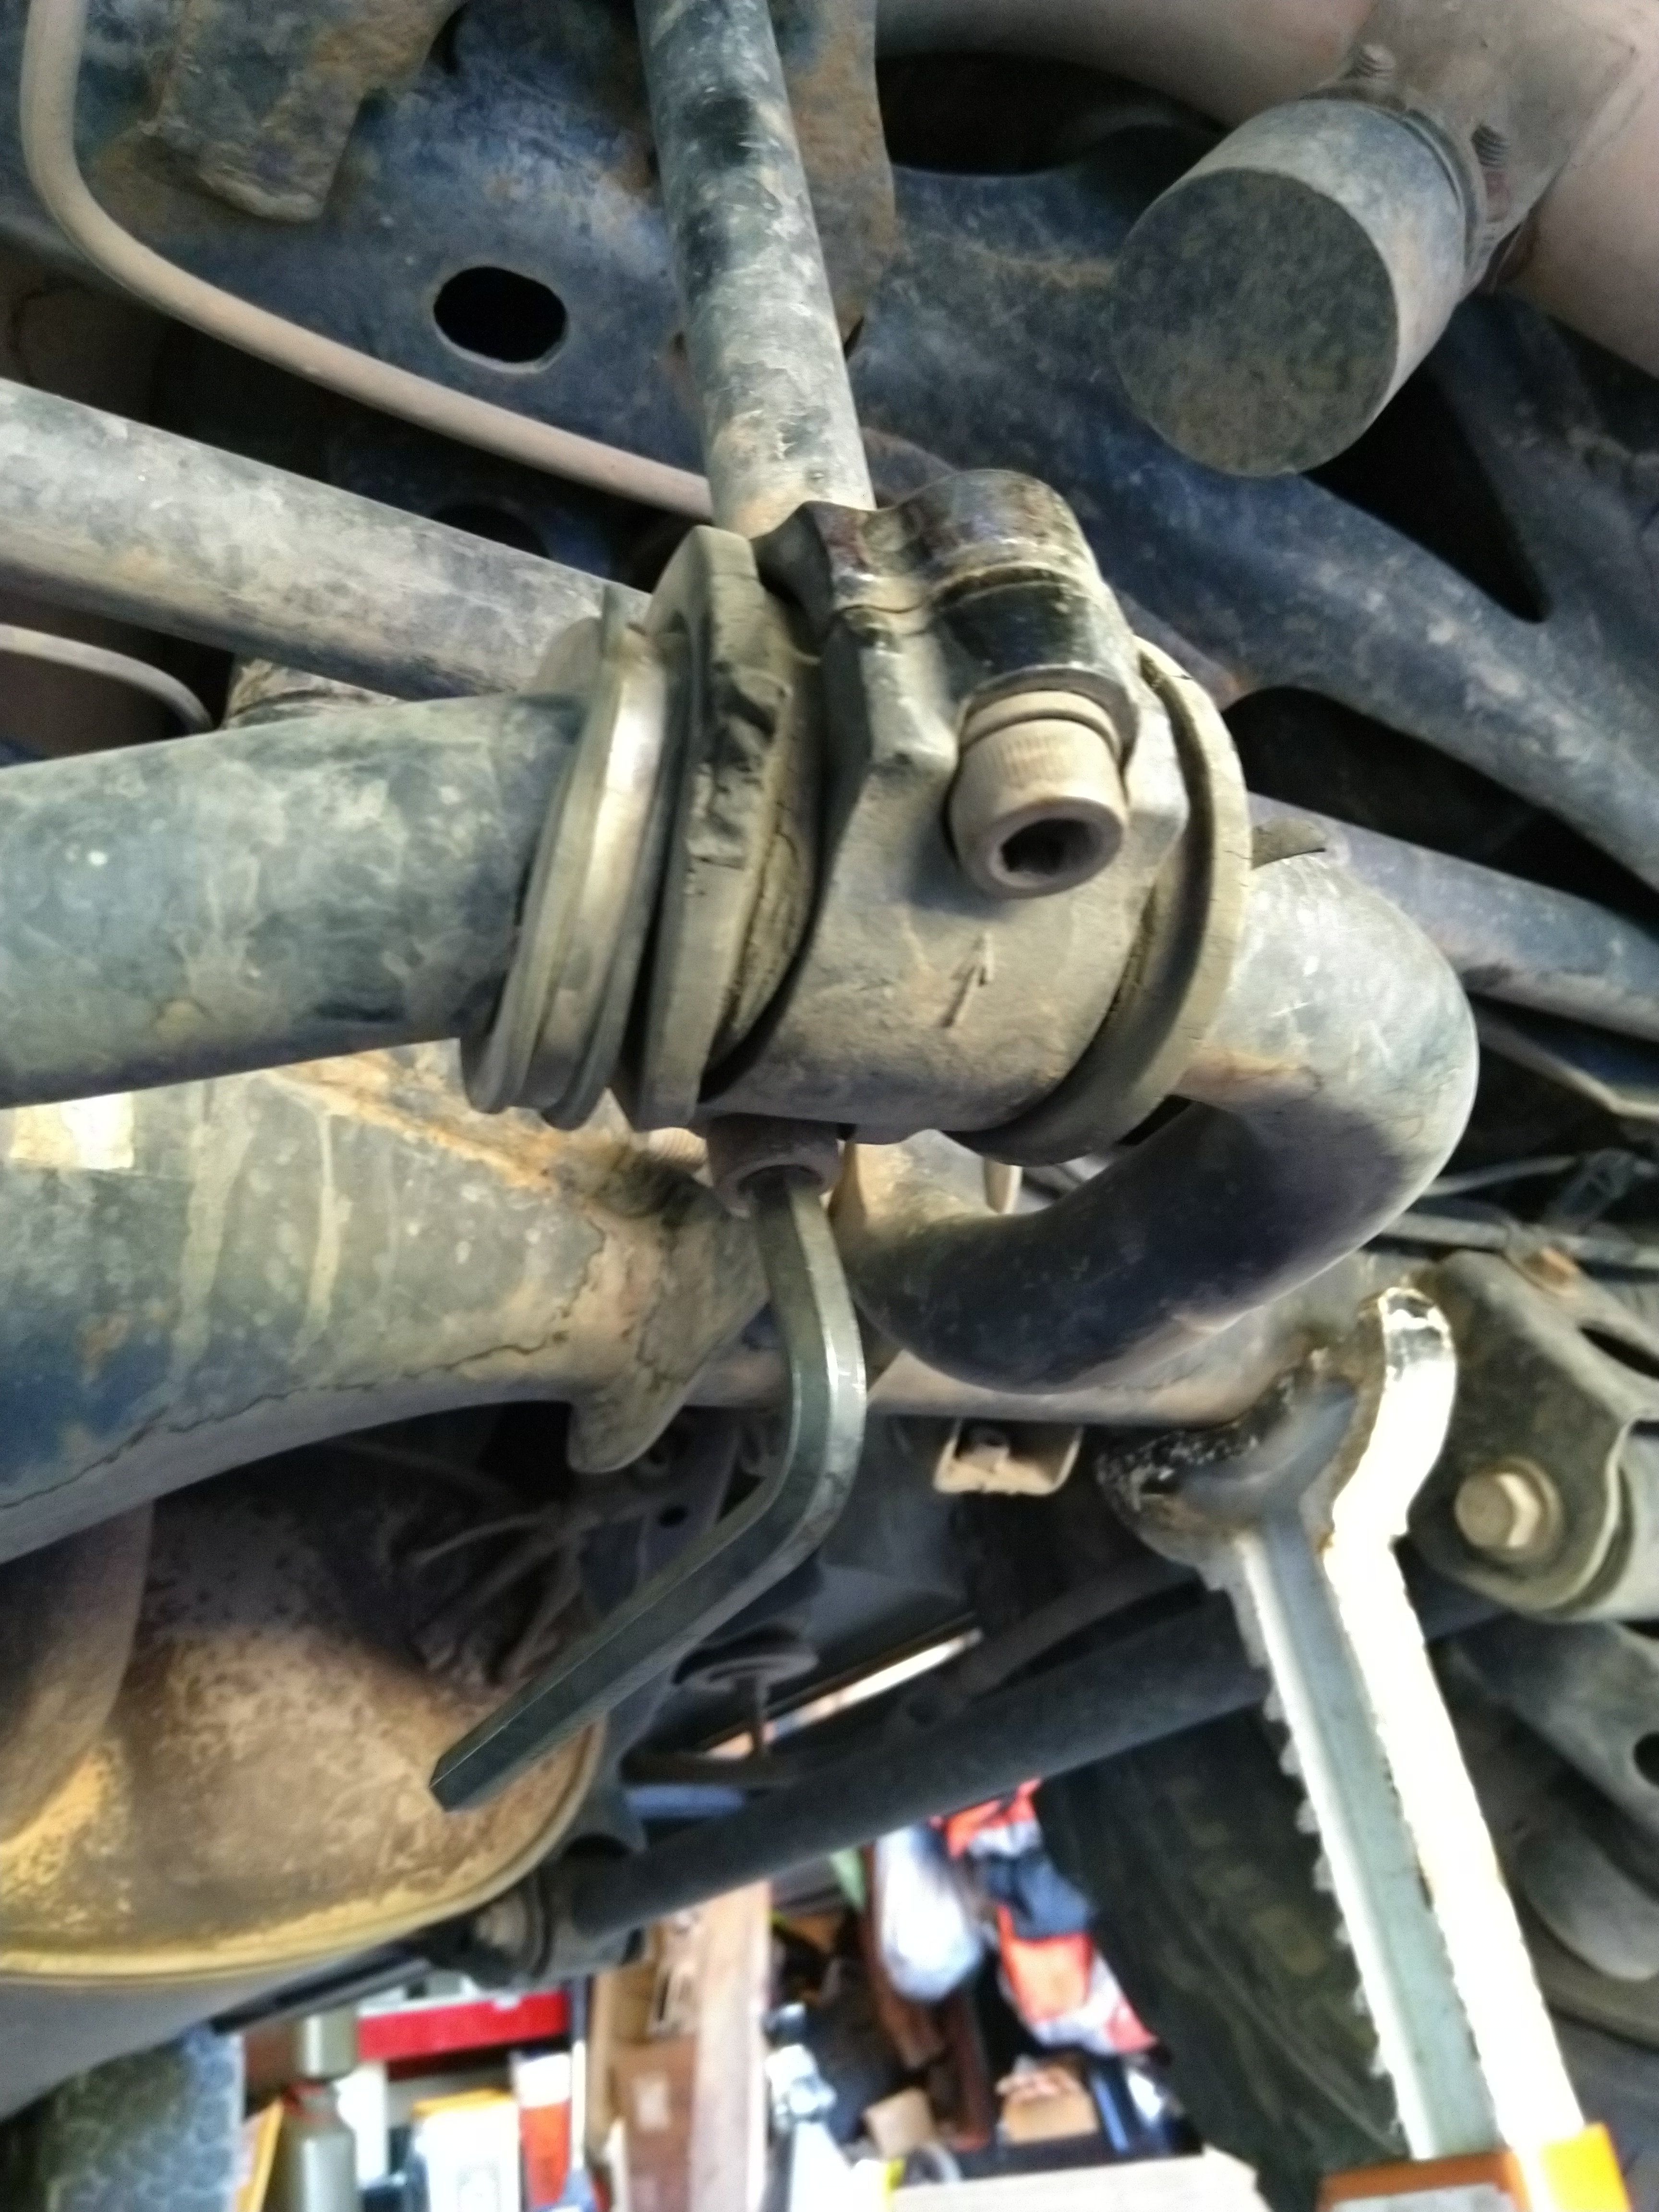
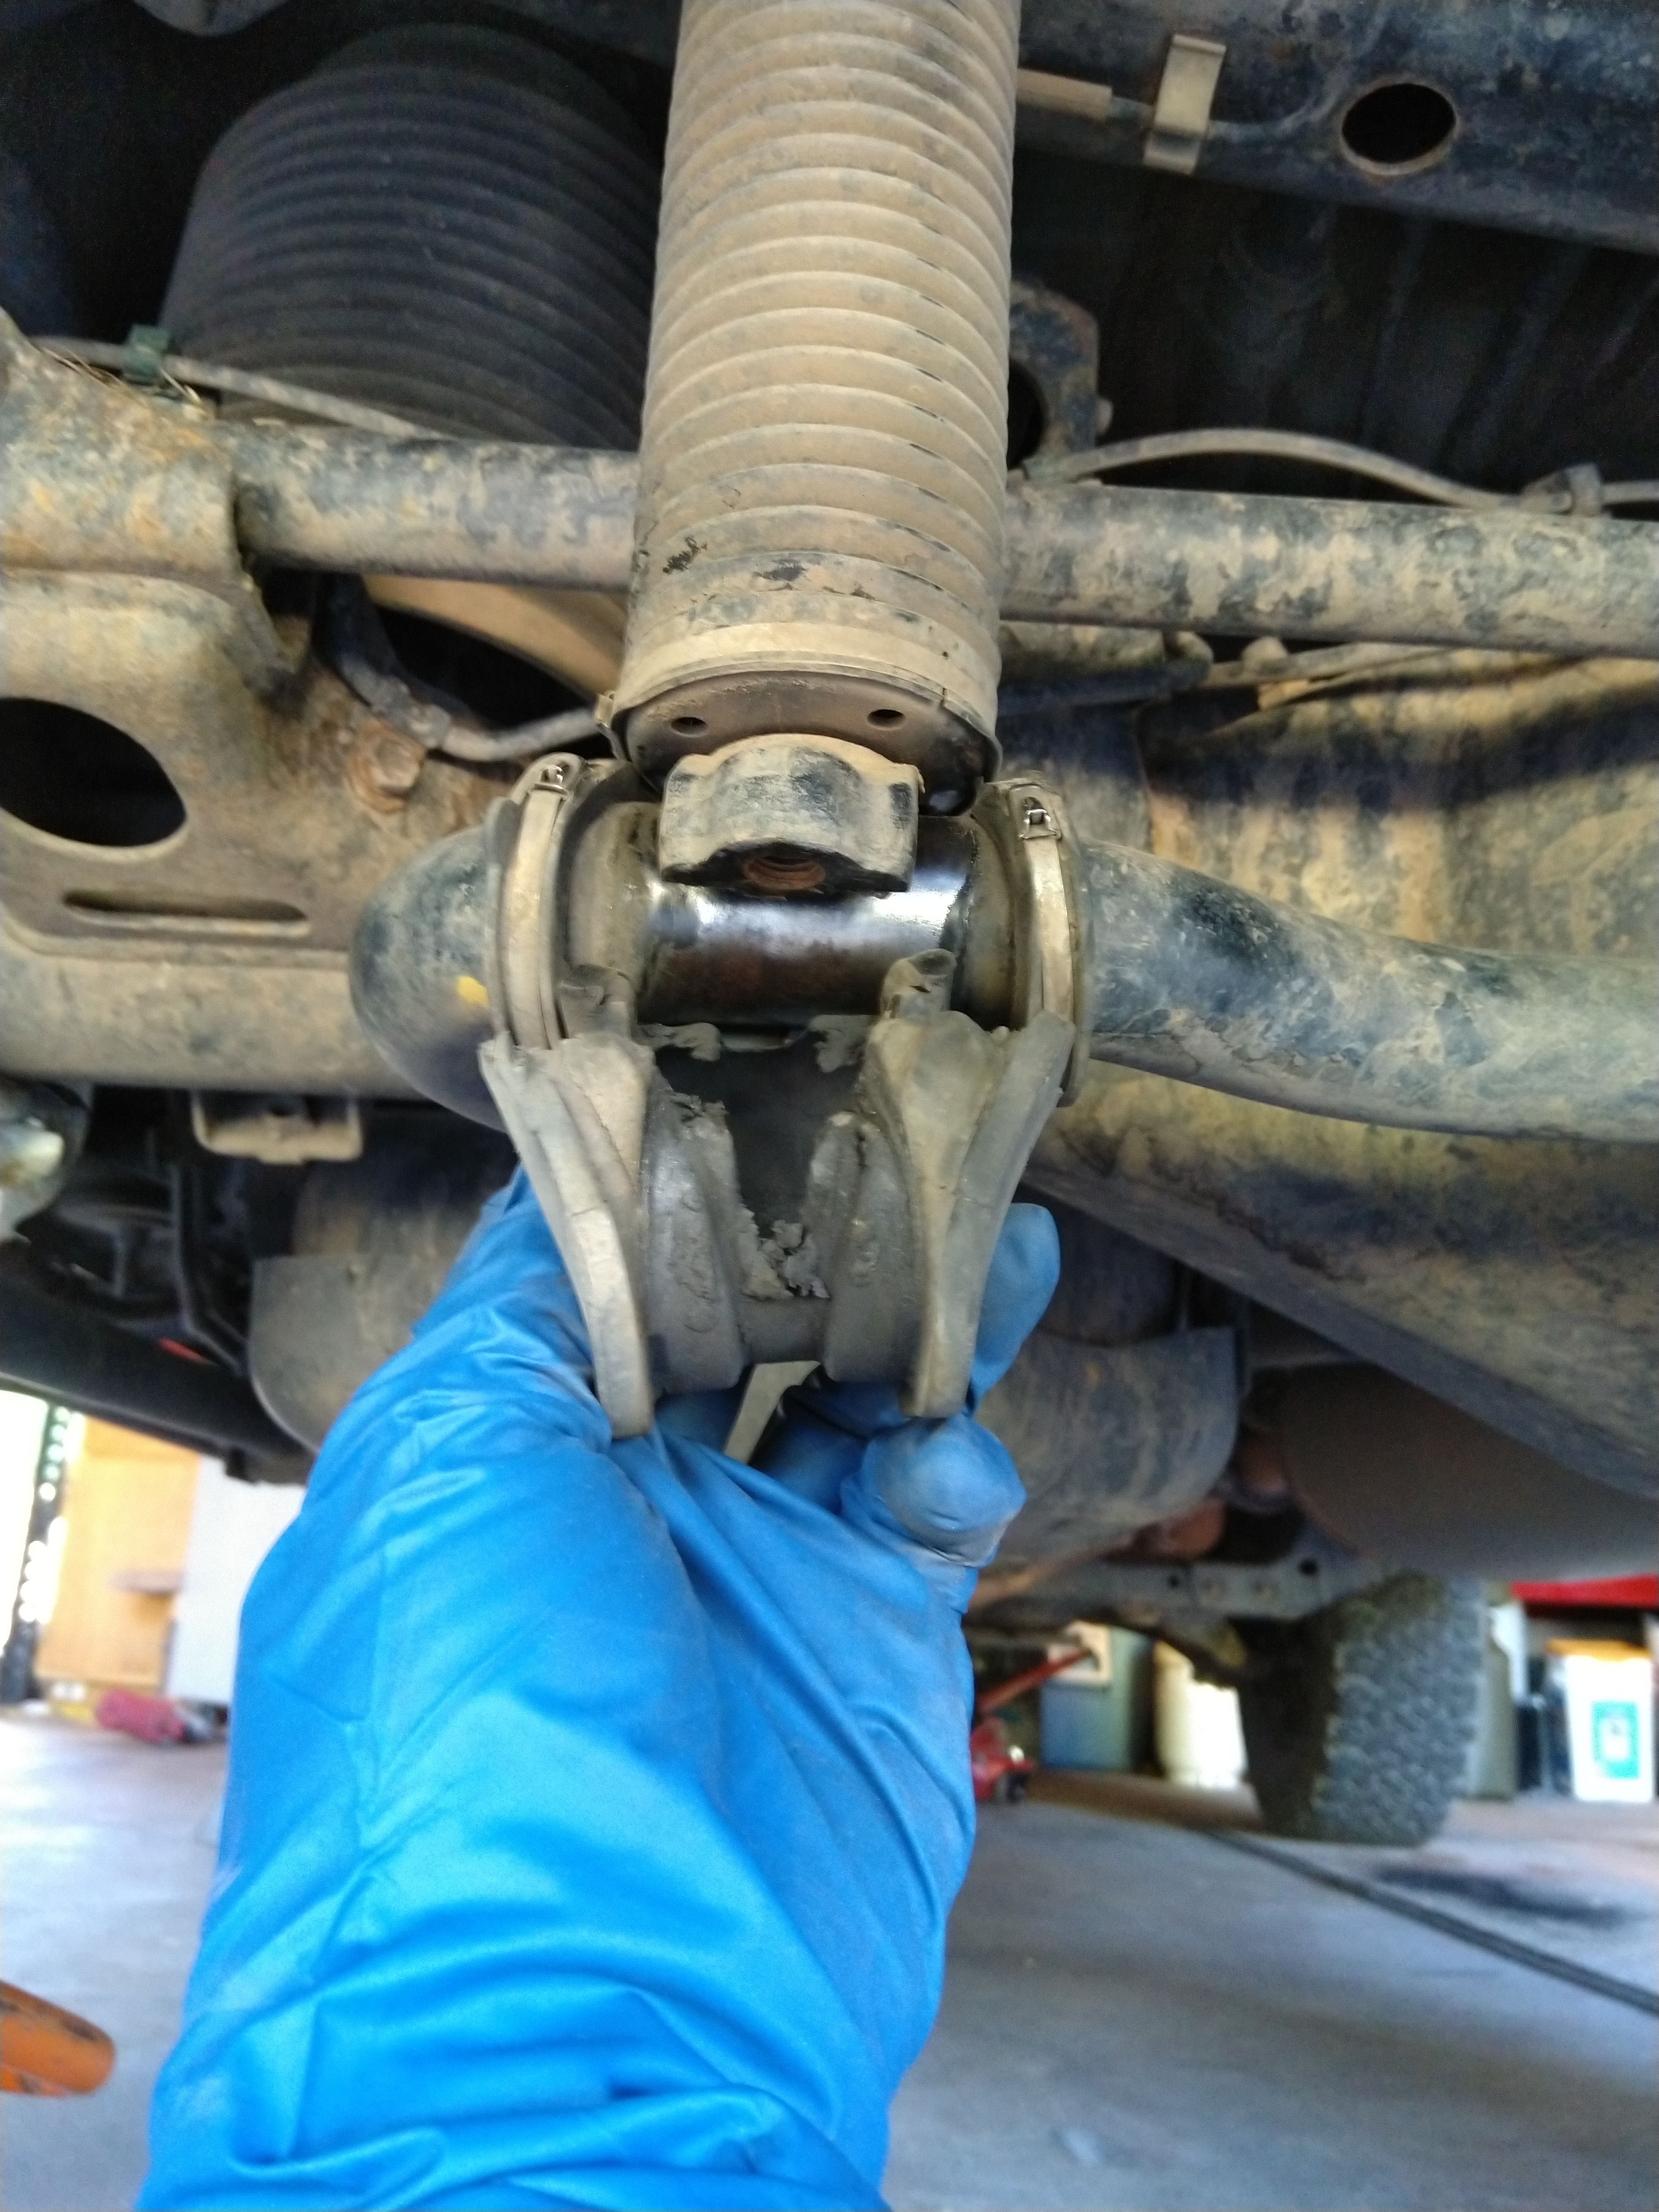
30-minite wrenching!
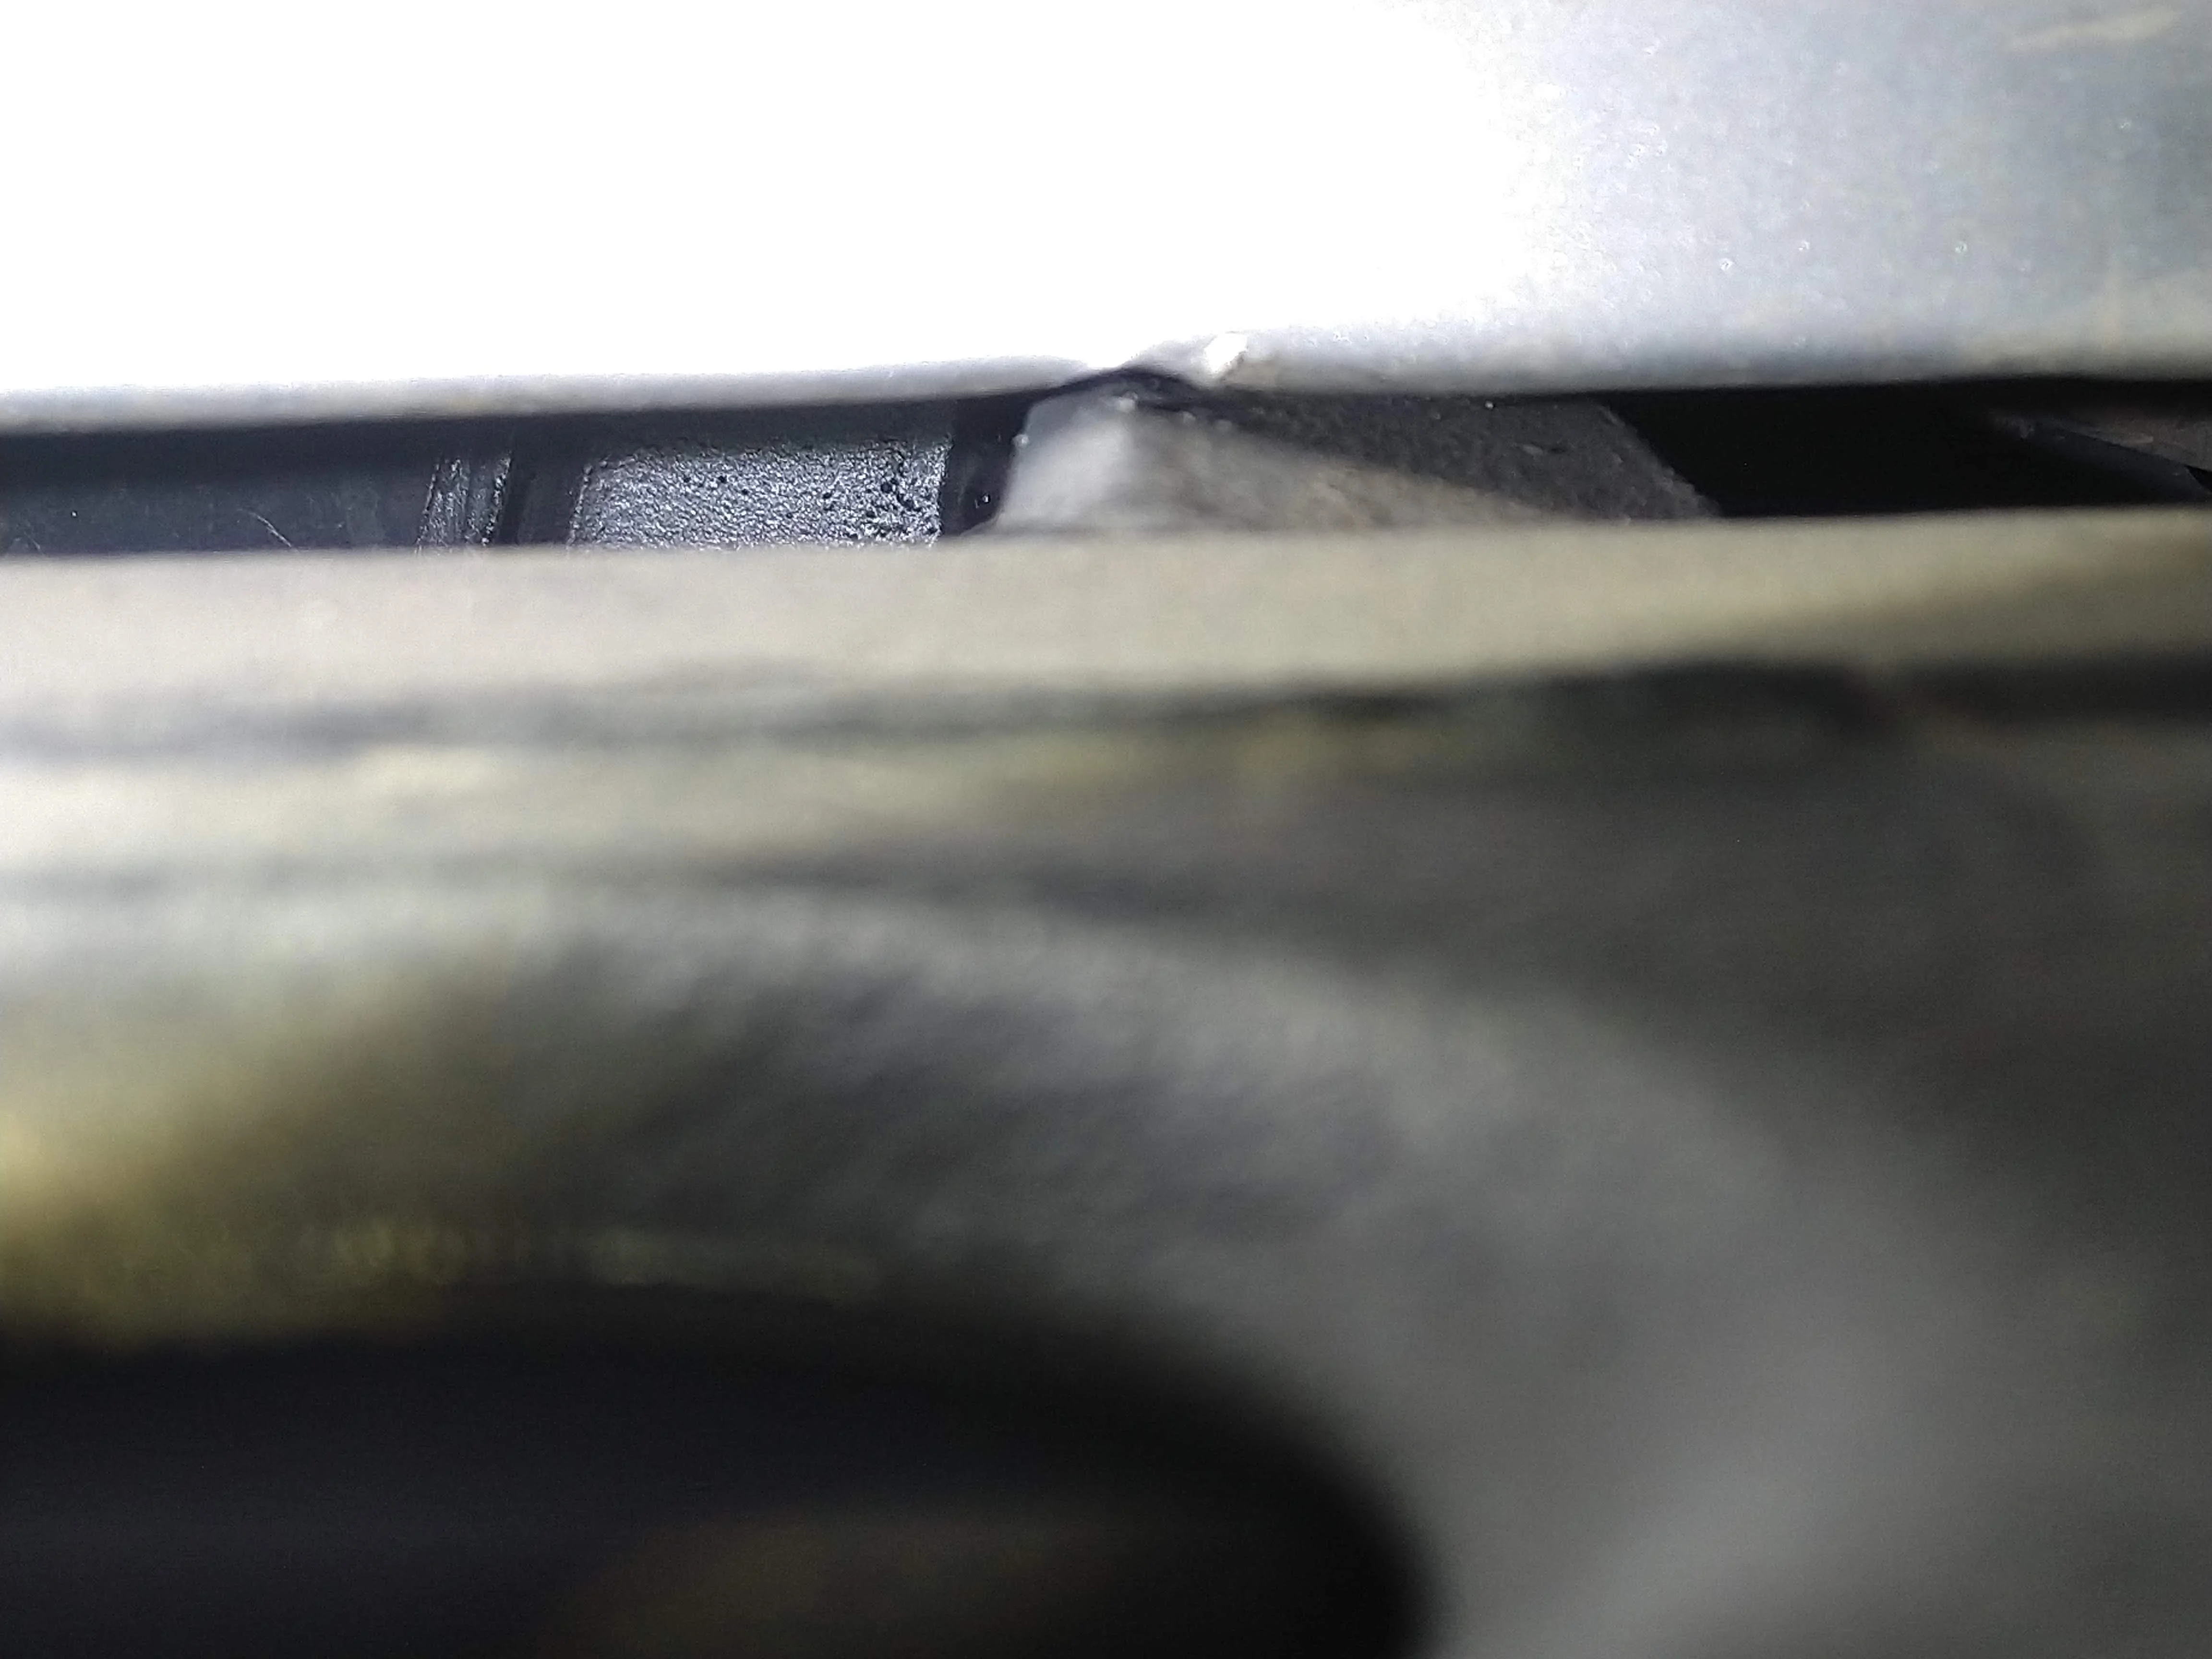
Loosened driver slider bolts, pried the KDSS lines down a scosh so they wouldn't be pressing against the slider leg.
Then I pried the slider away from the body and tightened it back up. I think I'm about 0.25" from leg to pinch seam on both legs now.
Rear:
Front:
Loosened driver slider bolts, pried the KDSS lines down a scosh so they wouldn't be pressing against the slider leg.
Then I pried the slider away from the body and tightened it back up. I think I'm about 0.25" from leg to pinch seam on both legs now.
Rear:
Front:

Sliders looking good. Always appreciate your meticulousness in detail.
- Thread starter
- #359
Used them too.Sliders looking good. Always appreciate your meticulousness in detail.
Legit hits and a couple self-fulfilling drags.

Similar threads
Users who are viewing this thread
Total: 3 (members: 0, guests: 3)