Builds Crusty - 1976 FJ40 (1 Viewer)

This site may earn a commission from merchant affiliate
links, including eBay, Amazon, Skimlinks, and others.

Joined
Jul 1, 2015
Threads
47
Messages
1,295
Location
Canton, GA
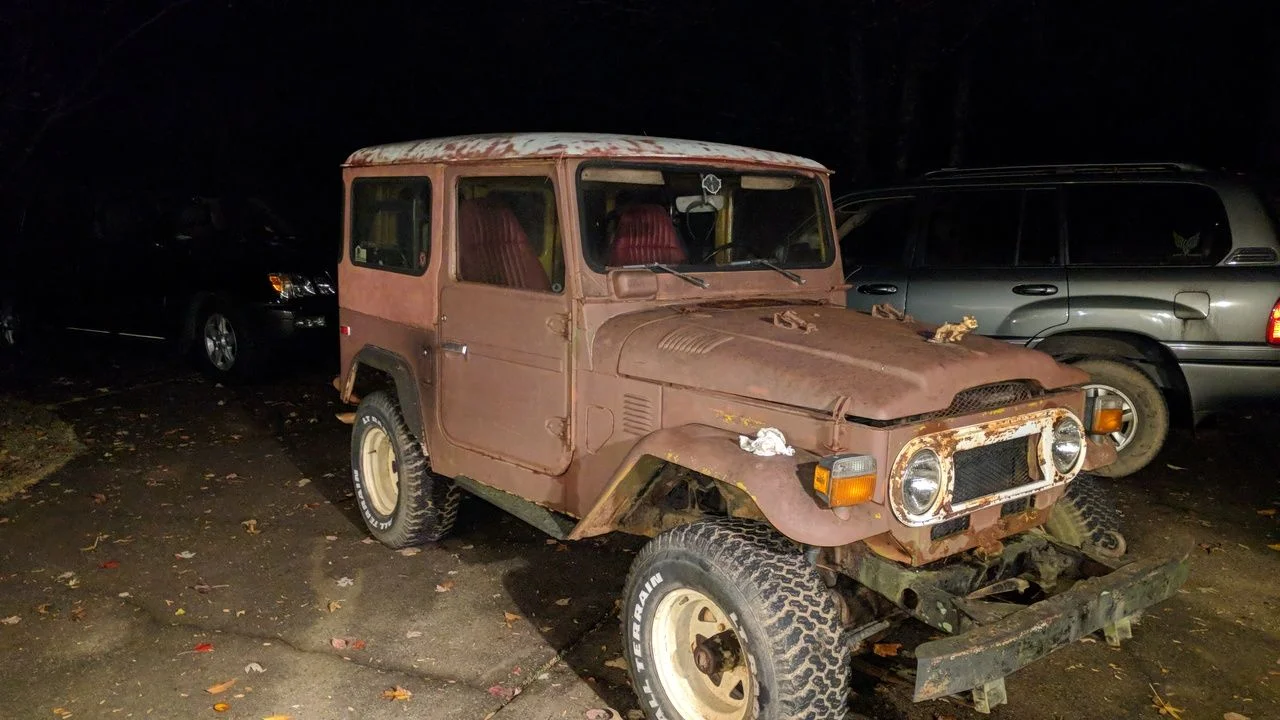
I recently purchased my first 40! It's spent the past 20 years in south Georgia as a boat slip and hunting truck. It hasn't run in awhile, I was a little apprehensive and uneasy loading a non-running truck on the trailer. It's a little rough around the edges and will probably stay that way.

At some point the PO rattle can primed over the yellow, he was also a UGA enthusiast:

What appears to be the original spare, date code 016, would love to get some stock wheels and some ko2's at some point:
I haven't found the date code on the 31's, but they're probably pushing 20yrs old now.

Some of the crusty goodness:

I happened to have a few 1976 GA tags in the garage and added one, I will register it with the tag eventually:

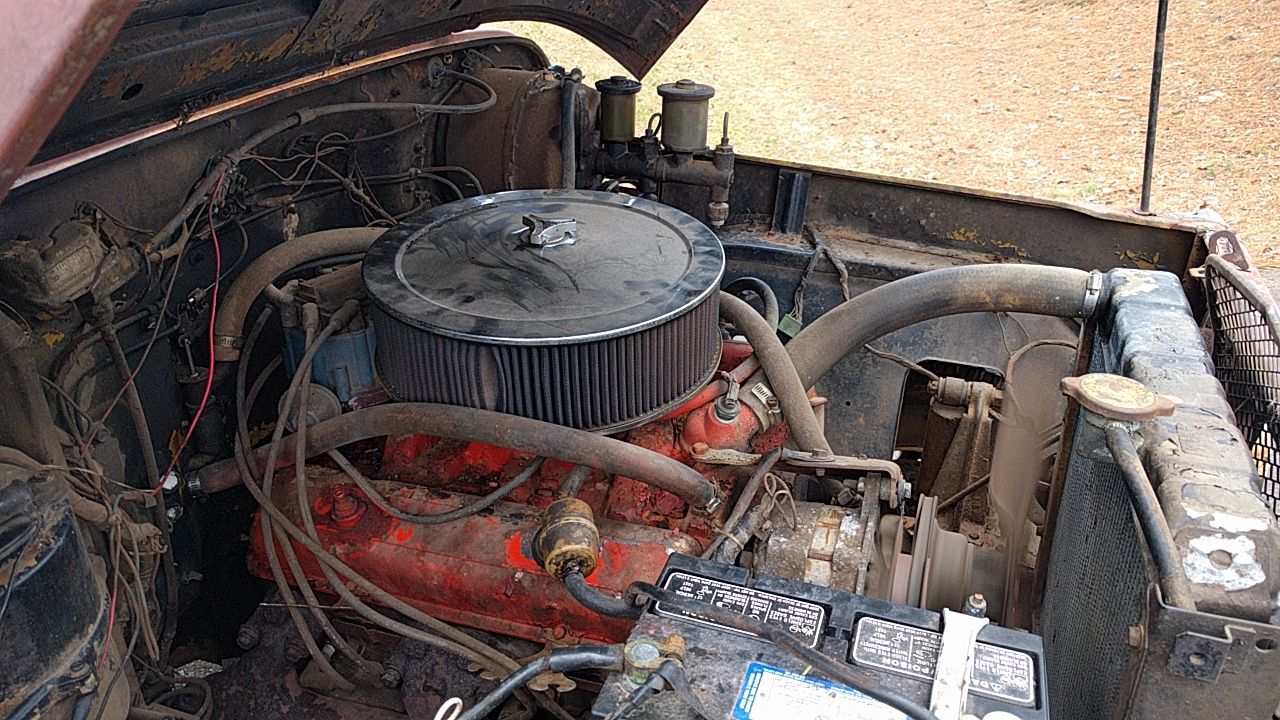
The SBC, a new cheapo mechanical fuel pump and we were back in business:


The transmission shifts all four forward and reverse, 2 wheel, 4 wheel high and low are all operational!

I attempted some rattle can paint removal via can of cheap oven cleaner, it may work with the real stuff, hoping to get to see the factory finish:

The interior needs some attention, some jeep seats were thrown in at some point, the jump seats aren't in great shape, will need some welding at some point.
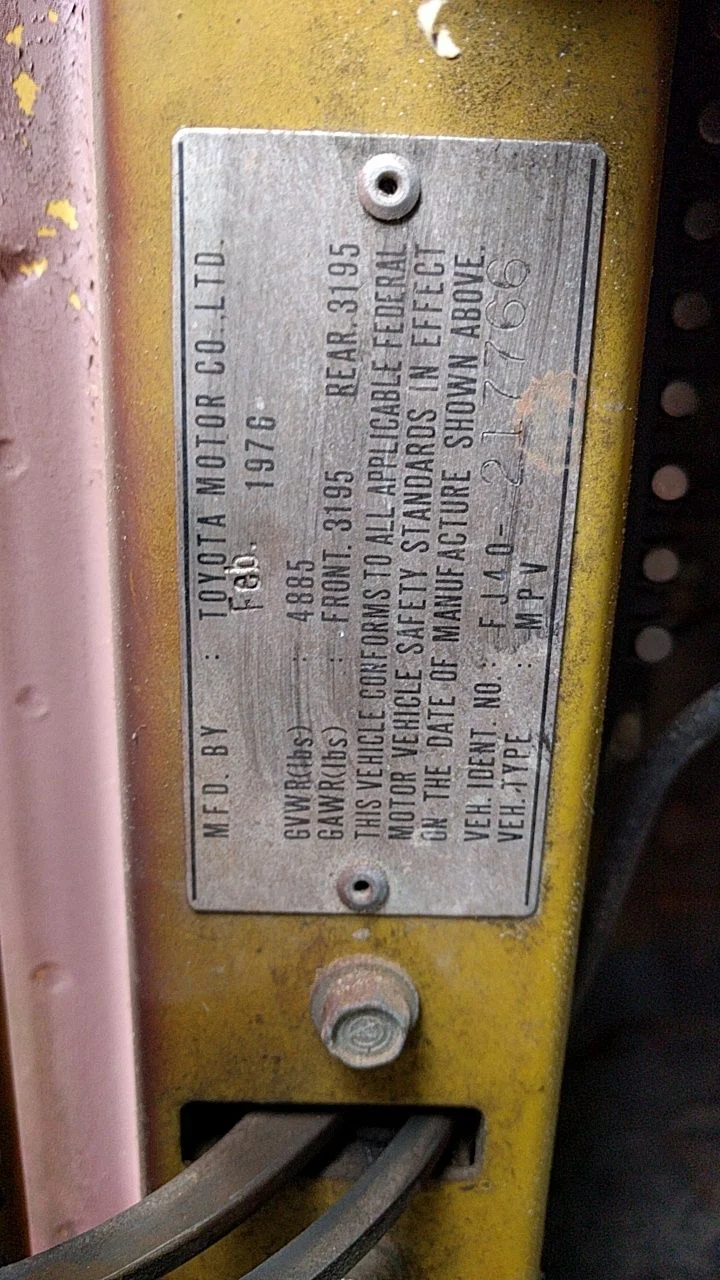
Built in Feb 76:

I'm hoping to spend some time with my girls working on it. I'm slow and have a few 100's that need attention too.
 
Looks solid! There is some great info on here from the patina crowd on safely removing old spray paint, she might clean up better than you imagine!
 
Try acetone on the paint. Be upwind. Wear dishwashing gloves, not thin nitrile. Cover the acetone-wet paint with aluminum foil sheet to slow evaporation. Use worn-out, or soft, Scotchbrite.
 
A good power washer may remove a lot of that spray paint.
 
Thanks guys. I hadn't tried pressure washing yet. I have a small/cheap electric, so not exactly what I would consider a "good" power washer, but I'll give it a shot. Hopefully it's good enough to get rid of the mud dauber tunnels covering almost the entire under carriage :)

I tried non-acetone nail polish remover first, because that's what was in the house, it didn't do anything. I moved on to acetone from the dollar store and got some red transfer to my rag, but very little. It evaporated so quickly, but I'm nervous to cover it, I'd like to keep an eye on it.

I picked up some oven cleaner with lye in it on the same trip to the dollar store. It softened up the red quite a bit, but all I was using was a rag.

After pressure washing, I'll start my testing process over with a scotchbrite pad.
 
Thanks guys. I hadn't tried pressure washing yet. I have a small/cheap electric, so not exactly what I would consider a "good" power washer, but I'll give it a shot. Hopefully it's good enough to get rid of the mud dauber tunnels covering almost the entire under carriage :)

.

I had previously suggested pressure washing to another member here and it worked fairly well plus you're not messing around with chemical removers. ed
 
It's been raining all day, I'm going to need to address weatherstripping sooner than later, I'm seeing water inside.
 
Look at the epoxy seal between the fiberglass top and the drip rail. Do you have a couple of tubes connected to the cowl vent drains that go thru the cab to the bellhousing? That is a notorious offender because it destroys floorboards. Rain gets thru Cruiser hood vents. You may want to use a PTFE wrapped bolt as a seal on the windshield washer nozzle to keep the distributor and starter dry.
 
Are these tires from 1980?
Edit: I was originally thinking 2280 was the date code, but after some additional reading, I think 076 is the correct date code, similar to the oldie spare. This is probably Feb 1996, as they used the last digit as the year in the decade through the 90's.
 
Last edited:
5/8" heater hose from the auto store will fit on the cowl drain, IIRC. A p.o. used some approximately 5/8" O.D. PCV hose to go into the OEM tube and grommet at the floor on my rig, so, I just connected the new heater hose to the deteriorated end of that. This might work on your driver's side after you clear out the compost.
 
I just picked up some clear 3/4 from the hardware store, it's tight. Any advice on loosening it up? A little heat?
 
Last edited:
I feel like an idiot, I couldn't get the drivers side drain on there tonight and I didn't even get the passenger side apart. Do I need to pull the heat apart to get to it?
 
Don't feel bad, anything behind the dash, or the cab side of the firewall is really challenging on any vehicle. My heater box is in there when I did it, but I can't remember if the air ducts were in place or not.
 

Users who are viewing this thread

Back
Top Bottom