Bump for a great write up! Fixed my issue, thank you!!
Navigation
Install the app
How to install the app on iOS
Follow along with the video below to see how to install our site as a web app on your home screen.
Note: This feature may not be available in some browsers.
More options
You are using an out of date browser. It may not display this or other websites correctly.
You should upgrade or use an alternative browser.
You should upgrade or use an alternative browser.
Cabin Filter Change and the Recirculation Flap Issues FIXED (1 Viewer)
- Thread starter ttrmike
- Start date
This site may earn a commission from merchant affiliate
links, including eBay, Amazon, Skimlinks, and others.
More options
Who Replied?Thank you for the very thorough write-up. My issue was the recirculation flap was stuck down and would not open when switching to recirc mode.
I too found that the linkage wasn't connected. A minor adjustment to put it and and presto, the recirc flap is now functional.
I too found that the linkage wasn't connected. A minor adjustment to put it and and presto, the recirc flap is now functional.
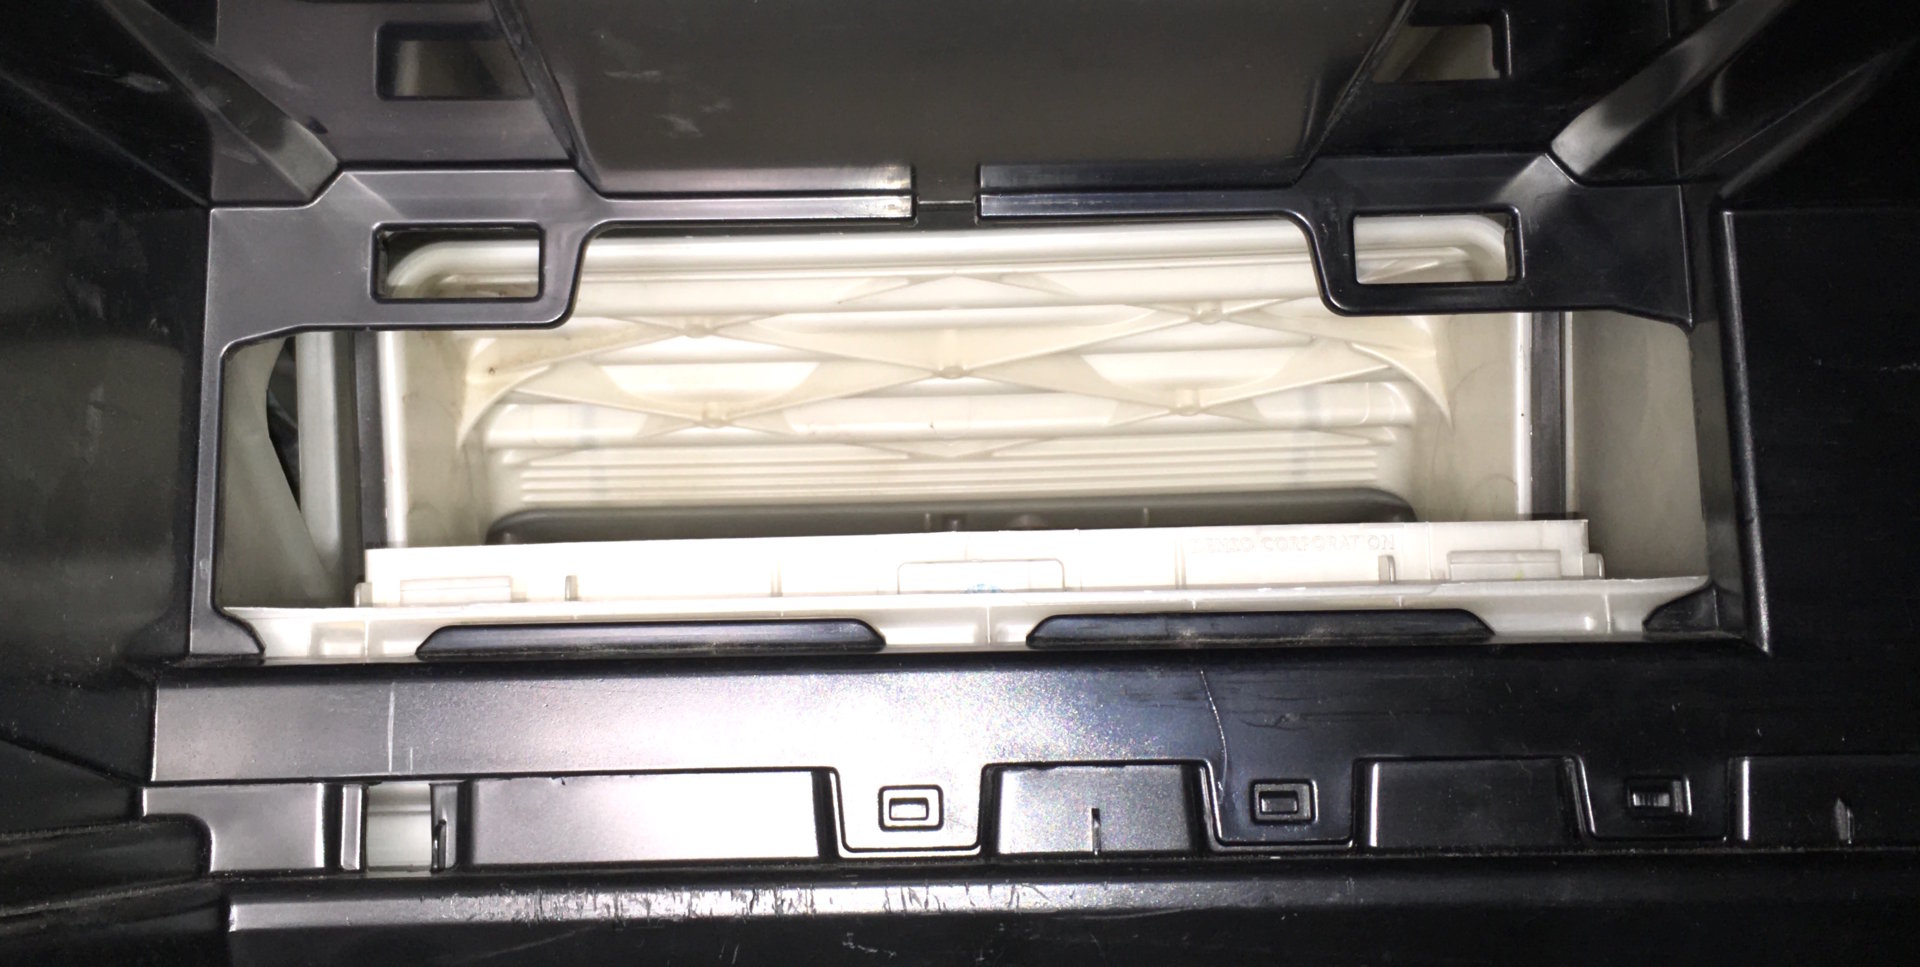
Thanks MUCH for this writeup. My new-to-me, one-owner, dealer-serviced 200 had the square drive arm pop out from the fresh / recirc door. Sort of disappointing dealer techs would have jammed the door and not fixed it. I guess no guarantee a tech didn't, but toyota.com shows incremental 30k mileage records throughout its life.
The photos helped me gain access and re-seat the square drive pin.
The door is now working properly.
One thing off of my list of things to do.
I also spent about $60 @ toyotapartsdeal.com on new plastic door handle pulls and driver's side window regulator trim panel. The prior were quite thrashed.
Doug
 to
to  to the ham-fisted mechanic that changed my cabin air filter last time. Haha! As others have posted, the link arm had just popped off the door and was super easy to pop back in and now I'm back in business. Thanks!
Tackled this today (again, awesome writeup). Unfortunately in my case there is no recourse. The female socket molded into the flap that interfaces with the drive lever is shattered into many pieces, those pieces now long gone in the bowels of the dash. So I can't even peice it together. Guess it's permanently on fresh air mode. Which seems fine, anyway. We don't live in a desert or dust storms so I'm guessing we'll be fine. AC is already like a meat locker in this thing at all temps in fresh air mode.
As a bonus, the idiot who last removed my glove box stripped out all 4 screws. These are essentially wood screws into plastic bungs and all 4 were stripped. Who are these guys working at 'Yota dealers?
As a bonus, the idiot who last removed my glove box stripped out all 4 screws. These are essentially wood screws into plastic bungs and all 4 were stripped. Who are these guys working at 'Yota dealers?
80 to 100 degrees, humid and allergens abound here in Austin except for a few weeks in the winter. Taking it off recirculate is not an issue ") Great write up and curiosity will probably drive me to see what it looks like off recirculate.
Great write up and curiosity will probably drive me to see what it looks like off recirculate.
Great write up and curiosity will probably drive me to see what it looks like off recirculate.Has anyone run into an issue where the flap does function, traveling through about 90% of its range of motion, but doesn’t quite seal all the way closed?? In my case I think it’s drawing outside air when closed but isn’t creating a seal because it leaves about a half inch gap when in the closed position.
Any idea how to fix THAT one?? :/
Any idea how to fix THAT one?? :/
If you have TechStream go to Body Electrical / Air Conditioner / Utility / Servomotor Initialization. Run the initialization procedure. It only takes a minute. If it’s quite you can hear the servos moving around while they home.
The 2013 service manual (mine is a 2013, so that’s the year I’m familiar with) calls for this procedure every time power is lost or the battery is disconnected.
Your servo has possibly lost its zero. Or the linkage is broken or out of place. You need to pull the glovebox to peek at the servo and linkage that is mounted outside of the fan housing if you want to check on that. If the linkage and recirculating flap is working smoothly and with authority, the servo zero is probably off.
Get a copy of TechStream or take it to the dealer. It shouldn’t be too expensive.
This thread and
 forum.ih8mud.com
Should be in FAQ.
Maybe @Romer will consider adding them.
IMPORTANT: Check your HVAC recirculate door and answer Poll
This is REALLY important, it affects how well your system defogs in winter and cools in summer, and if a small amount of damage is caught early it could save you MANY hundreds of dollars. My door hinge is busted, probably by somebody who forced it open, not understanding how to correctly access...
forum.ih8mud.com
Should be in FAQ.
Maybe @Romer will consider adding them.
3: The inboard hinge pin is OK, but I cannot see any way to remove the door from the blower housing without taking the whole darned thing out of the dash. I have tried carefully prying on the interfering part (to the right of the leaf) and there is no way I can flex the parts enough to get the pin to clear.
It is possible with patience to get the door out of the assembly without removing the whole assembly (doing it by the book requires removing the dash). I did it. I couldn’t get enough flex either, so I took a fillet knife, heated it with a propane torch, and cut/melted away some of the blower housing and made some clearance.

After getting the flap out I glued and safety wired it back together.
The glue I used came from 3M. Through work I know a 3M adhesives application engineer. He came over on his lunch break and walked me through the two products he’d recommend and then helped me glue it all back together. These are the products he recommended. He and I used the 8010, but he said the other two products used together should be fine too. Epoxy and JB weld won’t stick to the low surface energy plastic Toyota used for this part. These products will. This type of plastic is also easily weldable if that is appealing.

Getting the door back in was the hardest part. Eventually I folded in the seal and just pushed the whole thing straight in the housing window. I tore the seal slightly. Some lube might have helped.
HTH, Ken.
bloc
SILVER Star
It is possible with patience to get the door out of the assembly without removing the whole assembly (doing it by the book requires removing the dash). I did it. I couldn’t get enough flex either, so I took a fillet knife, heated it with a propane torch, and cut/melted away some of the blower housing and made some clearance. View attachment 2064087
After getting the flap out I glued and safety wired it back together.
View attachment 2064095
The glue I used came from 3M. Through work I know a 3M adhesives application engineer. He came over on his lunch break and walked me through the two products he’d recommend and then helped me glue it all back together. These are the products he recommended. He and I used the 8010, but he said the other two products used together should be fine too. Epoxy and JB weld won’t stick to the low surface energy plastic Toyota used for this part. These products will. This type of plastic is also easily weldable if that is appealing.
View attachment 2064113
Getting the door back in was the hardest part. Eventually I folded in the seal and just pushed the whole thing straight in the housing window. I tore the seal slightly. Some lube might have helped.
HTH, Ken.
Does cutting up the housing like that allow air to bypass the filter?
Not that that fact would disqualify this from being a good option..
Does cutting up the housing like that allow air to bypass the filter?
It would, unless you do something about it. Glad you asked. I wondered if anyone would notice that I left that part off.
While I was working on the project I was planning on making a part to glue back in place of all of the little pieces I’d removed to gain the clearance. Once the door was back in place I realized the door itself was now in the way and would prevent most reconstruction possibilities. I thought for a moment, took a piece of nice quality duct tape, made a couple of strategic folds in it, and taped up the open space between the housing and the frame for the air filter. The air can’t bypass the filter now. The action of the fan and location of the tape leaves the tape in a suction position not a pressure position. If the tape was under pressure, I’d have a slight more concern. And the piece of duct tape is way too big to get drawn through the hole and into the fan, so suction isn’t a concern.
I’ll never let a tech in there again unsupervised, so the tape shouldn’t ever be a problem. I might have to replace it when I replace the filter element. Not a big deal. It’ll probably be my permanent solution.
HTH, Ken
Last edited:
The threads on this topic had me nervous. So I did this before my appointment this morning. Thanks for the heads up!
bloc
SILVER Star
The threads on this topic had me nervous. So I did this before my appointment this morning. Thanks for the heads up!
View attachment 2064360
Might already be in this thread but another option is any time you go in for service, lock your glove box and keep the key blade with you.
Overland Tailor
Boltripper
- Joined
- Jun 24, 2012
- Threads
- 81
- Messages
- 1,142
- Location
- Birmingham, AL
- Website
- www.overlandtailor.com
The last sticker needs to be added that says "Yes, you will the screw driver, step back"........The threads on this topic had me nervous. So I did this before my appointment this morning. Thanks for the heads up!
View attachment 2064360
Tommy Dwyer
SILVER Star
Done - added to the maintenance sectionThis thread and
IMPORTANT: Check your HVAC recirculate door and answer Poll
This is REALLY important, it affects how well your system defogs in winter and cools in summer, and if a small amount of damage is caught early it could save you MANY hundreds of dollars. My door hinge is busted, probably by somebody who forced it open, not understanding how to correctly access...
Should be in FAQ.
Maybe @Romer will consider adding them.
Some lube might have helped.
HTH, Ken.
More of an 80 forum comment than a 200 forum
Similar threads
Users who are viewing this thread
Total: 2 (members: 0, guests: 2)