Builds Bemerritt Builds a 1970 (1 Viewer)

This site may earn a commission from merchant affiliate
links, including eBay, Amazon, Skimlinks, and others.

Not too bad on the clearance. One bolt has some slight contact with the bondy that will need clearancing. Still need to put in the shifters.

IMG_4353.jpg


IMG_4356.jpg


My father has started refreshing the paint, looks incredible. On the left is the before, which pretty much the whole exterior looks like. On the right is post CLR, 2000 grit, cut and polish. Seeing that old paint shine is exciting.

IMG_3100.jpg


One thing we can't agree on is whether I re-finish the bezel back to white or if I leave it how it is. He wants to try and polish it up a bit. I am in the keep it original camp, but once it is all put together I may be convinced to go white.

IMG_4369.jpg


Random pieces of new ruber make me happy.

IMG_4368.jpg
 
Original for sure!
 
Some days things go well, others are frustrating. Couple of questions for the group to help point me in some directions.

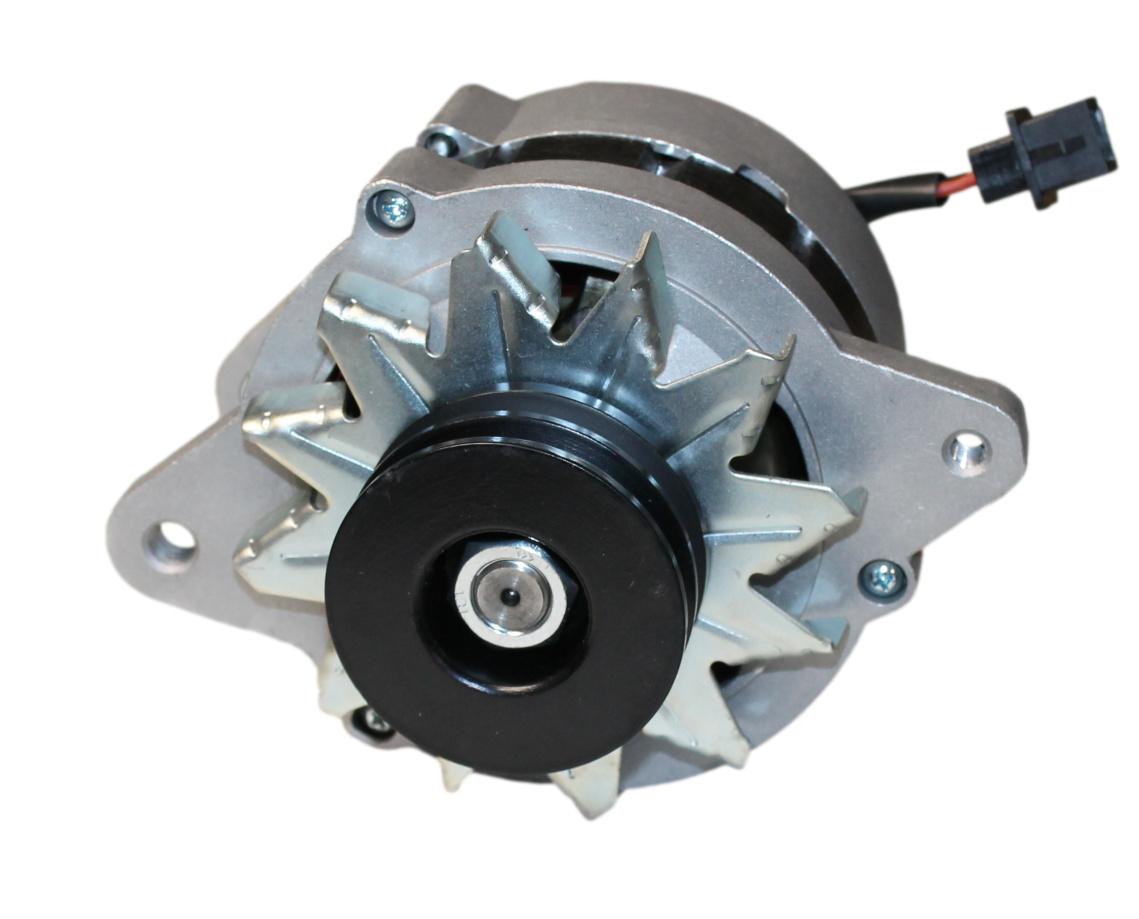
First up the damn alternator pulley. Replacing the original that I broke pulling off my original alternator. This is a new oem pulley on this alternator.


I cannot for the life of me get it on the shaft all of the way. Probably already pounded on it harder than I sould have. You can see the gap i nthe first pic. I can push the whole shaft/pully in to remove the gap, this makes it not able to rotate. Plus the backing plate is still loose, so i presume I need it on further. I tried driving it on with the nut, but it stripped out the nut, luckily the shaft looks ok... Any tips/thoughts?

IMG_4417.jpg


IMG_4418.jpg


IMG_4420.jpg
 
I
Not too bad on the clearance. One bolt has some slight contact with the bondy that will need clearancing. Still need to put in the shifters.

View attachment 3300349

View attachment 3300348

My father has started refreshing the paint, looks incredible. On the left is the before, which pretty much the whole exterior looks like. On the right is post CLR, 2000 grit, cut and polish. Seeing that old paint shine is exciting.

View attachment 3300347

One thing we can't agree on is whether I re-finish the bezel back to white or if I leave it how it is. He wants to try and polish it up a bit. I am in the keep it original camp, but once it is all put together I may be convinced to go white.

View attachment 3300346

Random pieces of new ruber make me happy.

View attachment 3300345
Polished apron looks fantastic. I think leave the silver bezel original and clean it up, but also seek out a patina white bezel and see what you like best once it's all together.
 
Some days things go well, others are frustrating. Couple of questions for the group to help point me in some directions.

First up the damn alternator pulley. Replacing the original that I broke pulling off my original alternator. This is a new oem pulley on this alternator.


I cannot for the life of me get it on the shaft all of the way. Probably already pounded on it harder than I sould have. You can see the gap i nthe first pic. I can push the whole shaft/pully in to remove the gap, this makes it not able to rotate. Plus the backing plate is still loose, so i presume I need it on further. I tried driving it on with the nut, but it stripped out the nut, luckily the shaft looks ok... Any tips/thoughts?

View attachment 3300385

View attachment 3300384

View attachment 3300383
welll, if anyone stumbles accross this problem, this is what I saw when i took the alternator apart. There is some slop in the shaft which somehow led to breaking the brushes. New one ordered and installed no problem.

IMG_4972.jpg
IMG_4973.jpg
 
did some work on the fuel tank. First time welding on nuts to remove broken fasteners. worked like a charm. And yes, the fuel tank was bone dry whe ni did it.

IMG_4730.jpg


IMG_4732.jpg


I then decided to deal with this small amount of rust. Used a mixture of baking soda and vinegar. Then rinsed thouroughly with water, then ethanol and then filled with some gas to keep it from flashing. Apologies for no after pic.

IMG_4733.jpg
 
Well it took quite a bit of work, but the next big milestone complete!

Once the sniper was properly setup, it was time to try and start the F for the first time post rebuild.

First attempts my timing was way off and I was leaking oil profusely from the oil pressure regulator. Took it off and it was broken. erhaps from overtightening the connections? Either way, SOR got me a new one in two days, the benefit to living in Southern California.

IMG_4993.jpg


Replaced that and the next attempt shot oil out of the freeze plug on the oil sending rail.

IMG_4991.jpg


So the good news was the oil pump was clearly creating pressure. Not sure if i had a clog, I put the plug back in and this time made sure to really pound it in there with some gasket sealer. I think I put it in backwards the last time, thus not wedging it in there.


Couple more timing changes and voila!


So now I just need to route some brake lines and then I'll be happy to pull the body back off and wrap up all of my line routing. Put a new floor in the rear of the tub, decide what kind of undercoating i want, decide what to do with the new interior tub floor.......etc etc
 
Its a great feeling to be able to fire it up for the first time. I just did the same a couple weeks ago. Congrats!
 

Users who are viewing this thread

Back
Top Bottom