
Ah somehow missed this - thank you, should have known you'd have it! In a bit of a rush at the moment and feeling hosed by the cost of the valve so will look for a local solution first otherwise that little set looks perfect.it’s straight 5/8” heater hose. Gates is what the collective uses. If you are looking for the other off the firewall:
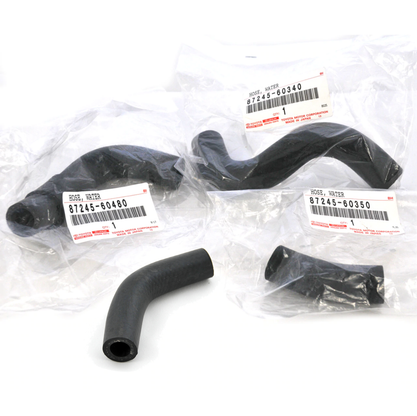
80 Series 1FZ Curved Heater Hose Kit
80 Series 1FZ Curved Heater Hose Kit (CHH-1)absolute-wits-end.com
Navigation
Install the app
How to install the app on iOS
Follow along with the video below to see how to install our site as a web app on your home screen.
Note: This feature may not be available in some browsers.
More options
You are using an out of date browser. It may not display this or other websites correctly.
You should upgrade or use an alternative browser.
You should upgrade or use an alternative browser.
Rotted heater control valve (1 Viewer)
- Thread starter Dan2722
- Start date
This site may earn a commission from merchant affiliate
links, including eBay, Amazon, Skimlinks, and others.
More options
Who Replied?- Joined
- Sep 17, 2003
- Threads
- 64
- Messages
- 4,427
- Location
- Sunnyvale, CA
- Website
- www.george4wd.taskled.com
I've removed the valve and bypassed it with hose when it broke apart on some sand dunes. Then installed a new one back in town a week later. Never had to burp anything other than myself after a beer. Just top it all up and drive around, let engine cool and top up overflow as needed over a few days. Our driveway has a minor slope and vehicle is parked nose up. Even a full flush and refill has no burping issues.
For pulling it I doubt it matters where the valve lever is positioned, but mine just happened to be on cool when I removed/replaced it.
cheers,
george.
For pulling it I doubt it matters where the valve lever is positioned, but mine just happened to be on cool when I removed/replaced it.
cheers,
george.
davidp14
SILVER Star
Thanks friends.
Seems like the consensus is: it doesn't matter. Its on cool now so ill leave it there.
I wasn't planning on draining the coolant (just did that in the fall) I can't imagine ill lose enough to make a difference but ill be sure abd top it off afterwards.
Seems like the consensus is: it doesn't matter. Its on cool now so ill leave it there.
I wasn't planning on draining the coolant (just did that in the fall) I can't imagine ill lose enough to make a difference but ill be sure abd top it off afterwards.
davidp14
SILVER Star
Also.
I am planning on doing a rear heater delete at the same time. I got LCP single piece hose and wits end supplied the HCV. I'll be replacing the egr hose side with oem too (I think i got that from UAE). I'm cheapin out on the hose clamps though.
I am planning on doing a rear heater delete at the same time. I got LCP single piece hose and wits end supplied the HCV. I'll be replacing the egr hose side with oem too (I think i got that from UAE). I'm cheapin out on the hose clamps though.
Thread bump...
I am baselining my rig and I took a few threads I've read to heart, specifically about the radiator and the heater control valve turning "yellow" and how this is an indication that either/both need to be replaced.
Happily, the radiator tank isn't showing ANY yellowing or any type of discoloration after 220K miles...the heater valve on the other hand...
I'll replace that ASAP.
Don't mind the dirty of the bay...she'll be washed this weekend")

I am baselining my rig and I took a few threads I've read to heart, specifically about the radiator and the heater control valve turning "yellow" and how this is an indication that either/both need to be replaced.
Happily, the radiator tank isn't showing ANY yellowing or any type of discoloration after 220K miles...the heater valve on the other hand...
I'll replace that ASAP.
Don't mind the dirty of the bay...she'll be washed this weekend
^^^^^^Thread bump...
I am baselining my rig and I took a few threads I've read to heart, specifically about the radiator and the heater control valve turning "yellow" and how this is an indication that either/both need to be replaced.
Discoloration of the plastic IS a good indicator BUT the heater valve can have a good appearance (the exposed part) and still be in need of replacement. The part underneath the hose connections is usually the first to degrade. As was the case with mine.

Same thing happens to the plastic " T " connection found in the 100 series water heater circuit (luckily our 80 series uses a brass T ).
The heat control valve (IMHO) needs redesigning with a more glycol/heat resistant plastic (if such a thing exists).
Or, just plan to replace it every ?10 years.
The heat control valve (IMHO) needs redesigning with a more glycol/heat resistant plastic (if such a thing exists).
Or, just plan to replace it every ?10 years.
(luckily our 80 series uses a brass T ).
Unless you order a replacement. Those are plastic.
Unless you order a replacement. Those are plastic.
I’ve searched mud and the internet to find out if it normal for this tube to angle up like this with the new heater hoses. Should I just push it down and connect the heater control valve?Unless you order a replacement. Those are plastic.

Was the pipe in the correct position when you took it apart? (assuming
it was still a stock system)??
Either way, it doesn't look right, the left end of that pipe should be horizontal to hook up to ~2" section of straight hose, then there's a U shaped pipe that goes up and back the other way which then connects to a ~2 1/2"" section of hose before that connnects to the heat control valve (right side pipe/nipple).
Can you post up a couple more photo of the pipe from two different angles??
Maybe check the length of those hoses. If they're not the correct length (or not slid on the pipes correctly) that might upset which way the end of the pipe points. ie: if one is too long and the other is too short that will tilt the end of the pipe assembly, but hard to tell without more photos to see if the pipe somehow got bent??
IMHO I would replace the Safety Stripe hose with Green Stripe or OEM (top hose is 5/8" ID, bottom hose is 1/2" ID).
Last edited:
Malleus
Far west of Siegen
That tube is supposed to be bolted to the head, which puts it in the correction position for the hose. It look like a) it's not bolted in place and b), the lower hose is too short.
Was the pipe in the correct position when you took it apart? (assuming
it was still a stock system)??
Either way, it doesn't look right, the left end of that pipe should be horizontal to hook up to ~2" section of straight hose, then there's a U shaped pipe that goes up and back the other way which then connects to a ~2 1/2"" section of hose before that connnects to the heat control valve (right side pipe/nipple).
Can you post up a couple more photo of the pipe from two different angles??
Maybe check the length of those hoses. If they're not the correct length (or not slid on the pipes correctly) that might upset which way the end of the pipe points. ie: if one is too long and the other is too short that will tilt the end of the pipe assembly, but hard to tell without more photos to see if the pipe somehow got bent??
IMHO I would replace the Safety Stripe hose with Green Stripe or OEM (top hose is 5/8" ID, bottom hose is 1/2" ID).
the green stripe isn’t available at any of my auto stores. Is it really that much better than gates safety stripe? I was considering removing the short piece of green stripe 1/2” since it’s so thick and stiff. I’ll post a few more photos soon.Was the pipe in the correct position when you took it apart? (assuming
it was still a stock system)??
Either way, it doesn't look right, the left end of that pipe should be horizontal to hook up to ~2" section of straight hose, then there's a U shaped pipe that goes up and back the other way which then connects to a ~2 1/2"" section of hose before that connnects to the heat control valve (right side pipe/nipple).
Can you post up a couple more photo of the pipe from two different angles??
Maybe check the length of those hoses. If they're not the correct length (or not slid on the pipes correctly) that might upset which way the end of the pipe points. ie: if one is too long and the other is too short that will tilt the end of the pipe assembly, but hard to tell without more photos to see if the pipe somehow got bent??
IMHO I would replace the Safety Stripe hose with Green Stripe or OEM (top hose is 5/8" ID, bottom hose is 1/2" ID).
the upper hose I removed clearly changed shape over its long life. I matched these lengths but I will try a longer lower piece.That tube is supposed to be bolted to the head, which puts it in the correction position for the hose. It look like a) it's not bolted in place and b), the lower hose is too short.
Just bend the piece of brass tubing back into the horizontal position. Do it slowly so it doesn't kink.the upper hose I removed clearly changed shape over its long life. I matched these lengths but I will try a longer lower piece.
View attachment 3116371
It's bent from yanking up on it trying to remove the hose from it. I did that on mine when the hose wouldn't come off, then I re-shaped it into position.
Use a light coating of anti-freeze on all your hose connections when installing so they slide on easily and the anti-freeze will dry and create a good seal. This way there is no contamination to the system either.
Unless you order a replacement. Those are plastic.
I’ve searched mud and the internet to find out if it normal for this tube to angle up like this with the new heater hoses. Should I just push it down and connect the heater control valve?Unless you order a replacement. Those are plastic.
View attachment 3116241View attachment 3116240
Here is the top hose that came vs. the Gates replacement.the upper hose I removed clearly changed shape over its long life. I matched these lengths but I will try a longer lower piece.
View attachment 3116371
Before you bend your pipe recheck the rotation of the hoses on the side pipes in relation to the firewall pipes. If they're twisted that also will change the angle of the long end of the pipe.
Or to put it another way, the lower section of the pipe assembly with the two side pipes does not sit vertically when installed properly, it should point to somewhere between 10-11 O'clock (your upper left as you look at it from the front). ie: draw a line down the axis of the short section of pipe and it points up and to the left while the long section of the pipe points to 9 O'clock.
With the short section of the pipe pointing in the correct direction (see photo) then the long end of the pipe will be horizontal.
Also notice when the firewall pipe is in the proper orientation how the two side pipes are not in line with one another, they are almost parallel and off-set.
When I replaced all my firewall hoses I first slipped the firewall hose sections on the short pipes of the assembly without the clamps so that I could move/rotate the hoses on the pipe assembly until everything lined up, then I installed the clamps.

Key words: water heater pipe firewall orientation
Or to put it another way, the lower section of the pipe assembly with the two side pipes does not sit vertically when installed properly, it should point to somewhere between 10-11 O'clock (your upper left as you look at it from the front). ie: draw a line down the axis of the short section of pipe and it points up and to the left while the long section of the pipe points to 9 O'clock.
With the short section of the pipe pointing in the correct direction (see photo) then the long end of the pipe will be horizontal.
Also notice when the firewall pipe is in the proper orientation how the two side pipes are not in line with one another, they are almost parallel and off-set.
When I replaced all my firewall hoses I first slipped the firewall hose sections on the short pipes of the assembly without the clamps so that I could move/rotate the hoses on the pipe assembly until everything lined up, then I installed the clamps.
Key words: water heater pipe firewall orientation
Last edited:
Gates Safety (White) Stripe Heater hose is their standard hose.
(copied from Gates web site)
Gates Green Stripe is a higher grade hose:
(copied from Gates web site)
- Temperature Range: -40°C to +125°C (-40°F to +257°F).
- Meets SAE 20R3 Standard Wall Class D-2 requirements.
- Not recommended for heavy-duty trucks, busses, or off-road construction equipment; use the Green Stripe® heater hose for these applications.
Gates Green Stripe is a higher grade hose:
- Exceeds SAE 20R1 Type EC (Class D-1 Tube, and cover, Standard Wall).
- Engineered with materials to resist electrochemical degradation.
- Temperature Range: -40°C to +125°C (-40°F to +257°F).
OEM is superior to Gates. Why fix what isn't broken?
@cruiserdanOEM is superior to Gates. Why fix what isn't broken?
I didn’t think you could still get this and the 2 short hoses that go to the firewall?
Find a parts professional that can find his/hers ass with both hands and a flashlight.
It is not rocket science. The challenge is connecting with someone that gives a s***.
The problem is that current buyers are not at all interested in paying for expertise. It is OK for them to make money but not anyone else.
It is not rocket science. The challenge is connecting with someone that gives a s***.
The problem is that current buyers are not at all interested in paying for expertise. It is OK for them to make money but not anyone else.
Similar threads
Users who are viewing this thread
Total: 2 (members: 0, guests: 2)