Rain Gutter and Top Restoration (1 Viewer)

This site may earn a commission from merchant affiliate
links, including eBay, Amazon, Skimlinks, and others.

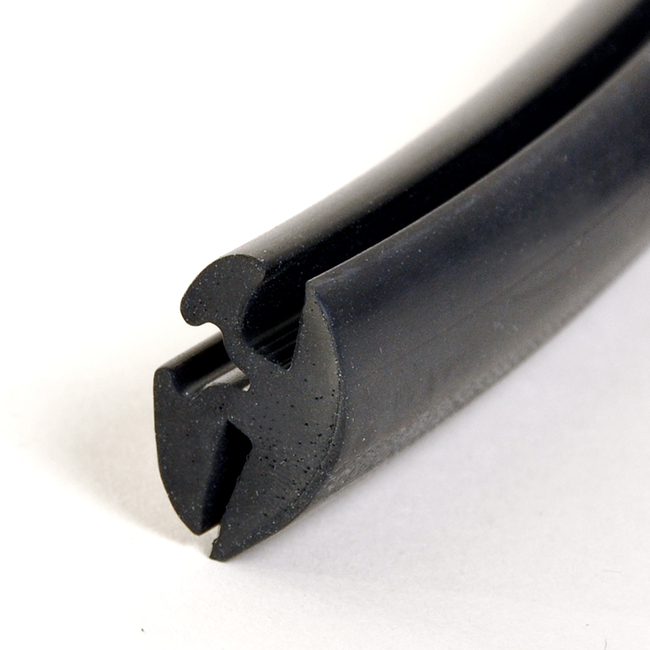
In the process of cleaning and replacing the weatherstripping on my 70 FJ40. Shortly before the original owner sold it he had a shop in his small town replace the headliner. Did okay job on the headliner but instead of replacing the gaskets used some type of non hardening tar to keep the original gasket together. One thing I did notice it had the same piece of dark tan tape used at the factory to hold the weatherstripping in place on the assembly line.
20220524_135040.jpg
20220524_135111.jpg

Have the OEM weatherstripping for the cap. Believe the over windshield piece is not knocked the the wiper arm. The holes in the main section are oval for an easier fit and the second hole for the interior light is not there. Overall worth going OEM.
 
Finished up the epoxy primer today. On the bottom of the gutter where it meets the weatherstrip seal, there are some small pits from where the rust once lived. Should I fill these with bondo or something thinner like a puffy that still uses a hardener?


Yes, i would definitely use body filler to fill those pitted areas. Ideally, you would have done the body filler before adding the epoxy primer, because the epoxy primer has a 72 hour recoat window. I'm not sure how the recoat window applies to body filler... but the idea is you have 72 hour to add your next product on without having to sand the epoxy primer. If you wait longer, you have to scuff up the epoxy in order for the filler to bond. Meaning, during the 72 hour window, you get a chemical bond. after that window, you have to scuff sand it to get a mechanical bond. Again, I'm not sure if the chemical bond applies to body filler or not. But for next time- for areas that are hard to scuff sand (like pitted metal, where your sand paper can't get to the bottom of the pits), it's better to apply your filler to the bare metal, then do your epoxy primer.

The reason you should fill those badly pitted areas is that they are areas where water and dust collected previously. So those are areas where it's likely to collect again, even with new weather stripping. You want to get rid of the voids to improve the seal to your weather stripping, preventing the water intrusion going forward.
All good points. The guy at the paint shop recommended the epoxy first because the welds left some difficult areas to get into with filler. I suppose I could have gone either way. I sanded everything smooth and am ready to hit it with epoxy primer. Starting to see the end of the tunnel!

Hard to tell from these pictures but this is super smooth.
BC3311D2-4FCD-405A-8FC4-2E6E3A4192FF.jpeg

9A49A5B6-B153-4F96-B773-7E021BB624C7.jpeg

18ECC1B2-2C1A-4295-86FE-525DD3D0483A.jpeg
 
A little more bodywork. Prep is so boring. Hope to paint soon.
F6AA090F-71CF-4DE4-8D5E-BC96912356DA.jpeg
 
Unfortunately, it looks like I am going to have to take on the fiberglass myself. I got a couple of quotes and they are very high ($1,700+ )

The main area I need help with is fixing the fiberglass edges on the corners as they are chewed up. I'm thinking I can probably tackle that on my own by watching some Youtube videos. Any recommendations on what products to use? Fortunately, all the fiberglass work will live under the seam sealer so nobody will see it. I don't need it to be perfect, just cleaned up before I rivet and lay down the epoxy seam sealer.

I will then send it to someone to have it painted. I dont have the compressor or the tools for that.

Thoughts or suggestions?
 
When I did mine I had a couple areas a lot like you described yours. I just ended up throwing in a couple extra layers of the fiberglass cloth along with some extra epoxy. If you do this I would suggest you build it up a little extra and probably more than just a couple layers, because when I went to put the rivets in it wasn't enough and it sort of cracked where I had filled in some spots. So just do more. Also instead of just going right along the edge following the edge of the existing fiberglass, build it out further then you can sand it and even it out to where you need. This way you might get a stronger section of fiberglass and epoxy to grab on and it won't crack like mine.

Just a thought but I'm also no expert at this.

Funny you say that. I was literally thinking the same thing. The bottom has some sort of original fiber cloth on it now but most has broken off. I need to sand that down so I have a clean surface to put the new fiber cloth. Like you were saying, If I don't do that, the rivets will crack the roof cap because it needs more material.

I need to practice my fiberglass skills on something small because I have never worked with it before. From what I could gather, it seems somewhat simple.
 
Cool cruisers sill needs to be welded together as well, it's in pieces for shipping.
Theirs also does not fit--at least the ones I ordered for my 77

visor overview.jpg


visor corner.jpg


visor length1.jpg


visor radius-length2.jpg
 
Any recommendations on which seam sealer I should use under here? I’m thinking single stage is fine before I secure the rivets down.

72E92A3C-603C-4F5B-B757-81B470A471C9.jpeg
 
Been doing a lot to the hardtop but most not post worthy. Prepped and painted all the the rear sides and hatch. Now I’m on to weatherstripping…. No fun. Will start tackling the fiberglass in a week or two.

970F4907-1158-4ED1-BA06-FA957DCDA6D7.jpeg

5C0FEC6B-0B64-4FB1-ACD1-01EBA554BB1B.jpeg
 
I have officially ripped the corner weatherstripping 3x. It mocks me. I ran out of material so just had to buy more. I think I am going to leave the corner to an expert.
 
I have officially ripped the corner weatherstripping 3x. It mocks me. I ran out of material so just had to buy more. I think I am going to leave the corner to an expert.
I just did the corners on a resto build using OEM seals and new OEM glass, they aren't that hard but you do need 2 sets of hands. What seals are you using?
 
I just did the corners on a resto build using OEM seals and new OEM glass, they aren't that hard but you do need 2 sets of hands. What seals are you using?
What year is your cruiser? I have a '67 so OEM will not work due to glass thickness. Post '71 glass is thinner and OEM rubber is available. Anything before '67 needs to be this stuff...

 
What year is your cruiser? I have a '67 so OEM will not work due to glass thickness. Post '71 glass is thinner and OEM rubber is available. Anything before '67 needs to be this stuff...

Mine are 75, 75, 75, 69, 72, etc. The one I recently installed glass on was a 78. Interesting to know on the differences in thickness. Having an open end instead of a closed loop of rubber would make it more challenging. Can you use CA glue for the ends to make it one piece? Also, make sure you're not mixing up the LH and RH pieces of glass, they go in but don't sit right, ask me how I know.
 

Users who are viewing this thread

Back
Top Bottom