Builds Evolution of a Land Cruiser: My 80's build thread (5 Viewers)

This site may earn a commission from merchant affiliate
links, including eBay, Amazon, Skimlinks, and others.

6ynQXrKh.jpg


NCUck7qh.jpg


6CQaI0Yh.jpg


1VkTeF4h.jpg


9amxQWYh.jpg


bZr2zXIh.jpg


J6dBhFGh.jpg


DqBEvdFh.jpg


u1A2AMSh.jpg


LJrc0M0h.jpg


2IhYdswh.jpg


QSSAp3Sh.jpg


05TD2txh.jpg


uXBEhF6h.jpg


gG6xGd4h.jpg
 
Last edited:
Your pictures are always amazing.... glad to see you on the trails again.
 
ROCK LIGHTS

Over the last few weeks I've been busy with misc projects, things I neglected over the last few years as I was preoccupied with suspension/drivetrain work. I replaced rear door and hatch lock actuators that stopped working years ago. Getting ready to do a much-needed speaker & head unit upgrade, might do no window runs, etc.

One of these projects was rock lights. Never really thought I needed them until this last Rubicon trip where we wheeled from Buck Island to Rubicon Springs in the middle of the night. Left Buck at 9pm and by the time the whole group made it to Springs it was almost 1am. There were a few times I had to get out with a flashlight to see where my tires were because headlights are useless when it comes to driving over big boulders. Decided I would never do that again so here we are.

I used several of Amazon rock lights along with a few LED pods. Overall I think I'm running about 20 lights and approx 330w. The only real hard part about this is the wiring. It's a lot of wiring to run all along the chassis, engine bay and into the cab for the switch. I also finally wired up the ditch lights mounted up on the mirrors. I put these brackets in back in 2014 and never hooked up the lights :meh:

Light pods mounted up on the shock tower to throw light behind the front tire

xljGCumh.jpg


And for the front of the tire

WogMXE9h.jpg


This is one of the little rock lights mounted up in the fender well. These little lights are bright!

mOA50Ush.jpg


I had these auxiliary lights sitting on the shelf for a few years. They worked out perfect to mount on the crossmember. These provide light in front of the rear tires.

o6eHWl2h.jpg


And the result. It's kinda bright 😎

ljLZPM6h.jpg


0kUrUOFh.jpg


Ditch lights finally work after 5 years.

4sOl7XEh.jpg


G8oxsBkh.jpg


Race Wars here we come!

75HLYTvh.jpg
 
Last edited:
INTERIOR ILLUMINATION

Next thing was to work on interior illumination, or lack thereof. Over the last few years most of my instrument lighting burned out and went neglected for too long. The only thing that really worked was half of the HVAC controls and my flickering disco gauge cluster thanks to crappy LEDs bulbs.

While this truck gets wheeled pretty hard and that's all its used for, I don't want to let it become a POS from the 90s where nothing works because that just makes it annoying when I finally do drive it. So I set out to replace every single bulb in the cab and change the color to amber in the process. That big 'Definitive LED thread' was a huge help. You can see the contributions I made starting here: Definitive led thread for 80s

I found the information in the first post a bit hard to follow so I made my own chart. This will come in handy when I have to replace these bulbs again a few years from now and won't remember what to buy.

NOTE: The colored boxes represent the quantity and bulb color of the original OEM instruments. Some of these switches and indicators have colored film that controls the color output. Hazard light switch for example uses a clear bulb but outputs red color because of the switch.

MRqACcWh.png


This chart is the specifically for the gauge cluster. Here I'm showing the color of the indicator light, not the bulb! All of these use clear OEM bulbs with plastic colored film. This is important if you choose to replace with LEDs as you'll want an LED bulb the same color as the indicator light otherwise you'll wash the color out if you use white LEDs. For example, red warning lights will appear pink with a white LED bulb. So if you want to replace with LEDs and keep the same color output, for example use a blue LED for the blue high-beam indicator light, etc.

d68bVGEh.png


With that said, I chose to stick with incandescent bulbs for everything except the switches that have soldered LEDs (HVAC, PWR/2ND, window switch). I tried a few different LED neowedge bulbs and they all sucked. The light is too dim and too directional to provide decent backlighting for our switches. Many also say they burn out very quickly. Maybe one of these days I'll find some LEDs that work but for now incandescents bulbs with colored light filters/condoms work great.

I ordered everything from Jackson Lighting including the colored bulb covers. Spent about $70 to replace everything: Colored Bulb Covers

Started with the PWR/2ND switch in the floor console. This one takes some work as you have to disassemble the switch and melt a few plastic tabs to get the circuit board off. Be careful with the springs and the flap door that controls the up/down function of each button. Green is the OEM bulb, clear is one of the amber LEDs i soldered in. Use a multimeter to test the polarity as you need to get the +/- right.

LgjnJXsh.jpg


1Ehnij1h.jpg


Testing to make sure it works.

xSQQnw4h.jpg


Success!

HlE8bnfh.jpg


Window switch kinda follows the same process as the PWR/2ND switch. I don't think I ever remember seeing a light here, was probably burned out when I bought the truck. Would be cool if all the buttons lit up. I think treerootCO mentioned in his thread that 94-95 models have lights in all 4 switches.

QNvqR8th.jpg


The hardest one is the HVAC (if you want to change the colors of all the LEDs). This one uses 3x standard incandescent neowedge bulbs for main illumination but each button has its own soldered LED indicator light. 14 LEDs all together, 12 green and 2 orange. However in my truck 2 are unused as there is a blank plug over them (I think this is for the auto-climate function?). Anyway, this process sucks. You have to completely take apart the entire unit and all the buttons. They're easy to break and putting it back together is just as difficult as you need to make sure everything is perfectly aligned. I opted to go with blue LEDs for the indicator lights and amber for the main illumination. I really like how this one looks.

Here you can see the 14 LEDs total. The 2 unused LEDs in my HVAC panel are right in the middle next to the green buttons.

dztvVejh.jpg


Success!

IpEpfqQh.jpg


With these 3 out of the way the rest was quite easy. Just remove and swap out the bulbs. I only have 4 OEM switches left in my cluster and the antenna switch is non-functional since I removed that years ago. Just have it there as a space filler. This is one that I never realized had lighting either.

These are still green as I haven't found any good ways to get them amber. The switches have film that controls the color output. Tried amber neowedge LEDs...awful. Super dim and very ugly pale gold color because of the green film. Tried incandescent neowedge bulbs with orange caps...again not enough light output to change the color. So I repurposed the green OEM bulb covers from the HVAC backlighting to get a deeper green color. The hazard switch has a red bulb cover. As you'll see from my chart above the antenna switch uses a tiny Type A/8mm bulb. These have really really dim light output so I took my Dremel tool and made the opening bigger to fit the bigger Type B/10mm bulb from the other switches. Now it lights up decently.

zWxWB3Eh.jpg


The lower console was modified to fit 3 rocker switches as I removed the rear heater also. I was starting to collect too many unlabeled switches and it was getting difficult to remember what switch did what. These are all from CH4x4.com.

SNjY9kCh.jpg


And the Wits End ashtray switch panel holds the other 3. The 'Party Lights' is still unused. Thinking of some RGB LED strobe throughout the cabin for those late night Buck Island sh1tshows 🎉

qXjT7glh.jpg


Couldn't have fancy new lighting with the original cluster lens. It was so scratched up it made everything look fuzzy. New OEM replacement to the rescue!

r3iH4Shh.jpg


And some glamour shots of the entire cab. Sure is nice to be able to see at night again :cheers:

qliBQiWh.jpg


VwhAU9Bh.jpg


sRacp4Uh.jpg


prjHdh6h.jpg


FzHtCqsl.jpg


GgD1XLOl.jpg


fvy1zh4h.jpg
 
Last edited:
Keep the old lens and polish it with some plastic or head light restoration.
Yeah I actually have some Novus 1-2-3, was thinking of giving it a try to see if it improves. Not sure what the material is but it scratches super easy, should be just as easy to polish out.
 
Been looking into doing some light switches, so I came over here because you OVERKILL IT EVERY TIME... but this time is way over the top o_O my eyes hurt bro....
On the positive side you pay attention to every detail.
Well done.
 
I like the amber you did - I never would have said that 10-15yrs ago where even my E30 M3 has non-LED amber.

But after nearly 3yrs now in the Tundra, I like amber in ‘Yota clusters.
 
Curious if you feel the rear suspension rework was worth all the effort. Is it that much better now?
 
Forgot to update this thread after I did my audio overhaul. This was Dec 2019. Copy/paste from my other thread:


Over the last few weeks I've been working on a major audio overhaul. Audio was never a priority and I still had most of the factory speakers for the last 7 years. I do enjoy nice sound quality but didn't know the first thing about audio equipment and would never consider myself an audiophile. I upgraded the front door speakers a while back with the cheap Pioneers that everybody recommends but that was about it. When I bought the truck it had an aftermarket deck and I just ran with it.

Now that I'm mostly done with suspension and drivetrain I decided to focus on the little things again. First off, huge thanks to @TYM4FUN I pretty much just copied what he did and he was a huge help answering a lot of my audio newb questions. Here is a list of all the components I used:

- Alpine iLX-W650 head unit
- Alpine KTA-450 amp, 50W x 4 RMS (for door/dash speakers)
- Polk DB652 6.5" coax speakers for front/rear doors
- Kicker DSC40 4" coax speakers for lower dash
- Rockford Fosgate P300-12 300W RMS powered sub
- Metra 70-1761 wiring harness
- Auto-VOX rear view camera (Amazon, about $25)
- MicroBypass Alpine Parking Brake Override

In my view this is about as simple as you could get for a good audio equipment upgrade without going too overboard.

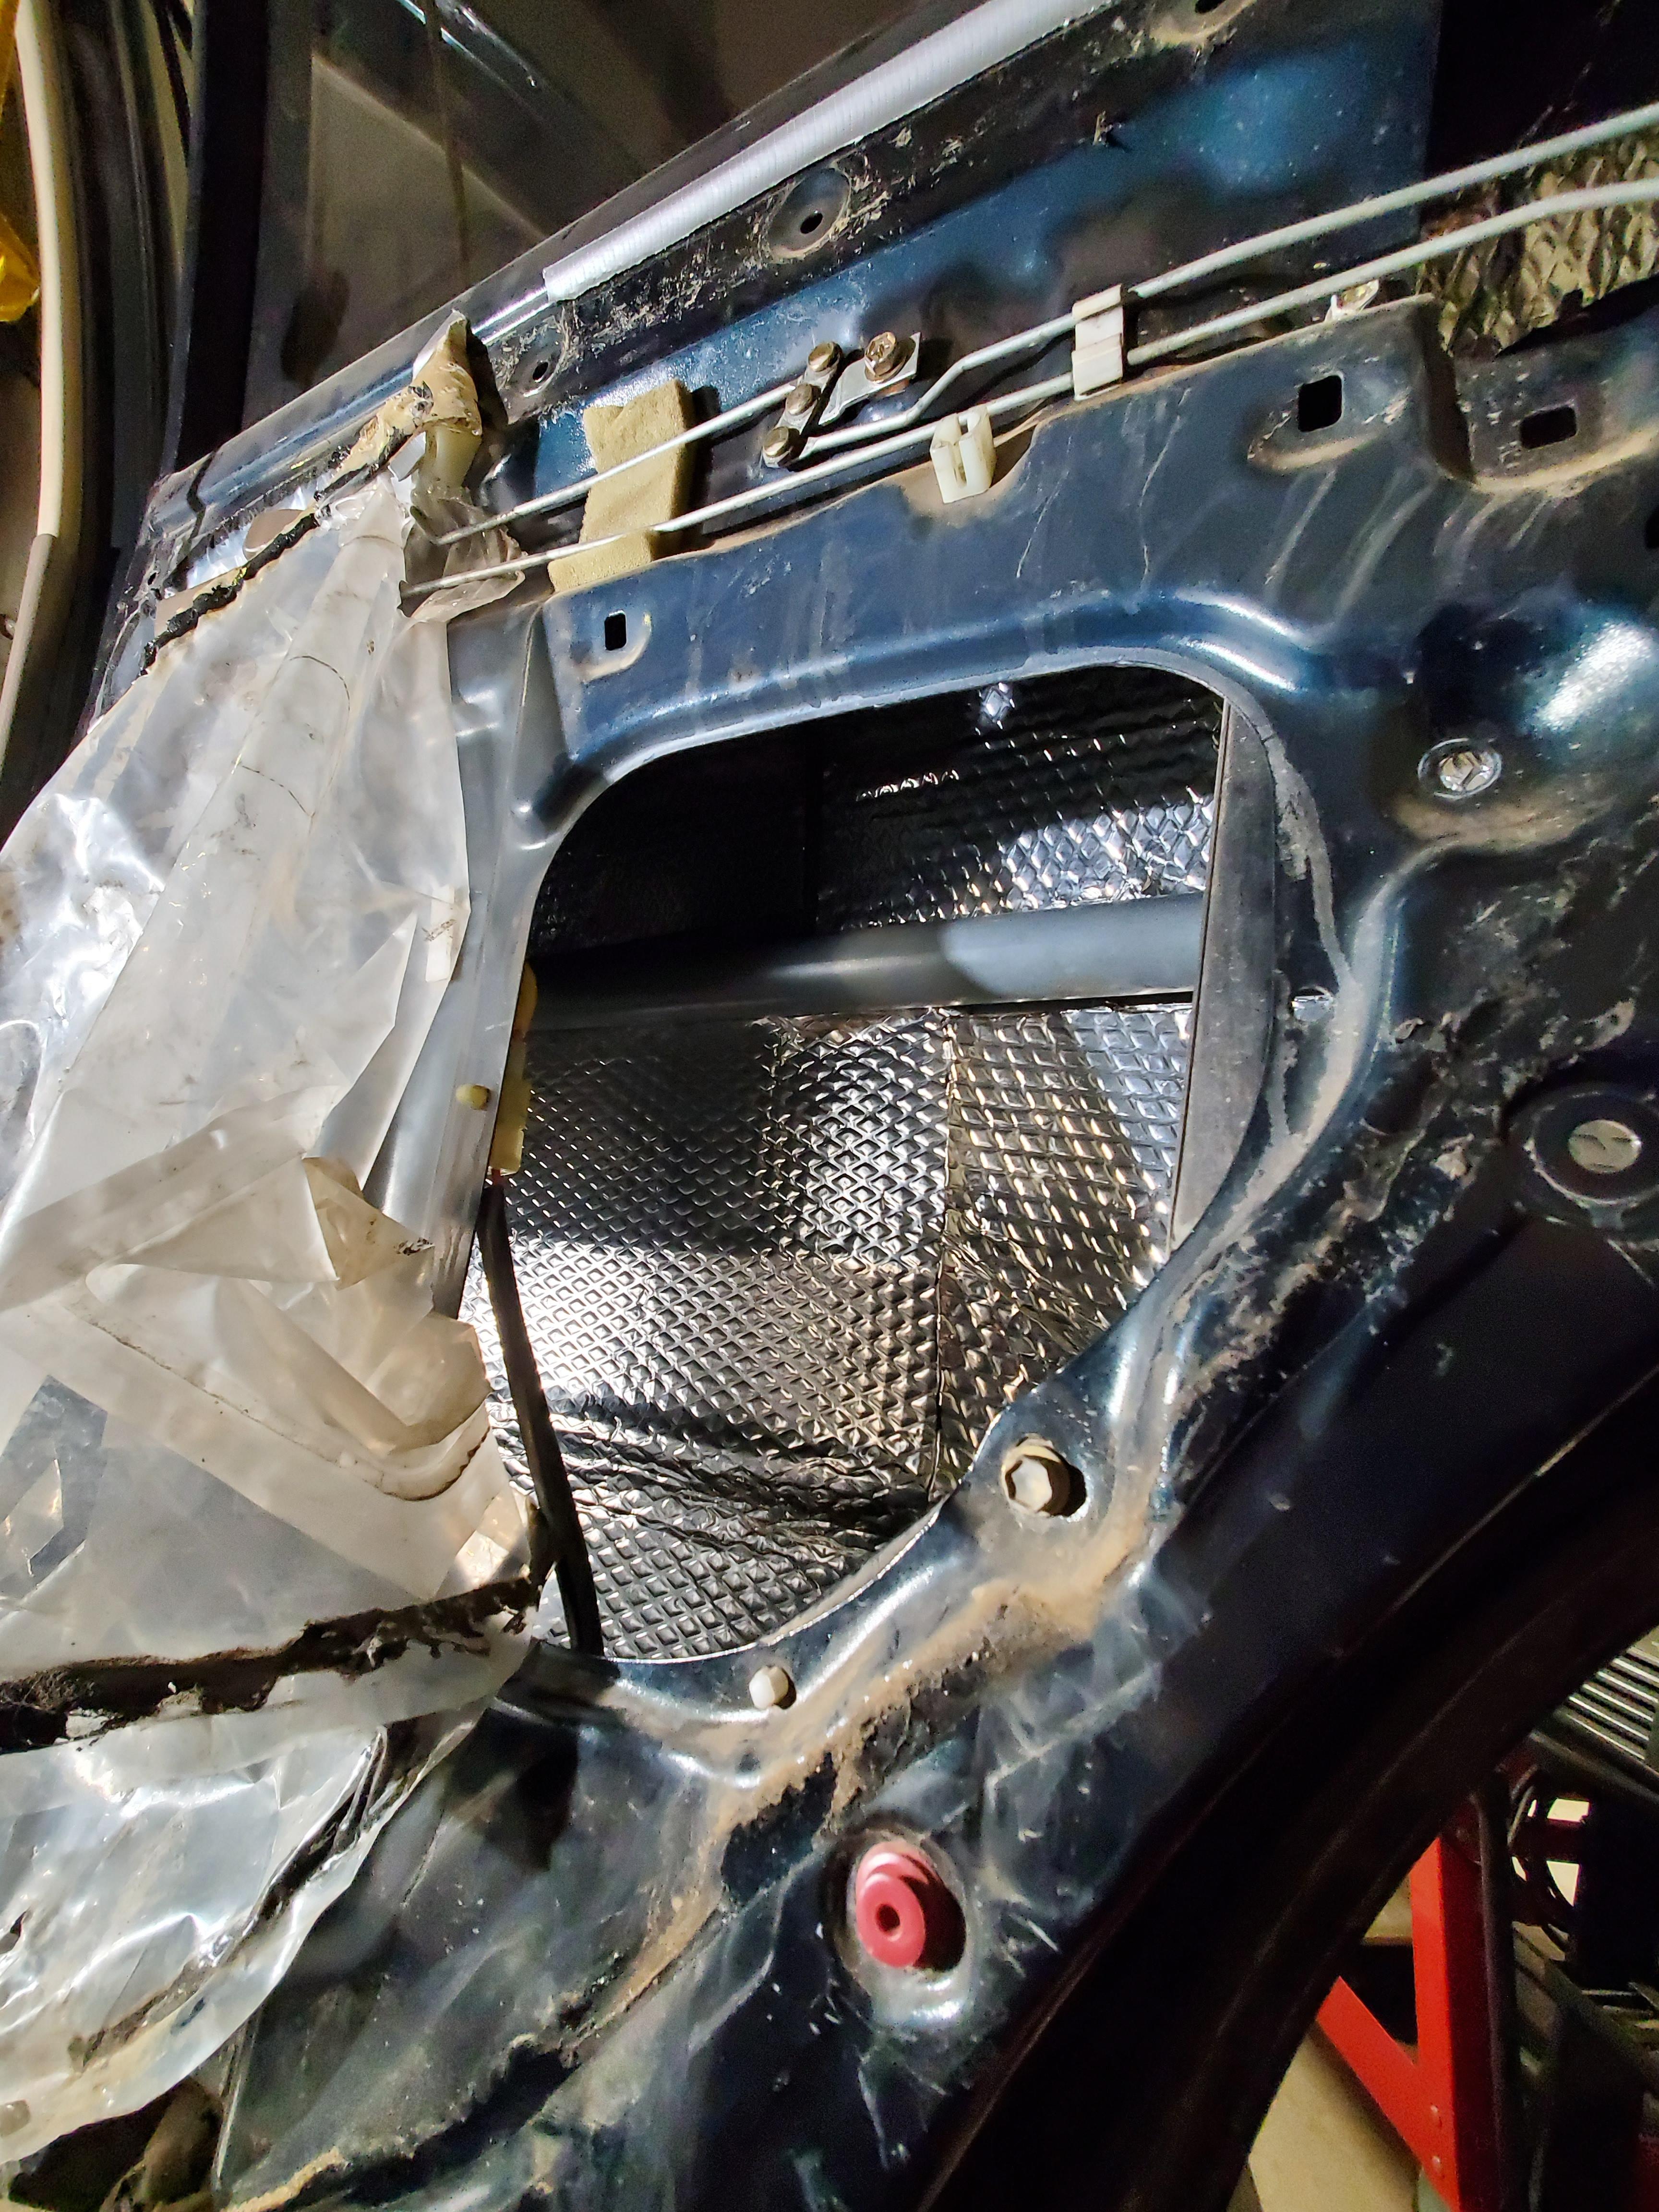
First up was some sound deadening. Used Kilmat CLD (constrained layer damper) + Noico CCF (closed cell foam) on the outer door skins, CLD on the inner door skins and some more CCF on the door cards. I know MLV (mass loaded vinyl) is the way to go for true noise reduction but that seemed like a pain in the ass to install so I decided to skip it.

GSpDZD1.jpg


CCF over the CLD


tvHGQAjh.jpg


CLD on the inner door skins

msEDQcc.jpg


Front doors

86OAL2oh.jpg


CCF on the door cards

DxCU7oY.jpg


It's a huge difference. Before the doors sounded like hollow tin cans and now they are truly solid. It's much quieter driving down the road.


Then I started on the dash speakers. I know a lot of people get rid of these but they make a huge difference. With the right type of speakers you can hear the highs blasting from the dash vs the mids in the doors. Simple speaker swap here.

QLVOADLh.jpg


TYwXr6gh.jpg


The passenger side speakers will only fit after you remove the factory amplifier that sits on the ECU

R2WDm5nh.jpg


No fitment issues with the driver side

iY067YRh.jpg


The rear doors are the ones that involve the most work if you want to run 6.5" speakers as you need to do some cutting to enlarge the opening. After the opening was enlarged, I used some weatherstrip foam to seal the gap between the door card and the door skins as these speakers will now mount ON TOP of the door panel vs underneath like the factory setup. This is the foam I used from Amazon. For the front doors I ran two rows of this, essentially giving me a 1/2" tall seal.

mEGP5vnh.jpg


With that out of the way the Polks easily mount to the door panel with new holes and longer screws. These things sound amazing with the 50w to each channel.

ZDUfPhlh.jpg


Front speakers are drama-free. Plenty of clearance with the door closed too.

Mgz5TO1h.jpg


Now the head unit. This is a mech-less receiver which means it's digital only and has no CD player. This allows it to be super slim. The matching Alpine amp mounts directly behind the deck and gives a very compact package. Even with the amp back there, this package is still slimmer than your standard single DIN CD player. Having the amp behind the deck makes wiring that much easier and allows to use all factory wiring with the Metra harness.

kBEbdjz.jpg


Soldering everything to make it look pretty.

kFGLK6Nh.jpg


Here's the entire setup, soldered and wrapped. As you can see there are very few connections to make once you have it all wired up. The two plugs at the bottom plug into your factory harness. Then you have your subwoofer/camera inputs and power/ground for the power pack amp. Oh and the other little plug you see sticking out is for my sub's amp remote power.

zrRrFcD.jpg


The Rockford sub. This thing sounds awesome. Very hard bass kicks vs annoying boom boom lowrider bass. The box is mounted upside down to fit better against my fridge, that is why you see the wiring harness going up and over the box. I still need to figure out some brackets or straps to secure this in place.

wvV9JcLh.jpg


The head unit itself is great. Has all the modern features and does Apple Car Play/Android Auto. I'm a huge fan of Android Auto for the various app integrations but Google Maps takes the cake. It's hard to not have AA once you've gotten used to it. I only wish Gaia would be added to the support list!

1zypt3Yh.jpg


$25 Amazon back up cam works well. The front camera port is currently unused, will eventually install one on the front bumper somewhere.

AXuljJIh.jpg


Google Maps via Android Auto.

pnOe5J8h.jpg


I still need to learn how to tune the amps and EQ but so far everything sounds great. I can turn the volume up all the way and have no distortion from the door/dash speakers. The HPF on the door speakers is set to 80 Hz. Anyway, hope this is helpful and makes you guys spend some money :cheers:
 
Long time listener, first time caller - just wanted to say you have a great truck and your Khoi fish are beautiful.

💕

Is my race truck done yet?
 

Users who are viewing this thread

Back
Top Bottom