Builds GX460 Adventure Build (1 Viewer)

This site may earn a commission from merchant affiliate
links, including eBay, Amazon, Skimlinks, and others.

HitchCrack

Supporting Vendor
Joined
Jun 18, 2017
Threads
2
Messages
86
Location
Funky Town USA
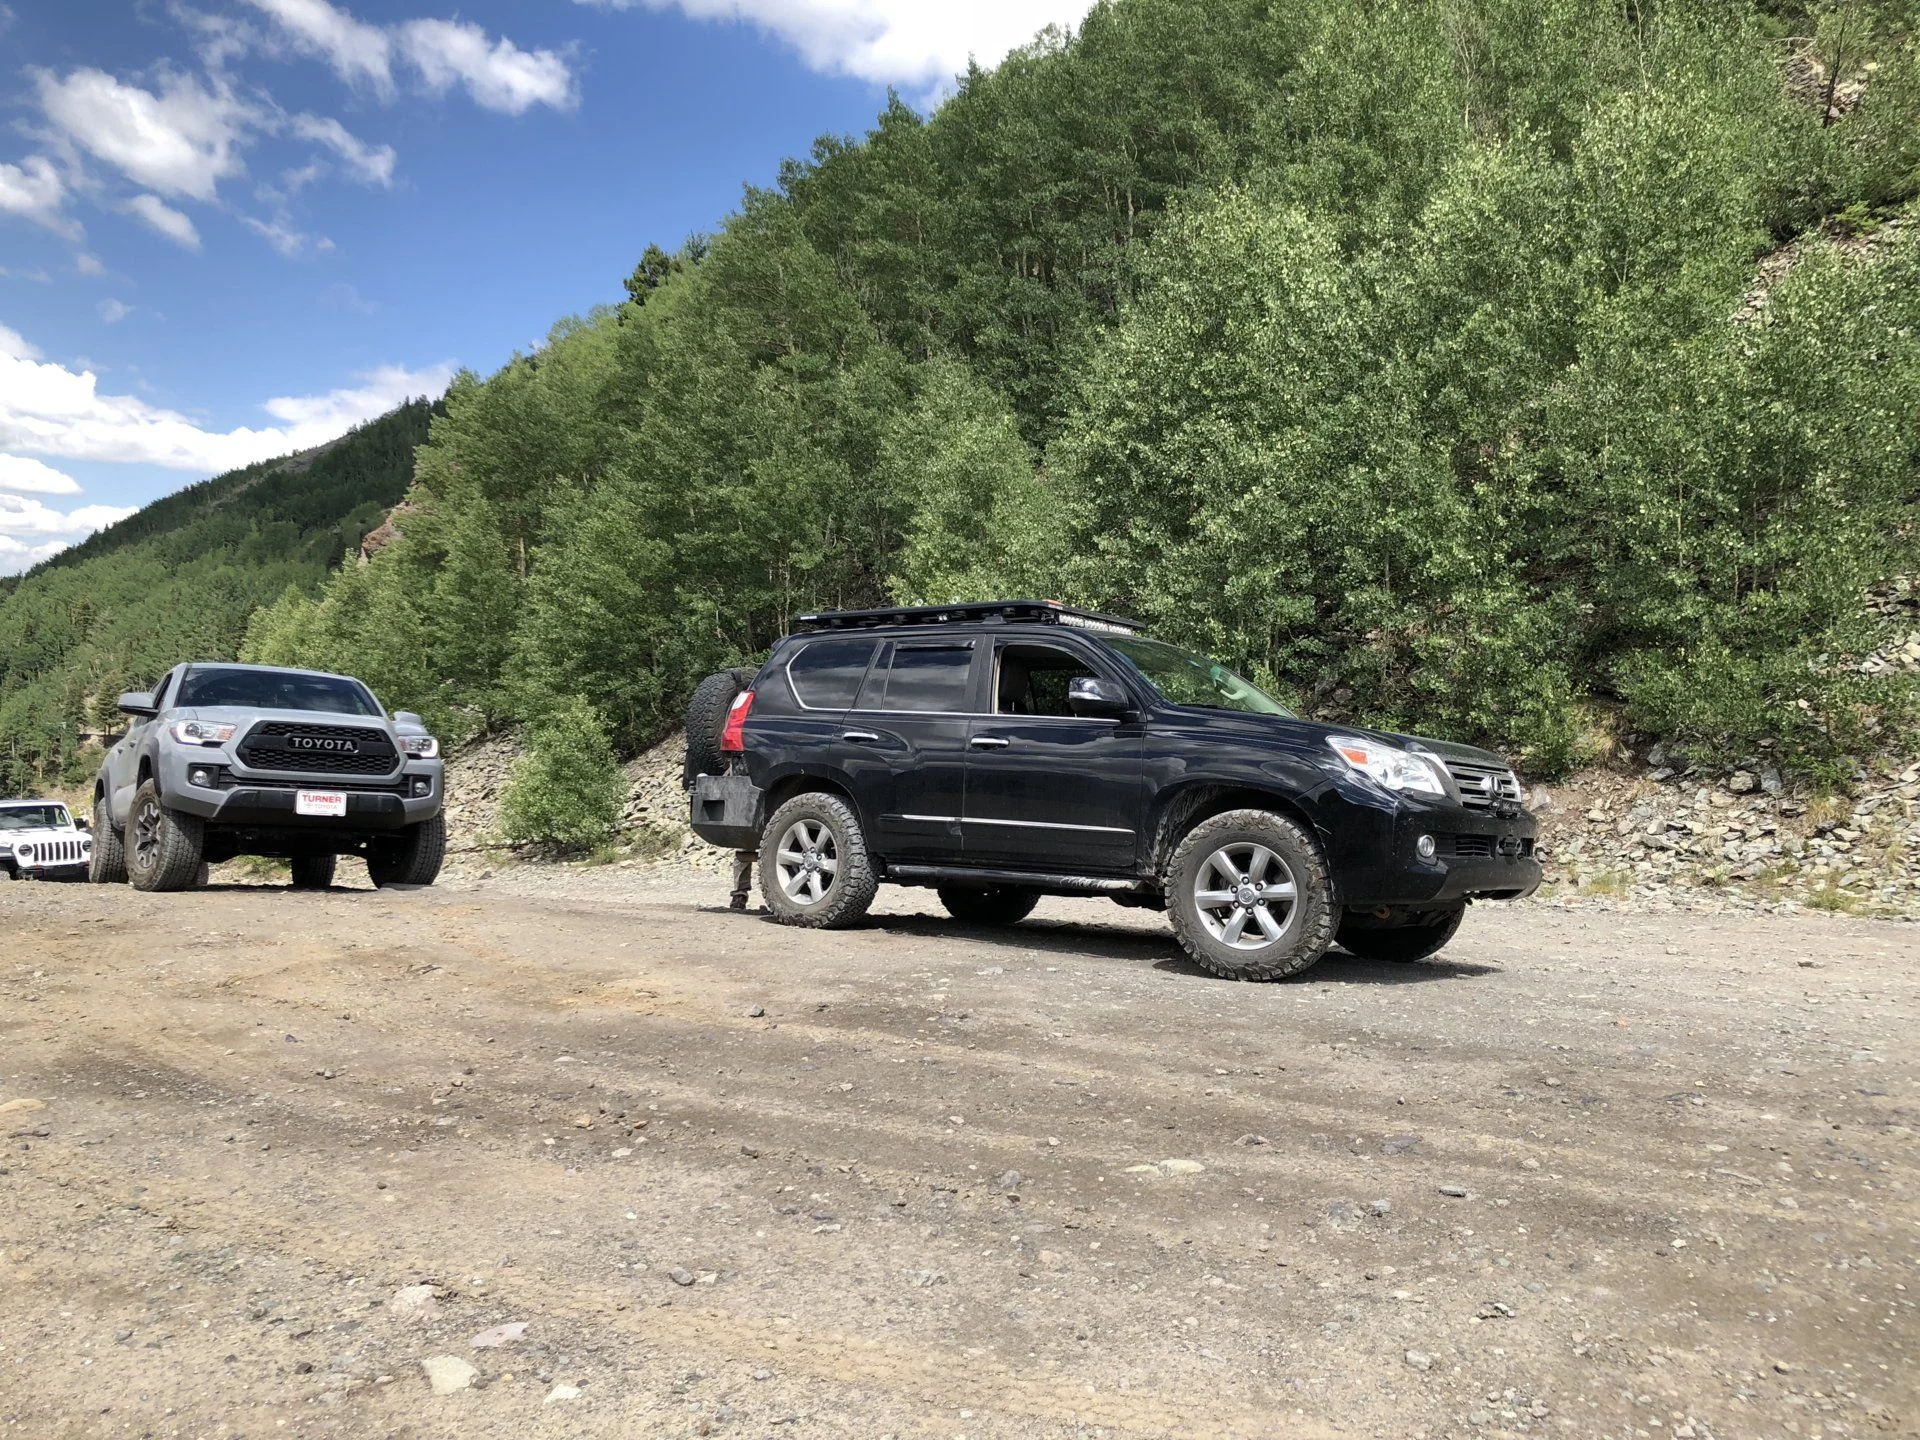
We bought a 2013 GX 460 a little over a year ago and have slowly been modding it to suit our needs as an adventure vehicle. This will be a thread to catch up where I am currently on the vehicle and I will add to it as I do more on this truck.

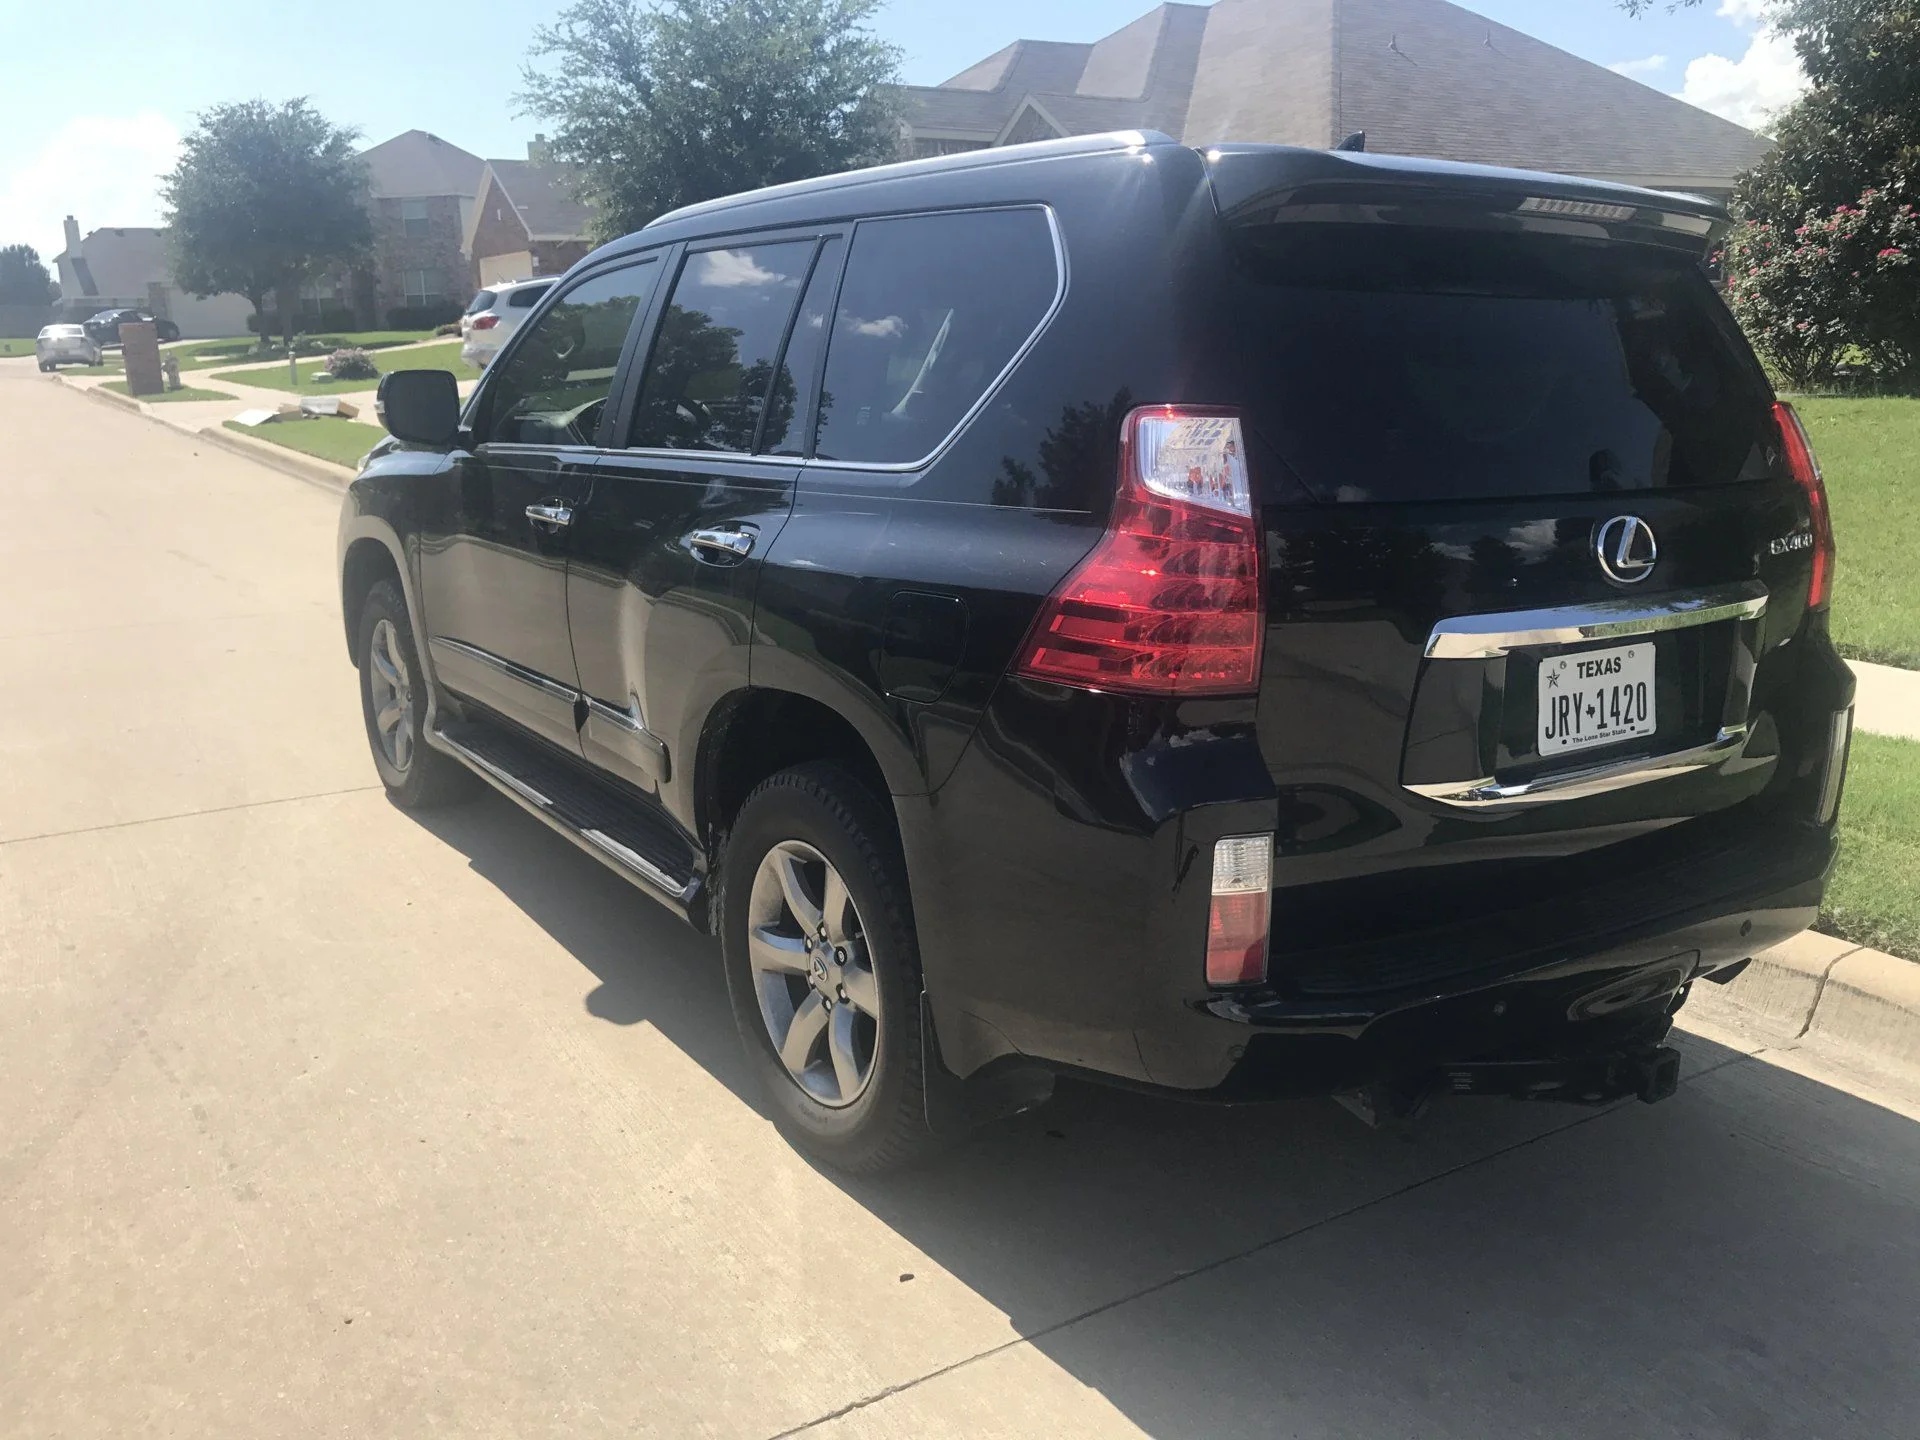
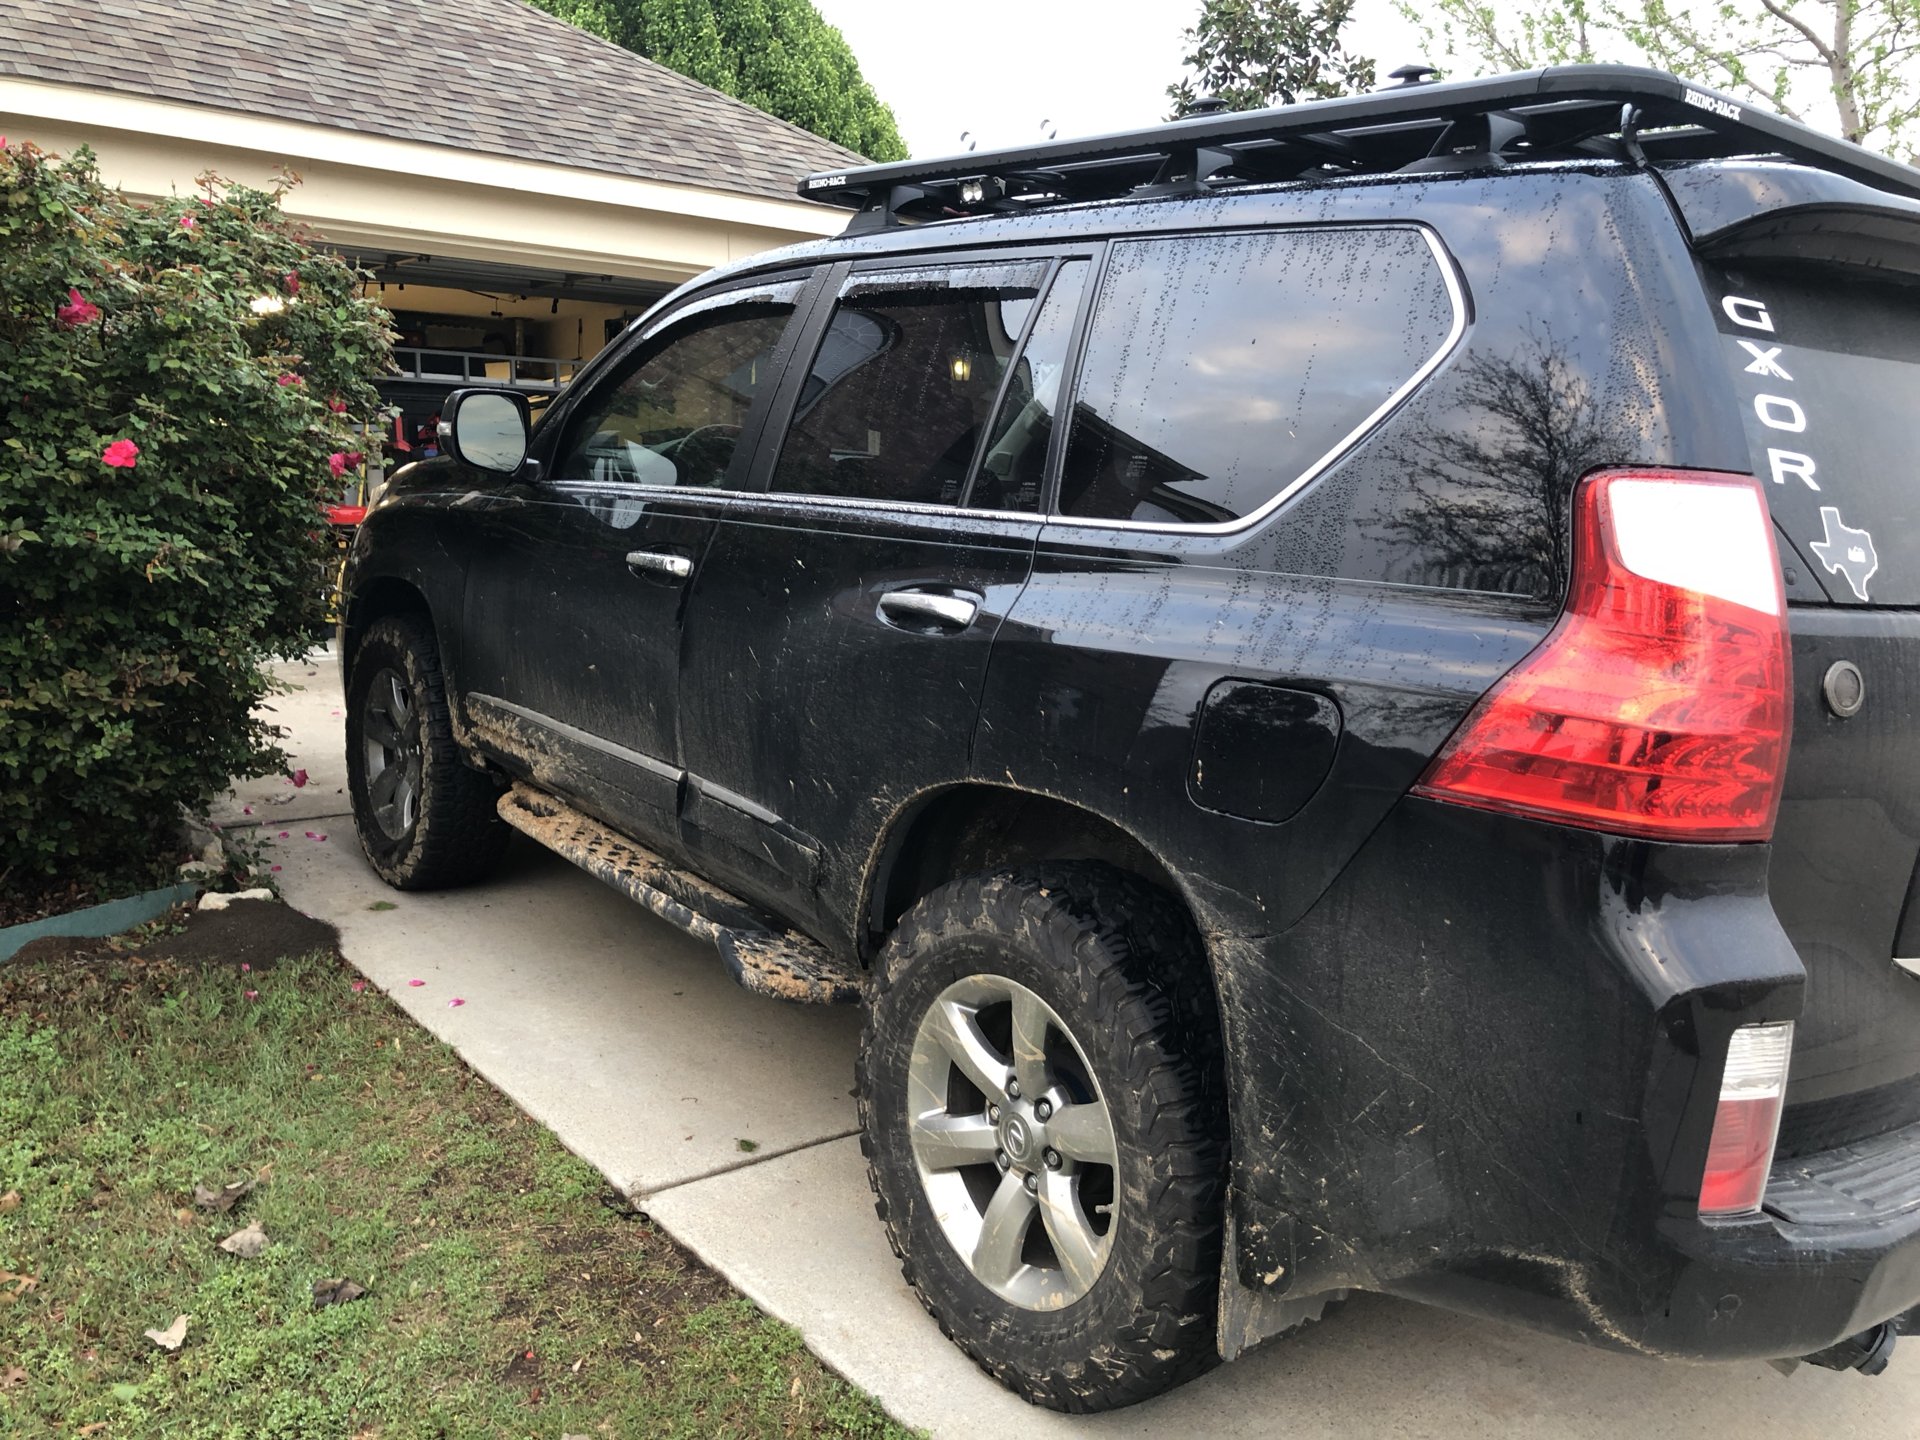
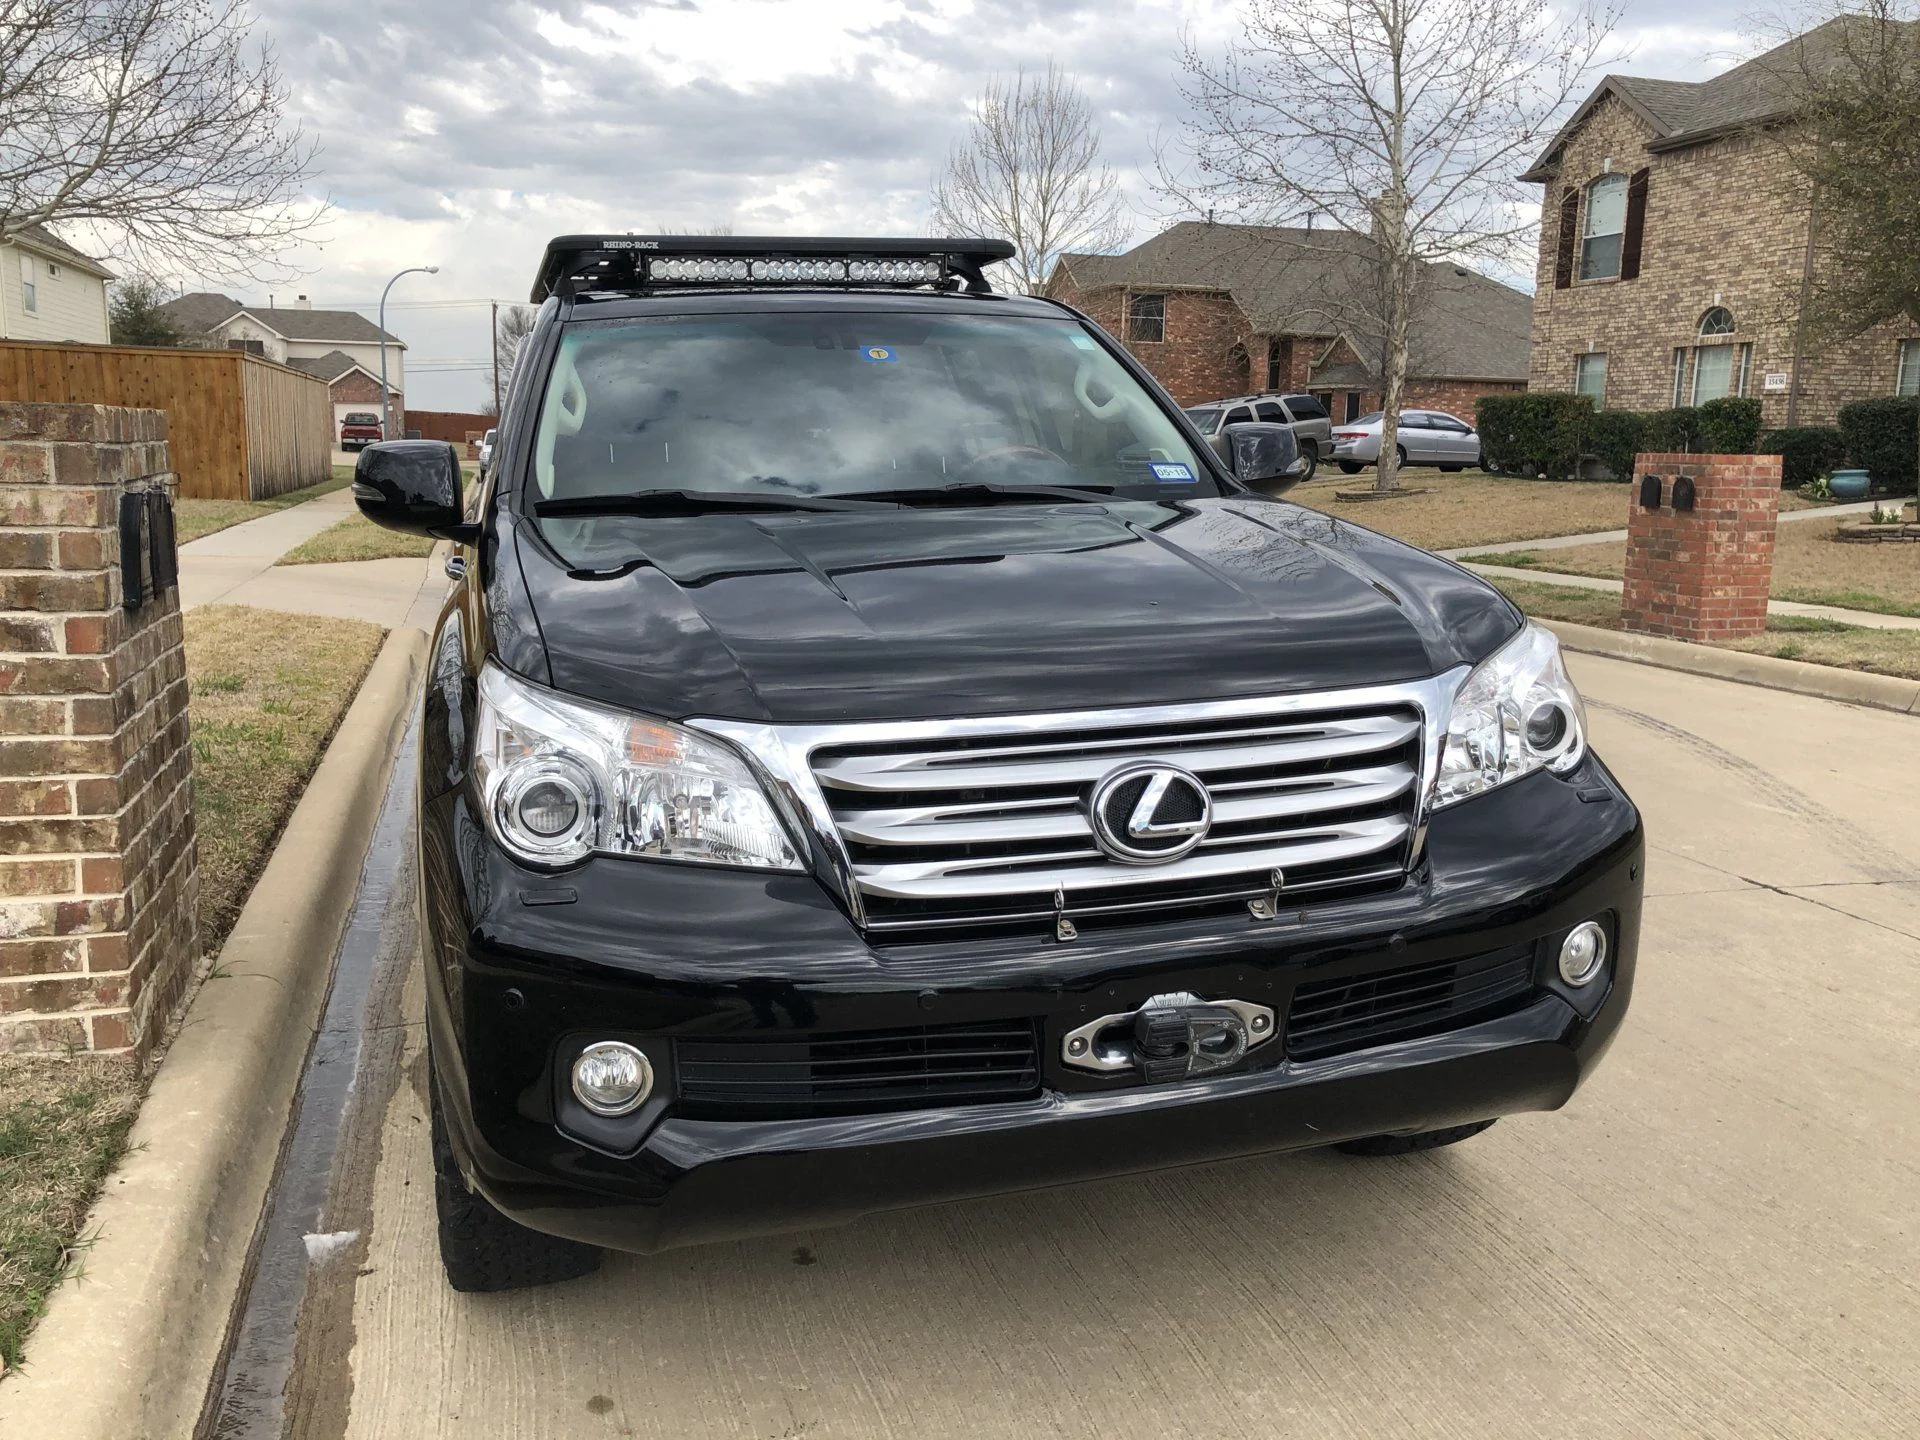
Here it is the day we brought it home.


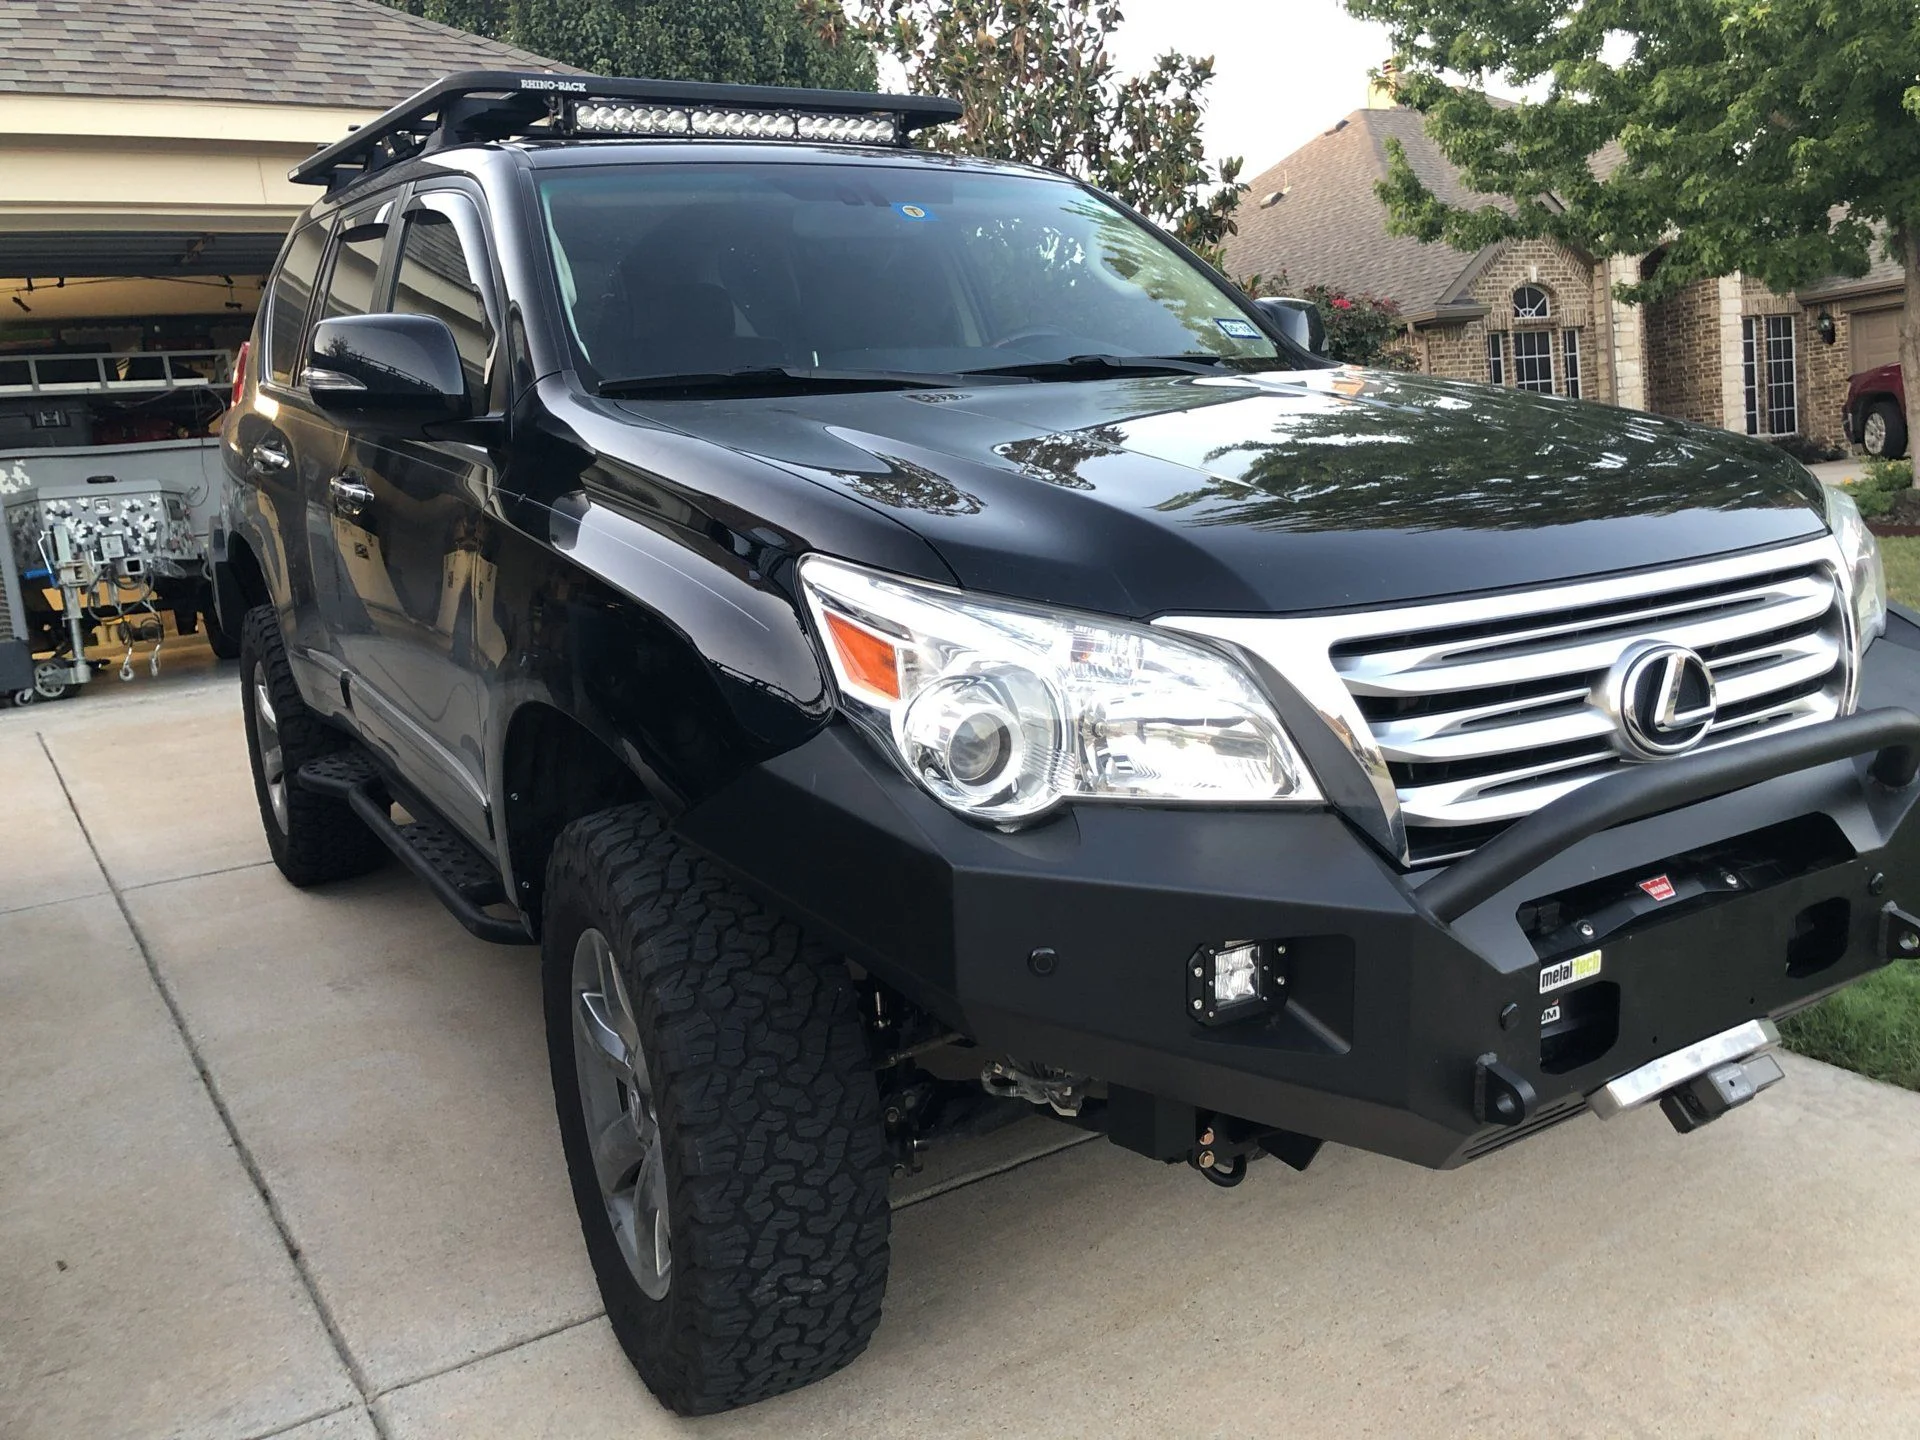
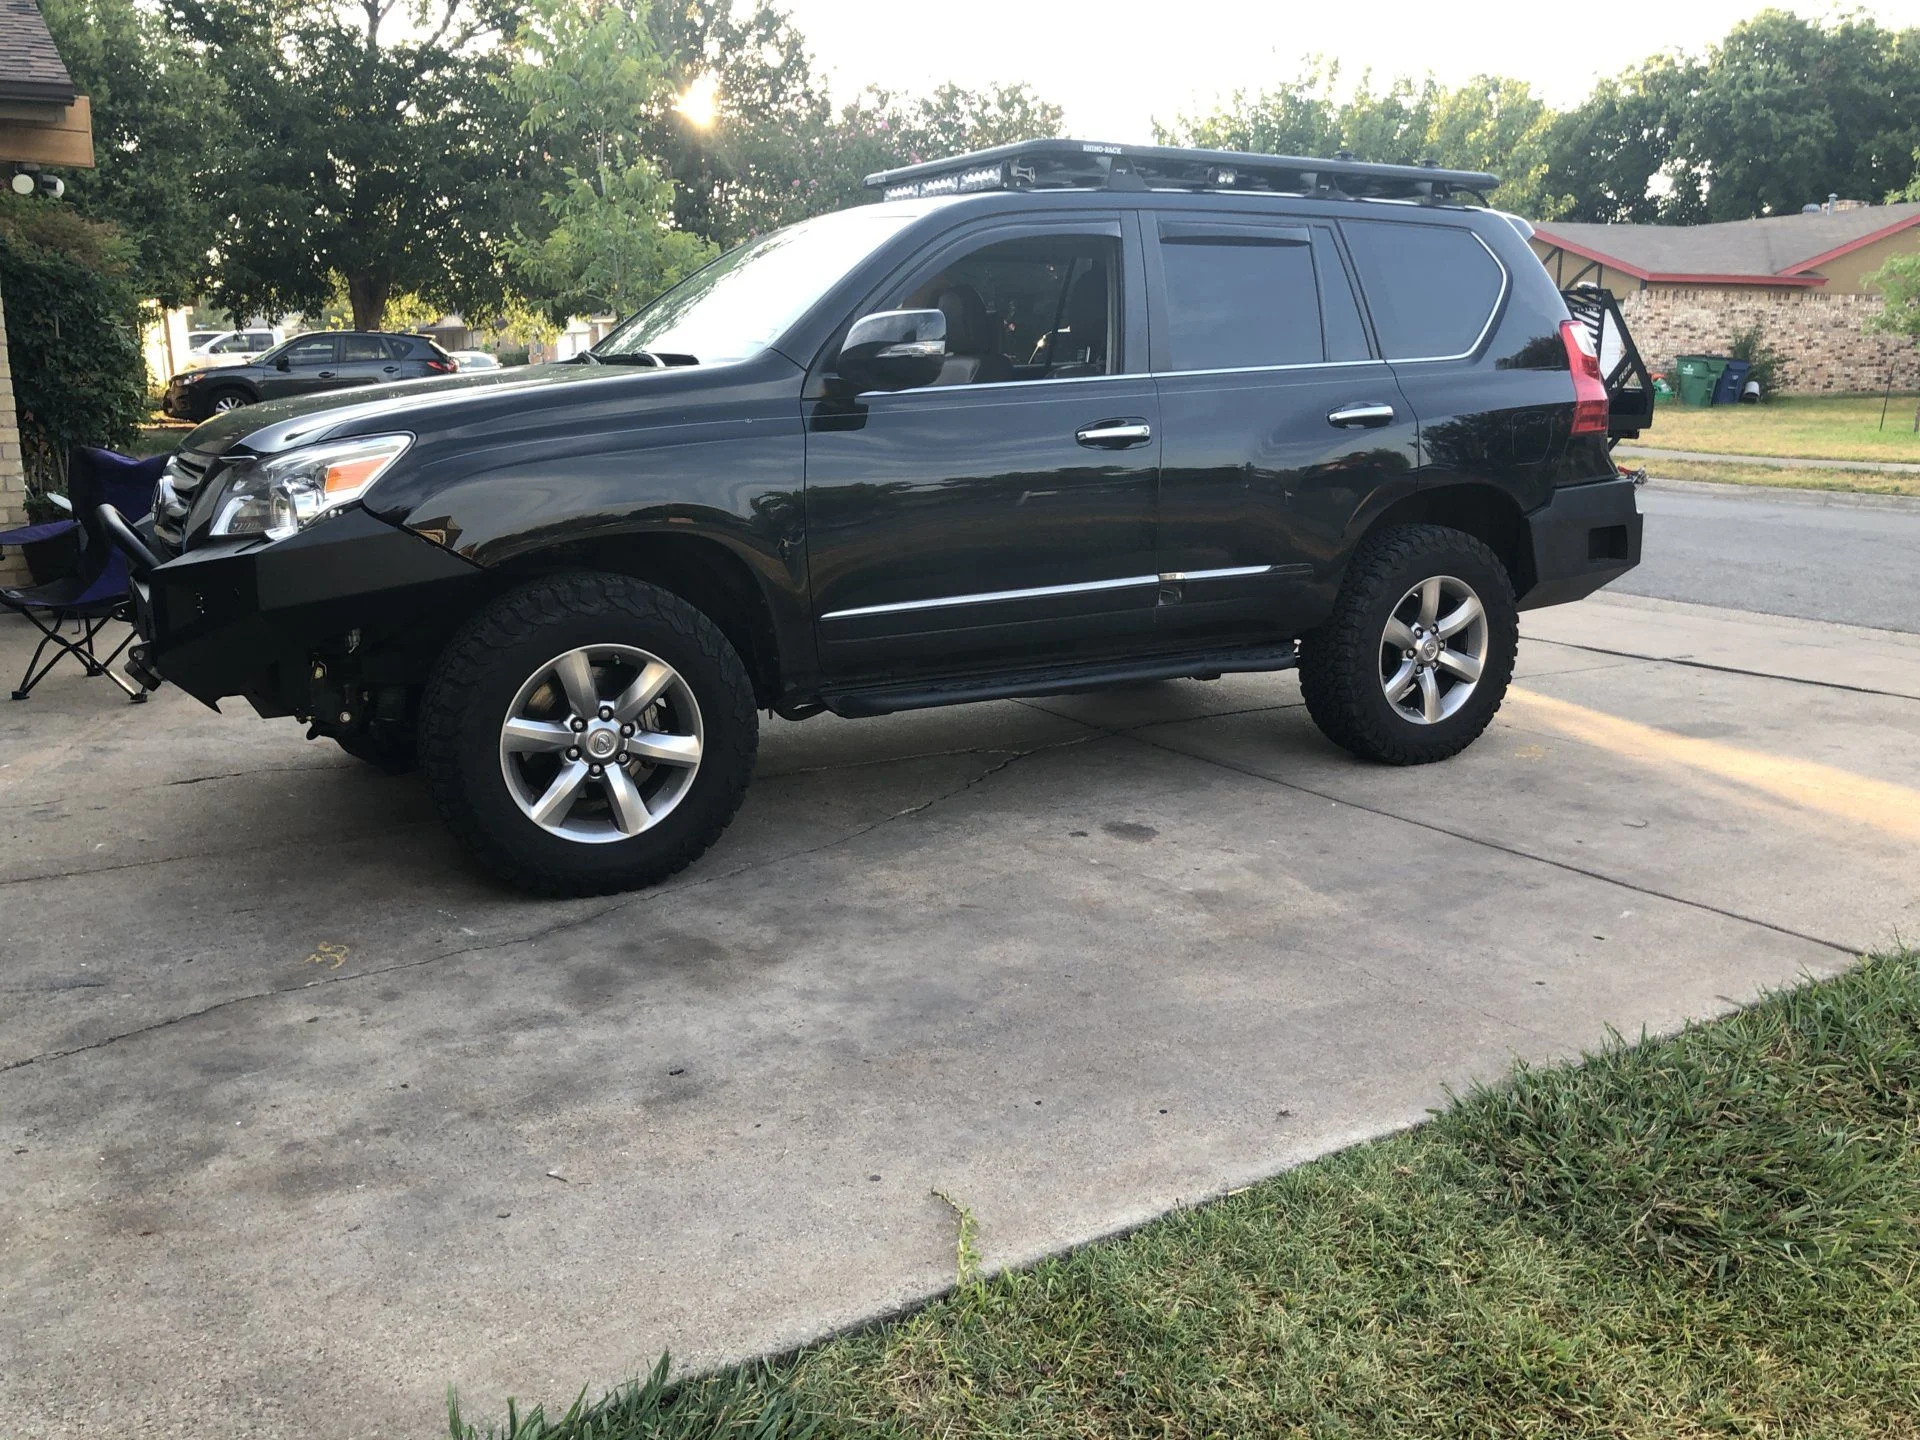
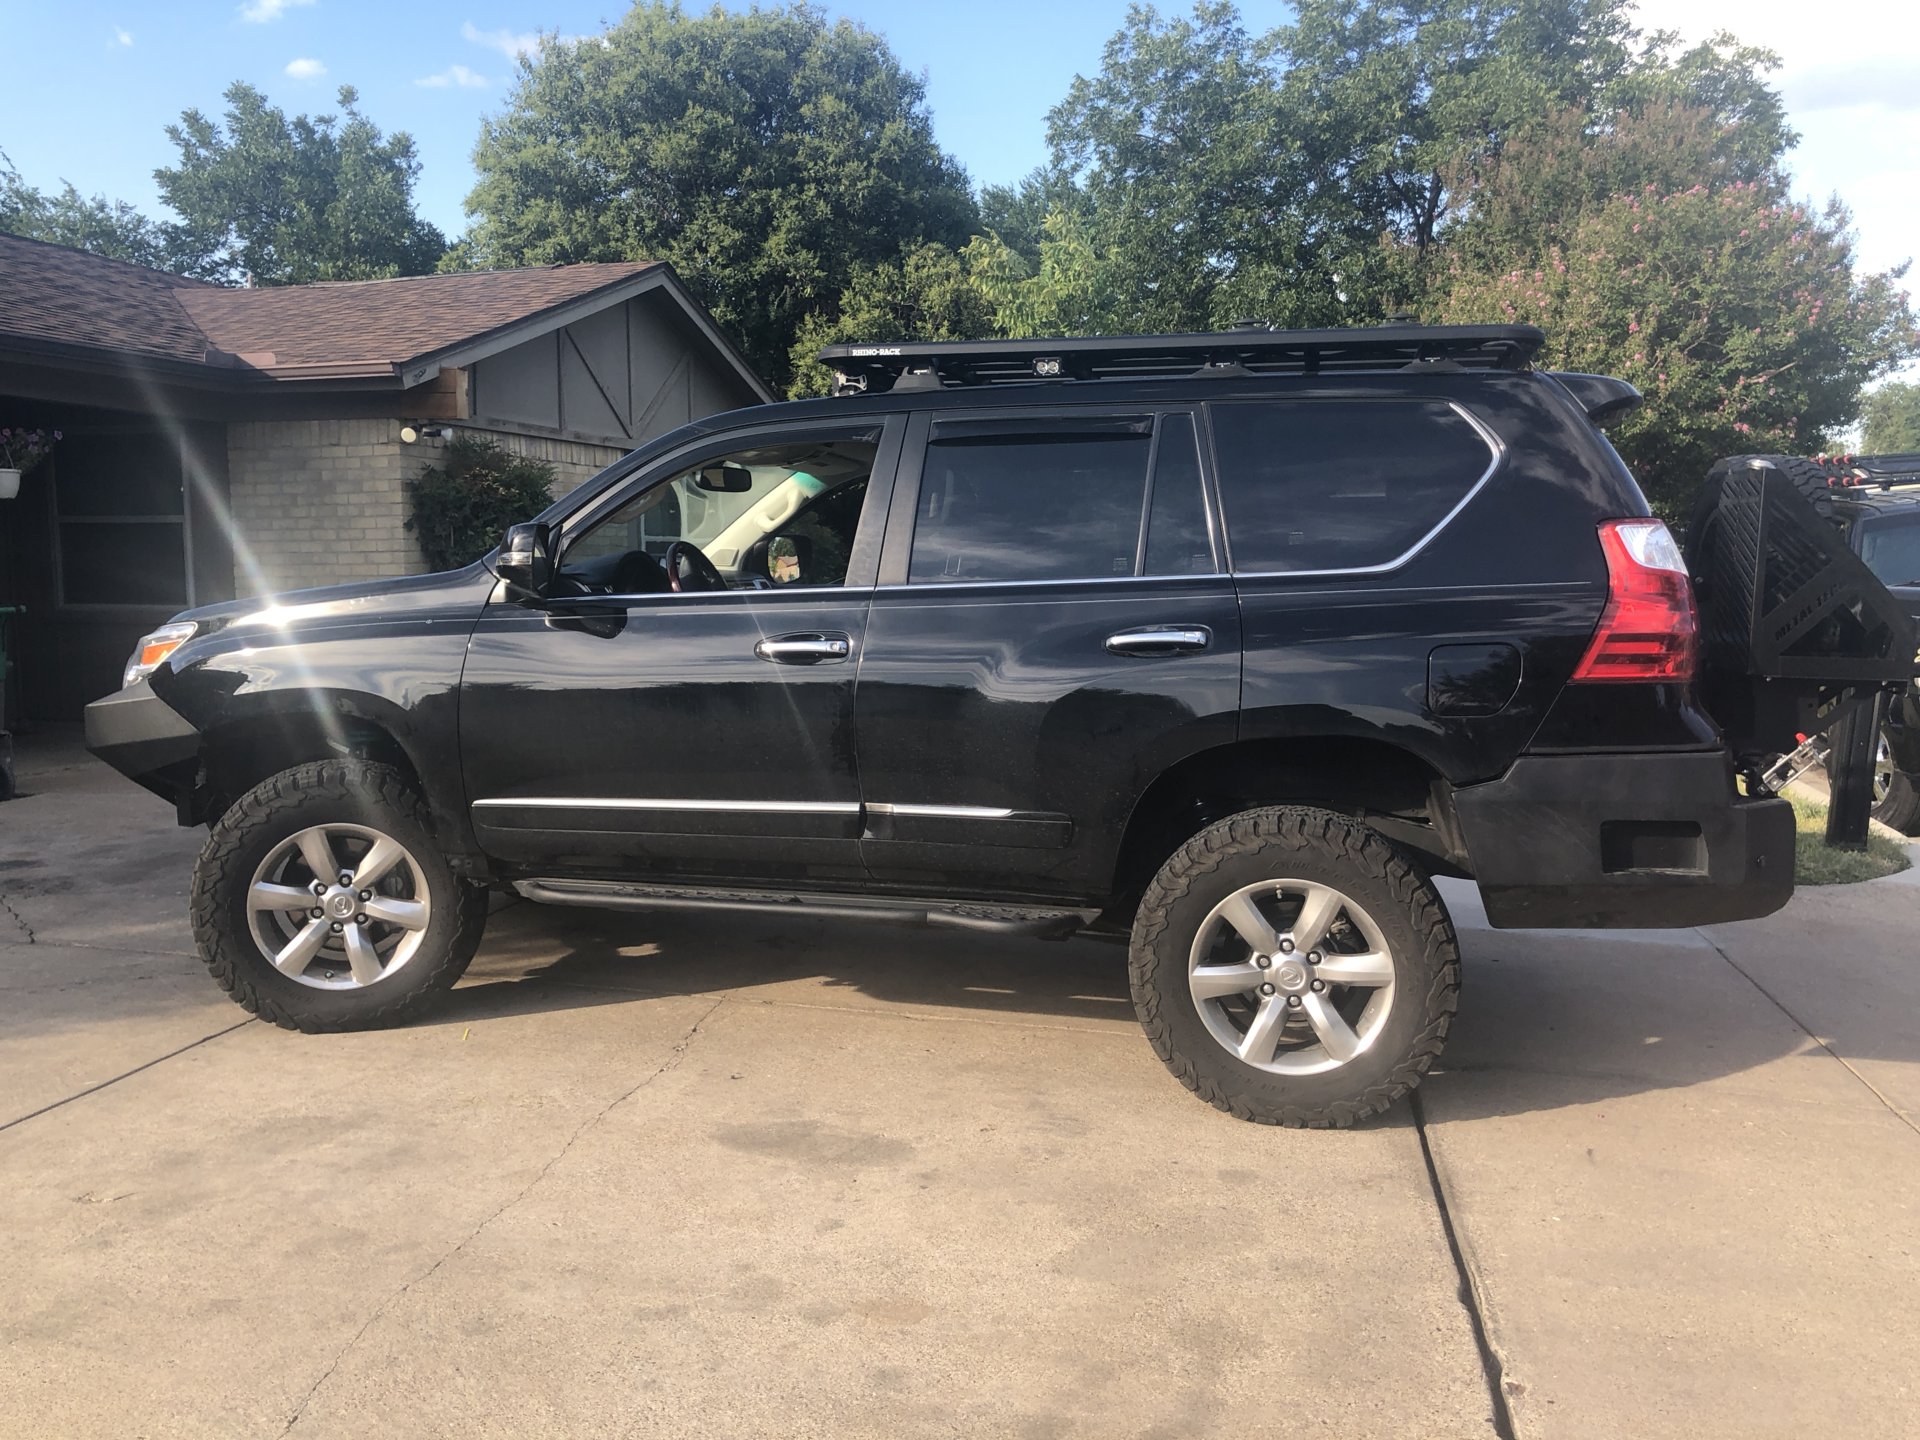
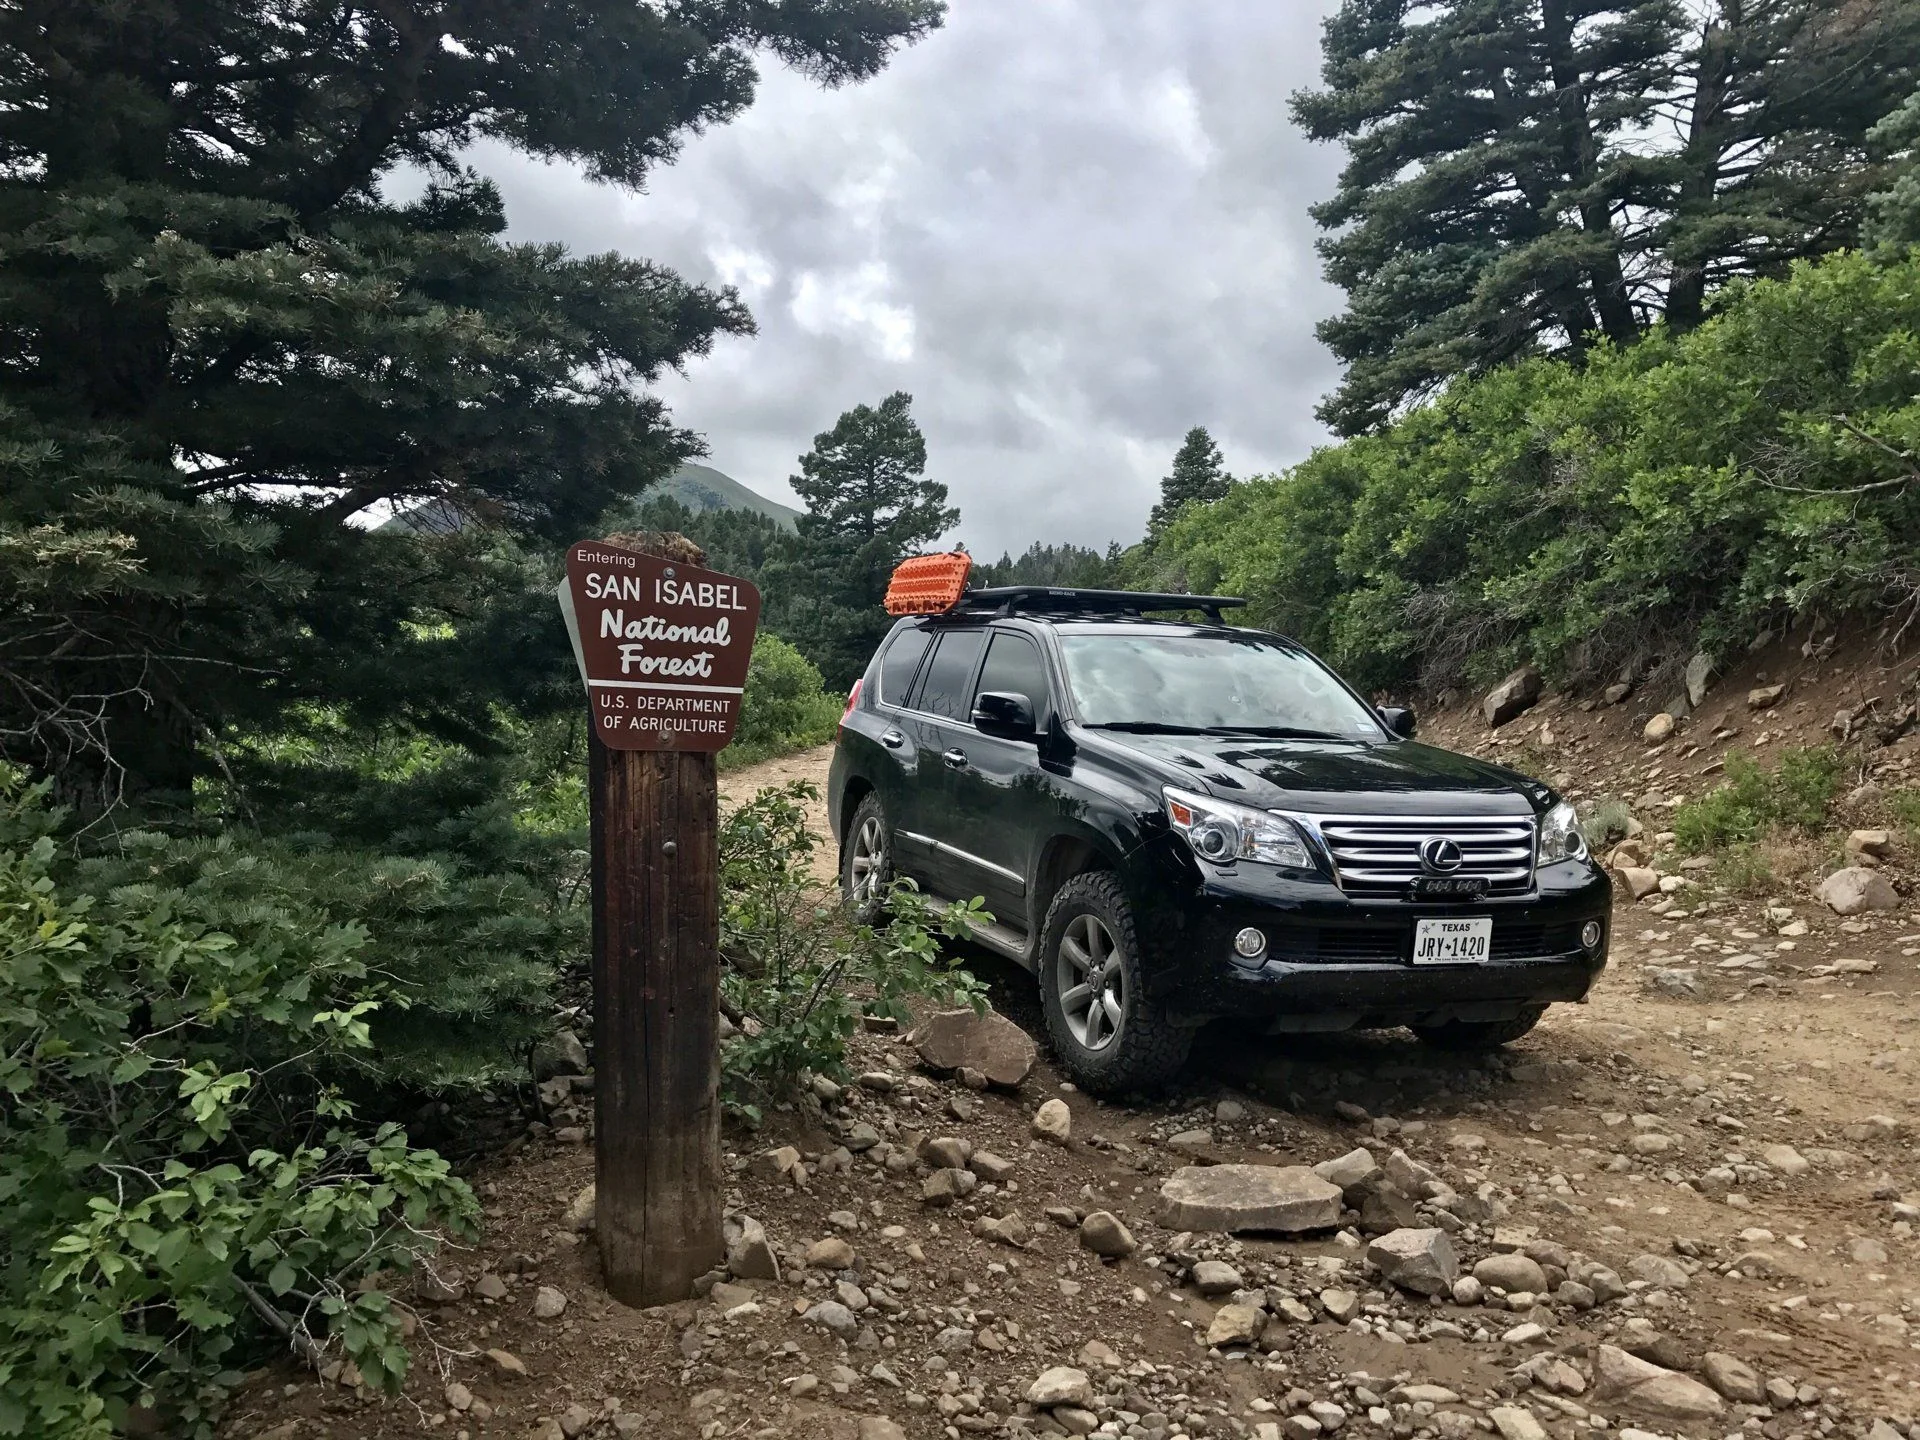
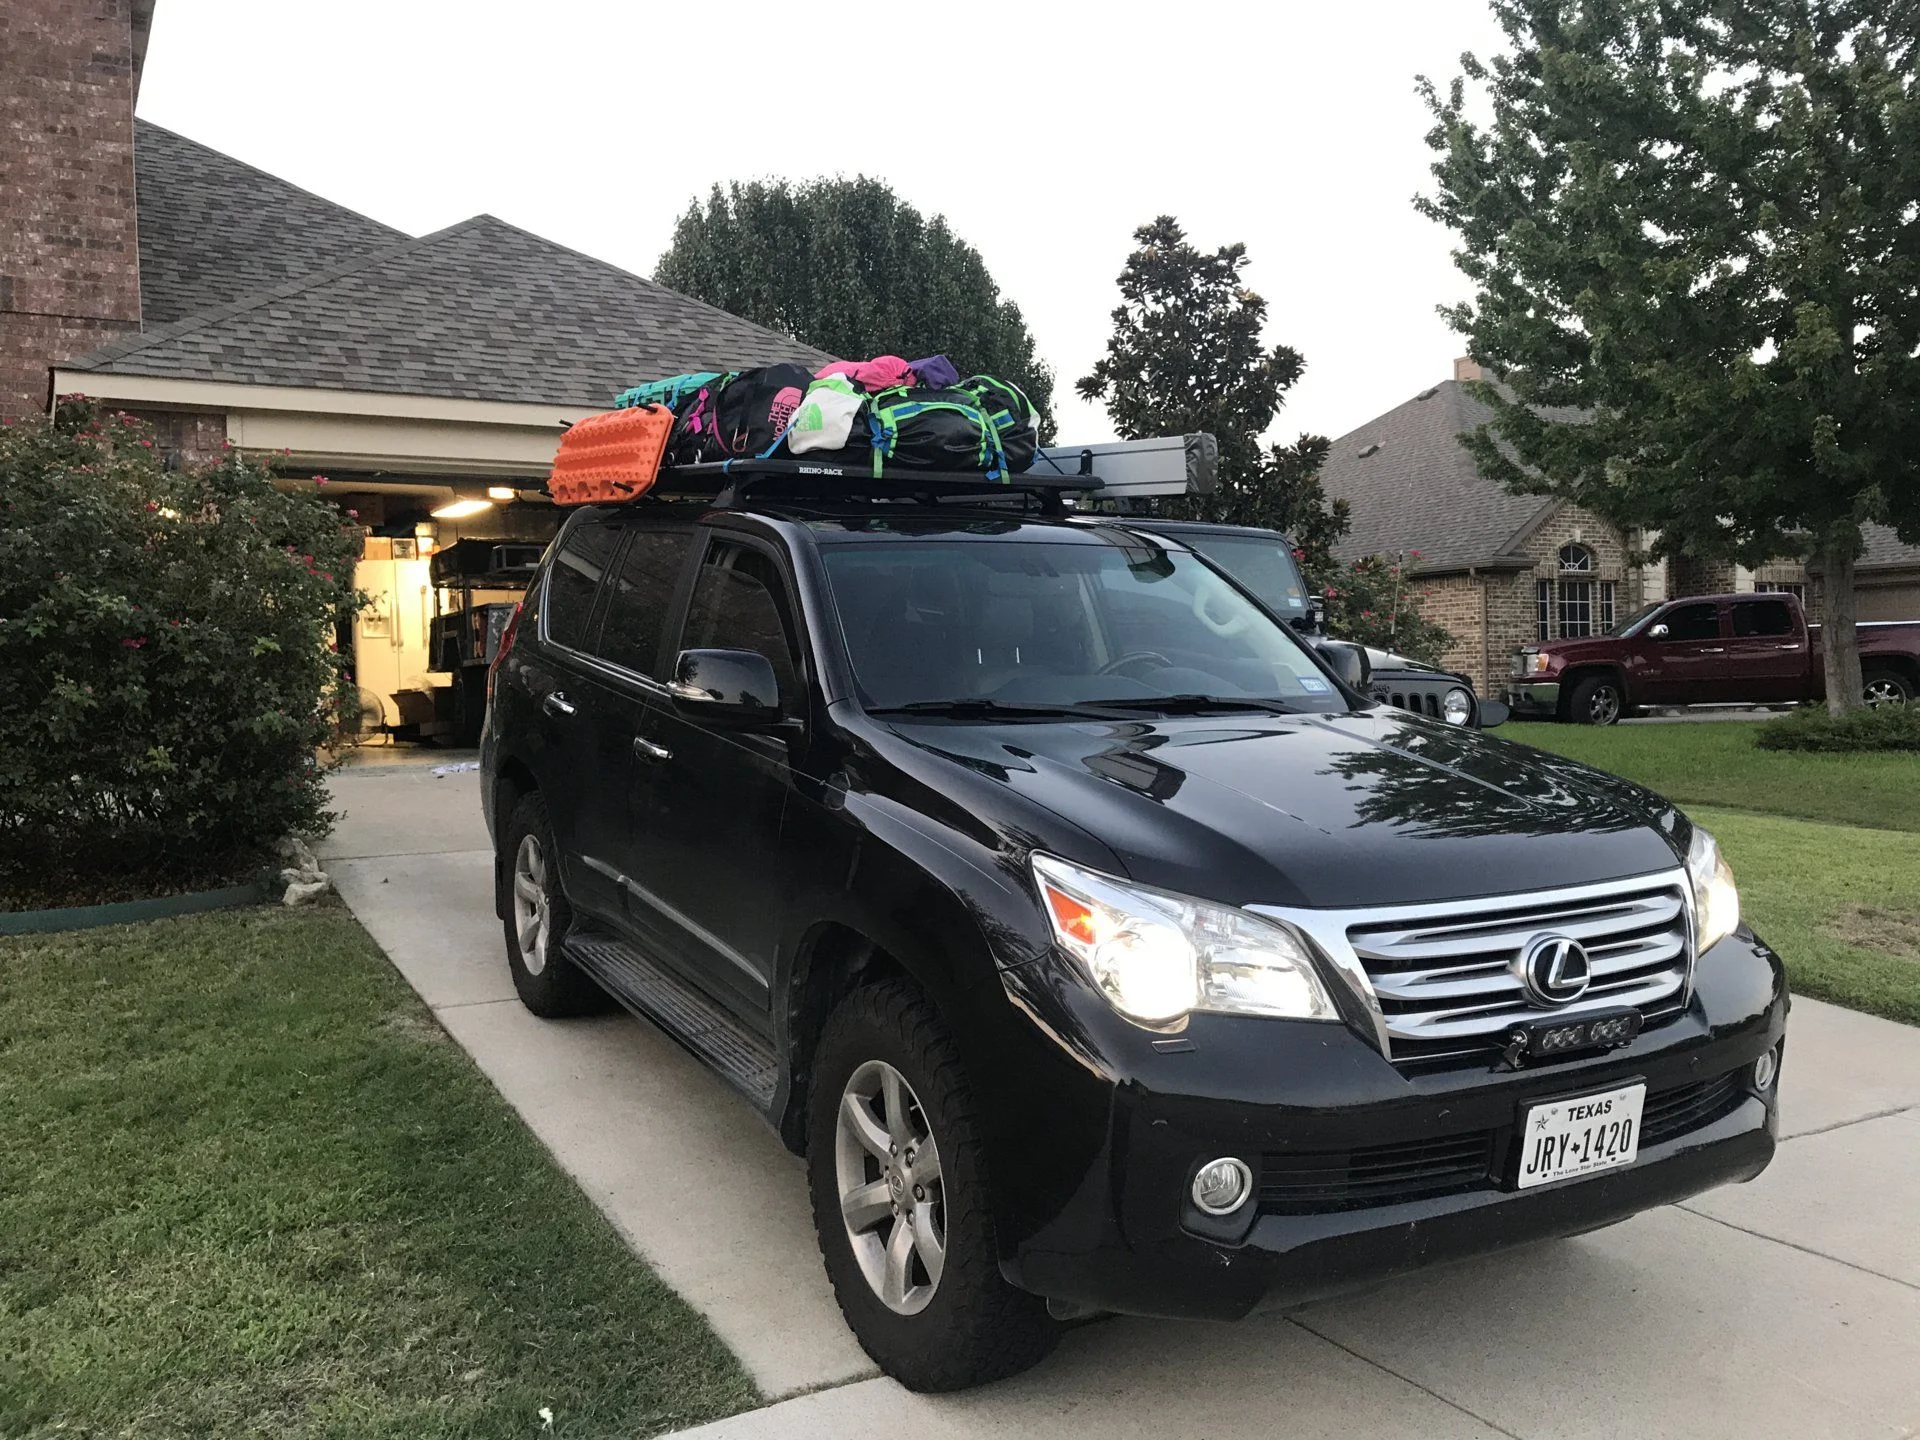
One of the first things I did was install a Rhino Rack Pioneer. We needed the extra storage space for when we are not pulling our trailer. The rack fits great and adds so many options when it comes to carrying things on the roof.


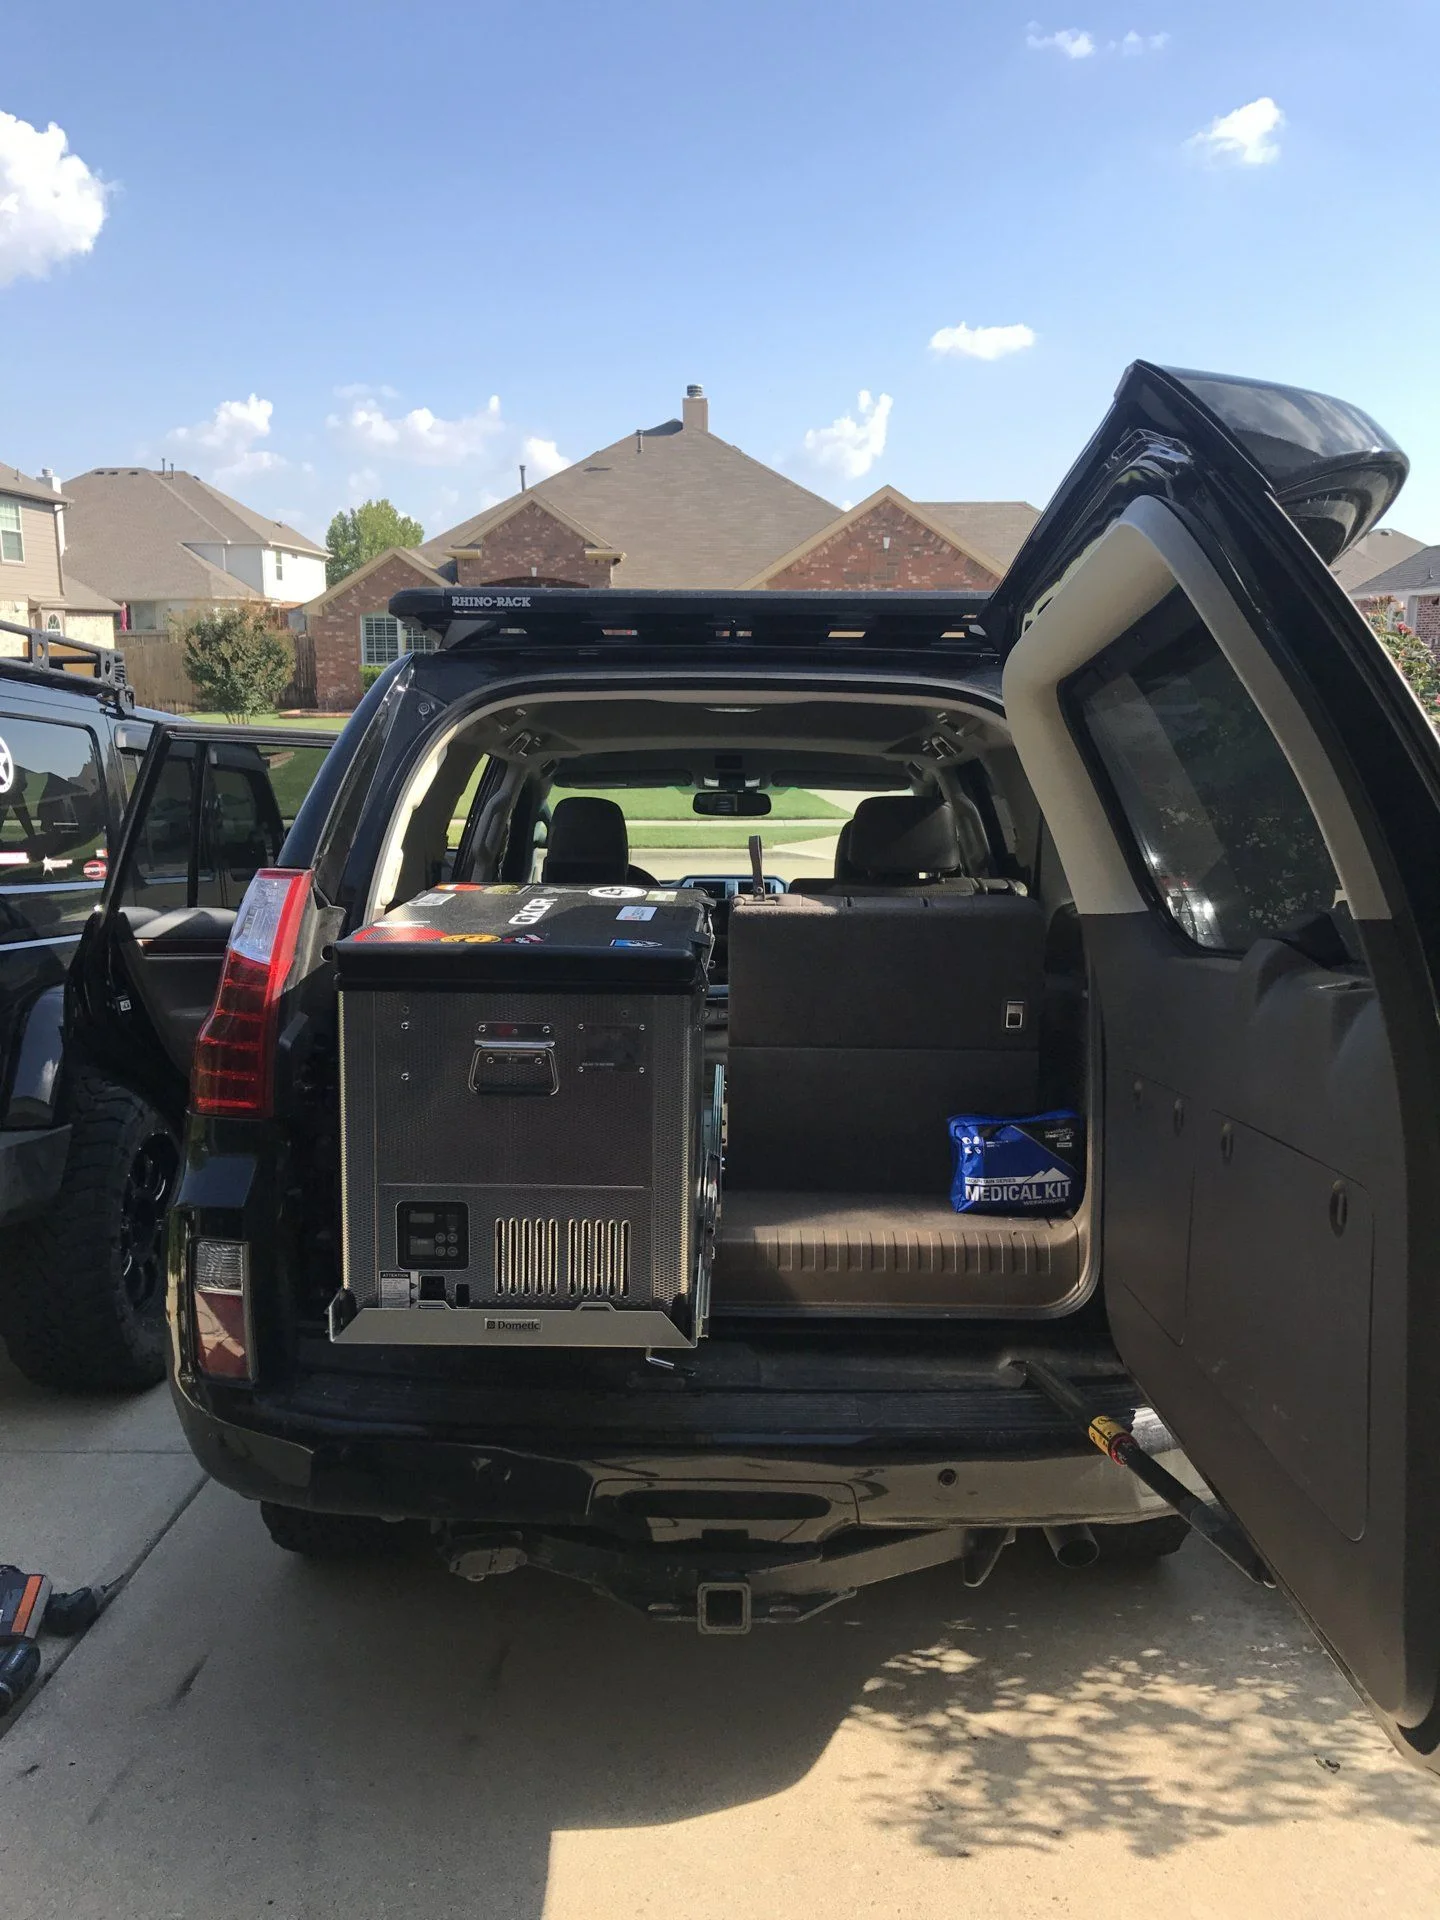
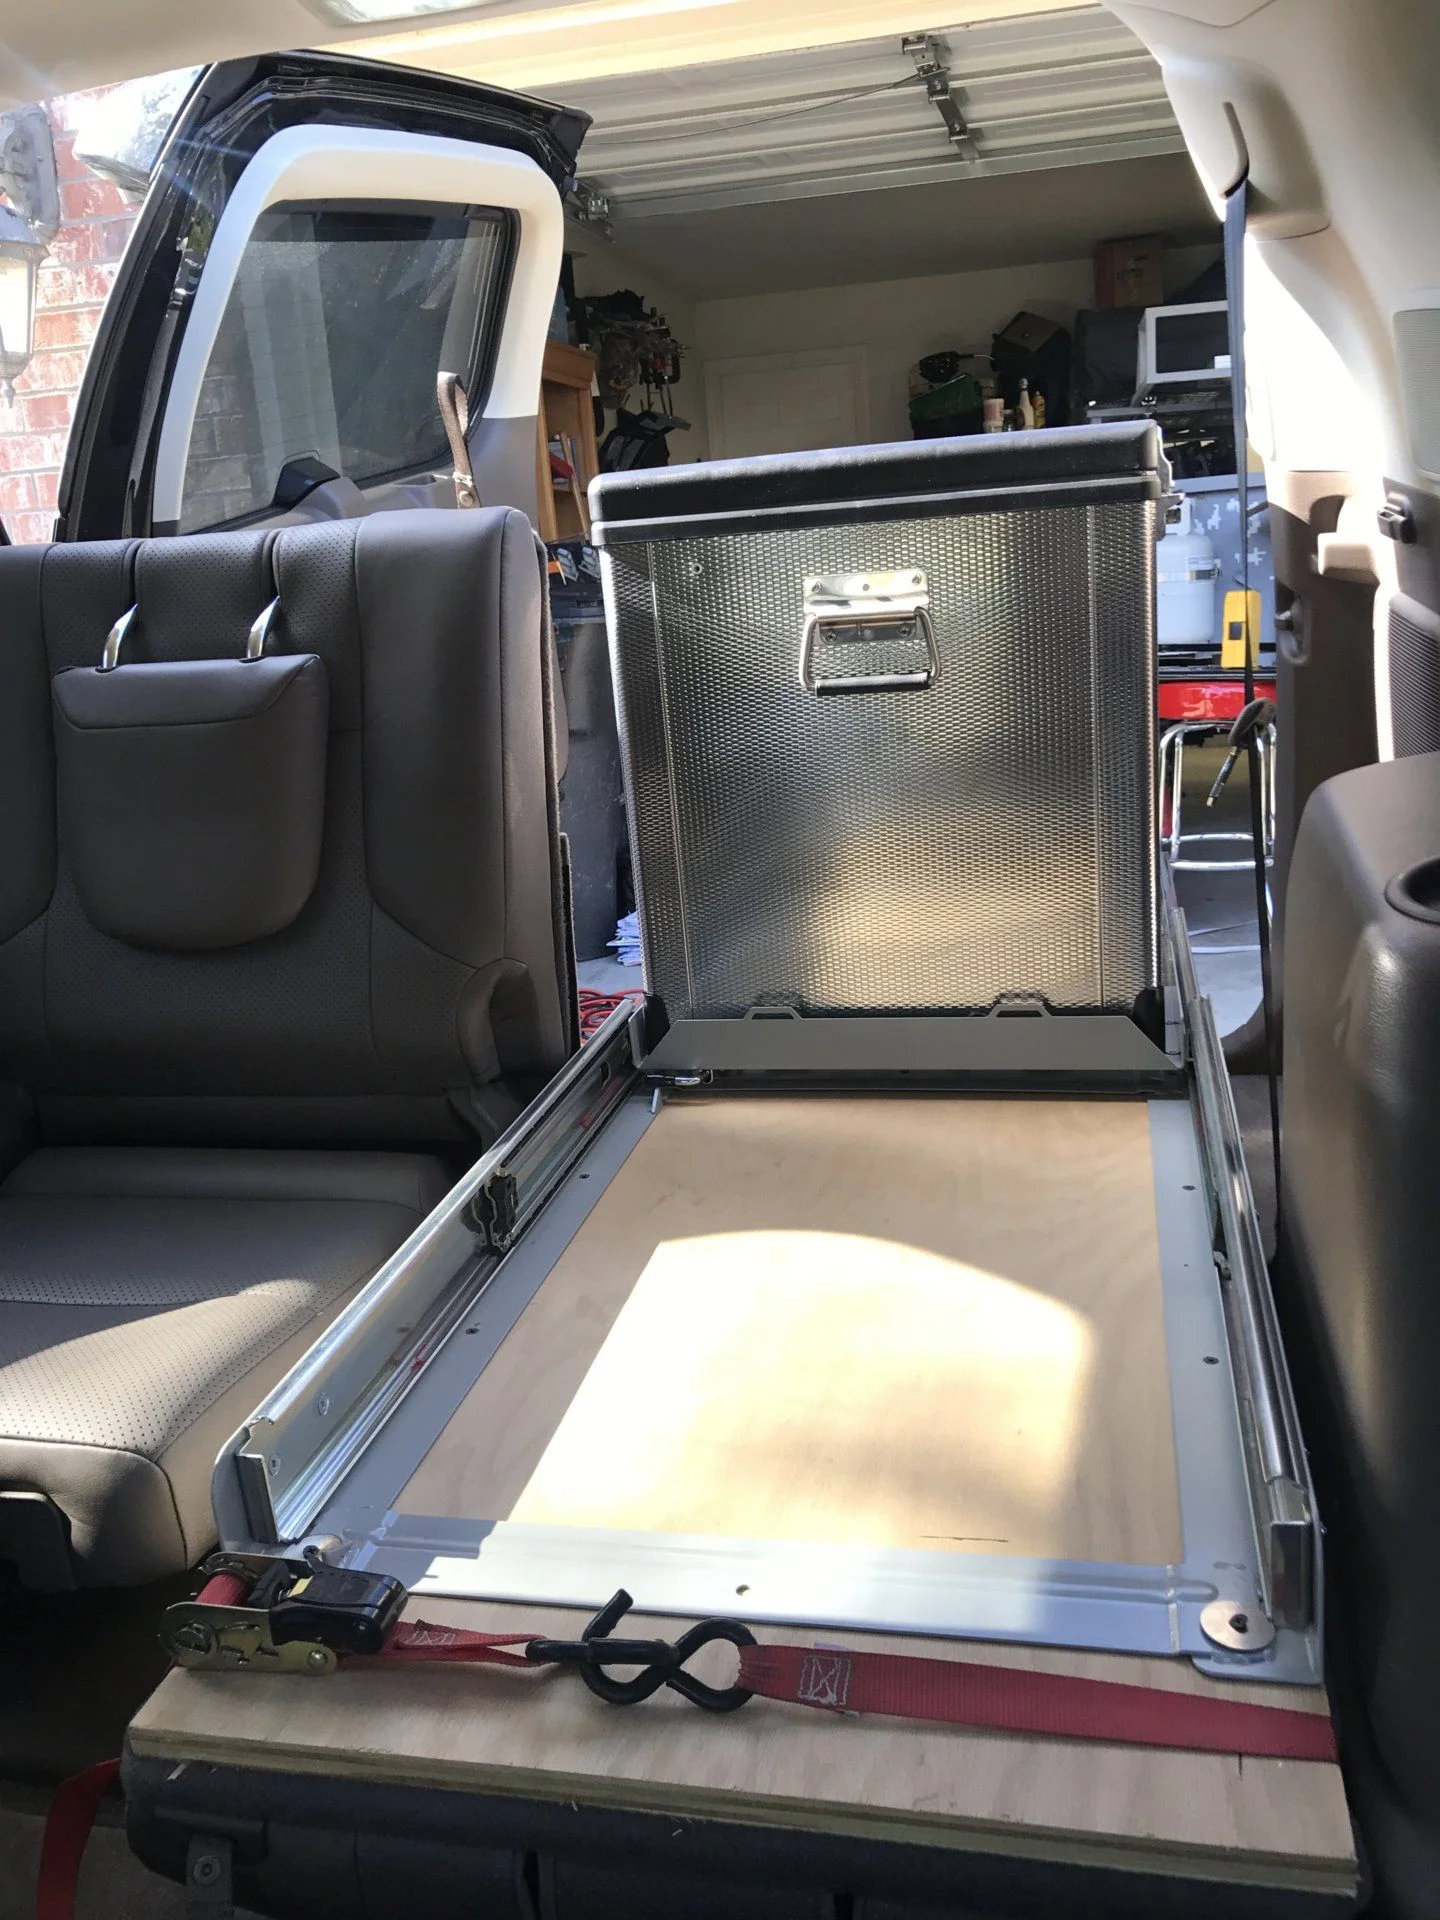
The next project was mounting a fridge slide and installing the wiring for the fridge and future electronics that would be needed in the rear of the vehicle. I will add some pictures of the wiring that I did but here are a few shots of the fridge installed. I mounted the slide to a piece if plywood so it can be removed when its not needed. My wife drives this every day and there are times when the rear seats are needed.


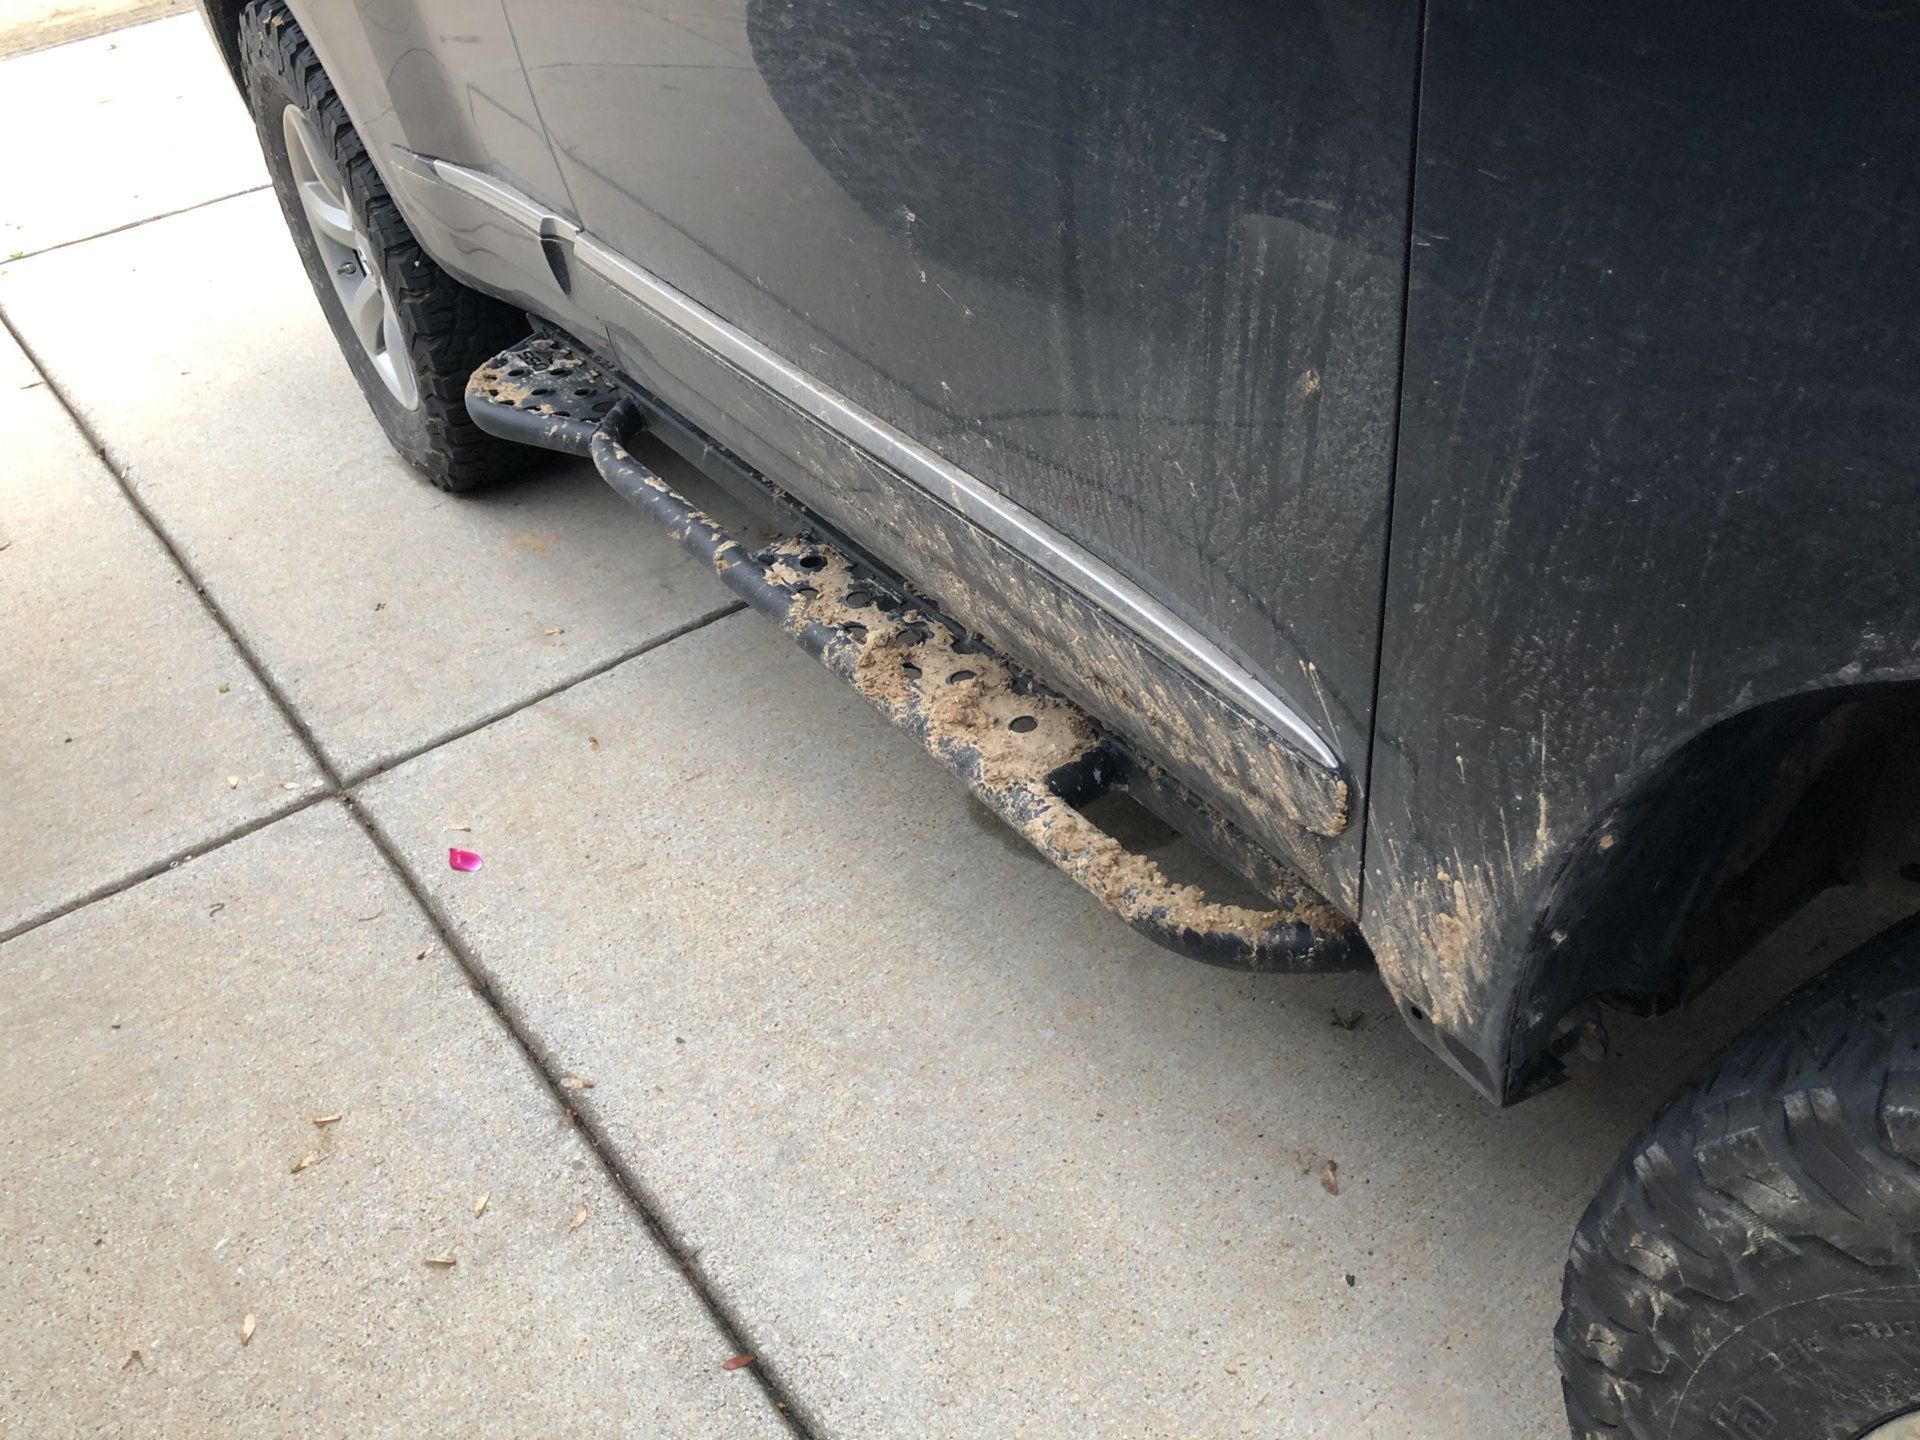
I picked up some SSO Sliders around Christmas time and got them powder coated. They really look good and I am very happy with the quality of there work.


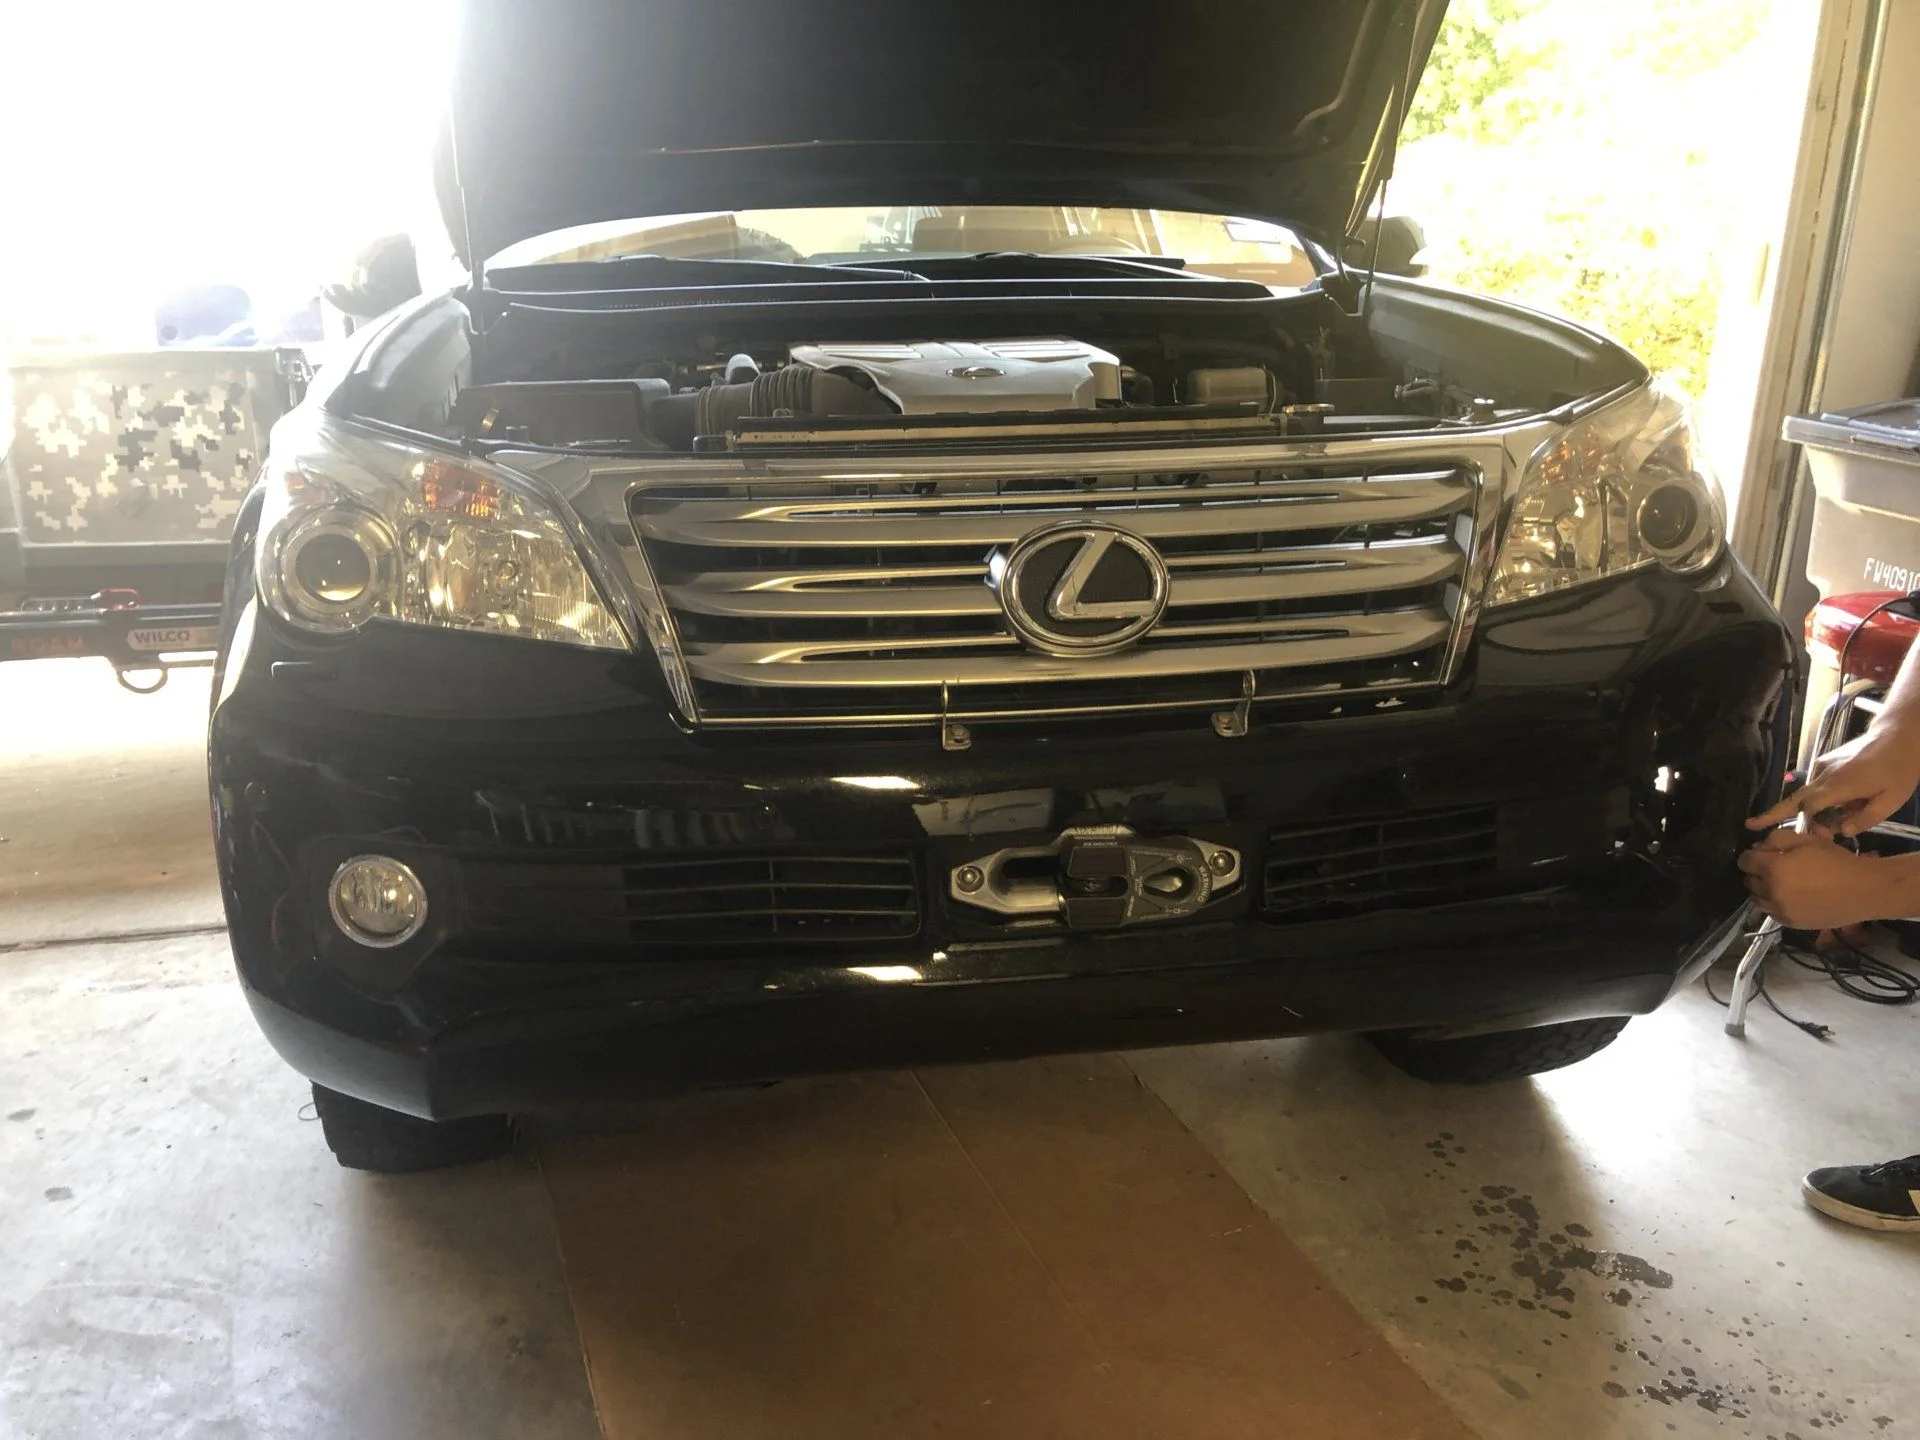
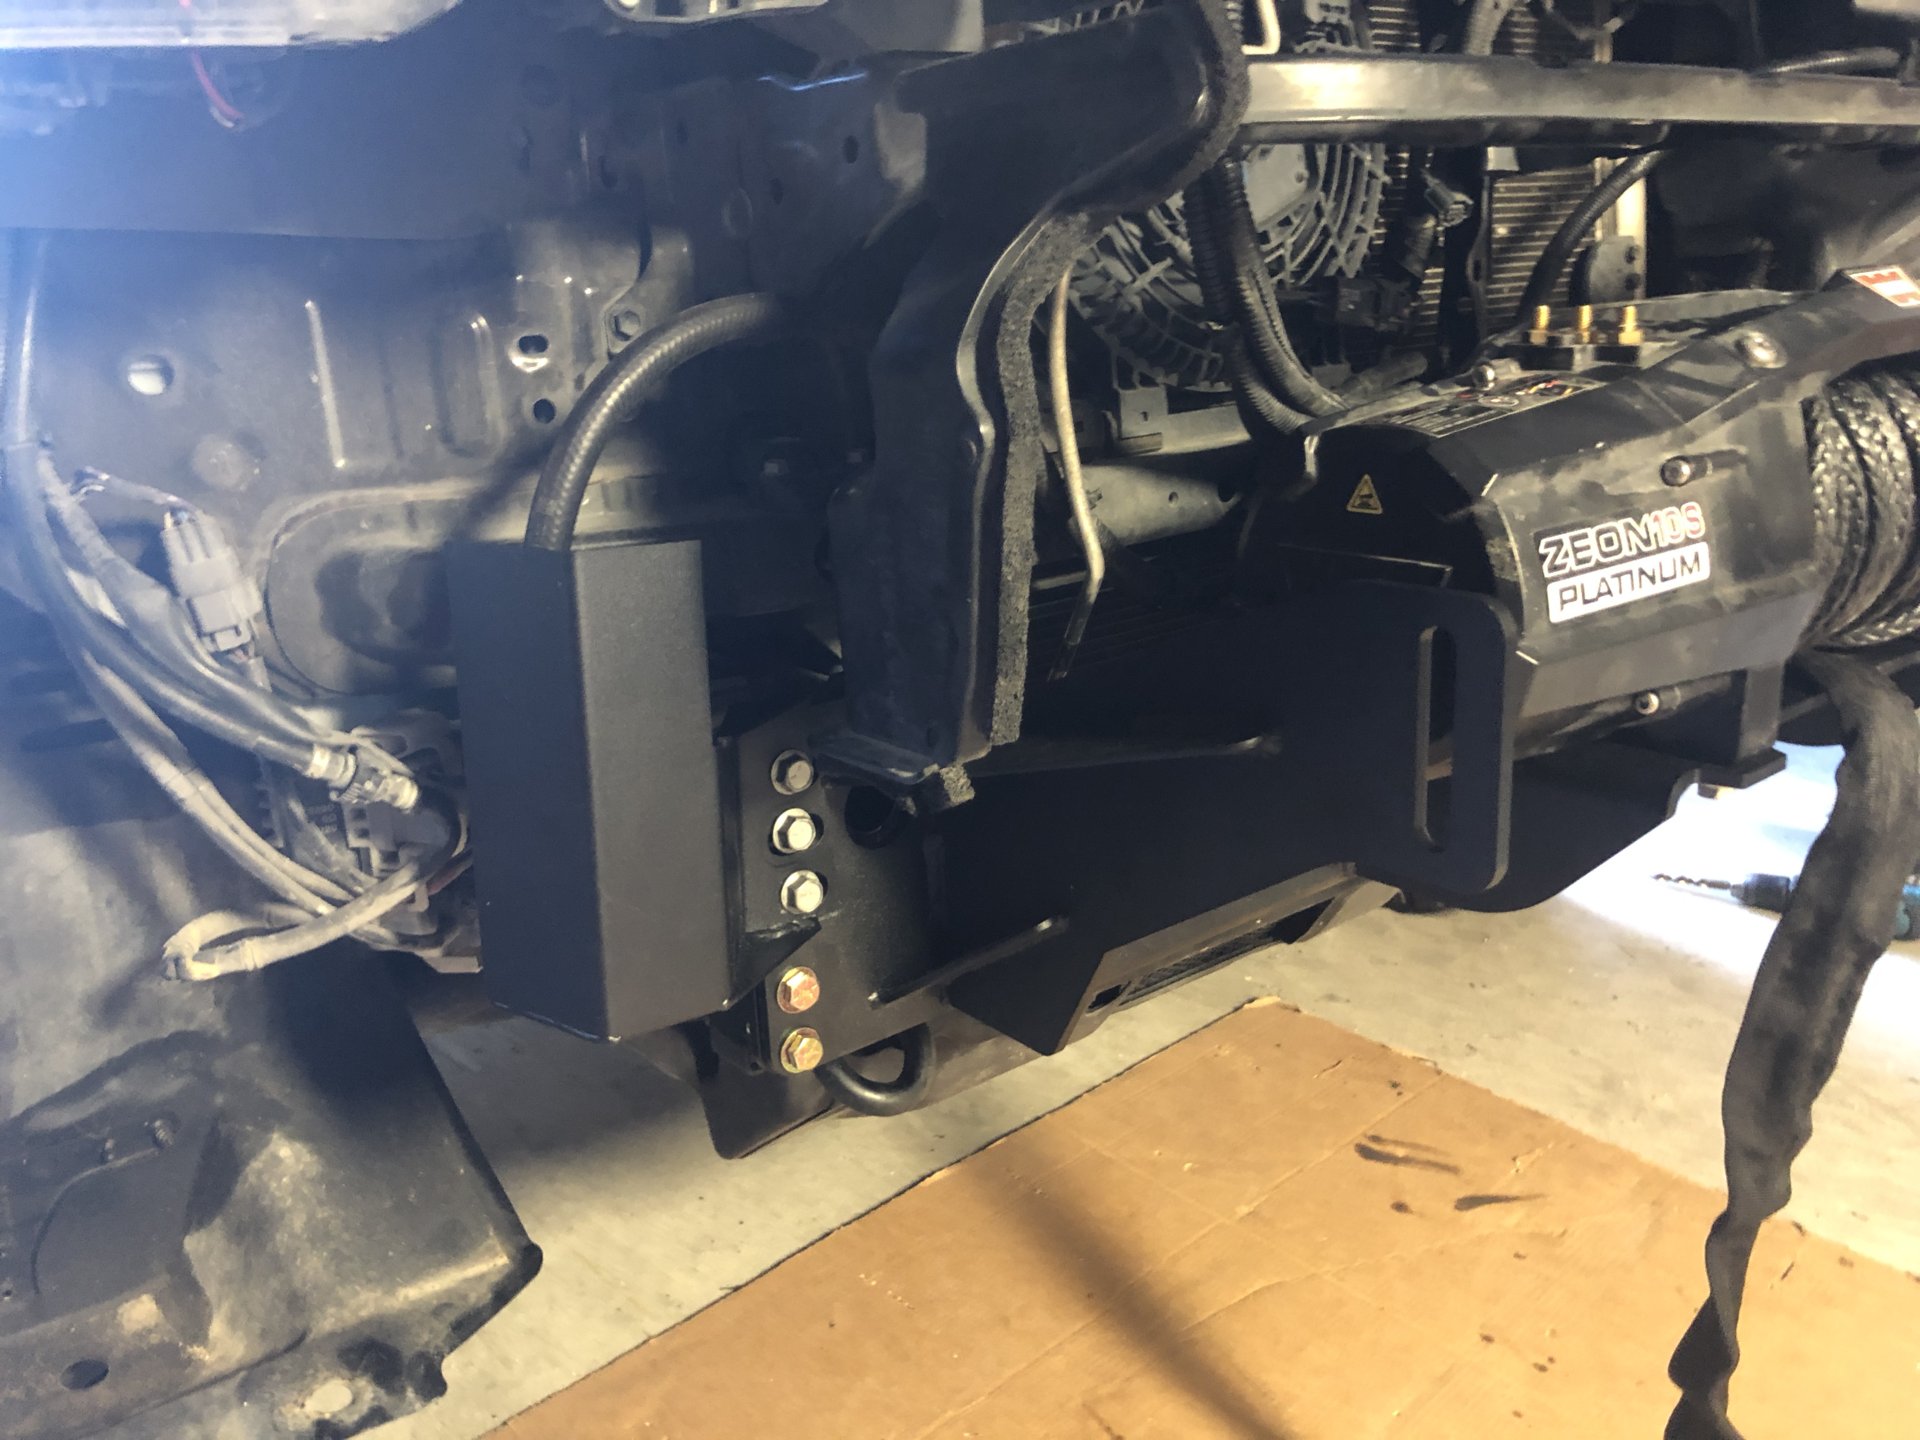
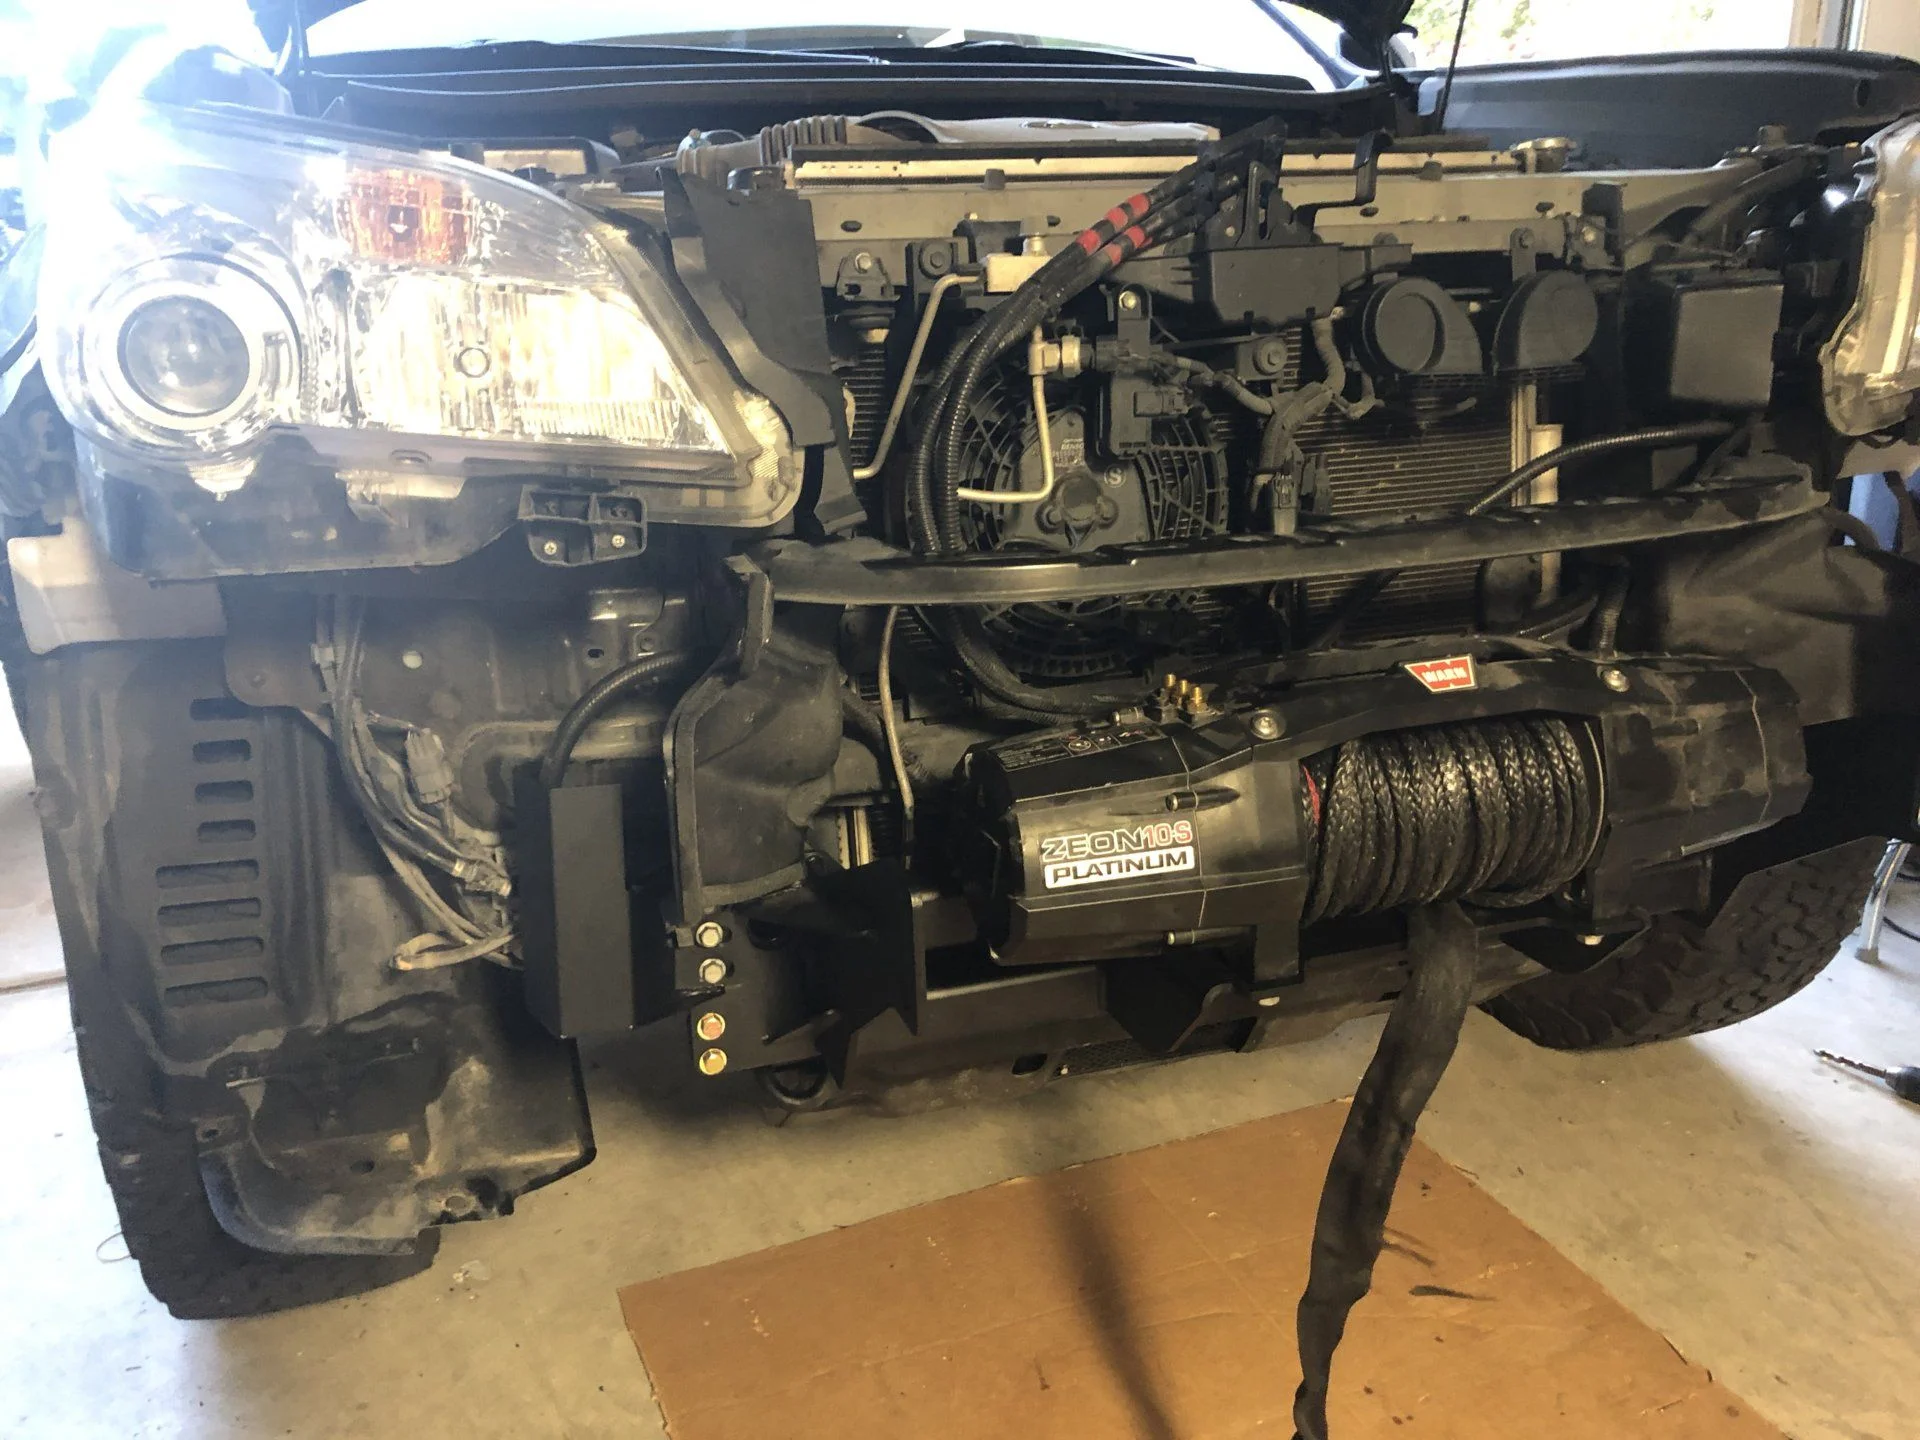
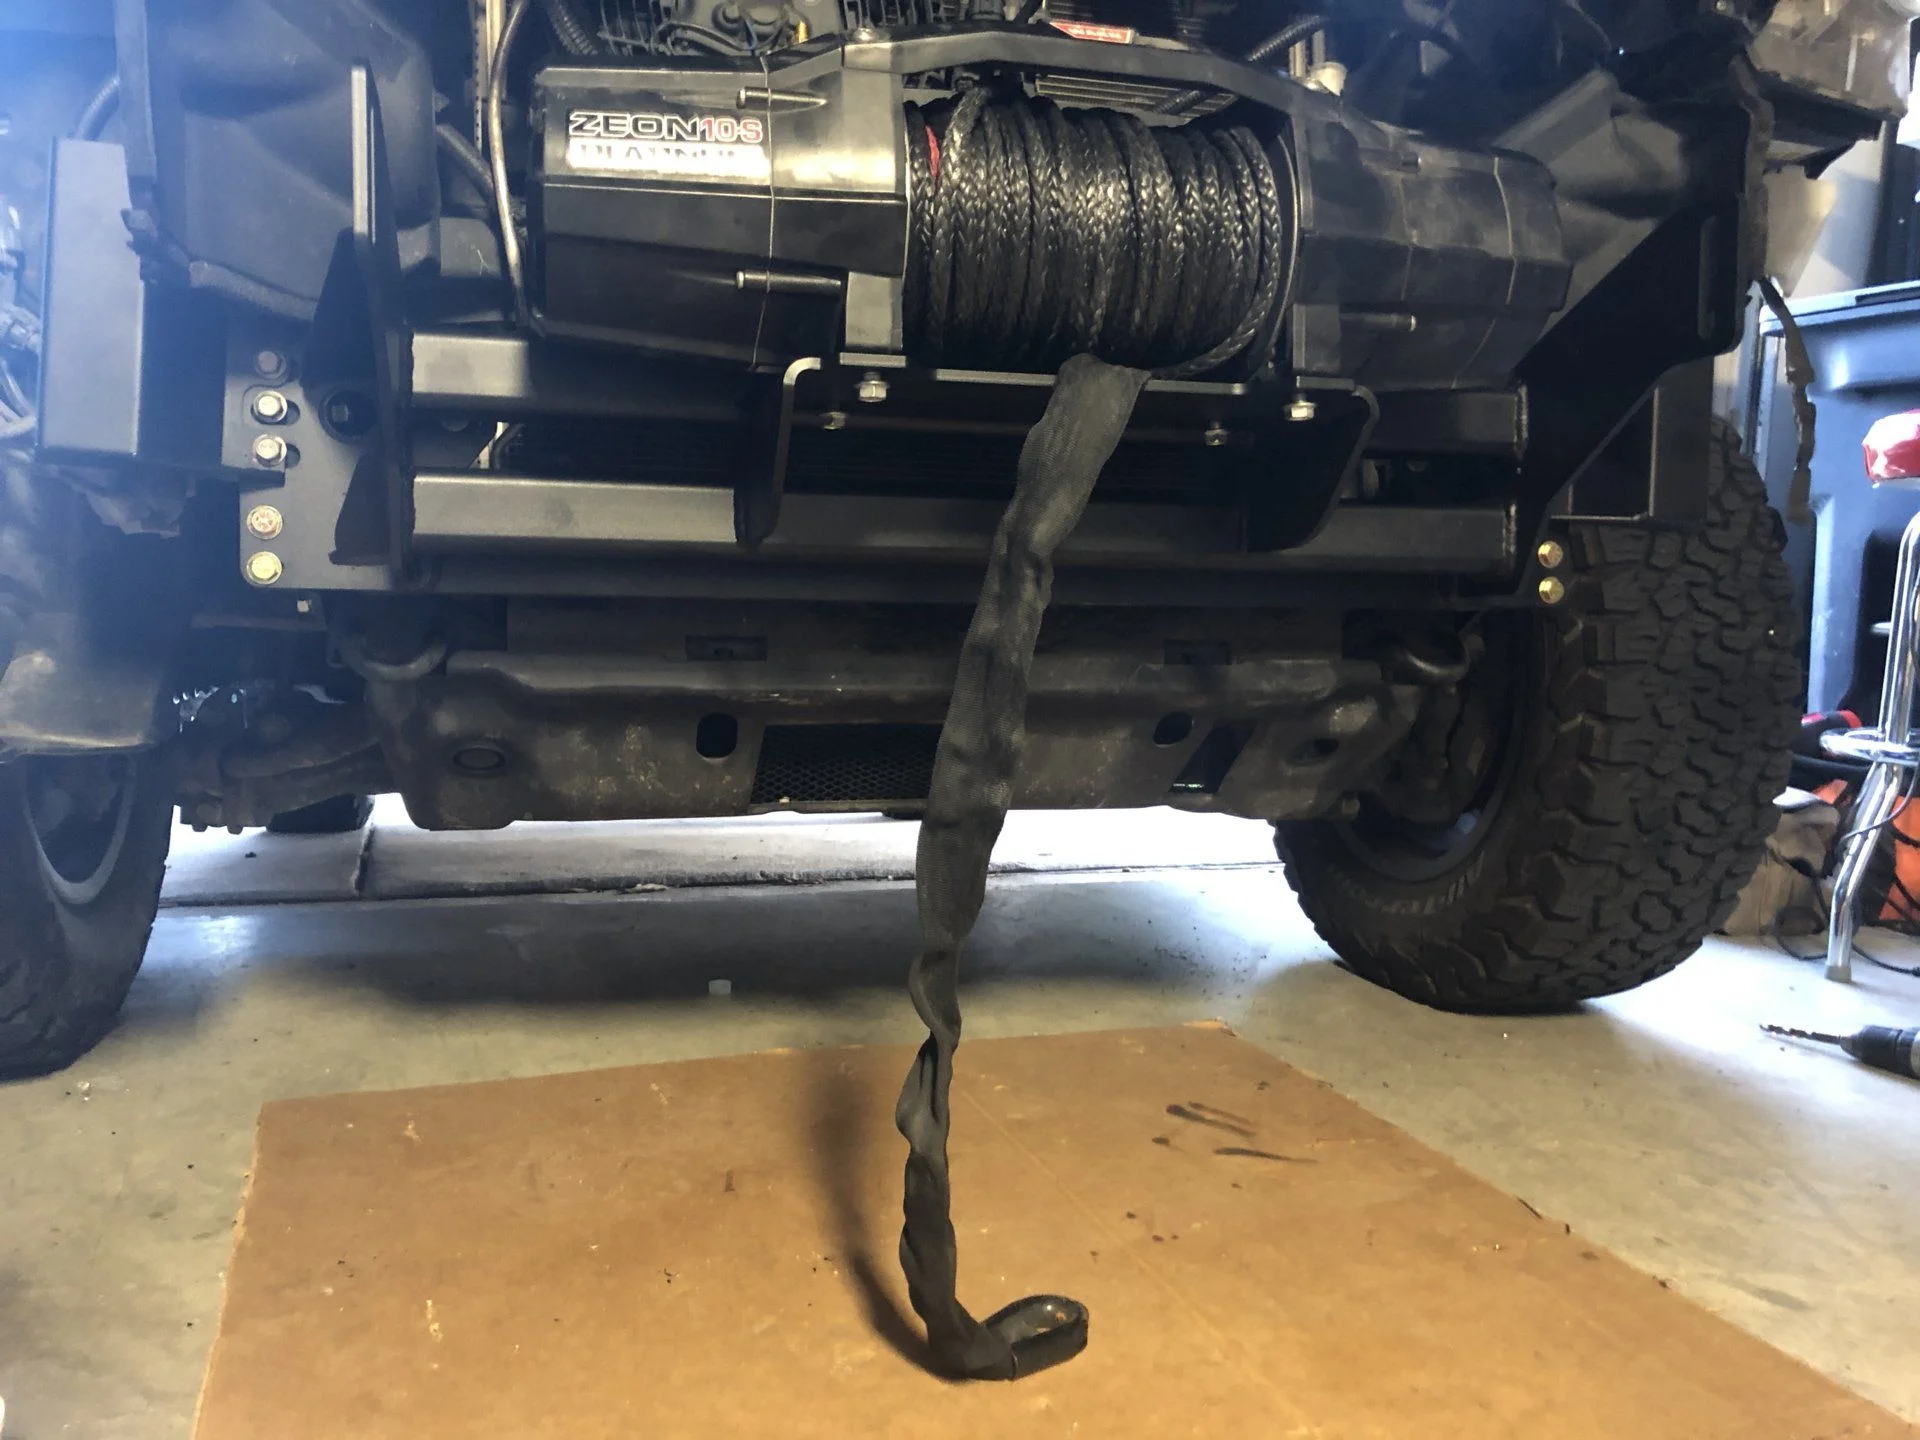
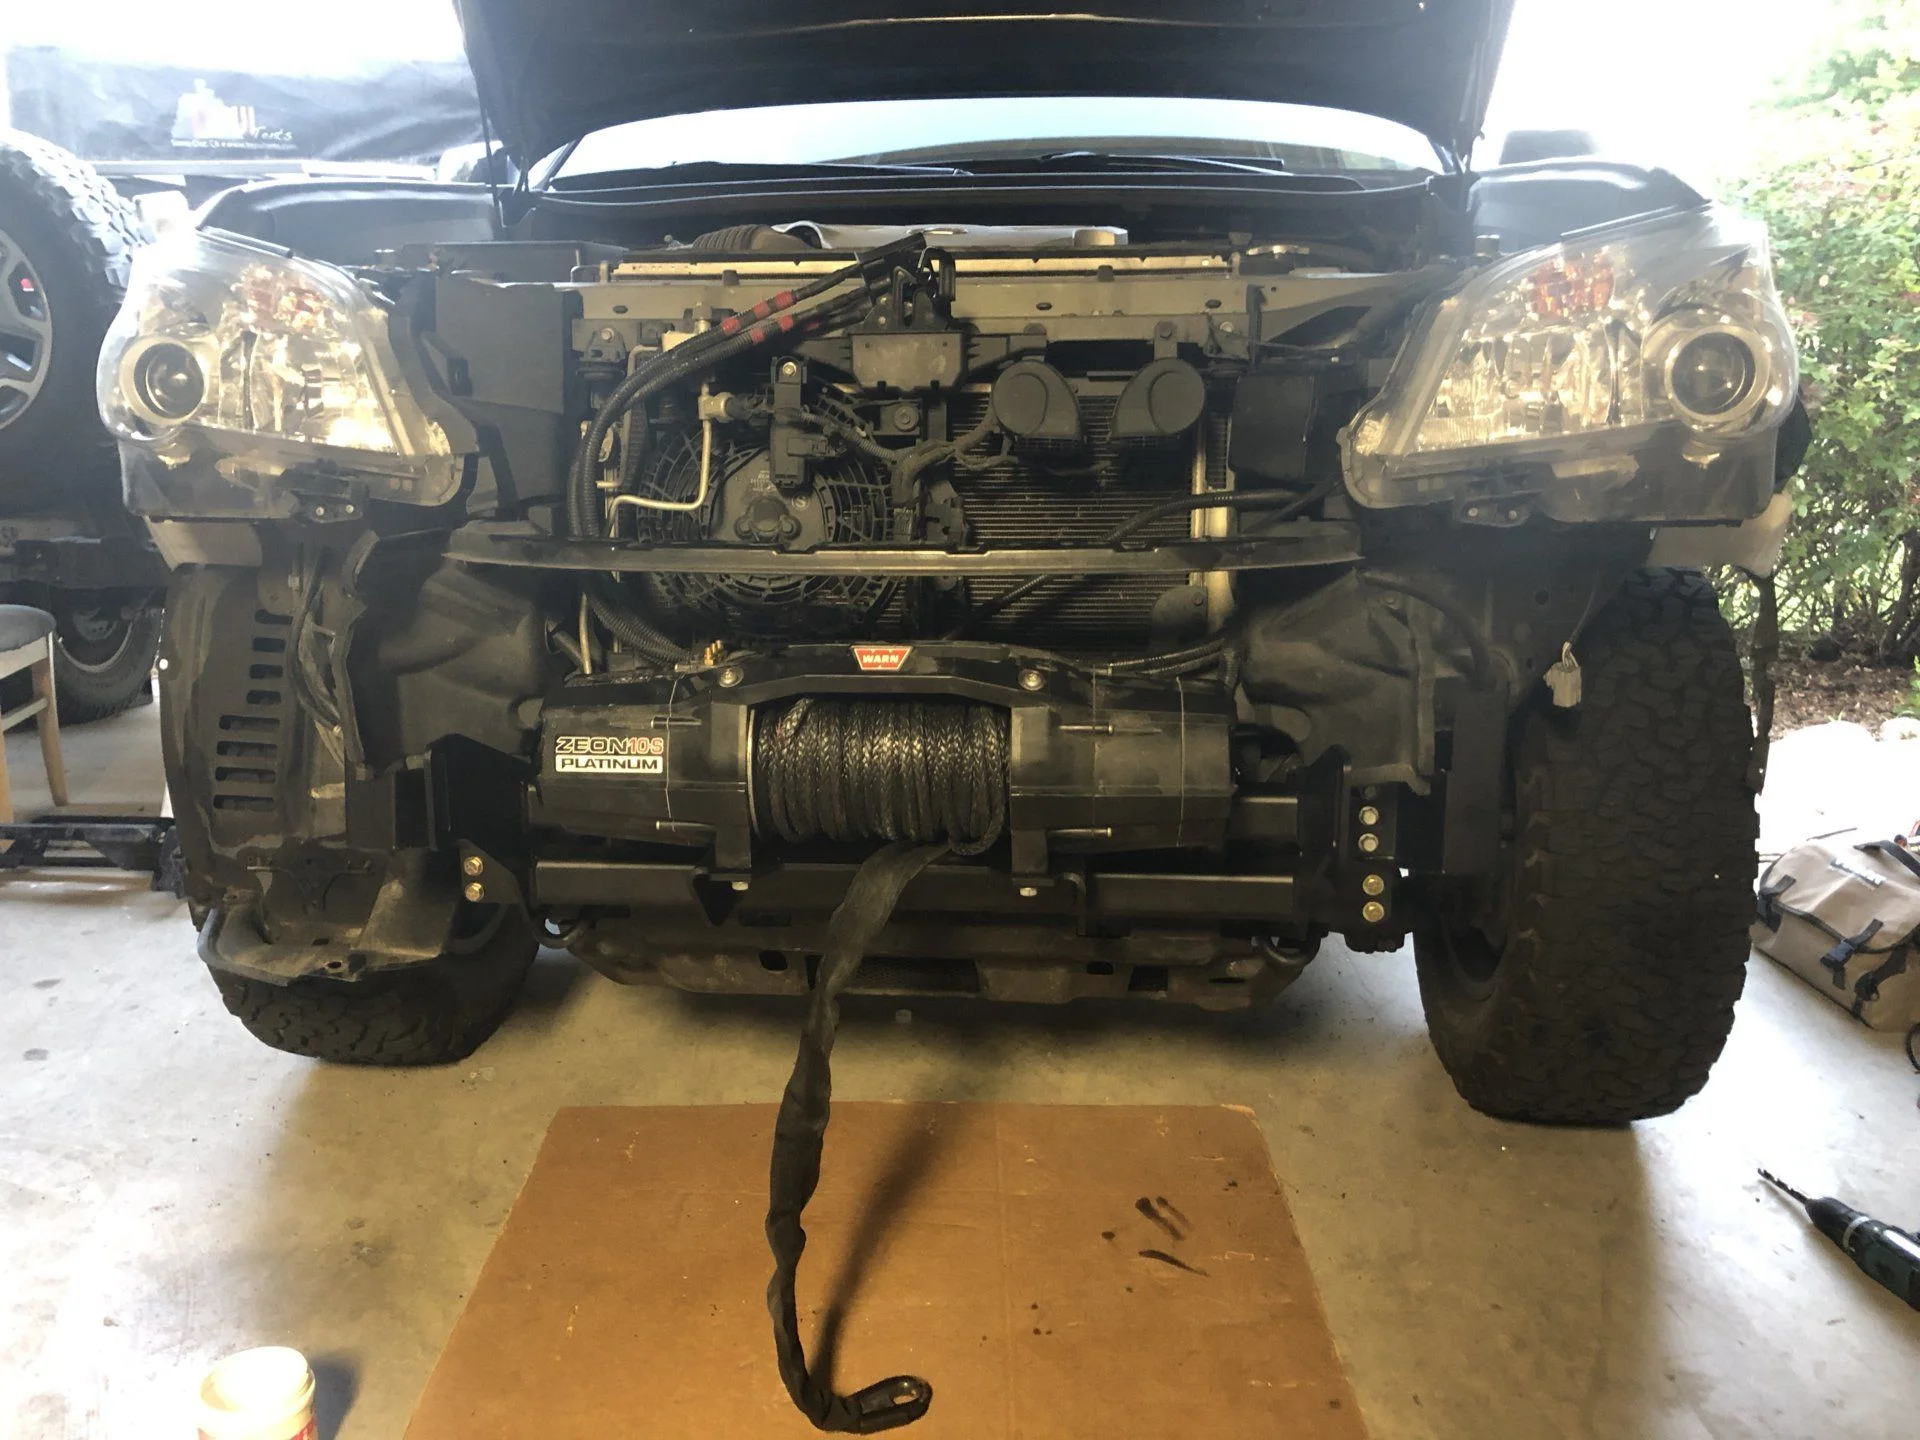
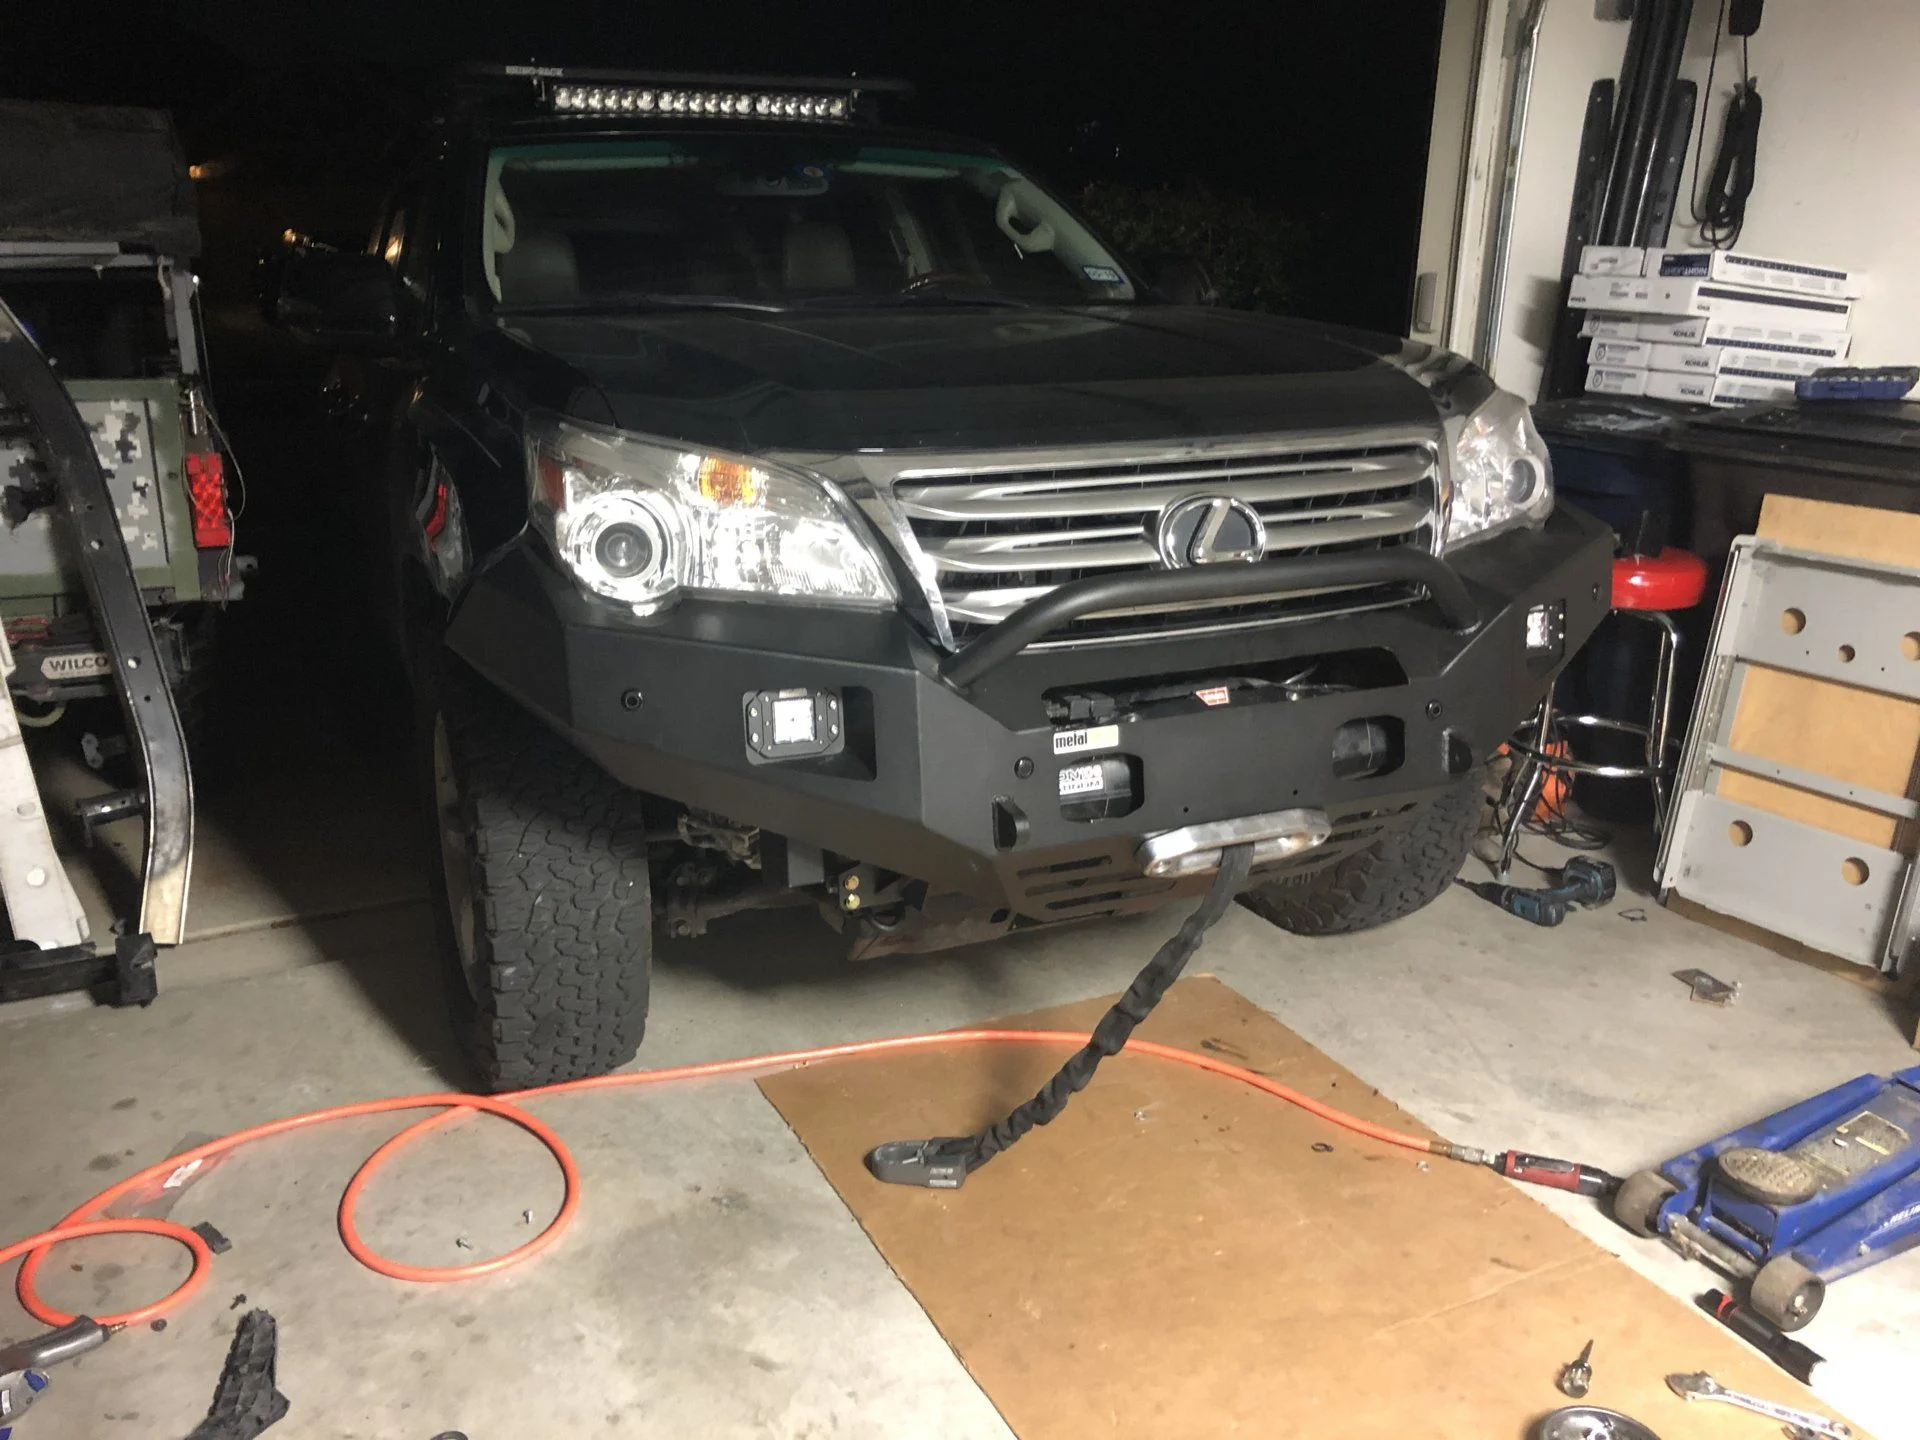
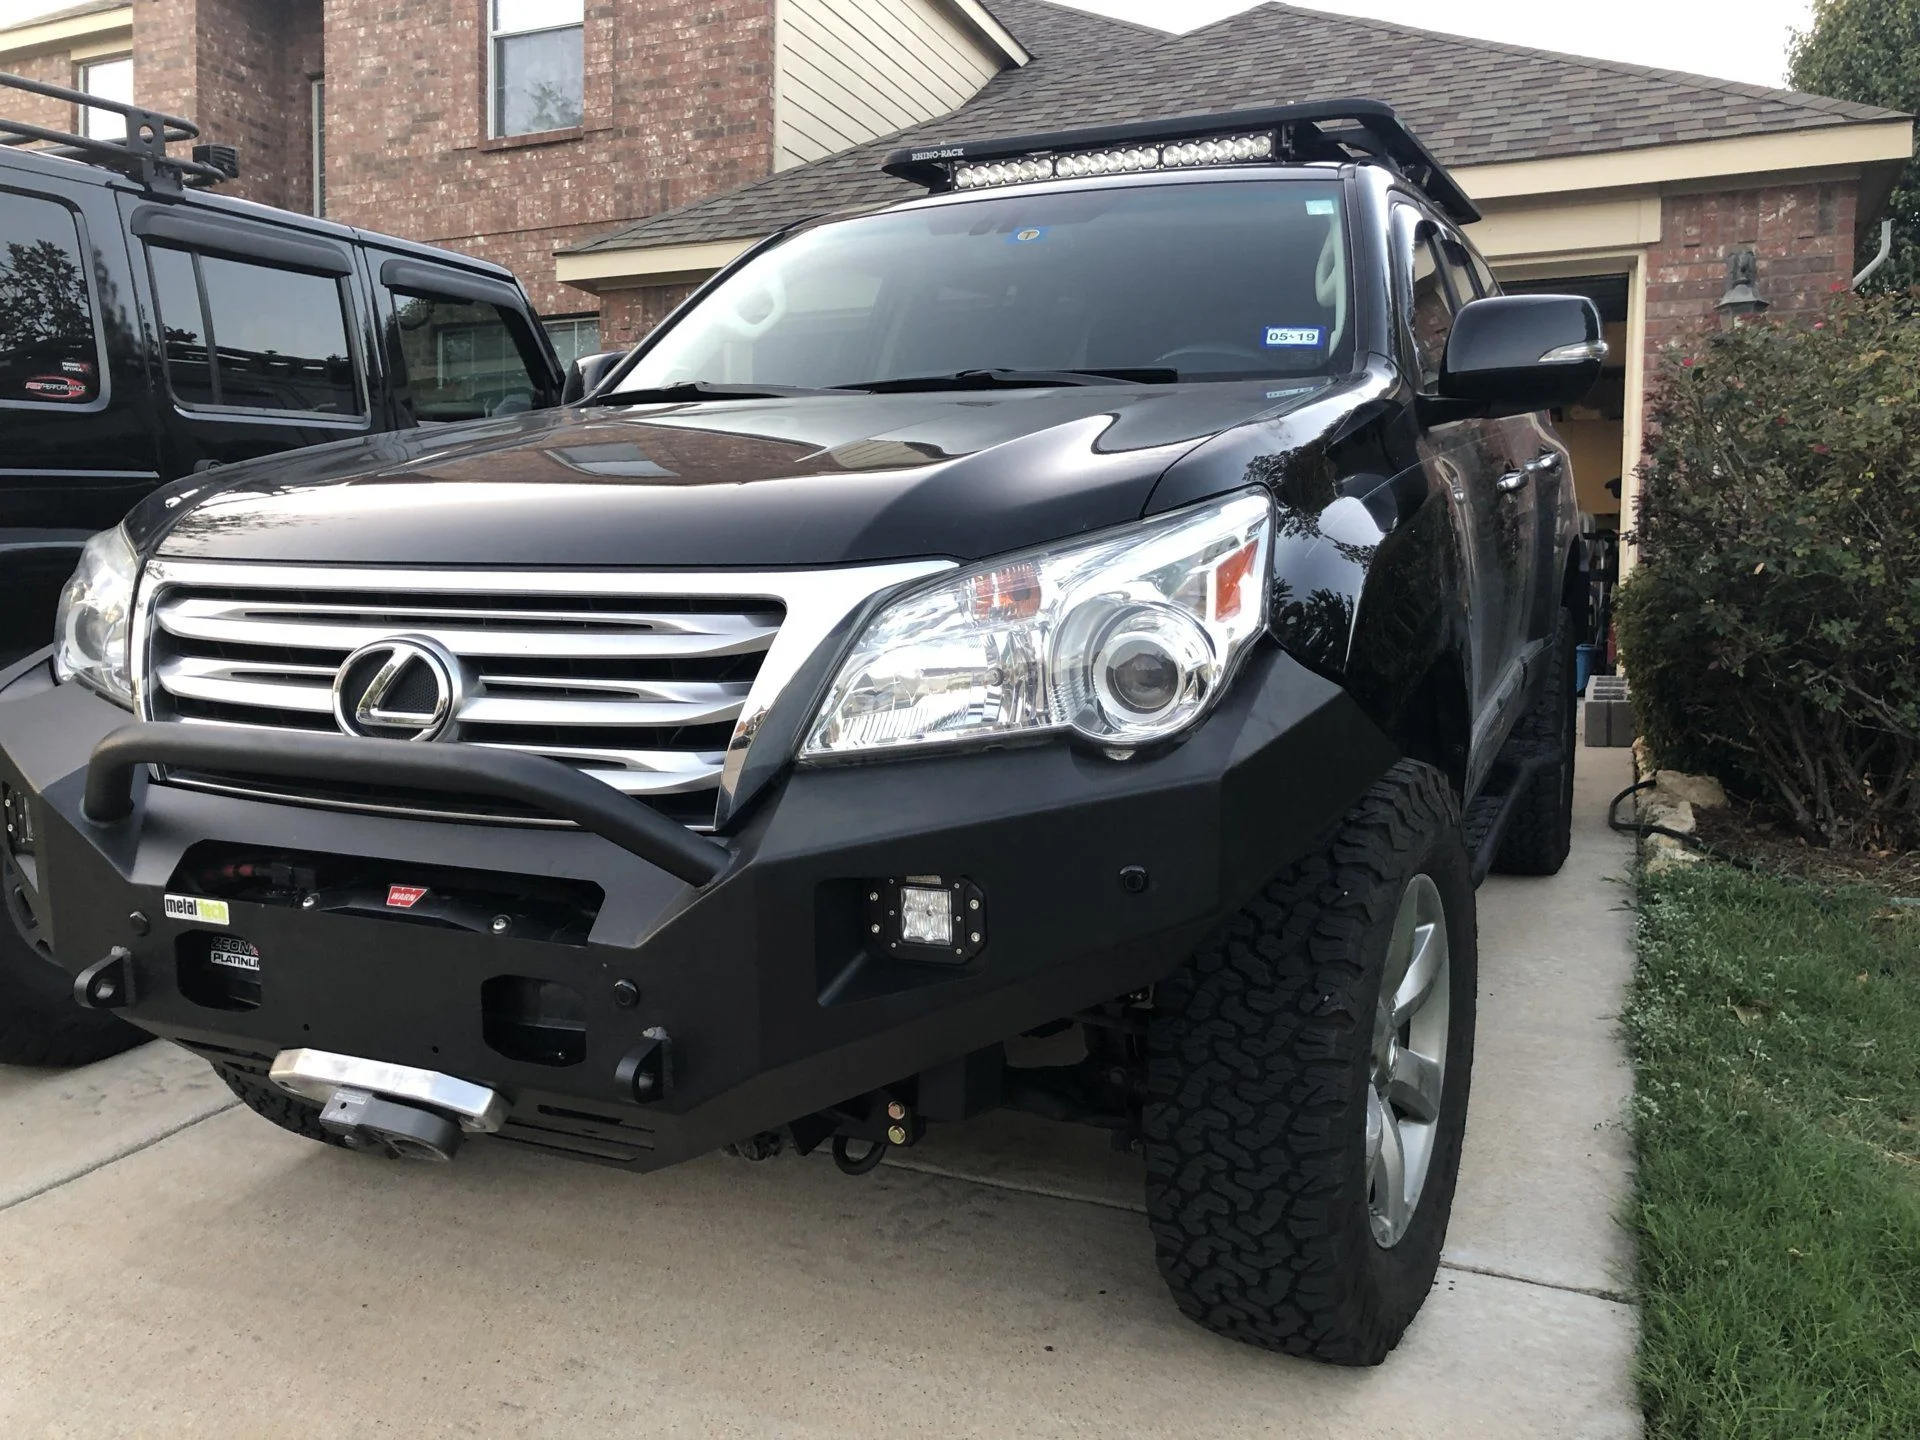
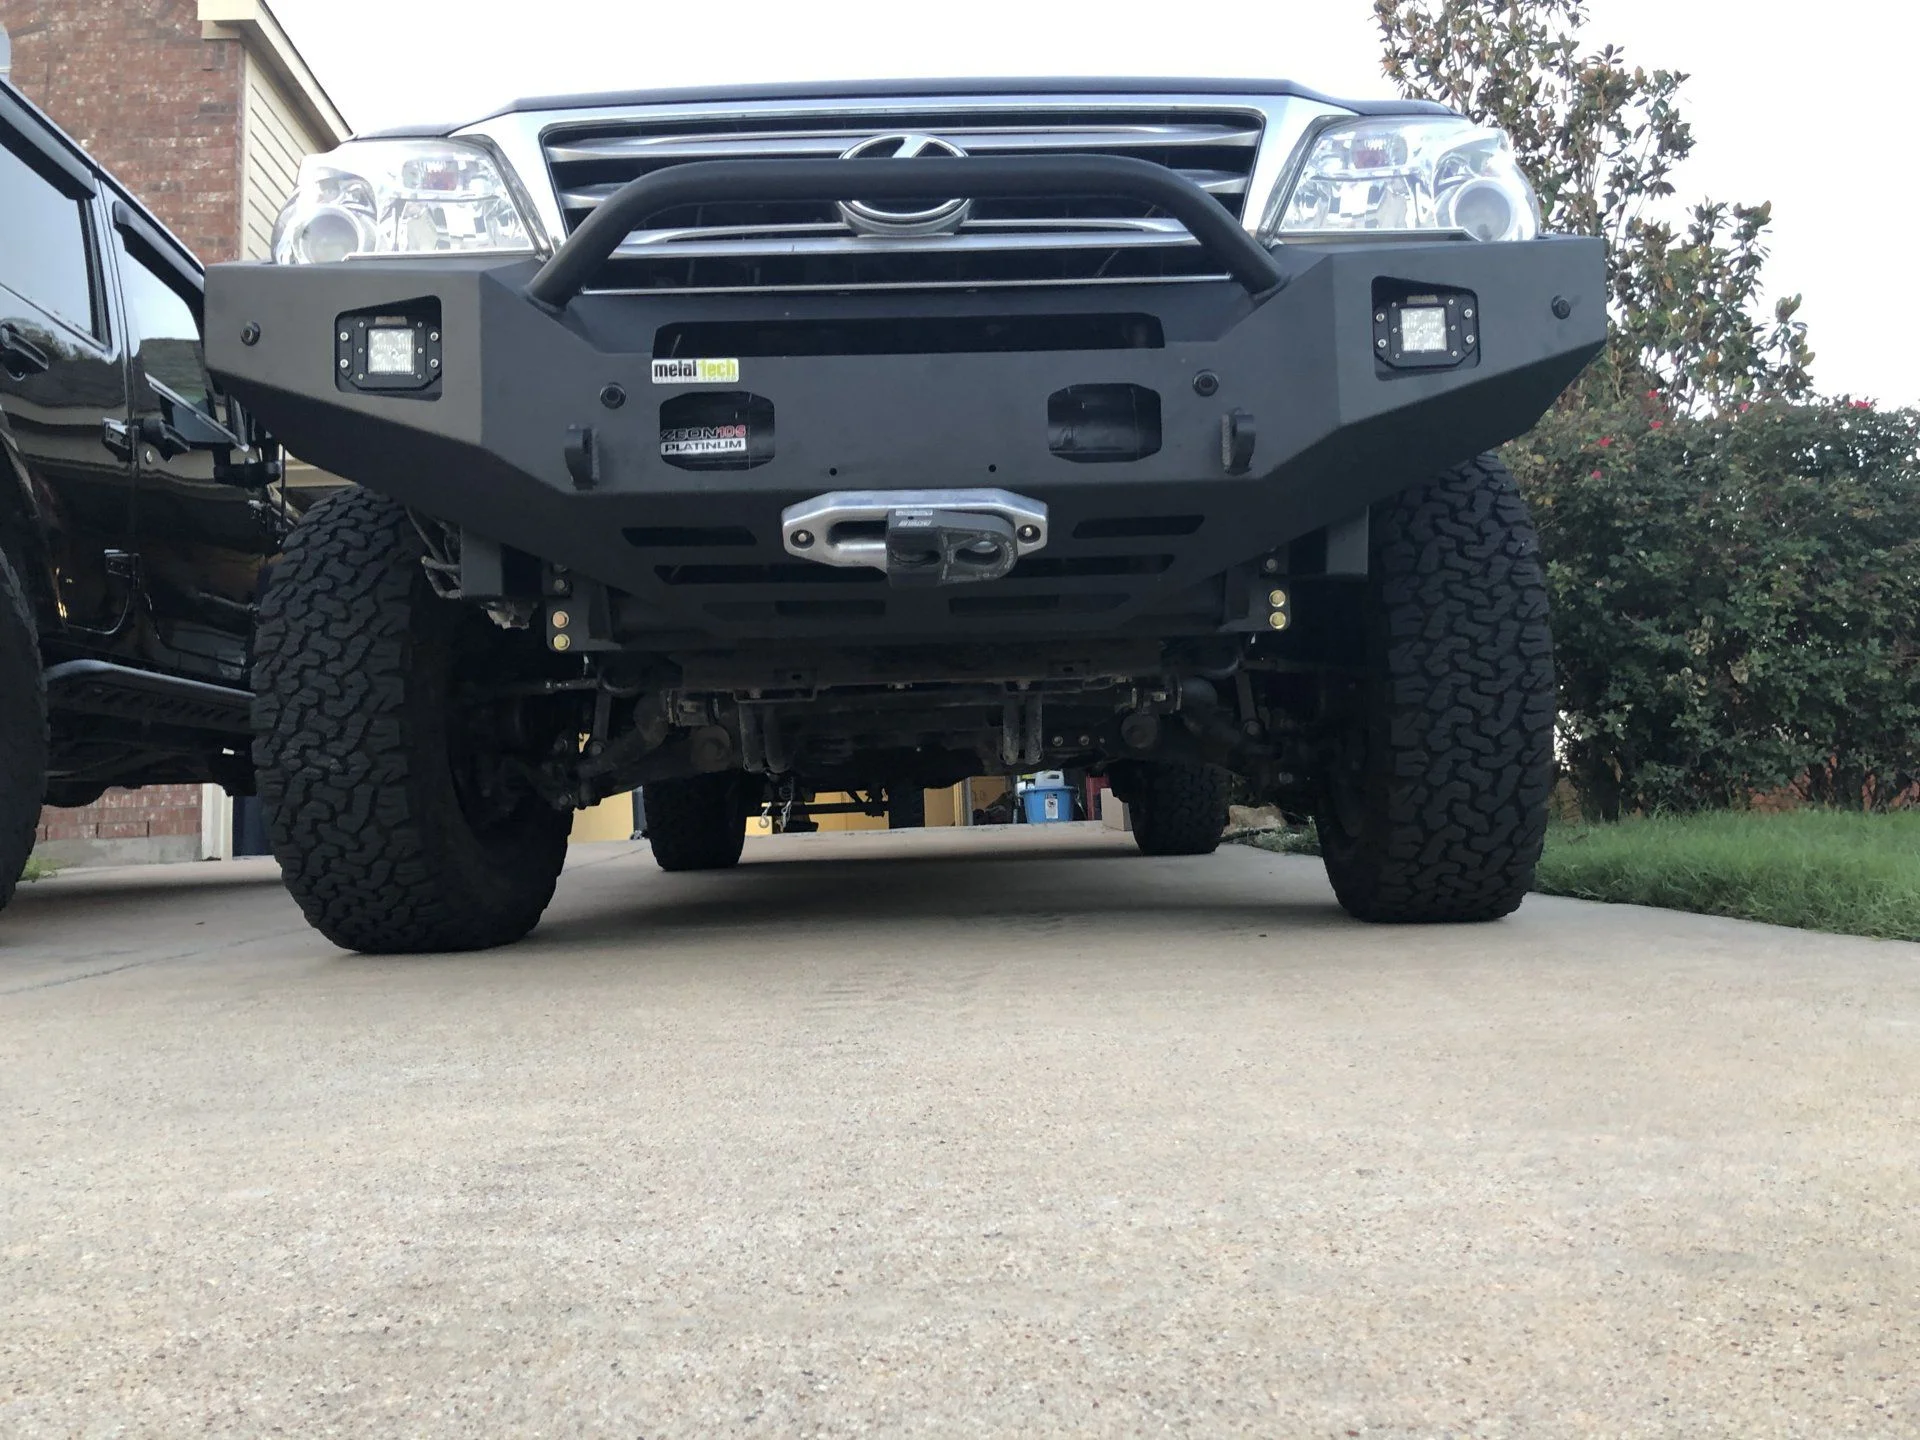
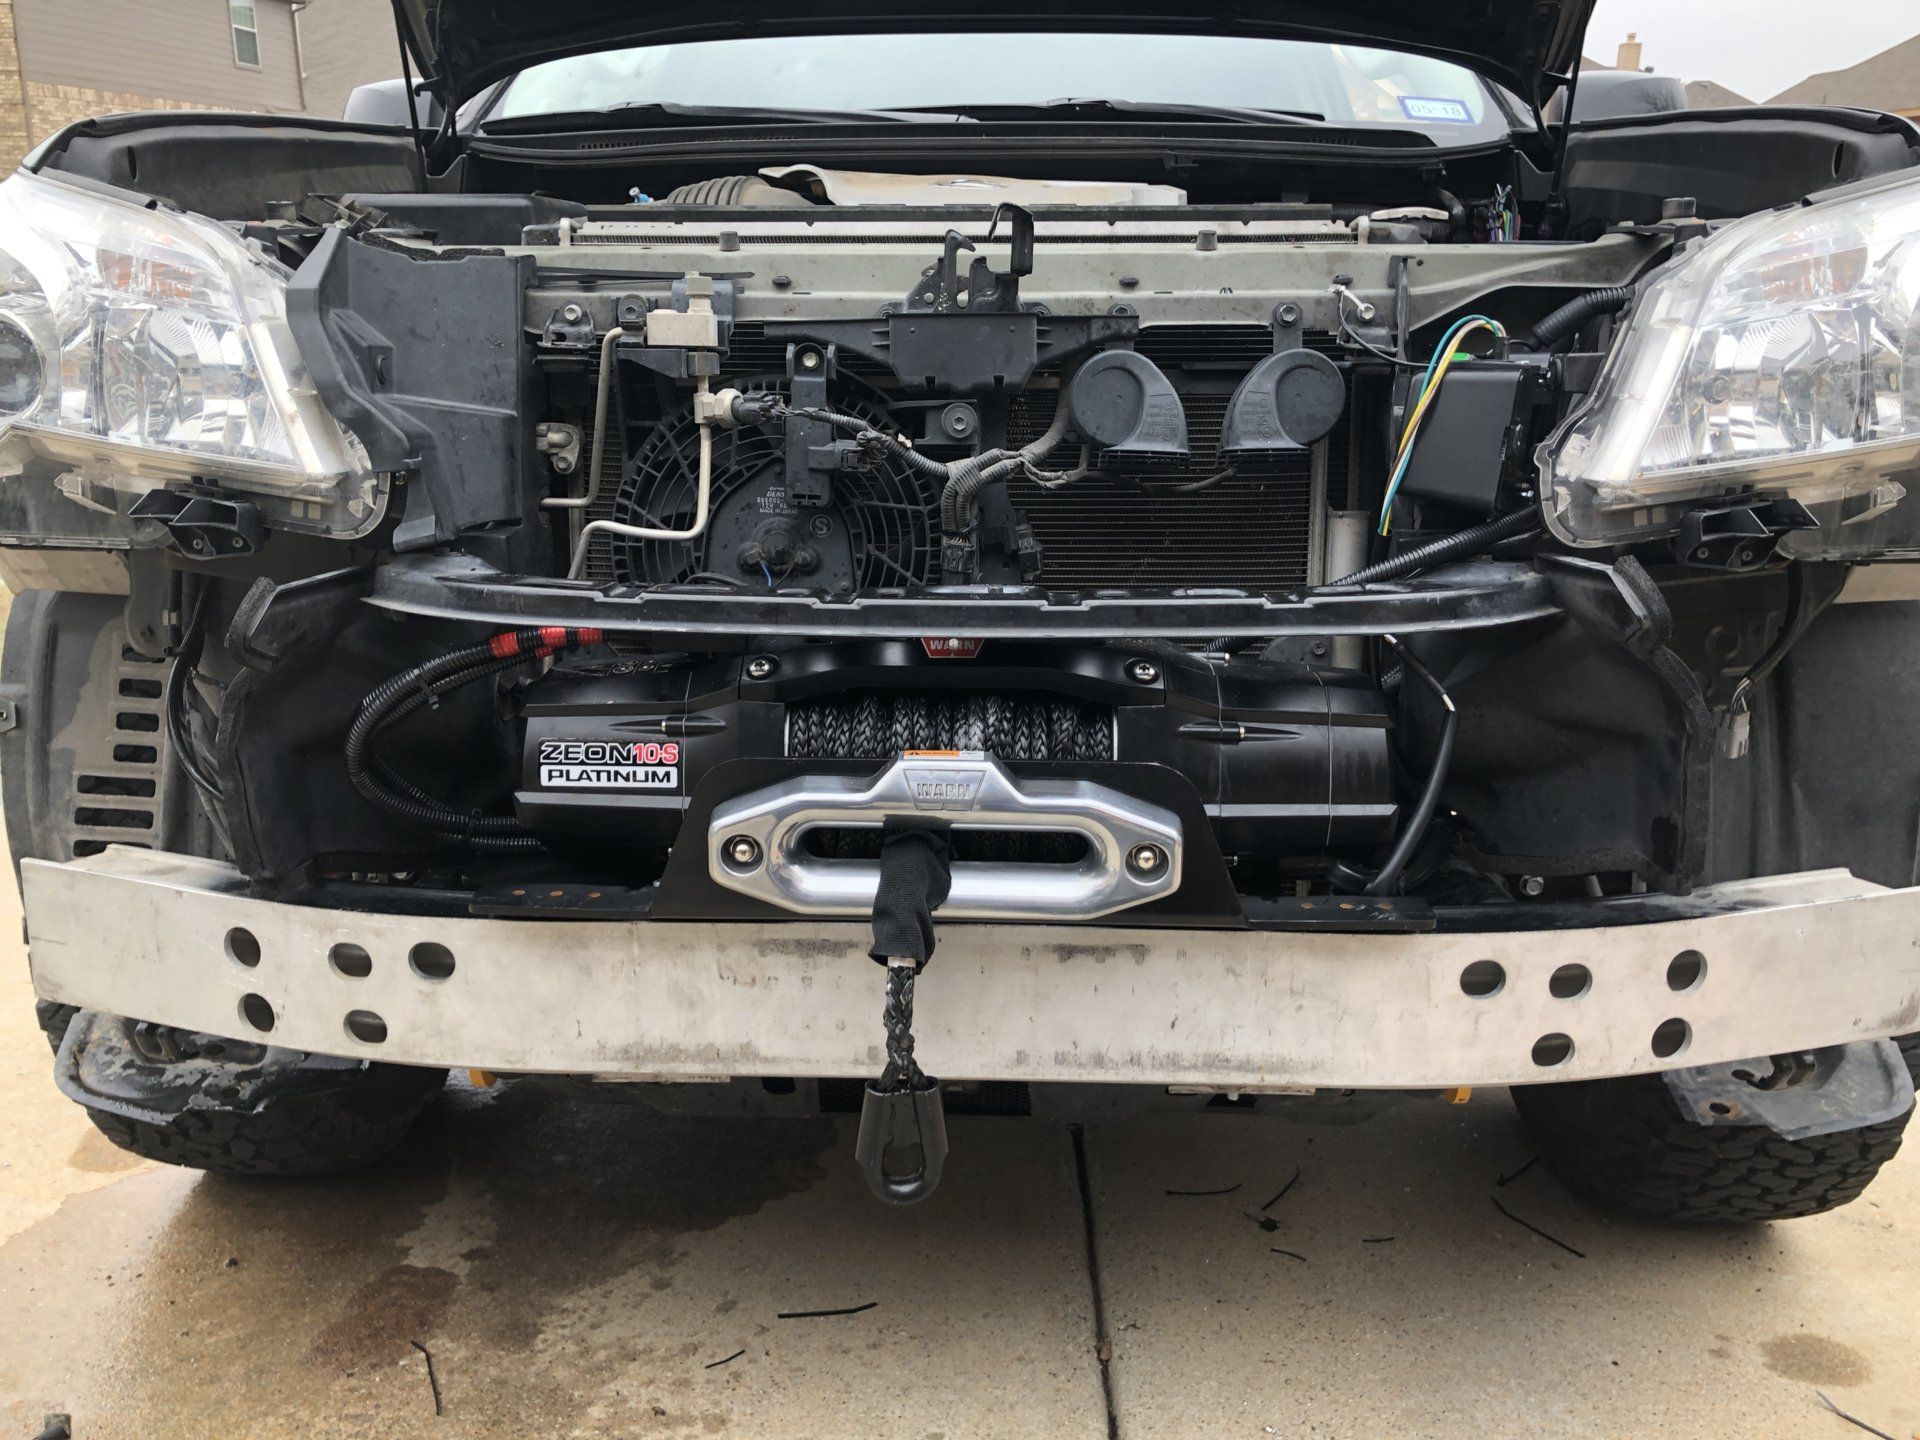
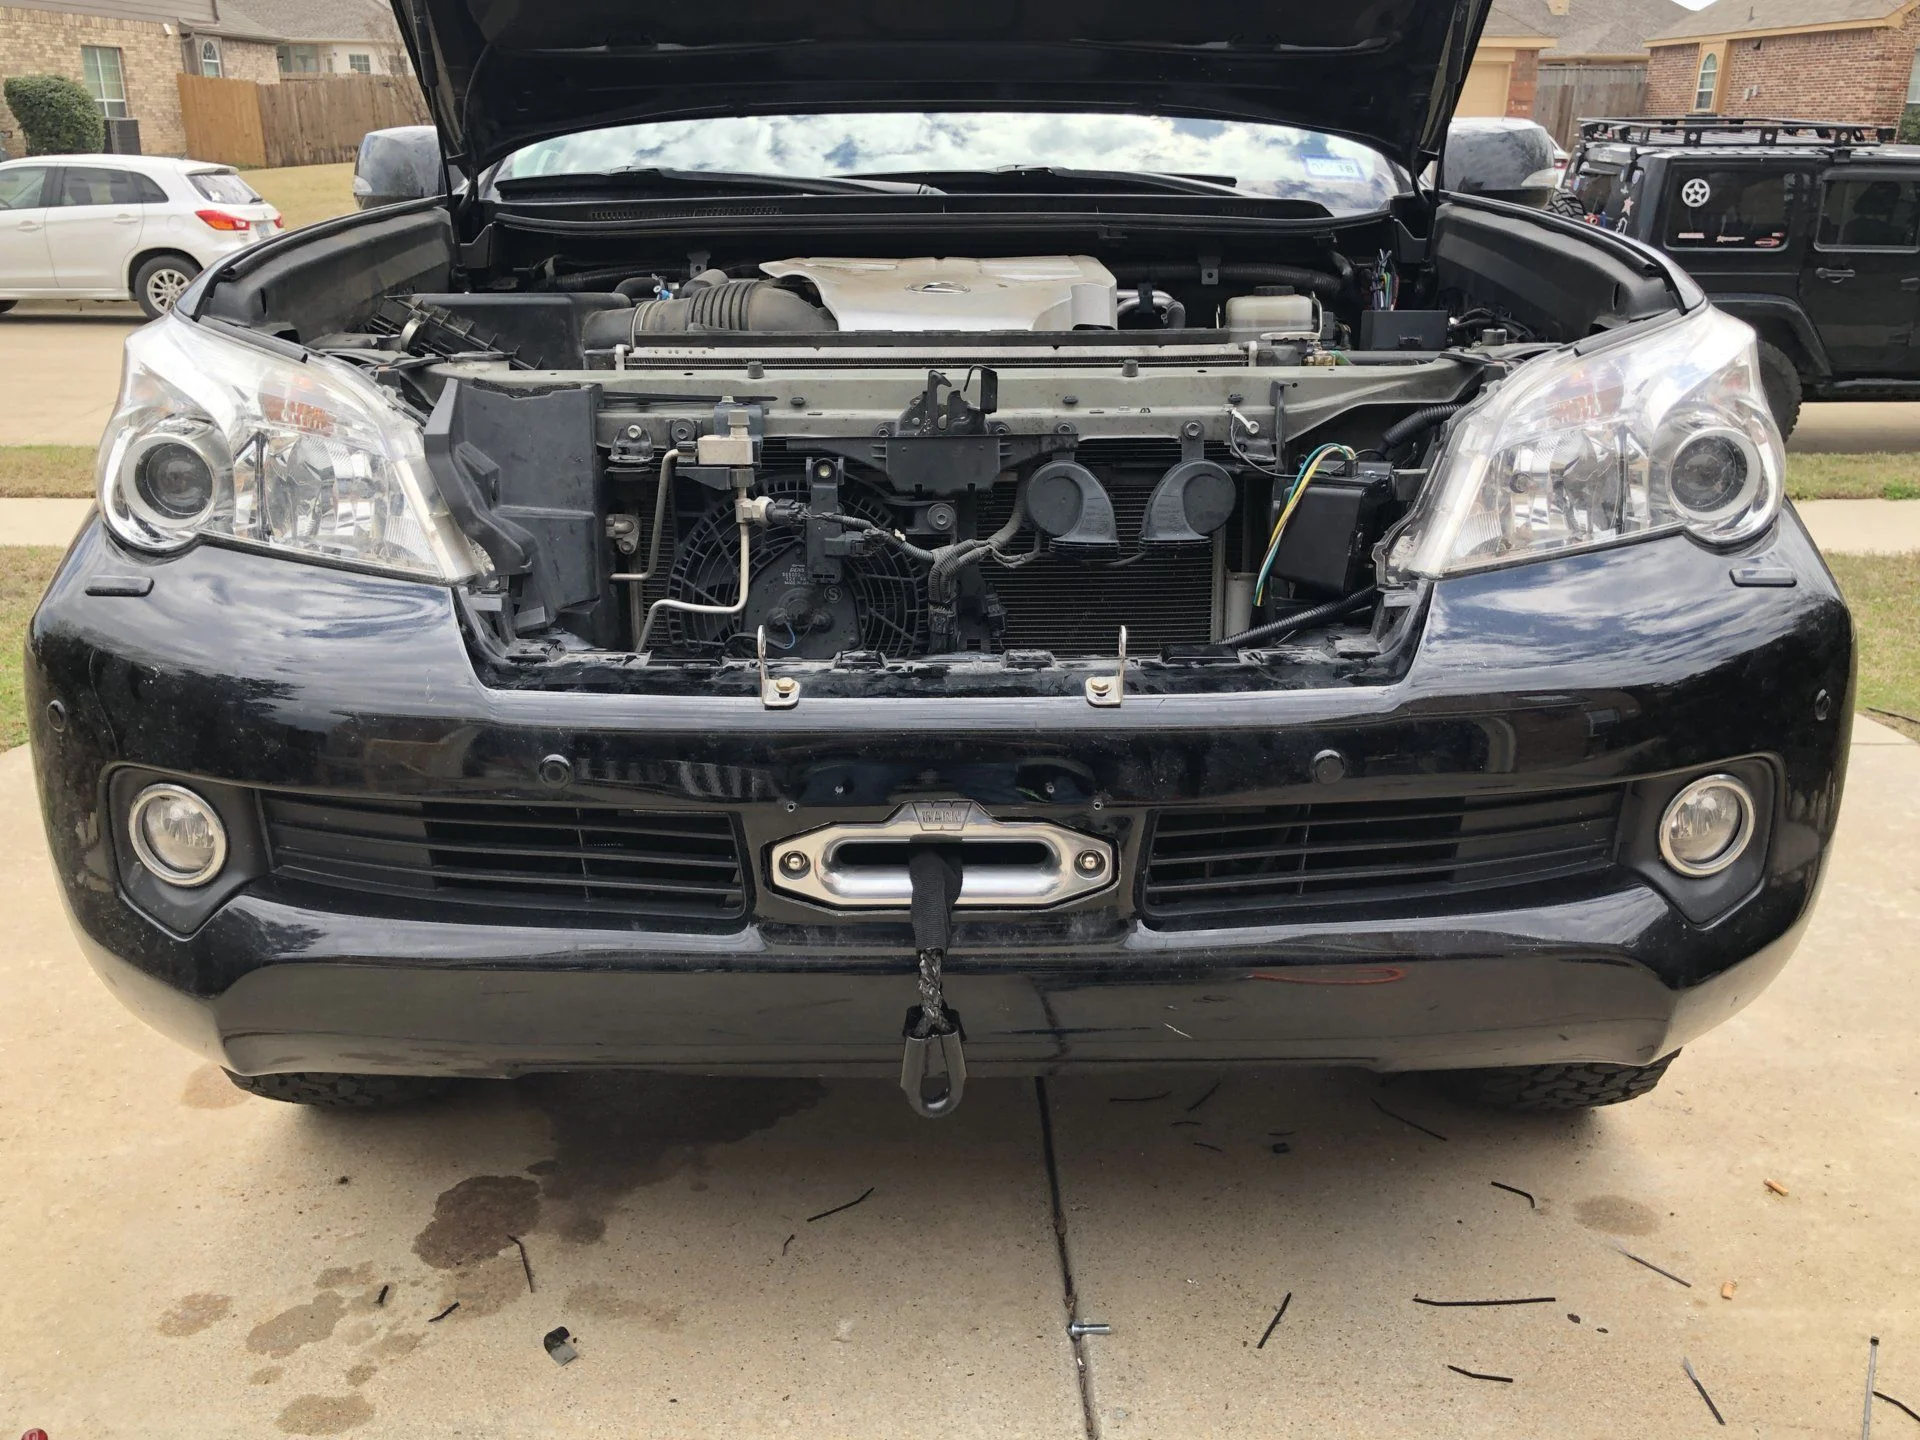
After much searching I decided to do a hidden winch mount since a steel front bumper was not in the master plans. I made a few phone calls to bud over at budbuilt and I picked up the one they advertised for the GX460. I am not sure if they had sold or installed one of these on a 460 yet but it was not a direct fit. I did have to do some modifications to get it to fit. I have a thread here on Mud that goes into a little more details. I picked up a Warn Zeon 10S Platinum. I did order a remote solenoid kit for it due to the space constraints in the front end. Aside from making some modifications to the mount I bought from Budbuilt I was very happy with the install.


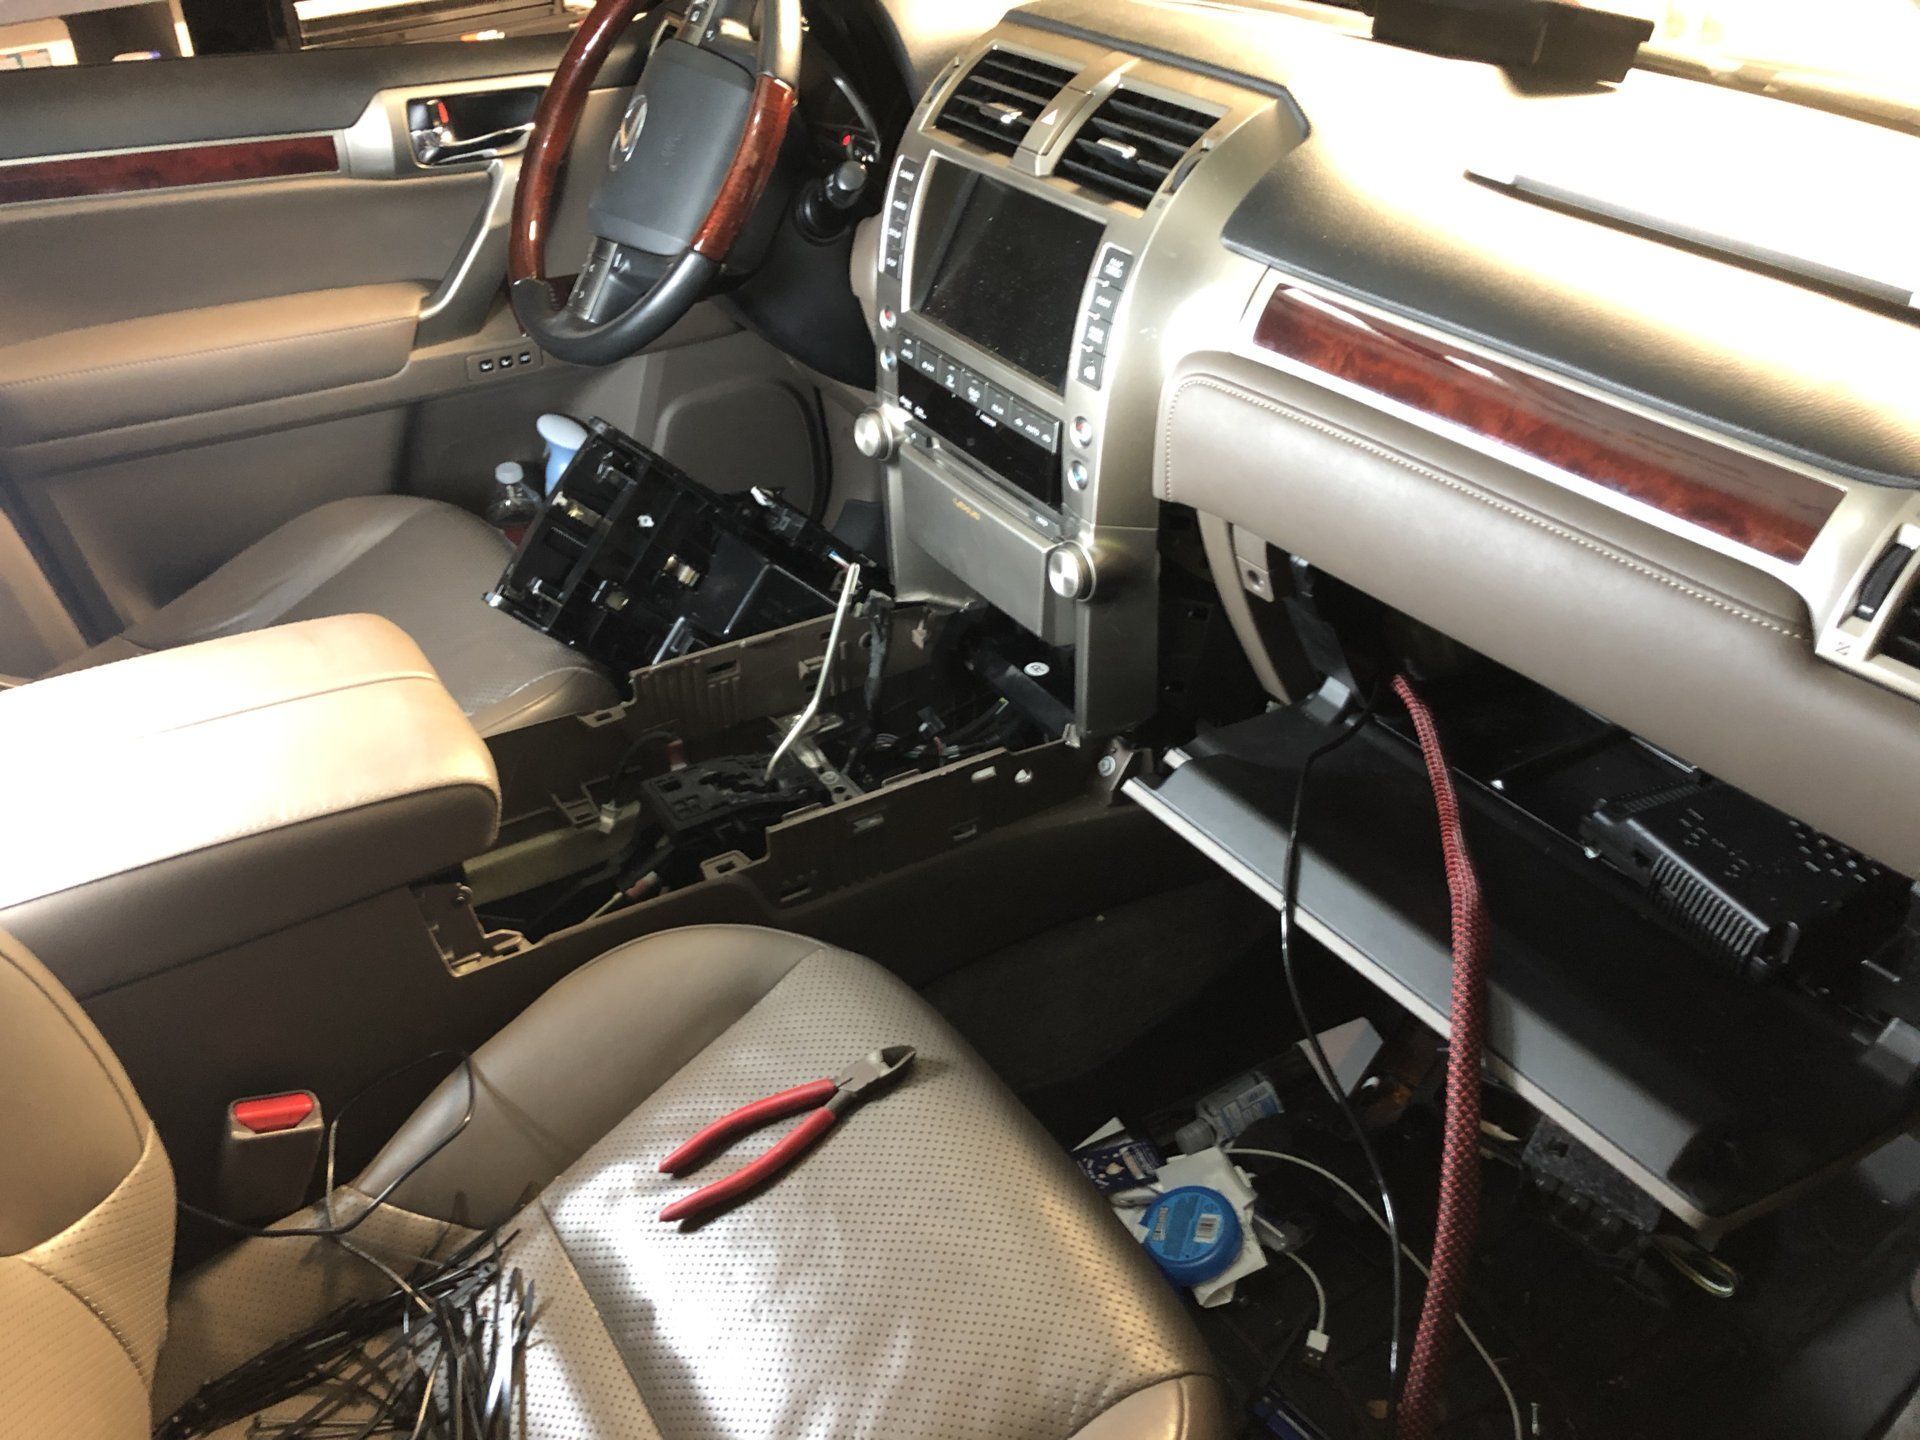
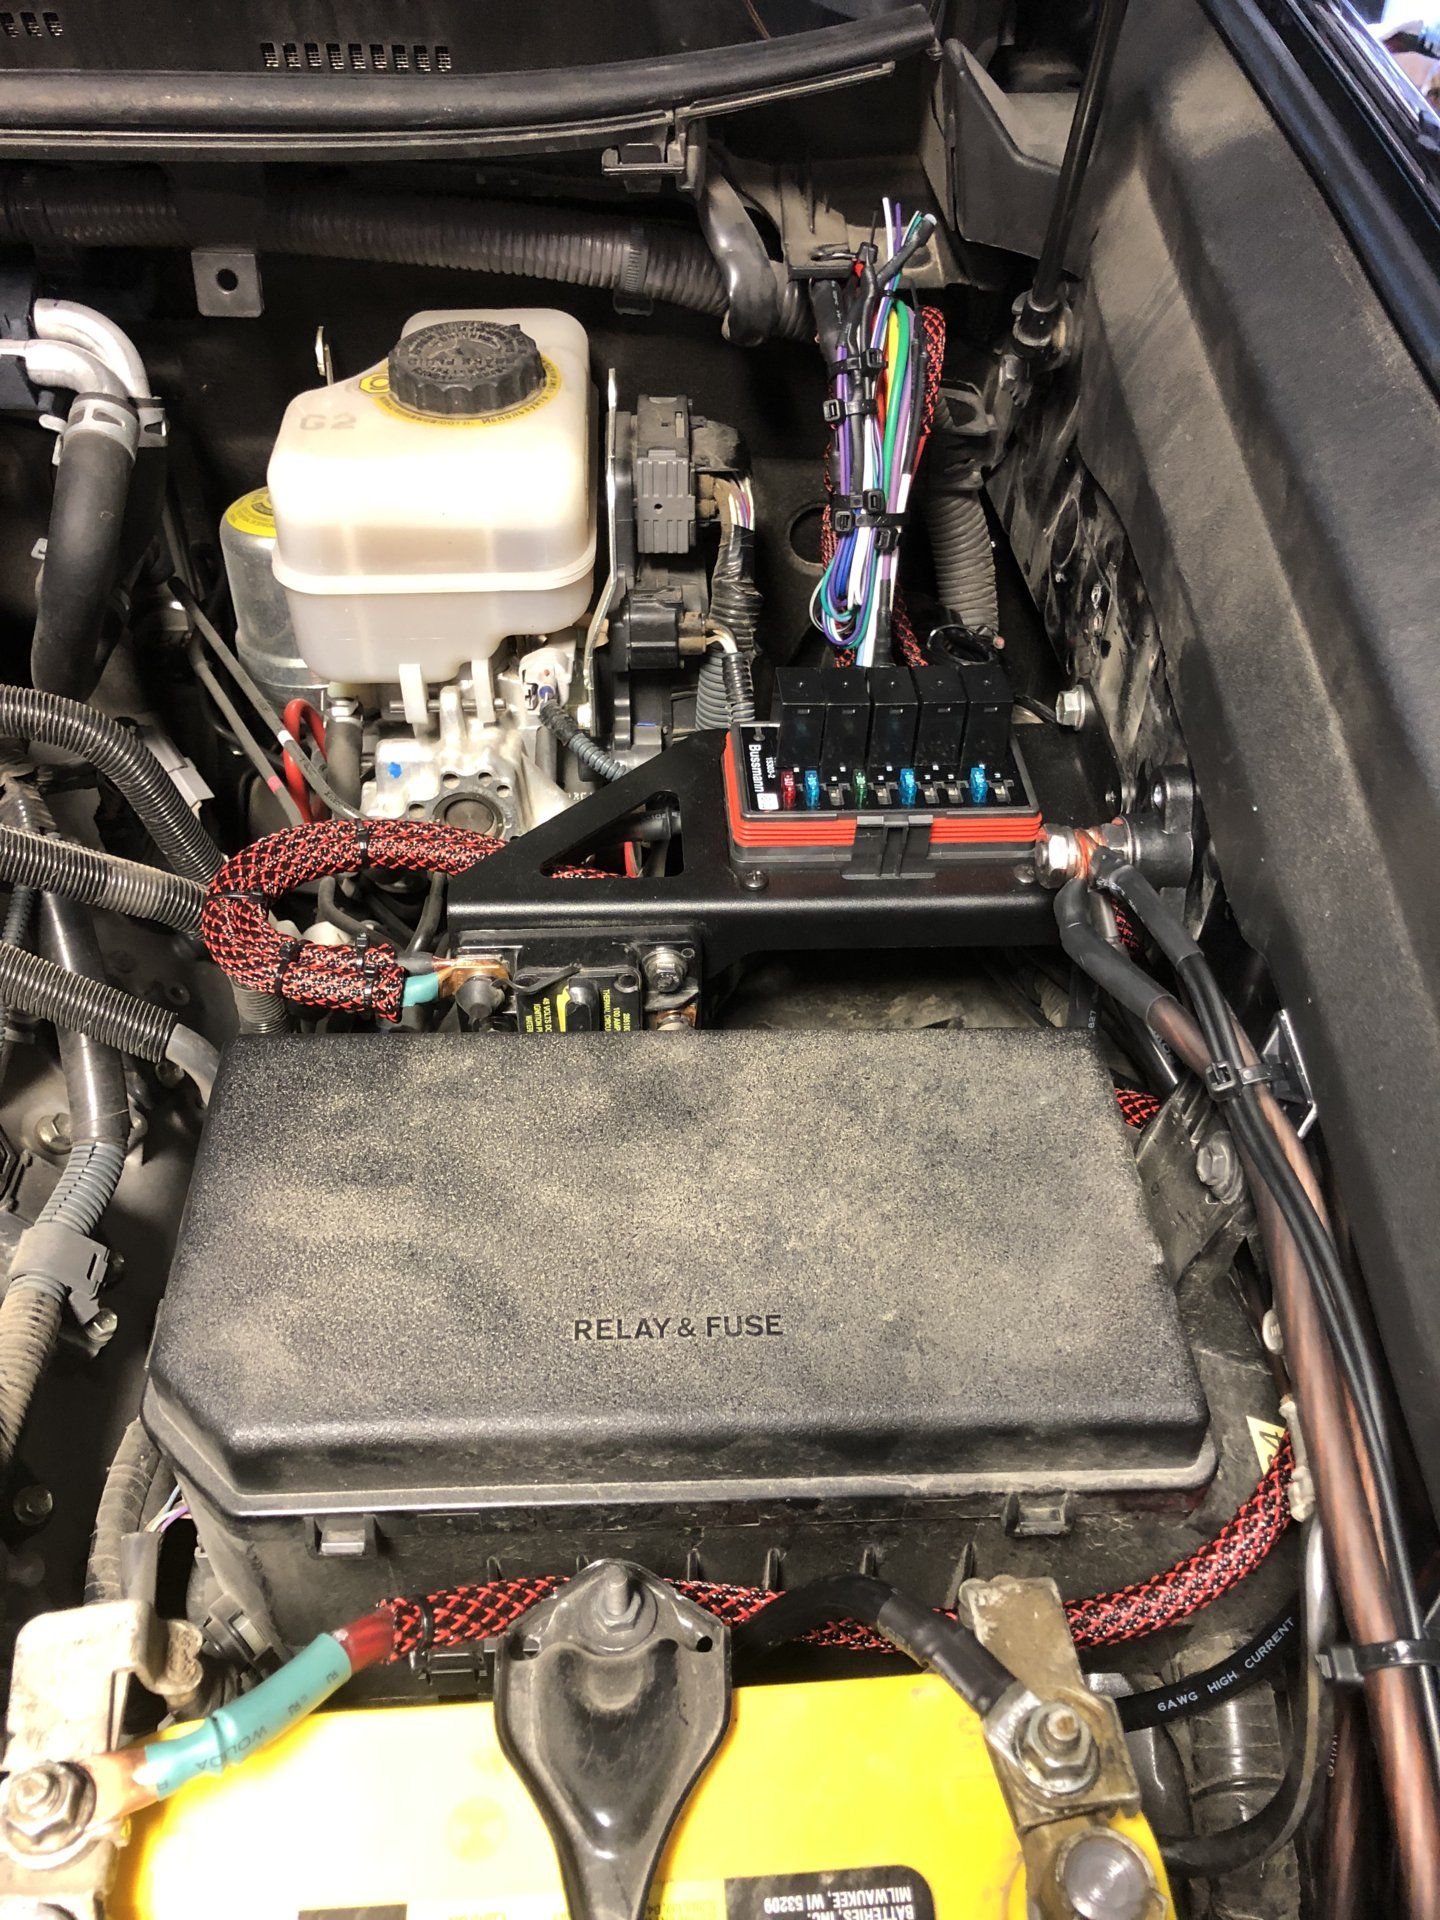
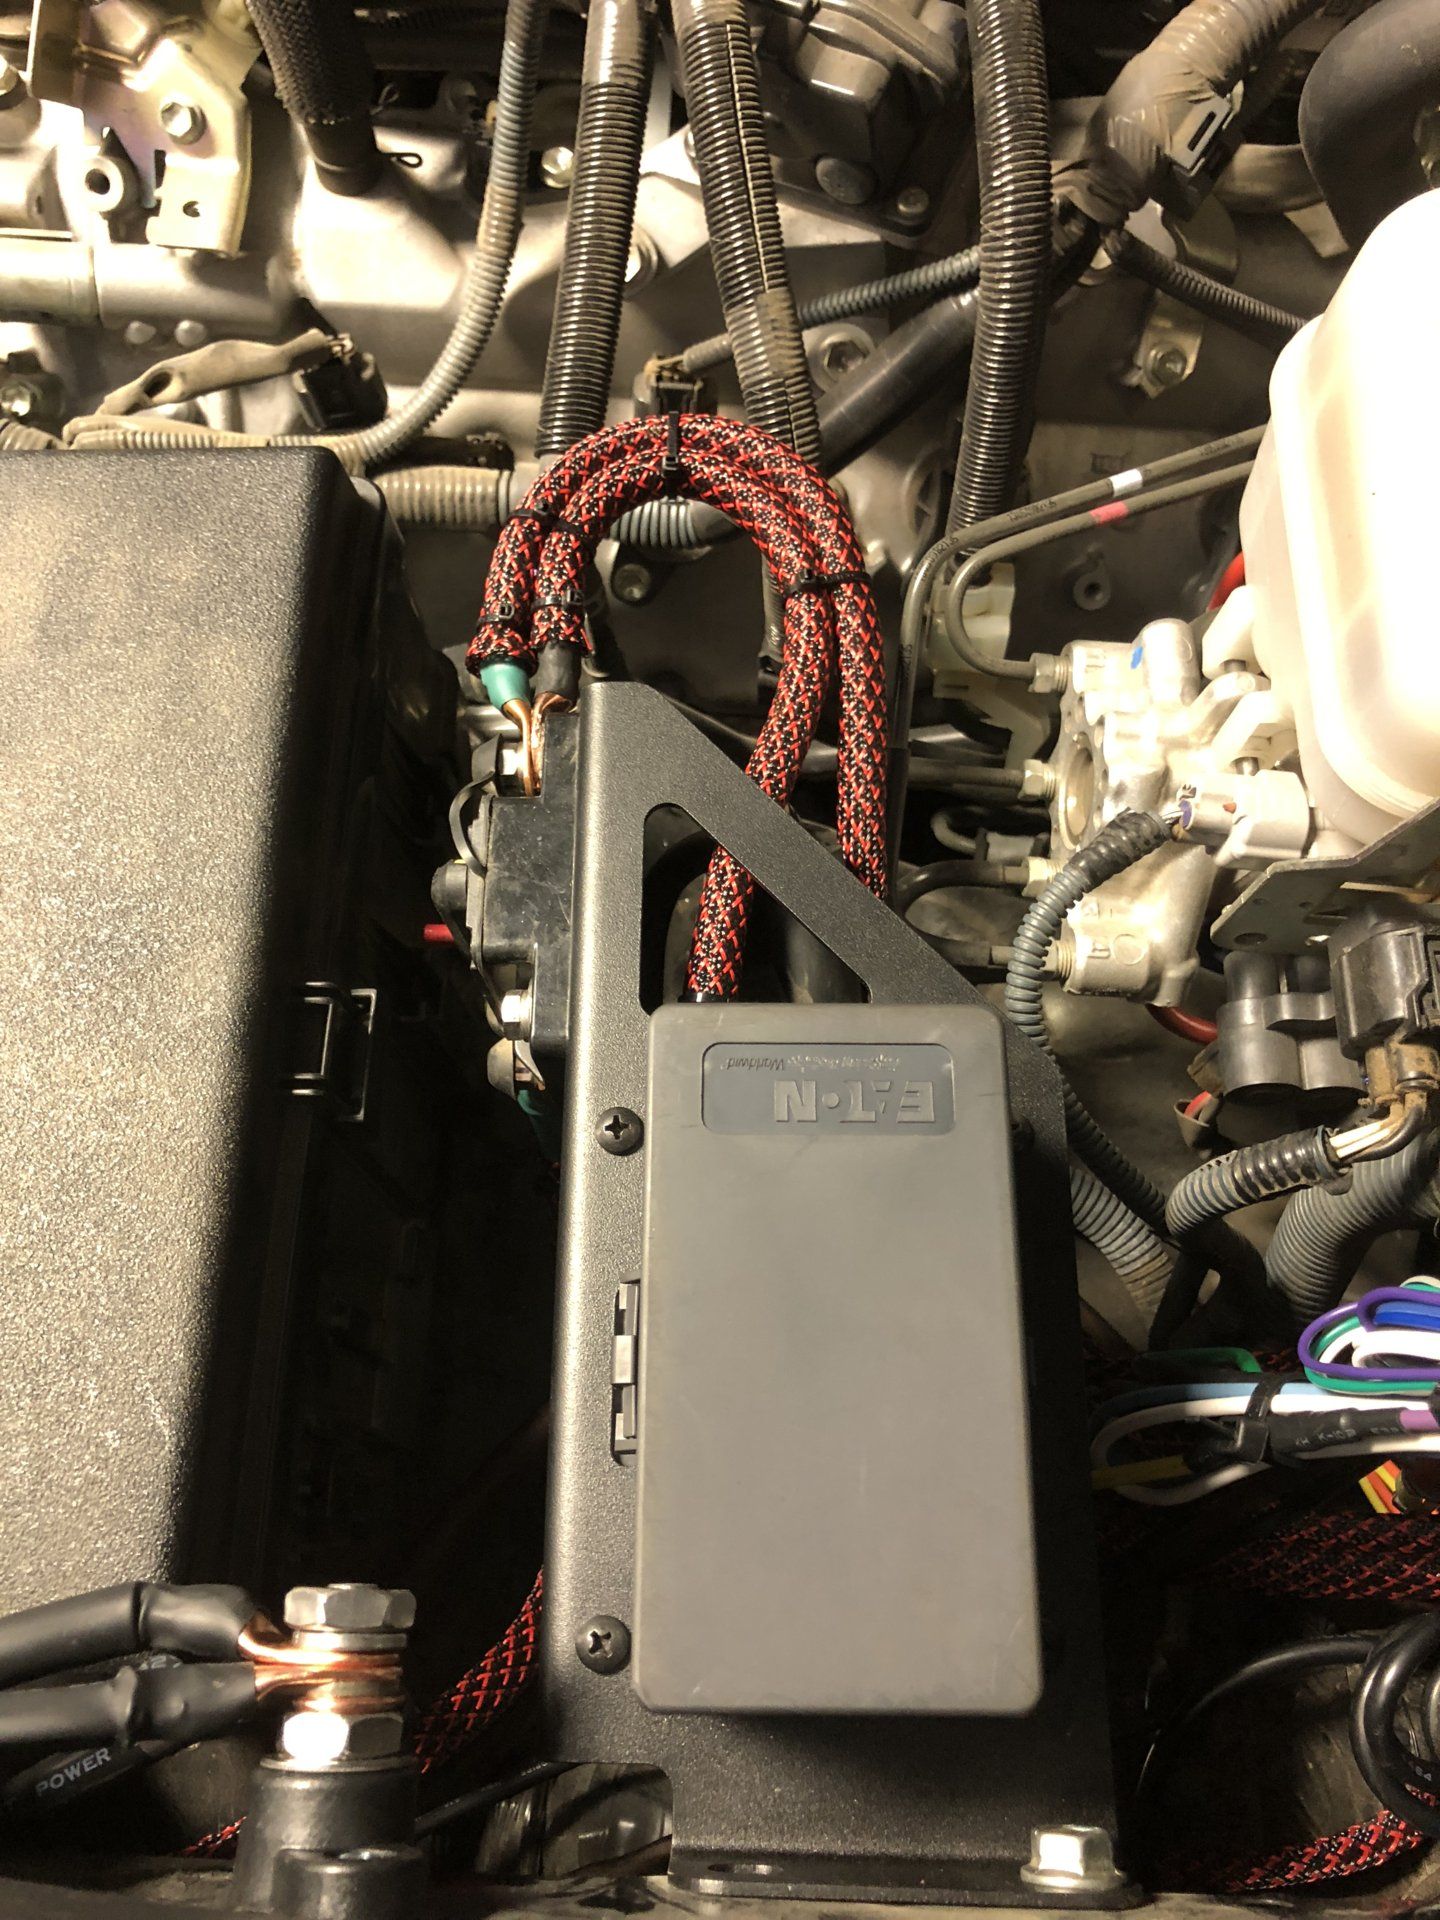
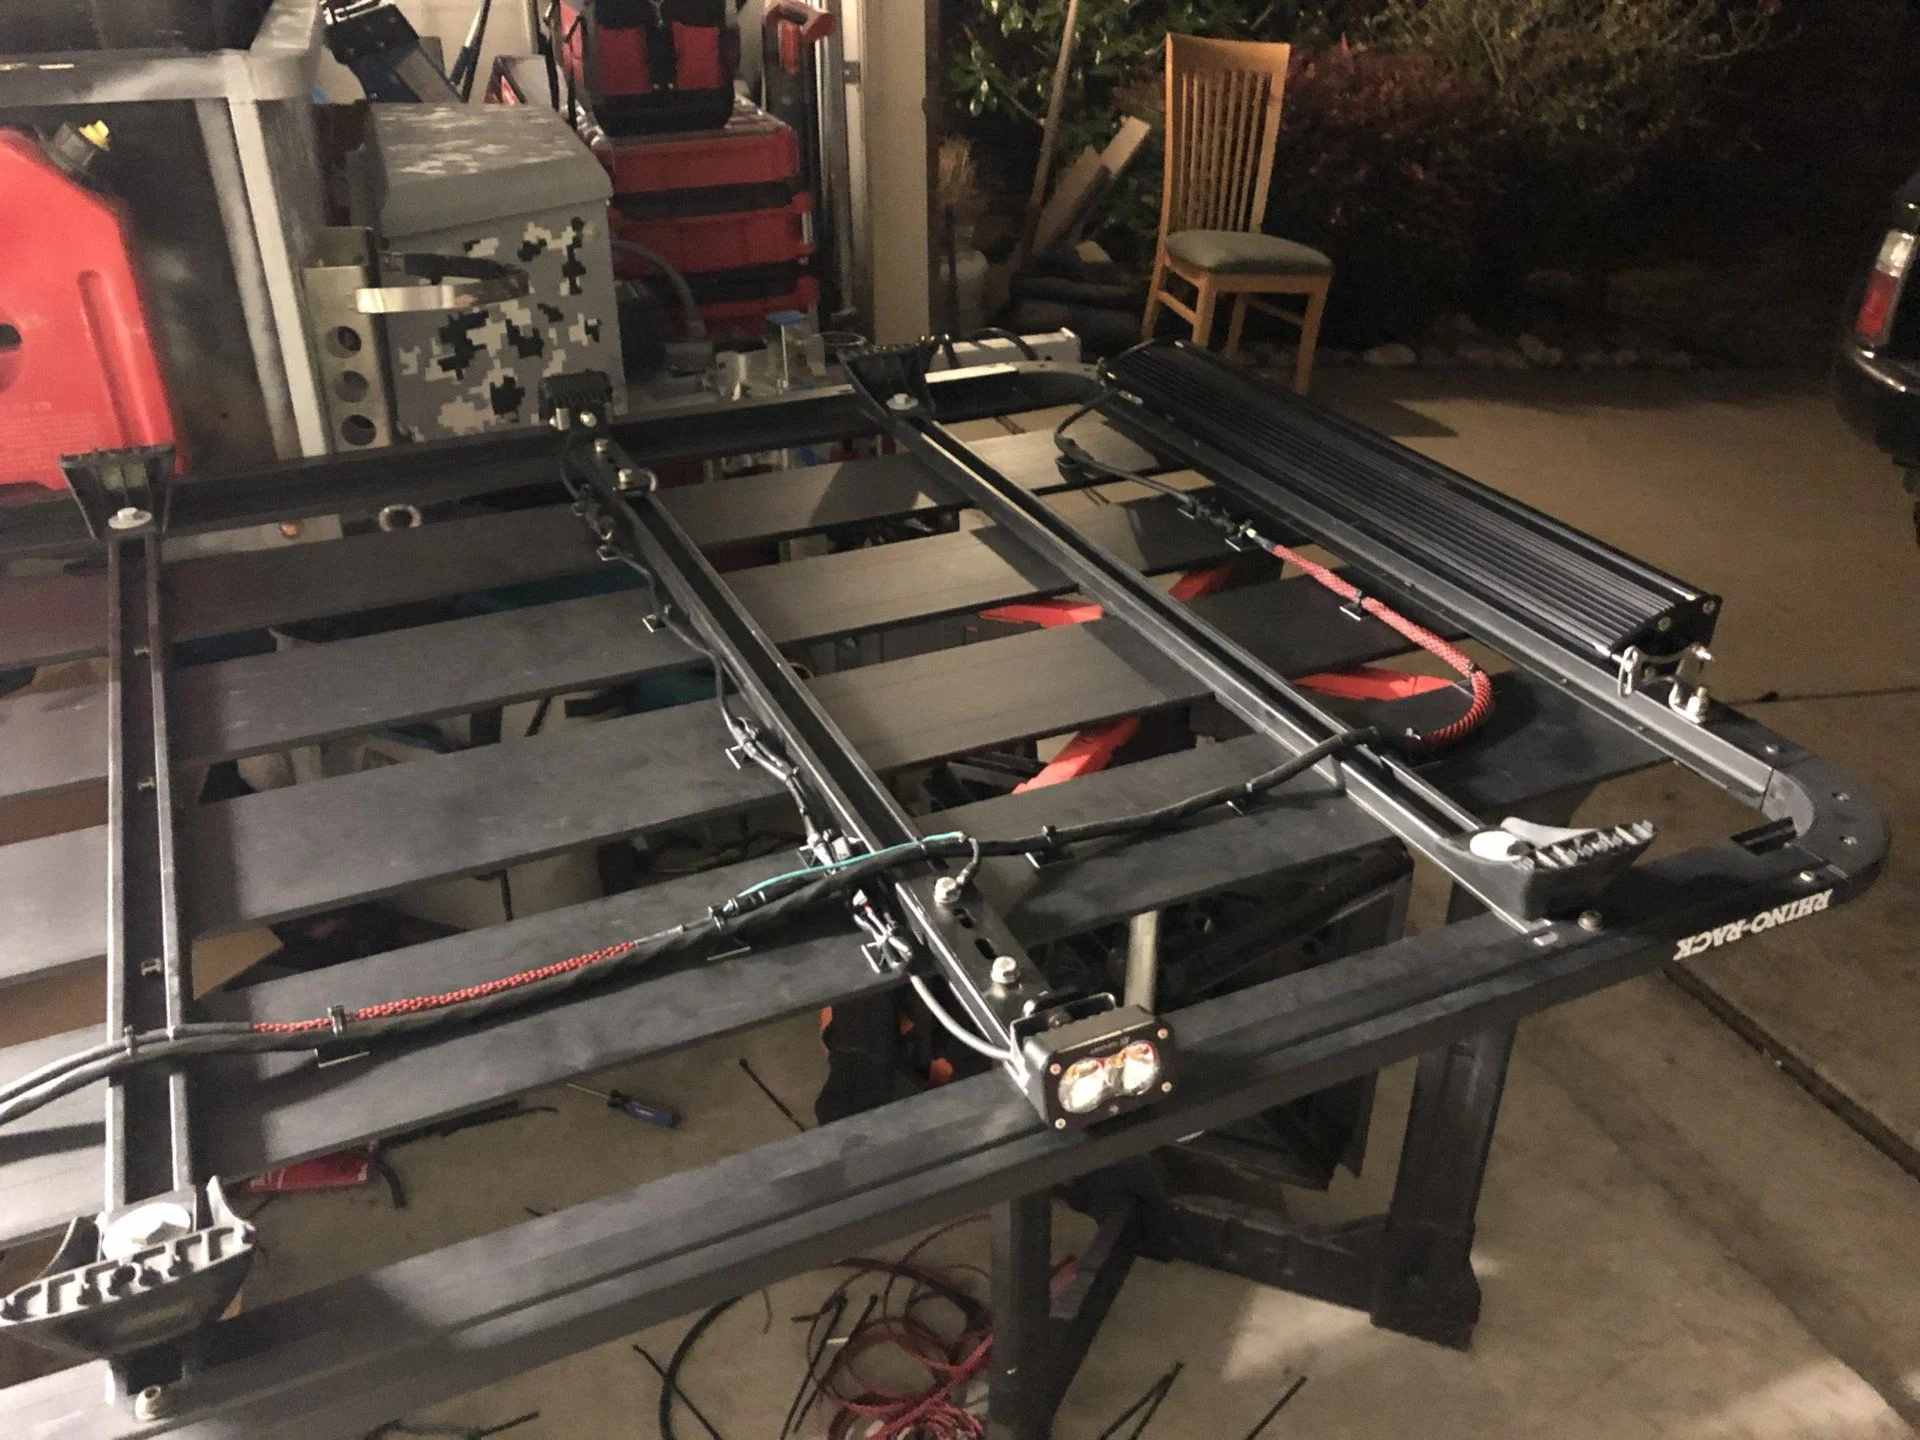
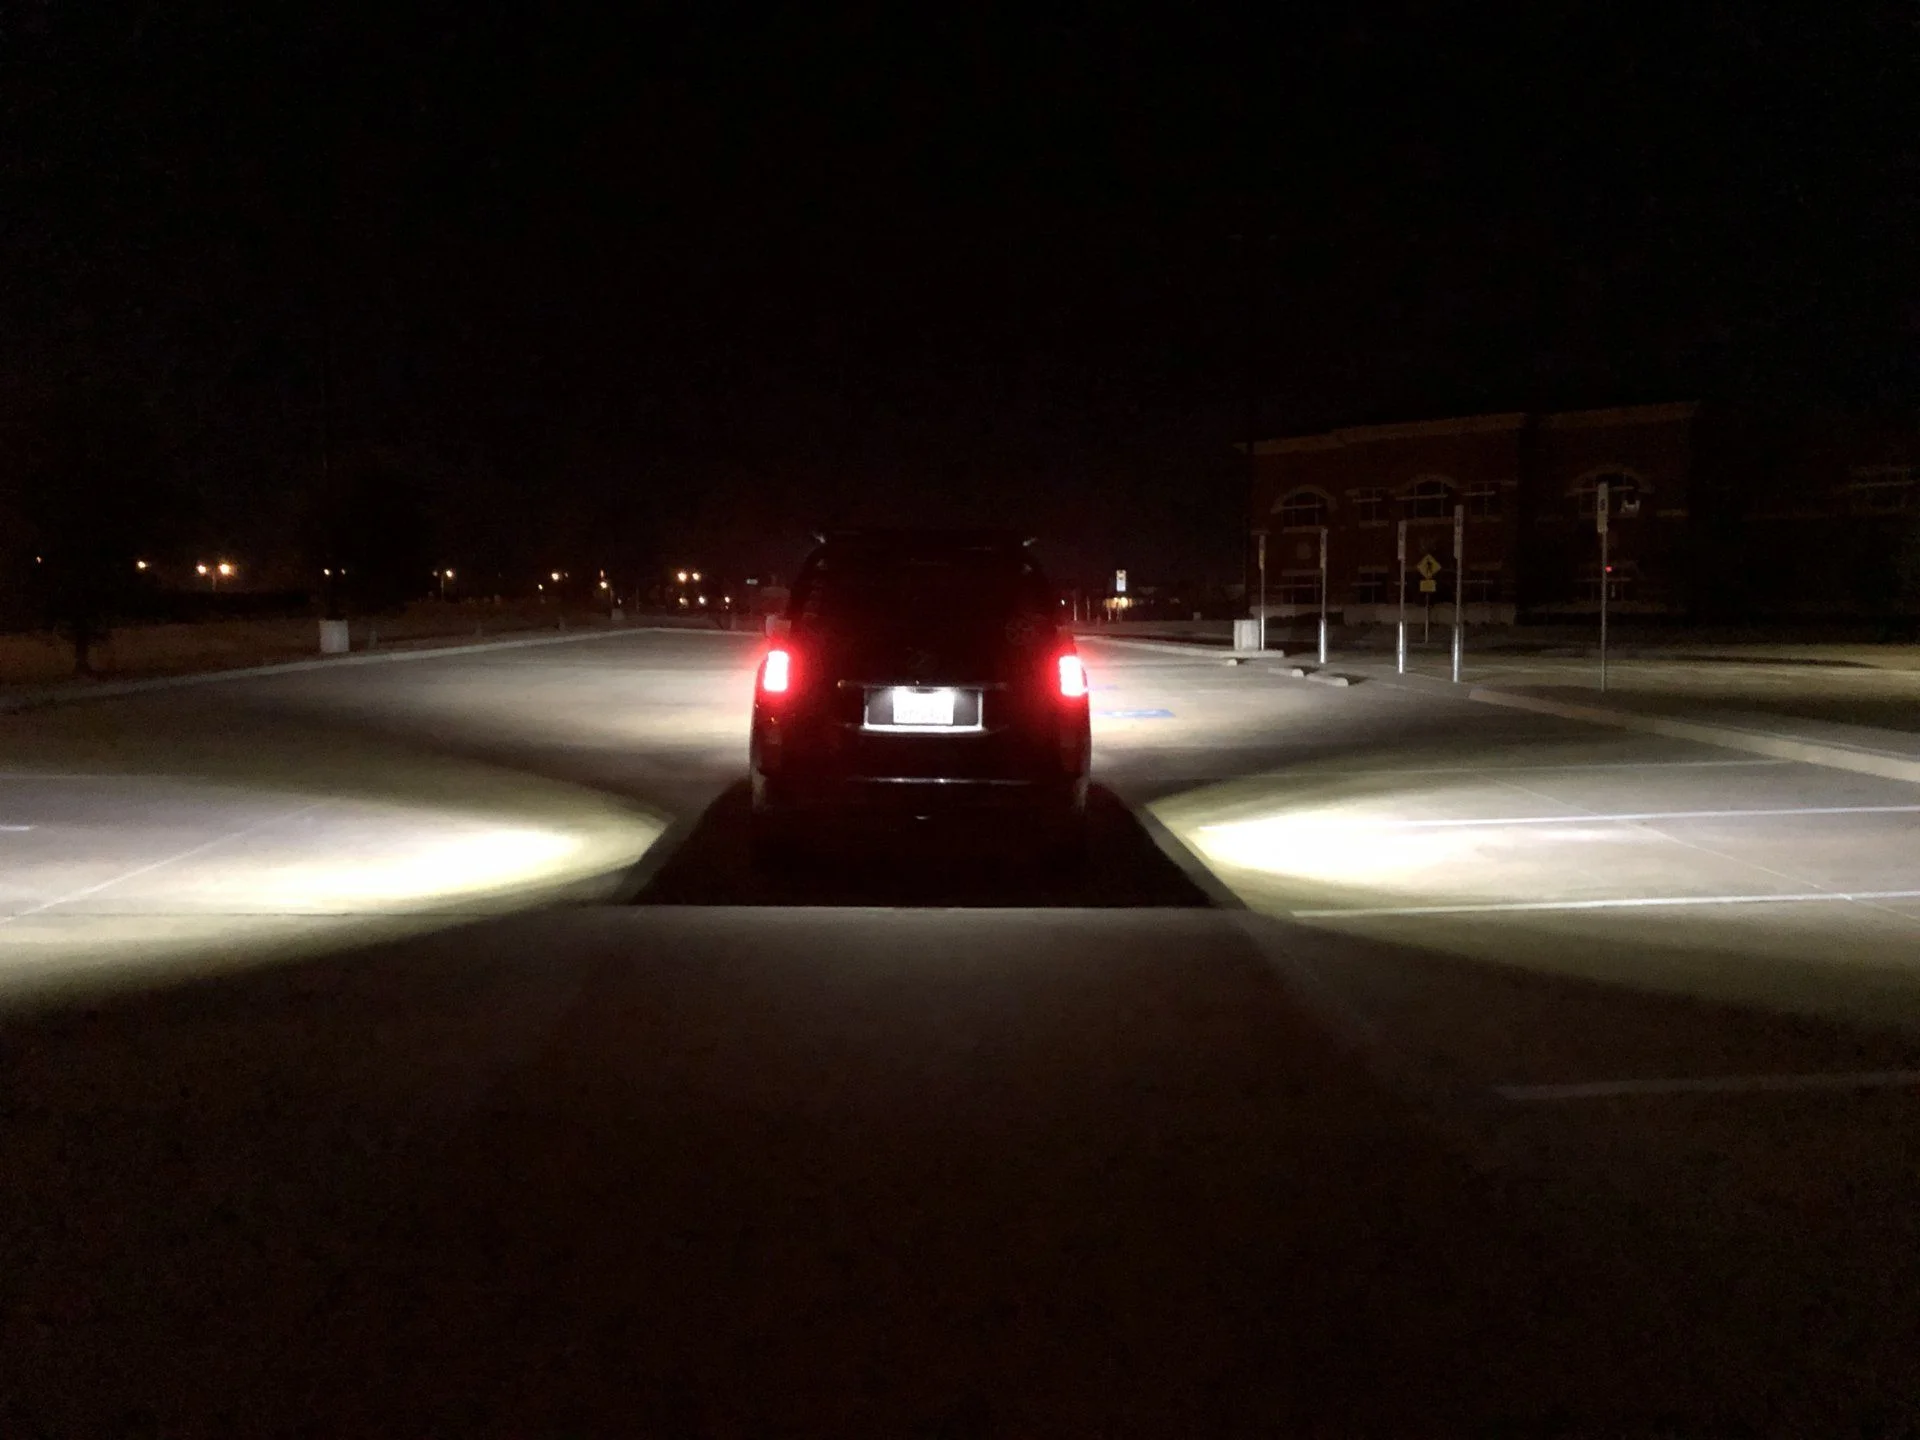
Around Christmas time I picked up some lights that were discounted due to the holidays specials everyone was running. I picked up a 30" Baja Designs OnX6 and a pair of the Baja Designs S2 Sports. I wanted to keep everything as slim as possible so I mounted them to the underside of the rack. I picked up a Feniex Typhoon to use as the controller for the lights. I also picked a fuse panel from Shrockworks, the one they have for the 5th gen T4R fits the GX460 perfectly. I will add more pictures of this when I can get them transferred over from my phone.


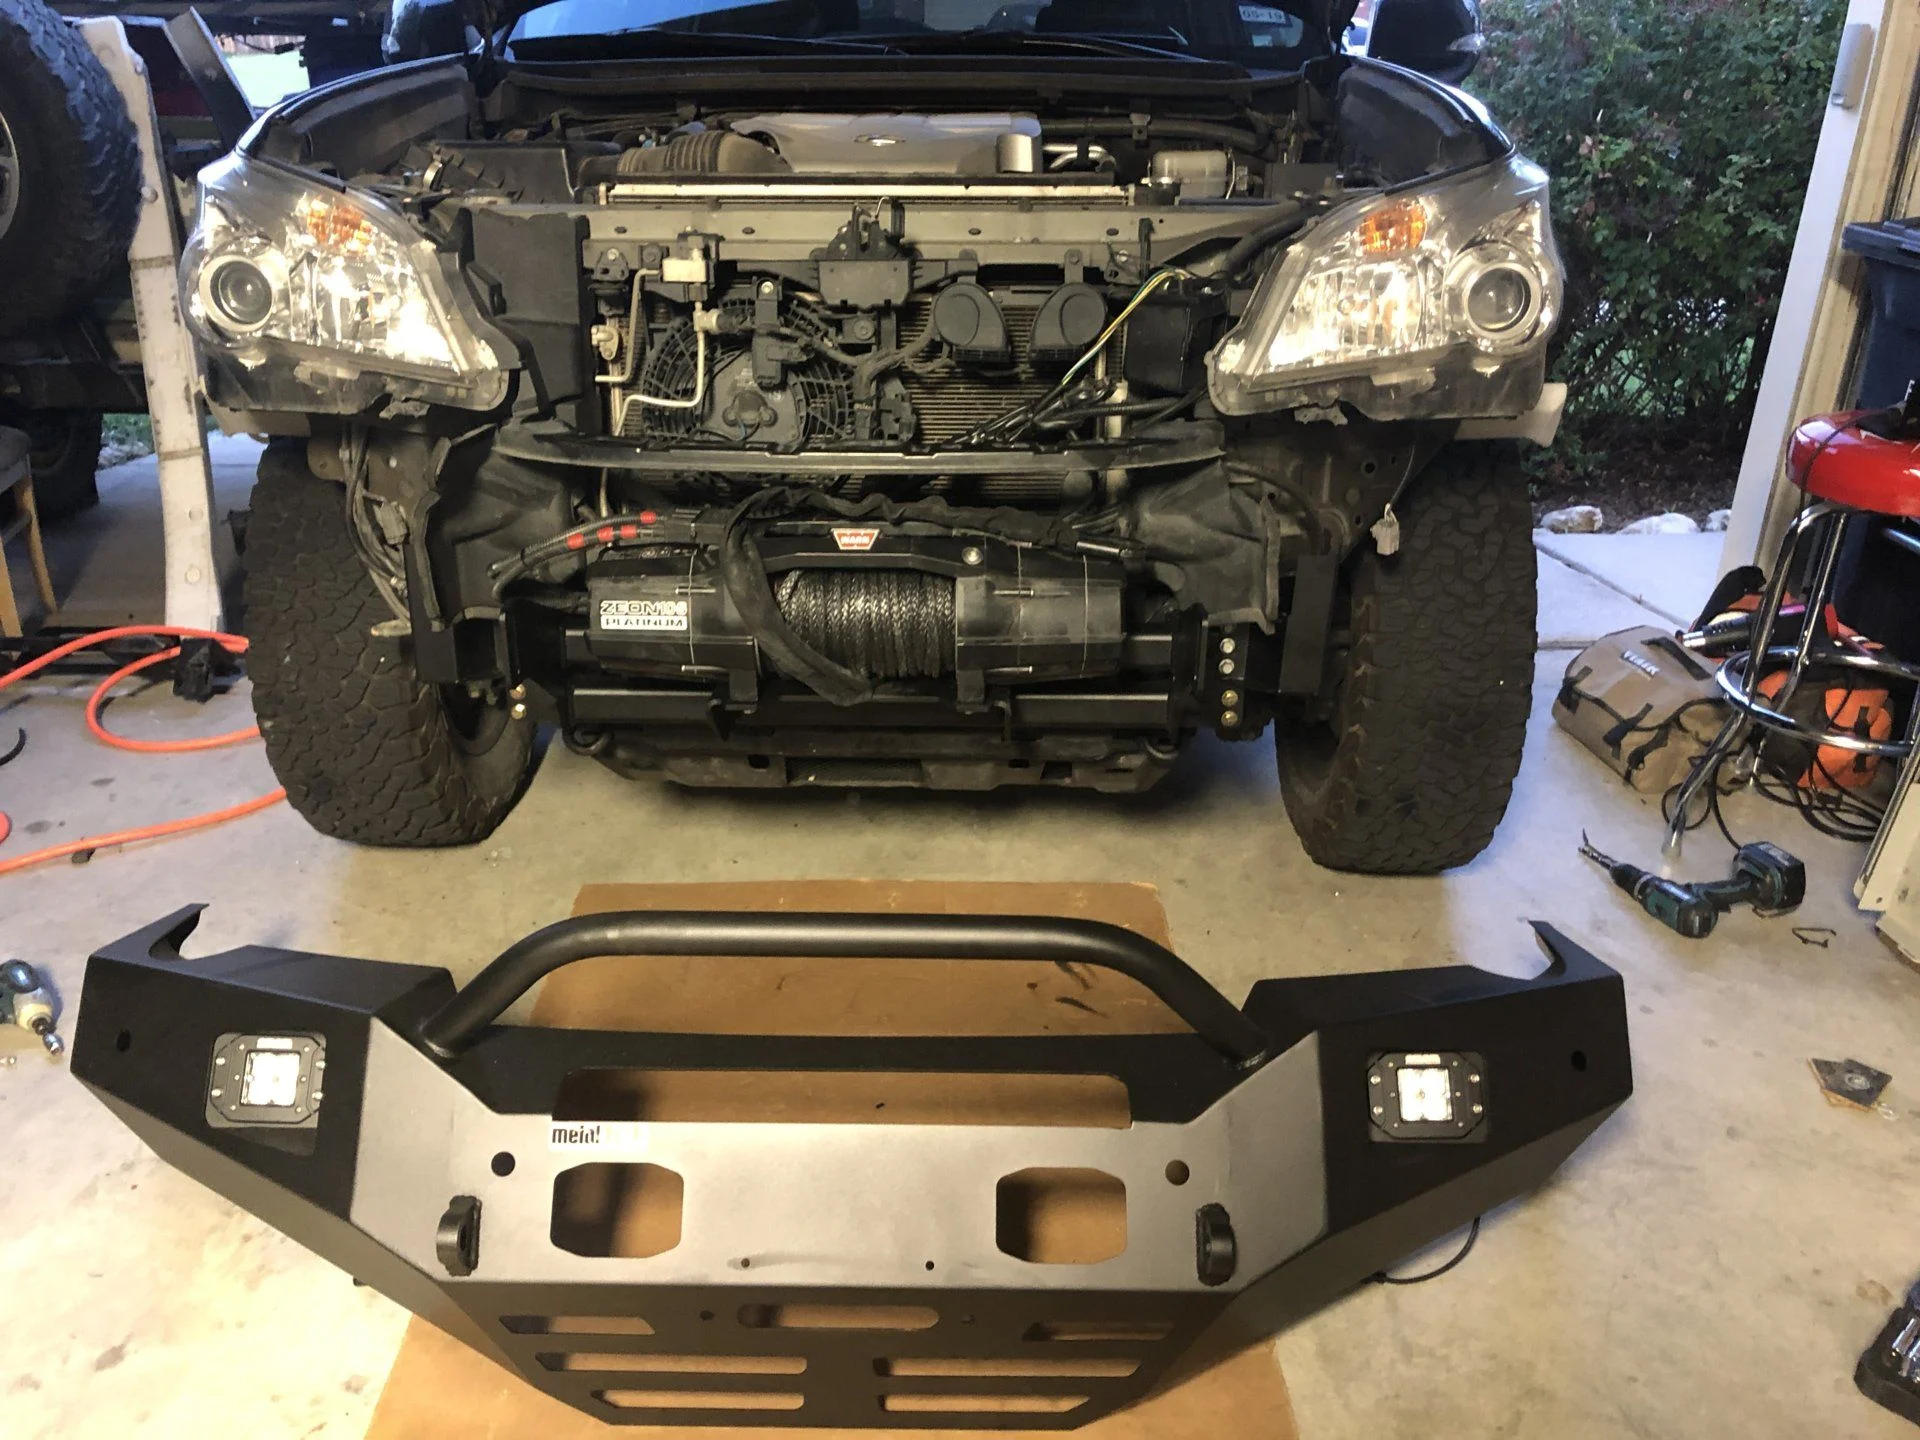
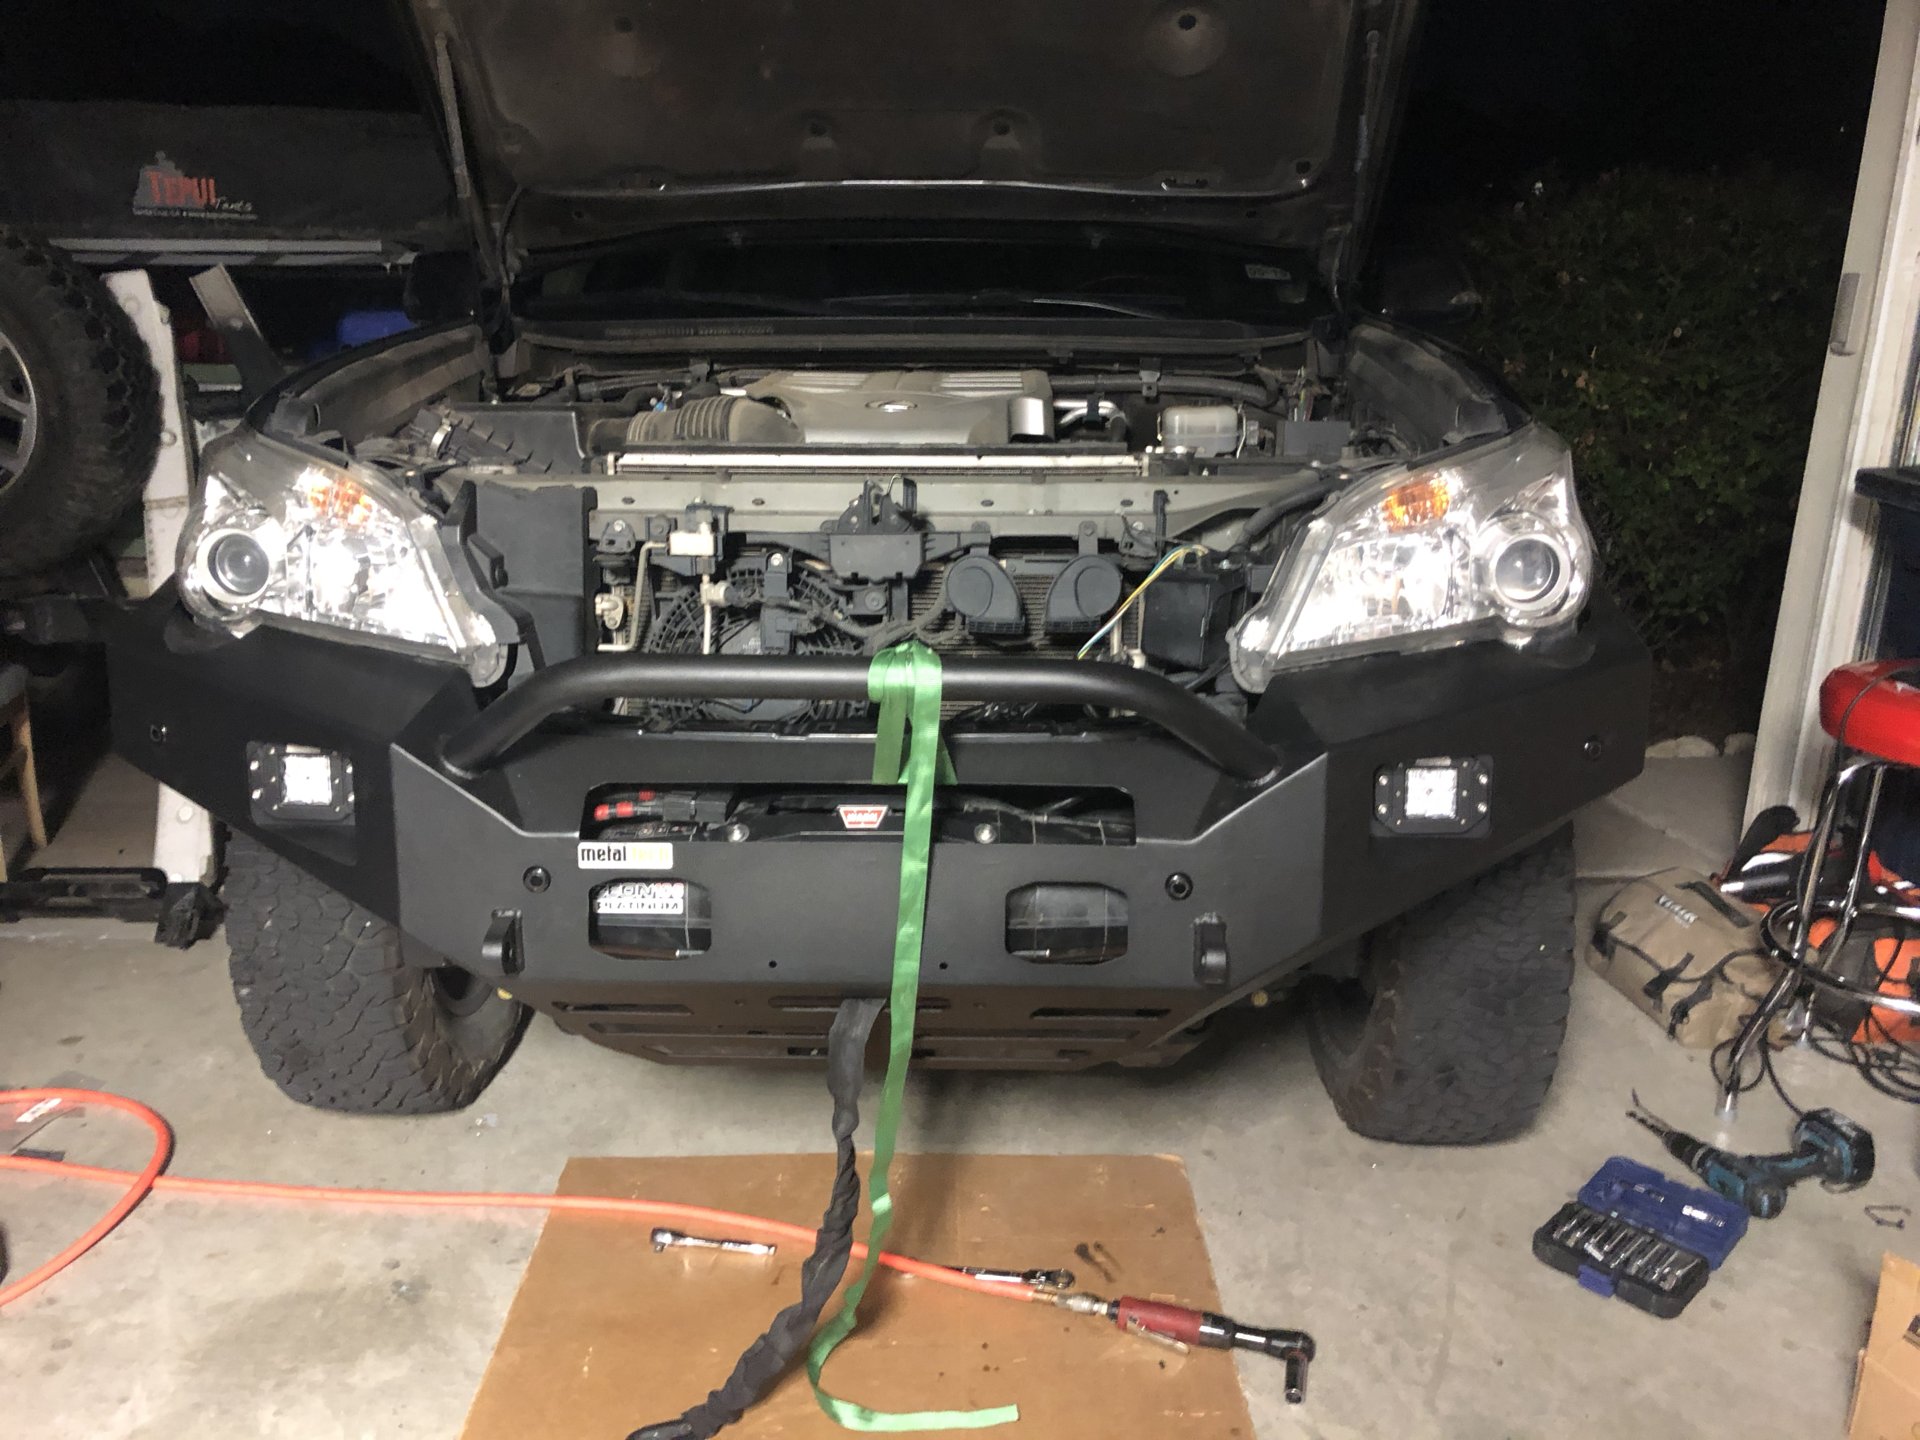
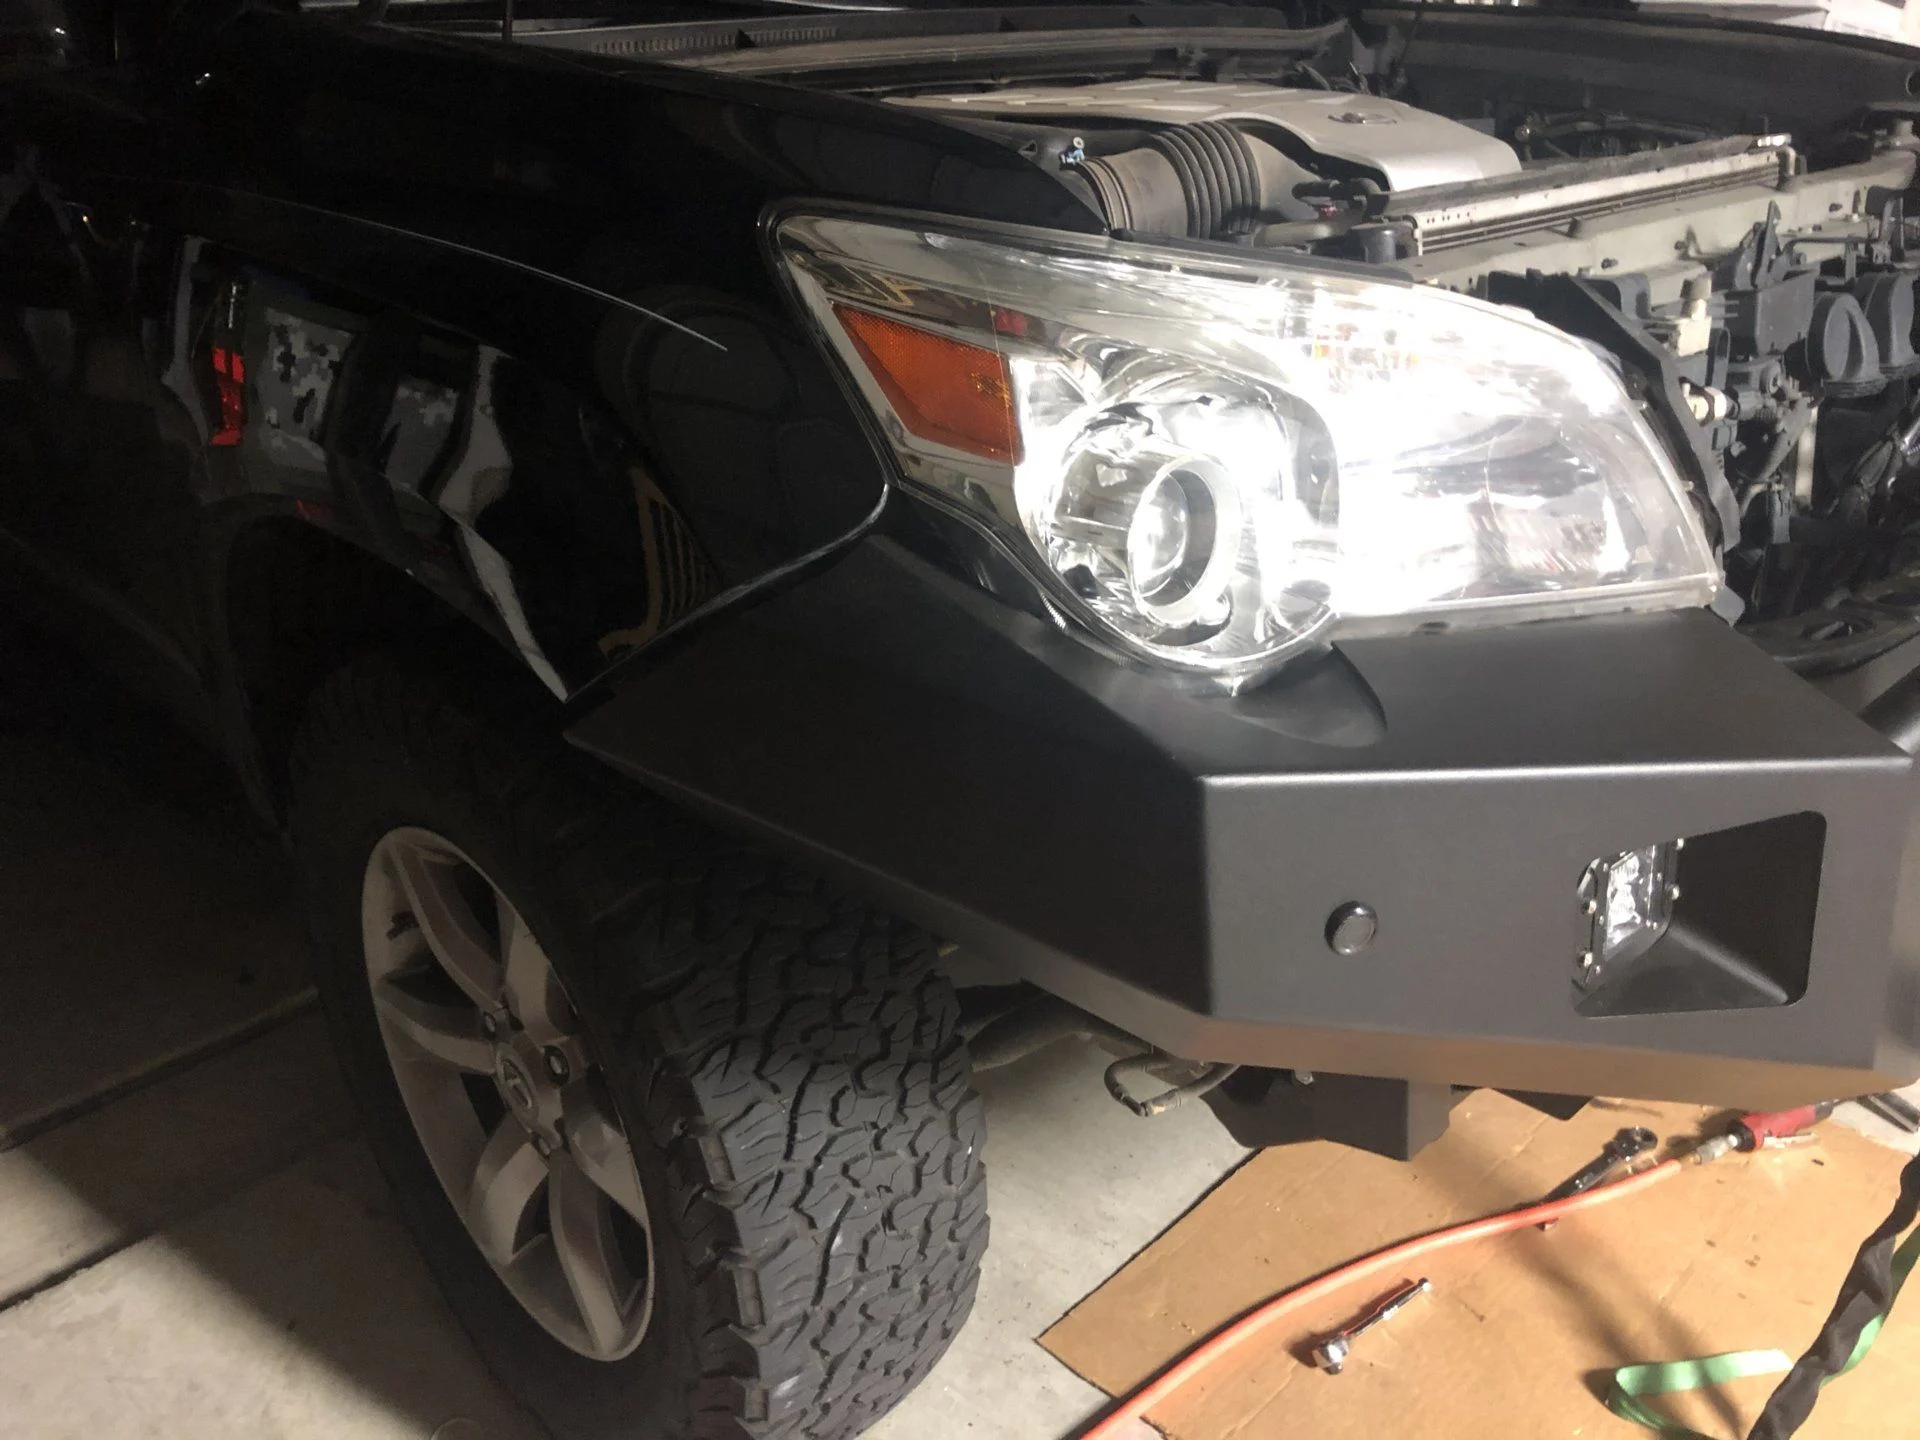
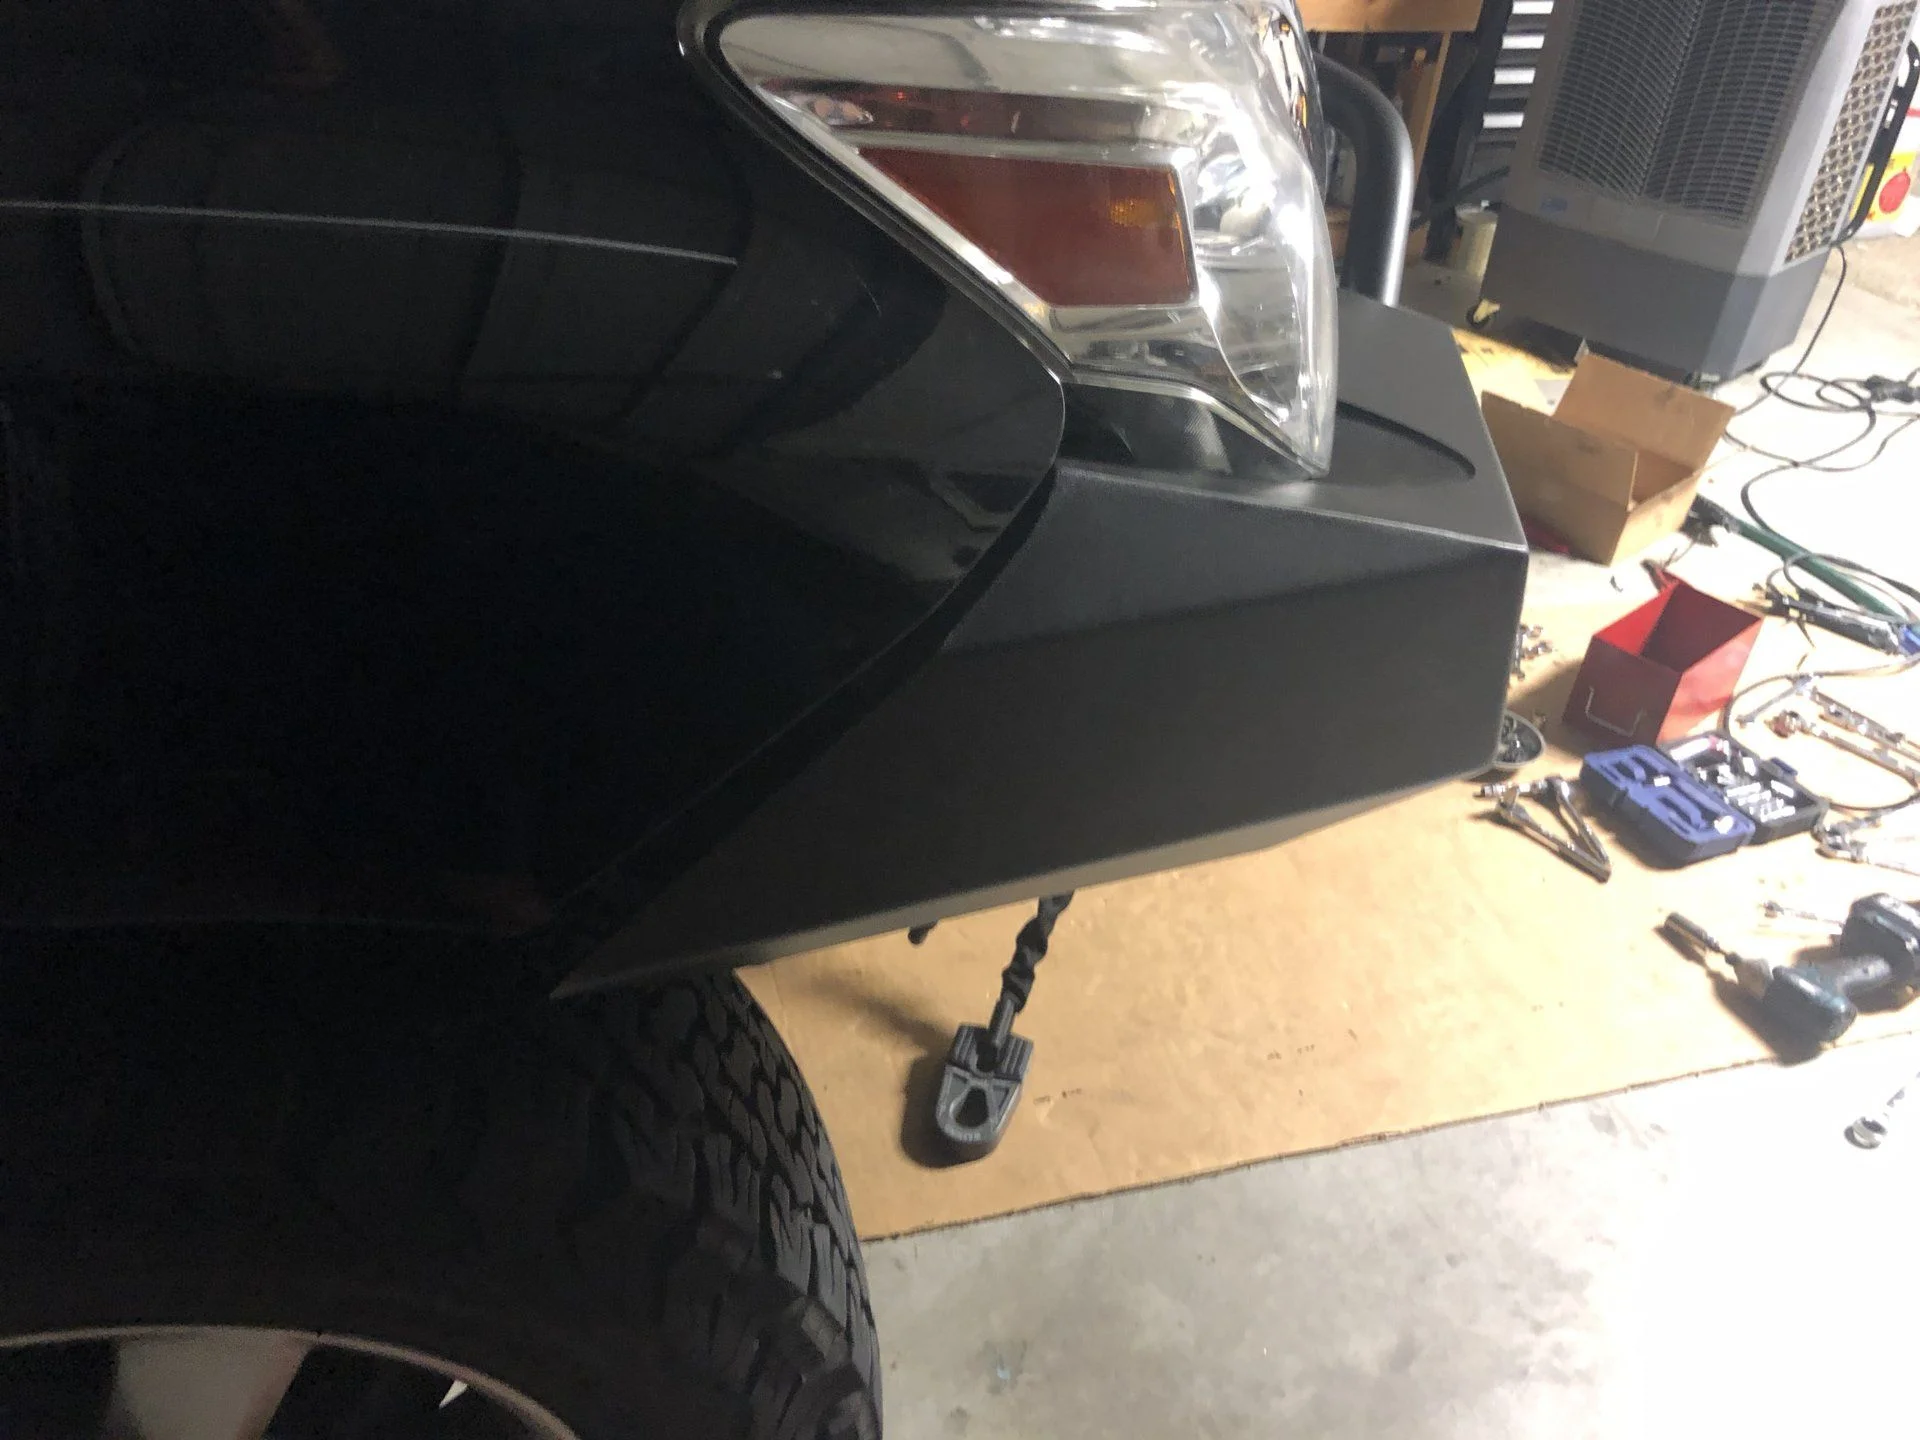
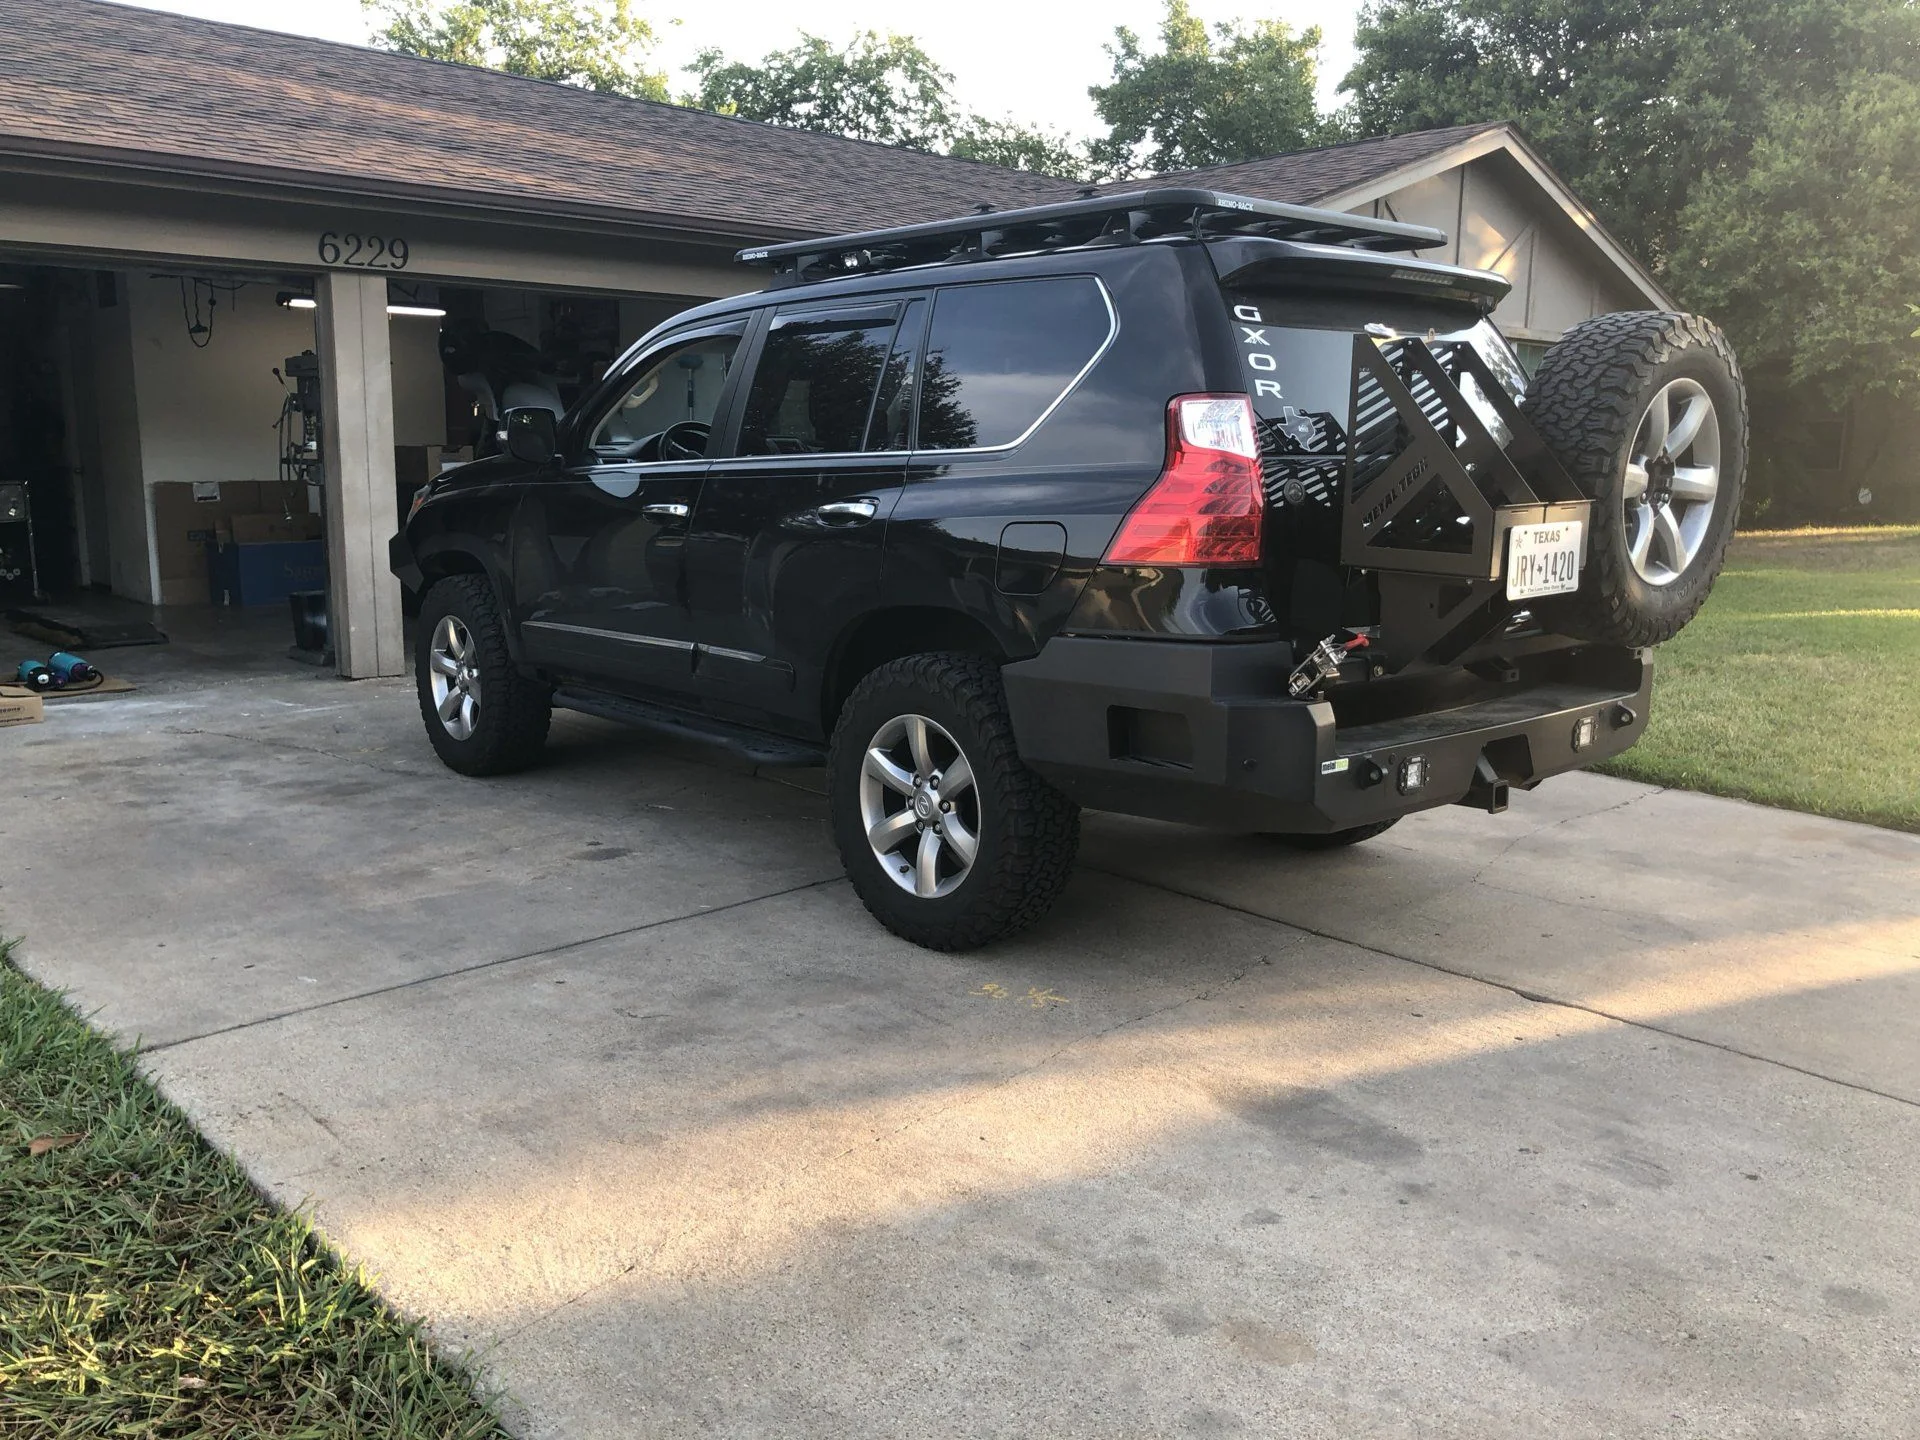
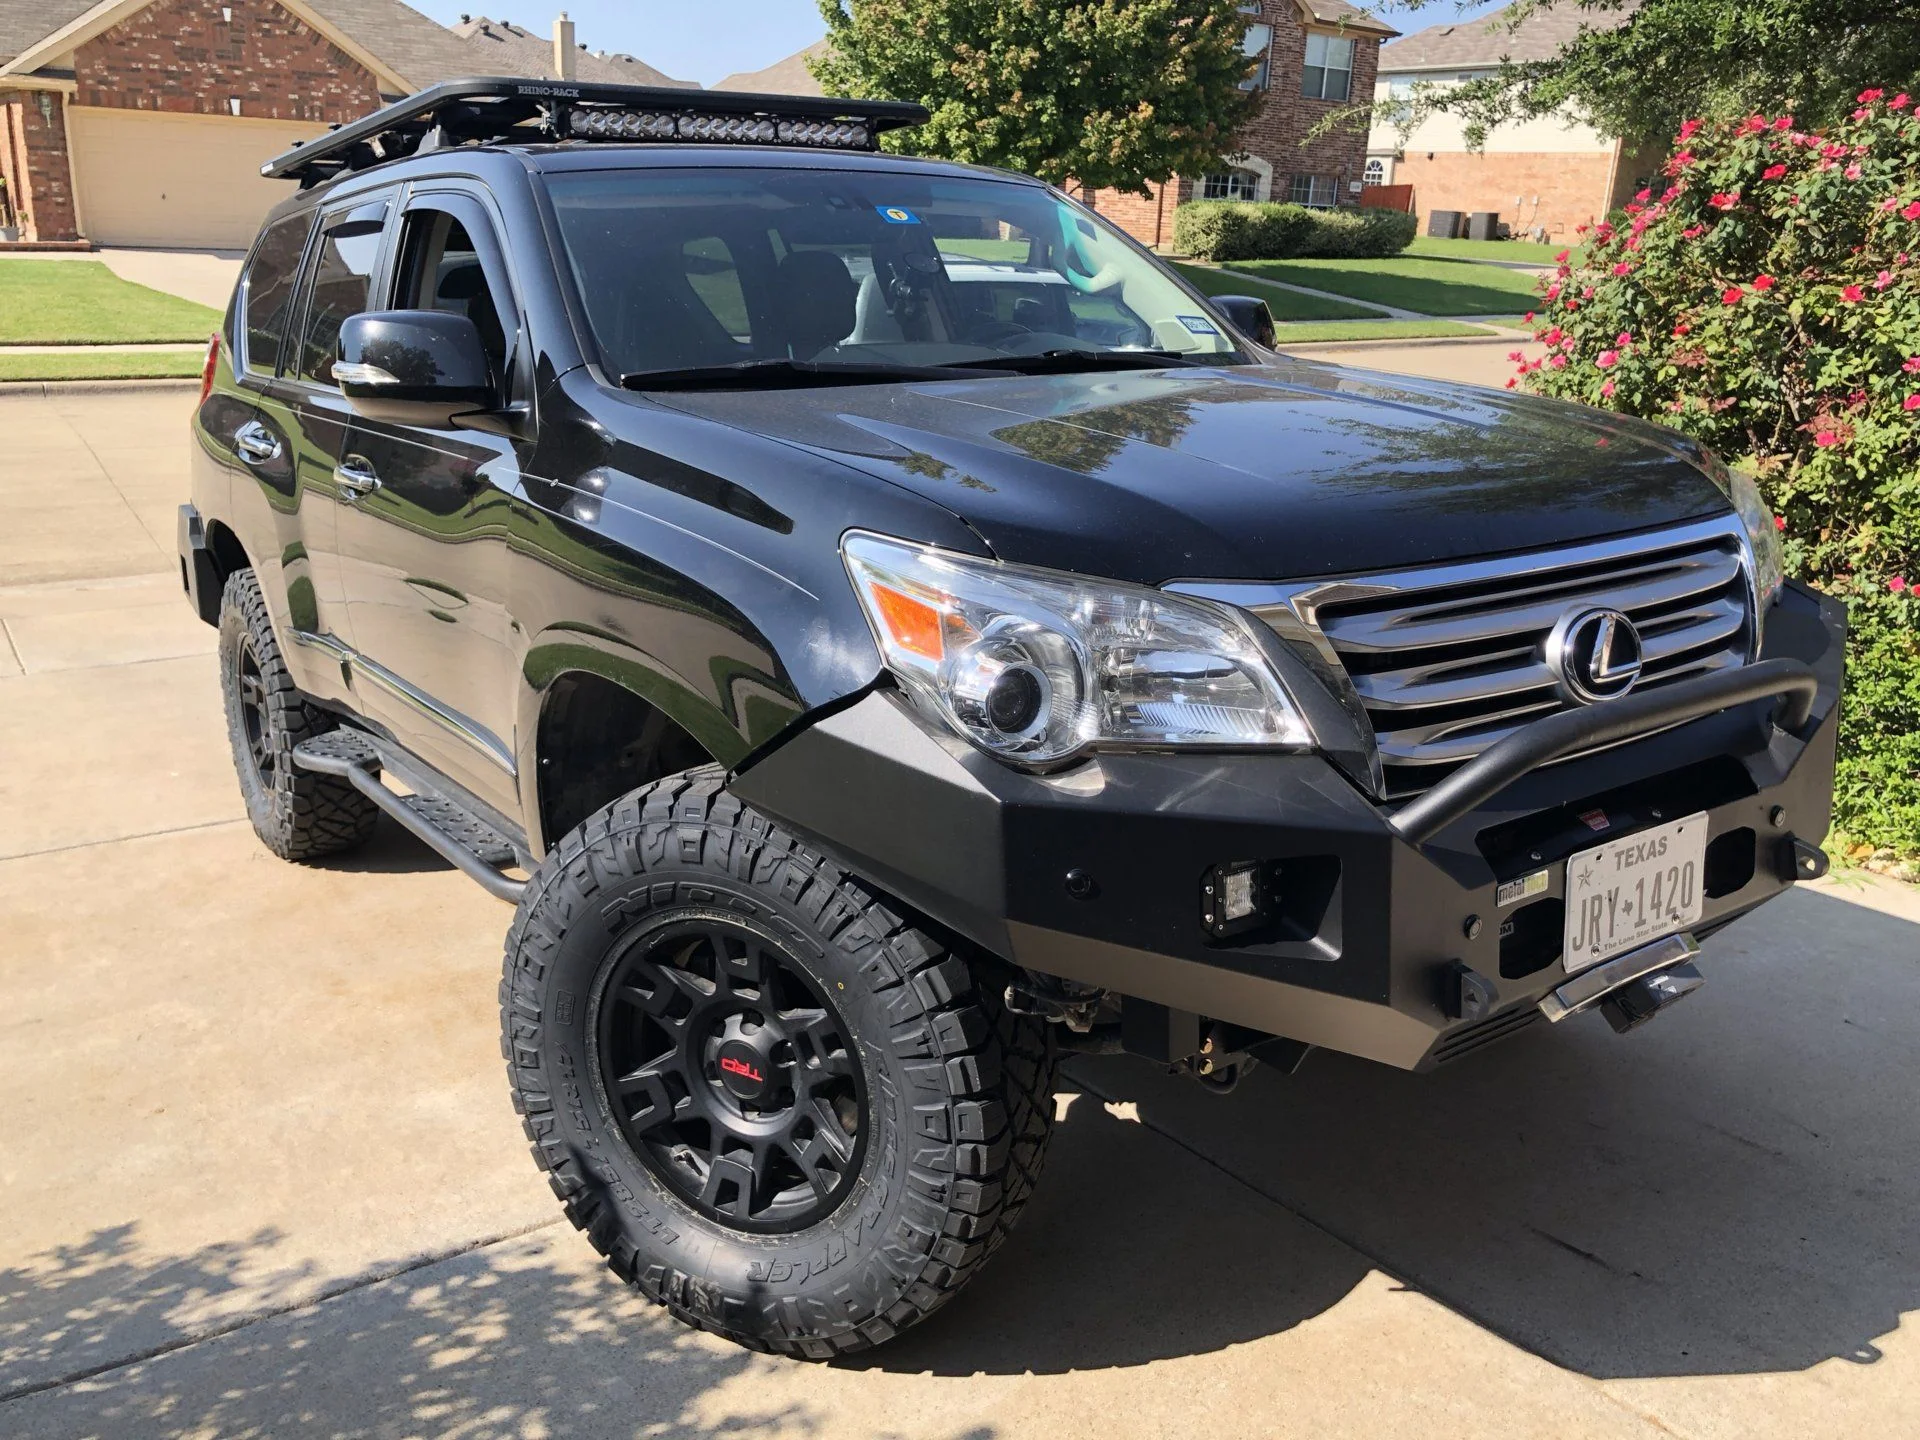
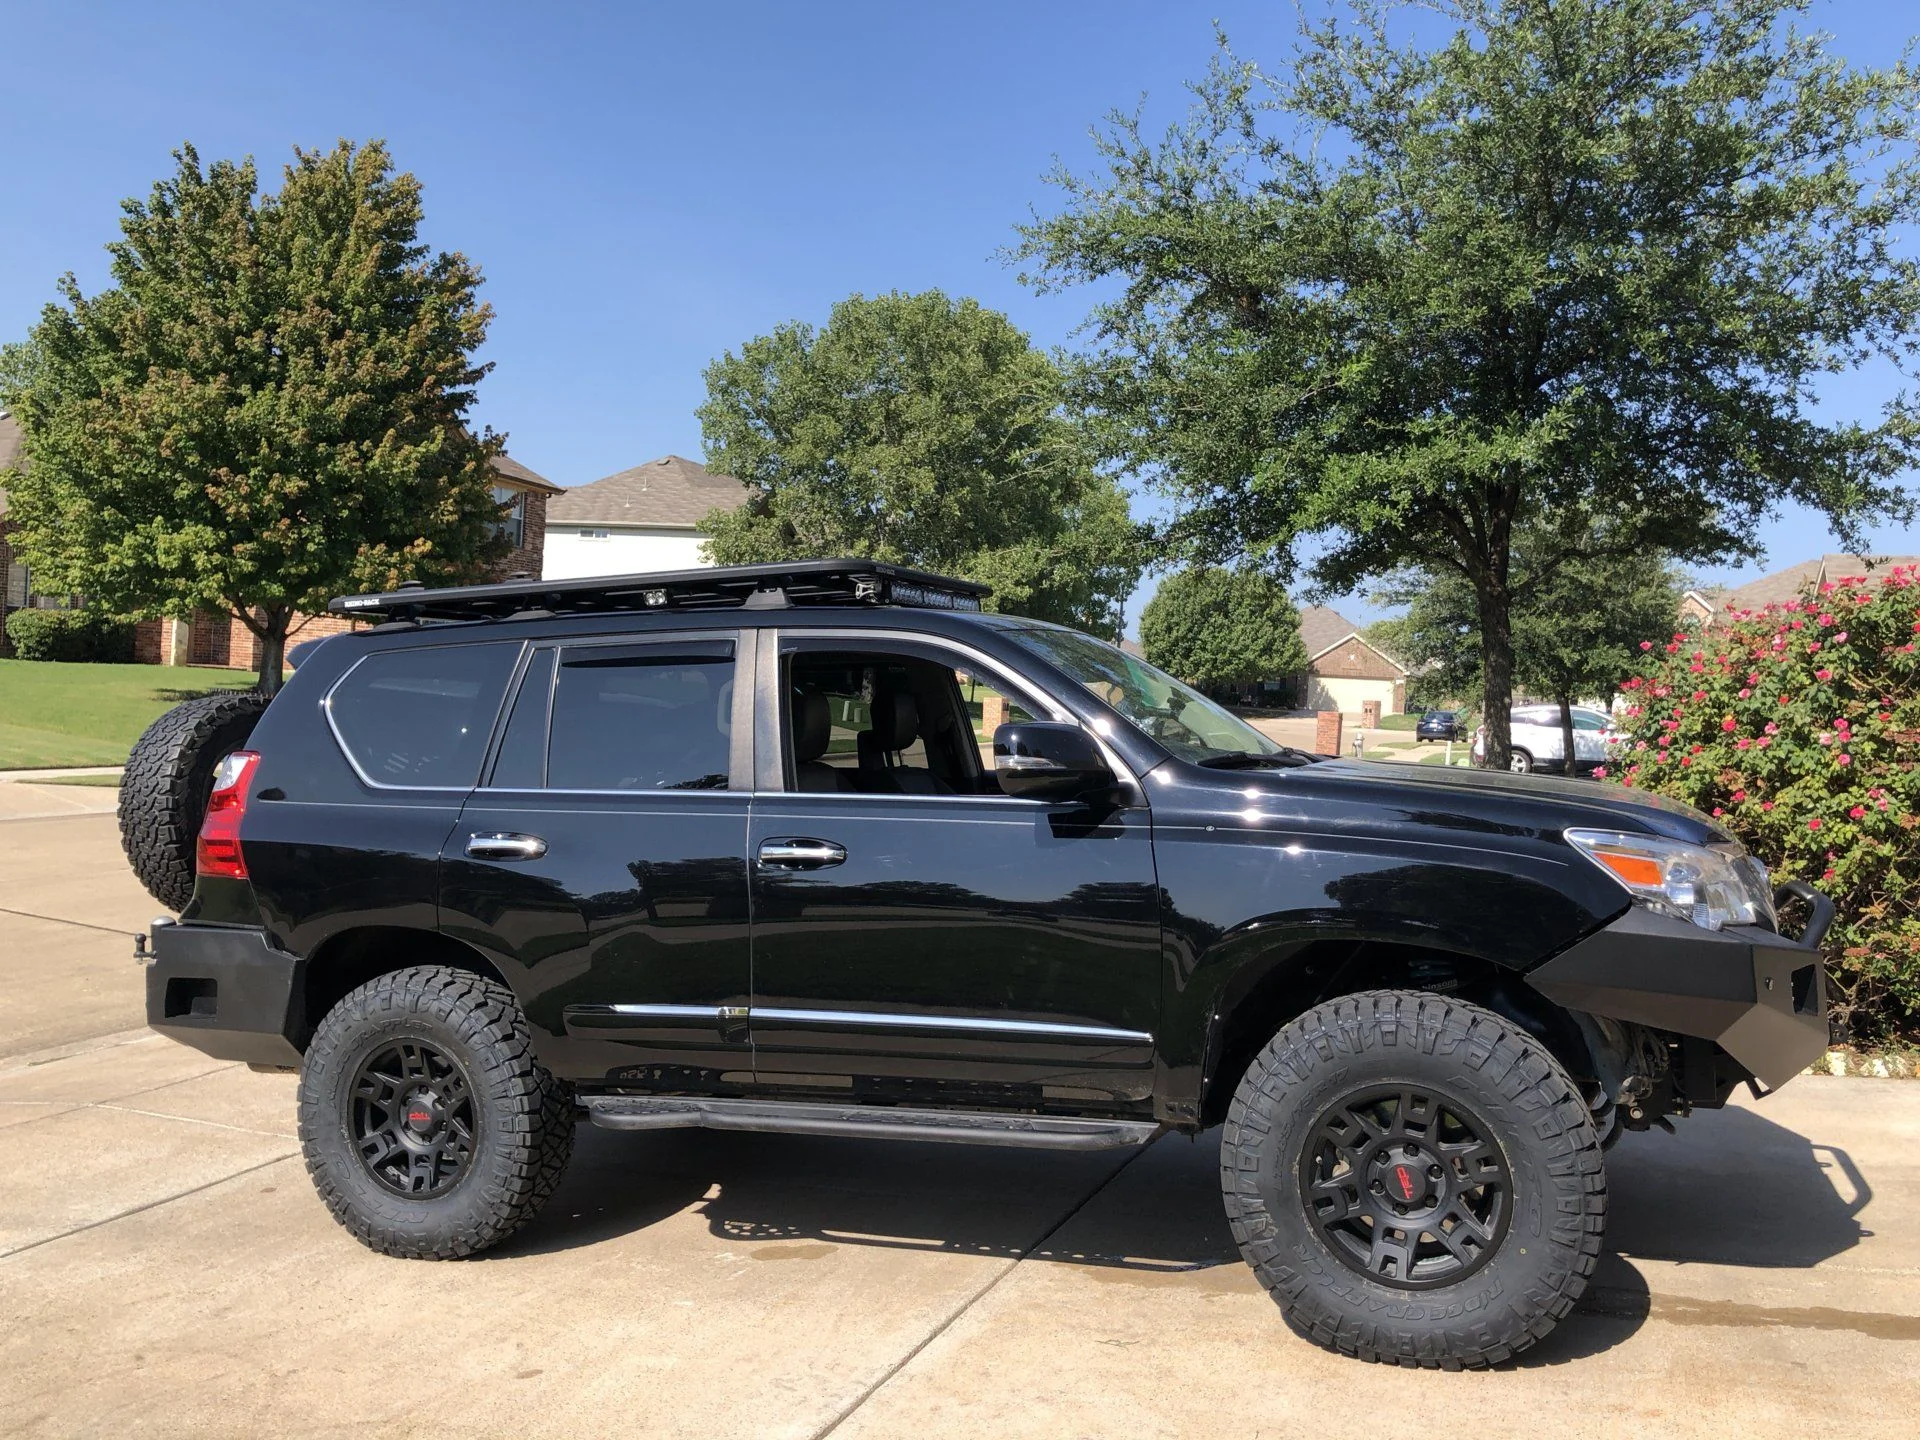
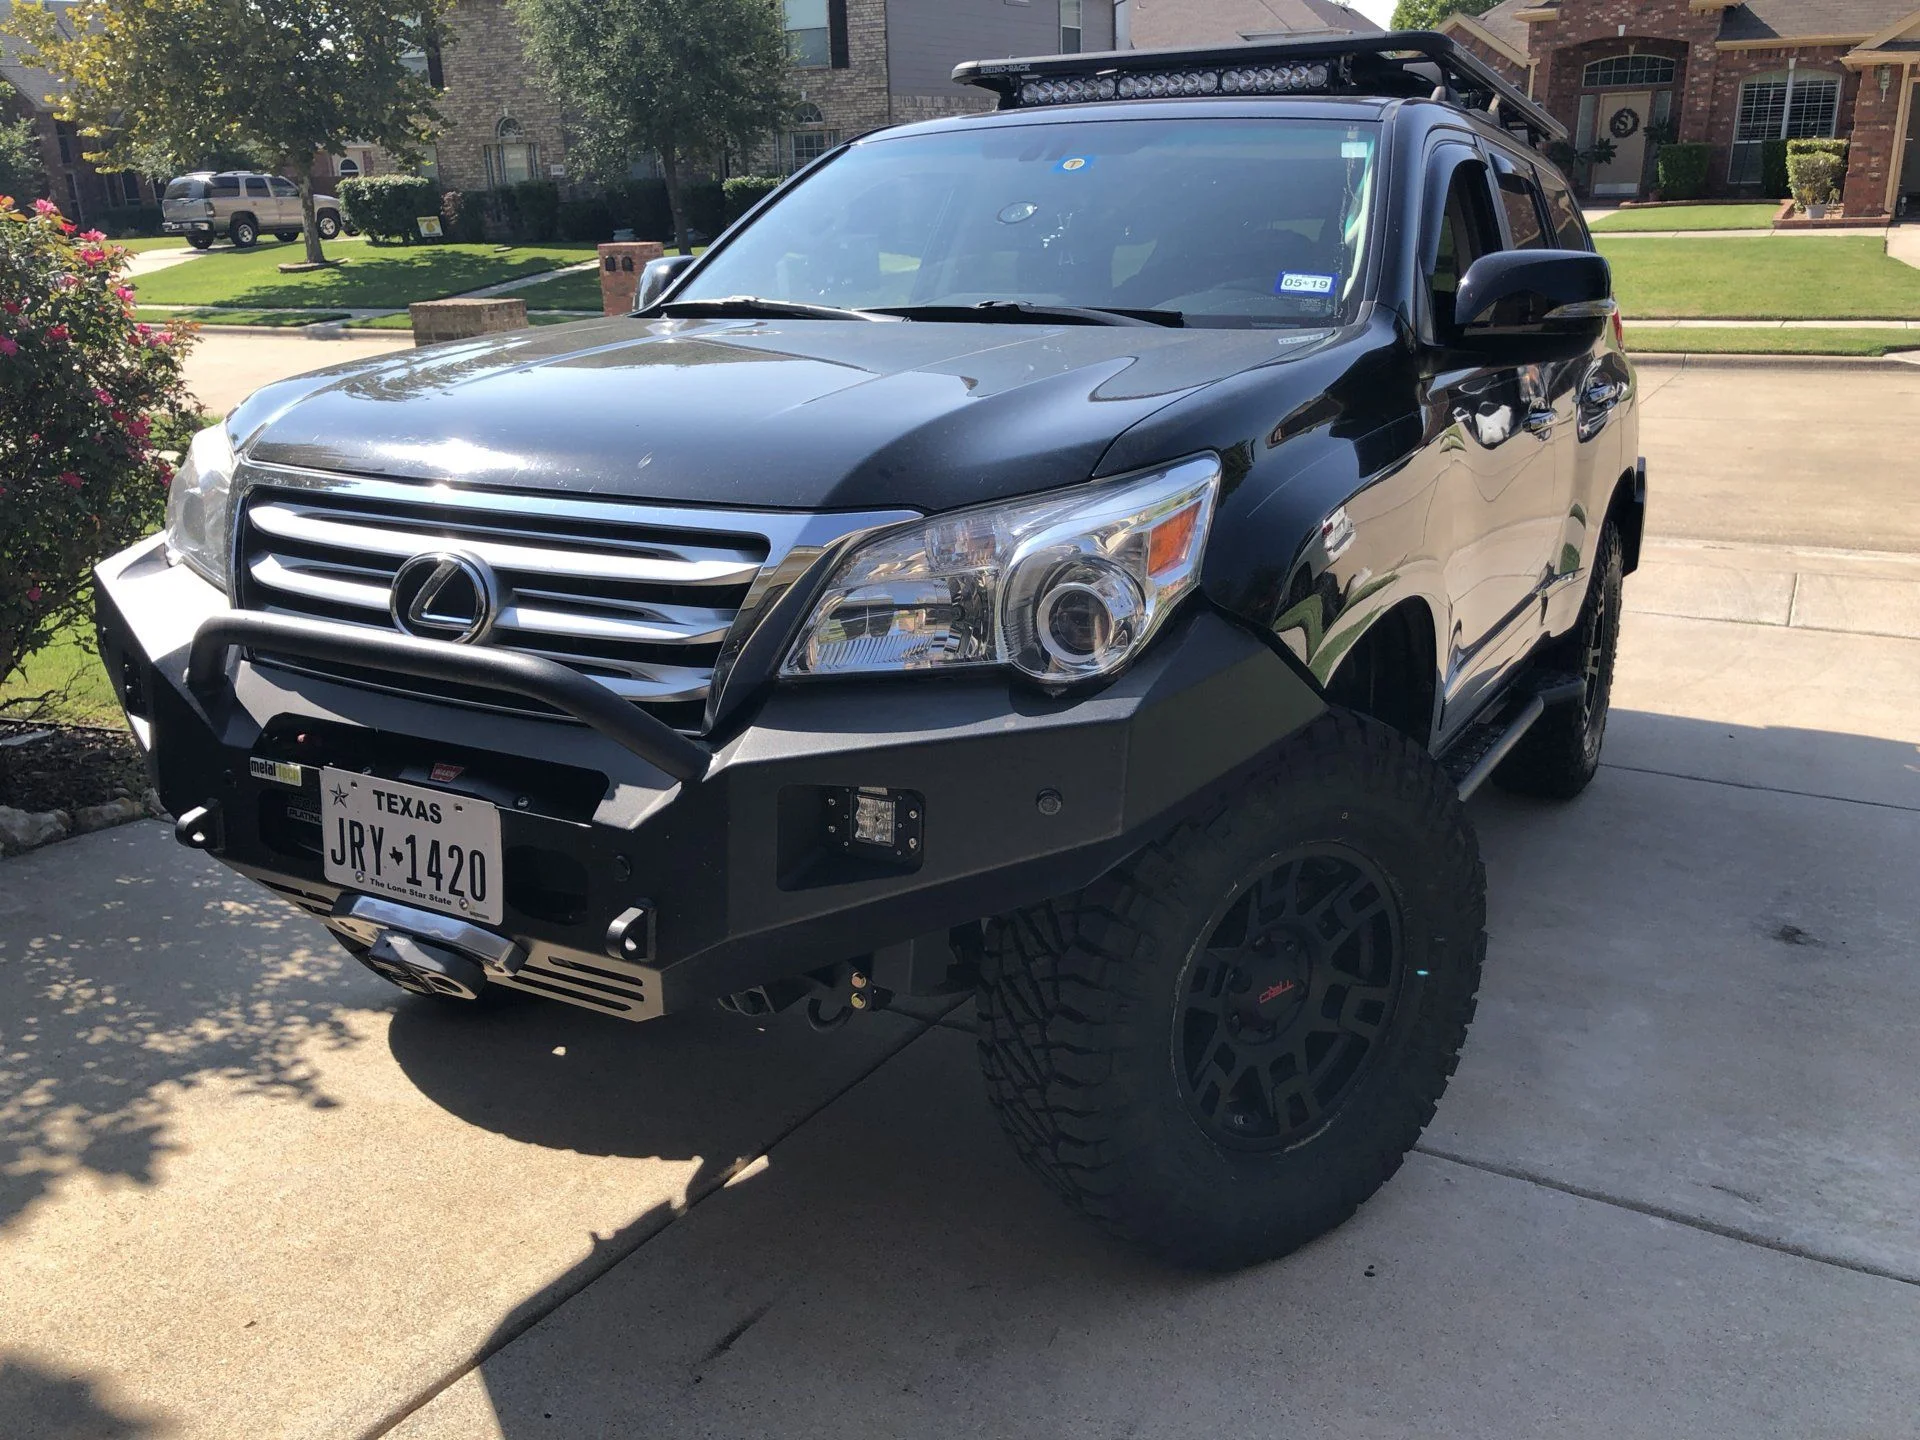
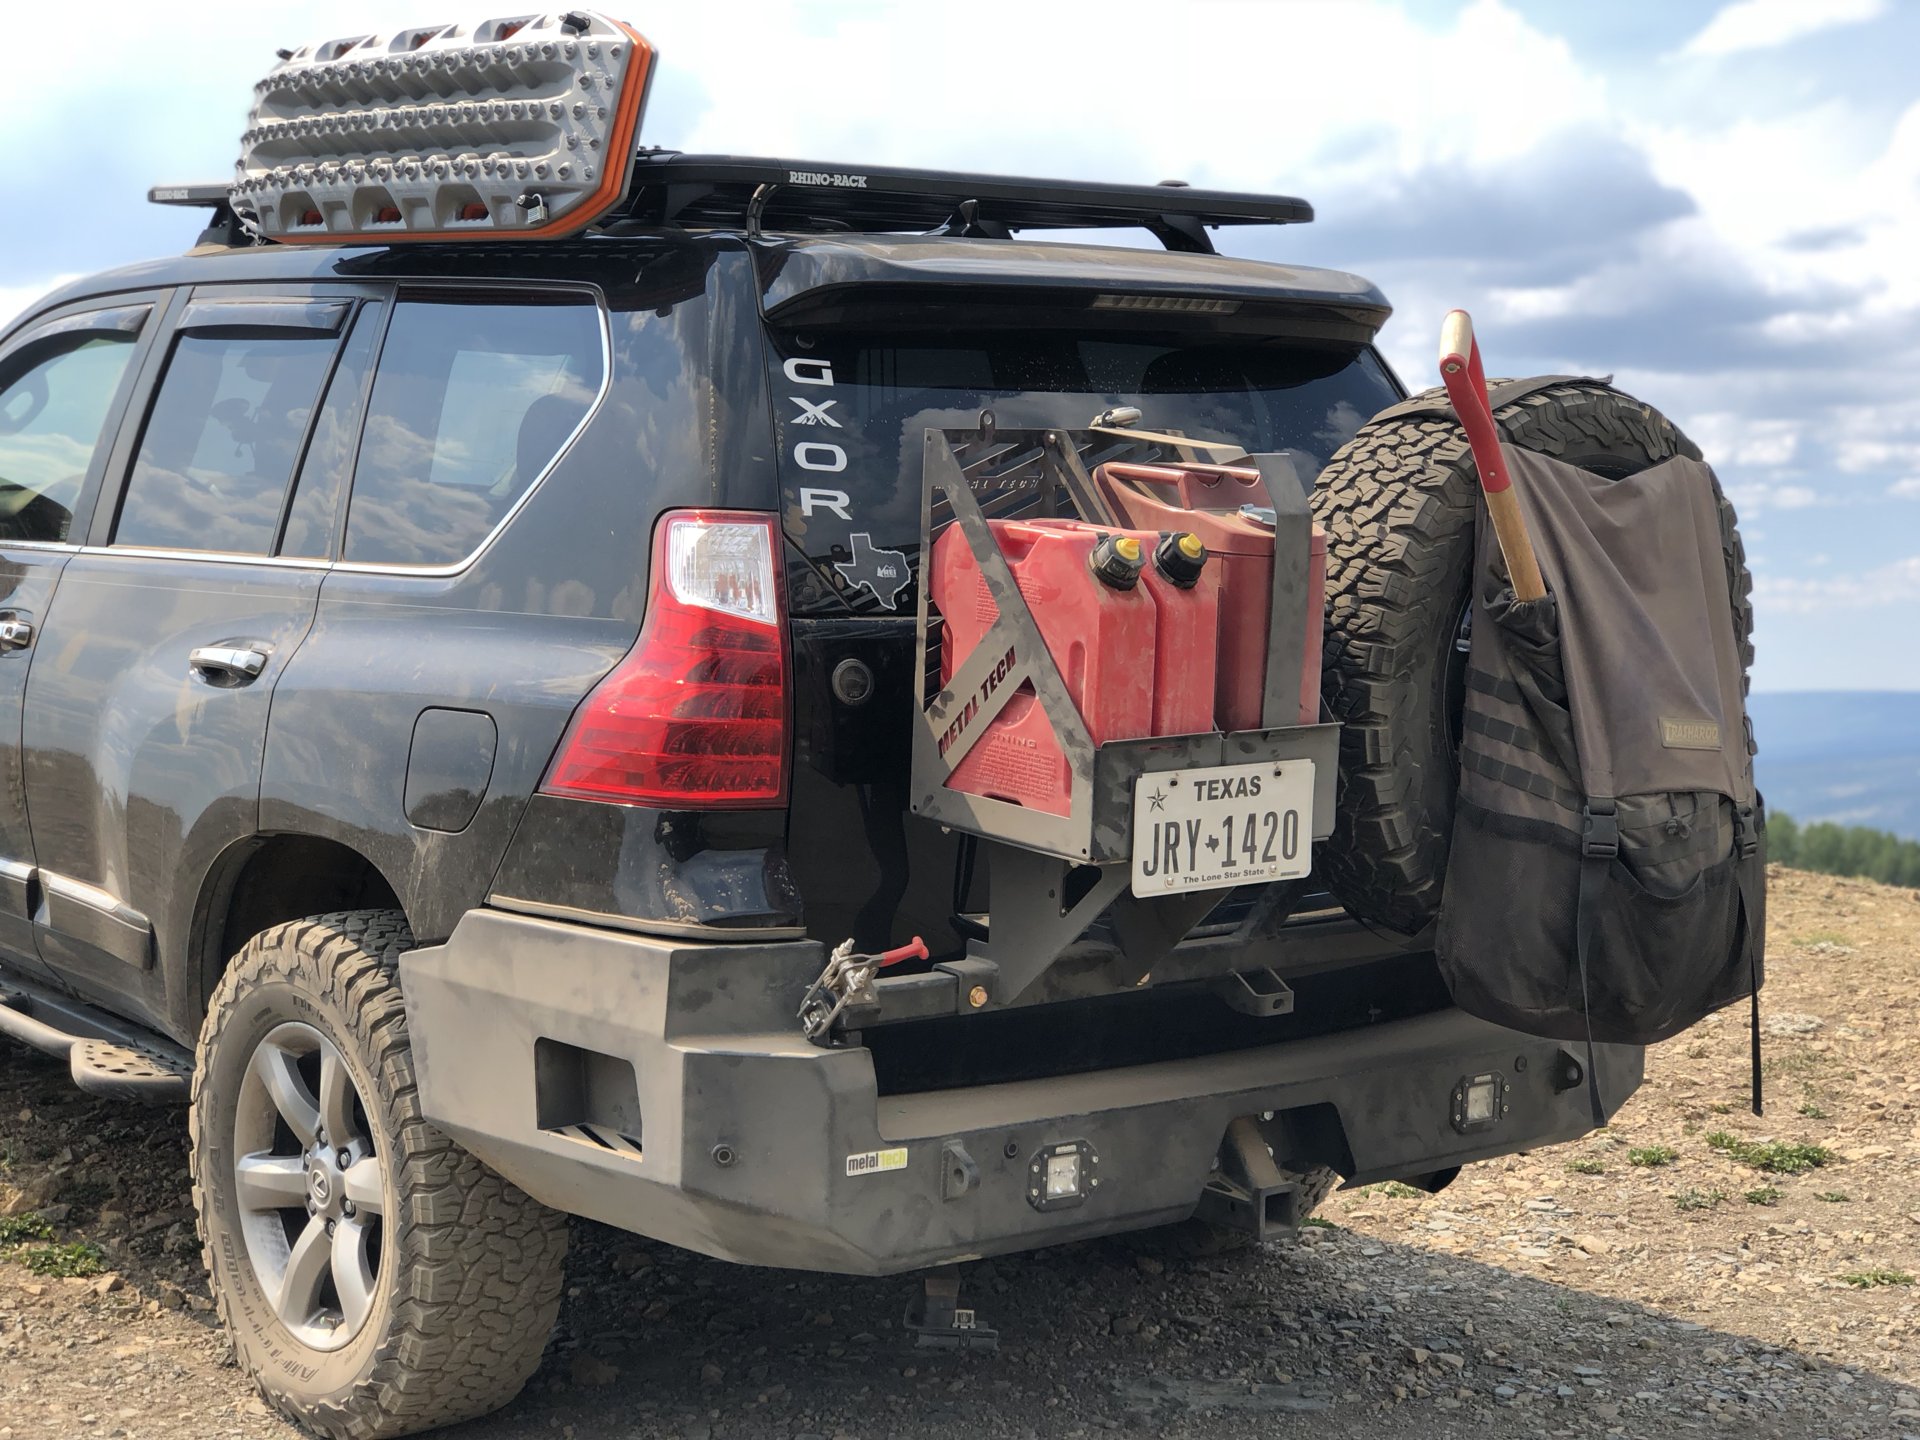
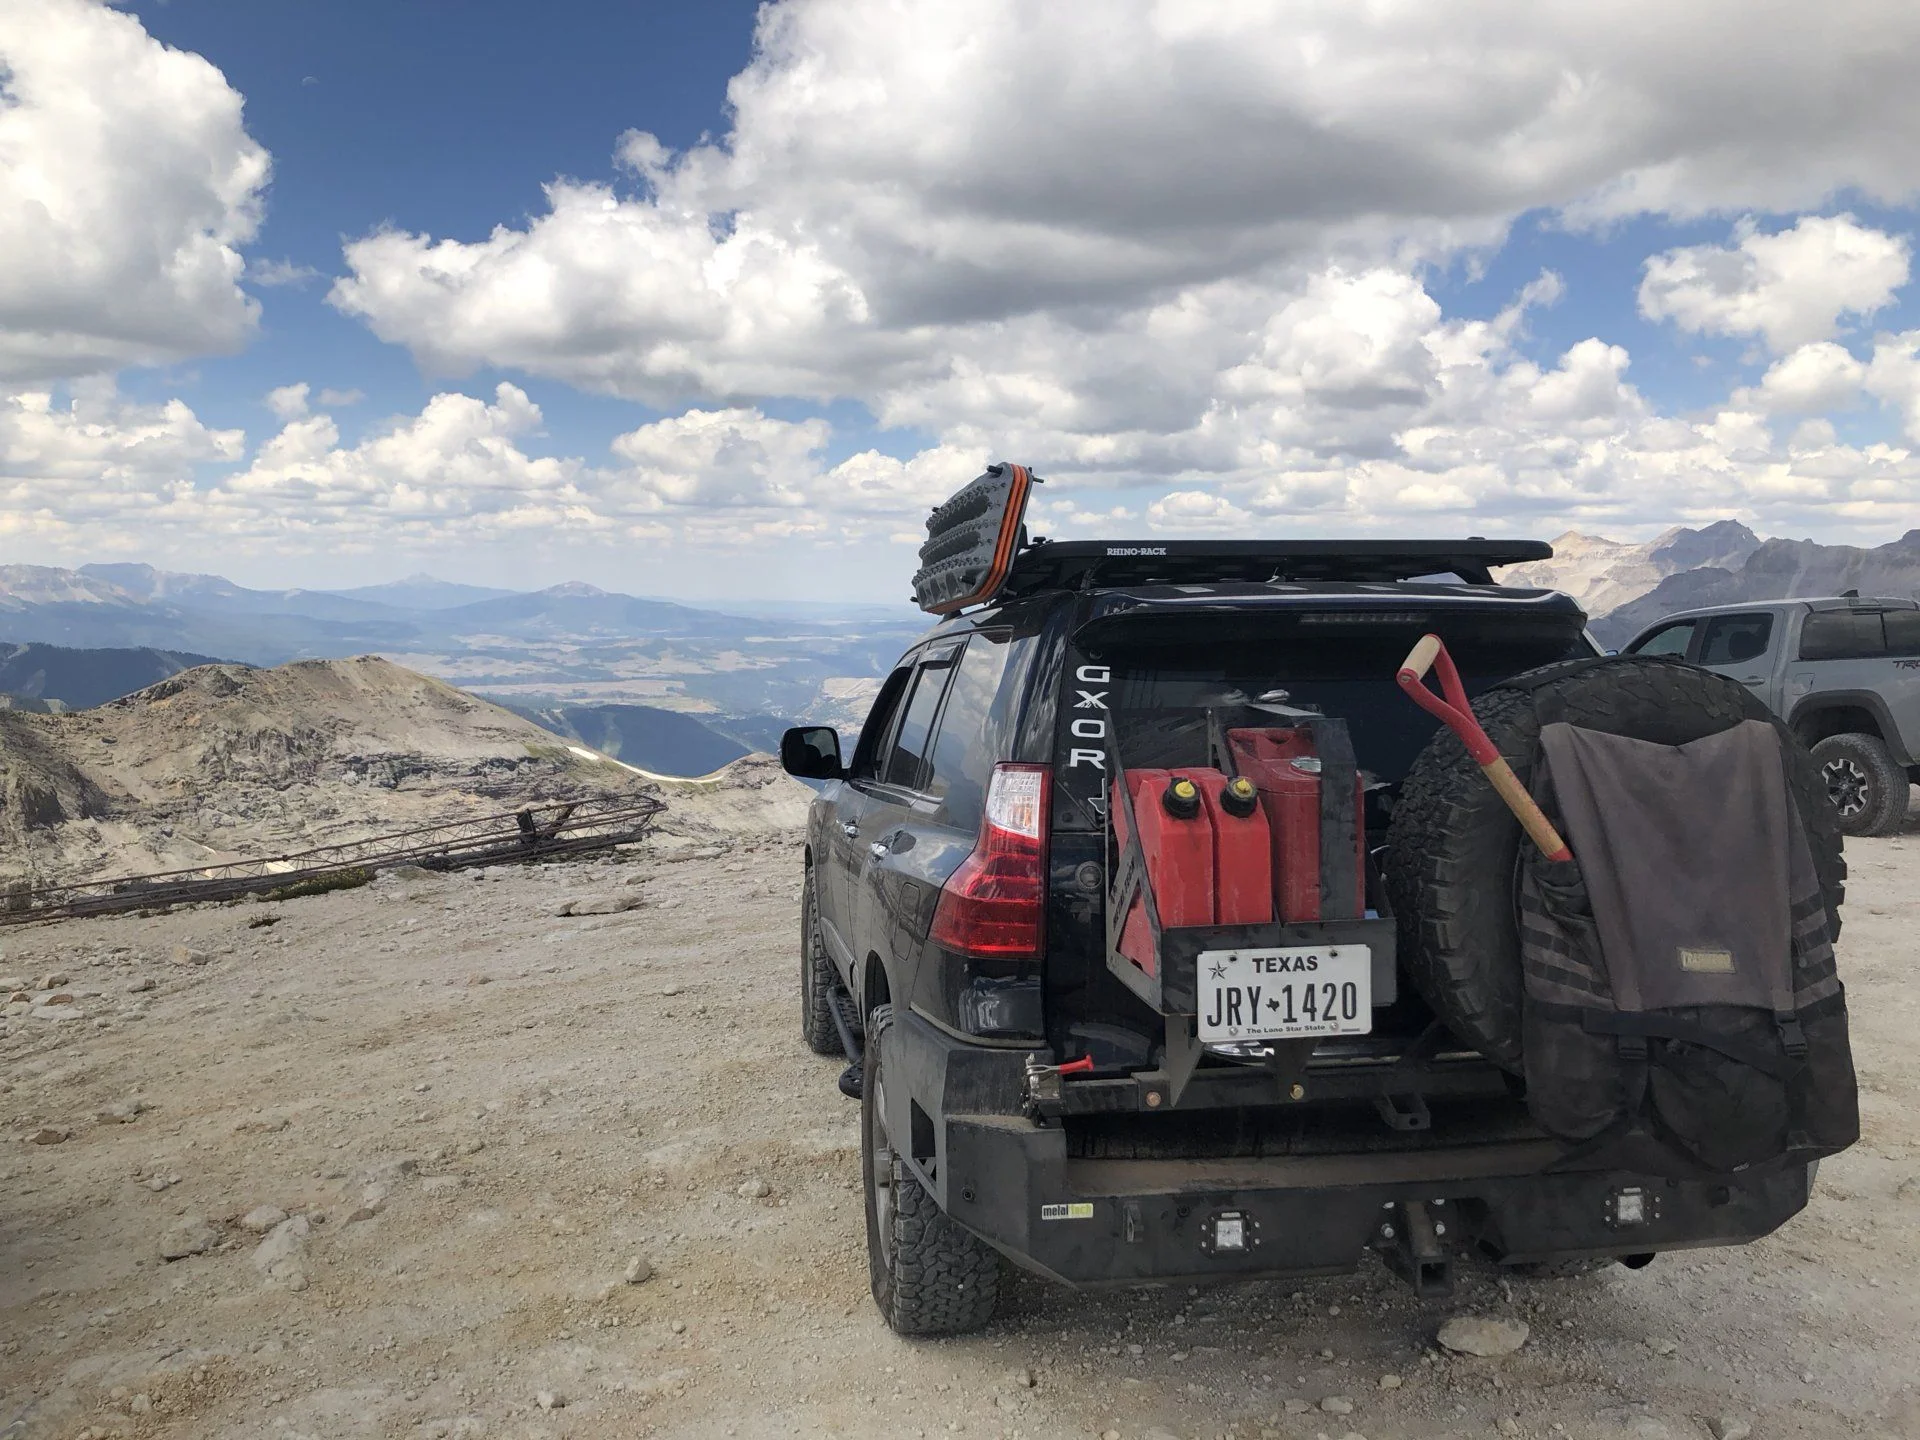
My plans to not add steel bumpers didn't last long. On our way up to our cabin in Oklahoma I hit a deer and the damage was not as bad as it could have been it still needed to be fixed. A few weeks after this Metal Tech did a group buy on Bumpers with freight credits if they hit so many purchases. I went ahead and picked up both front and rear bumpers from them. I just recently installed the rear bumper before our trip to Colorado. I wanted to have the rear recovery points along with the storage and ability to carry a full size spare tire.


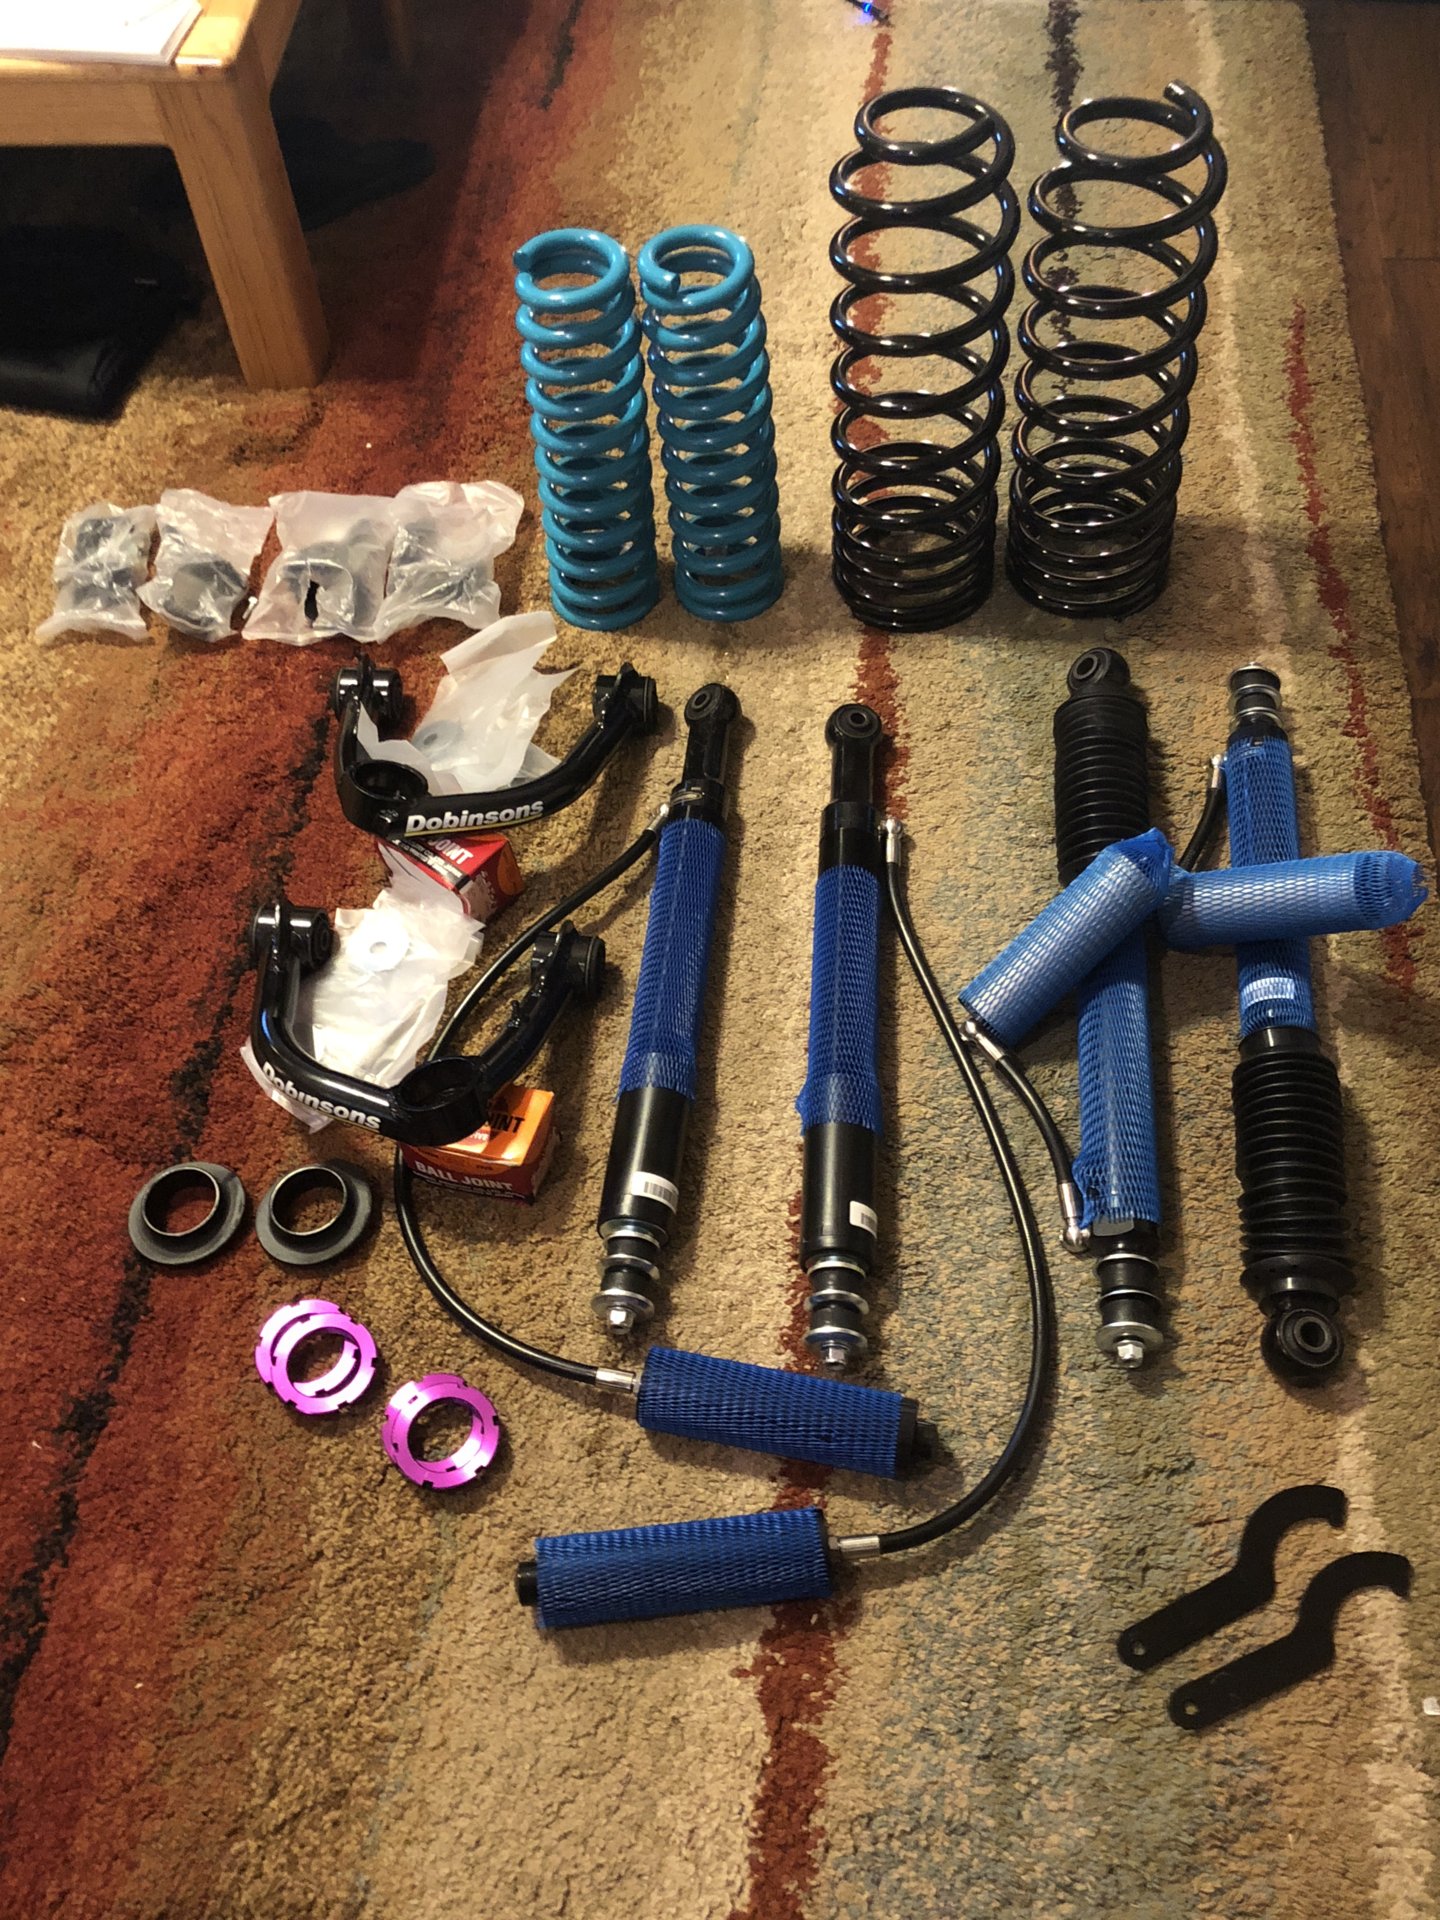
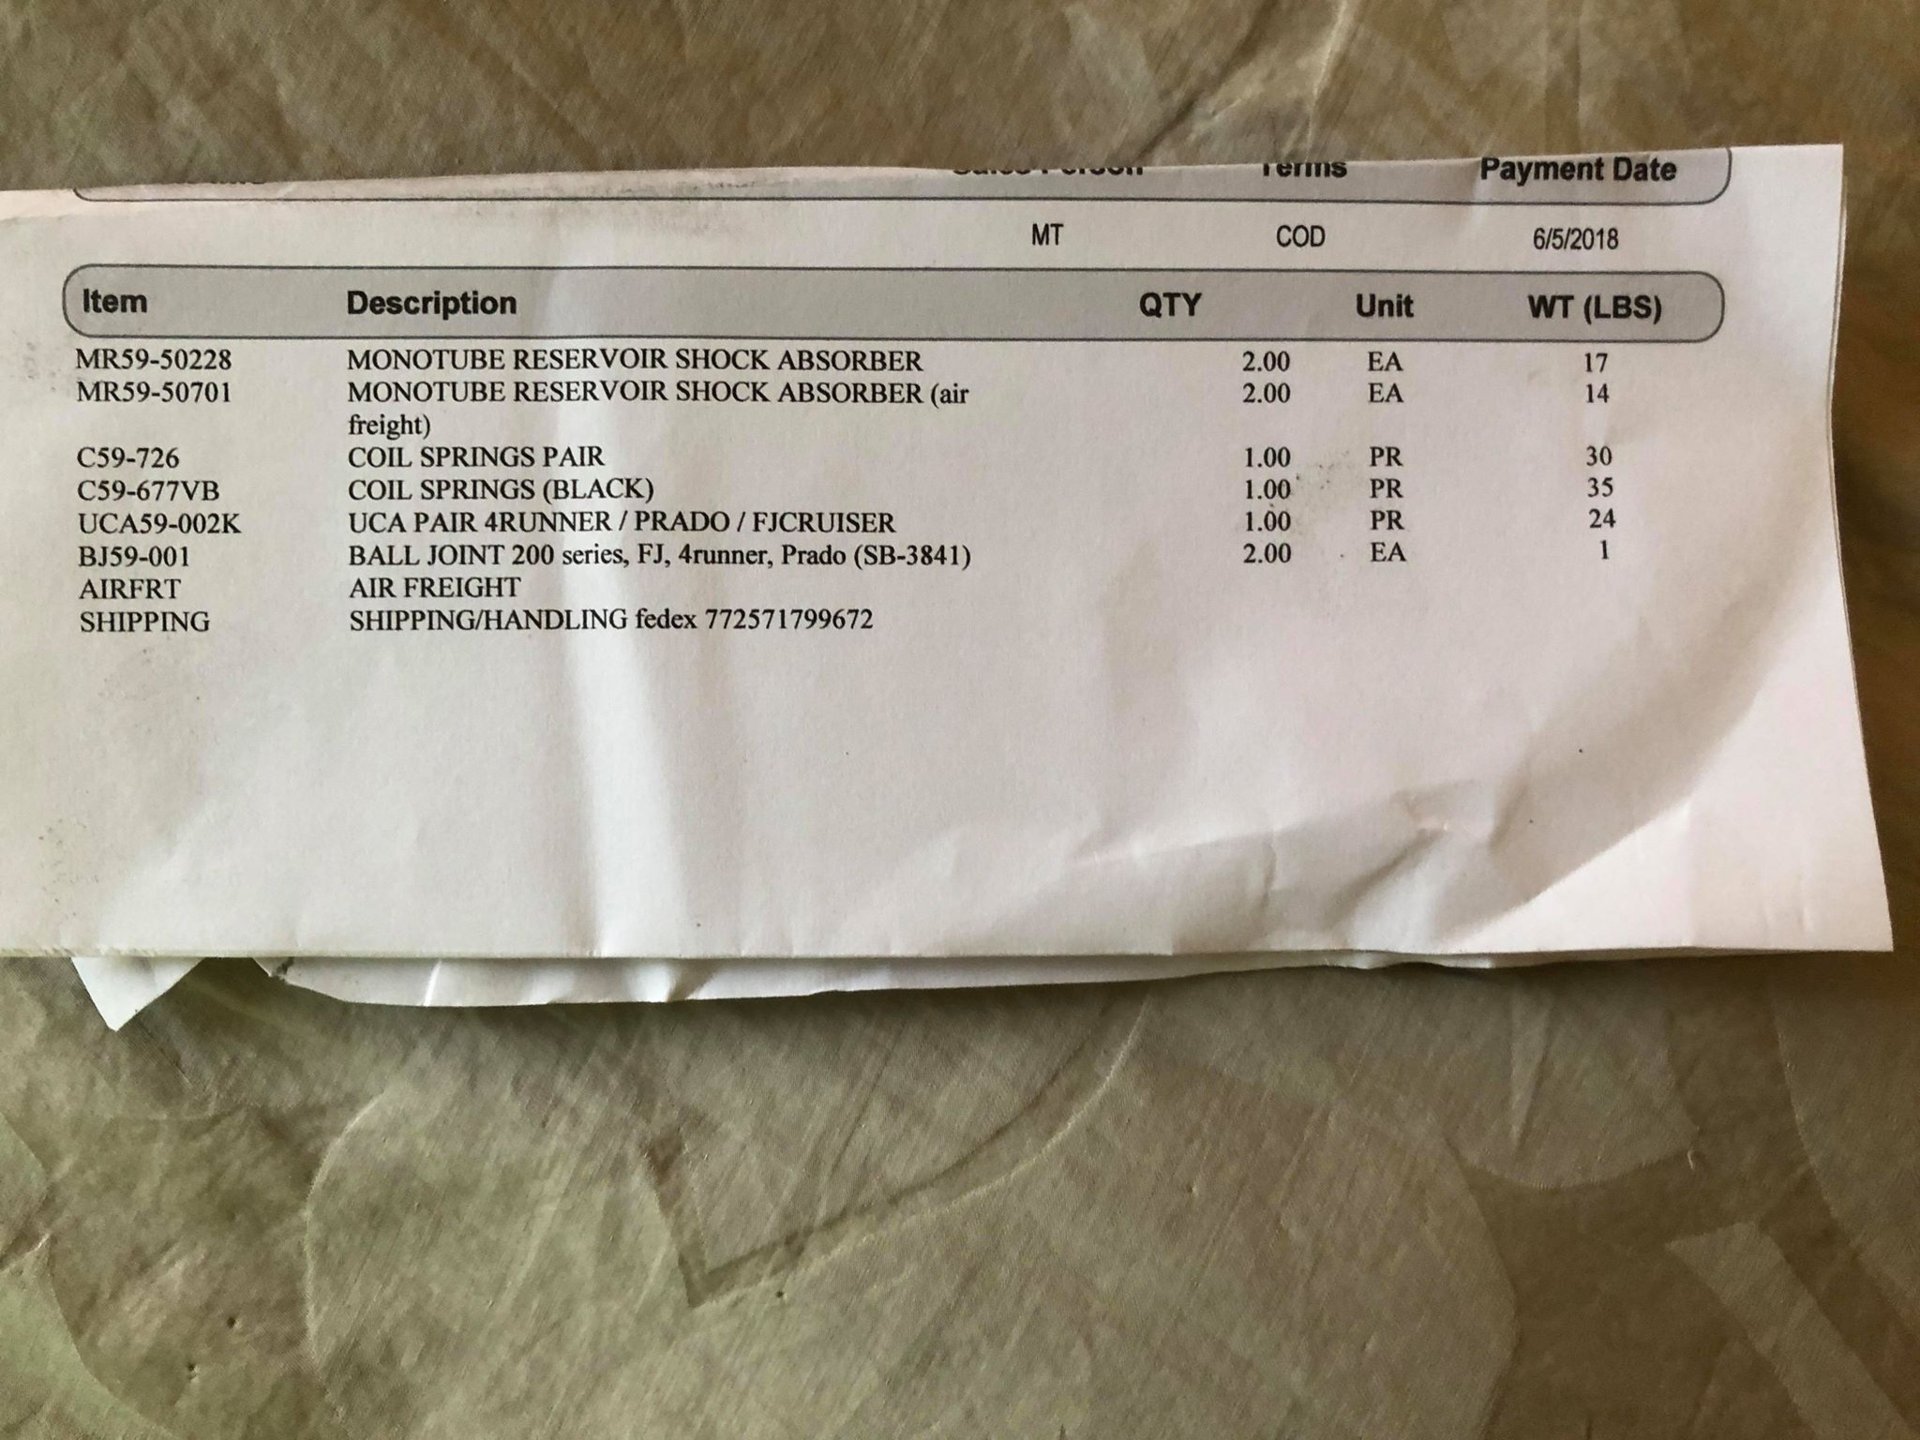
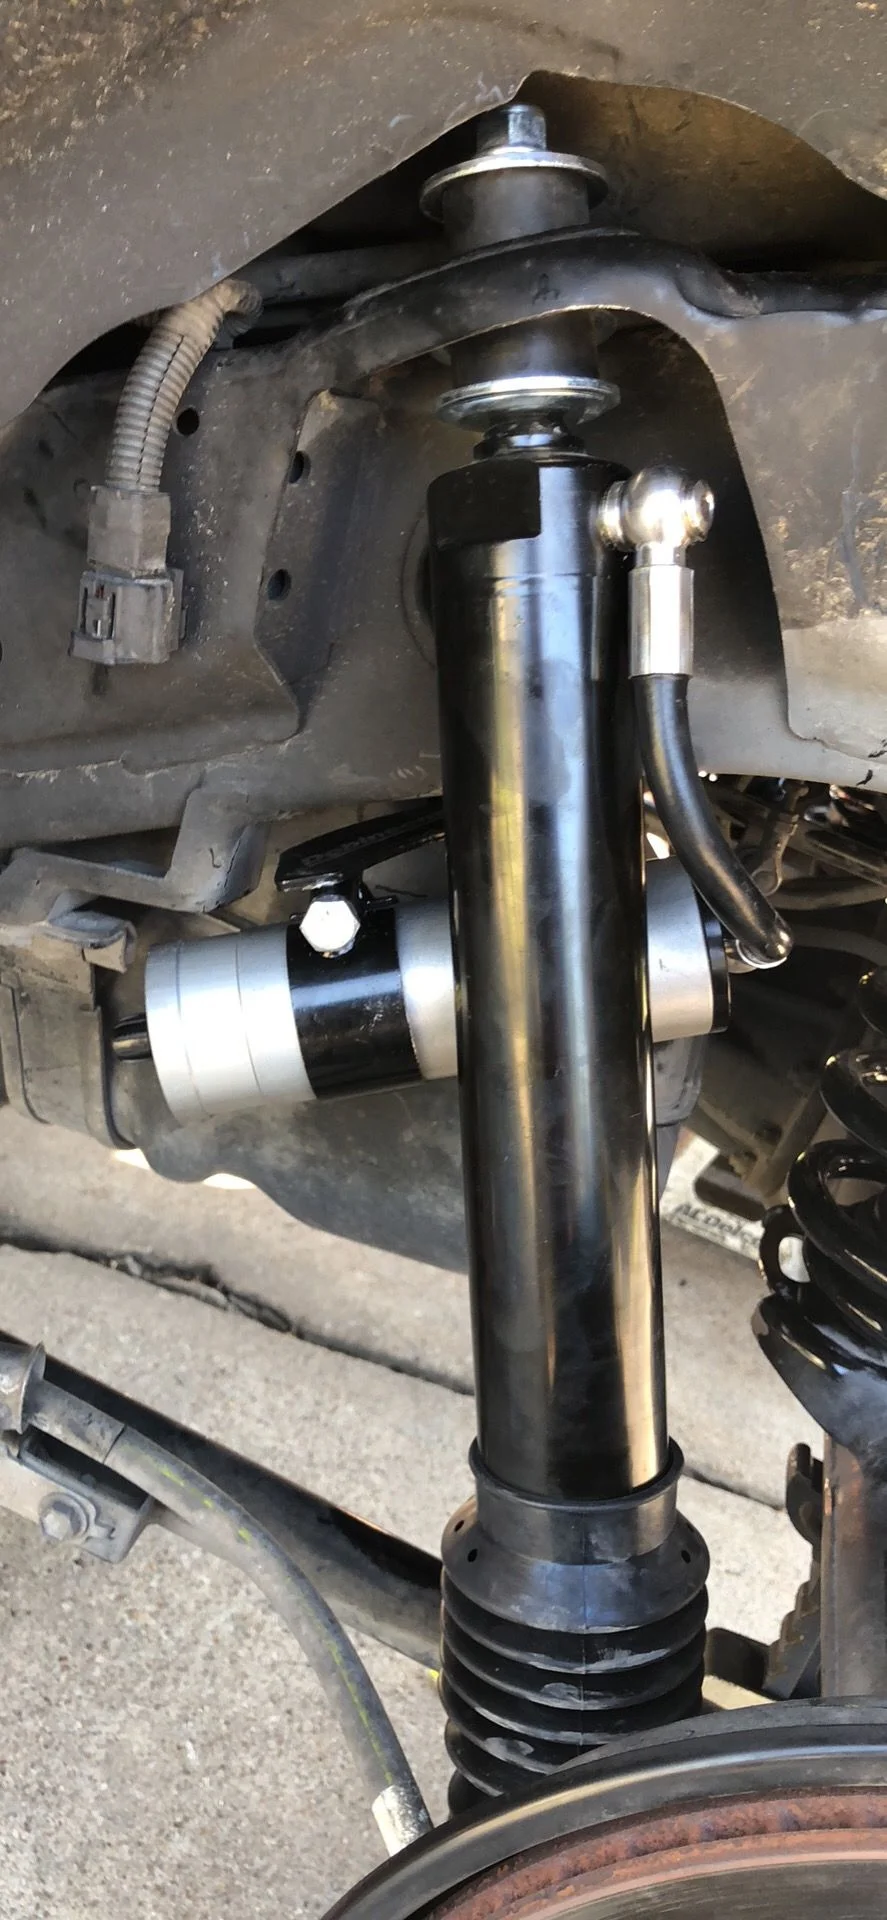
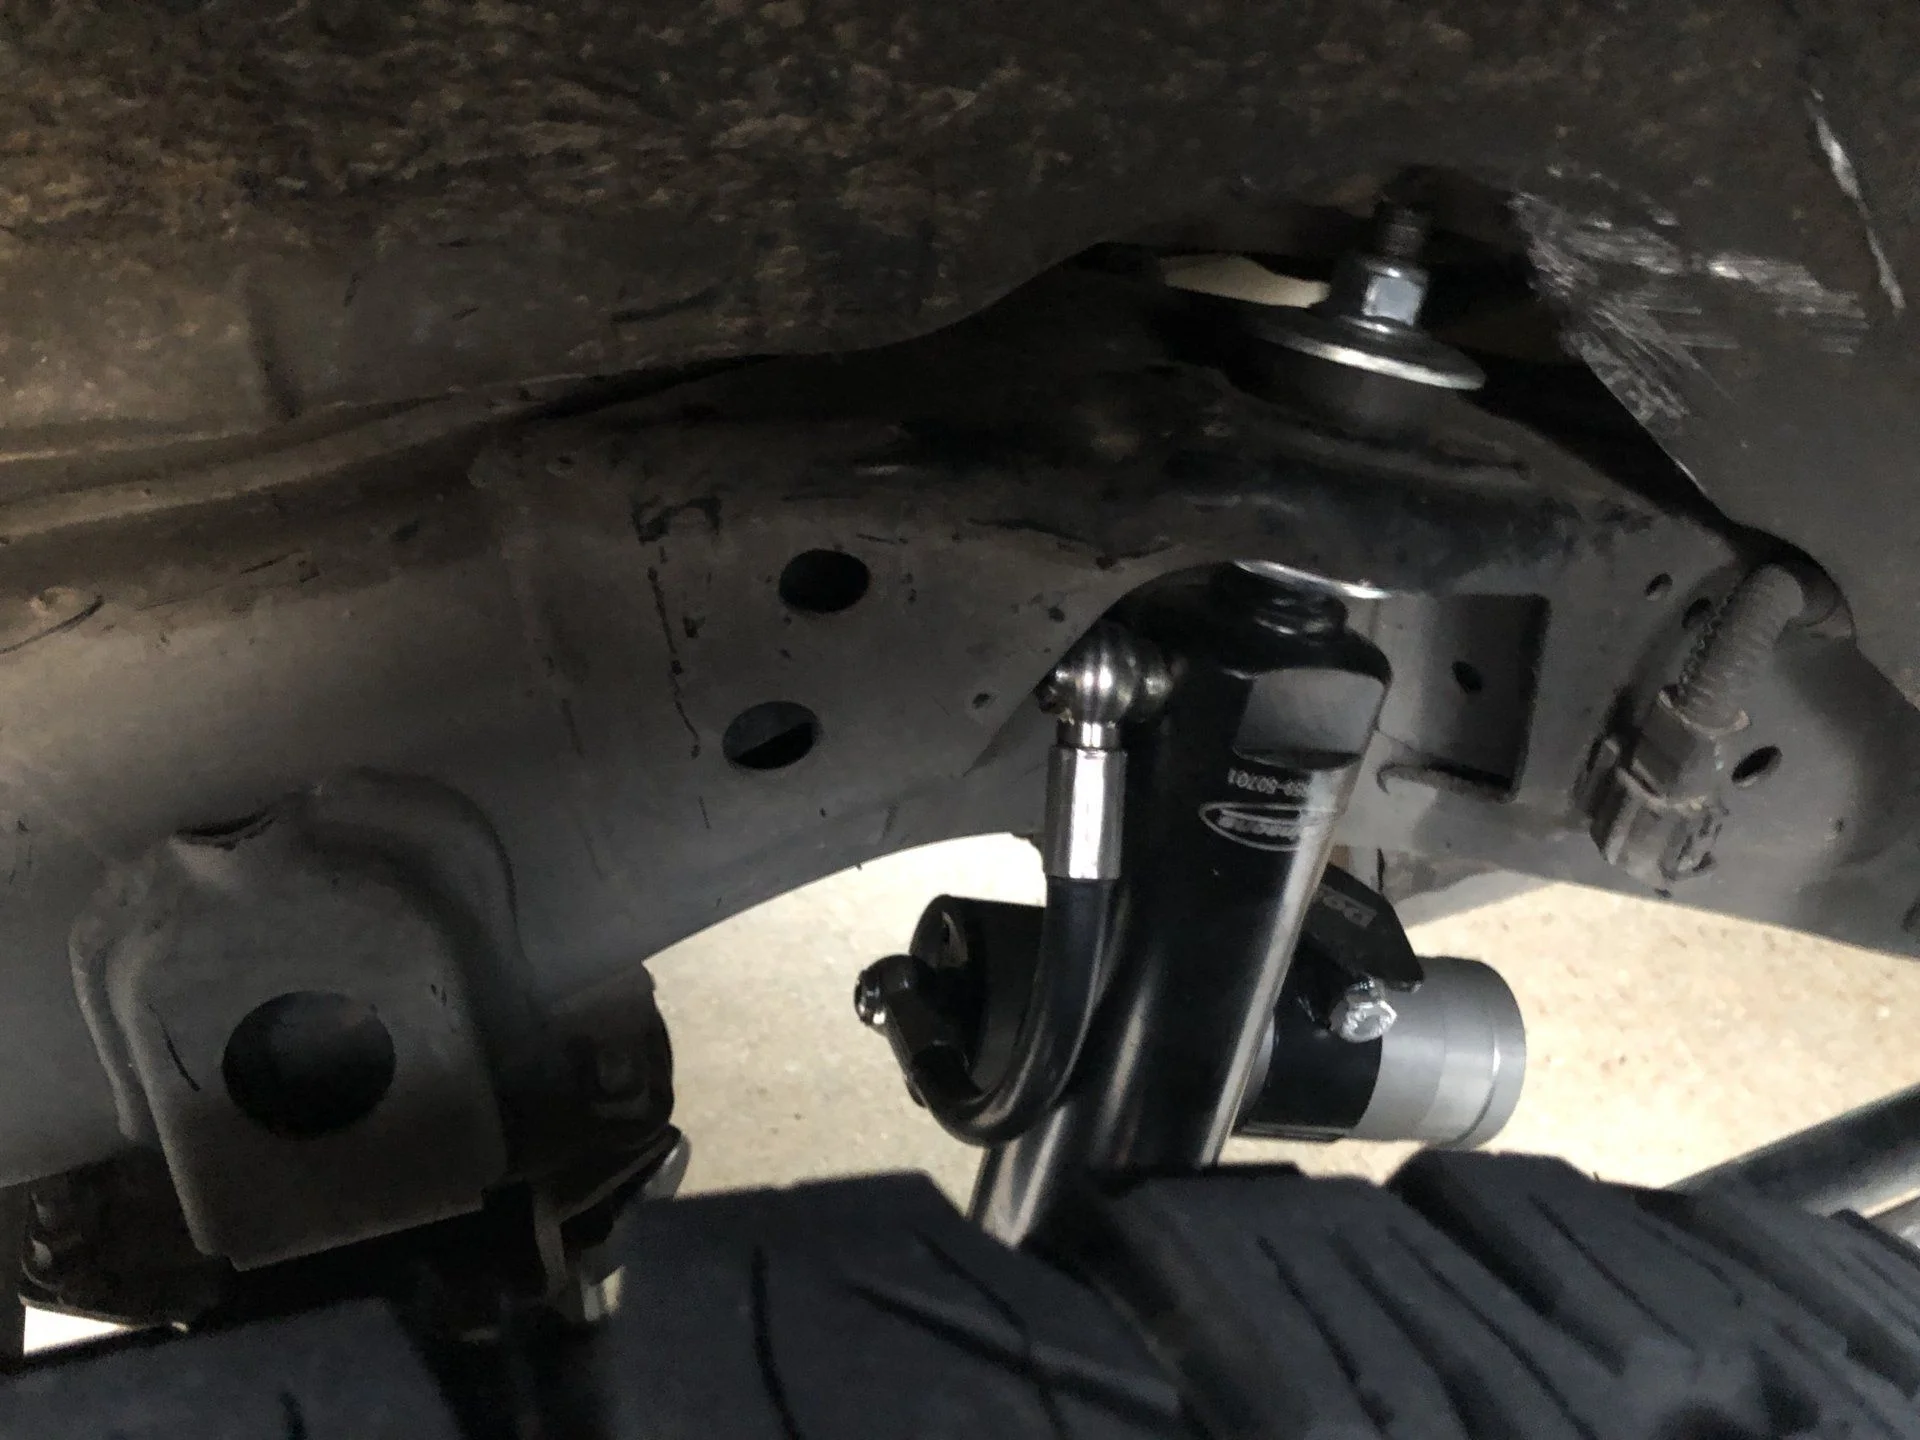
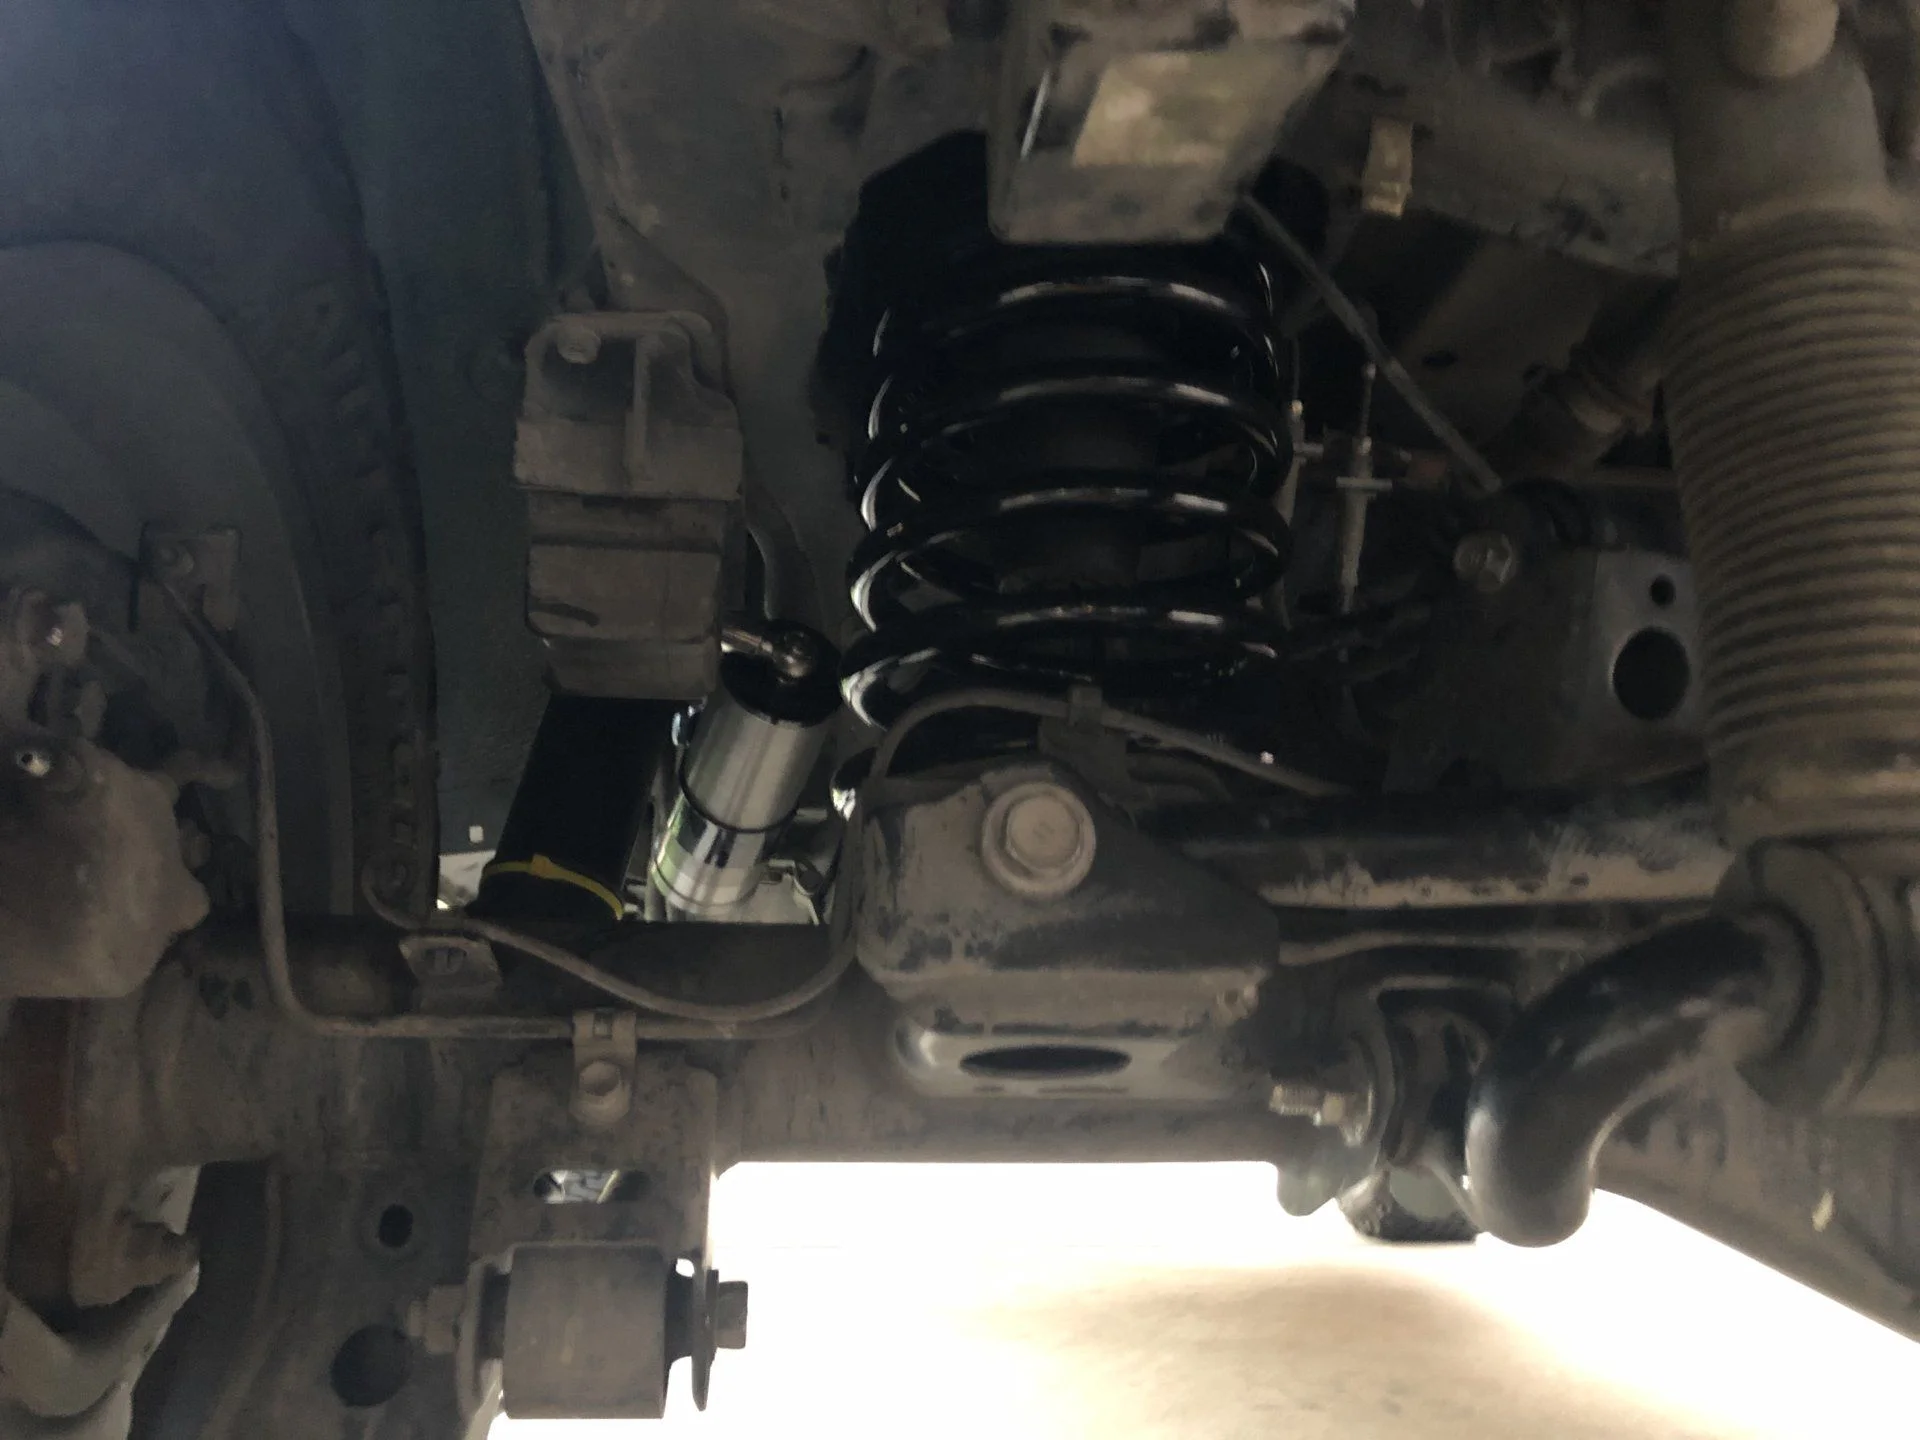
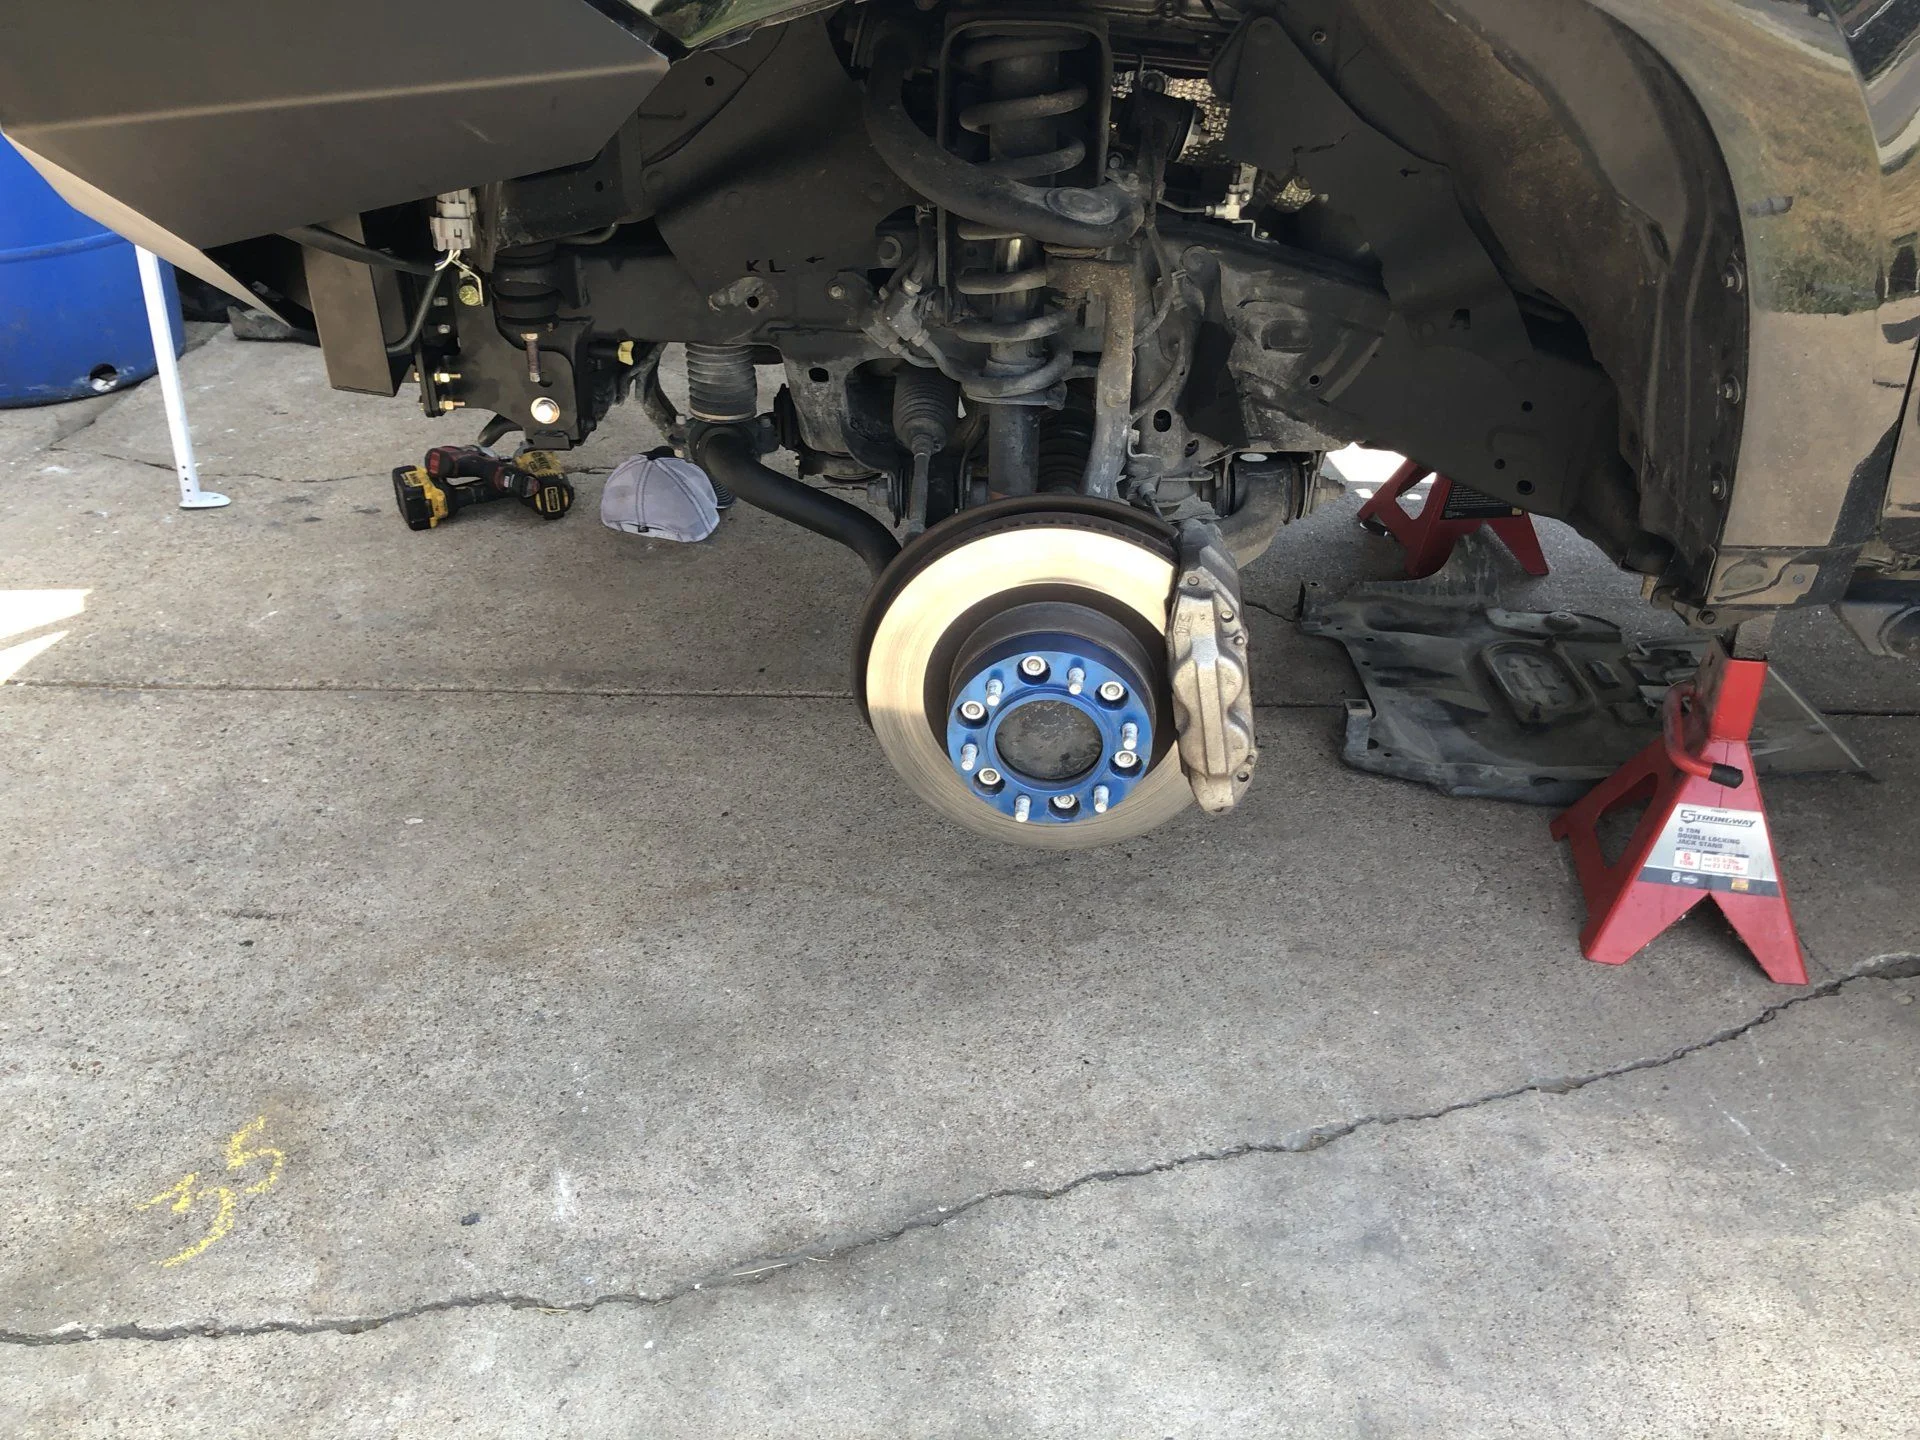
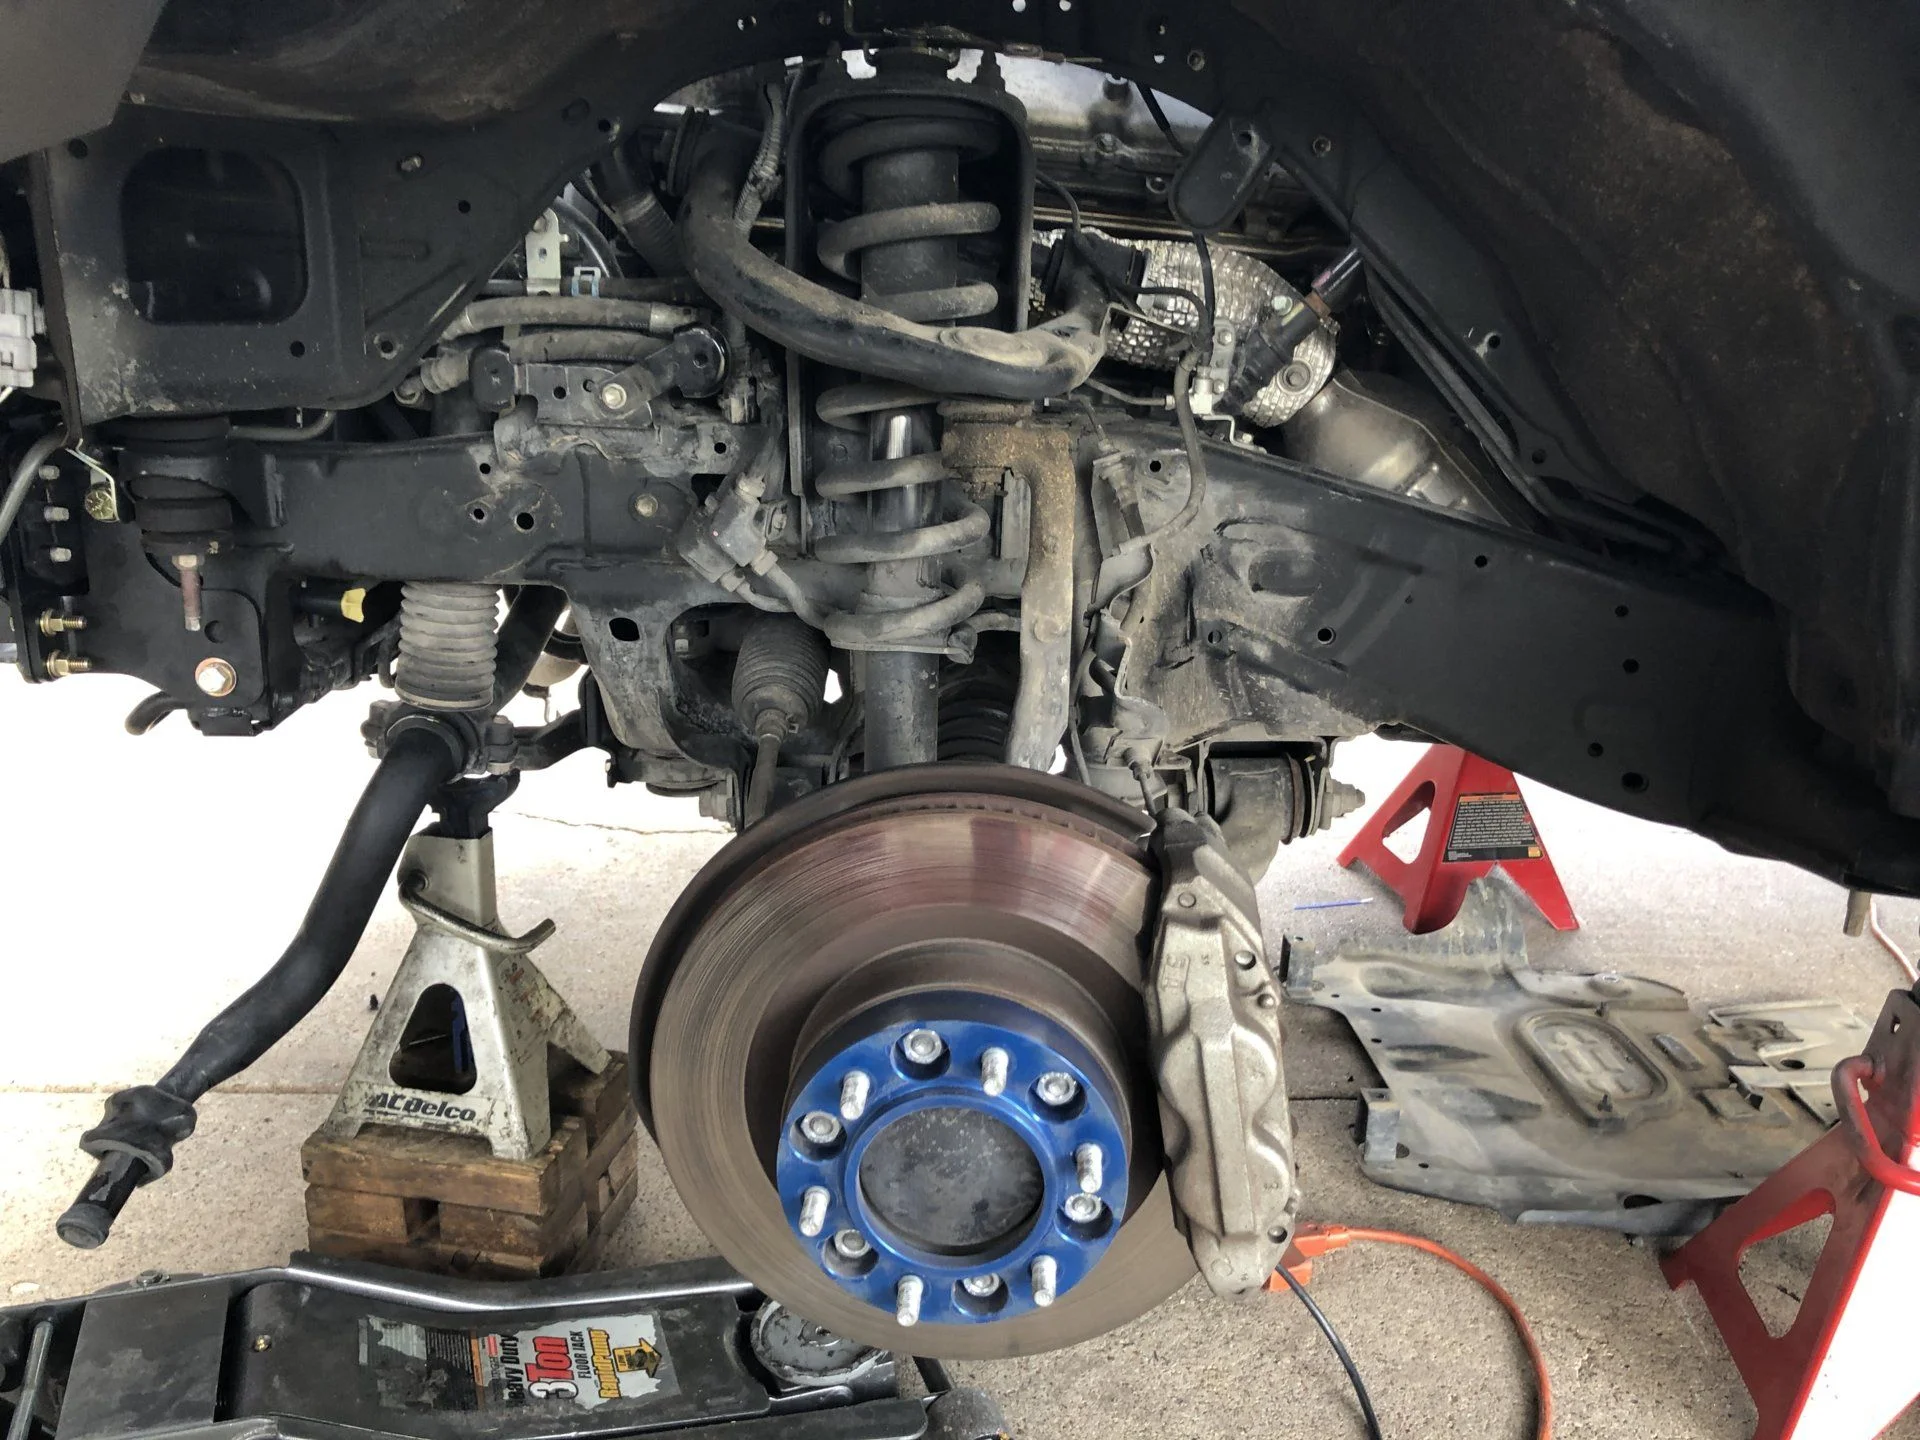
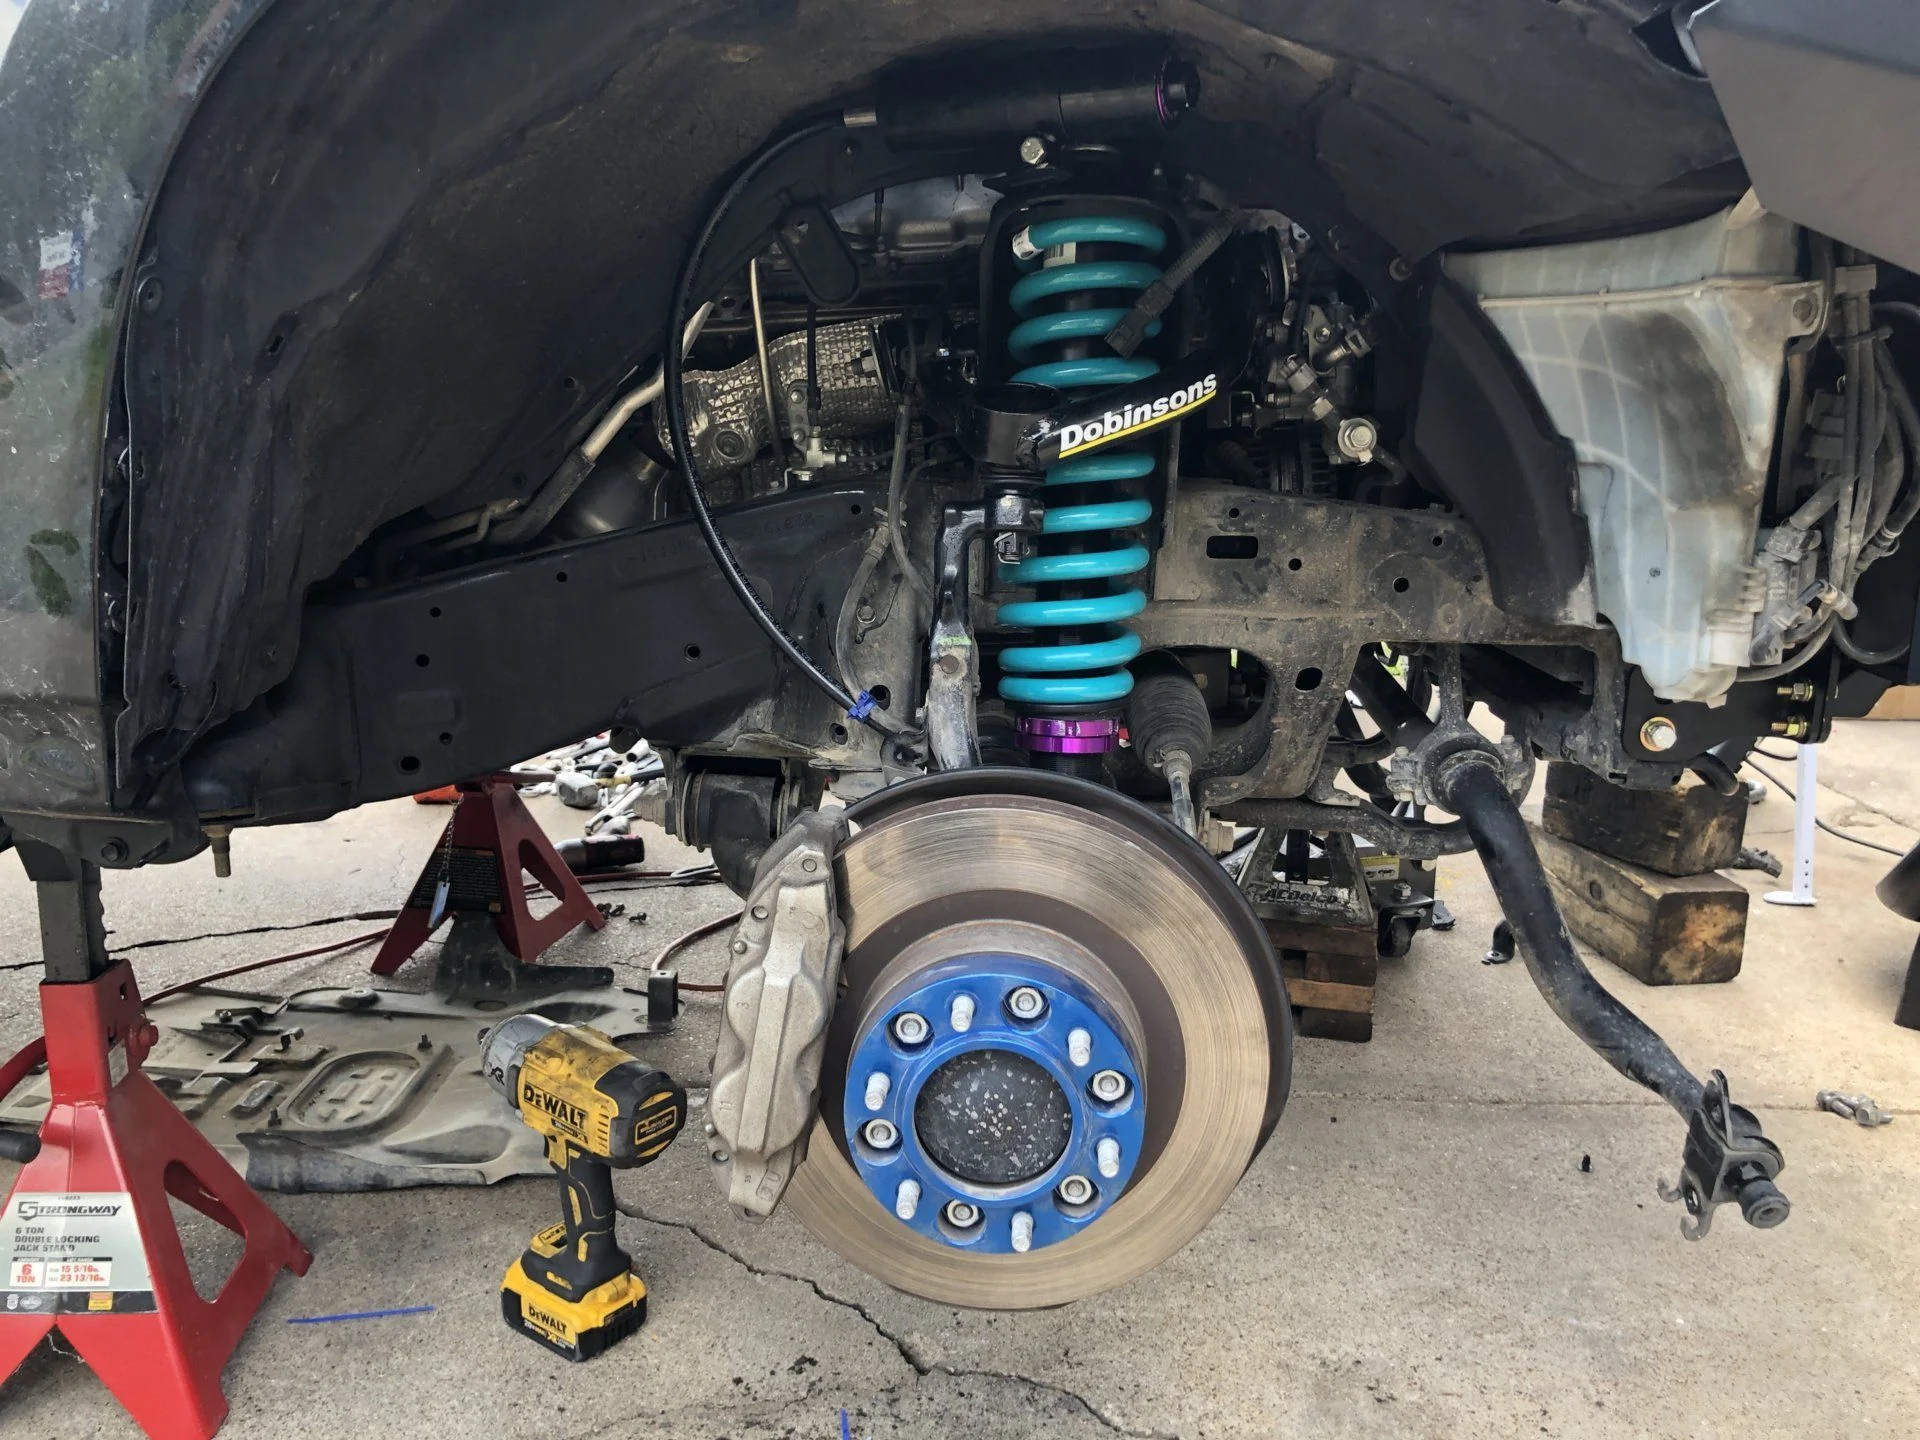
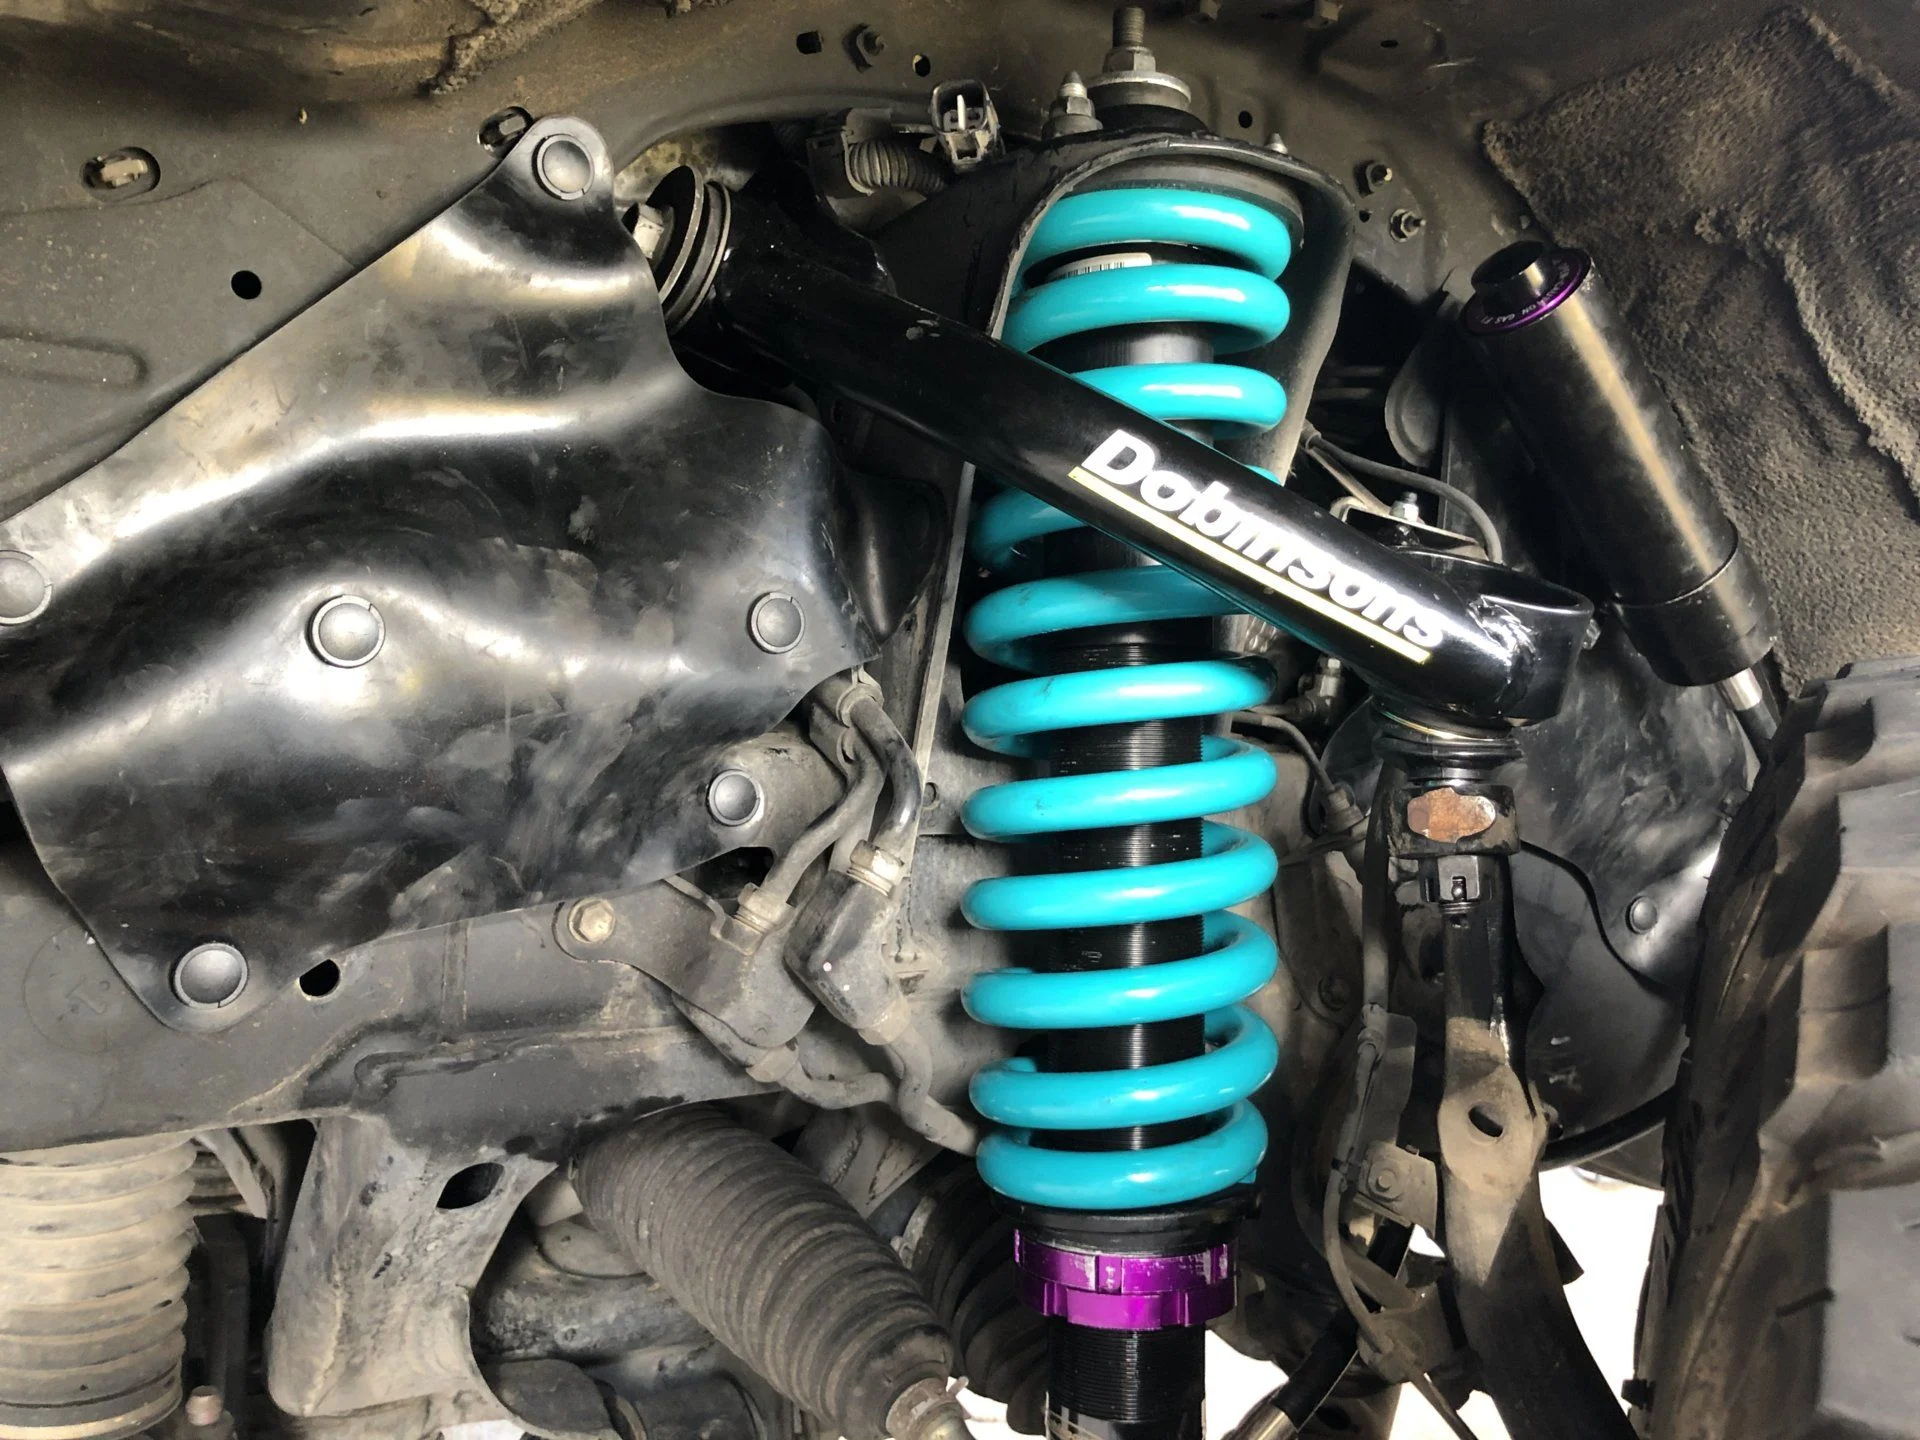
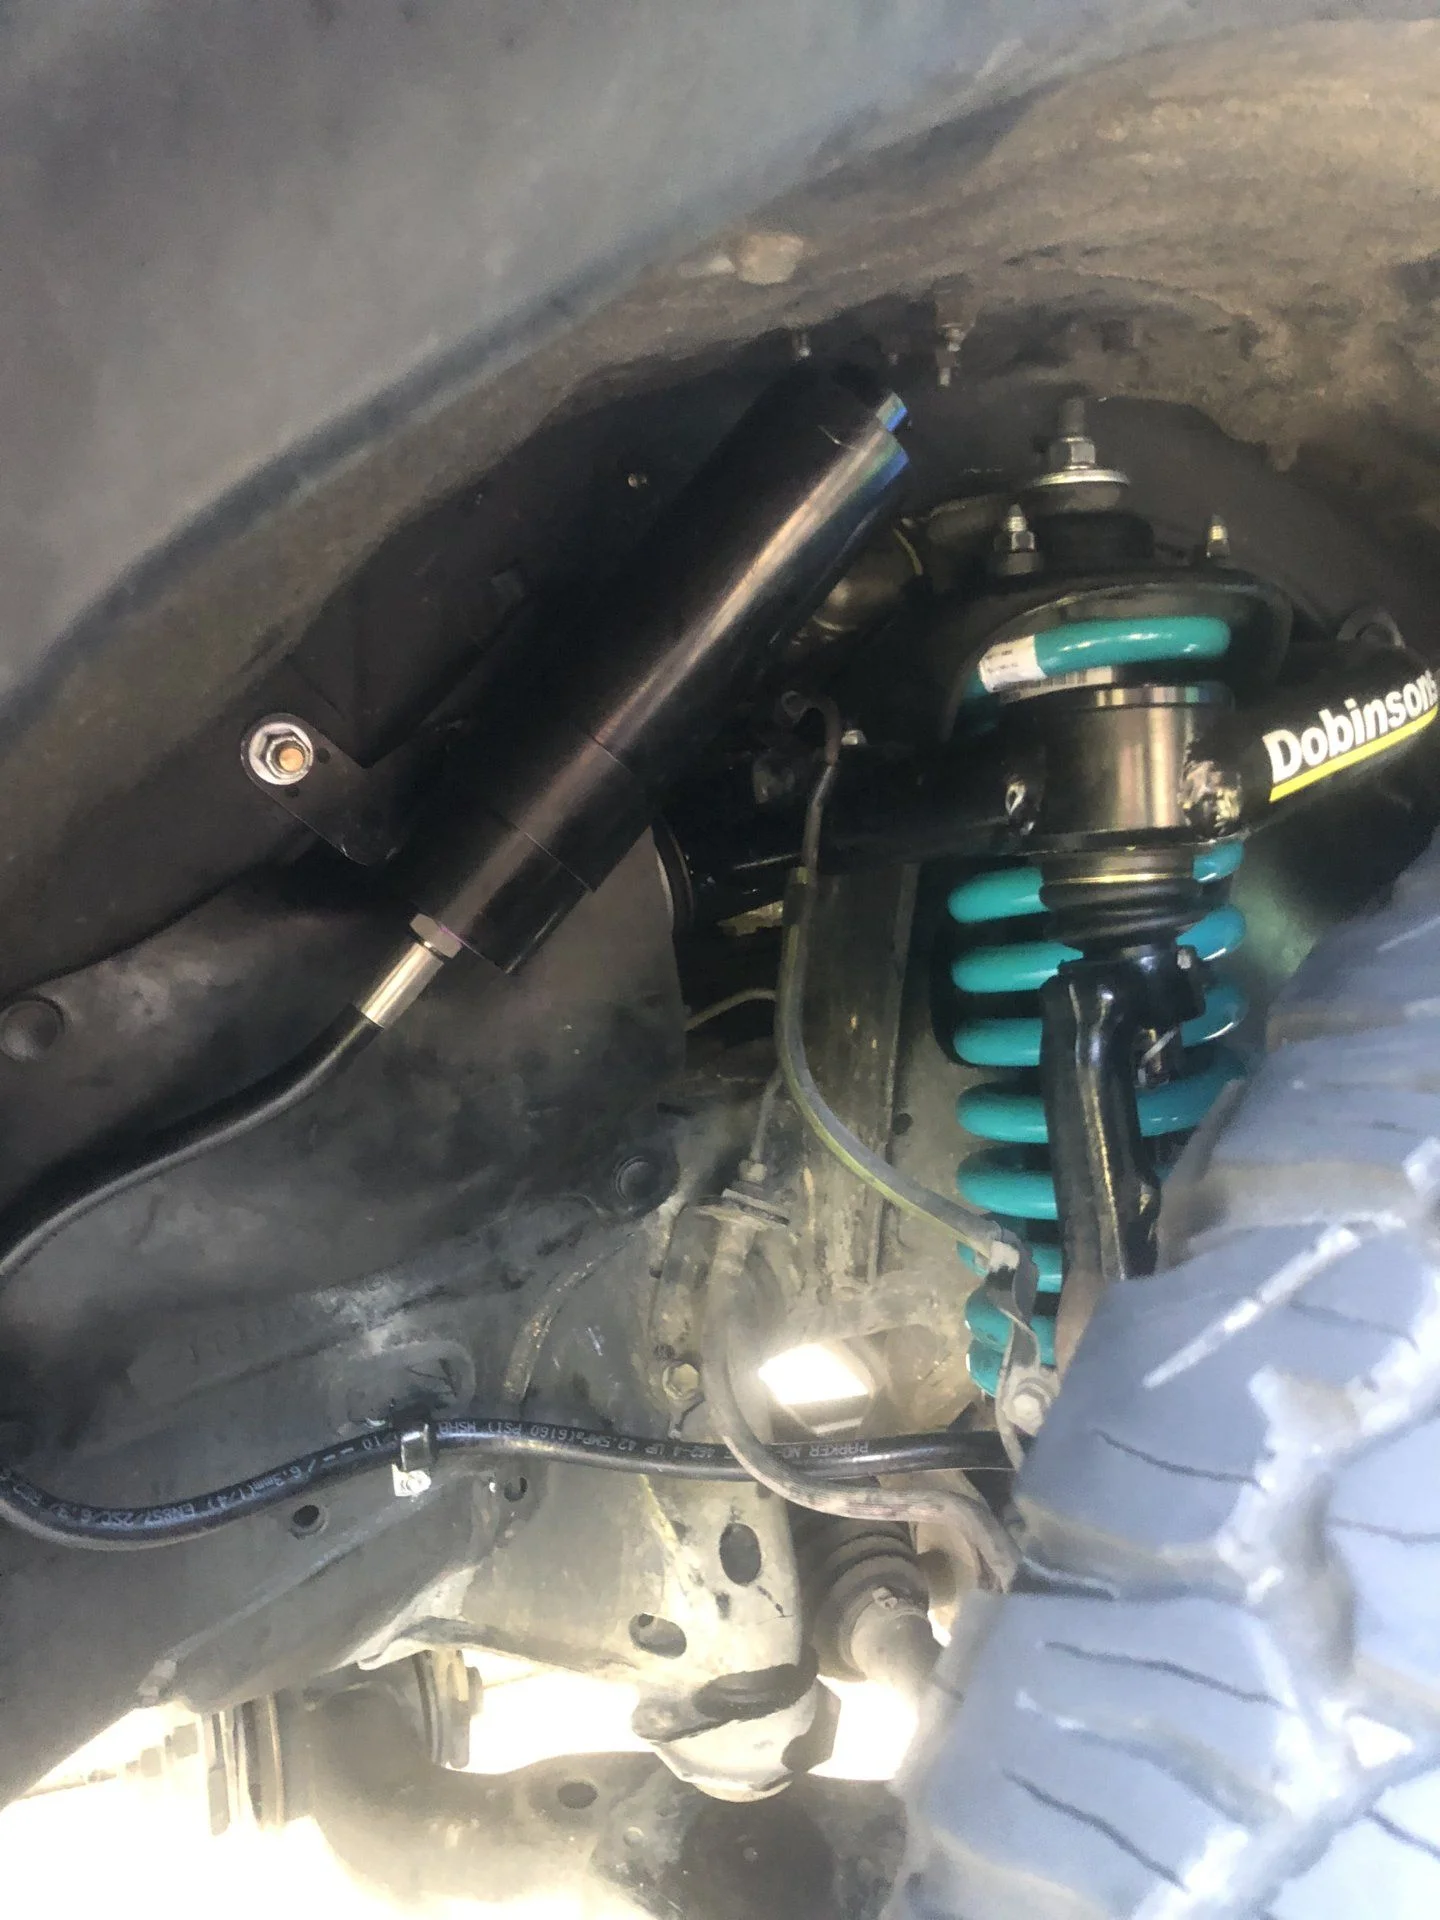
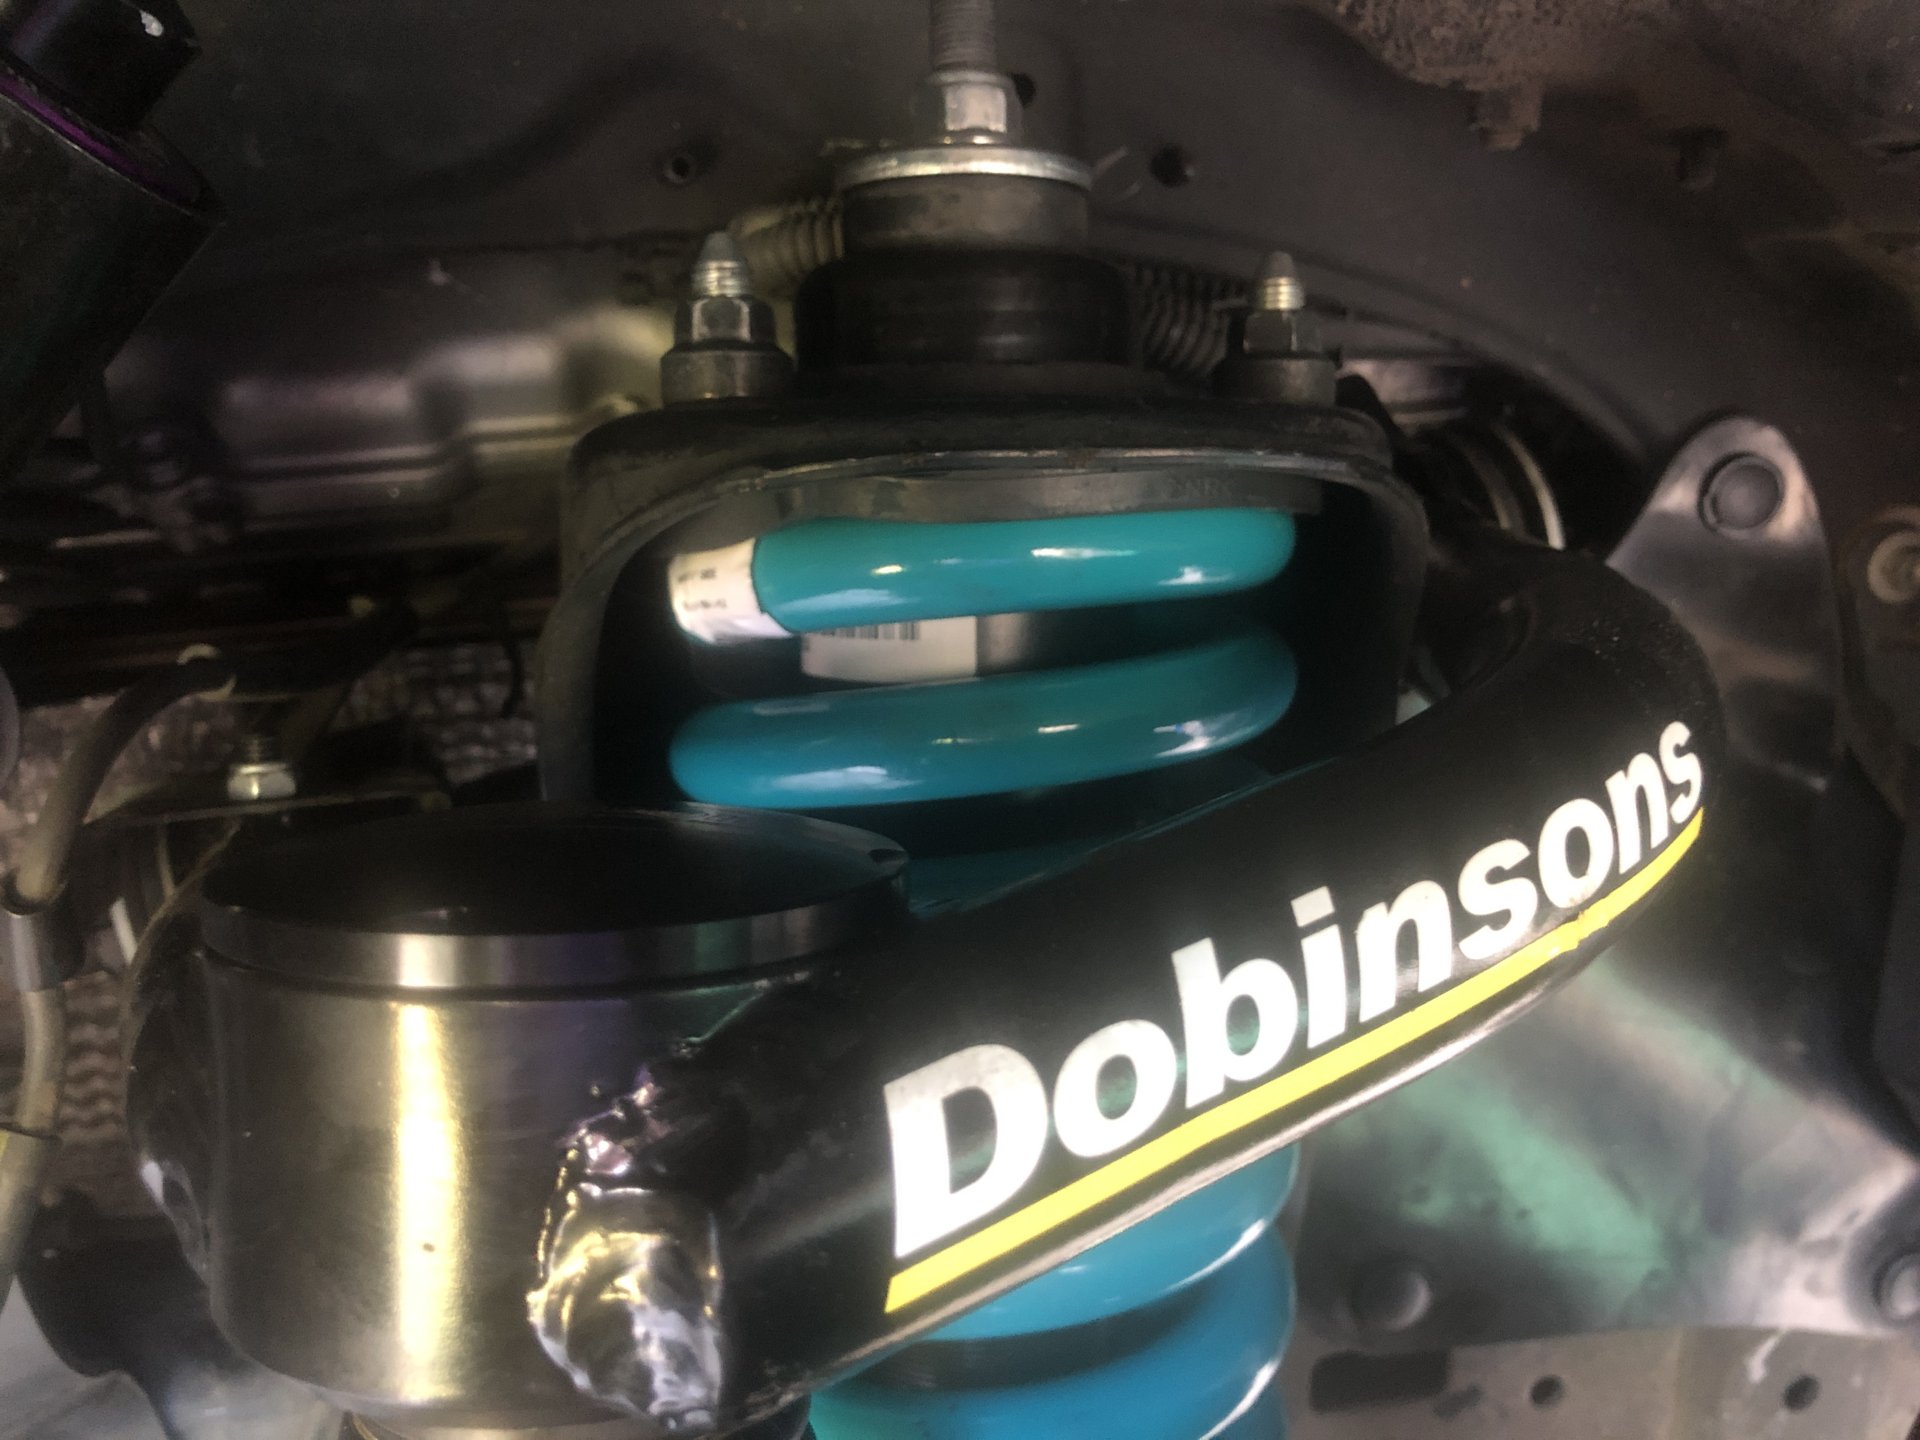
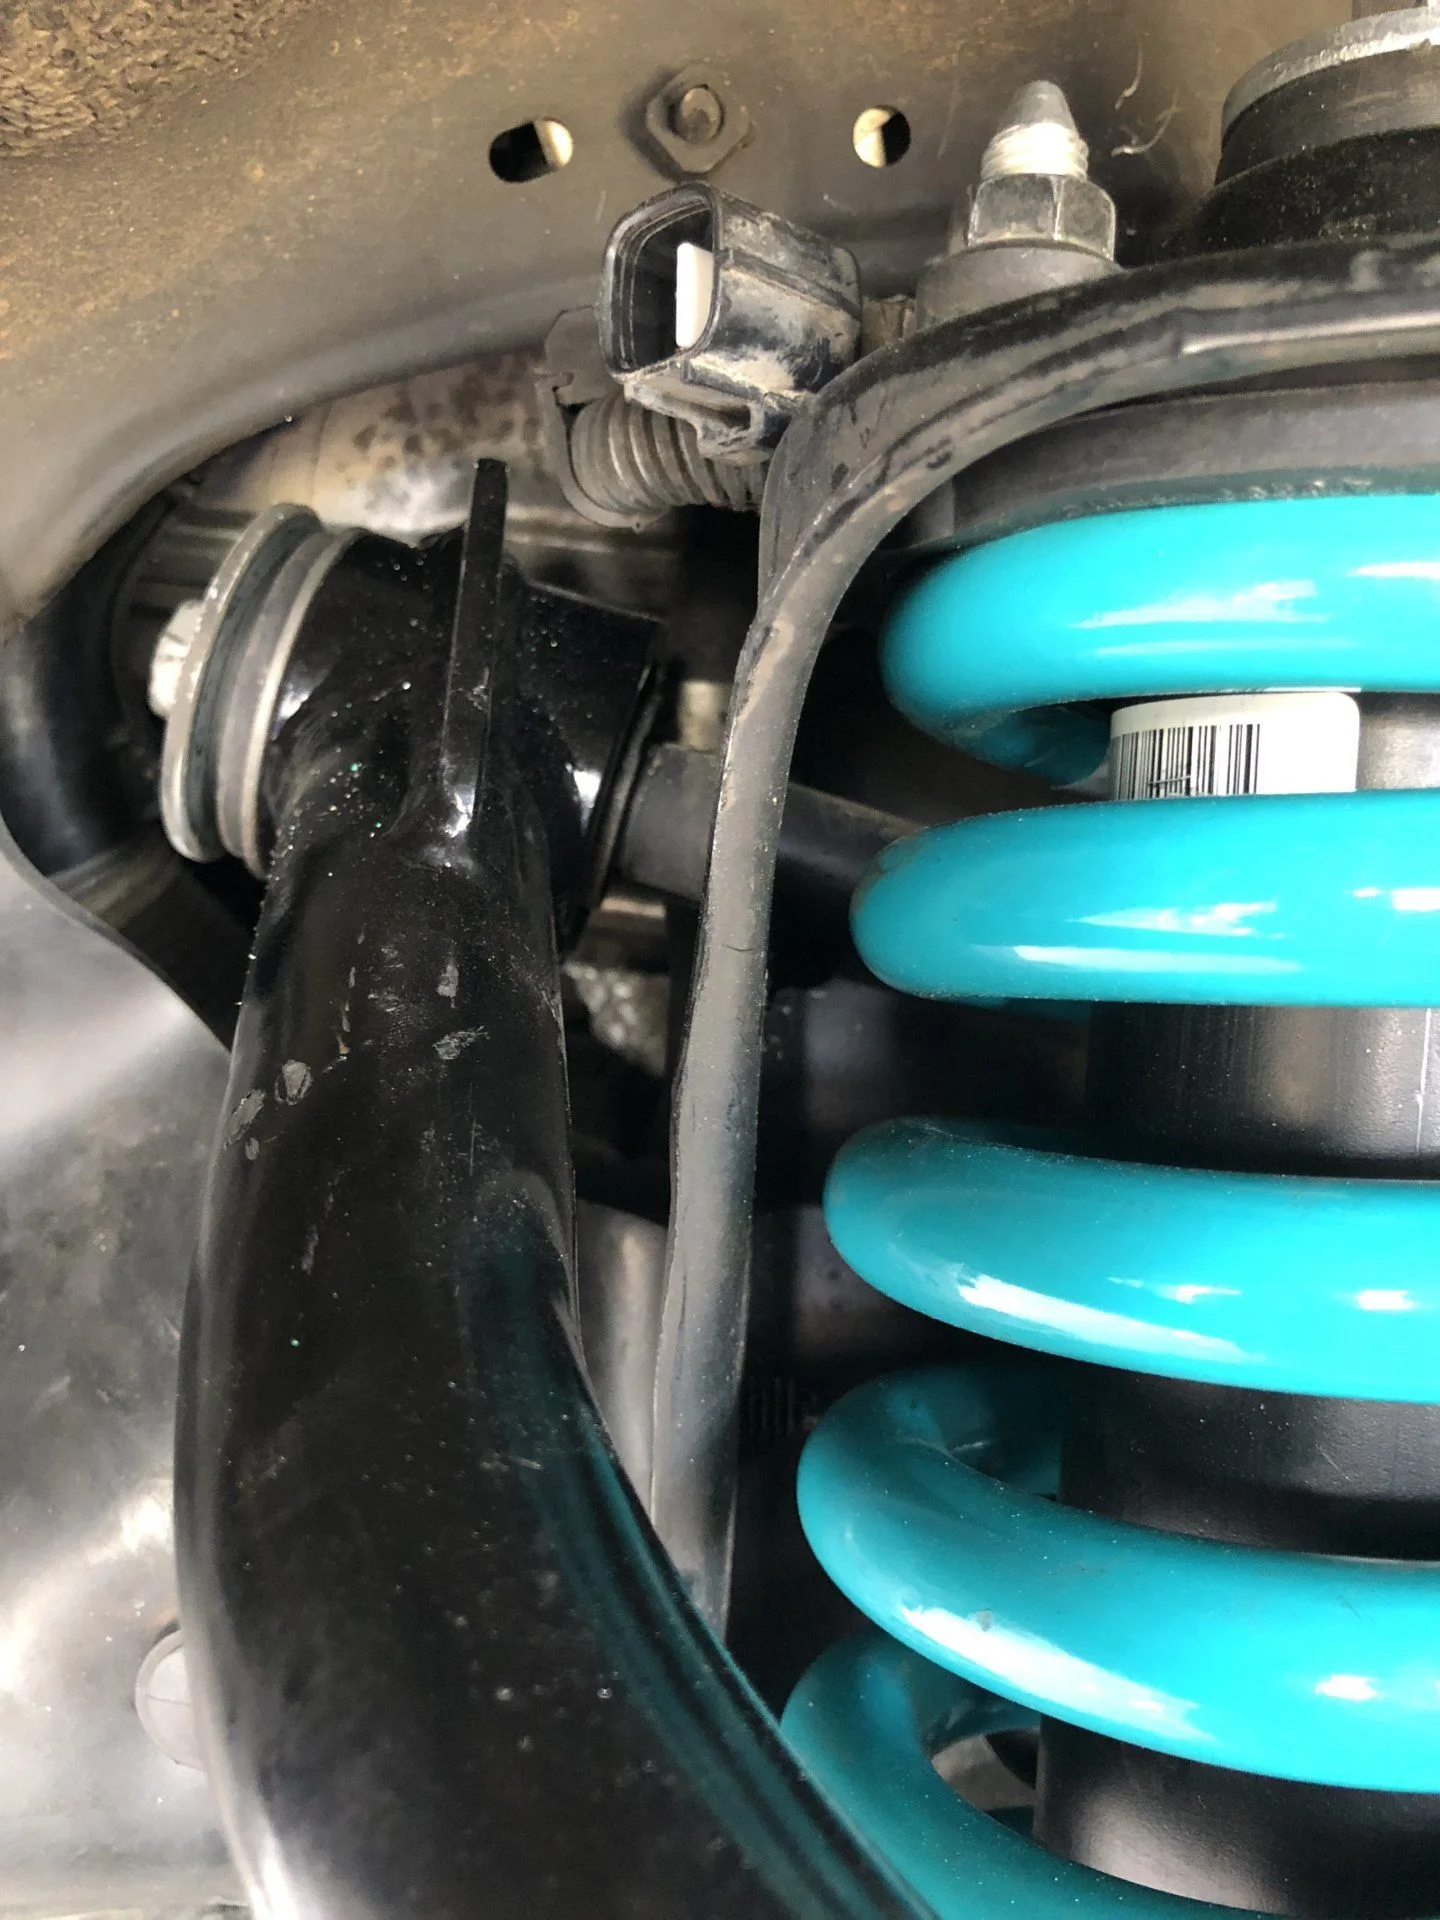
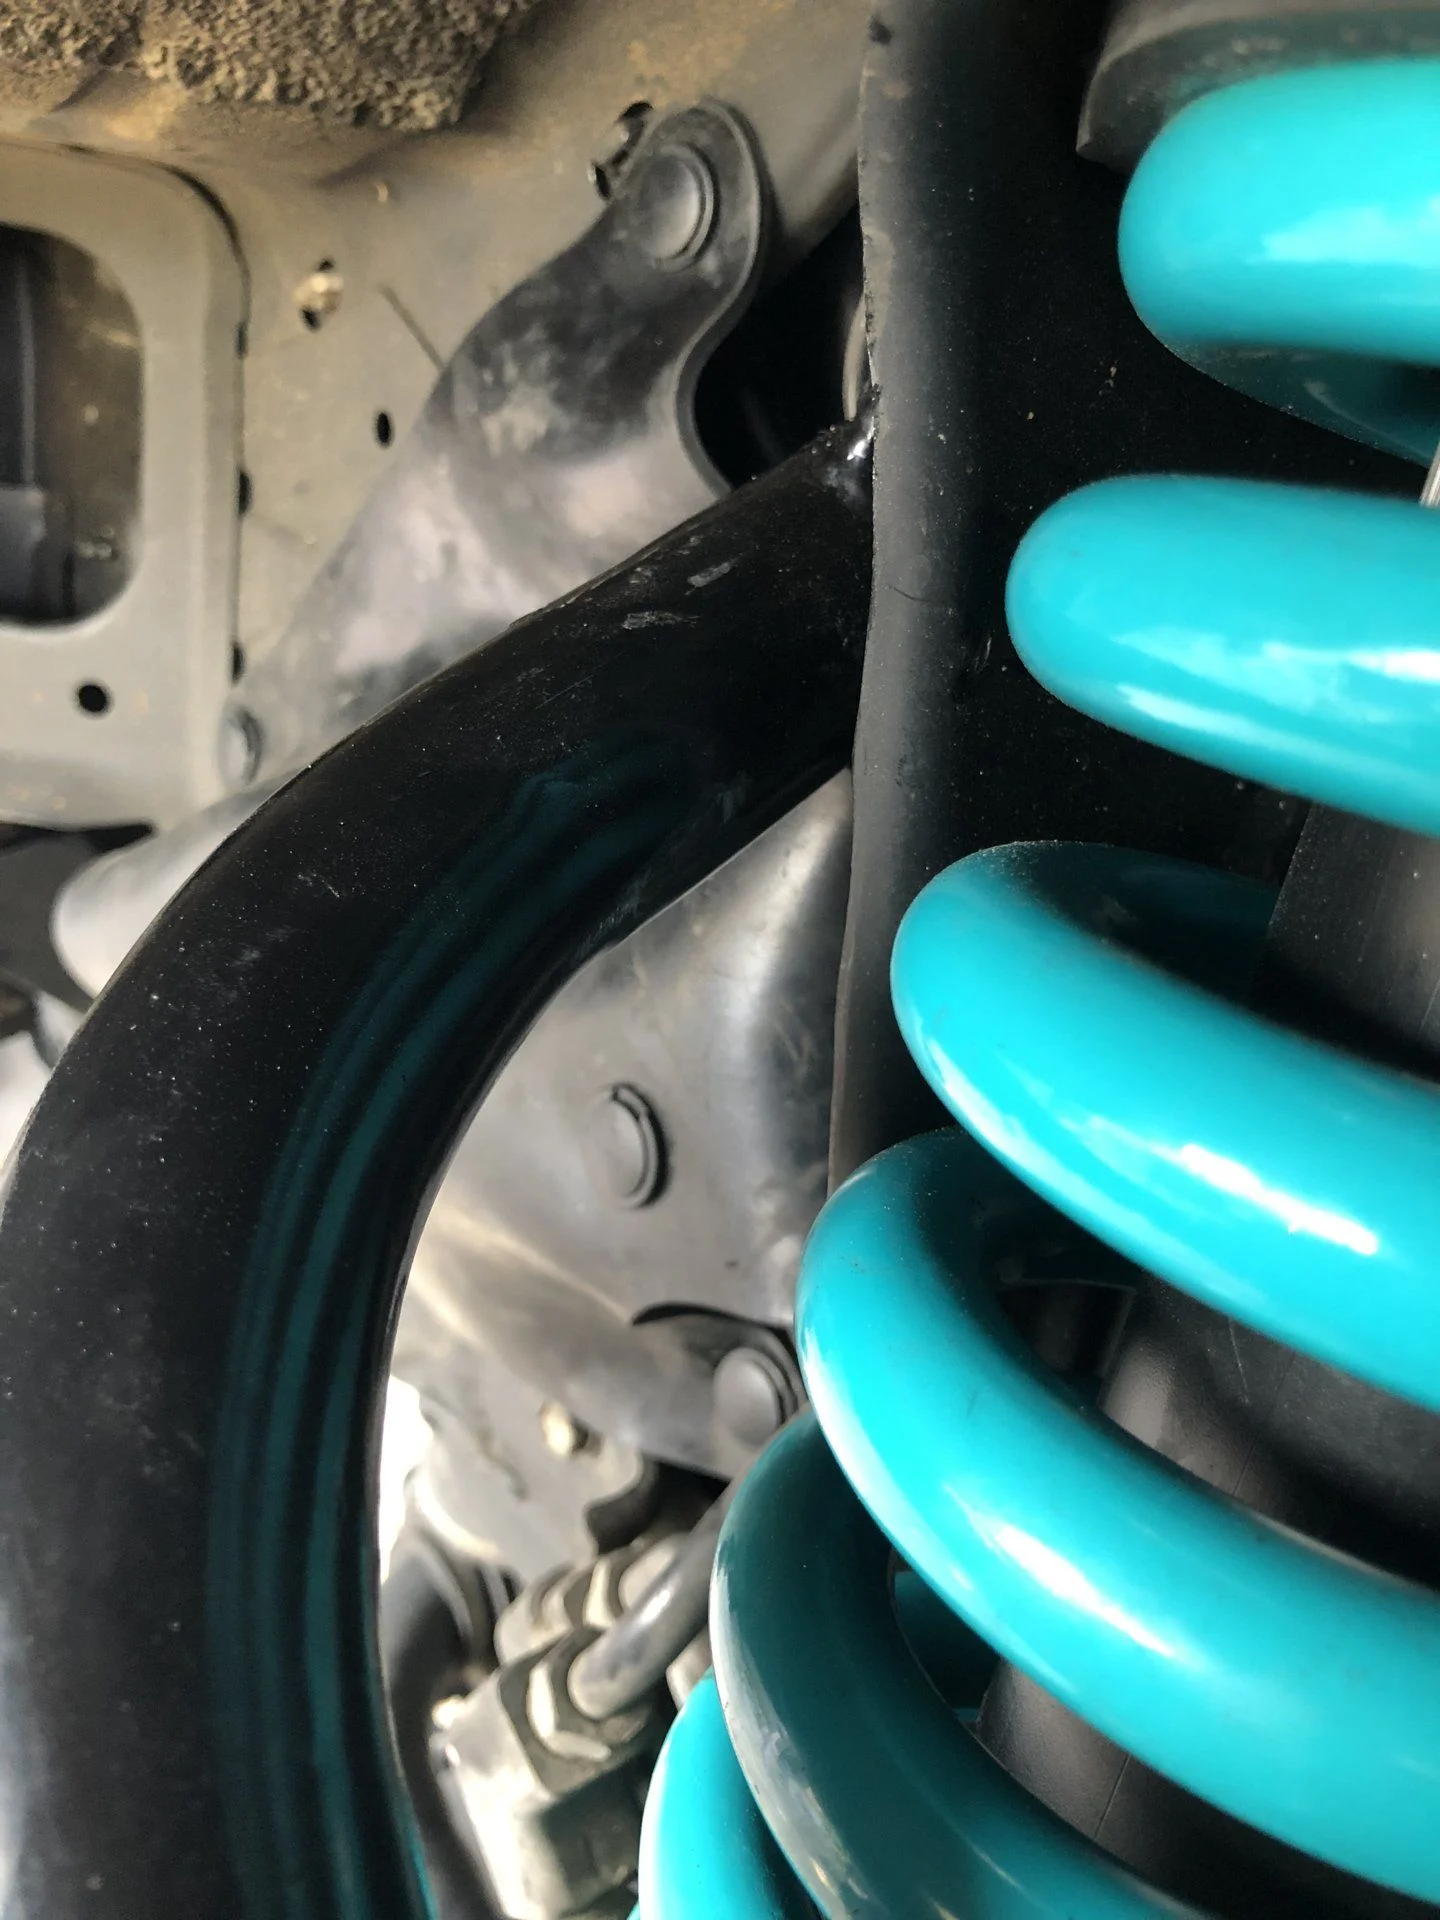
I have purchased a Dobinson suspension and plan on installing that before doing the front bumper. This is a great truck and we are very happy that it is able to get us to the places we enjoy to explore. I will update once I get the rest of the pieces of the build installed here in the next few weeks.
 
great write up and build. Did you use the Prado rocker panels? Do you have all the part numbers that was ordered? I have seen other thread where someone ordered the rocker panel parts but never confirmed if they ordered too much parts. Also, are there different rocker panels for the Prado? It seems as if your is not as low right behind the front wheels than others I have seen.
 
Thanks for posting your build. Did you have the lift installed before the Imogene Pass pictures, or not yet? Is it what they advertise as 40mm lift? Also what size and load rating KO2's did you go with? I'm looking at LT265/70R18 but expect there will be some minor rubbing to address if I go that route. I probably won't be able to do a roof rack because after tires and a modest lift, I'll already be pushing the limit on my 6'8" garage opening.
 
great write up and build. Did you use the Prado rocker panels? Do you have all the part numbers that was ordered? I have seen other thread where someone ordered the rocker panel parts but never confirmed if they ordered too much parts. Also, are there different rocker panels for the Prado? It seems as if your is not as low right behind the front wheels than others I have seen.

No I actually don't have the rocker panels. I kept the factory steps that I removed so I can eventually cut them to make covers. I think its not as prominent with the black paint.

HitchCrack
 
Thanks for posting your build. Did you have the lift installed before the Imogene Pass pictures, or not yet? Is it what they advertise as 40mm lift? Also what size and load rating KO2's did you go with? I'm looking at LT265/70R18 but expect there will be some minor rubbing to address if I go that route. I probably won't be able to do a roof rack because after tires and a modest lift, I'll already be pushing the limit on my 6'8" garage opening.


Thanks! I have not installed the lift just yet. I did Imogene at stock height, I do have the premium so it has the air bags in the rear which keeps it level when loaded down. It was very bouncy in the rear with all the weight of the passengers and the rear bumper. I will let you know how much lift I actually get once I get around to installing the suspension. I am not sure what size the opening on my garage is but with the rack on it now I clear with several inches to spare so I have no doubt that I will be able to fit it post lift. I have the same tire but in a load range E. I wanted the stiffer sidewall for a more solid ride offroad. It does ride quite a bit firmer for Daily but its not bad.

HitchCrack
 
Ordered a full set of skids from RCI, well less the LCA skids. Dobinson suspension will be going in this weekend. Hope to have enough time to install the MT front bumper as well. I have been stockpiling parts and its time to catch up so I can get all these mods out of my garage. I have a buddy who has a set of the 5th gen T4R TRD wheels that I may pick up at a good price. I need to find a 5th for the spare and that will be a challenge. I will update with some photos once I get a chance to upload them.
 
Ordered a full set of skids from RCI, well less the LCA skids. Dobinson suspension will be going in this weekend. Hope to have enough time to install the MT front bumper as well. I have been stockpiling parts and its time to catch up so I can get all these mods out of my garage. I have a buddy who has a set of the 5th gen T4R TRD wheels that I may pick up at a good price. I need to find a 5th for the spare and that will be a challenge. I will update with some photos once I get a chance to upload them.
im ready buddy!!!!
 
Ok ladies and gents here is the next step in the Adventure Build. Like I stated above I had a deer strike on our way up to our place in Oklahoma. This pretty much demolished the stock bumper which I actually had grown to like. I did install a hidden Winch using the budbuilt bracket. I don't see that he has them posted on his site under the GX tab so he may have removed it since it was not a direct fit and required some modifications to get it to install properly. Because of this I had already relocated my power steering cooler with a kit from 4x4 labs. They had a kit for a 5th gen T4R that worked perfectly.

So enough about the past lets get to this bumper install!!

I did this on a Friday evening because I wanted to get this done before the suspension went in. This would give us more room to work around the KDSS and muscling the front LCA and such.


I didn't post any pictures of the removal of all the bits and pieces behind the bumper camp since I have a thread floating around somewhere on here of the install of the Budbuilt & Winch.

I mounted the new bracket and installed my Warn 10-S Platinum winch that I had previously mounted to the Budbuilt bracket. I had already removed the power pack from the top of the winch and located it behind the drivers headlight.

The new winch bracket also has wings that cover the power steering lines where they will be exposed due to the high cut approach.


At this point I had a helper assist me with hoisting the bumper on to the bracket that hold the winch. I used a strap to help hold the bumper in place while I installed the bolts. Once the bolts were in I used a jack under each corner to support the bumper where it best matched up with the body lines and headlight contours.


It took some muscle to get it lined up but it is as good as it will get. I am not supper impressed but it is starting to grow on me. I am supposed to mark the bracket that holds the bumper and pull it back off and drill out the hole. They refer to this as pining the bumper, I was not in the mood to pull the bumper after all that work, so for now it is lacking this pinning bolt. I will get this done before our next adventure.


I like the functionality the bumper adds but not sure how I feel about the fit to the front end. It definitely looks good. FYI they do not have installation instructions for this bumper, I called Friday afternoon and was give the instructions for the 5th gen T4R and GX470 and was told to read both and that would fill in any gaps I might have. The instructions were better than nothing so that was appreciated.
 
Next on the list was the Dobinson Suspension I ordered from Treaty Oak Offroad. Kyle was awesome to work with and is a great vendor. Here is what I ordered incase anyone has any questions as to what I used. I did separately order a set of toyota spring seat bumps for the rear coils part# 48302-35040 and a set of new tops for the coilovers, I could have used the existing ones from the stock suspension but did not want to deal with disassembly on what I knew was going to be a long day already. The part number for the new tops was 48609-60100.


Here is how the truck was sitting at 7am when we started before the hot Texas sun got high in the sky.


I did have the premium model so I decided to start with the rear since it involved removing the airbags and installing the Metal Tech conversion kit for the rear coils. I played around with the mounting of the reservoirs for the rear shocks and ultimately decided to put them under the frame rails above the lower trailing arms for the rear axle. These rear coils were pretty big all stretched out and we had to loosen all the upper and lower arms for the rear end, disconnect the panhard bar and KDSS. We did have to disconnect the driver side upper trailing arm since it has a small bracket that hits the gas tank before the arm makes contact and this was posing to be an issue with us getting enough room to install the springs. We wound up compressing the springs about an inch or two with coil compressors. This allowed us to get them up into position. I didn't think about taking pictures at this point so these are post install but you get the idea.


Next we moved up to the front which had its own set of challenges. Disassembly went pretty easy and so did the reassembly. Where we hit the first road block was the mounting location of the front reservoirs. We went with mounting them to them on the top of the coilover tower. The most difficult part of the front end was the bolts for the Upper Control Arms. Those require a little maneuvering in the engine compartment to get them out and back in. I ordered a set of Rad Rubber replacement splash guards for the fender wells and glad I did because the stock ones pretty much disintegrated when we tried to take them out. The Rad Rubber splash guards are awesome for anyone looking for an upgrade.


At this point we also adjusted the preload on the shock to the recommended 8-⅜" from the center line of the lower eye to the bottom of the spring perch.

We set the truck on the ground and took it around the block a few times for a test ride. Right off the bat I could hear a noise in the front passenger fender well. It took us about 15min to figure out that it was the UCA hitting the reservoir mounted to the coil tower. After some research and reaching out to a few great people on this page we were able to come up with a solution. We also found out that the UCA was hitting the outer lip of the coil tower. We did a little grinding on the rolled edge of the coil tower and there is now about ⅛" of clearance with a good amount of compression on the coil. Here is the new mounting locations of the reservoirs.


You can see where the UCA was making contact in this picture


Here are the final results.


First measurements put it at 2.5" - 2.75" all the way around the truck if my memory serves me correctly. The truck drove great after making the changes to the resi locations and the grinding of the coil towers. I didn't feel like I need an alignment but I knew it needed to be checked and I dont have any time to take it down to Tandem Automotive in Haltom City, So I dropped it off at firestone for an alignment. They were backed up and it took them all day to get to it. I am not happy so it will be going back to them this weekend and I will let them know where I want it to be and will stay with them this time incase they have any questions during the alignment.

I am very happy with the ride quality of this suspension system. The HD coils in the front and HD progressives in the rear are a perfect match.

Let me know if you have any questions.

- HitchCrack
 
Awesome build
 
Looking great with the lift. I'm curious to know if you have to do any mods/tweaks to the skid plates when mounting on the GX or if it is purely bolt-on.
 
Very nice write-up Ryan, and the rig is looking great. Looking forward to seeing it in person!

Thanks Jared! Same to you buddy, It will be fun to see your truck in person and swap info on the two builds. Once we can get some cooler weather we need to see if we can meet up on a weekend.
 
I picked up 4 TRD T4R wheels from a buddy for a good price. I used these to get some Nitto Ridge Grapplers 285/75/17 under the truck. I did have to do a body mount chop and I did this in advance since I was having discount mount the tires. Looks like it just barely clears and may need just a little more cutting. I didn't take many pictures during the chopping but I will post some up here soon. I am heading up to my cabin in OK next weekend and I plan on running a section of the K-Trail while I am up there for the weekend. I can't wait to see how these Nitto's do on the dirt/rock.

I am super exited about how the tires and wheels look on the truck. I am digging the black on black I have and plan on continuing this with the front grill and headlights. Those projects will be for another day.

- HitchCrack


That tire & wheel does look great. Did you go with C or E load rating? Are your fender liners still intact at this point? It will be interesting to see if you find other rub points with some flex on the trail. You didn't extend your bump stops at this point have you?
 
That tire & wheel does look great. Did you go with C or E load rating? Are your fender liners still intact at this point? It will be interesting to see if you find other rub points with some flex on the trail. You didn't extend your bump stops at this point have you?

Thanks xplorr! I went with the E rating for the tougher side wall we have some sharp rocks here in Texas and OK. I am second guessing this decision as it seems to have impacted the ride quality quite a bit. I had 275/65/18 Load E BFG KO2 and they seemed softer than these do. I have taken them down to about 35psi and haven't driven on them yet. I need to do a chalk test on them and see where they really should be set at.

I do still have the fender liners in both front and back. I trimmed the front where the new bumper allows for a better approach angle. I converted the rear over from the premium air suspensions so Installed the toyota upper spring isolators and they look like they will make contact before the factory bump stops do. I am with you I have a feeling I will find more contact points once I get a chance to flex the suspension a little bit. I am headed up to my cabin in OK friday and while I am up there I am going to do some playing around on a few "trails".
 
Ok ladies and gents here is the next step in the Adventure Build. Like I stated above I had a deer strike on our way up to our place in Oklahoma. This pretty much demolished the stock bumper which I actually had grown to like. I did install a hidden Winch using the budbuilt bracket. I don't see that he has them posted on his site under the GX tab so he may have removed it since it was not a direct fit and required some modifications to get it to install properly. Because of this I had already relocated my power steering cooler with a kit from 4x4 labs. They had a kit for a 5th gen T4R that worked perfectly.

So enough about the past lets get to this bumper install!!

I did this on a Friday evening because I wanted to get this done before the suspension went in. This would give us more room to work around the KDSS and muscling the front LCA and such.


I didn't post any pictures of the removal of all the bits and pieces behind the bumper camp since I have a thread floating around somewhere on here of the install of the Budbuilt & Winch.

I mounted the new bracket and installed my Warn 10-S Platinum winch that I had previously mounted to the Budbuilt bracket. I had already removed the power pack from the top of the winch and located it behind the drivers headlight.

The new winch bracket also has wings that cover the power steering lines where they will be exposed due to the high cut approach.


At this point I had a helper assist me with hoisting the bumper on to the bracket that hold the winch. I used a strap to help hold the bumper in place while I installed the bolts. Once the bolts were in I used a jack under each corner to support the bumper where it best matched up with the body lines and headlight contours.


It took some muscle to get it lined up but it is as good as it will get. I am not supper impressed but it is starting to grow on me. I am supposed to mark the bracket that holds the bumper and pull it back off and drill out the hole. They refer to this as pining the bumper, I was not in the mood to pull the bumper after all that work, so for now it is lacking this pinning bolt. I will get this done before our next adventure.


I like the functionality the bumper adds but not sure how I feel about the fit to the front end. It definitely looks good. FYI they do not have installation instructions for this bumper, I called Friday afternoon and was give the instructions for the 5th gen T4R and GX470 and was told to read both and that would fill in any gaps I might have. The instructions were better than nothing so that was appreciated.
Did you keep your proximity sensors on your new bumper?
I'm having YotaMasters install the same bumper on my 2013 GX 460 also and would like to keep those sensors.
Thanks! and nice buildup!
 
Did you keep your proximity sensors on your new bumper?
I'm having YotaMasters install the same bumper on my 2013 GX 460 also and would like to keep those sensors.
Thanks! and nice buildup!

Yes I moved the sensors from the factory bumpers both front and rear. I still am having issues getting the front to work correctly. I think the deer strike has caused the one on the far driverside to not work correctly and is causing the issue. Other than that they fit perfectly. I have been told to keep them in the same order that they are removed from the original bumper so I did that during the install. Not sure if that is true or not since they all seem to have the same part number labeled on them.

-HitchCrack
 
I would think the "Same order" would refer to the wiring locations so when you're getting close that wall on your left front corner, your right front sensor isn't going off inside your cabin.

Thanks for the reply! I'm having YotaMasters doing my work since I have no time right now. So I'll have to make sure they don't just plug the holes in the bumper and DO put in the sensors.
 

Users who are viewing this thread

Back
Top Bottom