Builds Blender, My LX450/FZJ80 + FJ45esk + GM + Land Rover crazy concoction (3 Viewers)

This site may earn a commission from merchant affiliate
links, including eBay, Amazon, Skimlinks, and others.

FYI, you can still buy a stock toyota switch for early fj40. Not too pricey, and really kinda cool to have toyota key.
 
FYI, you can still buy a stock toyota switch for early fj40. Not too pricey, and really kinda cool to have toyota key.

I'm not nearly that brand loyal.

I'd rather be able to get a replacement ignition switch in just about any small town USA.
 
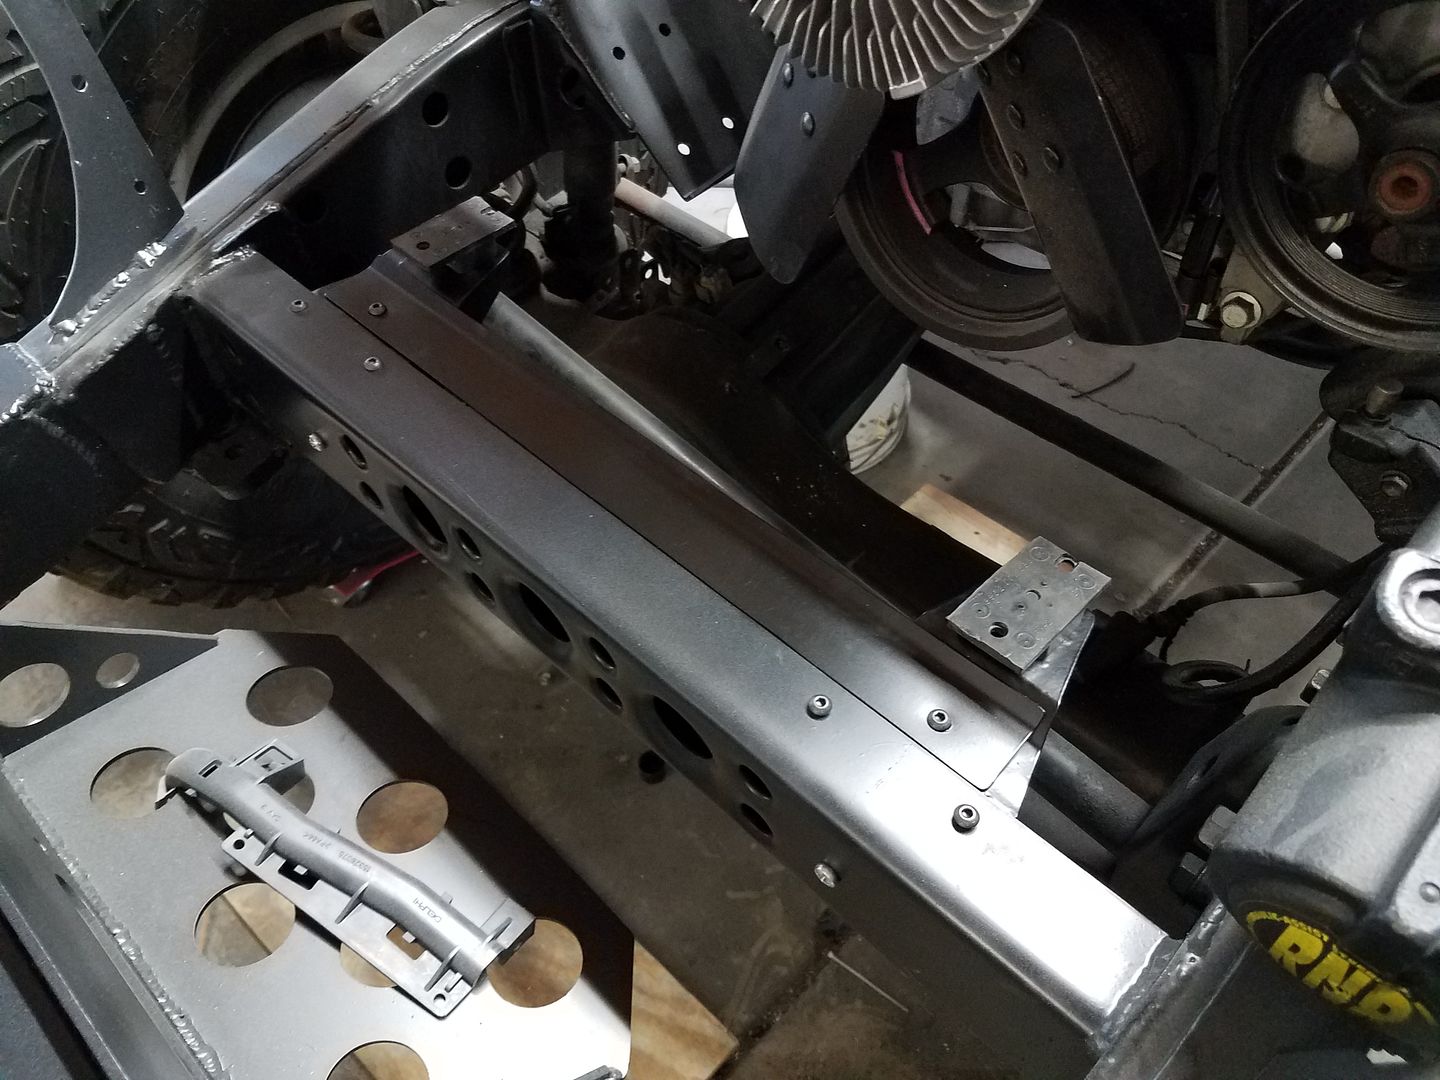
I pulled the belly pan ( which is only 32 lbs ) (and only takes a single tool to remove) so I could install the downpipes to test the o2 sensors with the #LX45 tub on (and the harness) After that I pulled them back off to drill out for the bungs. I'll weld them up tomorrow. Good times.


I'm not nearly that brand loyal.

I'd rather be able to get a replacement ignition switch in just about any small town USA.

I agree with you, but not on that switch. I've owned a half dozen flat bottom jet boats, and those switches have driven me to blind rage. OEM, whether it's Toyota, GM, or even Lucas are better then those switches. Some work just fine, others get intermittent shorts, contacts fail, pins seize, or the entire lock falls out (not a complete list).
 
I agree with you, but not on that switch. I've owned a half dozen flat bottom jet boats, and those switches have driven me to blind rage. OEM, whether it's Toyota, GM, or even Lucas are better then those switches. Some work just fine, others get intermittent shorts, contacts fail, pins seize, or the entire lock falls out (not a complete list).

I have had good luck with the NAPA brand of this switch. I might throw a spare in the long distance parts bag. The hole is cut. I don't really want to recut the hole at this point. Near as I can tell it is what was factory in just about any key on dash Jeep CJ.
 
napa switches aren't that bad, have one in the forklift, bobcat and fj40... they work.. and are always in stock.. just try and get the ones made in Taiwan and not china. The China ones seem to be lower quality.. napa is trying to do better for a while their quality on replacement parts was suffering but lately, it seems to have improved..


oh and unreal build,

So as long as you get the earlier or late switches, you'll be okay.... those middle switches will get you every time. I'm glad to know that I'm the only unlucky bastard who gets the middle switch. :flipoff2:
 
Been slacking and a small set back along the way...


I ended up welding in the O2 bungs with the plugs installed for some reason. I messed up something in the welding and the plugs bonded to the bungs. I stripped them out trying to remove them. I ended up having to cut and grind them out. Non fun.

Oh, and I didn't find that out till the exhaust was installed. Total bummer and waste of time!

I ordered another pair of bungs, while I waited for those I did a few other things.


I found some off the shelf o-ring to jic fittings for the transmission cooler to replace the GM factory version. No mods needed to the cooler. This will make a future replacement easy. This will also make hoses easy.


I was able to slightly mod a factory drivers side gasket to work on the passenger side exhaust manifold also, instead of the factory donut.


I built a bracket that bolted to some existing threaded holes on the firewall on the passenger side. It holds the engine fuse/relay box along with the ECM. I'm trying to keep things off the fenders completely to make working on things a bit easier.


Once I got the new O2 bungs in, I welded those up, with no issues this time. I was able to finally install the y-pipe in the vehicle along with the new O2 sensors. This is a bad picture of the clearance the front driveshaft has on the passenger side down tube. I had a few people ask about the clearance in that area.
 
I have learned that the hard way too about welding in bungs. It’s tough because if you don’t have anything in there spatter usually contaminates the threads and you need to tap them. I’ve found that wiping the threads down with nozzle lube helps keep them clean
 
More things....


Re-plumbed the vent tube for the 6L80E transmission up to behind the intake on engine. That is pretty high on this chassis....


Worked on making some hole patch seams disappear....


I custom made a pass through grommet for the fit in the old master cylinder mounting hole ( the booster and master are now on the clutch pedal side with a reworked pedal ). The base hole was JUST big enough to pass the OBD2 and DBW pedal through. It was nice to have some threaded holes to work with already in the firewall too. I hate drilling new holes....


I also made a bracket for the Derale Thermostat housing for the transmission cooler. Again, didn't want to drill a bunch of holes. I also didn't want it mounted to the fender or something. I found a few threaded holes in the frame I wasn't using so I decided to use those.

I made a chip board template. The holes from the frame where transferred with a ball peen hammer while the template was held in place with magnets. The hole pattern for the thermostat was transferred with some set screws in the mount holes and some firm pressure to mark the chip board.

The double bend angle tabs where a little challenging. I didn't want to dig my big press brake out for this little part. I did the shallow bend in my little HF press brake setup to get things started. Then I clamped the part in place with the press and used a hammer to bend the small tab over to the full 90 degrees. The press makes a GREAT clamp with 20 tons of force, which is WAY better than trying to use the edge of a table.

I decided to change the fittings on the thermostat to JIC/AN style so I can use normal hydraulic hose setups. I am lucky enough to be able to get hoses made at my work with crimped ends and just about any fitting I want. I think I can plumb just about everything with -6 through both the transmission and steering systems. That will let me carry a few field fittings and a spare section of line for repairs on the trail I hope.
 
Ok.....holy cow I am behind....kinda busy trying to get this thing together.
Let me try to catch ya up.


I started on some body work with the grill. It took a few applications of filler, but I got things pretty straight. I tried to use some ear plugs for holes protectors...meh. Small rolls of masking tape work better I think.


I did epoxy primer on both sides, and then 2 good wet coats of sandable primer down to 320grit. Overall I am pretty happy. It isn't show car perfect, but for a guy in his garage who doesn't really know what he is going, and a part that I cut in to 4 parts, added 4 panels, and did 6 feet of tig welding on.


Here is a terrible picture of the first bit of paint. I am using a single stage system that seems to work pretty well. It is a color called Glacier Blue. It is much lighter and brighter in person. I can't wait to get it assembled and out into the light!


I pulled bed frame for finish welding and a trip to the sand blaster. While it was off I pulled things all apart to paint the rear bumper/crossmember. The gas tank skidplate had to get pulled, and I finally remembered to weight it ( it was 26lbs by the way ). I got to put it all back together for the last time.


While the frame is off, I needed to drill and tap the bed posts for the mounting hardware. It's metric, because I have OCD issues.


I ended up having to modify the power steering cooler a little bit for some more fitting clearance...ugh. A little tig welding and rattle can black and it was all ok.


While the paint on the grill was getting nice and hard, I did a little assembly on the front crossmember with the power steering cooler and lower radiator mounts.
 
......one more.....Time for more body work!


I found this surprise under about 3/8 of an inch of bad body filler on the drivers side cowl. Super fun.


After much love from some body hammers, some hot and cold shrinking, a tig welded hole patch, and some patience it mostly disappeared. I was able to go from 3/8 an inch of dent to a wavy 1/16 over the entire panel. I'd not going for show car, but I have to try....


The rocker panel also had a few surprises on both sides. The tub is almost 50 years old and I got it for a few hundred bucks. Somewhere in there my stud welder from HF showed up. That sure was handy for fixing things on the double wall rocker section!


Just when I thought things where going my way, I got this lump of coal in my stocking on the passenger side. Ouch. It was the size of a small dinner plate and about 3/8" thick!


After turning into a porcupine with the stud welder, hitting it with a hammer, making a home made jack screw, and doing some heat/cold shrinking it finally started to look half way decent again. A lot of stuff was smooshed that I couldn't really get to in double wall sections and stuff. I think the worst place is about 1/8, but overall it is better than 1/16 which is fine for a skim coat of filler rather the lump it had before!


I skipped over a few steps, but this is where I am at as of tonight. The drivers side is all skimmed and sanded in filler. Now onto the passenger side, then a bit of work on the dash panel, and hopefully some primer by late this weekend!
 
Bondo was the wonder filler in the 70's and way overused.. have seen it 2 inches thick before because some idiot was too lazy to get a hammer and dolly and fix the metal.. it really doesnt take that long just requires patience...

Nice work on straightening it out.. 3 coats of y2k high build primer will come out about 1/8 of an inch. Lots of shops are doing the rough work then, spraying 3 coats and blocking it, saves time and y2k being a catalzing primer is stable once curred/off gassed.. about a week in the sun cures it good..
 
Mini update.


I got the passenger side filled and sanded.

I did a few other things like test fitting some power steering plumbing parts and stuff, but forget to get pictures. Sorry. I will show most of that stuff coming up soon when I install the grill shell and plumb up the coolers.
 
Holy Carp I am behind! Things are accelerating as I push towards my September completion date. If you want daily updates please look me up on facebook or instagram....brennanmetcalf.


This is where I am at today. I got the tub painted this weekend. Oh boy is it blue!

I have been working on a lot of other things as I progressed to paint...

-Transmission cooler lines are made and mounted along with the transmission thermostat.
-The power steering lines are all done. This included the low pressure return lines along with the pressure lines and assist ram lines.
-I have most of a power steering reservoir extension made.
-Coolant overflow bottle started
-I had to fix a few issues with the new HD drag link
-The cooling system is mostly plumbed other than the heater
-Suck down winch installed

The paint process was...
-Epoxy DTM primer, two wet coats inside and out.
-Sanded with 320
-Primer Surfacer, two wet coats outside and on the 'cage'
-Sanded with 320
-A bit of glaze
-Sanded with 320
-Another coat of Primer Surfacer
-Sanded with 320
-PAINT! lots of blue paint. I am using a single stage from TCP Global.

Lots done....Lots to do.


Been watching you on Instagram for a few weeks. Really amazing stuff; however, figured I would post up my question here. I started playing with the same welder you have on aluminum and not having great results. wanted to see if you changed any other settings after you started playing with it.

Here is your original post for settings....


AHP AlphaTig 200x older model without AC frequency control.
3/32nd 2% lanthinated Tungsten with 1x ball end
#7 cup and maybe 1/8 stickout
20 cfh of Argon
100amp
AC balance set to to 11 o'clock or so
5052-H32 Material
3/32nd 5356 filler
I think things are getting better, but still not there yet...

And your second post...

I am going to try some 1/16 filler instead of 3/32nd. I think that will help out a little bit with the puddle getting too cool too fast when trying to work corners.

I can functionally make a tank right now, but it will not look like I want.

Things that seem to be helping on outside corners.

-A tapered 2% Lanthinated Tungsten with a slight flat on the end seems to work better than a ball for outside corners for sure.

-Slightly less amps seems to be required for outside corner work. I'm doing 1/8" 5052 at 100-110 amps max and not really needing to mat the pedal.
 
Can you measure the dia.of the ps pulley? What application did it come from? I need one like that and can not find one to fit my 6.2.

Thanks,
Rob
 
Been watching you on Instagram for a few weeks. Really amazing stuff; however, figured I would post up my question here. I started playing with the same welder you have on aluminum and not having great results. wanted to see if you changed any other settings after you started playing with it.

Here is your original post for settings....


AHP AlphaTig 200x older model without AC frequency control.
3/32nd 2% lanthinated Tungsten with 1x ball end
#7 cup and maybe 1/8 stickout
20 cfh of Argon
100amp
AC balance set to to 11 o'clock or so
5052-H32 Material
3/32nd 5356 filler
I think things are getting better, but still not there yet...

And your second post...

I am going to try some 1/16 filler instead of 3/32nd. I think that will help out a little bit with the puddle getting too cool too fast when trying to work corners.

I can functionally make a tank right now, but it will not look like I want.

Things that seem to be helping on outside corners.

-A tapered 2% Lanthinated Tungsten with a slight flat on the end seems to work better than a ball for outside corners for sure.

-Slightly less amps seems to be required for outside corner work. I'm doing 1/8" 5052 at 100-110 amps max and not really needing to mat the pedal.

What problems are you having? Pics?

I have added amps to get a faster start on larger pieces, but once they get warm you don't need them. I'd say 1 amp per .001 + 10-20.
I think just being able to be more consistent and comfortable is key, practice and more practice.
 
Can you measure the dia.of the ps pulley? What application did it come from? I need one like that and can not find one to fit my 6.2.

Thanks,
Rob

It is a standard pulley off a 2013 truck application, nothing special.
 

Users who are viewing this thread

Back
Top Bottom