
After almost 22 years, my 62's shifter was in sad shape. Even with new OEM bushings and proper adjustment per the FSM, it still had a lot of lateral and fore/aft slop. So the other day I decided to take a break from my current projects (and troubleshooting) to tackle this and fix it for good.
The first order of business was to lose the OEM urethane bushings and install bronze bushings from Lowe's. The proper bushings are Hillman part# 882995. Lowe's is the only place I've seen them, which makes me wonder if they own or have exclusive rights to retail Hillman stuff. Anyway, the bushings are just slightly smaller ID than the pivot rod, which is easily remedied by a little (VERY little) massaging with a sandpaper drum attachment on a Dremel. The OD was also slightly larger than the ID of the shifter mount bracket (the gate assembly), so they had to be turned down slightly. This took a little while as I kept taking off just a bit, then test fitting until they were a snug fit inside the bracket. I just put the bushings on the pivot rod and tightened the nuts on either end to secure them, put the rod in my drill and spun it on high speed while I slid a file back and forth along them.
Poor man's lathe

The bushings installed in place of the OEM ones
This alone made a considerable difference. Lateral slop was greatly reduced and the shifter felt much more "solid" for lack of a better way to put it. Credit for coming up with this goes to doctorjj, who I shamelessly copied
Next up was to find a way to correct the fore/aft slop. If you look at the pivot rod, you can see flat portions machined on to it that the vertical linkage and the shifter handle slide onto. After 20+ years and 246K miles, those can wear pretty good, which was the case with mine. Instead of plunk down what I thought was way too much for a new rod and handle, I pulled the whole thing out, including the vertical linkage. I installed the shift rod onto the vertical linkage and secured it. Then I secured it into a vice, punched it, then with a drill press I drilled a 1/8" hole through it. The hole now goes through the vertical linkage AND the pivot rod.
The hole drilled through the linkage and rod:
I then drove a 1/8" tension pin through the hole once the assembly was installed back into my truck:
I did the same thing for the shift handle as well. One important note is that it is absolutely CRUCIAL that you use a drill press with a vice installed to ensure that the bit goes straight through the center and does not walk. You don't have any room for error here and if you fxxx it up, you're pretty much stuck with a broken vertical linkage and pivot rod, which could leave you without a truck in the worst case while you wait to get new parts shipped to you.
Handle drilled and pin installed:
While I was pulling the vertical linkage off I saw that the linkage under the truck is connected with steel sleeves and hardened rubber bushings.
Old bushing at the connection point:
More potential for slop, so I picked up an aluminum cable end that ended up the same as the bronze bushings (just slightly smaller ID than the rod's pin going into it and just slightly larger OD than the hole it needed to go into. This was easy though. I just filed a bevel into one end of the aluminum "bushing" (it was actually a crimp-on cable end) and used the press to press it straight into the hold in the vertical linkage. I then cut it to match the length of the steel sleeve that went between the rubber and the pin. Handheld band saws are awesome, BTW
The bushing pressed in and cut:
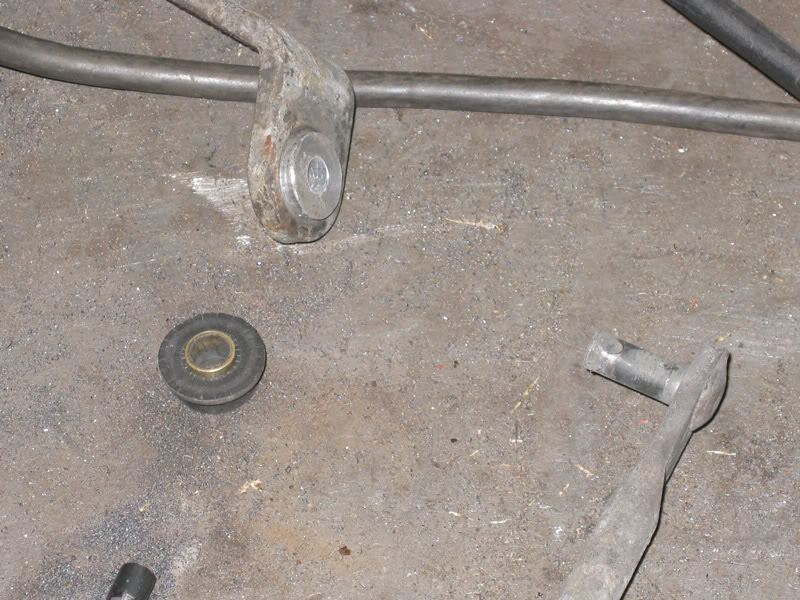
Another shot showing the fore/aft linkage and the old bushing and sleeve (used a razor to cut one of the flange portions off of the rubber bushing so I could remove it without destroying it):
There are two hardened plastic (maybe nylon?) washers that go on either side of the bushings. I reused those and secured the two rods back together with a cotter pin. There's another identical sleeve/bushing arrangement where the fore/aft rod connects to the arm on the transmission itself that I didn't get to because I could only get one aluminum bushing. Once I get another I'll do that portion too. After putting everything back together I adjusted the shifter per the instructions in the FSM and it feels like a factory new shifter. I couldn't be happier with how it turned out. Well under $50 for all this stuff put together, but you need good shop tools and it's a full day's worth of work to get it all done. I already had the bronze bushings in place and it still took me 9 hours to do everything else. I love how my shifter feels now. Nice and tight with no slop whatsoever.
For reference, this is the nut you use to properly adjust the shifter (I'm pointing to it):
Edit: Oh yeah I almost forgot to add, despite the pin I installed in the shifter handle, I realized I can dismantle everything while it's still secured to the pivot rod, so I got a little crazy and just welded the two together so there would be ZERO movement. If you do this, WELD THE THREADED SIDE! If you weld the smooth side, it won't go into the bronze bushings again. I ended up putting the washer and nut back onto the threads anyway, just so they wouldn't be lost.
The first order of business was to lose the OEM urethane bushings and install bronze bushings from Lowe's. The proper bushings are Hillman part# 882995. Lowe's is the only place I've seen them, which makes me wonder if they own or have exclusive rights to retail Hillman stuff. Anyway, the bushings are just slightly smaller ID than the pivot rod, which is easily remedied by a little (VERY little) massaging with a sandpaper drum attachment on a Dremel. The OD was also slightly larger than the ID of the shifter mount bracket (the gate assembly), so they had to be turned down slightly. This took a little while as I kept taking off just a bit, then test fitting until they were a snug fit inside the bracket. I just put the bushings on the pivot rod and tightened the nuts on either end to secure them, put the rod in my drill and spun it on high speed while I slid a file back and forth along them.
Poor man's lathe

The bushings installed in place of the OEM ones

This alone made a considerable difference. Lateral slop was greatly reduced and the shifter felt much more "solid" for lack of a better way to put it. Credit for coming up with this goes to doctorjj, who I shamelessly copied
Next up was to find a way to correct the fore/aft slop. If you look at the pivot rod, you can see flat portions machined on to it that the vertical linkage and the shifter handle slide onto. After 20+ years and 246K miles, those can wear pretty good, which was the case with mine. Instead of plunk down what I thought was way too much for a new rod and handle, I pulled the whole thing out, including the vertical linkage. I installed the shift rod onto the vertical linkage and secured it. Then I secured it into a vice, punched it, then with a drill press I drilled a 1/8" hole through it. The hole now goes through the vertical linkage AND the pivot rod.
The hole drilled through the linkage and rod:

I then drove a 1/8" tension pin through the hole once the assembly was installed back into my truck:

I did the same thing for the shift handle as well. One important note is that it is absolutely CRUCIAL that you use a drill press with a vice installed to ensure that the bit goes straight through the center and does not walk. You don't have any room for error here and if you fxxx it up, you're pretty much stuck with a broken vertical linkage and pivot rod, which could leave you without a truck in the worst case while you wait to get new parts shipped to you.
Handle drilled and pin installed:

While I was pulling the vertical linkage off I saw that the linkage under the truck is connected with steel sleeves and hardened rubber bushings.
Old bushing at the connection point:

More potential for slop, so I picked up an aluminum cable end that ended up the same as the bronze bushings (just slightly smaller ID than the rod's pin going into it and just slightly larger OD than the hole it needed to go into. This was easy though. I just filed a bevel into one end of the aluminum "bushing" (it was actually a crimp-on cable end) and used the press to press it straight into the hold in the vertical linkage. I then cut it to match the length of the steel sleeve that went between the rubber and the pin. Handheld band saws are awesome, BTW
The bushing pressed in and cut:

Another shot showing the fore/aft linkage and the old bushing and sleeve (used a razor to cut one of the flange portions off of the rubber bushing so I could remove it without destroying it):
There are two hardened plastic (maybe nylon?) washers that go on either side of the bushings. I reused those and secured the two rods back together with a cotter pin. There's another identical sleeve/bushing arrangement where the fore/aft rod connects to the arm on the transmission itself that I didn't get to because I could only get one aluminum bushing. Once I get another I'll do that portion too. After putting everything back together I adjusted the shifter per the instructions in the FSM and it feels like a factory new shifter. I couldn't be happier with how it turned out. Well under $50 for all this stuff put together, but you need good shop tools and it's a full day's worth of work to get it all done. I already had the bronze bushings in place and it still took me 9 hours to do everything else. I love how my shifter feels now. Nice and tight with no slop whatsoever.
For reference, this is the nut you use to properly adjust the shifter (I'm pointing to it):

Edit: Oh yeah I almost forgot to add, despite the pin I installed in the shifter handle, I realized I can dismantle everything while it's still secured to the pivot rod, so I got a little crazy and just welded the two together so there would be ZERO movement. If you do this, WELD THE THREADED SIDE! If you weld the smooth side, it won't go into the bronze bushings again. I ended up putting the washer and nut back onto the threads anyway, just so they wouldn't be lost.

