Offroad popup camper build (2 Viewers)

This site may earn a commission from merchant affiliate
links, including eBay, Amazon, Skimlinks, and others.

Joined
Nov 16, 2006
Threads
82
Messages
2,106
Location
Aspen, CO
First of all, I'm not sure if this should be here or in trailers, but since campers, tents, and camping goodies are discussed here (and I hang out here;)), I thought I would post here.

As my wheeling days have changed and I now roll around with a family of four, tent camping has become increasingly cumbersome. My folks had a popup when I was a kid and we slept 6 in it, not too comfortably I might add.

So from my first post on Mud, I've been looking for an offroad popup. One that I can afford, and will also be capable of moderate trails (such as my local Taylor Pass).

The new breed of "offroad" popups from makers such as Starcraft, Jayco, and Fleetwood are expensive, and quite frankly change little in the crappy construction of these particle board boxes on wheels to make them reliable offroad campers. I guess that's why so many choose to go the RTT and military trailer route. Me, I'm still hellbent on making one of these these able to actually go offroad. It would have to be short, light, and with a well-built interior; no more office staples and balsa wood for cabinets.:rolleyes:

Fastforward to the new year, 2010. I found and purchased a crappy old 1980 Palomino Shetland popup. Despite most everything being in terrible disrepair, there were a few gems.
  1. the size. It sleeps four and only has a 7' box:).
  2. Furnace. I expected the 30yo camper to have a standing pilot furnace, but it's got electronic ignition and appears as though it may never have been used. Runs like a champ!:cool:
  3. Sink and two burner stove. A couple years ago, I borrowed a friends PUPfor Cruise Moab. I got up in the morning to go outside and start the stove for coffee. My wife reminded me that I can make coffee and breakfast in my PJs in a PUP with a heater.:D
  4. Weight. At the time of manufacturing, this thing weighed just over 600lbs. I forgot it was there driving back up into the mountains from the Front Range. I know it will weigh significantly more when I'm done, but it's a good starting point.
The rest of the thing, like I mentioned is basically junk. So I started disassembling. Right now, it's down to a metal frame. However, the parts for assembly are starting to pile up.

When it's said and done, it will be sitting on 305 Wrangler MTRs atop my old minitruck rear springs on a rebuilt/reinforced frame. Hardwood and plywood construction (versus chipboard and foam) with a 35 gallon water tank and new lift arms.

Did I miss anything? Prolly.

Anyways, I already have a mess of pictures which I'll start posting up as soon as I get a chance.

BTW, I'm hoping to have it ready for a Canyonlands trip in April/

:cheers:
Nick
 
good to see you're realistic about the sturdiness of the newish "offroad" popups, nice as they may be, they're still lightly constructed.
Part of it of course being the weight issue which you will have to deal with. But if you're not bent on esthetics (as in do we really need cabinets when plastic containers will do... :) ) it may not be too bad.
 
Looking forward to following this build. Now post some pics to kick things off.
:cheers:
 
But if you're not bent on esthetics (as in do we really need cabinets when plastic containers will do... :) ) it may not be too bad.

Oh, I'm bent on estetics. It'll look good inside with decent finish carpentry. I have an illness which doesn't allow me to overlook finish details. It's terribly afficting actually, but I guess it makes me good at my job.

Anyways, here's a couple pictures to start.

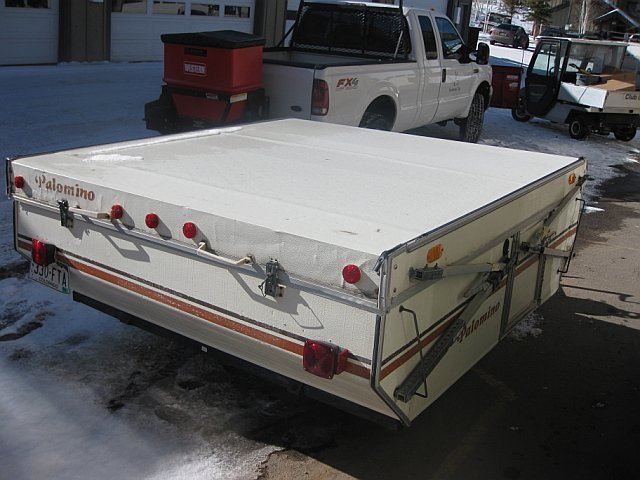
The camper before I started disassembly.
pu001.jpg

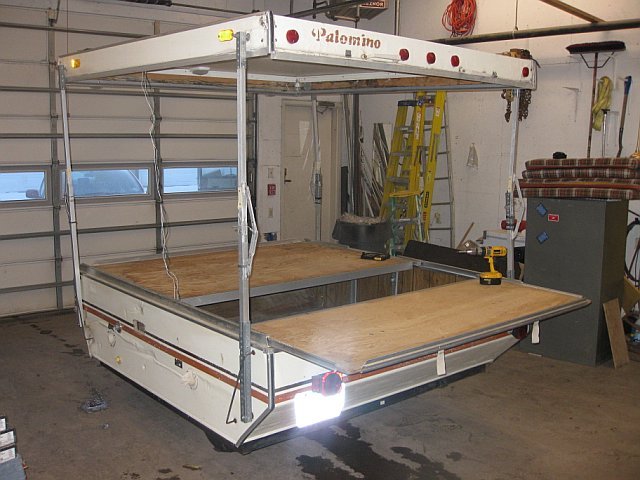
Popped up sans canvas, bunkends, and interior.
pu020.jpg

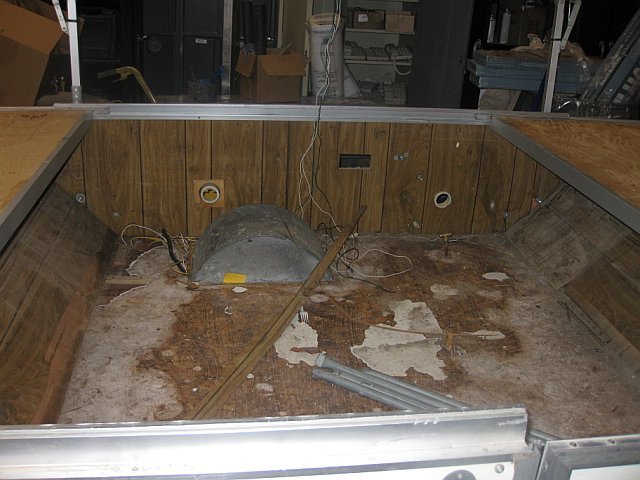
Inside the "box" after I removed the cabinets, counter, and appliances.
pu035.jpg
pu001.jpg
pu020.jpg
pu035.jpg
 
very interesting build, I am very curious to see this through. I am also considering this route, except I am leaning towards taking off the wheels and flopping the pop up over a stout trailer with 35"S. keep the pics coming
 
very interesting build, I am very curious to see this through. I am also considering this route, except I am leaning towards taking off the wheels and flopping the pop up over a stout trailer with 35"S. keep the pics coming

I was gonna go with 35s, except that the 33s were donated to the cause. Clearance won't be an issue as I'm planning on clearing the tires clean without wheel wells. The trailer is gonna be stout, the new frame rails and supports are gonna be 1/4" thick 2"x3" rectangular tube.

Buggy springs and sliders?

Kinda. The new frame rails at 1/4" steel will work fine for bouncing this thing off anything I desire. The cross supports for the springs will also be comprised of the 1/4"-2"x3" rectangular tube. With exterior lift arms and all of the new exterior, I'll be leaning toward sliders welded to the fram rails down the road.
 
A few more pictures from last night.

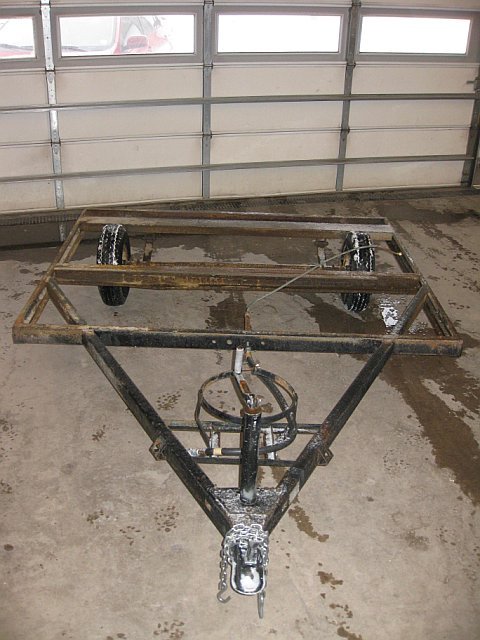
Here's the unmolested frame.
pu40.jpg

Here's what I'm keeping of the frame. Essentially, the tongue and the rear crossmember as it has the mounts for the bunkend supports.
pu042.jpg

Lastly...
one feet, two feet, old meat, new meat!:grinpimp:
pu041.jpg
pu40.jpg
pu041.jpg
pu042.jpg
 
Last edited:
... The trailer is gonna be stout, the new frame rails and supports are gonna be 1/4" thick 2"x3" rectangular tube.
...

IMHO way overkill, with that size tube 1/8" or even .090" range will be plenty strong and weigh half as much. To make it handle/wheel well it's all about the weight, so would look at everything from a weight perspective. Look at your Cruiser, it's frame takes far more stress than that trailer ever will and the frame is less than 1/8".

I would think more about the tires. Trailers need very little in the way of traction, only enough to keep them from slipping around, they don't have any drive traction, even street tread would work fine. If the finished/loaded unit is ~1500, each tire is only supporting ~750lb, so those tires are way overkill. Lighter tire/wheel weight (unsprung weight) will make for a better handling, less vibration rig. For that application, my ideal tire would be ~28-30" tall, as narrow as possible (6"?) and as light of a rim/tire combo as possible. Something like the front runners on 2wd desert racers.
 
I put the tape to the steel last night. It's actually 3/16". Either way, I agree it's overkill. However, I don't have the luxury of a lot of options. Heck I'm an hour from a Wal-Mart and a couple miles from where the highway ends. The steel yard had 3/16" in 2"x3" (which is the dimension I need), so that's what it is.:meh:

Kevin, I think I forgot to mention that the tires and wheels were free. Donated by a good buddy of mine to the cause. Beggars can't be choosers. Besides, offroad I will be able to air those way down and not worry about the sidewalls (unlike street or trailer tires). Not sure how it is in your part of the dessert, but the trails around here tend to have unforgivingly sharp granite that eat offroad tire sidewalls all the time.

Anyways, I'm gonna try and get some more pics up.
:cheers:
 
...
Kevin, I think I forgot to mention that the tires and wheels were free. Donated by a good buddy of mine to the cause. Beggars can't be choosers. Besides, offroad I will be able to air those way down and not worry about the sidewalls (unlike street or trailer tires). Not sure how it is in your part of the dessert, but the trails around here tend to have unforgivingly sharp granite that eat offroad tire sidewalls all the time.

Anyways, I'm gonna try and get some more pics up.
:cheers:

Yep, free is good.:hillbilly: I agree on the rock, my tires look like hell. Trailer tires are a whole other dynamic: On a light trailer they are much lighter loaded and they don't drive or brake so never spin/skid. A much lighter rated tire will be as tuff or even stouter than the heavier tires on the rig. Heavy/stiff tires are a big reason they bounce around on the trail. But I'm with you would probably run free wheels/tires.:hillbilly:

Weight is bad, weight high is worse, tends to make trailers bounce side to side when one tire hits a bump/hole. I would make it as low as possible, make bigger wheel wells? Add a couple of skid tubes underneath running forward from the rear bumper/cross member or a light skid plate and let it slide over/off of obstacles?
 
Well, I'm afraid I'm disappointin ya all around.:frown:

There will be no wheel wells. More of a PITA and they would take up way too much interior dry storage on this tiny trailer. I'll be clearing the 33s with my old minitruck springs helped by an add-a-leaf and 6" shackles. Some (donated) Rancho shocks will be stabilizing the ride.

As to the weight, I guess it's relative. I'll be adding significant weight to a 600lb trailer. My guess is when it's done, it'll be just over 1,000lbs. Considering one of the smallest of the production "offroad popups" the Starcraft 10RT weighs in dry at 2,290lbs, it'll still be light enoug for my desired emd product.

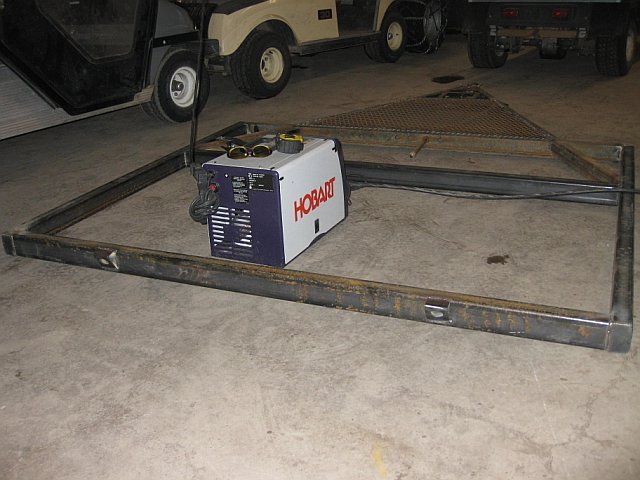
I got the new frame rails welded up and I should have the new crossmembers and endcaps welded up tomorrow. I'll try and get some pictures up after that. Maybe I'll include a mock up pic of the springs. I'm still waiting on the new trailer axle and the add-a-leaf kit. If I'm lucky, by the end of this coming week I'll have a rolling trailer frame.:meh:
 
...
There will be no wheel wells. More of a PITA and they would take up way too much interior dry storage on this tiny trailer. I'll be clearing the 33s with my old minitruck springs helped by an add-a-leaf and 6" shackles. Some (donated) Rancho shocks will be stabilizing the ride.
...
This is why I stopped at adding 5-lug hubs and 13" wheels on my pop-up. They clear fine after the SOA but much larger would require some serious interior mods.
Since ours is a stepping stone to a true off road trailer it just wasn't worth the effort.
In you case I think you are taking the right approach.
 
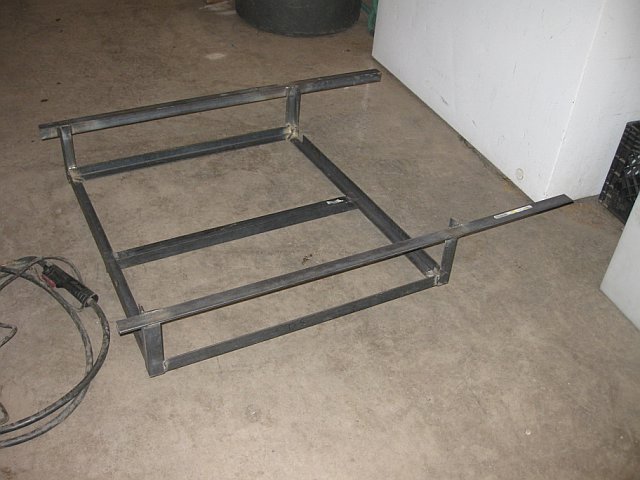
Well, the frame rebuild is complete. I replaced the frame rails as well as the crossmembers with the 3/16" 2"x3" rectangular tube. I also removed the fixed stabilizer jack. It will come back as a removeable sidemount stabilizer jack (extended of course;)).

I also removed the propane tank mount and relocated it a far forward on the tongue as I could now that the stabilizer jack is not there.

I cut off the rear bunk end supoort mounts from the old trailer frame and welded them in place on the new frame.

Lastly, for a little additional (wet) storage, I cut to fit and welded in a piece of expanded metal on the underside of the tongue. This will be nice for firewood, camper accessories (like jack extensions, additional fuel or water, etc.).

I also finished getting the springs prepared. Here's a picture of the regular spring pack, and the spring pack with the add-a-leaf in the background.
springs.jpg

Here's a view of the frame.
frame.jpg

Lastly, here's a view of the frame from the rear with the bunkend support mounts in the foreground.
frame2.jpg

:cheers:

The axle arrived today. More pics to come...
Nick
springs.jpg
frame.jpg
frame2.jpg
 
Well, making sure everything was square to the hitch and to the rest of the frame was interesting to say the least, but I got it sorted out finally.

Last night, I mounted up the axle and wheels, welded on the spring perches, and got the bumper put together as well. Bottomline is that I've got a rolling trailer frame. In the current configuration, the suspension could bottom out into what will be the floor, so I'll be block lifting it 3" next week.

Now though it's time for more pictures!:clap:

Old axle, wheels, tires VS. New axle, wheels, and tires
camper axle2.jpg

A view of the rolling frame (note the 55gal trash can as the tongue stabilizer:hillbilly:)
camper frame1.jpg

a view of the backside of the frame and suspension setup.
camper frame2.jpg


Next I'll be working on a cradle mount for the 35gal water tank, retrofitting the tongue stabilizer back onto the camper, and rattle canning the frame...

:cheers:
Nick
camper axle2.jpg
camper frame1.jpg
camper frame2.jpg
 
Interesting project! You keep posting your progress and we'll keep reading about it :D. Good job!
 
I got the standard stabilizer jacks in for the rear, promptly cut the feet off, and set about making adjustable extensions for them. Meanwhile, I also finished up the cradle for the 35 gal water tank which just barely fit in between the leaf spring mounts.

I ended up going with 4" custom lift blocks to keep the tires out of the floor of the box. This allows for 6" of uptravel, which will definitely avoid any intrusion of the tires into the floor (sans wheel wells).

On the frame, I still have to work out the shocks and the tongue stabilizer jack. Lastly, I have to relocate a couple of the water tank fittings with bulk head fittings and a patch, but the water tank will be centered over the wheels and slightly forward for tongue balance.

Here's a side view of the block lift. I had to remove the load max bar to accommodate the block lift with the new u-bolt length.
block lift.jpg

Here's a back view of the lift blocks. I welded 1/2" all thread to the sides of the block to stabilize them between the u-bolts.
block lift2.jpg

Here's a view of the fresh water tank cradle made from 1 1/4" angle iron before installation.
cradle.jpg
block lift.jpg
block lift2.jpg
cradle.jpg
 

Users who are viewing this thread

Back
Top Bottom