
A few weekend ago, with the help of a few good friends, I started the project of building a drawer system and sleeping platform for the back of my FZJ80. I’d done quite a bit of homework through Mud & the web to try and glean some ideas of what features I should incorporate, and what I should change. Here’s what I came up with:
Getting an early start on Saturday morning, we started out by cutting down some ½”, sanded one side, Arauco plywood sourced from the local Lowes.

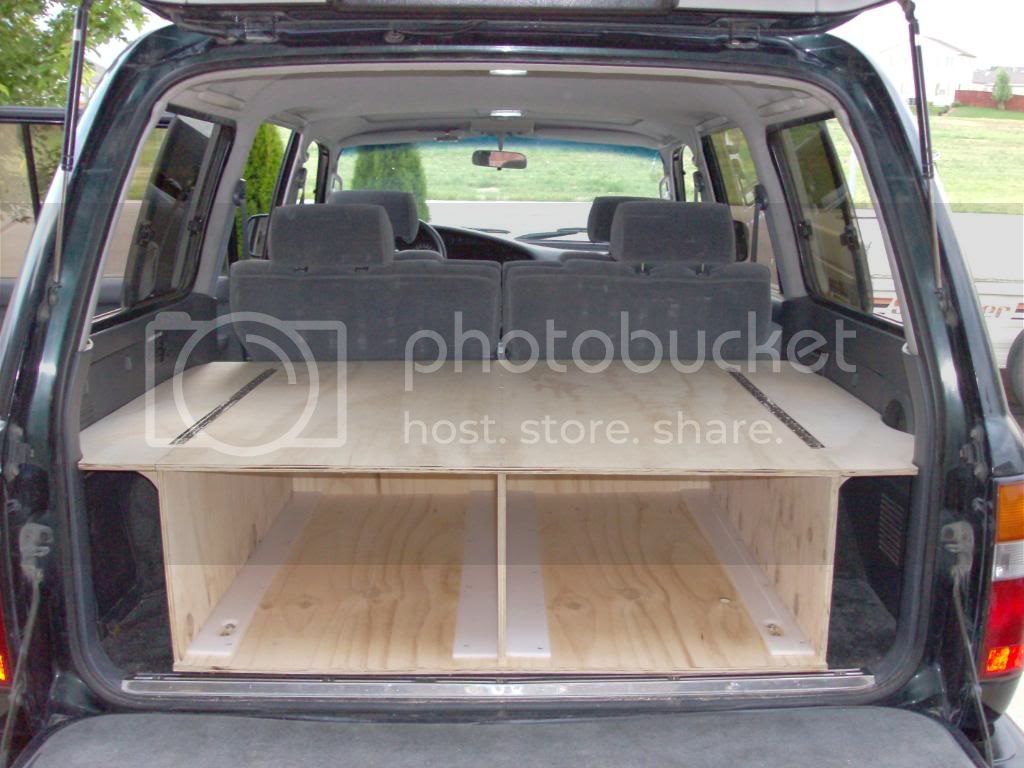
Before too long, we were starting to see progress:
Many of the drawer systems I’ve seen constructed here and elsewhere, utilized ball bearing drawer slides. While they no doubt provide a smooth drawer pull, they had two major flaws that made me to look for a replacement. First they’re expensive. Secondly, they take away storage space. By the time you factor in the width they consume, and also the height, you lose space which I think is better suited to actually storing things. My alternative? UHMWPE - Ultra High Molecular Weight Polyetheylene. Or plastic, as I like to call it. A friend of mine works for a plastic thermoforming company, and gave me a bunch of this to use – freebie! From wiki:
Once we had the basic framework of the box constructed, we stopped to think about how all this was going to be anchored down. While I never intend to roll my rig, there is always a possibility of it happening. Even a good car accident could turn the box into a deadly projectile, so I had to come up with a way to anchor it. I’d seen several other people using turnbuckles to anchor their systems, and I chose to do the same. I used 5/16” tee nuts inserted into the plywood, and installed the rearmost floor tie-downs (the ones closest to the tailgate) at the top, front corners of the box.
The tee nuts, as seen from the ‘inside’ of the box:
And from the outside:
And with the floor mount installed:
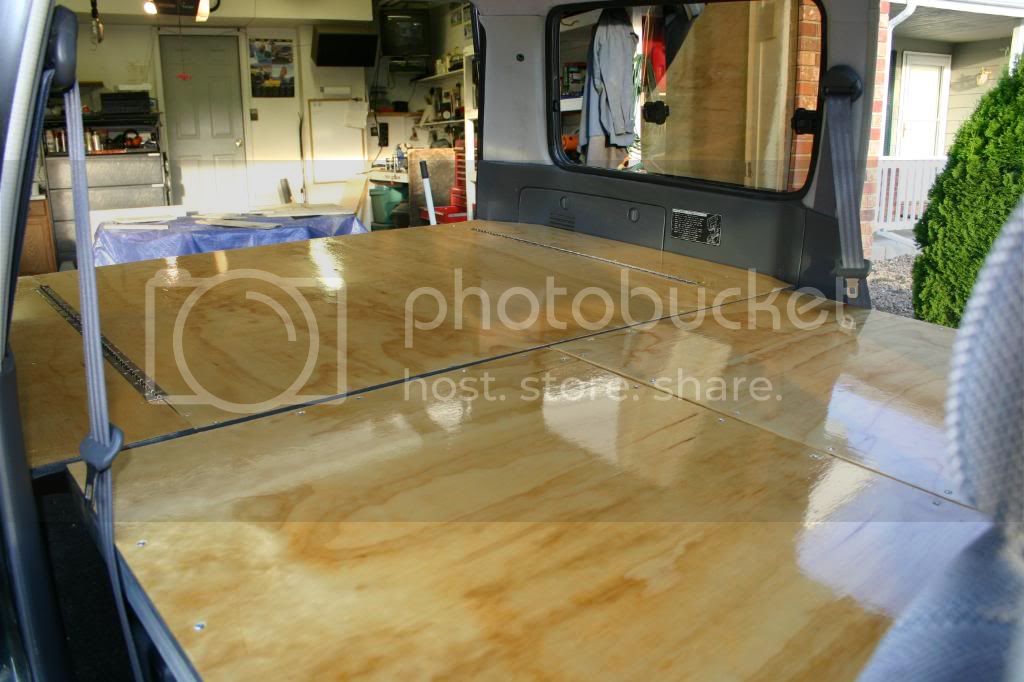
This makes for a nice, clean install in my opinion:
Once the forward anchor points were in, we cut out a lid, and temporarily installed the box:
Using an 8” turnbuckle, here is how the front edge of the box is secured (this is the portion directly behind the second row seats):
Since I had relocated one pair of the floor tie-downs to the drawer box, I was able to use the remaining threaded inserts in the body as the anchor point for the rear of the drawer box (closest to the tailgate). I cut some room in the plastic slides for the bolts heads, and bolted it down. If I remember correctly, with ½” plywood, and the carpet left in place, I needed 6mm x 45mm long bolts to replace the factory ones.
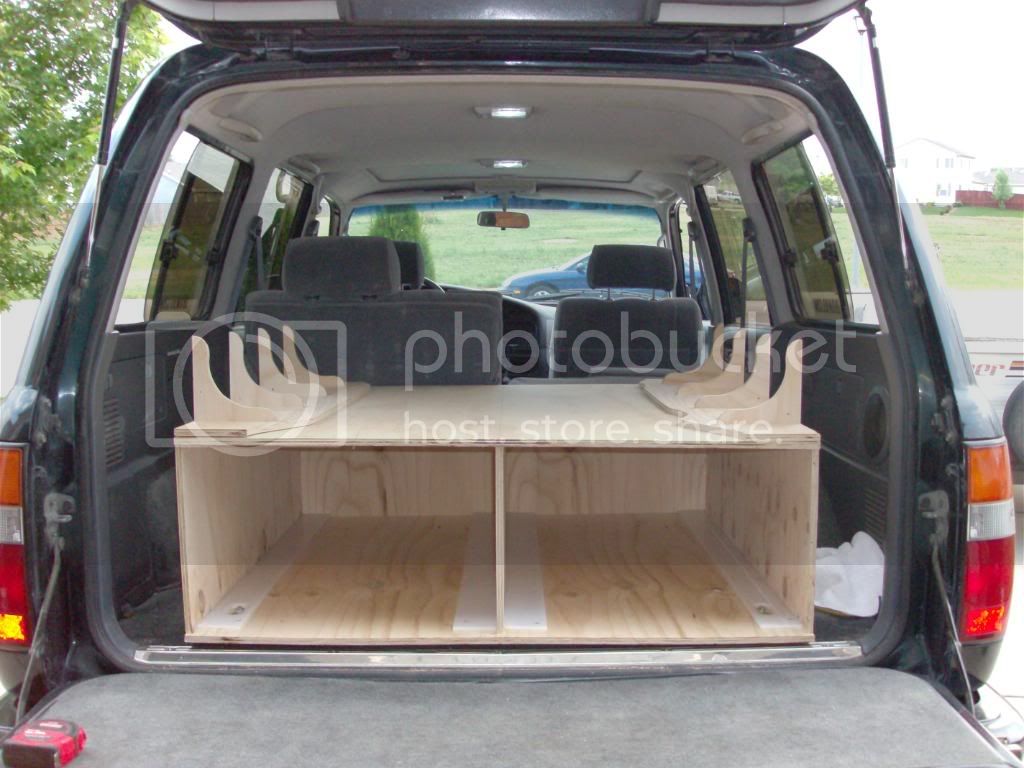
And a quick overall view from the rear – we’re making some progress!
Prior to starting any construction, I picked up a water jug from Paul at Equipt Expedition Outfitters. While a lot of people use the Scepter or MFC water jugs, I find them to be a pain to actually use – try filling a cup from them, and it’s like trying to fill a shot glass from a five gallon bucket. These 20L containers from Equipt have a large mouth for easy filling, but also provide a spigot at the bottom to easily fill smaller vessels. Brilliant! Here’s ours in one of the possible stowage positions:
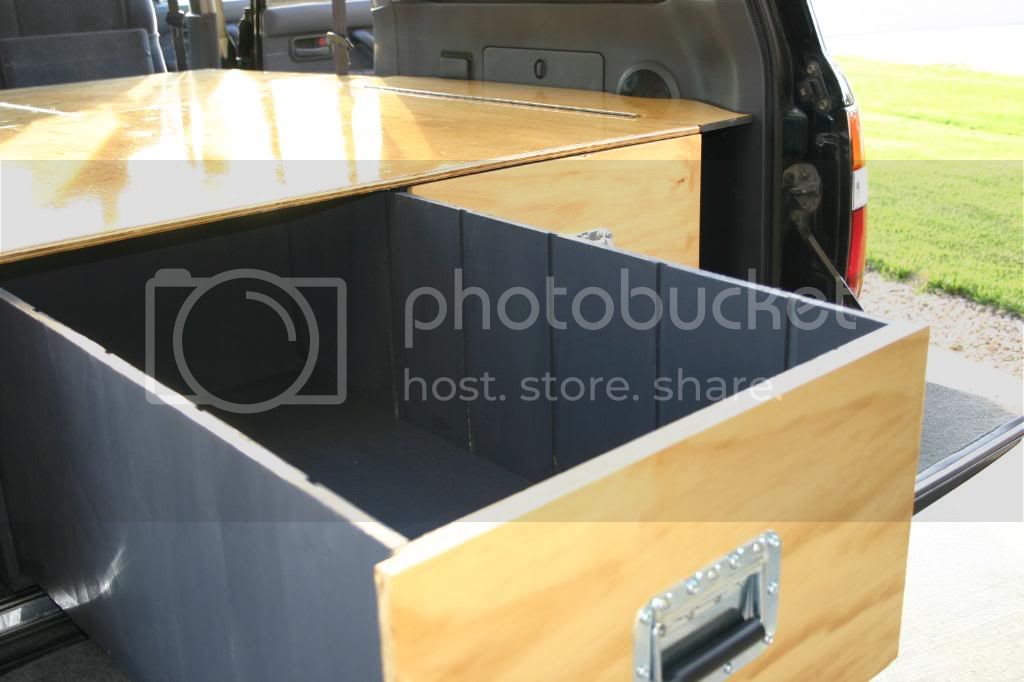
Next we turned our attention to making a storage drawer. Not rocket science here, just a simple box. Turns out our water jug will even fit in one of the drawers if need be:
As a slight tangent to this whole drawer project, I also decided to build one drawer as a camp kitchen. Some people like to call these a chuck box, and the Boy Scouts out there (myself included) may know them as a Patrol Box. I did some research on these over the web as well (Drifta in Australia makes some gorgeous ones), and came up with a simple design that I could construct. It should be noted that even at 30 years old, prior to this weekend, I’d never run a table saw before – I’ve always been more of a metal worker. I’ve used jigsaws, circulars saws, routers & other small powered woodworking tools, but never tackled a project like this. Anyways, I digress. Here’s an early shot of the kitchen box:
Keeping things simple, I wanted room to store our camp stove, water container & other miscellaneous cooking & cleaning supplies. Here’s the general layout – any open space will be used for storage of other necessities:
A little more work, and I had a hinged lid, as well as a hinged front that would serve as work surfaces if needed:
A couple coats of Minwax Clear Gloss Polyurethane, as well as some Formica I picked up off Craigslist for free, and the kitchen box was really coming along:
Closed up (the shorter ‘front’ section is held closed with some inexpensive $0.87 push latches from Lowes):
And opened up:
Getting an early start on Saturday morning, we started out by cutting down some ½”, sanded one side, Arauco plywood sourced from the local Lowes.

Before too long, we were starting to see progress:

Many of the drawer systems I’ve seen constructed here and elsewhere, utilized ball bearing drawer slides. While they no doubt provide a smooth drawer pull, they had two major flaws that made me to look for a replacement. First they’re expensive. Secondly, they take away storage space. By the time you factor in the width they consume, and also the height, you lose space which I think is better suited to actually storing things. My alternative? UHMWPE - Ultra High Molecular Weight Polyetheylene. Or plastic, as I like to call it. A friend of mine works for a plastic thermoforming company, and gave me a bunch of this to use – freebie! From wiki:
This results in a very tough material, with the highest impact strength of any thermoplastic presently made. It is highly resistant to corrosive chemicals, with exception of oxidizing acids. It has extremely low moisture absorption, has a very low coefficient of friction, is self-lubricating, and is highly resistant to abrasion (15 times more resistant to abrasion than carbon steel). Its coefficient of friction is significantly lower than that of nylon and acetal, and is comparable to that of Teflon, but UHMWPE has better abrasion resistance than Teflon. It is odorless, tasteless, and nontoxic.

Once we had the basic framework of the box constructed, we stopped to think about how all this was going to be anchored down. While I never intend to roll my rig, there is always a possibility of it happening. Even a good car accident could turn the box into a deadly projectile, so I had to come up with a way to anchor it. I’d seen several other people using turnbuckles to anchor their systems, and I chose to do the same. I used 5/16” tee nuts inserted into the plywood, and installed the rearmost floor tie-downs (the ones closest to the tailgate) at the top, front corners of the box.
The tee nuts, as seen from the ‘inside’ of the box:

And from the outside:

And with the floor mount installed:

This makes for a nice, clean install in my opinion:

Once the forward anchor points were in, we cut out a lid, and temporarily installed the box:

Using an 8” turnbuckle, here is how the front edge of the box is secured (this is the portion directly behind the second row seats):

Since I had relocated one pair of the floor tie-downs to the drawer box, I was able to use the remaining threaded inserts in the body as the anchor point for the rear of the drawer box (closest to the tailgate). I cut some room in the plastic slides for the bolts heads, and bolted it down. If I remember correctly, with ½” plywood, and the carpet left in place, I needed 6mm x 45mm long bolts to replace the factory ones.

And a quick overall view from the rear – we’re making some progress!
Prior to starting any construction, I picked up a water jug from Paul at Equipt Expedition Outfitters. While a lot of people use the Scepter or MFC water jugs, I find them to be a pain to actually use – try filling a cup from them, and it’s like trying to fill a shot glass from a five gallon bucket. These 20L containers from Equipt have a large mouth for easy filling, but also provide a spigot at the bottom to easily fill smaller vessels. Brilliant! Here’s ours in one of the possible stowage positions:

Next we turned our attention to making a storage drawer. Not rocket science here, just a simple box. Turns out our water jug will even fit in one of the drawers if need be:

As a slight tangent to this whole drawer project, I also decided to build one drawer as a camp kitchen. Some people like to call these a chuck box, and the Boy Scouts out there (myself included) may know them as a Patrol Box. I did some research on these over the web as well (Drifta in Australia makes some gorgeous ones), and came up with a simple design that I could construct. It should be noted that even at 30 years old, prior to this weekend, I’d never run a table saw before – I’ve always been more of a metal worker. I’ve used jigsaws, circulars saws, routers & other small powered woodworking tools, but never tackled a project like this. Anyways, I digress. Here’s an early shot of the kitchen box:

Keeping things simple, I wanted room to store our camp stove, water container & other miscellaneous cooking & cleaning supplies. Here’s the general layout – any open space will be used for storage of other necessities:

A little more work, and I had a hinged lid, as well as a hinged front that would serve as work surfaces if needed:

A couple coats of Minwax Clear Gloss Polyurethane, as well as some Formica I picked up off Craigslist for free, and the kitchen box was really coming along:

Closed up (the shorter ‘front’ section is held closed with some inexpensive $0.87 push latches from Lowes):

And opened up:


 .
.