New FAQ topic - Radio Install Aftermarket and others (2 Viewers)

This site may earn a commission from merchant affiliate
links, including eBay, Amazon, Skimlinks, and others.

Romer

fatherofdaughterofromer
Moderator
Joined
Sep 14, 2003
Threads
547
Messages
11,684
Location
Centennial, Colorado
Lots of threads on Radio Installs

Some folks go Scion for the factory look. 4 runner and other radios available.

Some go aftermarket with either the single or double din sized radio.

Lots of options. Here is my suggestion on format. Add more info if appropriate

Year of truck

Radio installed

Removed factory Amp yes/no - why if no.

Cable harness - buy the Toyota one from BB or Circuit city or other

work with existing speakers - even if you upgraded speakers

If you have an LX450 - work with stock sub woofer

Ease of install and steps. e.g., use factory bracket, connected to cable behind radio or removed amp and wired to those connectors, etc.

How's it sound?

If single din, what did you put in the empty space.

Pic of finished product

After thoughts, what would you do different, go for one with aux input? MP3 capability? other?

Post up your solution.


Some helpful hints from other threads

Make sure that the power antenna wire on the aftermarket harness (usually blue) is not connected to the antenna wire on the stereo harness....It causes problems.

I have a question. Its pertaining to the power antenna wire. I see a lot of folks have an issue with it being connected. I don't remember, but does the metra harness have a jumper in it to connect it to two pins? Is it the loop that is cut or do you just not connect the wire to the aftermarket deck at all? If so, how do you make the antenna go up? Im just curious because I just hooked mine up like normal and have the power ant. wire connected. My system would shut down until I had unplugged the factory amp. Maybe that's what the problem was? Not the speaker leads connecting to the amp but the power antenna wire? I never bothered to diagnose what was actually wrong. It just worked after I unplugged the amp. Anyone ever actually figure it out? Why do some of you have issues with the power antenna wire?


from my understanding the 97s are a different animal then the rest concerning the antenna. 97s have the auto up feature as well as the manual buttons where the rest are manual only.

My wiring kit worked fine but was bought some time ago. I think the current ones are designed for the 97s and the rest of us have to adapt it to ours.

Not 100% sure but I think this is how the story goes.


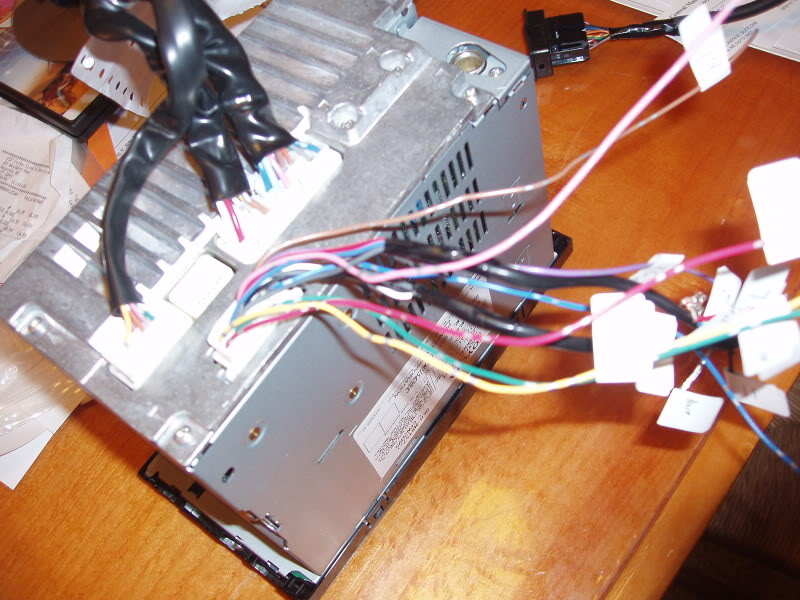
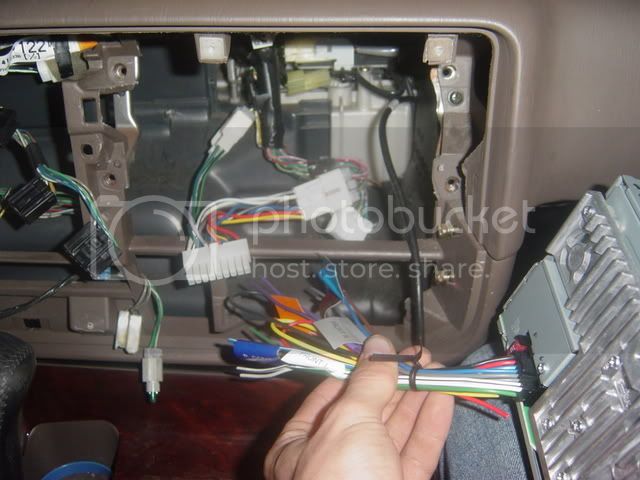
Go to a Best Buy or Circut City and get the Toyota wire harness for the LC. Go behind the right dash speaker and remove the factory amp (crap). Three screws and its gone. Take the wire harness that you got from BB or CC and plug it into the two Grey plugs that were connected to the factory amp. Those are the "out " plugs that go to the speakers. You will now have to go from the wires that come out of the head unit harness to the harness that you just pluged into the grey factory harness. This is simple and you can go to your local hardware store and get a wire crimpimg plyers and extra wire and join the color coded wires from the head unit to the harness you got from BB or CC. It's that simple. It wil take you a couple hours and you will want to remove your entire lower dash and glove box to get at all the stuff but it will be easier if you do. The head unit will screw right into the existing mounting bracket from the OEM double din unit.

Get rid of the original OEM amp and wire around it and you are good to go.

Speakers for the front and rear need to be less than 1 7/8" deep and you can fit almost anything in there with some trimming of the sheet metal.

I just did all of the above and it took some time but it sounds frickin fantastic. I put in a Pioneer 6800 head unit, iPod adapter, Rockford Fosgate 5 1/4" rear door speakers, Kenwood 6" front door speakers and a Kenwood 8" 150 watt amp sub and couldn't be more happy. Yeah, it's not a 80 watt unit but it is 1000 times better than the OEM unit! It gets me to the pain threshold with no distortion and great sound.
.

Here is a thread with Pics of some aftermarket installs:

https://forum.ih8mud.com/showthread.php?t=141293
 
Last edited:
Year of truck: 1997
Radio installed: Scion First Gen Headunit
Removed factory Amp yes/no - why if no.: Not removed, just unplugged.
Cable harness - buy the Toyota one from BB or Circuit city or other: None Needed, plugs worked from stock setup - this is not true for the LX450 as far as I know so be warned.
Work with existing speakers - even if you upgraded speakers: Yes, using stock speakers though.
If you have an LX450 - work with stock sub woofer: Unknown
Ease of install and steps. e.g., use factory bracket, connected to cable behind radio or removed amp and wired to those connectors, etc.:
1. Take out factory radio surround - as I remember there are two screws down where the slide out tray is and two behind the little cubby in the top right
2. Unscrew the factory unit and unplug it
3. Plug the factory cables into the Scion unit and screw it it using the stock screws and locations
4. Trim the dash surround slowly while testing it for clearance. You're going to have to shave the right and left sides of the radio hole.
5. Reinstall the factory radio surround once you have it trimmed correctly.
6. Open the glove box and empty it then press the sides in toward each other while trying to open it even more; it should drop right down.
7. Unplug the factory amp <pending edit of picture of amp>
8. Press the two sides of the glove box together and push it back closed.
What I'd do differently: I'd have waited for a 2nd or 3rd gen unit to come up on ebay since they look much nicer; I'd have also taken more time to correctly trim the radio surround so it looks better. <pending edit for picture of radiosurround>
Pic of finished product:
interior-1.jpg

scion-radio-dark.jpg
 
Last edited:
Year of truck: 1991

Radio installed: Alpine CDA9883, Audio/MP3/WMA CD's, Built-in iPod controls, Sat radio ready

Removed factory Amp: Yes

Cable harness: Scosche TA02

Dash Kit: Scosche UI2222B. Includes dash pocket, EQ mount, and other stuff.

Work with existing speakers: Yes, INCLUDING dash tweets and cargo speakers...Removed those, upgraded the door speakers

Ease of install: Fairly simple, :banana: or :banana::banana:
Steps:
1- Remove dash panel surrounding stereo; two screws behind the ashtray and one screw underneath the ignition.
..A- GENTLY pull the bottom, then the top of the panel to remove it.
....A1- Unplug and pop out the buttons from behind (CDL, RR Defrost, etc...)
2- Unscrew factory stereo; unplug it from the back.
..A- Remove factory brackets from the radio. You will need these later.
3- Wire the aftermarket vehicle and stereo harnesses together. They are color-coded for ease of use.
4- Connect vehicle side of the harness into the two extra plugs that were behind the radio.
5- Attach the new stereo to the factory brackets
6- Connect stereo side of the harness to the stereo.
7- Secure stereo into the dash.
8- Re-attach lower dash panel/buttons.

How's it sound? Excellent, especially w/the subs

Second DIN: Dash pocket, to keep wallet, phone, etc..

Note: Since I had a dash kit, I took a few extra steps to install a supplied dash pocket. PM me if you want to know how. And the iPod will remain in an undisclosed location. I've had two stolen already...

PICS
DSCN0028.JPG
DSCN0029.JPG
 
Last edited:
Year of truck: 1997 FZJ80

Radio: Pioneer DEH-MP5900IB, plays cd's, Mp3's, FM, AM, XM, controls Ipod on the head unit itself, main knob on deck and remote control with wheel that work like the Ipod.

Removed factory Amp: Don't think so, see below.

Cable harness: Best buy adapter that joins to Pioneer harness so it can plug into the factory wiring harness without cutting it.

Work with existing speakers: Yes, including the dash tweeters and cargo area speakers. Upgraded front door speakers to Pioneer 150w 2 ways but forgot part #.

Ease of install: Pretty easy just wire to wire in dash. Hard part was getting the wiring for Stereo and two radio's in dash, XM under shifter console, and in center console.

How's it sound: Pretty good, I would like to upgrade the rear door speakers and add a better sub and amp in the back.

Single din: Put 2 meter in second din and CB in ashtray slot.


After thoughts: I would try to look harder for an adapter cable for the Ipod to mate to my old Pioneer instead of upgrading the whole stereo.


Mo
rotw m1.jpg
lsk m1.jpg
 
A Scion install by JOFS from this thread

IMPORTANT DO NOT SWITCH TO THE NEW HEADUNIT WITH IPOD CONTROL UNLESS YOU GET THE WIRING OFF THE BACK OF THE HEAD UNIT AS IT IS NOT AVAILABLE.


So I wanted to put a Scion head unit with ipod control in My wife's 80. This is the newer upgraded headunit. I bought one off ebay from an auto recycler. Got the unit looked good with all the harnesses in the back cut off a short distance off the radio.
ipodworks001.jpg


Did some background and found that there is a cable off the back of HU to the ipod control that does not have a part number. So there are three cables. One out of the head unit: this links to another cable that has an Ipod port in the console, (PT546-21061), Then from this to the Ipod is a cable PT546-21062.

So I had part of the cable off the head unit that links to the cable I have, So I figure I just need a connector and can just match colors, well the colors don't match. So I match wire numbers from a scion wiring diagram and then put in individual connectors as I could get the unit from cdan or local toyota but I need to get this done today, Plus that is just the connector, not wiring or anything else.
http://img118.imageshack.us/img118/7529/radioconnkq9.gif
http://img93.imageshack.us/img93/9489/radioct5.gif

So I splice in some wire and then do connectors. This took quite some time. The wiring did look like it was patched together as reported on scionlife.com, was different than any toyota wiring I have seen before.

ipodworks004.jpg

ipodworks005.jpg

ipodworks006.jpg

ipodworks007.jpg


So then put the radio in. Usual stuff as all the scion transplants documented before. I have the picts but it is available elsewhere and pretty straight forward, unhooked the amplifier to the right of the glove box and it work right away,

Then checked and rechecked and played around with the mounting a bit, needed to trim the head unit and the surrounding plastic. this is the final result, prior to smoothing the cuts off and firmly mounting every thing back.

ipodworks013.jpg


Take home message, I think it is totally cool to now have a headunit directly driving the ipod that looks factory. However the amount of time I spent dealing with the wiring makes me suggest you think really hard about doing this. Unless of course you get the wiring in its entirety with the head unit. I did call cdan and he sent me all the wiring available. If I did not have the cut of section I would have really been screwed.

I hope this makes sense if it doesn't let me know. Took me over 8 hours to do this, but considering I am unable to use my right hand due to recent surgery could be much shorter.

John
 
Here is my setup. This is a cut and paste from a PM where I was helping out a fellow mudder so the format is different than suggested. It is in my 97 with stock amp removed.

Up front I am running top of the line Diamond Audio 6.5 components(around $750). I chose these because of they are fairly shallow for a speaker that can handle 200watts continuous. The mid grade diamond audios are excellent as well. I prefer these over the focals because they offer an aluminum or silk dome tweeter so you can match your highs with the type of music you listen to. I had to cut the front openings a little and use spacers to make the 6.5s fit. I mounted the tweeters just above the door handles in the leather. I found this gave me optimal sound.

In the rear I had to cut and use spacers as well. The tweeters are mounted in the leather near the door handles once again. These were the diamond motorsports series (around $350).

I also removed the stock dash speakers and installed 1" Diamond Audio tweeters there as well.

For the center channel I use the clarion self powered 1/2 DIN unit mounted where the stereo pocket usually resides. This is not the best sounding option but it makes wiring a lot easier since it has a built in amp.

To power the front and rear I use JL 300/4 amps. The front 6.5's are bridged to one of the amps. The rear speakers and the dash tweeters are ran off the second JL amp.

I run a JL1000/1 to the 12W7 in a sealed box in the rear cargo area.

Phoenix Gold capacitors are used (6farad total.)

0 gauge wiring is ran with a circuit breaker up by the battery.

I have a Kenwood head unit (KDCX917? IIRC) that decodes Dolby 5.1 automatically. Previously I used a Clarion 7" flip out monitor with touch screen I grew tired of the poor sound quality of this unit. The Kenwood has much nicer preouts and better audio controls.

This is my current setup. The subs change every few months. I am extremely happy with the JL W7 series though. These are some of the best subs that I have ever owned.

Sound quality is excellent on CD's that are Dolby 5.1 encoded. When i used to have the DVD setup movies were awesome.

Dynamat is applied to every possible place that you could stick it. I used an adapter wiring harness from a stereo shop to install the head unit. New speaker wire is ran to everything. Amps are hidden in the back panels where the stock sub used to go. It is loud and has excellent sound quality.
 
Excellent write-up from this thread

searching around, one would be hard pressed to find a whole lot of stuff on how to install and configure a new head unit. so as my first write up, and the first modification to the pigbuggy, here it is...

there are a couple ways you could go about doing this. since i was doing this completly on random advice and tid bits, it took a while, and with any project, I ran into a few glitches. nonetheless, it was pretty straight foward, and in taking my time, and researching carefully, i didnt have to go back and redo anything. it should also be noted, that these steps could be a little different depending on the year of your truck, and what kind of head unit you go with. so, keep that in mind.

Cruiser was a 1996
Head unit was a Double Din, Kenwood DPX 301.

You'll need a few things to start:
a wiring harness is a must have.
IMG_3772.jpg

you will probably get some kind of harness with the head unit, and most likely, one end will plug into the back of the unit, and the other end will be a mess of wires that you will need to crimp or solder to the new wiring harness.
DSC01472.jpg

don't try to rip into the factory wiring harness, because you will most likely kick yourself if you do. i'm quite sure it would take a lot of time, be very confusing, and pretty much leave you SOL if you screw it up. rather, buy one from circuit city or someplace else, and it will clip into 2 separate connections on the factory harness. depending on what is on the other end of your new harness, you may not have to crimp or solder at all.

here is the link to the wiring harness that i got. it didn't match my head unit so i ended up cutting it. i think it matches to pioneer or jensen. that being said, check the back of your new Head unit to see what the male end of the harness will look like. count the pins and look at the shape of it. do this before you order, so you know what to get.

http://www.circuitcity.com/ssm/Metr...41015/catOid/-15882/rpem/ccd/productDetail.do

if you cant find one that fits your new head unit, don't waste your money thinking you'll just cut off the one side. go to the site below, and you can buy one for $10 less, and you can just crimp or solder it onto the harness that came with your head unit. unless of course, you like the wiring to be easy, and uncluttered. in which case, for an extra $10 or $20 they have new wiring harnesses that will plug into the factory harness and plug into the back of your new head unit. no soldering, no crimping, nothing to go wrong, just plug it in and go. i would highly recommend it.

http://www.installer.com/wires/

other things of necessity:
Phillips head screwdriver
flat head screwdriver
wire cutters (if you plan on soldering or crimping.)
wire strippers (if you plan on soldering or crimping.)
wire connectors(...yet again.)
flashlight
i used 10 or so styrofoam cups to keep the screws organized.

I started by taking the screws out from under the ash tray, and removed the useless cubby trey thing to take out 2 more screws behind that.
DSC01461.jpg

before i completely took off the control panel, I turned the ignition (dont turn on the car) pressed the brake, and moved the shifter back to D. this will made taking off the panel a little easier. the right side of the panel came out fine, but i had to run the flat head screw driver across the top of the left side, gently prying on the driver to release it.
DSC01463.jpg

there are be 3 plugs across the top of the back of the panel. I unhooked those, and worked my way down to the climate control plugs. took those out, and went to the cigarette lighter and removed those two plugs. the last two didn't really need to come out, so i just let the panel rest on the seat with the last 2 wires connected. you should have enough room to do what you need to do.
DSC01465.jpg

there are 4 Phillips screws on the old head unit. i took those out and gently removed the unit until i could access the wires in back. unhooked the wiring harness and then used the pliers to remove the other cable (it's black, round, and connects to the antenna) the head unit was now free.
DSC01466.jpg

DSC01467.jpg

I was able to reuse the brackets from the original HU. just unscrew them from the old, and put it back on the new.
now, next was cutting and crimping the wires. I ended up ordering the wrong part, so i had to cut the plug i didn't need off. *if all you need to do is connect your new harness to the factory harness and the back of your HU, cut off the blue wire. i believe that is an antenna control and could really screw things up.
IMG_3772.jpg

IMG_3774.jpg

I started by stripping the ends of the wires. the cables were color coded so matching them wasn't too difficult. i had 3 wires i didn't use. a mute wire (brown), the blue antenna wire (cut this wire from both wiring harnesses.) and a blue and white wire for an external amp. (i didn't have one) matched the wires from the HU harness to the wires of my new harness and twisted the ends together.
IMG_3775.jpg

i then took the wire connectors and screwed those on. came up with a jumbled mess like this, but it worked.
IMG_3776.jpg

I have and auxiliary input in the back of my new unit, so i can hook up my mp3 player. i got the necessary input adapter (6ft. long) and then proceeded to devise a plan so no excess wires would show. i ended up taking out the center console, and the one in front of it so i could run the wire underneath those.
IMG_3777.jpg

after i removed those, and ran the wire underneath, i went up through the bottom of of the center console, through the backside of the middle part, and up through to the very top of the console, following the path of the built in telephone wire. worked out pretty slick.
IMG_3778.jpg

IMG_3790.jpg

I then took my mess of wires and hooked up harness to the 2 gray plugs in the factory plug (the white one on the factory harness was not be used) I then pluged the antenna cable into the new head unit, and then finished it off by connecting the wiring harness to the head unit.
IMG_3781.jpg

I put the head unit in, (didn't screw it in yet) aligned it with the screws, and then sorted out the mess of wires behind the unit so it would fit properly. then i screwed it in and made sure it worked. (make sure you do this before you go and put everything back together, because if it doesnt work, you'll have to take everything apart again.)
IMG_3783.jpg

then it was just a matter of putting everything back together. started by hooking the plugs back into the control panel, and then the two screws under the ash tray, and behind the pocket.
IMG_3784.jpg

since most (if not all) new HU's come with built in apms, theres no reason to use the crappy factory amp anymore. so, i removed the glove box, and took a look around.
DSC01459.jpg

the amp is the sliver box directly behind the speaker next to the glove box. there were two sets of wires coming out of it, so it was a simple matter of just unplugging them. some people prefer to unscrew the whole thing all together and completely take it out, but i just left it.
DSC01476.jpg

screwed in the glove box and then sat back to admire my handiwork.
overall this wasn't at all a very complex job at all. if anything, i hope some find it helpful in sorting things out. thanks for reading.
IMG_3788.jpg
 
Here is a good post on the LX450 wiring

Here's the lowdown specific to the LX450 OEM stereo:


The headunit has no built in amplifier. The head unit sends its low level output (LF/RF/LR/RR) through the wire harness to a small amp behind the US Passenger Side dash speaker which is to the right of the glove box. This amp then drives 5 channels (LF/RF/LR/RR/Sub) and has the stock subwoofer's crossover built in. The front dash speakers are tied in with the front door speakers. I can't remember if they are in series or parallel. Just remember to unhook those dash speakers if you ever replace the door speakers with aftermarket units or you may overload the oem amp. The bass knob on the oem head unit is not a gain control just for the sub. It will also affect the bass in the other speakers. It's a typical bass knob.


Here's what you need to do for your LX:


1. Make sure to unhook your battery before working on wiring projects. Buy an amplifier wiring kit or acquire the equivalent bits and install the wires and fuses. 8 gauge should likely be sufficient, but the wire gauge needed depends on max current draw of the amp and length of wiring run. The install directions for your basslink should have a table of wire gauge recommendations, along with the recommended fuse size for the basslink. If not, search online for this info. Fuse your power wire within 12" of the battery and 12" of the basslink on the other end. This protects the amp, and also the wire in the event of a short.


2. Get to the wire harness powering the stock 4" sub. There are 4 bolts at the base of the center console, plus a couple inside the console storage bin. The trim piece around the changer snaps out (carefully). The console lifts up and back exposing the stock sub and cd changer. I think you can then access the harness to the sub.


3. Unhook this harness, and extend the wires to the high level inputs on your Basslink. There are different ways to extend these wires, but whatever method you use make sure it's a solid, secure connection and electrically well insulated. A shorted speaker wire will cause the oem amp to behave irregularly and lead to a lot of troubleshooting. I believe the basslink has a sensing circuit to turn itself on when it senses a signal at it's high level inputs. A turn on lead should not be needed.


4. If you have the remote level control for the basslink, run that cable up near the driver and find a convenient place to mount the control.


5. Secure the basslink to the vehicle. Flying subwoofers can ruin your day, or your life.


6. :beer:

7. Tie up and hide any loose wiring

8. Put the center console back in

9. Put in fuses and then hookup the battery

10. Turn on the stereo, dial the knobs to your satisfaction, and enjoy better bass. I don't know the crossover frequency for the oem LX sub, but it's a little high for a sub located in the hatch area. A lower crossover frequency will help it blend with the front speakers better. You should be able to adjust this lower on the basslink. 60Hz would be a good starting point, and adjust to your liking from there.


HTH,

-Tim
 
I'll post up my install next week. After I finish and finish documenting it.

I went with a Clarion in dash dvd with 7" screen and the Clarion HD Nav systems for it. I got them both refurb for $550 (normally $999 each part) If anyones interested in where I got it let me know.
 
Here is a great write-up from this thread

I installed a Pioneer AVIC-D3 HU/Nav system yesterday with Sirius and iPod cord :cool:

158957933-M.jpg


After owning a few German cars, this install was cake - didn't have to open any manuals. Procedure for installing this kind of system:
  • 1. Remove Ash Tray
    2. Unscrew two bolts behind ash tray
    3. Work fingers behind black trim piece to get to the two clips above the "business card holder"
    4. Remove trim and unplug necessary plugs for full removal (you can leave a few in and fight with your shifter - I did...it sucked)
    5. Remove radio (2-4 screws depending on what you have) - if double din, be sure to remove the two side holders from the radio itself (4 screws)....don't be upset if only 3 or two of those screw spots actually fit up to your new radio (only 3 on each side fit on mine)
    6. Run all your wires and do all needed splices (easier said than done) - this includes installing any extra modules (sat radio, iPod, etc.)
    7. Plug wires into new radio and loosely screw back into dash
    8. Test fit dash trim piece
    9. Test connections (turn radio on)
    10. Finalize everything and put the car back together
The whole project took me about 3.5 hours. A half hour of it was due to the shop who sold me the radio telling me I had bypass the factory amp. I pulled the amp out and ran all my wires before discovering the harnesses didn't work on the amp plugs....helping me to realize I didn't have to bypass the amp :doh: Another 30 minutes was wasted trying to find spots to stash the Sirius module.

I couldn't come up with a better spot for the Sirius module other than the glove box because I didn't want to run wires all over the place. I can fit the iPod, Sirius box, some registration/insurance stuff, and my owners manual -that's about it now.

The Sirius and Nav antennas were ran around the glove box, around the factory amp, down past the front dash speaker and up the side of the dash to come out at the base carpeting of the A pillar - signals are awesome! The AVIC-D3 does not require splicing in the VSS wire, so no worries there - it is mostly plug and play.

I had to put two small slits in the top corners of the trim around the head unit to help it flex for fitment.

158957935-M.jpg


iPod controls on the D3 are the best yet!

158957938-M.jpg
 
Excellent write-up on a Scion install into an LX450

https://forum.ih8mud.com/80-series-tech/218369-how-i-installed-scion-1808-hu-into-my-lx-450-a.html

How I installed a Scion 1808 in my LX 450

I recently installed a Scion 1808 in my LX 450. I could have gone with an aftermarket unit and got more features, but I wanted it to look as stock as possible because I am not into that kind of shiny bling stuff that most aftermarket stuff has. I got the unit off ebay for $150. If I were more patient I could have got it cheaper.

There are two issues I had to wrestle with: 1) trimming the dash, and 2) the wiring. The trimming was easy, but rather than use a saw or an exacto knife I used my dremel tool and a coarse 0.5" diameter sanding drum. This afforded me great control over how much I took off and avoided chopping my hand off. I wound up having to take off more than I hoped, but it looks good. I did not want to cut up my dash in case I was not happy with the Scion unit so I got a Scion install kit from Frys that fills in the gap made by the wider than 2*DIN Scion unit. I also got a spare dash.

The Wiring was not as hard as I thought. I poured over the EWD for my truck and the scion. I concluded that its only from the Lexus amp on is the wiring not standard Toyota. This is the amp behind the passenger side tweeter in the dash. The plug for the LX amp is an S15 (for fronts and power, and a S17 plug for rears. The back of the scion takes an R2 plug (same as the S15) and an R3 (same as the S17). To confirm the wiring would work I plugged the scion unit in and it would power up, but no sound. I got sound on the fronts once I unplugged the S17 plug for the rears. The problem was LX the subwoofer. Once the sub was removed everything worked. Here is the pinout:

LX__(S15)_____Scion_(R2)
1__FR+________FR+
2__FL+________FL+
3__PWR_(acc)__PWR_(acc)
4__PWR________PWR
5__FR-________FR-
6__FL-________FL-
7__GND________GND
8__X__________PWR ANT
9__X__________X
10_X__________Illum+

(S17)_________(R3)
1__RR+________RR+
2__RL+________RL+
3__RR-________RR-
4__WF+________Rem._on
5__WF-________Illum-
6__RL-________RL-

I did not want to cut into my stock harness, so I went to the local wrecking yard and found a R2 4runner and yanked its noise supression harness. It had both male and female S15 and S17 plugs. I then cut this and extended the wires to go from the LX amp to where the Scion would be installed. I did not solder the joints. I used non-insulated butt end connectors. Have a look at your truck, do you see any soldered joints?

For the power antenna, I used the PWR ANT on pin 8 off the scion, and pin 8 on the the R1 on the LX off the LX radio (green not violet as in the ewd). This was the only place I decided to cut into my stock harness. The scion unit uses this pin for an antenna amplifier. The power antenna mini-ecu on the LX needs only a 12V signal to work and this is what the scion unit provides. It worked exactly as it did before the scion was put in until the mast broke, but thats a different story.

The scion is always lit because it uses LEDs for illumination (pin 10 on the S15). The dimmer does not work on the radio, but the light is subtle at night and dimming is not required in my opinion.

For the IPOD control I found a fellow that wrecked his scion on craigslist in Dallas. For $50 he sold me all the wires and connectors from the back of the scion unit to his centre console including the AUX plug. This harness just plugs in the back of the Scion unit. I have it wired to my centre console (now a cruiser console since there was no need for the centre console subwoofer. That little sub hardly worked at all anyway). I have not finished this part of the install yet. The wire just kind of hangs there and I plug in my IPOD and rest it on the centre console next to the tcase shifter. Nor have I finished installing the AUX plug. Its still too cold here in Calgary. Maybe next week I will finish.

Here are some pics:

First pic is me testing the harness I built. The second is the final install. The little red thing in my lighter socket is a rechargeable LED flashlight from Spotlight:

Car Flashlight: Spotlight LED In-Car Torch Finds Fluff Down the Side of the Car Seat

attachment.php


attachment.php
 
Year of truck: 1995 FJZ80
Radio installed: Scion Alpine head unit Toyota part number 08600-52838, HBTY501A
Removed factory Amp yes/no - why if no.: Not removed, just unplugged.
Cable harness - None require, used the 2 grey plugs that weren't used for the factory 95 unit. Did not use the white plug that was used before.
Work with existing speakers - even if you upgraded speakers: Yes, using stock speakers.
Ease of install and steps. e.g., use factory bracket, connected to cable behind radio or removed amp and wired to those connectors, etc.:
Used factory brackets but had to trim the leading edge before it would screw on. Middle clip that holds the surround to the dash had to be removed. Small access hole cut into Scion unit to clear the heater control mounting screw. Dash clearanced so that the HU would fit flush inside dash. I am betting the HU could be spaced out 1/4 inch and the dash would not need clearanced.

Thank you LexusBen and thank you Toyota;)
DSCF5417.jpg
DSCF5422.jpg
 
1996 Lexus LX450

Pioneer Pioneer FHP8000BT

*removed factory amp (but will connect it later to drive the sub-woofer seperately)

*Lexus CD changer is not connected but you can make it work by purchasing a seperate cable. (I didn't want to wait and also did not feel the need to have the cd changer)

*Wiring harness used (look at thread for appropriate harness- there are 2 avail)

*stock speakers

*headunit install is straighforward. re-use brackets off old headunit, plug-n-play. no alterations to dash required.

*iPod, USB, CD's, Bluetooth phone (address book storage as well), BT music, cd changer control, aux audio port, remote control w/keypad

*sounds good but I miss the Lexus sub but I think I can wire it up with further thought. simple, but just didn't think of it at the time.

Thread to more pics and info
https://forum.ih8mud.com/80-series-tech/223899-pioneer-2din-headunit-bt-usb-ipod-aux.html
2534452303_81e6cccfd9_b.jpg
 
Last edited:
looks like one from a Land Rover i could be wrong
 
1997 Land Cruiser

Sony XAV-W1 (Double DIN Touchscreen DVD HU w/5.1 Surround)

Unplugged Factory Amp behind dash and removed factory sub and amp from rear quarter panel.

Bought Toyota plug and play harness from Circuit City and soldered/heatshrunk all connections to the HU's harness.

It played through the factory speakers and the sound was night and day difference from the factory Toyota HU.

I later replaced the factory door speakers with Pioneer TS-G1643R's and kept the stock front and rear tweeters and it sounds even better.

The installation was straight forward and a direct bolt in with no modification to the dash, however, I did have to slice the lower part of the factory wood trim as the fit was too tight for the tilt screen to operate without binding (see the "A/V" link in my sig for more details)

The sound is incredible!!

I added a pair of 10" KEF KAR subwoofers and a Clarion 7 speaker center channel unit behind the dash.

I also added a pair of 9" LCD monitors in the rear, auxiliary inputs for games, a mic input for Karaoke/Electric guitar and a stand alone DVR unit that records my driving from multiple cameras.


Some photos:

centerchannelhacked9.JPG

newsuperiorredwoodz13.JPG

newsuperiorredwoodz21.JPG

newsuperiorredwoodz9.JPG

pioneerdoorspeakerz6.JPG

pioneerdoorspeakerz11.JPG

FZJ80KEFSUBZ.JPG

FZJ80KEFSUBZ4.JPG

clovermvr1.JPG

minidvrinstall2.JPG


Short video showing how the DVR works.

YouTube - Near miss caught on Cruiser cam


If I had to do it all over again, I don't think I would do anything differently other than the placement of my subwoofer controller.

I have it mounted below the ignition right in front of the hand throttle hole....

Now that I want to install a hand throttle, I have to relocate the controller somewhere else :doh:
 
Year of truck- 1993

Radio installed - Equinox ATV AM/FM/TV/DVD/CD/MP3 with AUX touch screen LCD head unit

Removed factory Amp yes/no - NO. Don't know if Mid-East spec units came with one.

Cable harness - buy the Toyota one from BB or Circuit city or other. Hacked pigtails off the original stereo and mated it to new stereo.

work with existing speakers - even if you upgraded speakers. Will work with stock speakers

Ease of install and steps. e.g., use factory bracket, connected to cable behind radio or removed amp and wired to those connectors, etc. - EASY. Shop labor to replace radio is just around equivalent to US$7.00 .

How's it sound? - Not an audiophile, sounds ok to me.

Pics to follow. (I'm at work).
 

Users who are viewing this thread

Back
Top Bottom