
I recently finished installing my dimmable lightforce 170s on the Slee shortbus bumper and finally got to use them in a real situation. I'm pretty happy with this setup.
First a picture of the front end:

My goal was to provide very bright wide angle lighting, with the added ability to provide softer area lighting for setting up camp at night. I also wanted to be able to set the aux lights come on only with the high beams, along with manual on and off.
I went with the lightforce 170s, and added the wide angle lenses. They provide lots of light, and give great wide angle visibility at night.
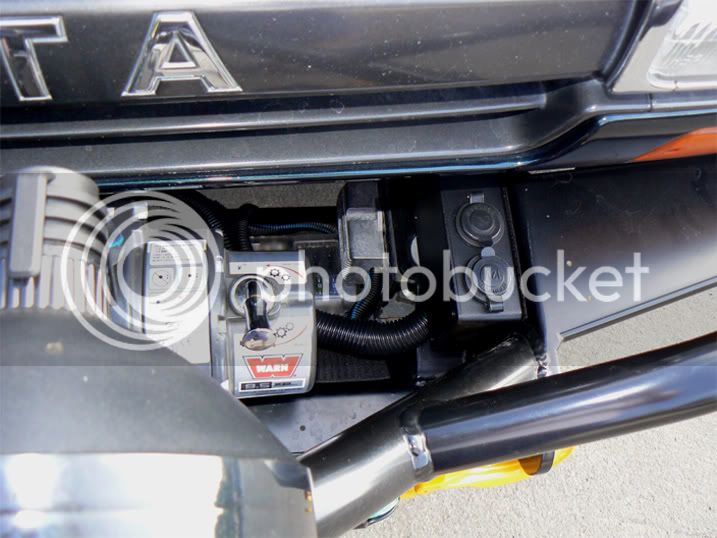
Since the Slee bumper has so much room in the winch box, I decided that while I was at it I'd add a power station up front, with both 12v cig style connector and a high current connector as well.
I decided on this basic schematic, although some connections, i.e. switch illumnation, are not shown:
**EDIT** I had to make one change after I drew this schematic. It turns out that the hot leads at the high beams go hot whenever the high beams or the mains are on. It's the path to ground that is controlled by the OEM high beam switch. I had to make a "not" gate to compensate for the high beam mirror mode to work.
I used the Blue Sea 7505 20 amp digital dimmer:
It's digital, and I know it's using pulse modulation because of the slight humming I hear at low output. It should be very efficient, in spite of the big heat sink. Marine electric designs are always very conservative.
I used extra rear heater and antenna up/down switches for in-dash control:
The camera flash makes the buttons look a bit sloppy, but in real life the color matches pretty well. I used vinyl self-adhesive film and an inkjet printer.
And I used a generic water-tight plastic box to house the connectors. I used a 40 amp trolling motor connector for the high current, and added the matching plug to my high current devices. This gives me a quick and easy way to connect my compressor, an extra inverter, etc. The trolling motor connector seemed like the most convenient physical shape that provided a high current connection. The cig connector is there for anything else up to 15 amps.
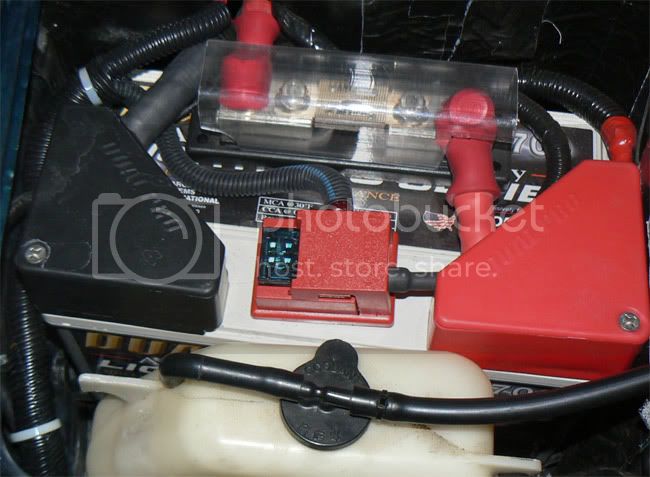
I added a 8 guage wire with a 50amp fuse to run power from my 2nd battery to a blue sea fuse box, and distribute the power from smaller fuses in the box.
I used part of the slee upgraded wiring harness to tap into the high beams and send it to the control switch.
This project turned out to be a lot more difficult than I thought, and I ended up installing it twice. I got it working with the first install, but it was a bit of a birds nest. I then re-did the controls with some seven strand marine signal wire, and essentially built a harness.
Even though it was a bit of a bitch, and it turned out to be pretty expensive, I'm happy enough with the results that I think it was well worth it.
First a picture of the front end:
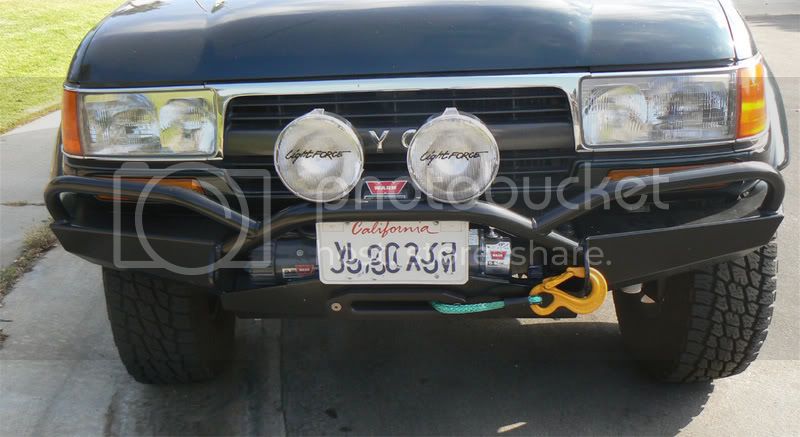
My goal was to provide very bright wide angle lighting, with the added ability to provide softer area lighting for setting up camp at night. I also wanted to be able to set the aux lights come on only with the high beams, along with manual on and off.
I went with the lightforce 170s, and added the wide angle lenses. They provide lots of light, and give great wide angle visibility at night.
Since the Slee bumper has so much room in the winch box, I decided that while I was at it I'd add a power station up front, with both 12v cig style connector and a high current connector as well.
I decided on this basic schematic, although some connections, i.e. switch illumnation, are not shown:
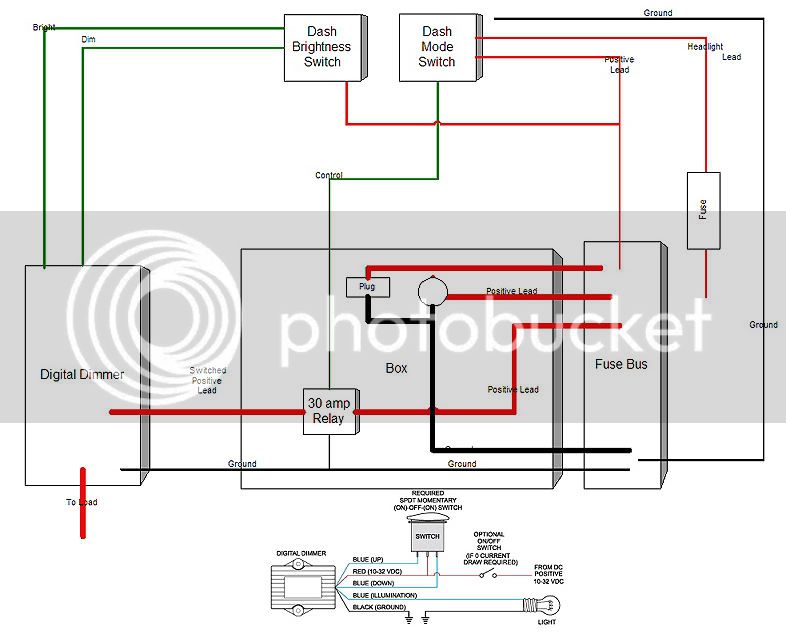
**EDIT** I had to make one change after I drew this schematic. It turns out that the hot leads at the high beams go hot whenever the high beams or the mains are on. It's the path to ground that is controlled by the OEM high beam switch. I had to make a "not" gate to compensate for the high beam mirror mode to work.
I used the Blue Sea 7505 20 amp digital dimmer:

It's digital, and I know it's using pulse modulation because of the slight humming I hear at low output. It should be very efficient, in spite of the big heat sink. Marine electric designs are always very conservative.
I used extra rear heater and antenna up/down switches for in-dash control:

The camera flash makes the buttons look a bit sloppy, but in real life the color matches pretty well. I used vinyl self-adhesive film and an inkjet printer.
And I used a generic water-tight plastic box to house the connectors. I used a 40 amp trolling motor connector for the high current, and added the matching plug to my high current devices. This gives me a quick and easy way to connect my compressor, an extra inverter, etc. The trolling motor connector seemed like the most convenient physical shape that provided a high current connection. The cig connector is there for anything else up to 15 amps.
I added a 8 guage wire with a 50amp fuse to run power from my 2nd battery to a blue sea fuse box, and distribute the power from smaller fuses in the box.
I used part of the slee upgraded wiring harness to tap into the high beams and send it to the control switch.
This project turned out to be a lot more difficult than I thought, and I ended up installing it twice. I got it working with the first install, but it was a bit of a birds nest. I then re-did the controls with some seven strand marine signal wire, and essentially built a harness.
Even though it was a bit of a bitch, and it turned out to be pretty expensive, I'm happy enough with the results that I think it was well worth it.
Last edited:

