cruiserpatch
Supporting Vendor
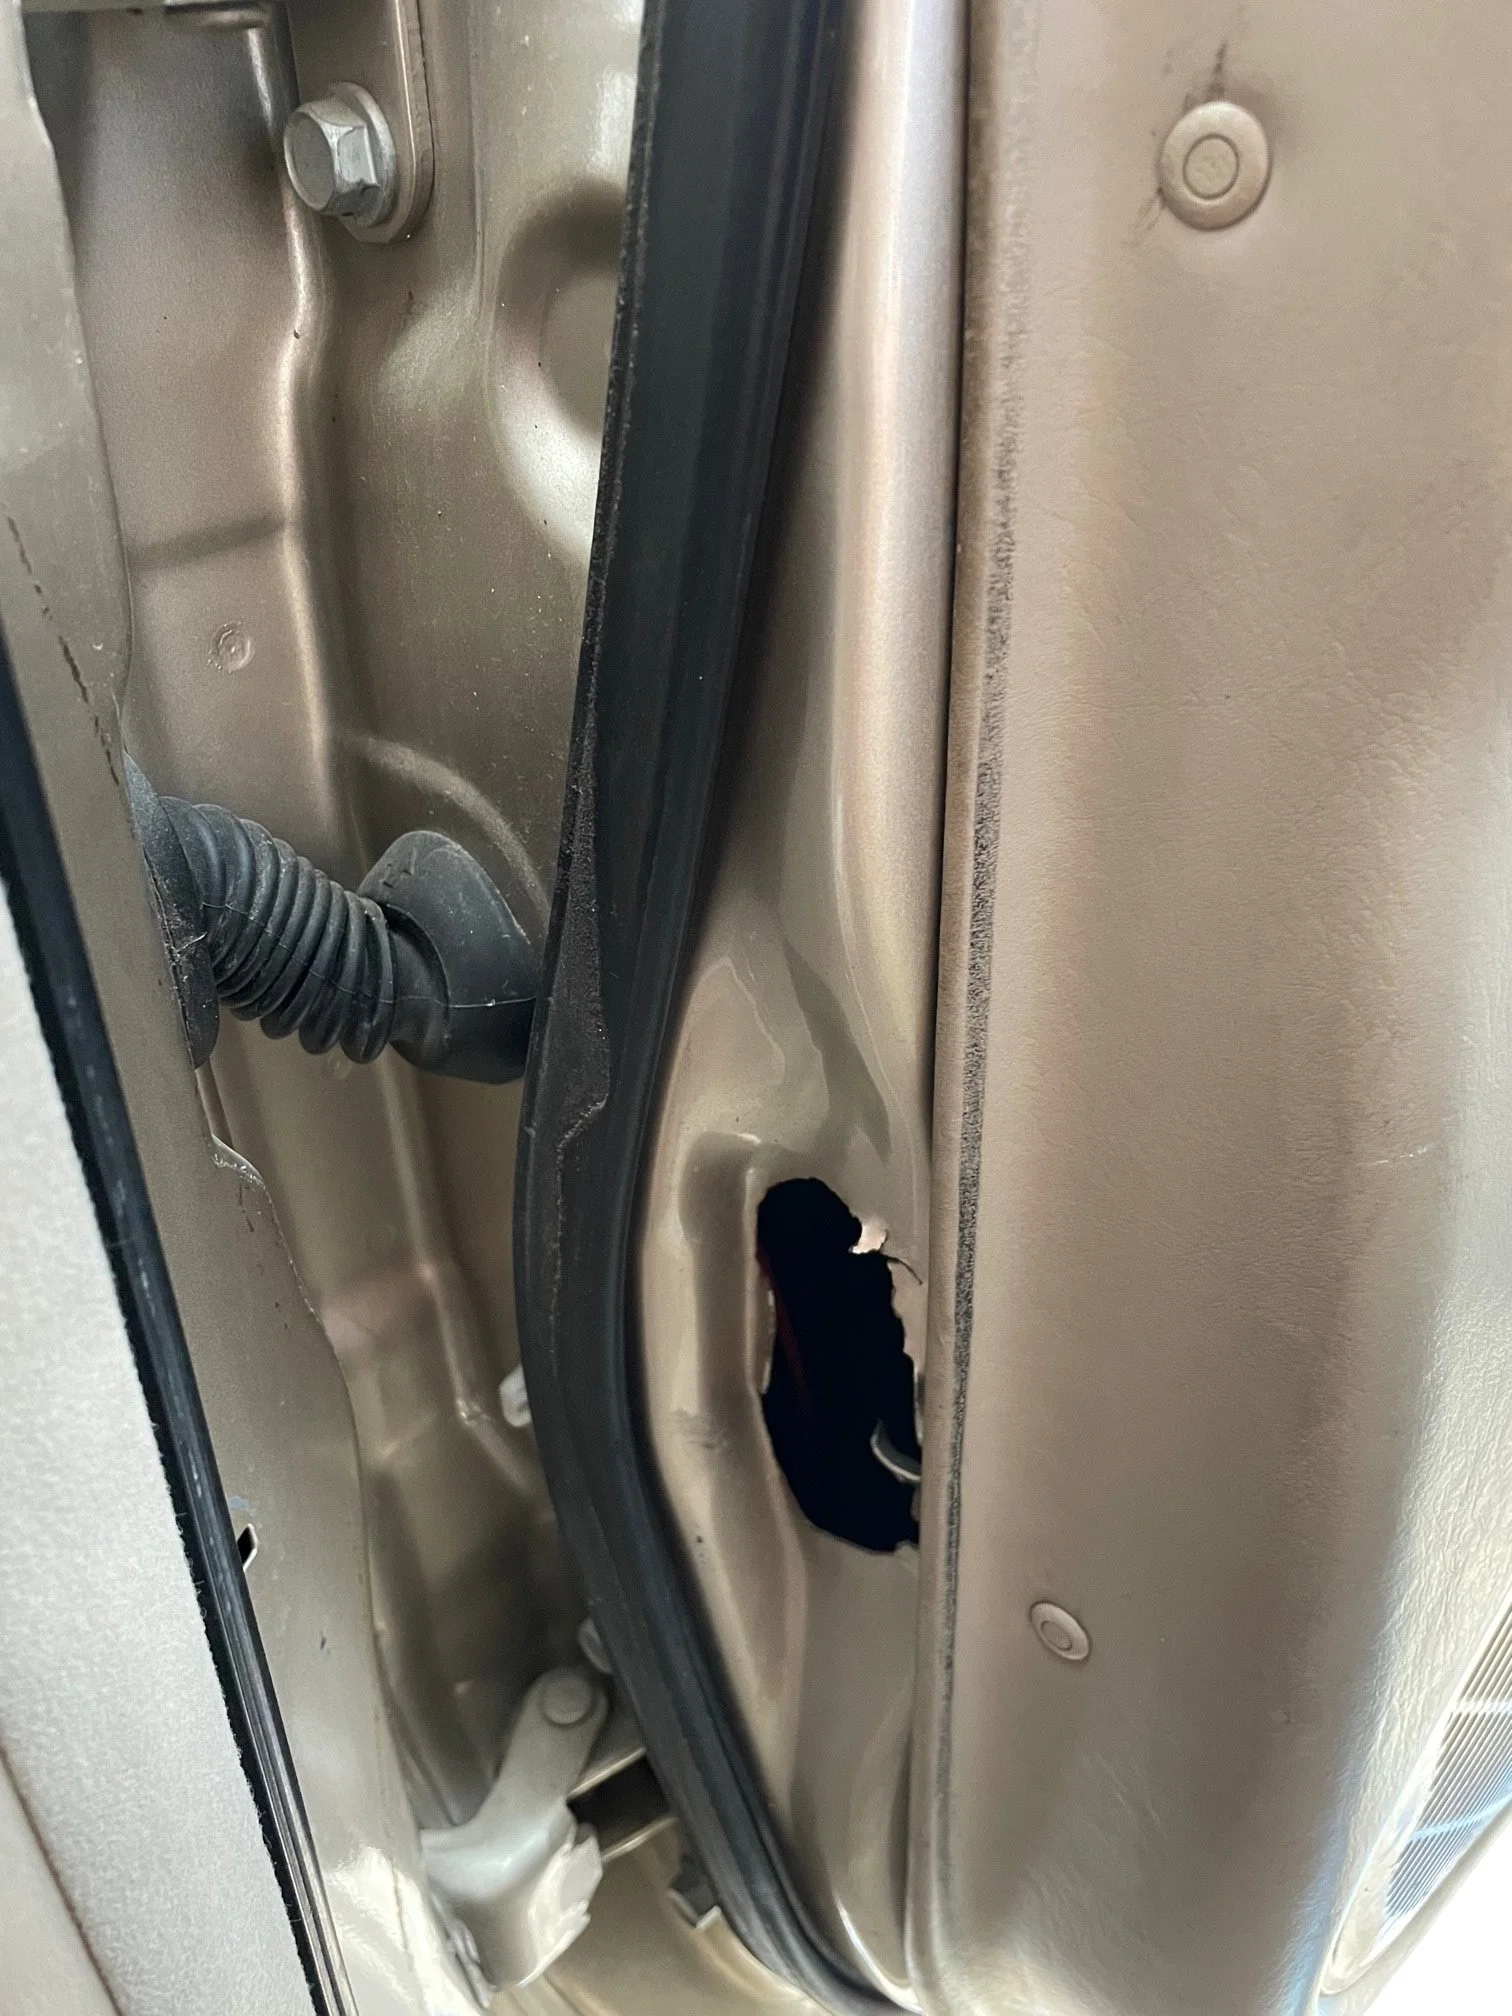
I bought my '99 LX in 2020 right before the price spikes. When I took it home, I noticed that the sheet metal had small cracks forming around the rear door props.
Unfortunately I did not address it immediately and this happened:
***Check your rear doors for signs of this. Address it immediately if you see cracks beginning to form.

I finally got around to fixing it almost two years later. I've been living in misery every time I had to open the rear doors. My thighs had bruises from one trip because the wind blew the door into my leg
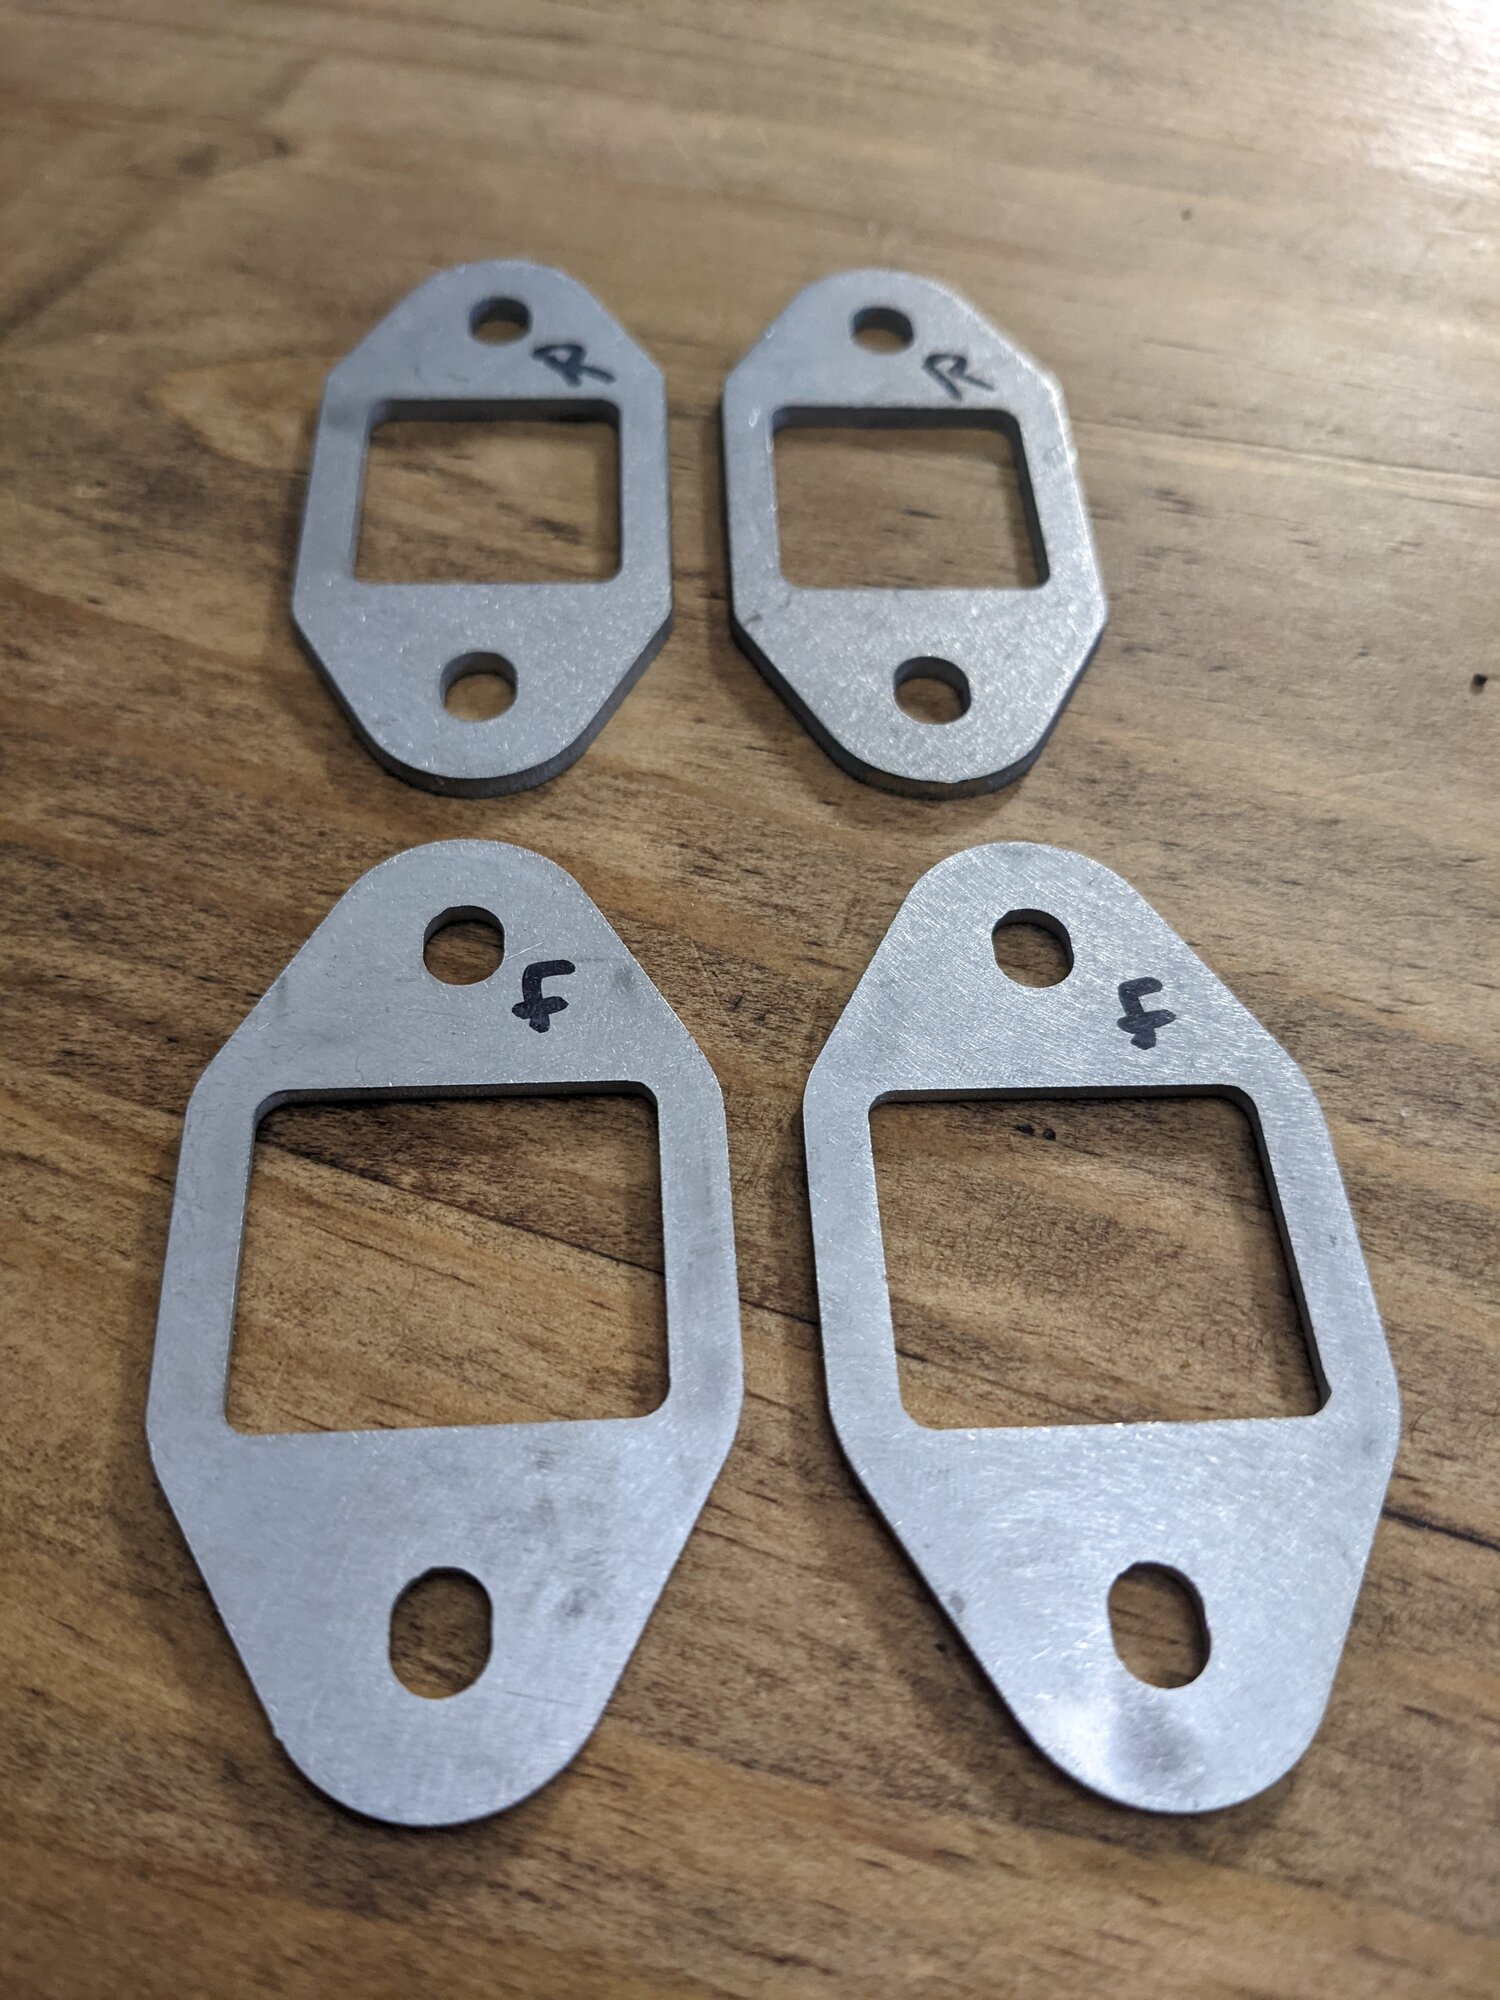
First I used a file to clean up the sheet metal around the carnage, then I sprayed some white paint on the bare metal to keep it from rusting. Once the door was prepped, I used some scrap metal from a useless Ironman front bumper skid plate that didn't fit to fabricate a reinforcement plate with enough space to fit the elbow of the door prop through the big hole.
I used a cardboard template to approximate the location of the holes, shape of the scrap, and overall prototype. Once the metal plate had been cut I used the 10mm nuts to hold it roughly in place, as well as the 10mm bolt to hold the elbow onto the body. I used a ballpeen hammer to shape the metal plate into a rough fit on the door, while simultaneously tightening the 10mm nuts, forming the plate to the door.
Once I was satisfied with the fitment, I drilled two 3/8" holes through the plate and the door above and below. I inserted the rivets to test fit and make sure I was ready to start filing, prepping, and painting.
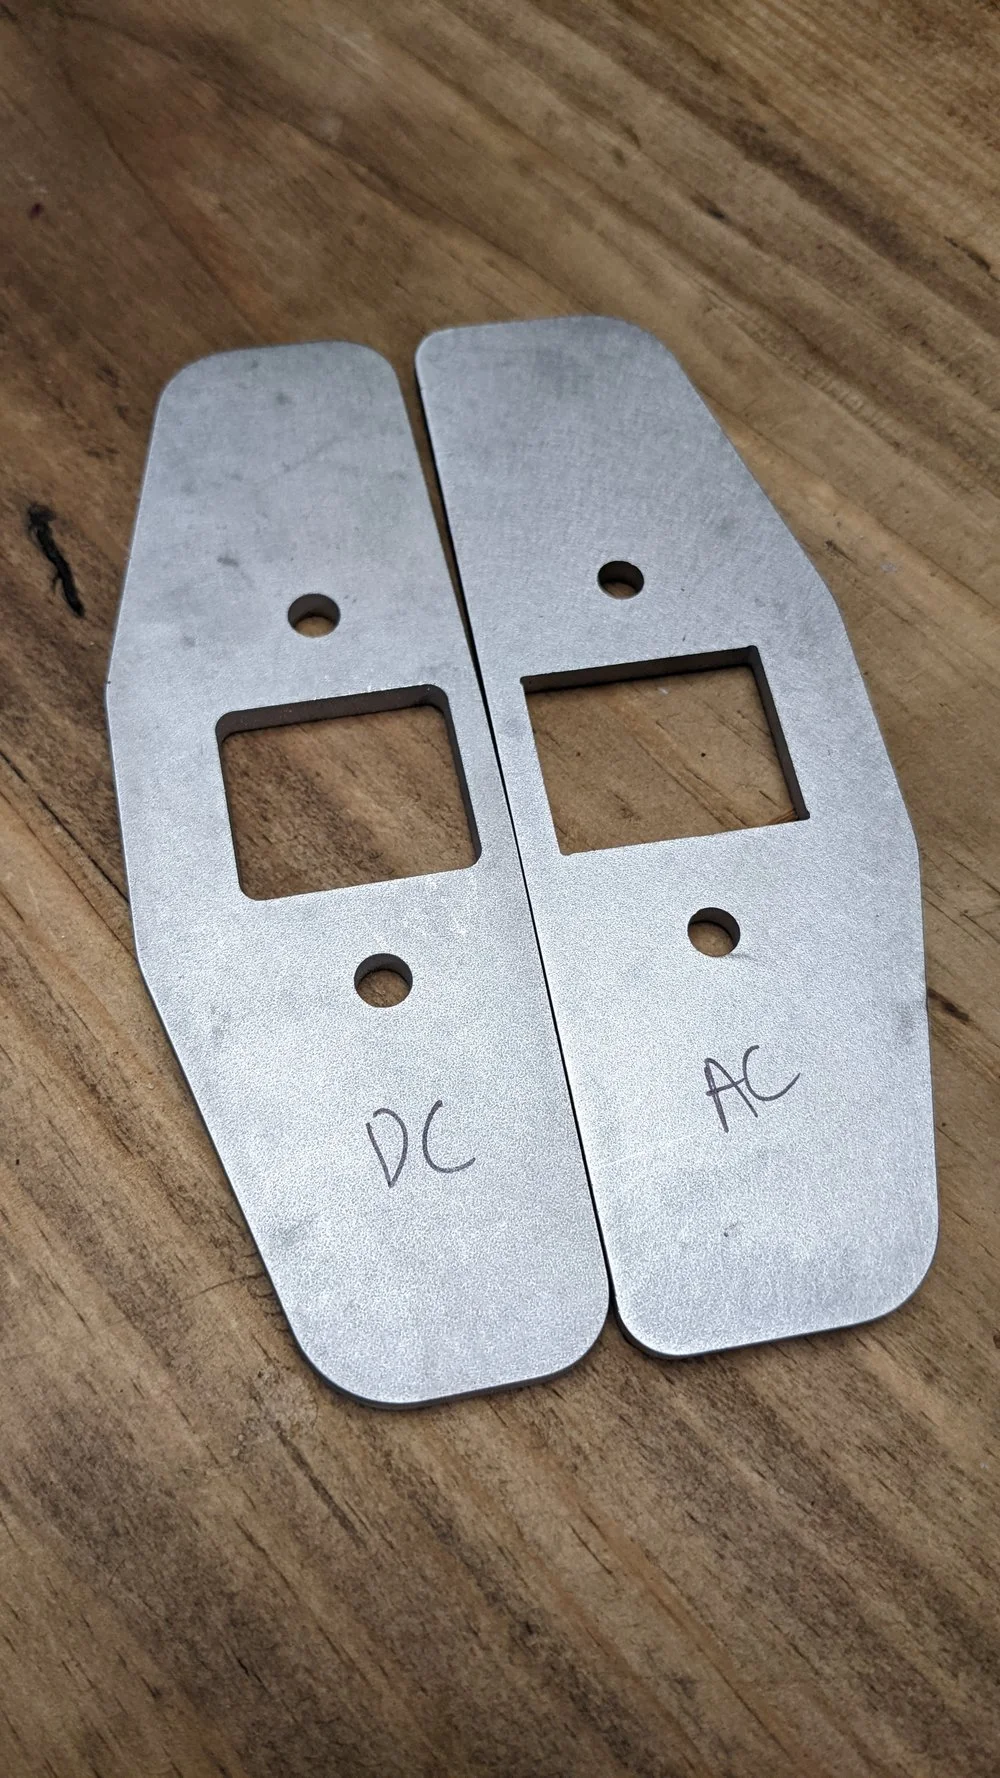
A few coats of paint later, it was time to install my little reinforcement plate. Attach elbow, lovely install 10mm nuts, slowly tighten them down with rivets inserted into holes, but not yet crimped. Once the 10mm nuts are torqued and the 10mm bolt for the elbow is in place, rivet the sheet metal down with large washers on the inside of the door panel. These add extra strength. Alternatively, you could fabricate two more identical pieces and mirror the curves, then use them instead of washers creating a sandwich.
(be careful with 10mm nuts - I wound up shearing off a stud - more on that in a follow-up)
Lube door prop with some form of grease, then slowly close/open door to test that it works. Be gentle for the first few times just in case. You don't want to mess anything up worse if the geometry isn't quite right.
The door props can be rotated and used interchangeably (marked with RR and RL depending on application).
Unfortunately I did not address it immediately and this happened:
***Check your rear doors for signs of this. Address it immediately if you see cracks beginning to form.
I finally got around to fixing it almost two years later. I've been living in misery every time I had to open the rear doors. My thighs had bruises from one trip because the wind blew the door into my leg
First I used a file to clean up the sheet metal around the carnage, then I sprayed some white paint on the bare metal to keep it from rusting. Once the door was prepped, I used some scrap metal from a useless Ironman front bumper skid plate that didn't fit to fabricate a reinforcement plate with enough space to fit the elbow of the door prop through the big hole.
I used a cardboard template to approximate the location of the holes, shape of the scrap, and overall prototype. Once the metal plate had been cut I used the 10mm nuts to hold it roughly in place, as well as the 10mm bolt to hold the elbow onto the body. I used a ballpeen hammer to shape the metal plate into a rough fit on the door, while simultaneously tightening the 10mm nuts, forming the plate to the door.
Once I was satisfied with the fitment, I drilled two 3/8" holes through the plate and the door above and below. I inserted the rivets to test fit and make sure I was ready to start filing, prepping, and painting.
A few coats of paint later, it was time to install my little reinforcement plate. Attach elbow, lovely install 10mm nuts, slowly tighten them down with rivets inserted into holes, but not yet crimped. Once the 10mm nuts are torqued and the 10mm bolt for the elbow is in place, rivet the sheet metal down with large washers on the inside of the door panel. These add extra strength. Alternatively, you could fabricate two more identical pieces and mirror the curves, then use them instead of washers creating a sandwich.
(be careful with 10mm nuts - I wound up shearing off a stud - more on that in a follow-up)
Lube door prop with some form of grease, then slowly close/open door to test that it works. Be gentle for the first few times just in case. You don't want to mess anything up worse if the geometry isn't quite right.
The door props can be rotated and used interchangeably (marked with RR and RL depending on application).