
BACKSTORY:
Where to begin…we’ve been relying on a Viair 88p compressor for a while and it worked well (except for the time we had a failure that led to a warranty claim and subsequent replacement, but we won’t get into it). That being said it was:
1) slow
2) could only inflate one wheel at a time
3) took up space in the vehicle when not in use
4) required popping the hood and connecting up to the battery
Because of those reasons, we decided to invest in some kind of on-board air system. Trying to keep to a budget, we picked up a Maxi Trac compressor from NAPA, having heard good things about them and seen similar models favorably reviewed in Australia (Thumper Max). The Maxi Trac cost us $105.33 delivered, although the first one that arrived came with a cracked piece that would have to be sent back for a replacement. NAPA said that due to their supplier process, they could not issue a replacement and instead I had to get a refund and buy a new one. That annoyance out of the way, we started looking around online to see if anyone had mounted one of these under the hood of a GX470 or similar, but there wasn’t much to go on except a couple 4Runners. Before mounting, I decided to take care of a few upgrades to the compressor itself to make it more usable.
MAXI TRAC MODIFICATIONS:
Out of the box the Maxi Trac comes with a hose and non-standard air fitting connected to a manifold on the compressor itself. An included hose with pressure gauge can be used to air up one tire at a time, but this defeats the purpose of having a fast compressor. It would be best to be able to inflate all 4 tires at once. I followed the instructions from Kevin Chon’s video on YouTube () to add a pressure cut-off switch and standard air quick-connect fitting to the compressor. I could then easily connect our DIY 4 tire inflation system (several examples on YouTube, just search “diy 4 tire inflation system”).
COMPRESSOR MOUNTING:
There are two places where one could realistically mount such a large compressor: in front or behind the airbox on the passenger side. In front of the airbox, you would have to relocate the power steering reservoir, which has been done, but we were looking for a simpler solution. This led us to choose to mount behind the airbox. With that mounting placement there are a couple issues to contend with:
1) the air cleaner hose downstream of the airbox has a resonator with a vacuum line attached that sticks out into the space
2) there is a hardline hose that goes though the firewall that juts up next to the engine and impedes the available space.
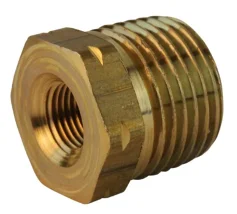
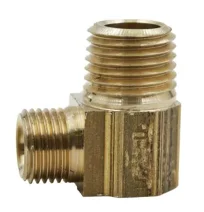
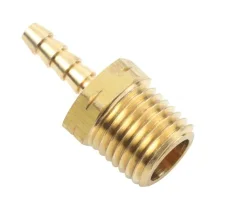
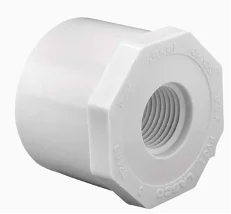
We removed the resonator and replaced it with a PVC plug. This plug has a smooth outer surface that mates well with the air intake hose and the end has threads which could be used to connect brass fittings to accept the ~1/8” vacuum line.
These are the specific parts we used:
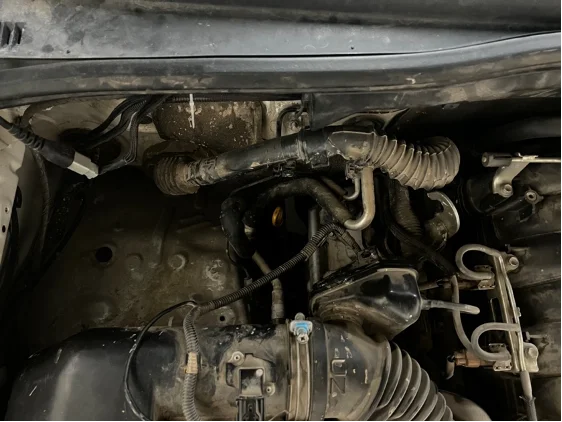
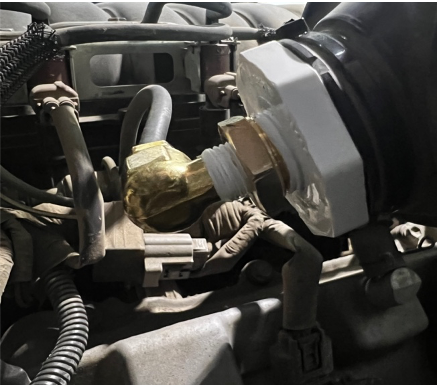
Here is the result (zip-tie is temporary, although probably not needed due to the nature of the friction fit):
So far so good, no codes from the ECU. With that out of the way, the compressor could comfortably fit (if elevated above the protruding hardline mentioned earlier). Next it was on to the CAD.
BRACKET DESIGN:
I mocked up a rough idea of what we needed with cardboard and painters tape. The bracket had to elevate the mounting location while keeping the top of the compressor low enough to clear the hood. After being sure that the chances of success were over 50%, we decided to cut out some metal. This being my first time welding, I didn’t have high hopes, but I am satisfied with the final product:
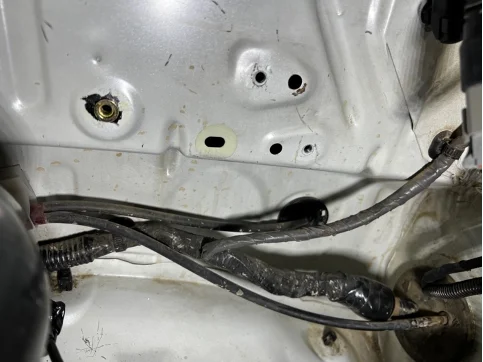
For mounting, we took advantage of a factory threaded ground location on the side fender wall and drilled out another vacant hole to accept a rivnut.
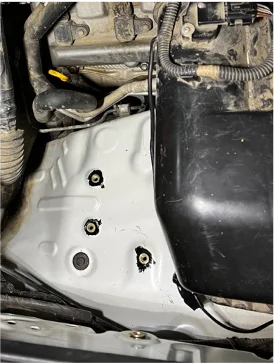
For the bottom, I drilled out three more holes in convenient places for more rivnuts. Positioning the bracket in place above the holes (before installing the rivnuts) I went from inside the wheel arch and marked the hole locations on the underside of the bracket.
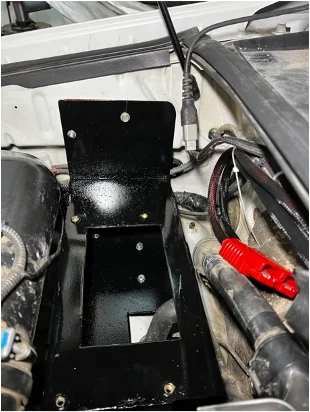
I then marked the holes for the compressor bolts on the top of the bracket. After drilling out the bracket and installing the rivnuts, I applied rusty metal primer followed by black paint. The bracket gets installed with some plastic spacers to correctly space the bottom on the uneven surface. This is due to the sloping nature of the wheel arch. You can also see in the pictures below the reason why the compressor needs to be elevated and the bracket looks weird.
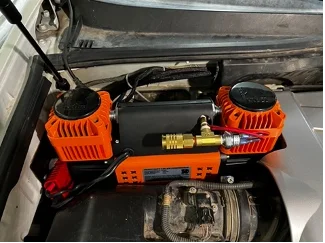
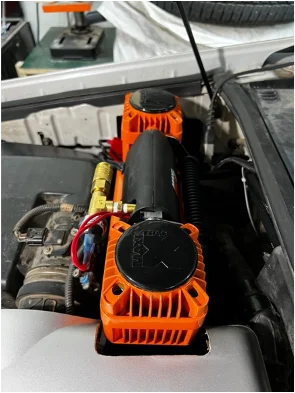
Finally, the Maxi Trac could go in for the first time. I removed the compressor from the base that it comes with, but kept the rubber isolator feet attached. I then bolted it down using the rivnuts installed earlier. It fit perfectly, just barely clearing the hood and strut when fully closed! The engine cover even fits with some trimming with a Dremel.
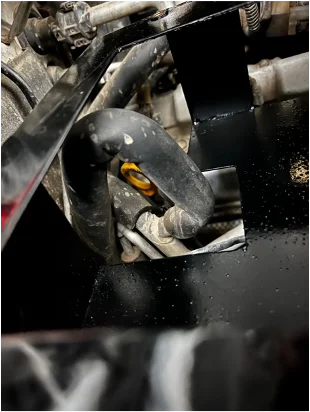
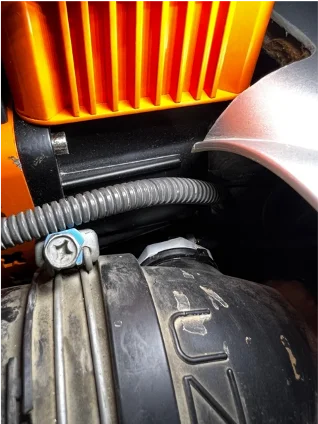
Below is a good illustration of why the resonator had to be removed from the air intake hose. Next it was on to the wiring.
ELECTRICAL:
When it came to the wiring, I had a couple requirements:
1) easily removable/disconnectable
2) switchable power from inside the truck
3) clean/simple with circuit breaker
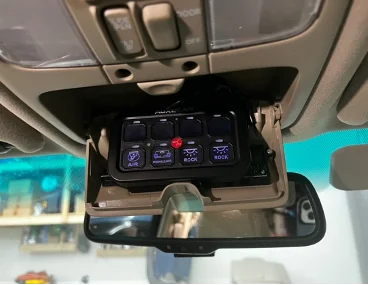
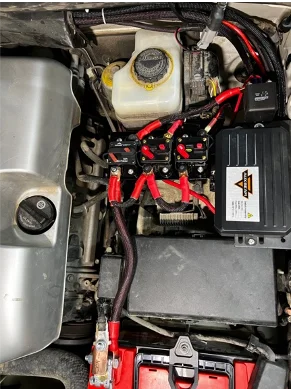
To make it removable, I used an Anderson connector. The quoted current for the Maxi Trac is 90A, which is quite a lot so I opted for the 175A Anderson connector and 4awg wire. This is probably overkill, but would rather oversize than undersize. Power from the battery goes to a 120A circuit breaker before feeding a 200A 12V relay and finally powering the compressor. The relay is controlled by our Auxbeam 8 gang switch panel. This allows the compressor to remain switched on at all times, but only powered once the relay is closed. This will make more sense after this next part.
EXTERIOR QUICK-CONNECT:
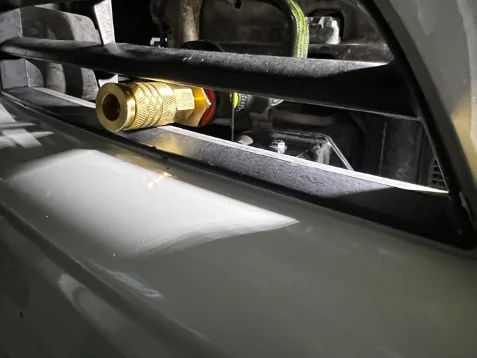
To save the effort of having to pop the hood every time we wanted to air up, I decided it would be best to have exterior access to the air. This meant running an airline out to a chuck somewhere convenient yet out of the way. I settled on the bottom part of the bumper, mounted to the crash bar. This is a perfect spot to connect up our DIY 4-tire inflation system: easily accessible yet protected from damage while offroad. The chuck can be plugged with a clever fitting from Wits’ End (Quick Connect Air Coupler Pacifier - https://absolute-wits-end.com/quick-connect-air-coupler-pacifier/).
All-in-all, the system works great. The compressor is solidly mounted, can be switched on from inside the car, cuts off once pressurized, and turns on when needed to fill the tires. Please reach out with questions, comments, suggestions etc. Have a great day!


Where to begin…we’ve been relying on a Viair 88p compressor for a while and it worked well (except for the time we had a failure that led to a warranty claim and subsequent replacement, but we won’t get into it). That being said it was:
1) slow
2) could only inflate one wheel at a time
3) took up space in the vehicle when not in use
4) required popping the hood and connecting up to the battery
Because of those reasons, we decided to invest in some kind of on-board air system. Trying to keep to a budget, we picked up a Maxi Trac compressor from NAPA, having heard good things about them and seen similar models favorably reviewed in Australia (Thumper Max). The Maxi Trac cost us $105.33 delivered, although the first one that arrived came with a cracked piece that would have to be sent back for a replacement. NAPA said that due to their supplier process, they could not issue a replacement and instead I had to get a refund and buy a new one. That annoyance out of the way, we started looking around online to see if anyone had mounted one of these under the hood of a GX470 or similar, but there wasn’t much to go on except a couple 4Runners. Before mounting, I decided to take care of a few upgrades to the compressor itself to make it more usable.
MAXI TRAC MODIFICATIONS:
Out of the box the Maxi Trac comes with a hose and non-standard air fitting connected to a manifold on the compressor itself. An included hose with pressure gauge can be used to air up one tire at a time, but this defeats the purpose of having a fast compressor. It would be best to be able to inflate all 4 tires at once. I followed the instructions from Kevin Chon’s video on YouTube () to add a pressure cut-off switch and standard air quick-connect fitting to the compressor. I could then easily connect our DIY 4 tire inflation system (several examples on YouTube, just search “diy 4 tire inflation system”).
COMPRESSOR MOUNTING:
There are two places where one could realistically mount such a large compressor: in front or behind the airbox on the passenger side. In front of the airbox, you would have to relocate the power steering reservoir, which has been done, but we were looking for a simpler solution. This led us to choose to mount behind the airbox. With that mounting placement there are a couple issues to contend with:
1) the air cleaner hose downstream of the airbox has a resonator with a vacuum line attached that sticks out into the space
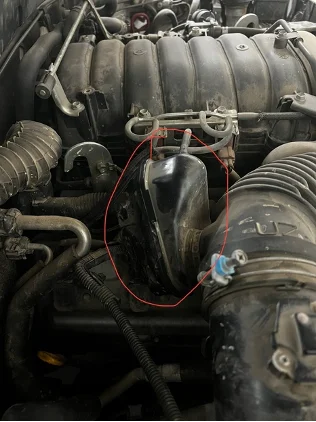
2) there is a hardline hose that goes though the firewall that juts up next to the engine and impedes the available space.
We removed the resonator and replaced it with a PVC plug. This plug has a smooth outer surface that mates well with the air intake hose and the end has threads which could be used to connect brass fittings to accept the ~1/8” vacuum line.
These are the specific parts we used:
Here is the result (zip-tie is temporary, although probably not needed due to the nature of the friction fit):
So far so good, no codes from the ECU. With that out of the way, the compressor could comfortably fit (if elevated above the protruding hardline mentioned earlier). Next it was on to the CAD.
BRACKET DESIGN:
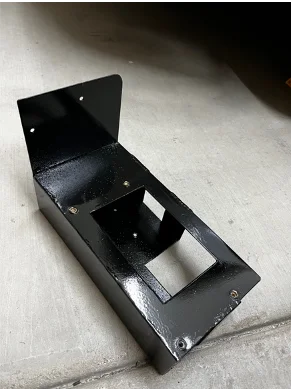
I mocked up a rough idea of what we needed with cardboard and painters tape. The bracket had to elevate the mounting location while keeping the top of the compressor low enough to clear the hood. After being sure that the chances of success were over 50%, we decided to cut out some metal. This being my first time welding, I didn’t have high hopes, but I am satisfied with the final product:
For mounting, we took advantage of a factory threaded ground location on the side fender wall and drilled out another vacant hole to accept a rivnut.
For the bottom, I drilled out three more holes in convenient places for more rivnuts. Positioning the bracket in place above the holes (before installing the rivnuts) I went from inside the wheel arch and marked the hole locations on the underside of the bracket.
I then marked the holes for the compressor bolts on the top of the bracket. After drilling out the bracket and installing the rivnuts, I applied rusty metal primer followed by black paint. The bracket gets installed with some plastic spacers to correctly space the bottom on the uneven surface. This is due to the sloping nature of the wheel arch. You can also see in the pictures below the reason why the compressor needs to be elevated and the bracket looks weird.
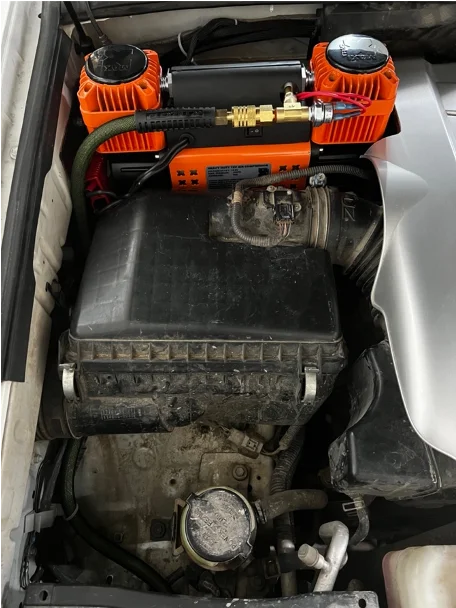
Finally, the Maxi Trac could go in for the first time. I removed the compressor from the base that it comes with, but kept the rubber isolator feet attached. I then bolted it down using the rivnuts installed earlier. It fit perfectly, just barely clearing the hood and strut when fully closed! The engine cover even fits with some trimming with a Dremel.
Below is a good illustration of why the resonator had to be removed from the air intake hose. Next it was on to the wiring.
ELECTRICAL:
When it came to the wiring, I had a couple requirements:
1) easily removable/disconnectable
2) switchable power from inside the truck
3) clean/simple with circuit breaker
To make it removable, I used an Anderson connector. The quoted current for the Maxi Trac is 90A, which is quite a lot so I opted for the 175A Anderson connector and 4awg wire. This is probably overkill, but would rather oversize than undersize. Power from the battery goes to a 120A circuit breaker before feeding a 200A 12V relay and finally powering the compressor. The relay is controlled by our Auxbeam 8 gang switch panel. This allows the compressor to remain switched on at all times, but only powered once the relay is closed. This will make more sense after this next part.
EXTERIOR QUICK-CONNECT:
To save the effort of having to pop the hood every time we wanted to air up, I decided it would be best to have exterior access to the air. This meant running an airline out to a chuck somewhere convenient yet out of the way. I settled on the bottom part of the bumper, mounted to the crash bar. This is a perfect spot to connect up our DIY 4-tire inflation system: easily accessible yet protected from damage while offroad. The chuck can be plugged with a clever fitting from Wits’ End (Quick Connect Air Coupler Pacifier - https://absolute-wits-end.com/quick-connect-air-coupler-pacifier/).

All-in-all, the system works great. The compressor is solidly mounted, can be switched on from inside the car, cuts off once pressurized, and turns on when needed to fill the tires. Please reach out with questions, comments, suggestions etc. Have a great day!
") .
.
