I Built my Roof Rack for $300 after scoffing at the cost of Prinsu/SSO - Here's the How-To (1 Viewer)

This site may earn a commission from merchant affiliate
links, including eBay, Amazon, Skimlinks, and others.

Joined
Oct 3, 2019
Threads
2
Messages
4
Location
Redondo Beach, CA
I was looking at roof racks and $1000+ seemed absurd for what amounts to some extruded aluminum and bolts.

I realized that the crossbars on most of these racks are just t-slot extruded aluminum (80/20) that you can buy for about $20 each already tapped, cut to length, and anodized. I bought 12 of them at 47" long each from a company called TNutz, though there are plenty of other places to buy.

For the side bars that hold it all together, I used 2" tall, 1/4" thick aluminum bar. The only real fabrication required is cutting the 2" aluminum bar and drilling the holes.

Video here:

Images with explanations here:

2bXOeZB.jpg


This was for my 5th gen 4Runner, so the 460 dimensions might be a little bit different.

2bXOeZB.jpg
 
Built not bought always wins! :beer:
 
Bravo!

I was one of the very first prinsu customer and after a couple years sold it due to all the reasons mentioned.

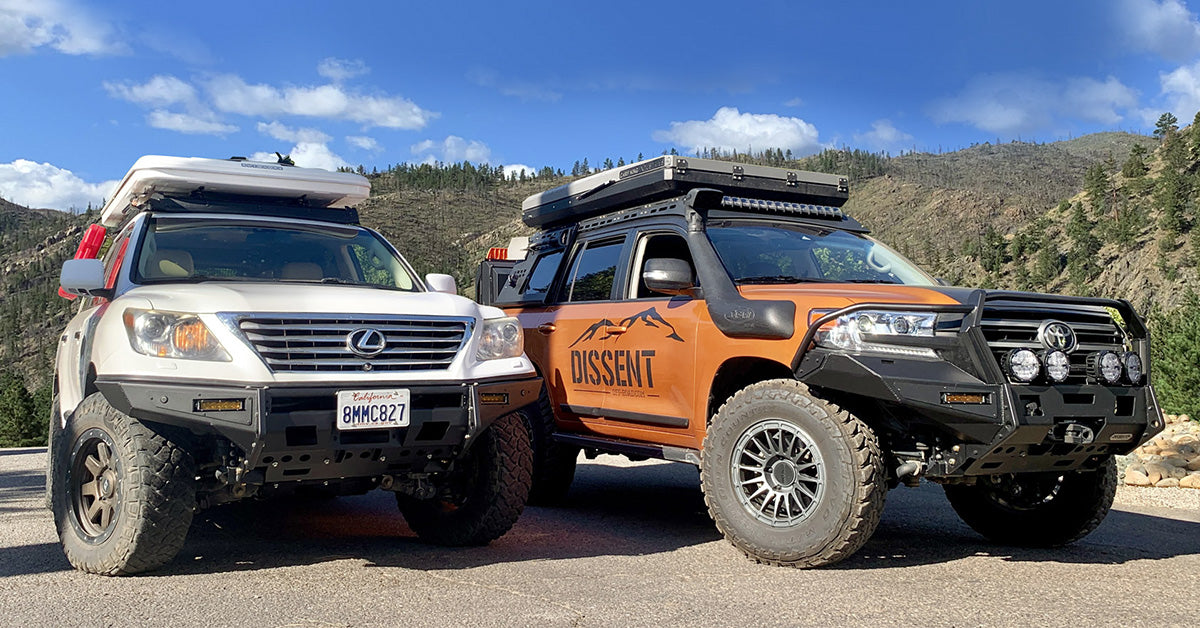
however I just saw dissent off-road’s 200 at surf and turf and his roof rack is awesome!

66C9A6C6-E6E6-4142-8702-BEA317AE0900.jpeg


U shaped cross bar so it’s super strong, not like a little spring with the just a stick of aluminum.

he also mentioned that he had a bunch made for 470 but people bailed on him so if enough of us reach out he might just modify them to the 460!
 
I guess what I'm really interested in is knowing what you have put into the 80/20. I bought tiedowns from Apache Offroad that I am happy with, but would love to see other ideas.
 
Bravo!

I was one of the very first prinsu customer and after a couple years sold it due to all the reasons mentioned.

however I just saw dissent off-road’s 200 at surf and turf and his roof rack is awesome!

View attachment 2128675


U shaped cross bar so it’s super strong, not like a little spring with the just a stick of aluminum.

he also mentioned that he had a bunch made for 470 but people bailed on him so if enough of us reach out he might just modify them to the 460!
I remember when he first started out when I was building my 100 series Landcruiser for overland a couple of years ago. I was following his work and quite interested in his aluminum bumpers. He has some nice designs.
I really like that he works in aluminum. I'm a big fan of trying to keep our rigs light and agile. If I had it my way, my front and rear bumpers and roof rack would be all aluminum and I'd use polypropylene (Delrin) for all my skid plates on the belly side.
 
I was looking at roof racks and $1000+ seemed absurd for what amounts to some extruded aluminum and bolts.

I realized that the crossbars on most of these racks are just t-slot extruded aluminum (80/20) that you can buy for about $20 each already tapped, cut to length, and anodized. I bought 12 of them at 47" long each from a company called TNutz, though there are plenty of other places to buy.

For the side bars that hold it all together, I used 2" tall, 1/4" thick aluminum bar. The only real fabrication required is cutting the 2" aluminum bar and drilling the holes.

Video here:

Images with explanations here:

View attachment 2121035

This was for my 5th gen 4Runner, so the 460 dimensions might be a little bit different.

View attachment 2121034


Great post. Love to see stuff like this. Sub'd your youtube. Hope to see more.
 
Love the DIY!
 
Really cool racks! I like the DIY stuff, and that dissent rack with the ratchet straps built in is pretty cool!

I needed a rack for my old 100 series in very short order, and so I did the old ATV ramp roof rack. it was the perfect dimensions, bent up some steel mounts and cut up some plastic sheet I had to make a windbreak for the front, and loaded it with a couple hundred pounds of stuff and headed off to Nevada.

My next big project on my GX will be an electrical system that incorporates a solar panel, as well. I love not needing a generator, even though I often have one in my wanderings. Is the solar for the house system, or do you have it hooked up to your crank battery? also, do you have the means to angle it? I'm thinking of adding markings for different latitudes on a sliding support, and just point the nose south, and angle it appropriately for wherever I'm at.

I bought this time around, a frontrunner that was on sale, so far so good, but always admire the DIY route ;)
 
You sound a lot like me. “Yah honey, If I buy this drill and just build it myself I’ll save $300.” Proceeds to buy $800 in tools... loved the video

Shhhh, this is how I've ended up with an EXTREMELY nice set of tools. Works every time. That being said, I don't have room for a drill press so I'll probably just by the Dissent on this one.
 
General question regarding all of these racks that extend all the way to in front of the sunroof.... How do you attach the front to the car when the mounting points only go to roughly the back of the sunroof? Does it just overhang like 18"? I would like to build one of these, seems pretty doable, but I would like to attach a light bar to the front and it seems like it might be a lot of overhang. I guess if the side bars are 1/4 that's gonna be pretty strong. Thoughts?

I see the OP has something on there that looks like a support of some kind? I'm going to do this on a 99 LX.

1612236580514.png
 
We have 3 mounting points/side on our roofs. That's all you need!
 
What did you use for your side panels? Where did you get them?
I used 1/4" x 6 aluminum stock...first I cut a pc. of 1/4" plywood, to use as a pattern.... I scribed it to the roof profile, laid it on the aluminum, marked it with a magic marker, then cut it with a hand held jigsaw. I finished it and fine tuned it with a belt sander (mostly on the bottom curve). The cross bars were 1" x 2" x .125 rectangle stock. The problem was the U channel they fit into, was slightly smaller than the outside dimension of the bar. So I used my compound miter and shaved just a hair off the top and bottom, and they fit . It's super strong, looks good (IMO) and really functional. It was (back in 2017) about 360+ in materials

Here's the other side

roam 5.jpg
 
Kudos on the rack!
From the photo, one couldn't tell if it was a professional aftermarket rack or not!
What did you use for the mounting brackets into the factory roof mounts?
Can you take some close up photos of that assembly?
Are you going to leave it unpainted or maybe clear coat or black?
 
I used 1/4" x 6 aluminum stock...first I cut a pc. of 1/4" plywood, to use as a pattern.... I scribed it to the roof profile, laid it on the aluminum, marked it with a magic marker, then cut it with a hand held jigsaw. I finished it and fine tuned it with a belt sander (mostly on the bottom curve). The cross bars were 1" x 2" x .125 rectangle stock. The problem was the U channel they fit into, was slightly smaller than the outside dimension of the bar. So I used my compound miter and shaved just a hair off the top and bottom, and they fit . It's super strong, looks good (IMO) and really functional. It was (back in 2017) about 360+ in materials

Here's the other side

View attachment 2576194
Where did you find 6” aluminum stock? I’ve only been able to find 2” locally. Is there some metal supply place near where you live?
 
Where did you find 6” aluminum stock? I’ve only been able to find 2” locally. Is there some metal supply place near where you live?

Yes...Dutchess Metal up in Poughkeepsie...bought everything up there.
 
Last edited:

Users who are viewing this thread

Back
Top Bottom