
I would have added this to the 'what have you done lately' thread, but I wanted to add some helpful hints, so started a new thread.
Purchased the Cruiser Corp seat covers for front and back of my 1977 FJ40.
First, the seat covers are extremely well made. The fabric is very supple and looks very durable.
Also, they fit like a glove.
It snowed Friday night and into Saturday, so was a good weekend for some indoor project.
I'll post a couple of pics, then give some helpful notes below.
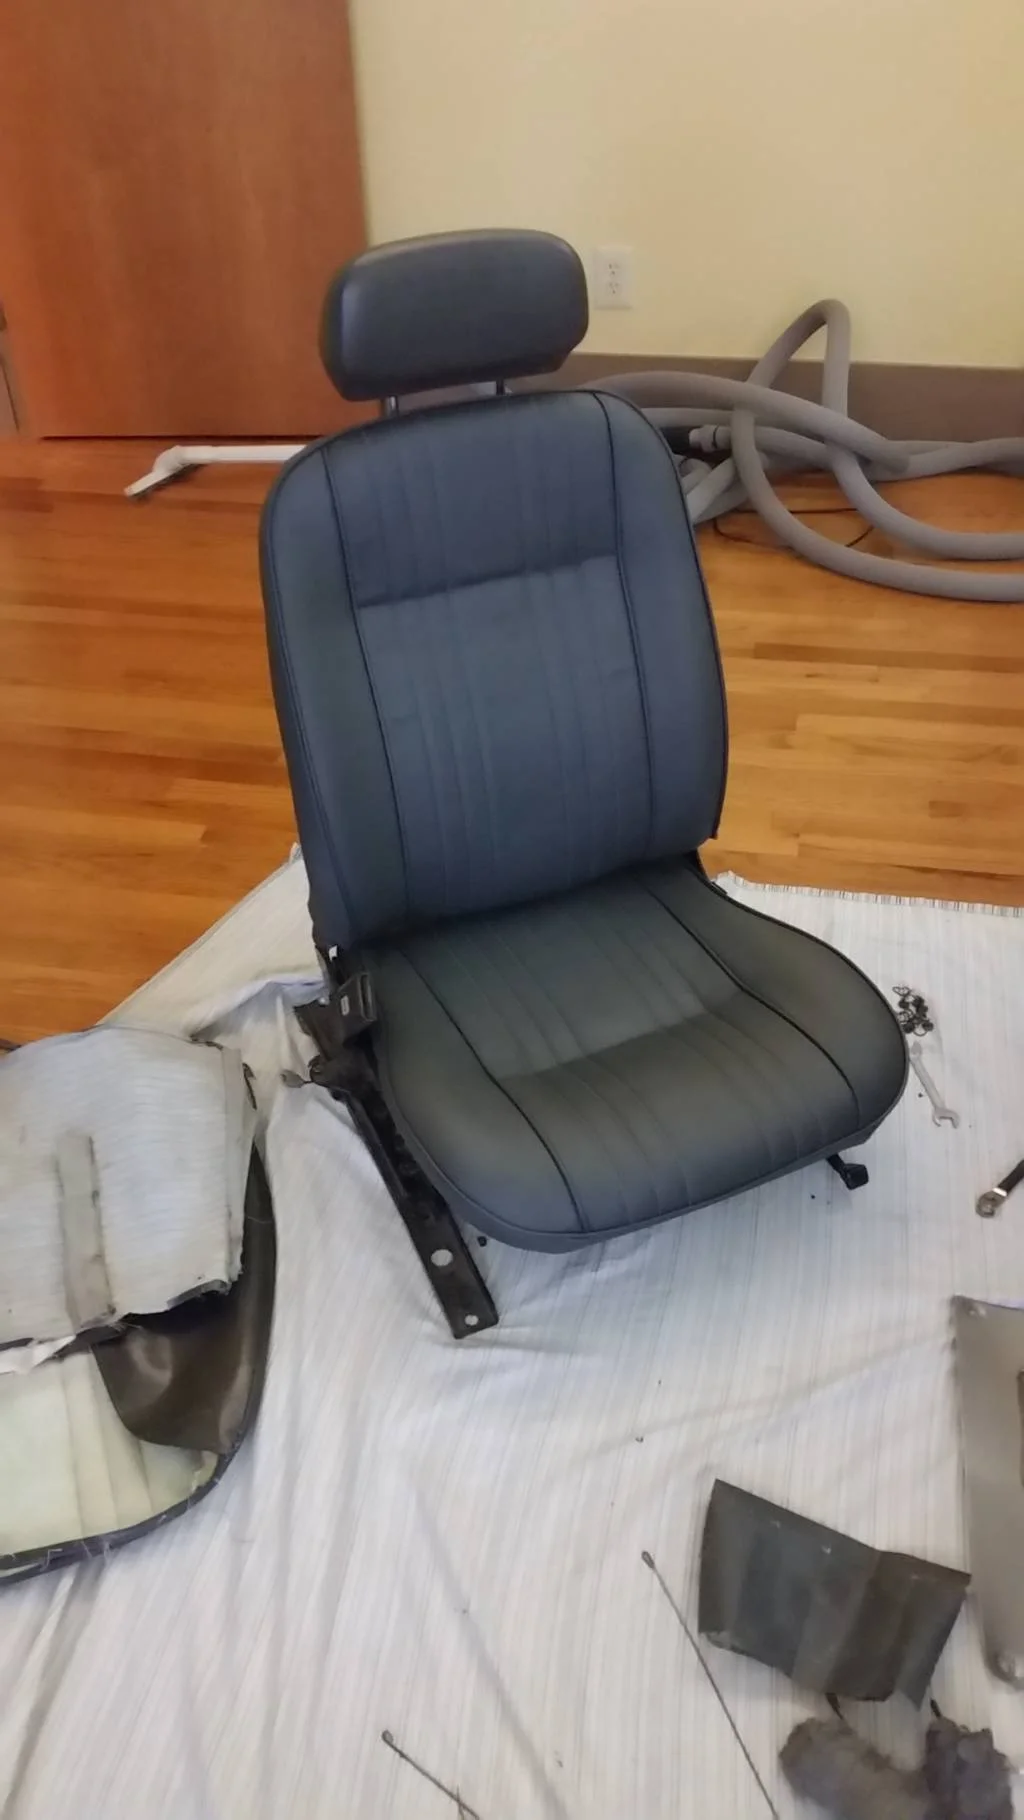
Driver's side completed.

The old seats had this really stiff vinyl on them (fore front). And was shiny. Never liked it.
NOTES:
The head rest comes off by pulling it forward (forward meaning if you had the seat in the truck) and then lifting. There are notches on the headrest chrome rods, on the back of each chrome rod, that need to get unhooked from inside. Pulling towards the front, like almost tilting it forward and then lifting seems to unhook the notches and you can lift the headrest out of the seat back.
Then, the two plastic guards for each rod hole, I found that if I twisted them 90 degrees they came right out. I stuck the handle end of some pliers into the hole and twisted.
Assembly-
For the seat backs, take the cover and turn it wrong side out until you have the two flaps exposed. These flaps need to hog ring on front and back side, so that the front and back are held snug against the frame. The flaps are in line with were you see the horizontal indents in my seat pictured above (seat back and bottom). After getting the flaps in place you can carefully roll the seat back cover down so it is right side out and pulled down into place. Then you hog ring the bottoms together. On each side you put a single hog ring to pull the fabric close around the hing metal. Be careful that the hog ring is not going to show. You will have already removed the old rods from the old cover so they can be re-used in the hemmed slots at the bottom and the internal flaps. It will be obvious where the rods go. You may have to make a little cut in the back side of the bottom hem so you can slip the rod into place.
Then at the top of the seat back, feel for the center of where the rods insert. Be careful as you get one chance to get this right. Make a small hole in the center of each hole and just make it large enough so you can force the plastic hole cover back into the top of seat back. Insert both of the plastic pieces and then slip the headrest back into position.
Seat bottom is similar. I slipped the front part on so I could then get the internal flap into position and hog ring the flap rod to the internal rod running across the seat bottom. This holds the seat bottom down to the seat frame. Then you just slip the cover all the way into place and hog ring all the way around. There are obvious places in the seat bottom frame where the hog rings attach.
Then just carefully snip a small opening for all the bolt holes and reassemble all the frame parts and get the seat back on. When putting on the seat back, keep the side frame that gets bolted onto the side of the seat back very loose so it is easy to slip the seat over the hinge points. Then tighten the side plate bolts after seat back is in position.
The jump seats were easy. Just unscrew all the screws. Re-use the old wire that you will slip into the hem. On my order, apparently Cruiser Corps forgot to hem the jump seat seat backs. They had hemmed the seat bottoms. I have an industrial sewing machine and have recovered all sorts of stuff in the past, so hemming the seat backs was no big deal.
Bottom line is the Cruiser Corps covers are top quality. My seats now look new and are more comfortable.
Purchased the Cruiser Corp seat covers for front and back of my 1977 FJ40.
First, the seat covers are extremely well made. The fabric is very supple and looks very durable.
Also, they fit like a glove.
It snowed Friday night and into Saturday, so was a good weekend for some indoor project.
I'll post a couple of pics, then give some helpful notes below.
Driver's side completed.
The old seats had this really stiff vinyl on them (fore front). And was shiny. Never liked it.

NOTES:
The head rest comes off by pulling it forward (forward meaning if you had the seat in the truck) and then lifting. There are notches on the headrest chrome rods, on the back of each chrome rod, that need to get unhooked from inside. Pulling towards the front, like almost tilting it forward and then lifting seems to unhook the notches and you can lift the headrest out of the seat back.
Then, the two plastic guards for each rod hole, I found that if I twisted them 90 degrees they came right out. I stuck the handle end of some pliers into the hole and twisted.
Assembly-
For the seat backs, take the cover and turn it wrong side out until you have the two flaps exposed. These flaps need to hog ring on front and back side, so that the front and back are held snug against the frame. The flaps are in line with were you see the horizontal indents in my seat pictured above (seat back and bottom). After getting the flaps in place you can carefully roll the seat back cover down so it is right side out and pulled down into place. Then you hog ring the bottoms together. On each side you put a single hog ring to pull the fabric close around the hing metal. Be careful that the hog ring is not going to show. You will have already removed the old rods from the old cover so they can be re-used in the hemmed slots at the bottom and the internal flaps. It will be obvious where the rods go. You may have to make a little cut in the back side of the bottom hem so you can slip the rod into place.
Then at the top of the seat back, feel for the center of where the rods insert. Be careful as you get one chance to get this right. Make a small hole in the center of each hole and just make it large enough so you can force the plastic hole cover back into the top of seat back. Insert both of the plastic pieces and then slip the headrest back into position.
Seat bottom is similar. I slipped the front part on so I could then get the internal flap into position and hog ring the flap rod to the internal rod running across the seat bottom. This holds the seat bottom down to the seat frame. Then you just slip the cover all the way into place and hog ring all the way around. There are obvious places in the seat bottom frame where the hog rings attach.
Then just carefully snip a small opening for all the bolt holes and reassemble all the frame parts and get the seat back on. When putting on the seat back, keep the side frame that gets bolted onto the side of the seat back very loose so it is easy to slip the seat over the hinge points. Then tighten the side plate bolts after seat back is in position.
The jump seats were easy. Just unscrew all the screws. Re-use the old wire that you will slip into the hem. On my order, apparently Cruiser Corps forgot to hem the jump seat seat backs. They had hemmed the seat bottoms. I have an industrial sewing machine and have recovered all sorts of stuff in the past, so hemming the seat backs was no big deal.
Bottom line is the Cruiser Corps covers are top quality. My seats now look new and are more comfortable.
Last edited:

