
Navigation
Install the app
How to install the app on iOS
Follow along with the video below to see how to install our site as a web app on your home screen.
Note: This feature may not be available in some browsers.
More options
You are using an out of date browser. It may not display this or other websites correctly.
You should upgrade or use an alternative browser.
You should upgrade or use an alternative browser.
Building a new house and shop (1 Viewer)
- Thread starter 1911
- Start date
This site may earn a commission from merchant affiliate
links, including eBay, Amazon, Skimlinks, and others.
More options
Who Replied?Ahhh.... I ran out of 40 tech stuff that interested me early this morning and ran across this home saga! Admit to mostly looking at the pictures but did read some too... great way to spend a lazy Saturday morning... got so into it I forgot to make coffee 
Look forward to “The Rest of the Story!”
Look forward to “The Rest of the Story!”
anxiously waiting....
thanks so much for sharing
thanks so much for sharing
looks awesome
chop chop!!! We're ready to move in already!
1911
chupacabra
- Thread starter
- #346
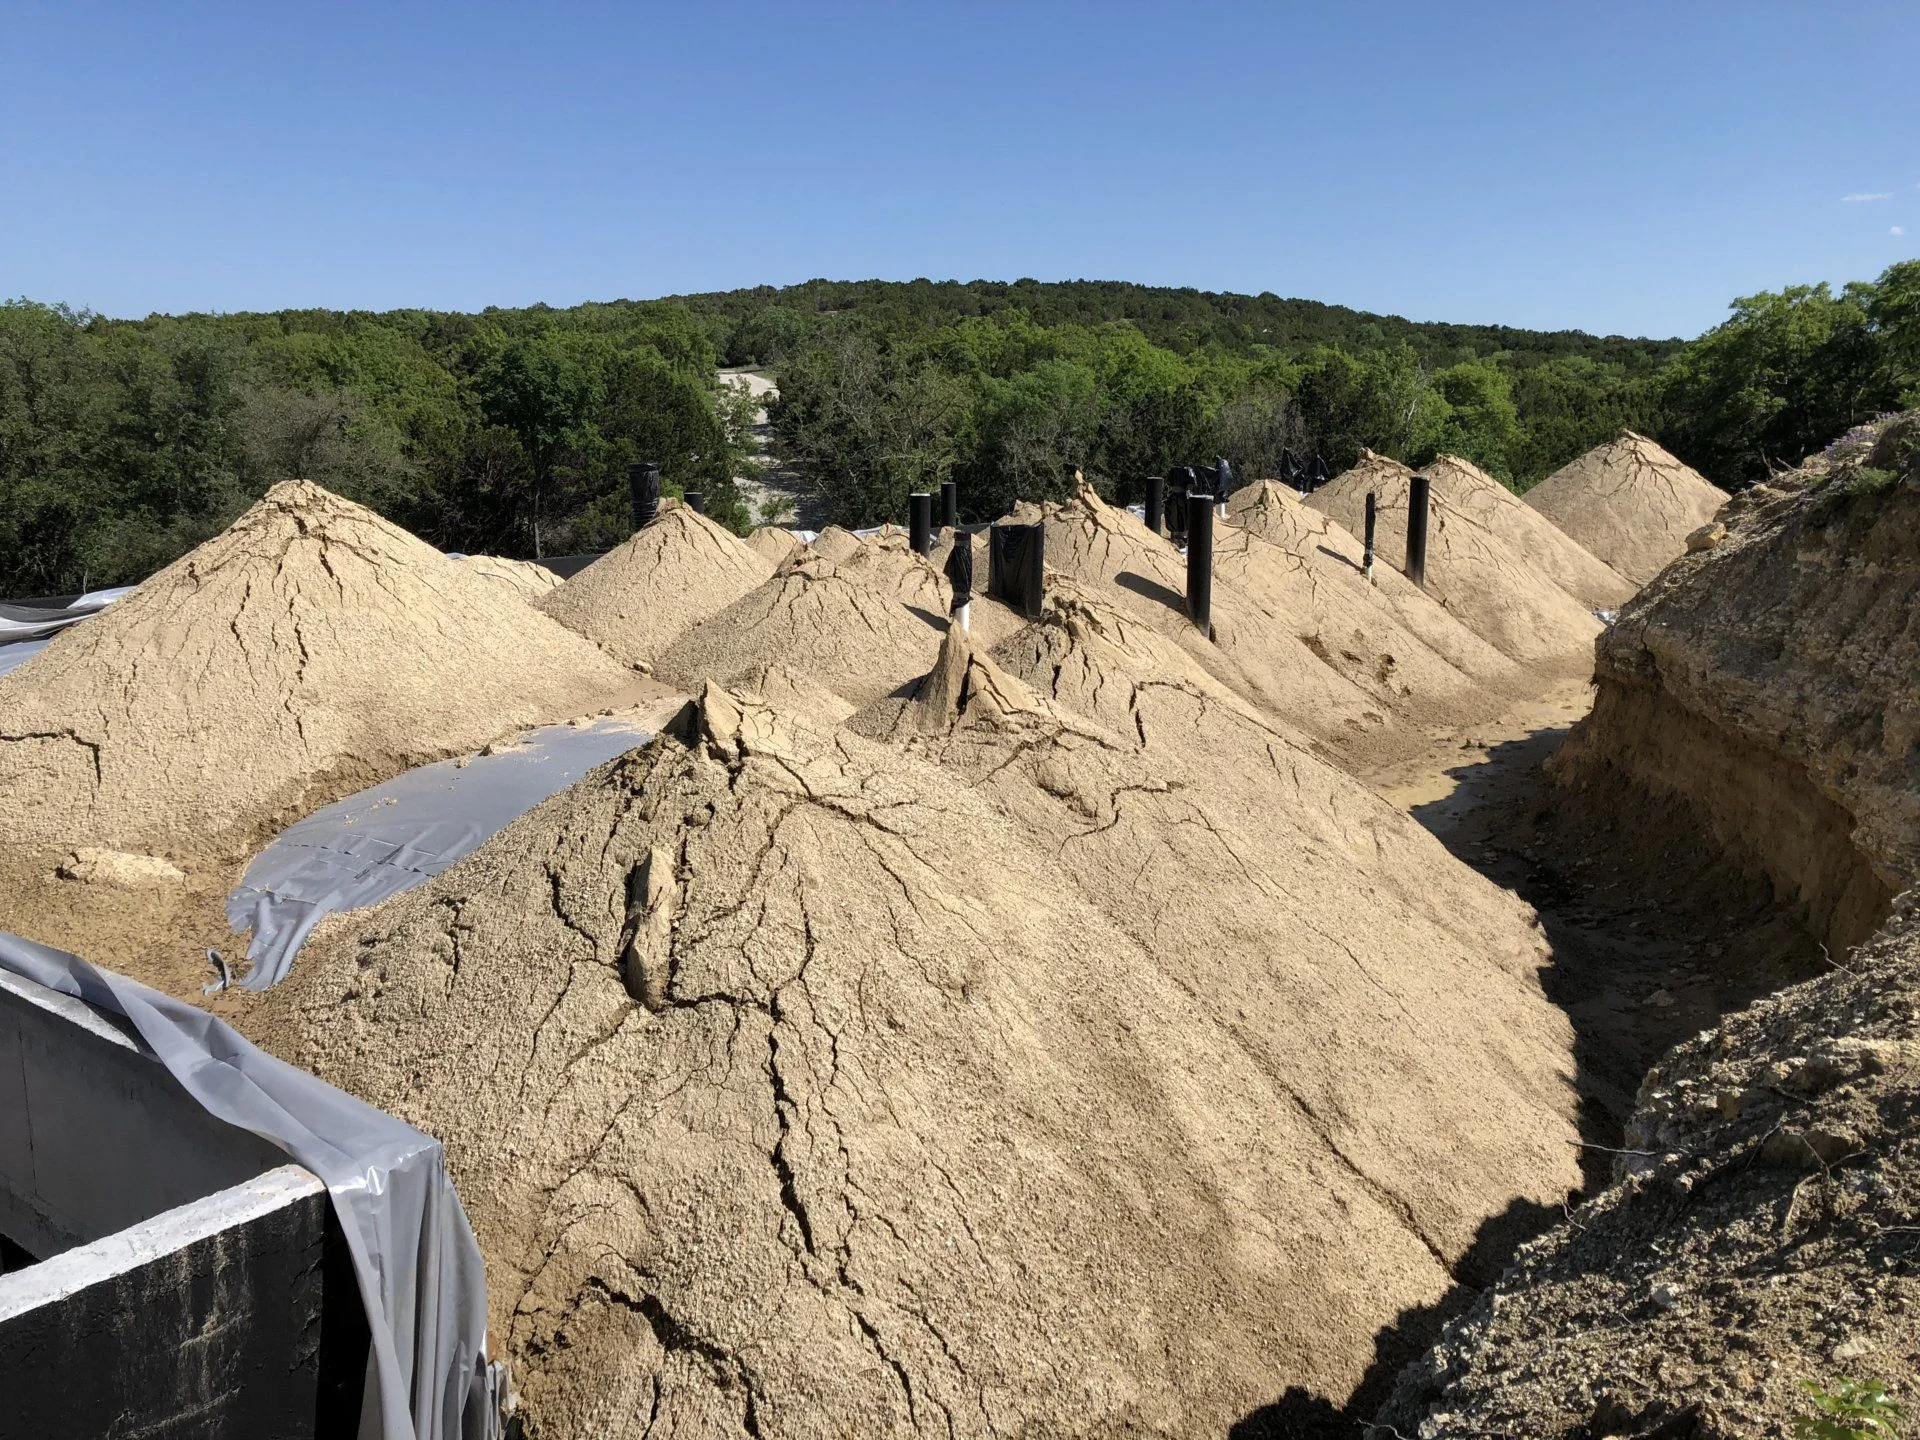
Progress, though never as fast as you think. Have a lot of sifted dirt up on top of the house, and more along the back side, but rain has delayed us several days the last couple of weeks. Here is what it looks like now, as seen from the hill above the back:
No rain is forecast for the next 10 days, so we should get a lot done this week. Now there is enough dirt on the back side to drive a track steer up there and on top, to start smoothing out this base layer of dirt. Once the base layer is down and smooth between the domes (and only 1' or so above the dome peaks), we will put down a layer of 1" thick expanded polystyrene foam board over the whole house, then another layer of 10-mil plastic sheeting over that, then as much dirt as we can over that and re-contour the hill side.
No rain is forecast for the next 10 days, so we should get a lot done this week. Now there is enough dirt on the back side to drive a track steer up there and on top, to start smoothing out this base layer of dirt. Once the base layer is down and smooth between the domes (and only 1' or so above the dome peaks), we will put down a layer of 1" thick expanded polystyrene foam board over the whole house, then another layer of 10-mil plastic sheeting over that, then as much dirt as we can over that and re-contour the hill side.
It’s biblical. Moving mountains. Epic. Looking great
1911
chupacabra
- Thread starter
- #348
OK, more progress this week, it's finally starting to look like something. Nothing happened all last week; the dirt contractor took the week off to take his daughter to the national archery championships in Louisville, Kentucky. His daughter won Texas for her age group (high school), and placed 68th out of a thousand contestants in Louisville. Her first time at this competition too.
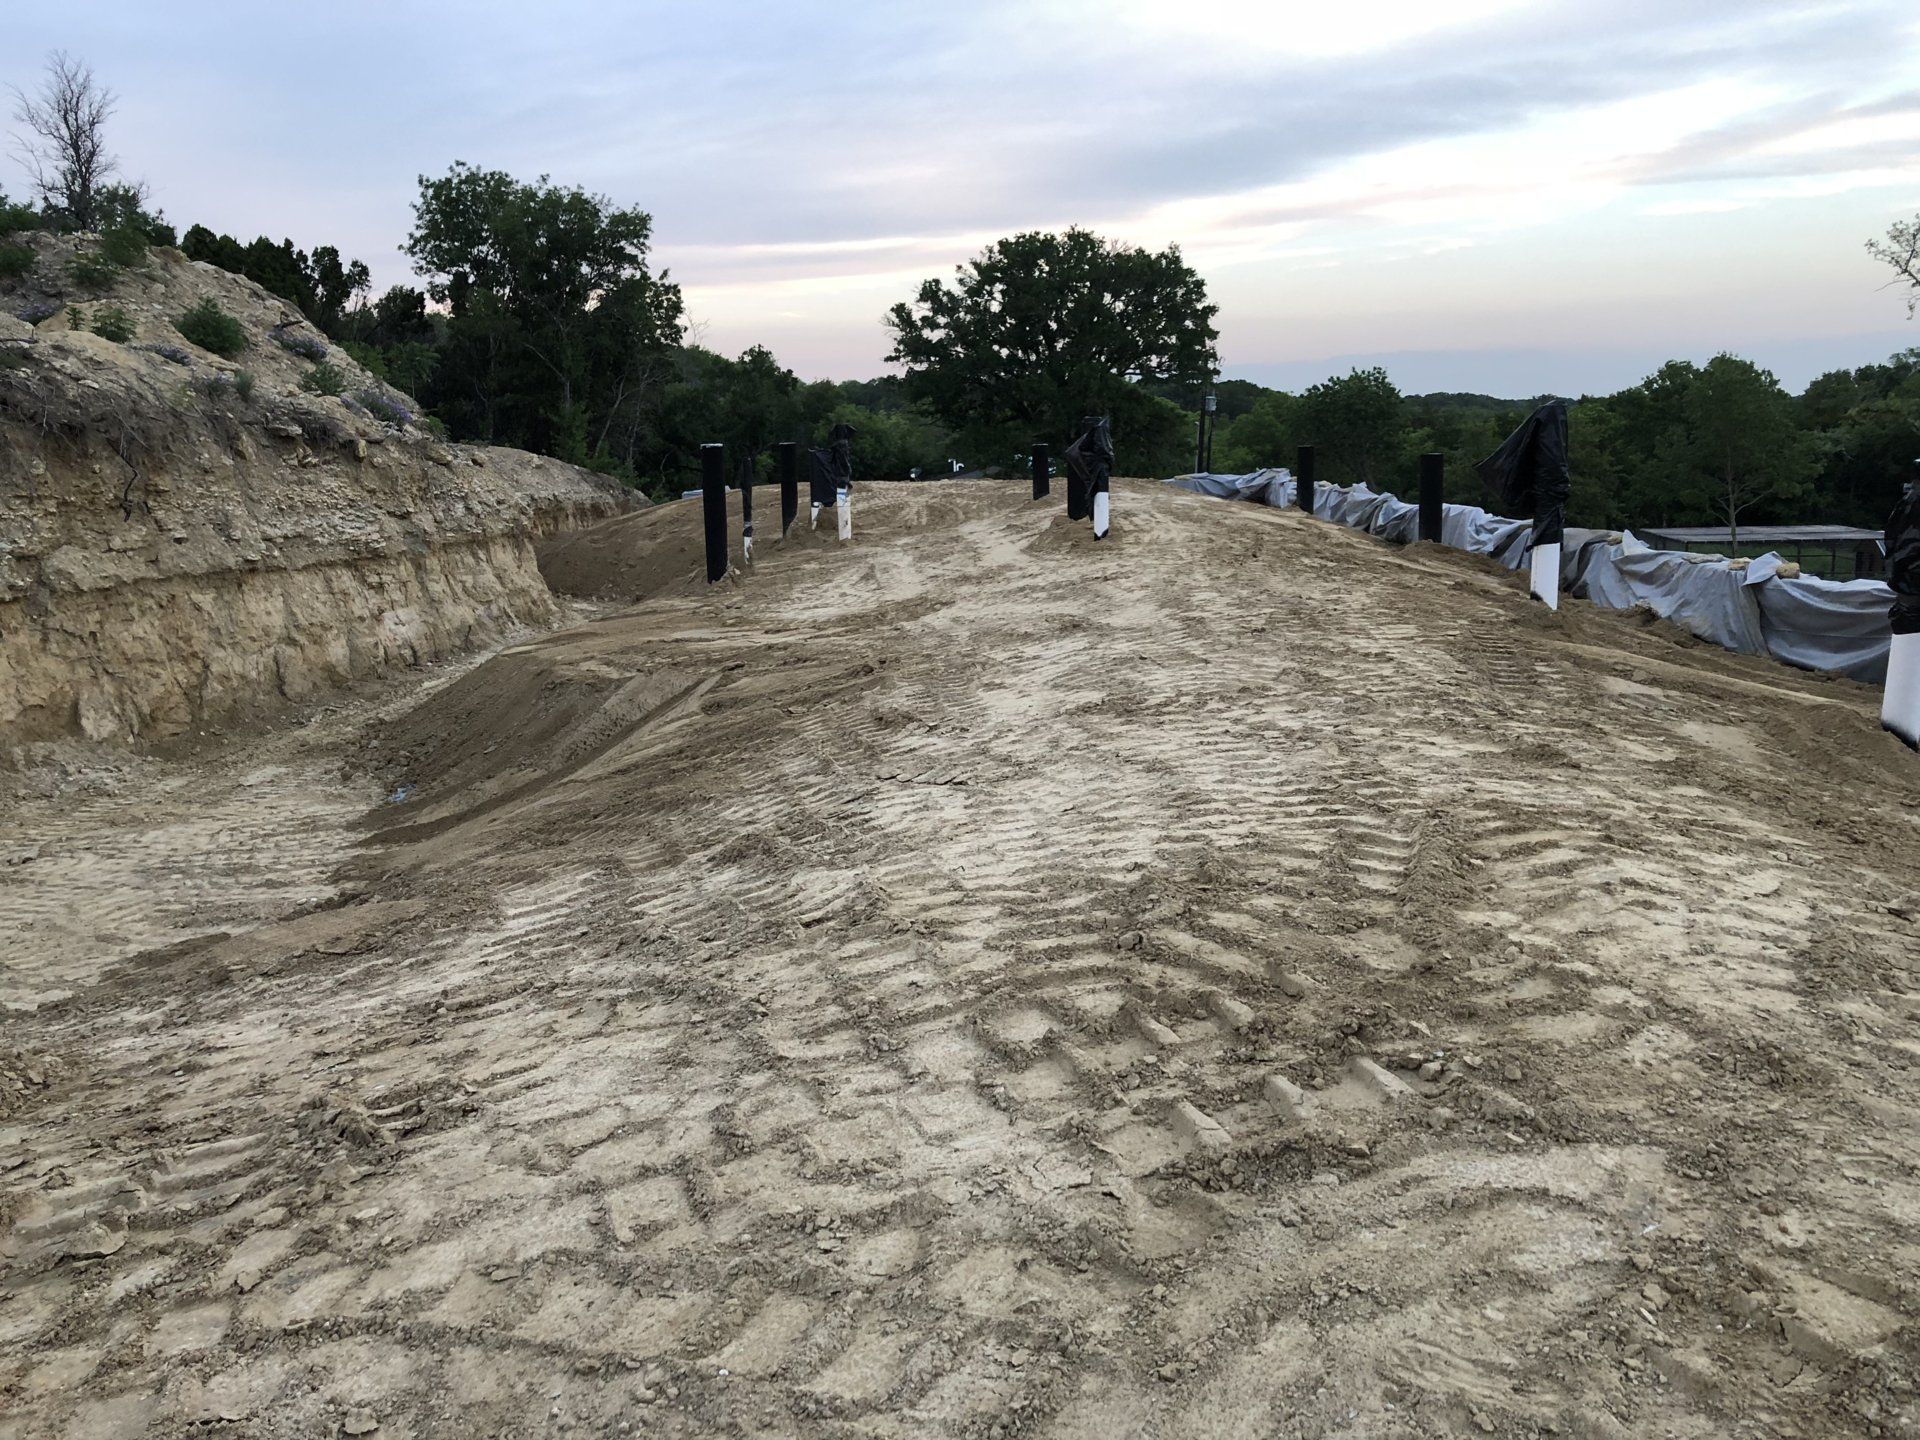
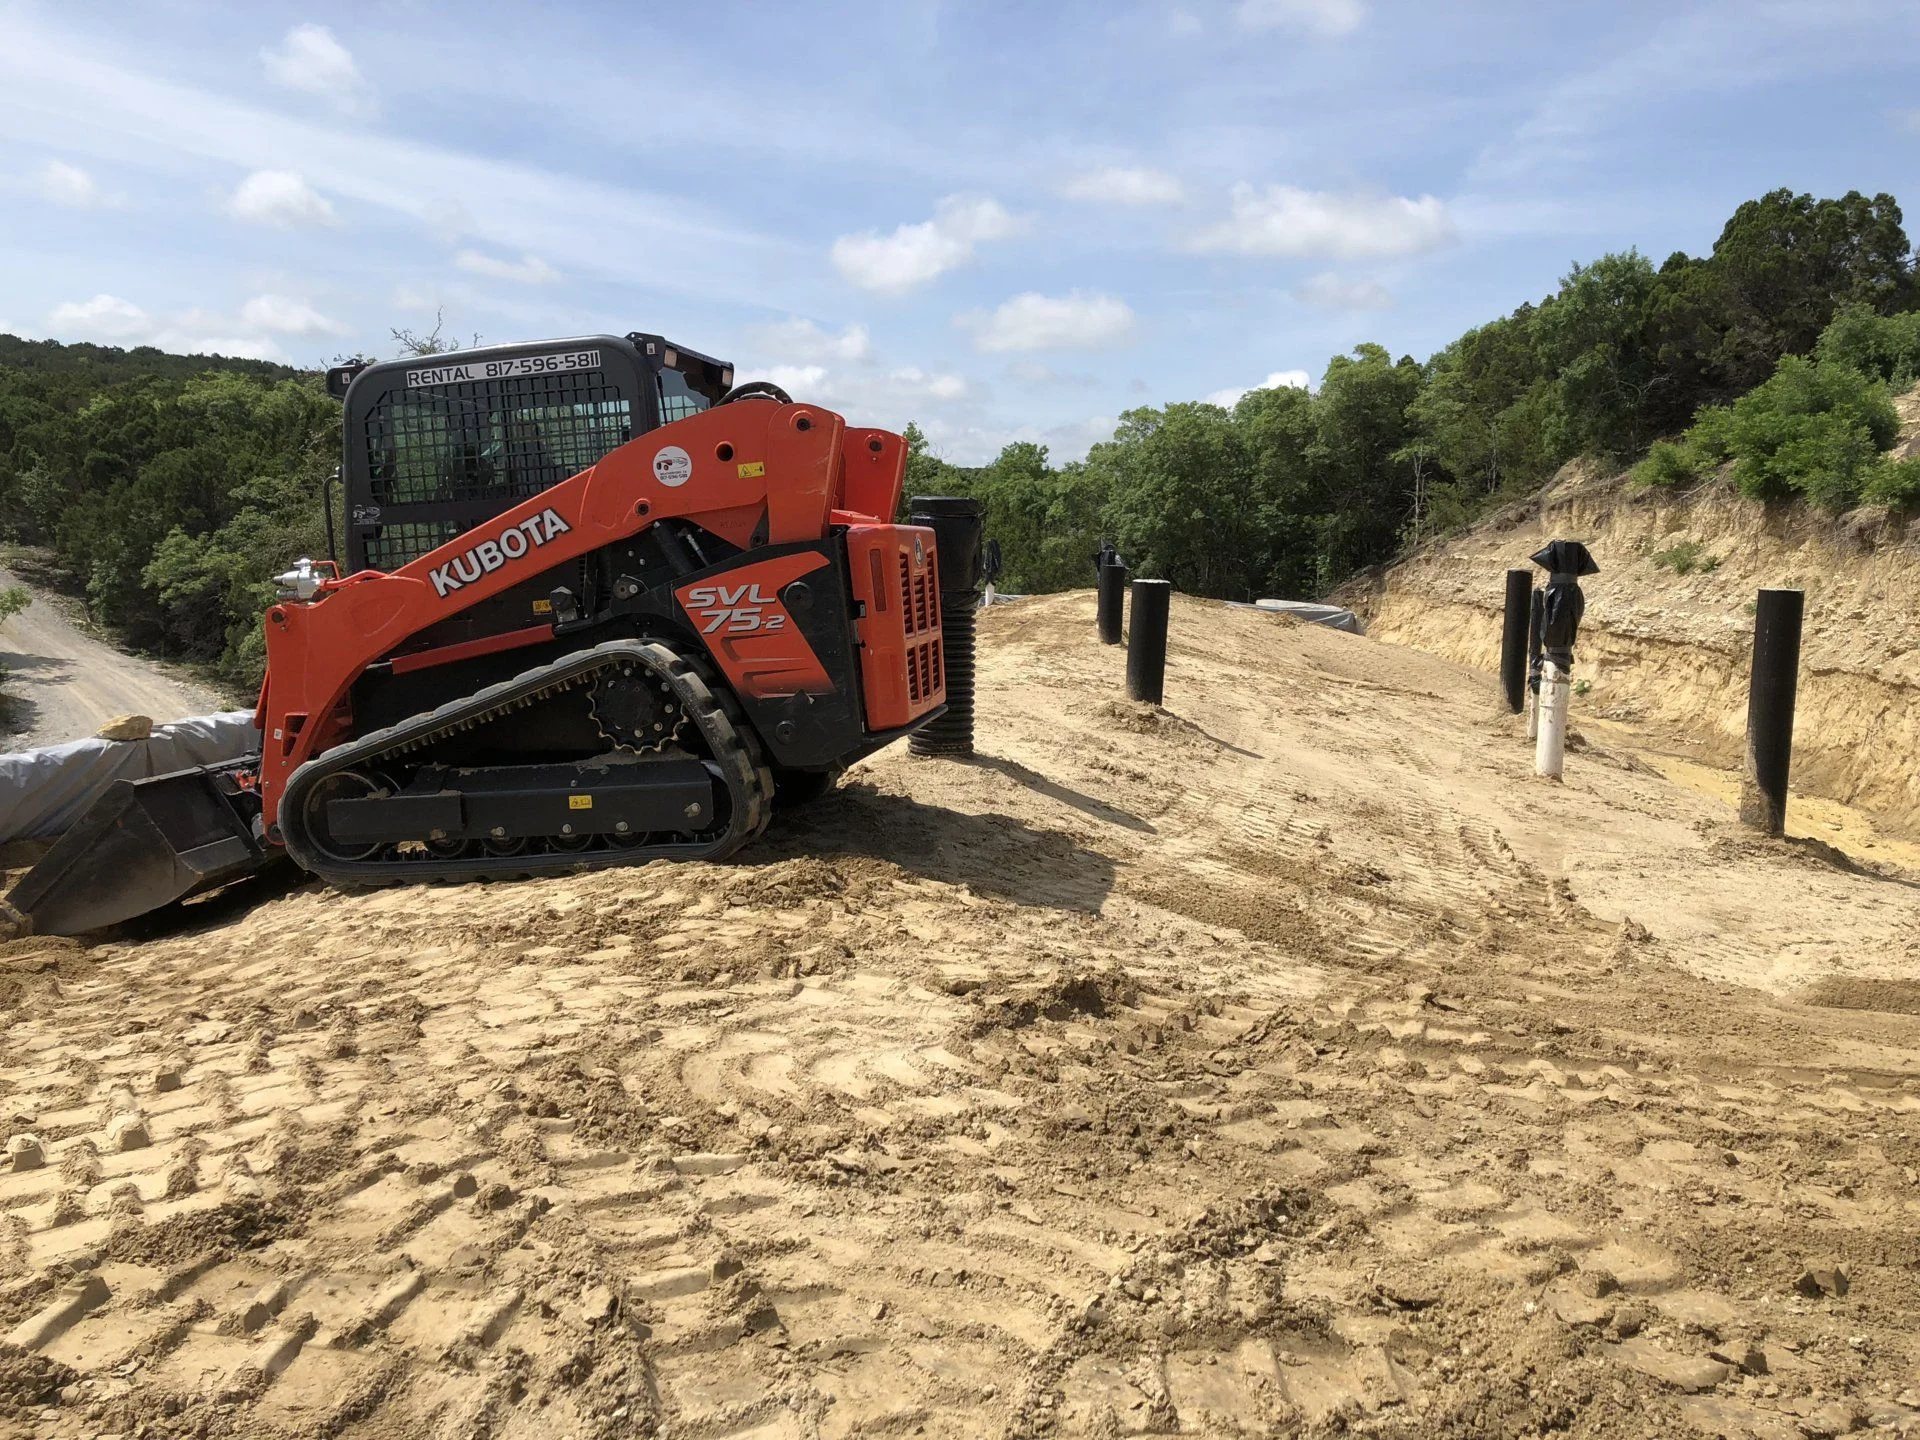
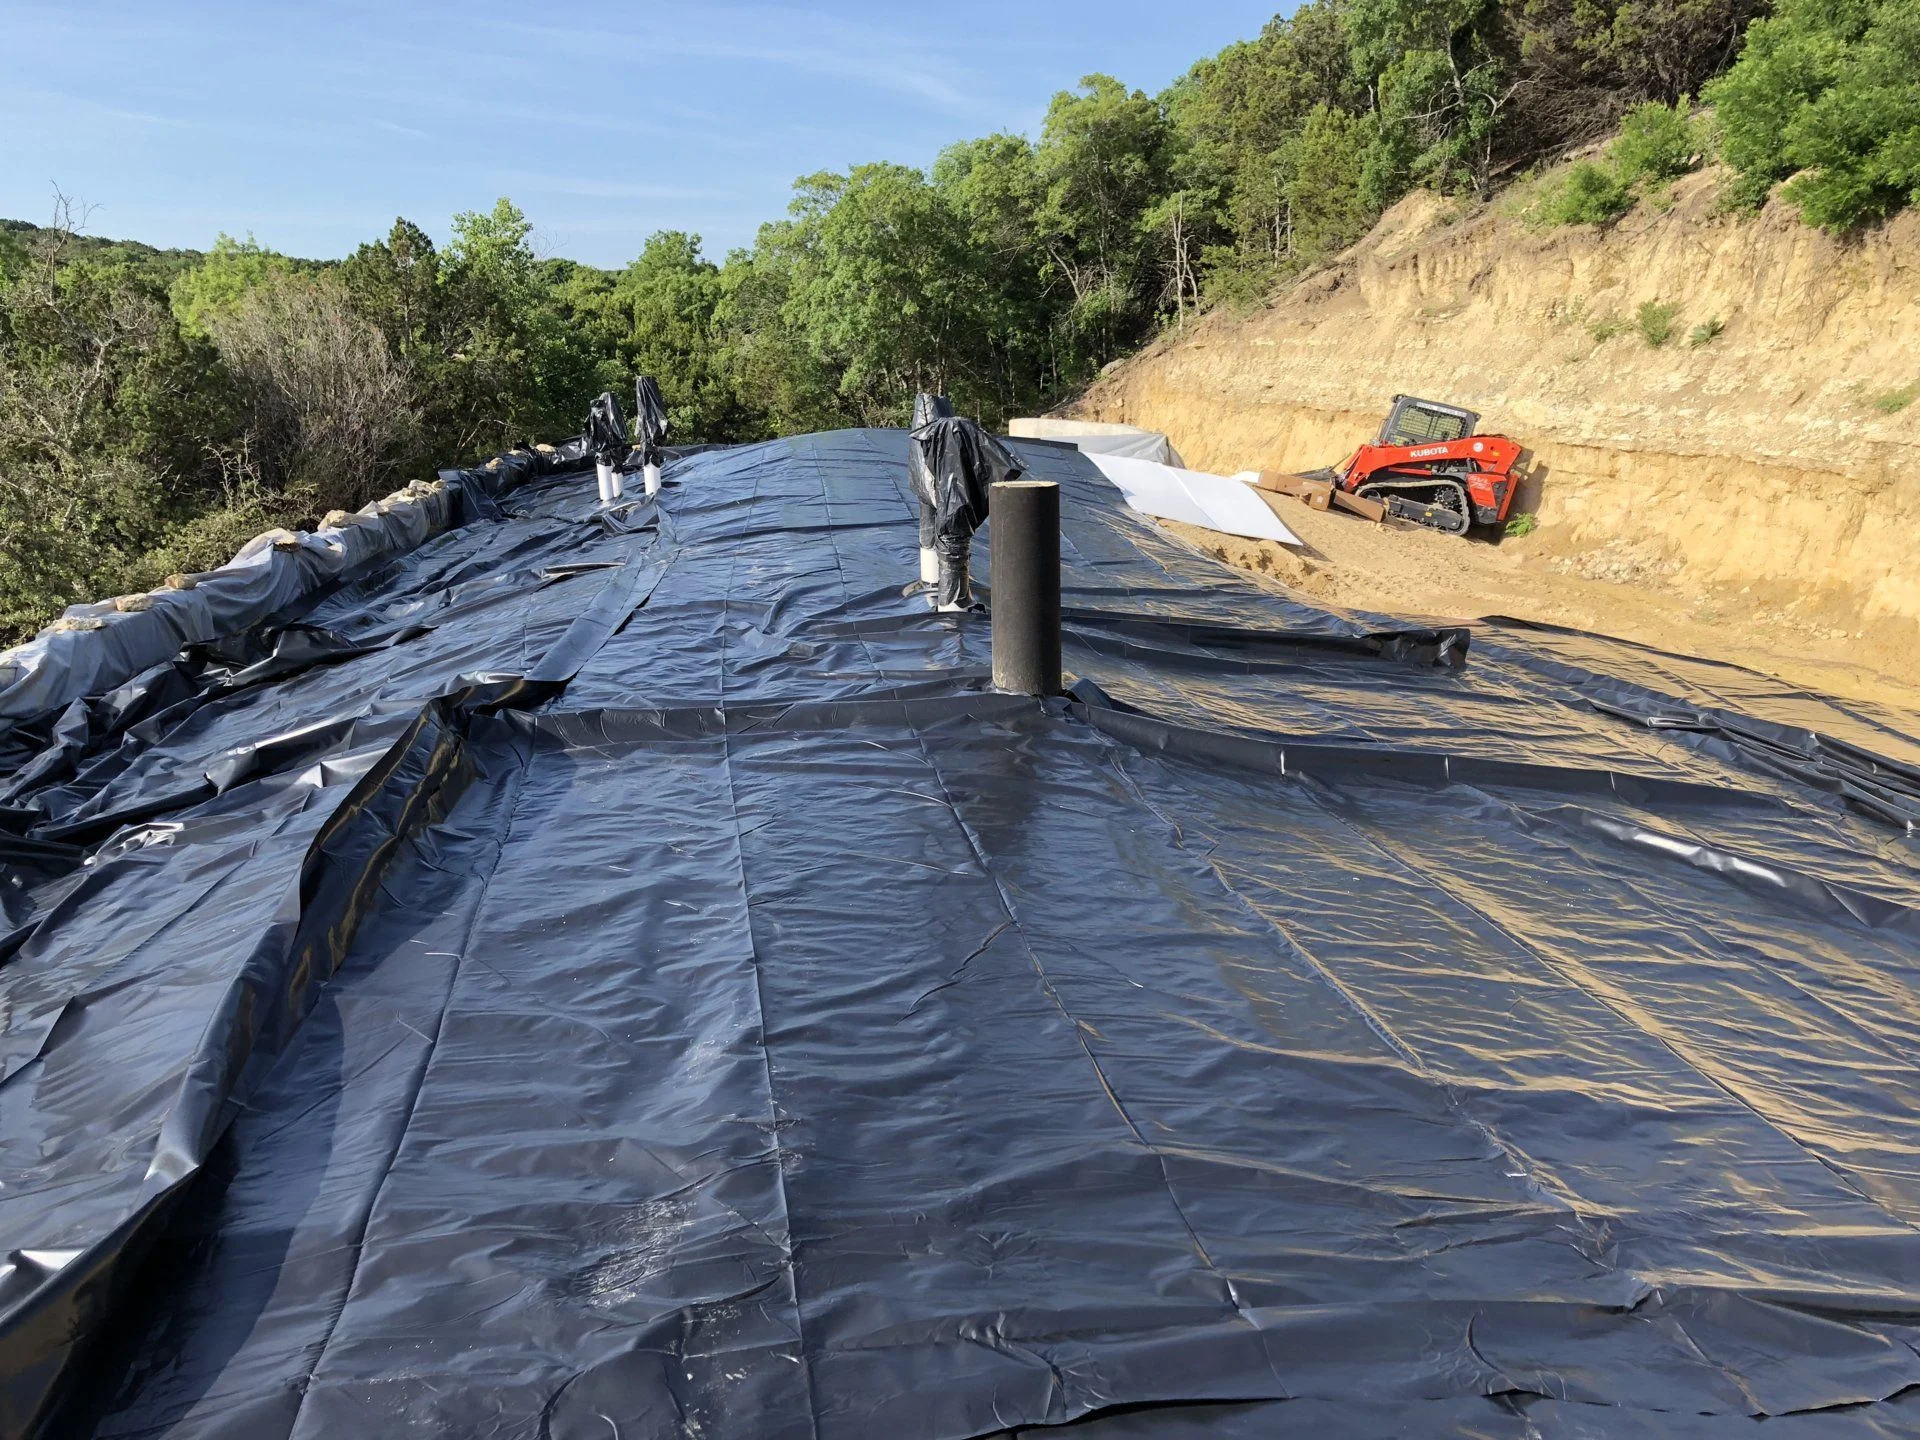
Once we had enough dirt on top and in the back to make a ramp for the track steer, it went pretty fast up on top. You just have to be careful to always be pushing dirt in front of you, so you don't run on the plastic sheeting and waterproofing underneath. The 1st layer is almost complete, just need a little more on the edges by the parapet wall, and to smooth everything so we can lay down a layer of 1" expanded polystyrene insulation and another layer of plastic sheeting:
The other thing you have to be careful of, is never to touch (with the track steer) any of the vent stacks or concrete pillars up there. Fortunately, there is enough room between most of them to maneuver, but you still have to watch, especially when backing up. Fortunately, the dirt contractor is an expert and an artist with his track steer. He rented a smaller 75 hp one just to work up on top.
It's starting to look like something, now that the domes are all covered and valleys between them filled in and smoothed out. One more day of track steer work should make us ready to lay the EPS and sheeting. Hopefully the wind won't be bad when the time comes - the EPS sheets are 16' long by 4' wide, but they're really light and would blow away easily.
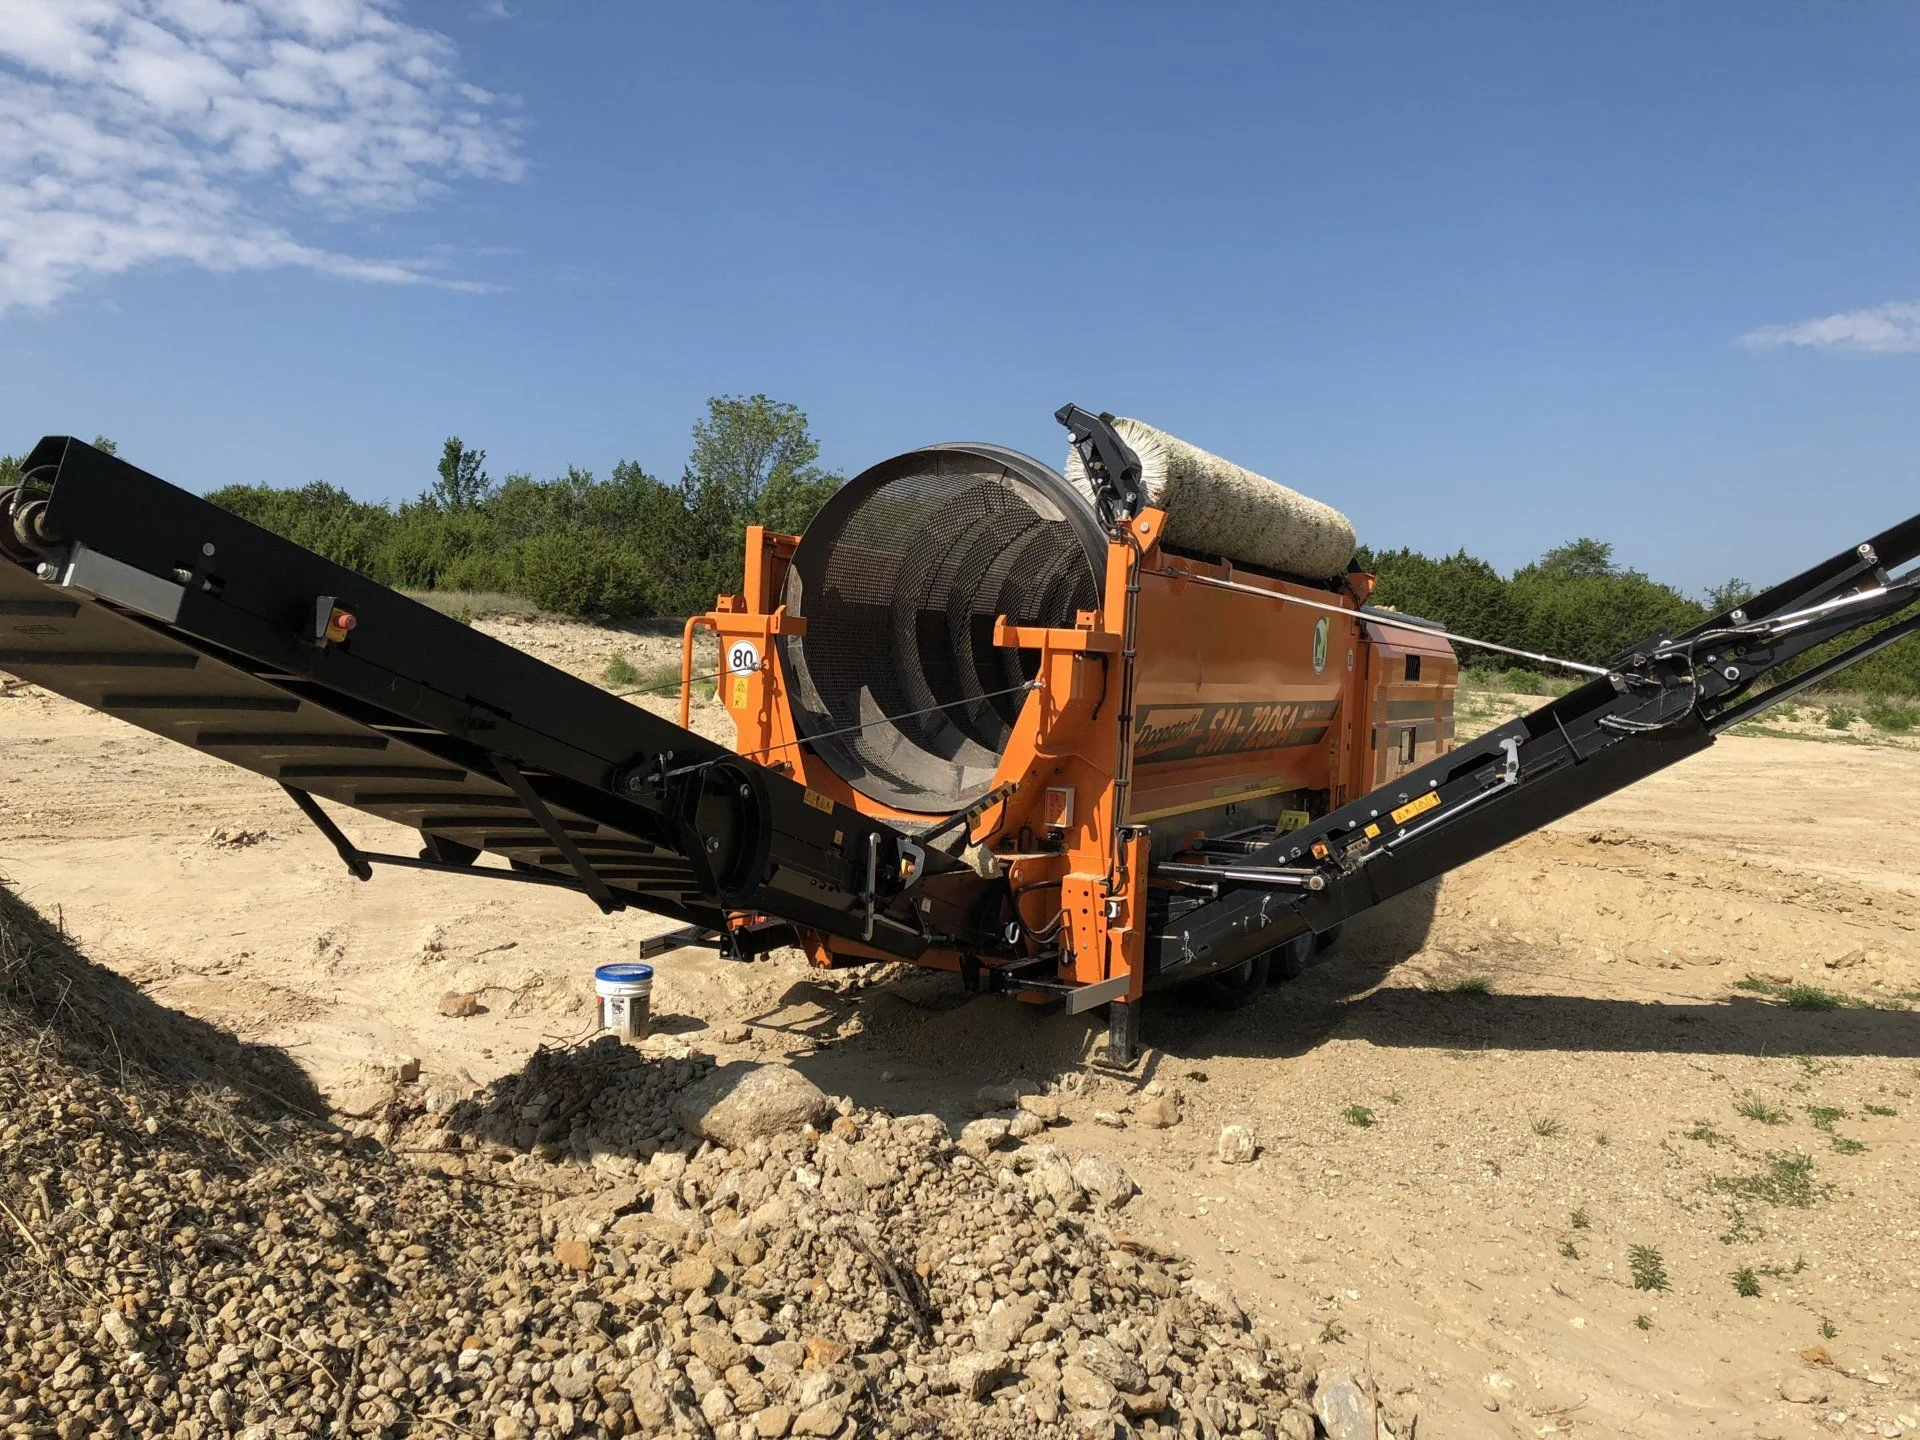
Meanwhile, back up the road at my shooting range, the soil processor is still at work. Another big (95hp) track steer is feeding it. You put raw material (excavated from the hill to build the house) in at one end, and it goes through a big turning drum. The drum exterior is a 1" open grid, so everything less than 1" in diameter goes out a conveyor on the side, and everything 1" or larger goes out another conveyor on the end. Powered by it's own diesel engine. This thing is expensive to rent, but really worth it, to have sifted soil to put on the top of the house and not have to worry about grinding rocks into/through the waterproofing.
Once we had enough dirt on top and in the back to make a ramp for the track steer, it went pretty fast up on top. You just have to be careful to always be pushing dirt in front of you, so you don't run on the plastic sheeting and waterproofing underneath. The 1st layer is almost complete, just need a little more on the edges by the parapet wall, and to smooth everything so we can lay down a layer of 1" expanded polystyrene insulation and another layer of plastic sheeting:

The other thing you have to be careful of, is never to touch (with the track steer) any of the vent stacks or concrete pillars up there. Fortunately, there is enough room between most of them to maneuver, but you still have to watch, especially when backing up. Fortunately, the dirt contractor is an expert and an artist with his track steer. He rented a smaller 75 hp one just to work up on top.
It's starting to look like something, now that the domes are all covered and valleys between them filled in and smoothed out. One more day of track steer work should make us ready to lay the EPS and sheeting. Hopefully the wind won't be bad when the time comes - the EPS sheets are 16' long by 4' wide, but they're really light and would blow away easily.
Meanwhile, back up the road at my shooting range, the soil processor is still at work. Another big (95hp) track steer is feeding it. You put raw material (excavated from the hill to build the house) in at one end, and it goes through a big turning drum. The drum exterior is a 1" open grid, so everything less than 1" in diameter goes out a conveyor on the side, and everything 1" or larger goes out another conveyor on the end. Powered by it's own diesel engine. This thing is expensive to rent, but really worth it, to have sifted soil to put on the top of the house and not have to worry about grinding rocks into/through the waterproofing.

Nice. Looks like you had fun with some big toys. Envious. Well done. One of a kind and for the ages. One open house I would go to.
Meanwhile, back up the road at my shooting range, the soil processor is still at work. Another big (95hp) track steer is feeding it. You put raw material (excavated from the hill to build the house) in at one end, and it goes through a big turning drum. The drum exterior is a 1" open grid, so everything less than 1" in diameter goes out a conveyor on the side, and everything 1" or larger goes out another conveyor on the end. Powered by it's own diesel engine. This thing is expensive to rent, but really worth it, to have sifted soil to put on the top of the house and not have to worry about grinding rocks into/through the waterproofing.
I've actually been thinking about putting a tiny one together for some projects around the house. I was thinking of using a portable concrete mixer, cutting "windows" in the drum, and welding in some perforated metal. Seeing the rotary brush on the one your using is a good idea. I should have a brush or scraper of some sort because I know stuff tends to get caught in the holes.
The other thing you have to be careful of, is never to touch (with the track steer) any of the vent stacks or concrete pillars up there.
Unfortunately, I've seen too many situations at job sites where some operator got cocky and ran into something at full tilt in reverse. It reminds you to stay humble about such things.
1911
chupacabra
- Thread starter
- #352
I've actually been thinking about putting a tiny one together for some projects around the house. I was thinking of using a portable concrete mixer, cutting "windows" in the drum, and welding in some perforated metal. Seeing the rotary brush on the one your using is a good idea. I should have a brush or scraper of some sort because I know stuff tends to get caught in the holes.
Yep, that's exactly why the rotary brush is there, to knock rocks and stuff out of the holes. I don't see why a homemade small one like you describe wouldn't work.
Unfortunately, I've seen too many situations at job sites where some operator got cocky and ran into something at full tilt in reverse. It reminds you to stay humble about such things.
It made me really nervous at first, and I was up there with him all the time. Even a single bump on a vent stack could possibly (probably?) cause a leak. But the operator is an artist with the track steer, and has done an outstanding job so far, so I am sleeping better at night.
Paint all the stacks with pink chalk/marking paint, disturbed paint makes it glaringly obvious if someone were to hit one. Then you have the opportunity to fix. All the future heartache I've seen stemmed not from the initial damage but from the tendency of people to hide the error and move on without inspecting/correcting.Yep, that's exactly why the rotary brush is there, to knock rocks and stuff out of the holes. I don't see why a homemade small one like you describe wouldn't work.
It made me really nervous at first, and I was up there with him all the time. Even a single bump on a vent stack could possibly (probably?) cause a leak. But the operator is an artist with the track steer, and has done an outstanding job so far, so I am sleeping better at night.
I know you're on it, just 0.02
Great progress!
1911
chupacabra
- Thread starter
- #355
Work on the top/back fill progresses, but with breaks for rain and wind. Yesterday early morning was calm, so we got all (108 4' x 16' sheets) of expanded polystyrene foam laid down over the the first layer of soil, and then another layer of overlapping 10-mil plastic sheeting on top of that. The sheeting went on a lot smoother and faster than last time, because the soil surface was pretty smooth and the valleys between domes are all filled in.
The EPS foam board is just to make a thermal break, to interrupt heat transfer through the soil.
The second layer of 10-mil poly sheeting is like an umbrella, to keep water off of everything below.
The EPS foam board is just to make a thermal break, to interrupt heat transfer through the soil.
The second layer of 10-mil poly sheeting is like an umbrella, to keep water off of everything below.
1911
chupacabra
- Thread starter
- #356
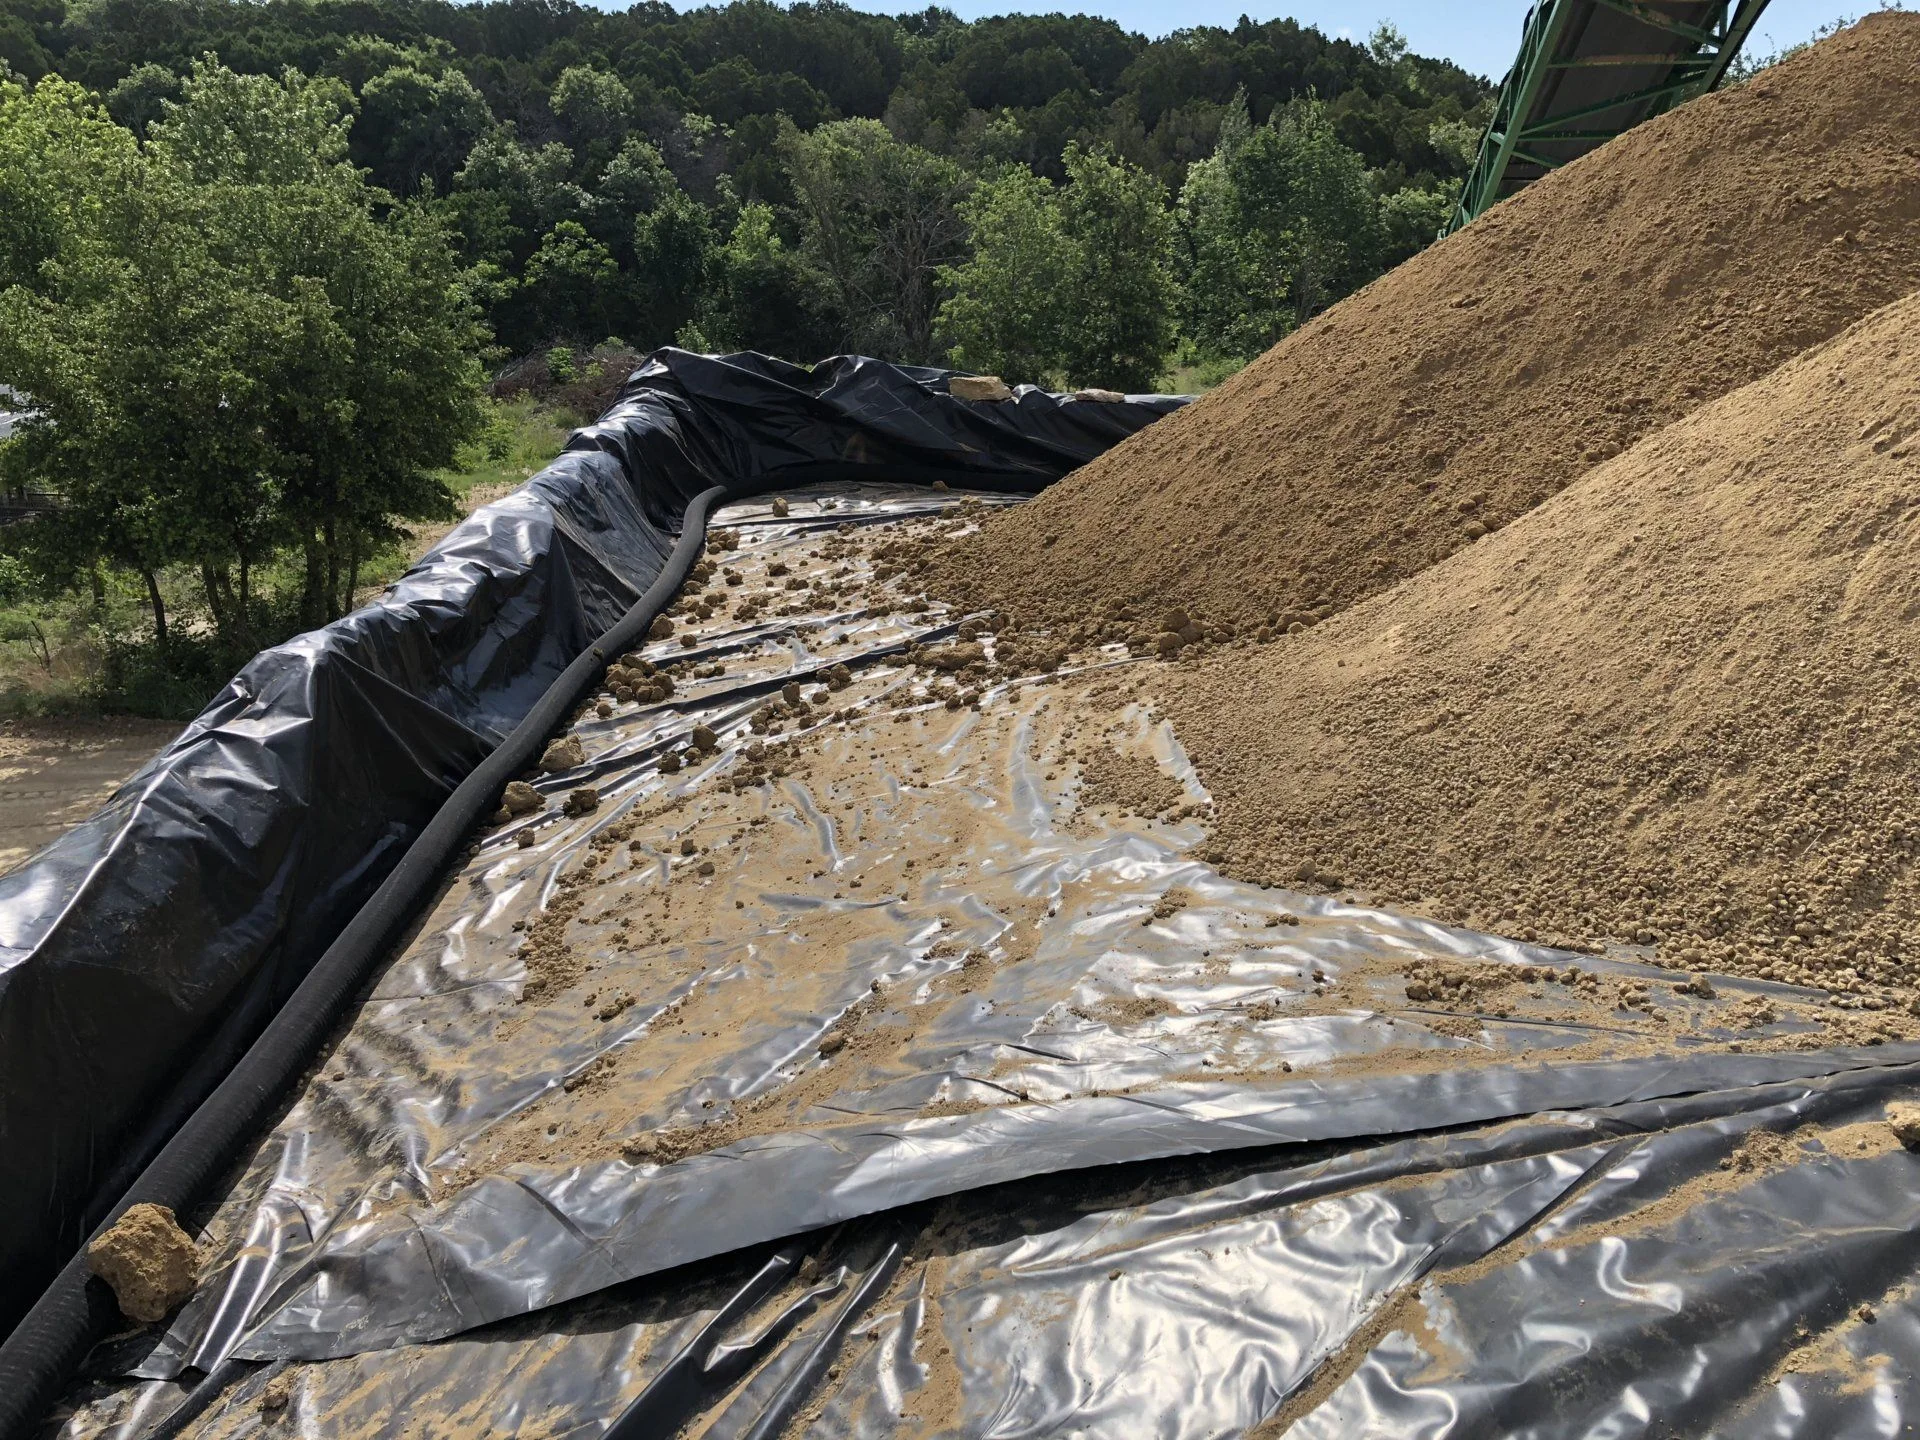
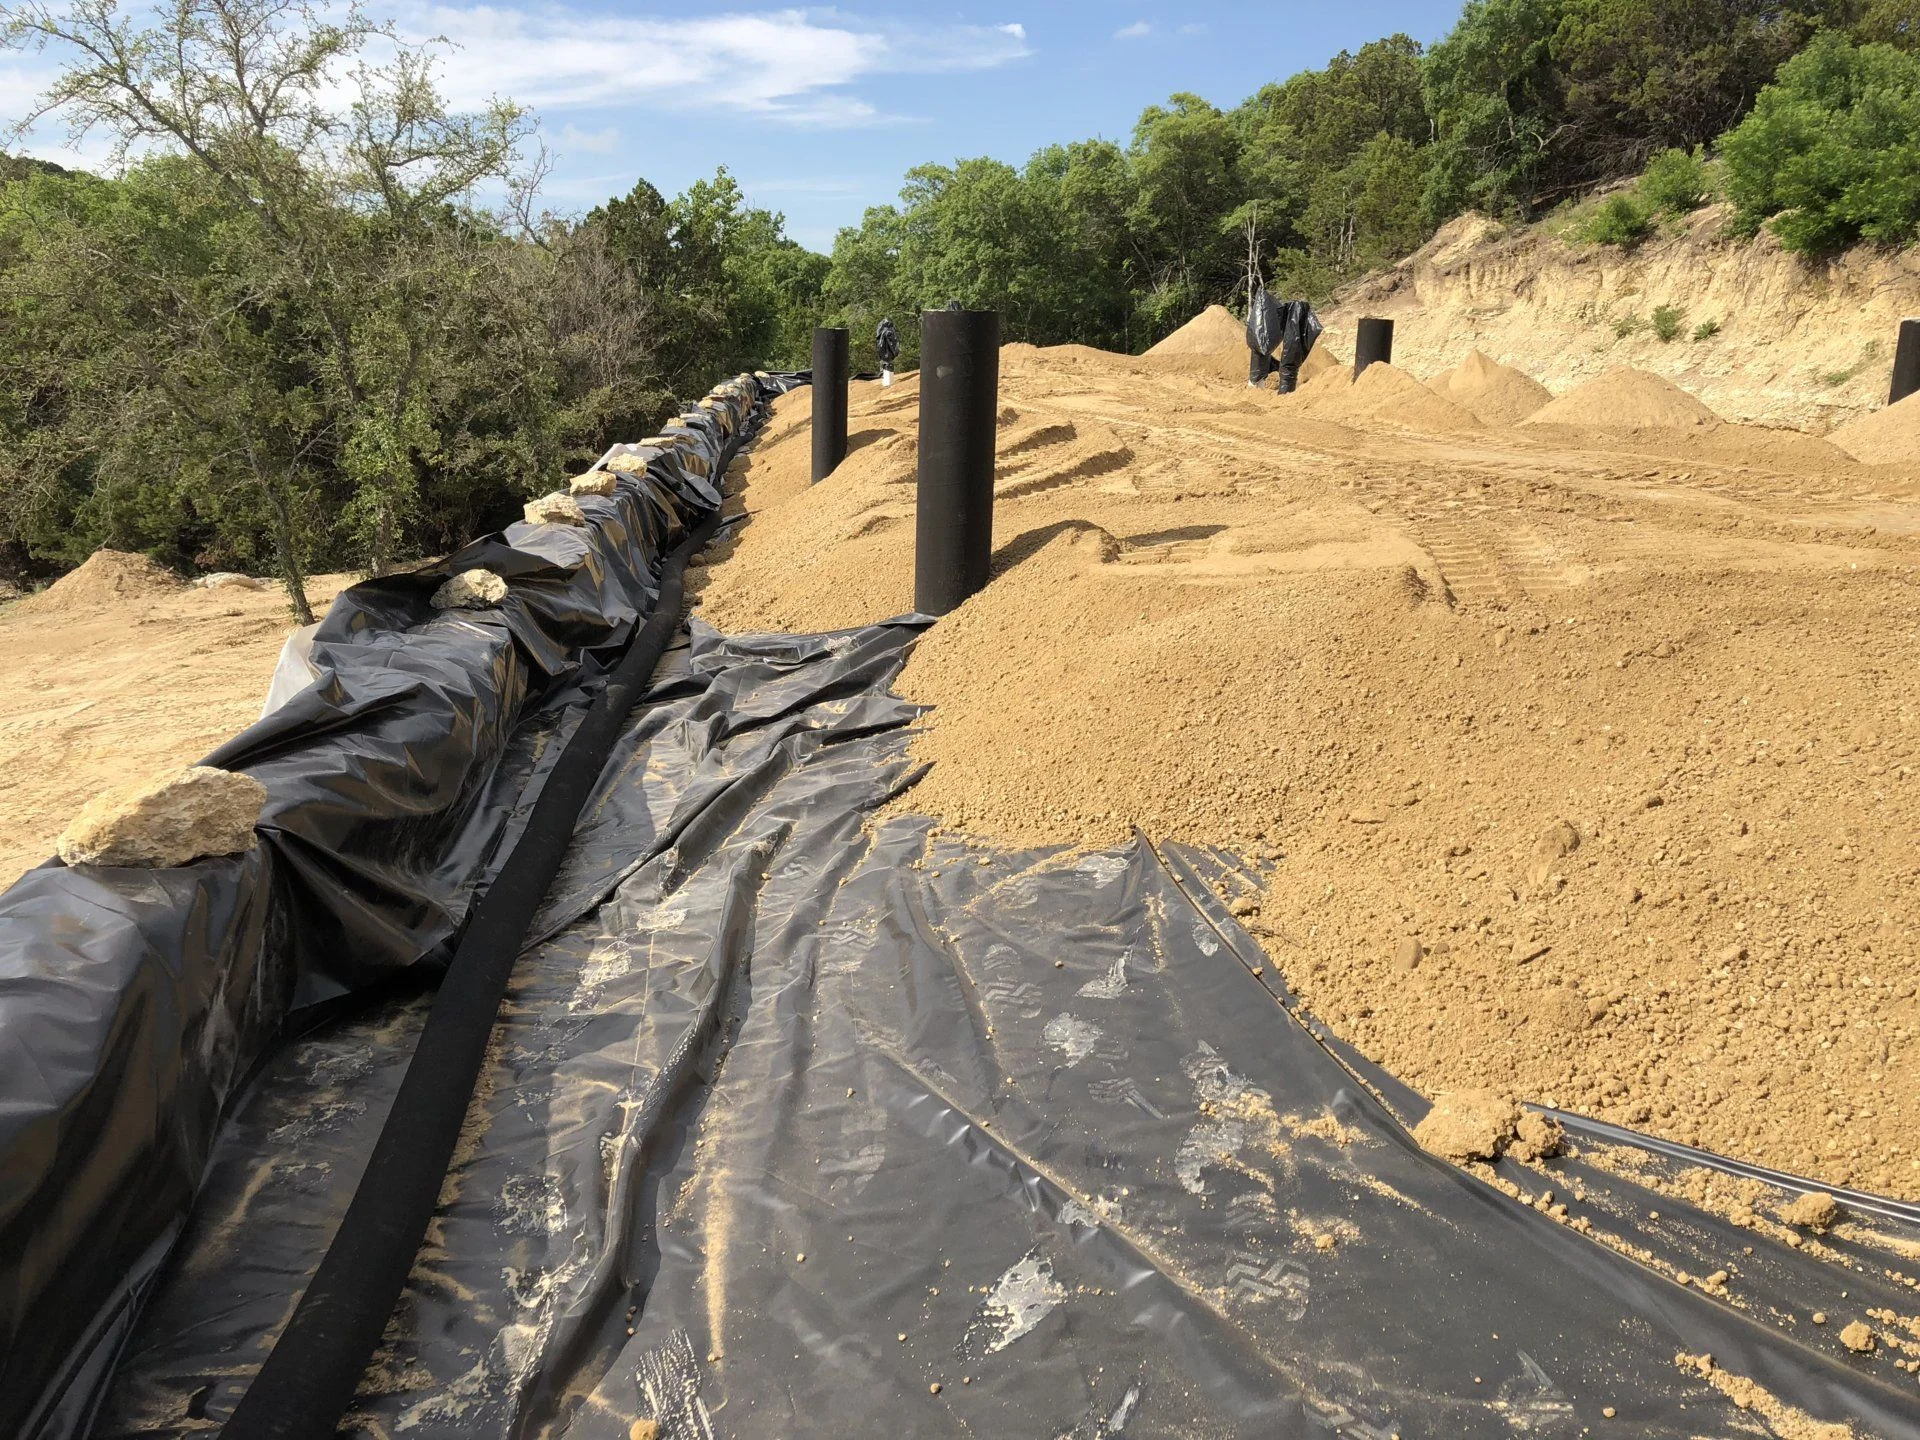
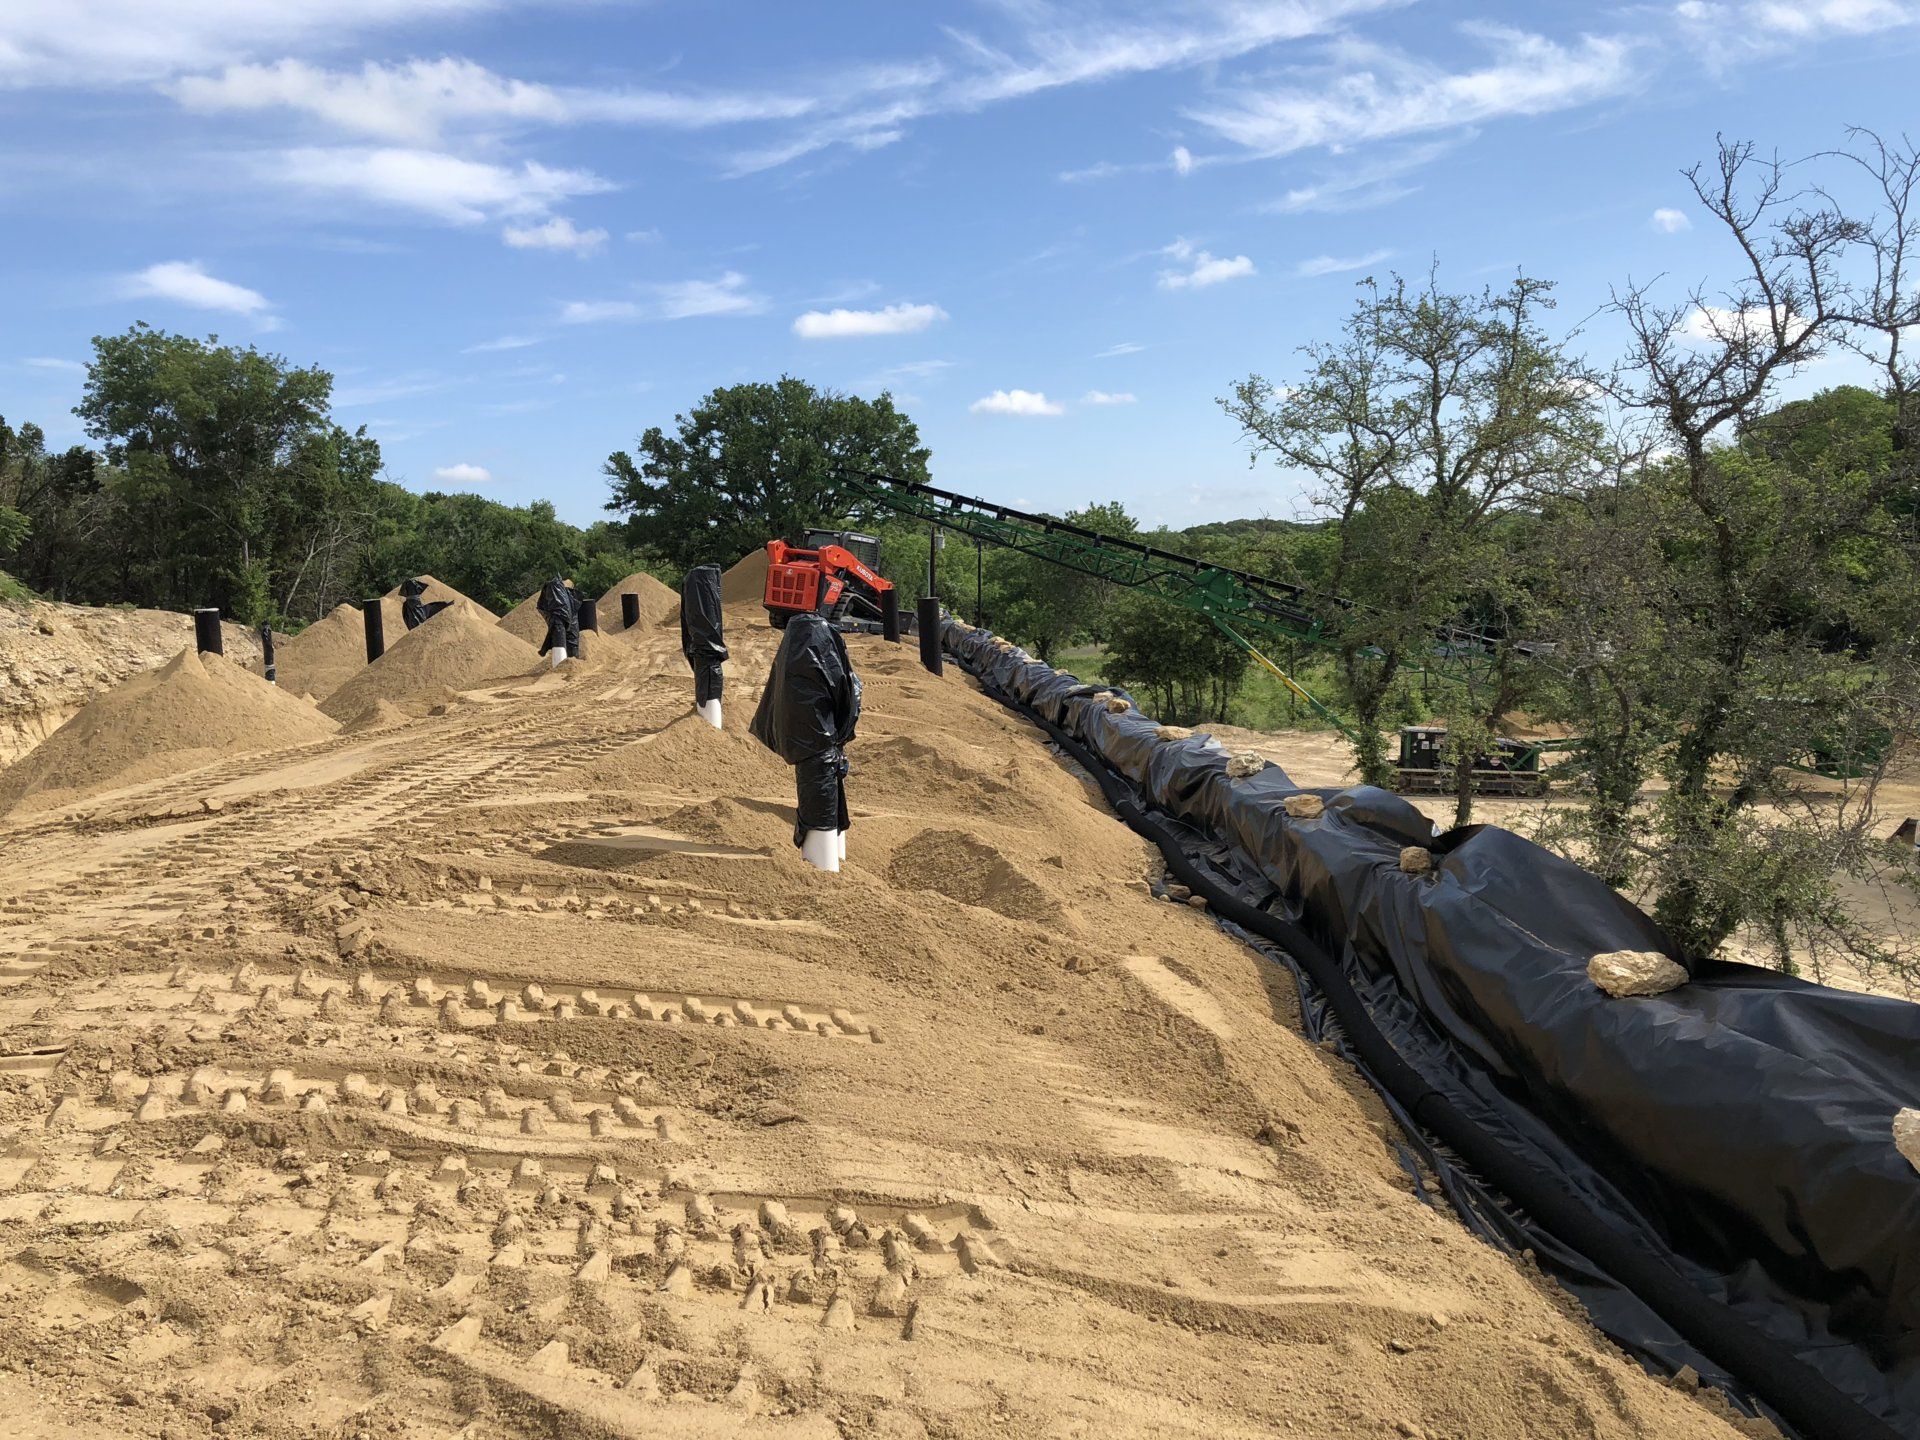
More progress as of this morning:
Conveyor belt continues to feed soil to the top, without having to drive around the back with every load. You can see the 10-mil poly sheeting of the "umbrella" laying over the parapet wall. It will of course be trimmed back when we're done. After the front and underside overhang of the parapet wall is plastered, I will put a metal cap over the top of the parapet wall to finish it off and capture the ends of all the poly sheeting.
Installing a second french drain, all along the parapet wall and behind the retaining walls at the sides. The first french drain is all along the base of the back wall, right at foundation level.
Pushing the second layer of soil over the "umbrella".
Conveyor belt continues to feed soil to the top, without having to drive around the back with every load. You can see the 10-mil poly sheeting of the "umbrella" laying over the parapet wall. It will of course be trimmed back when we're done. After the front and underside overhang of the parapet wall is plastered, I will put a metal cap over the top of the parapet wall to finish it off and capture the ends of all the poly sheeting.

Installing a second french drain, all along the parapet wall and behind the retaining walls at the sides. The first french drain is all along the base of the back wall, right at foundation level.
Pushing the second layer of soil over the "umbrella".
Truly amazing all the steps you're taking to do it right. I really like watching it come to fruit.
Nice to see that you're at this stage. Must feel very rewarding.
Keep up the good work and thanks for sharing the build.
Keep up the good work and thanks for sharing the build.
You are documenting this process very well. Thank you.
Do you have enough cash to start on the interior, or are you going to make us wait a while for that?
Do you have enough cash to start on the interior, or are you going to make us wait a while for that?
1911
chupacabra
- Thread starter
- #360
You are documenting this process very well. Thank you.
Thank you (and everyone else) for reading along and making positive comments and suggestions.
Do you have enough cash to start on the interior, or are you going to make us wait a while for that?
LOL, sorry but we probably won't start on the interior right away. The good news is, my business has picked up lately, I'm getting more work than I have in a long time, so as long as that holds out it should allow us to start moving forward again. The next step will be to frame-up the bottom of the window openings, and put in all the doors and windows to enclose it.
Similar threads
Users who are viewing this thread
Total: 2 (members: 0, guests: 2)