- Thread starter
- #181
I cut all my plies ahead of time and have them prepped so I know exactly what I’m reaching for when. Rough cutting is fine as you can trim edges and stragglers as you go. One nice thing about epoxy is the extended cure times.

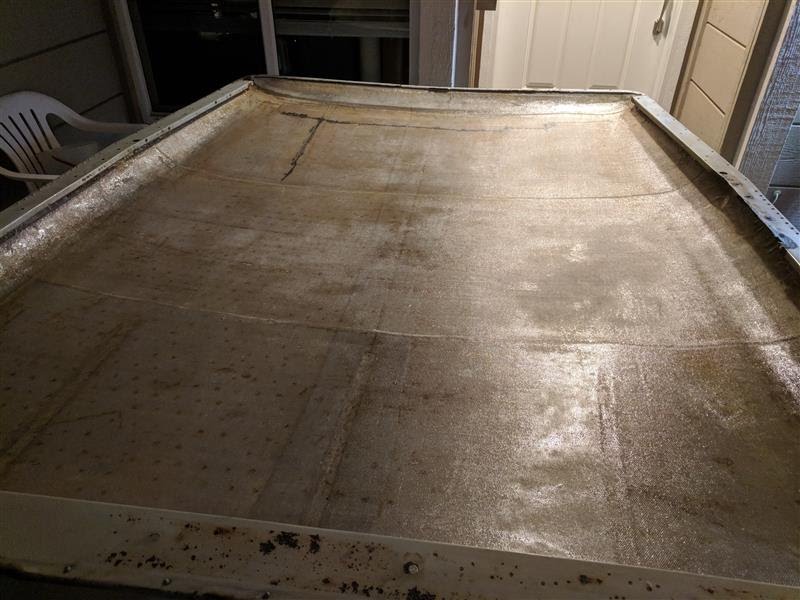
Turned out nice. 3-4 layers at the crack, 2 elsewhere.
I was getting ready to go after the topside and prepped the surface for glass over the front third. If you’re hardcore it’s better to take off all the gel coat, but I was trying to keep this simple and took the gel down until it was just starting to show glass through.
I was also still thinking about all those broken bolts from the side panels and the like. I was not looking forward to drilling all those… what a nightmare. It was weird to me that the majority would break loose, start to turn, and then after a turn you felt it seize up and snap. As such, I decided the best thing to do was commit and take the roof trim off completely. Had Randy cut the 50 or so rivets. I also ordered a rivet gun and bucking bar kit so theoretically I can put some of this stuff back.
Pulling the trim is nice in that it’ll let me seal the drip rail properly and make several other repairs easier as well, this inner surface is begging for some POR 15. Most of the bolts we were broke had rust nuggets formed at the tip which I’m assuming is what we feel jamming. No way that was going to pull through so think we did the right thing. We got ~15 of the broken guys out from the top should minimize repairs, but there’s still some work ahead.
Unfortunately, Randy did manage to carve into the lip quite a bit pulling rivets (once again, YAY for extra folks pushing me to keep moving. BOO for stuff getting jacked up when others aren’t as meticulous as I am). Brass tacks: I called an audible and we did a bonus round of fiberglass and glassed the entire perimeter with a couple layers of 10” strips.
A couple more tips on fiberglass. It doesn’t like sharp bends. For instance, you pretty much can’t wrap a sharp edge. The glass will just bulge around to find a gentler radius curve leaving with air gaps or “bridging” to use the industry term. If you have access to vacuum bagging a great deal of this is an non-issue (but then again if you’re vacuum bagging you probably don’t need my advice).
I worked on my edges for probably an hour at the end of this effort, just working the radiused 45 degree convex area where it transitioned to the flange. I clipped all the stray strands (scissors you can disassembly to clean--IE Cutco--are a big help). The overall edges get final cut with a razor blade when the resin is firm but not fully hard.
The above is also why composite mold edges wear down over time since part after part typically gets razor cut to the same edge shaving it down over time.
With that done, I finally flipped back to the topside. Since there were now grooves to fill at the rivets, I had Randy sand the whole roof, fill the divots (bondo), and then we put two layers of glass over everything up top.
Here I ran the seams fore aft and staggered the overlaps to minimize thickness (and eventually, the sanding and fairing required).
I was actually surprised how well the corners laid down, I was sure we were going to have to angle cut the plies to make the convex corners work out.
By the time this back together, I should have about the strongest FJ40 roof out there. Not sure it’d survive a roll, but I’ve done what I could (and then some). To anyone freezing back East, I’m sorry, but damn was I thankful for sunny Socal. The nice weather made this all much easier to tackle.


Turned out nice. 3-4 layers at the crack, 2 elsewhere.
I was getting ready to go after the topside and prepped the surface for glass over the front third. If you’re hardcore it’s better to take off all the gel coat, but I was trying to keep this simple and took the gel down until it was just starting to show glass through.

I was also still thinking about all those broken bolts from the side panels and the like. I was not looking forward to drilling all those… what a nightmare. It was weird to me that the majority would break loose, start to turn, and then after a turn you felt it seize up and snap. As such, I decided the best thing to do was commit and take the roof trim off completely. Had Randy cut the 50 or so rivets. I also ordered a rivet gun and bucking bar kit so theoretically I can put some of this stuff back.

Pulling the trim is nice in that it’ll let me seal the drip rail properly and make several other repairs easier as well, this inner surface is begging for some POR 15. Most of the bolts we were broke had rust nuggets formed at the tip which I’m assuming is what we feel jamming. No way that was going to pull through so think we did the right thing. We got ~15 of the broken guys out from the top should minimize repairs, but there’s still some work ahead.
Unfortunately, Randy did manage to carve into the lip quite a bit pulling rivets (once again, YAY for extra folks pushing me to keep moving. BOO for stuff getting jacked up when others aren’t as meticulous as I am). Brass tacks: I called an audible and we did a bonus round of fiberglass and glassed the entire perimeter with a couple layers of 10” strips.

A couple more tips on fiberglass. It doesn’t like sharp bends. For instance, you pretty much can’t wrap a sharp edge. The glass will just bulge around to find a gentler radius curve leaving with air gaps or “bridging” to use the industry term. If you have access to vacuum bagging a great deal of this is an non-issue (but then again if you’re vacuum bagging you probably don’t need my advice).
I worked on my edges for probably an hour at the end of this effort, just working the radiused 45 degree convex area where it transitioned to the flange. I clipped all the stray strands (scissors you can disassembly to clean--IE Cutco--are a big help). The overall edges get final cut with a razor blade when the resin is firm but not fully hard.

The above is also why composite mold edges wear down over time since part after part typically gets razor cut to the same edge shaving it down over time.
With that done, I finally flipped back to the topside. Since there were now grooves to fill at the rivets, I had Randy sand the whole roof, fill the divots (bondo), and then we put two layers of glass over everything up top.

Here I ran the seams fore aft and staggered the overlaps to minimize thickness (and eventually, the sanding and fairing required).

I was actually surprised how well the corners laid down, I was sure we were going to have to angle cut the plies to make the convex corners work out.

By the time this back together, I should have about the strongest FJ40 roof out there. Not sure it’d survive a roll, but I’ve done what I could (and then some). To anyone freezing back East, I’m sorry, but damn was I thankful for sunny Socal. The nice weather made this all much easier to tackle.