FJ60 5.7l TBI to 5.3l LS Swap (1 Viewer)

This site may earn a commission from merchant affiliate
links, including eBay, Amazon, Skimlinks, and others.

YotaJosh

SILVER Star
Joined
Jun 22, 2008
Threads
133
Messages
1,573
Location
Little Rock, AR
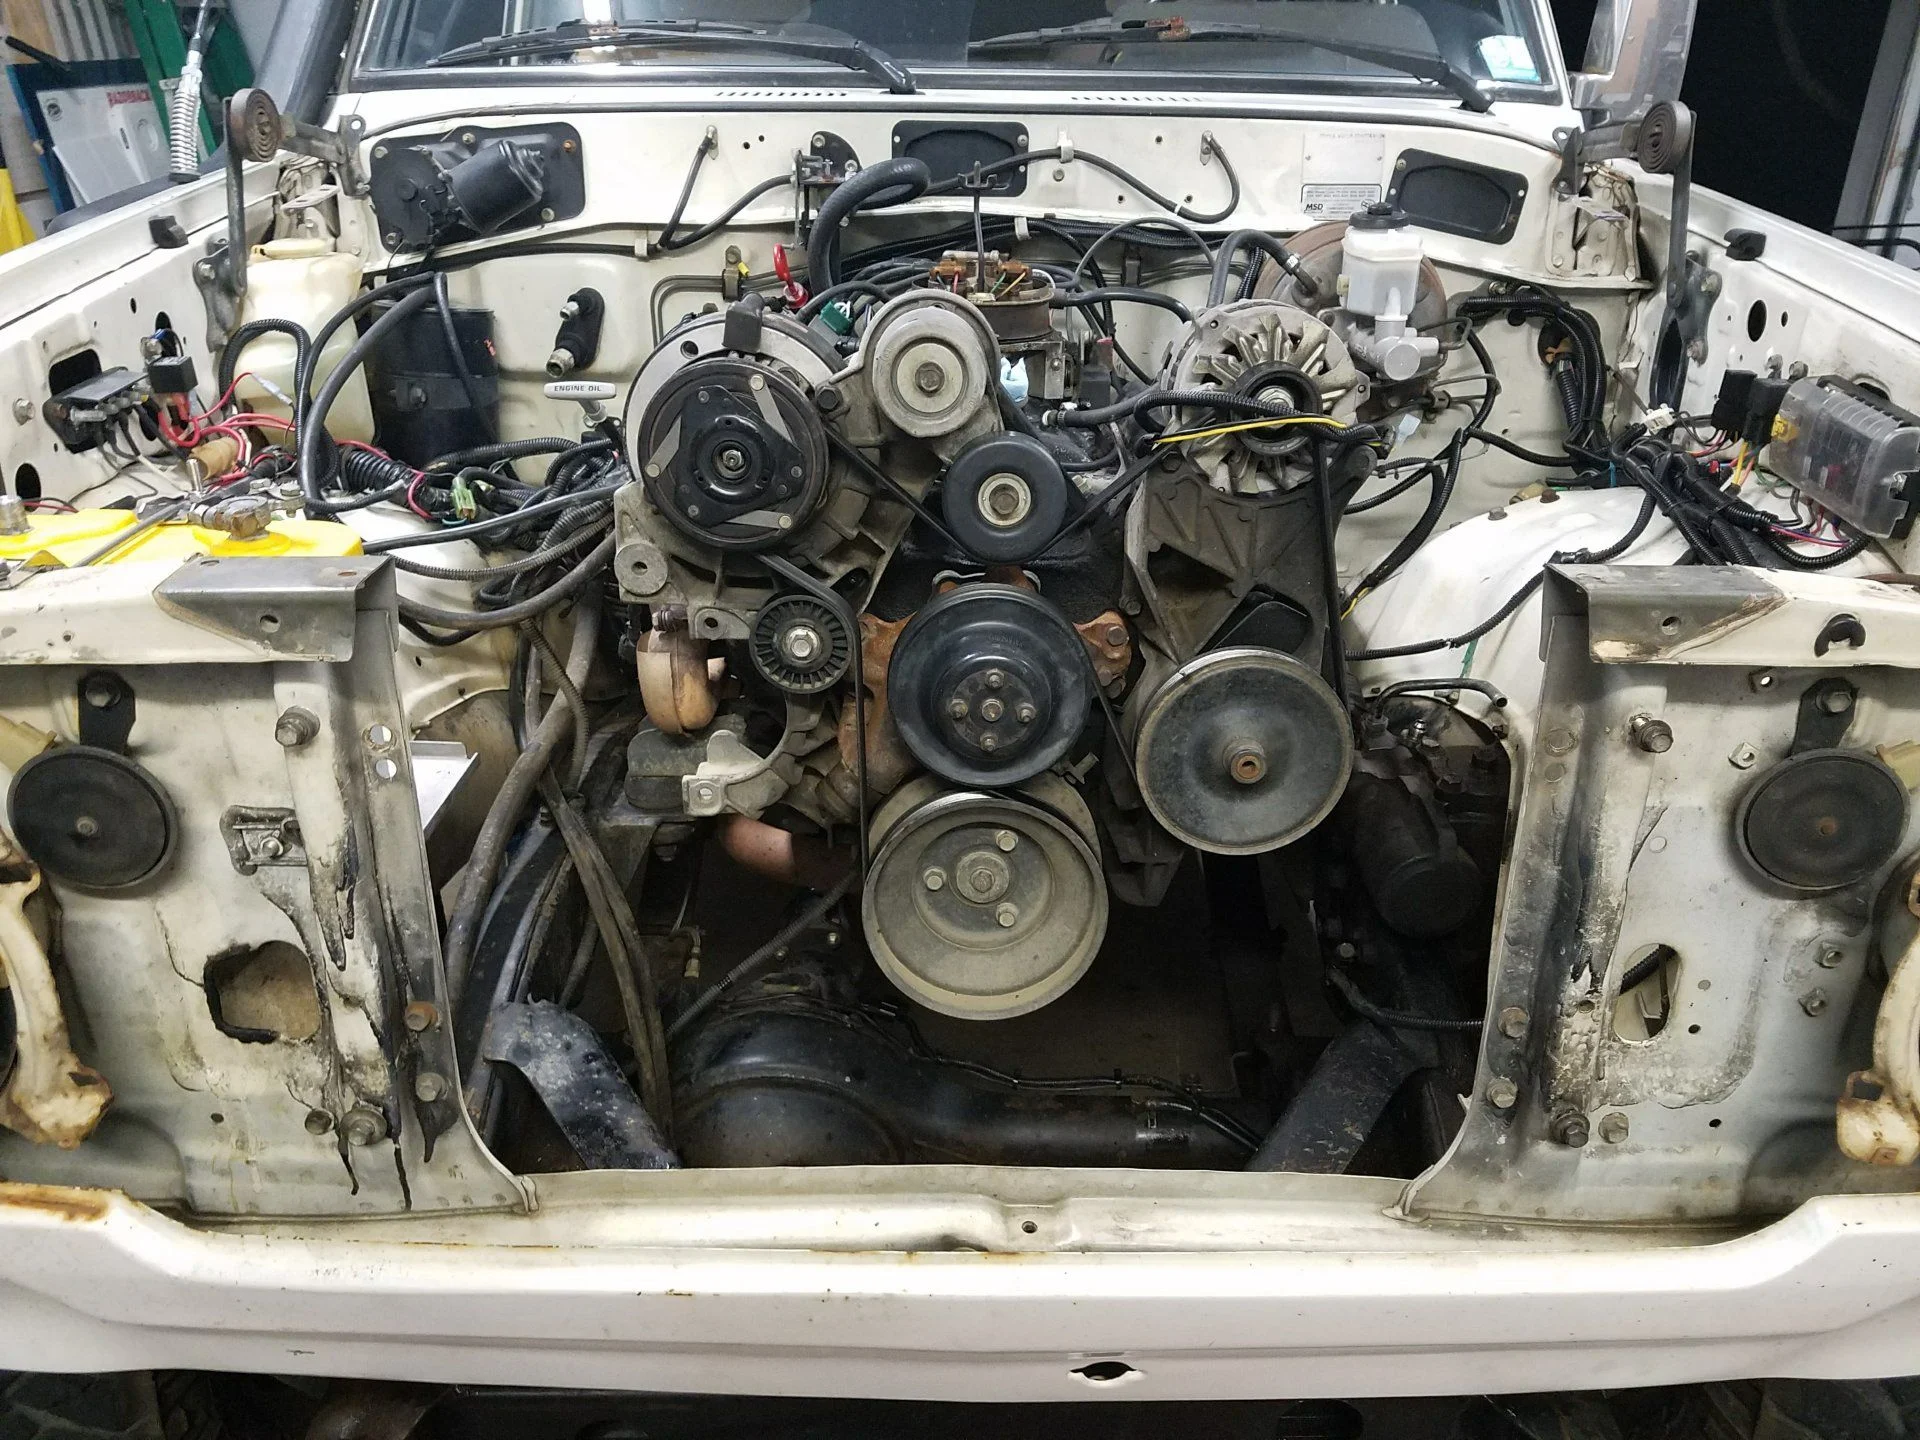
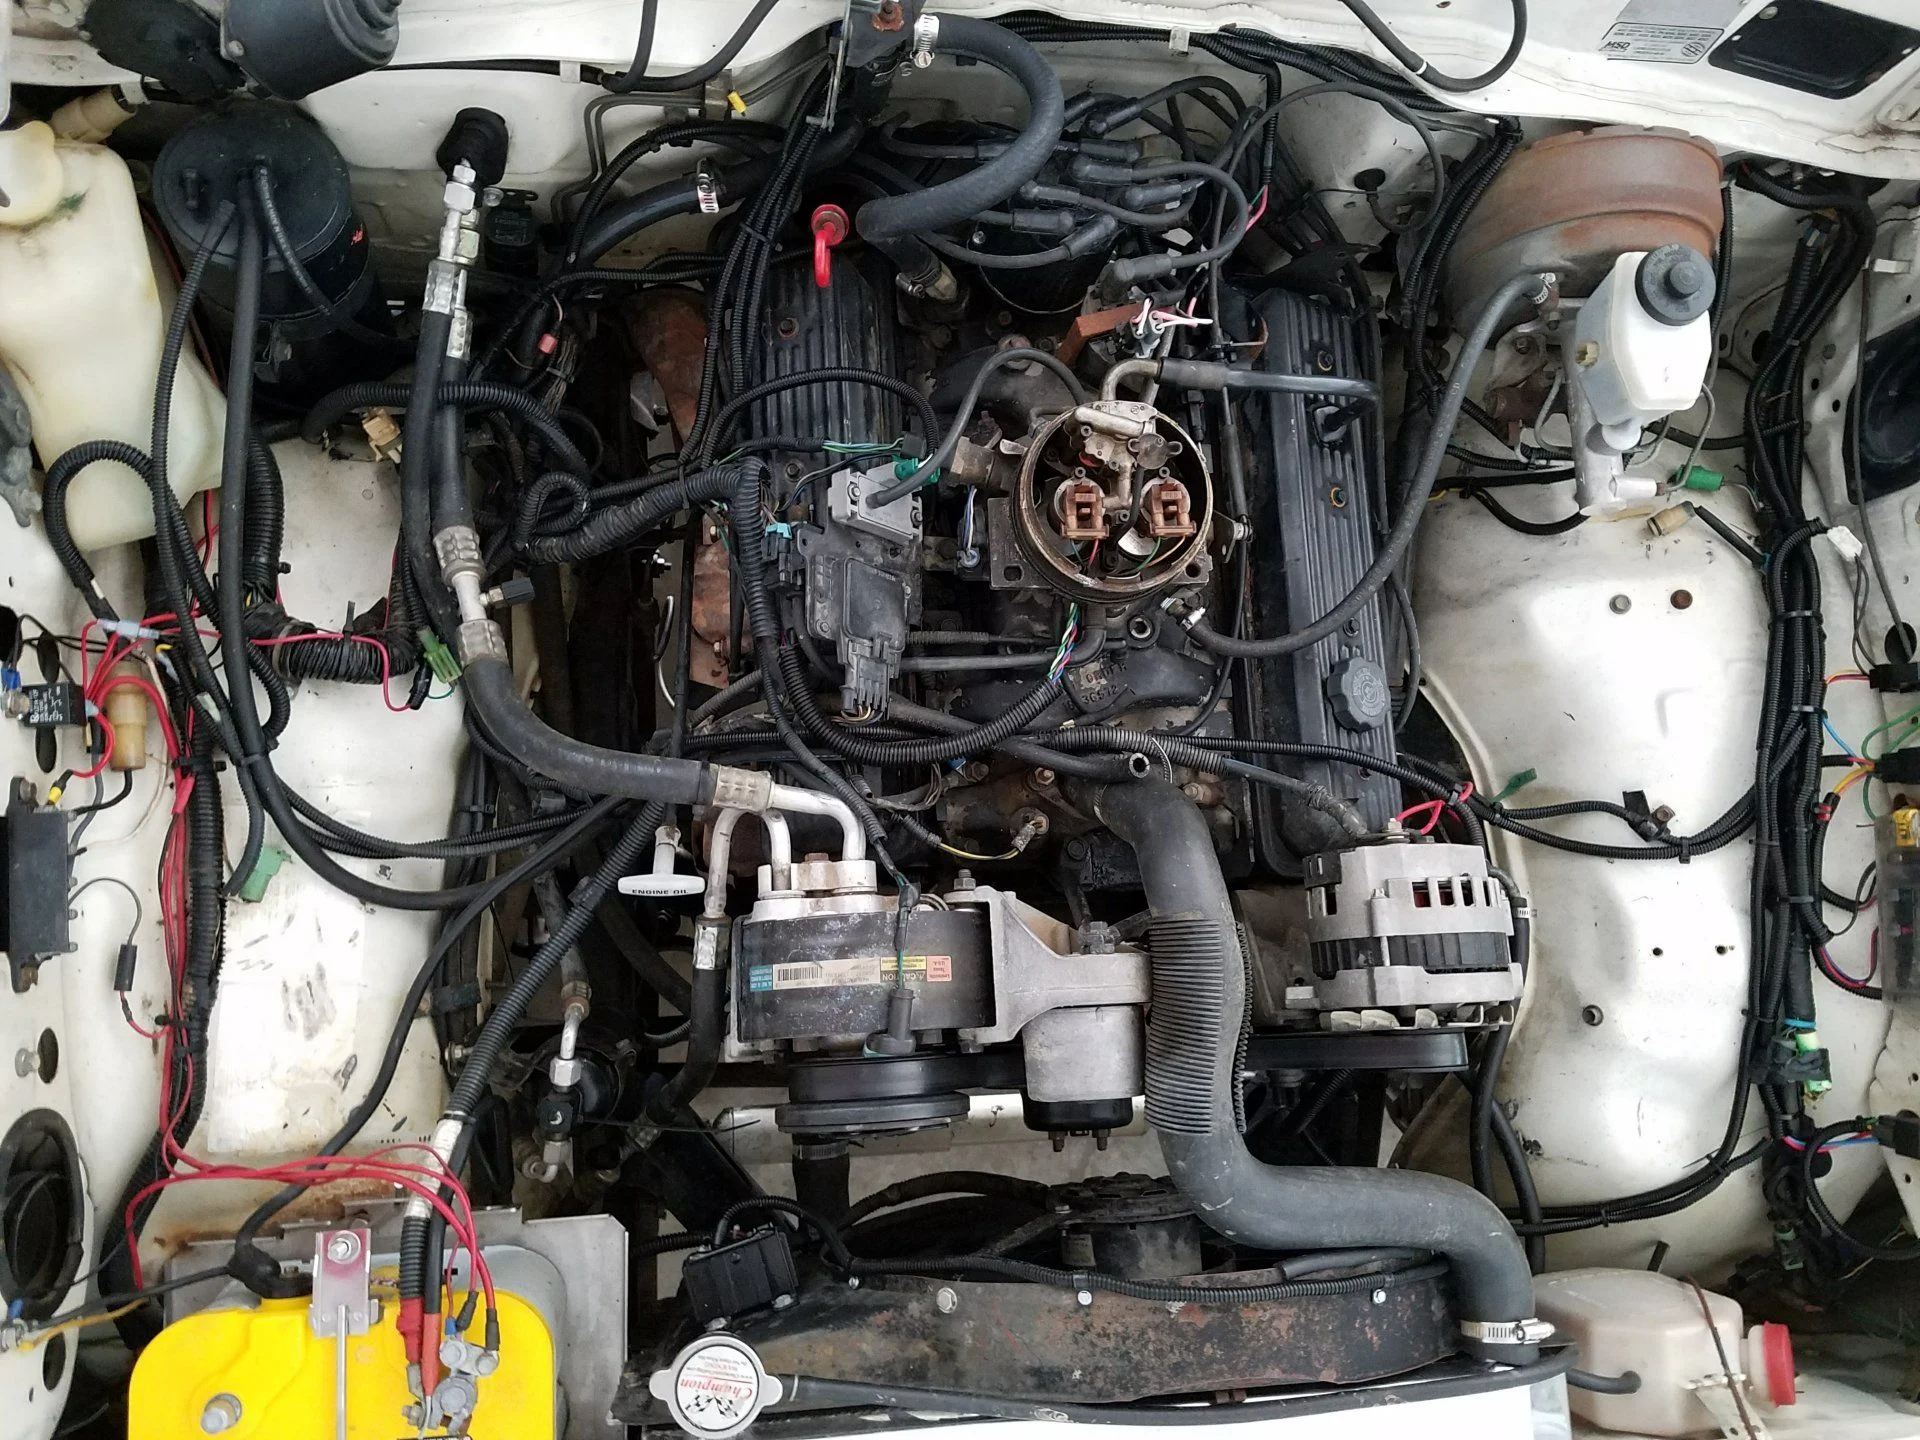
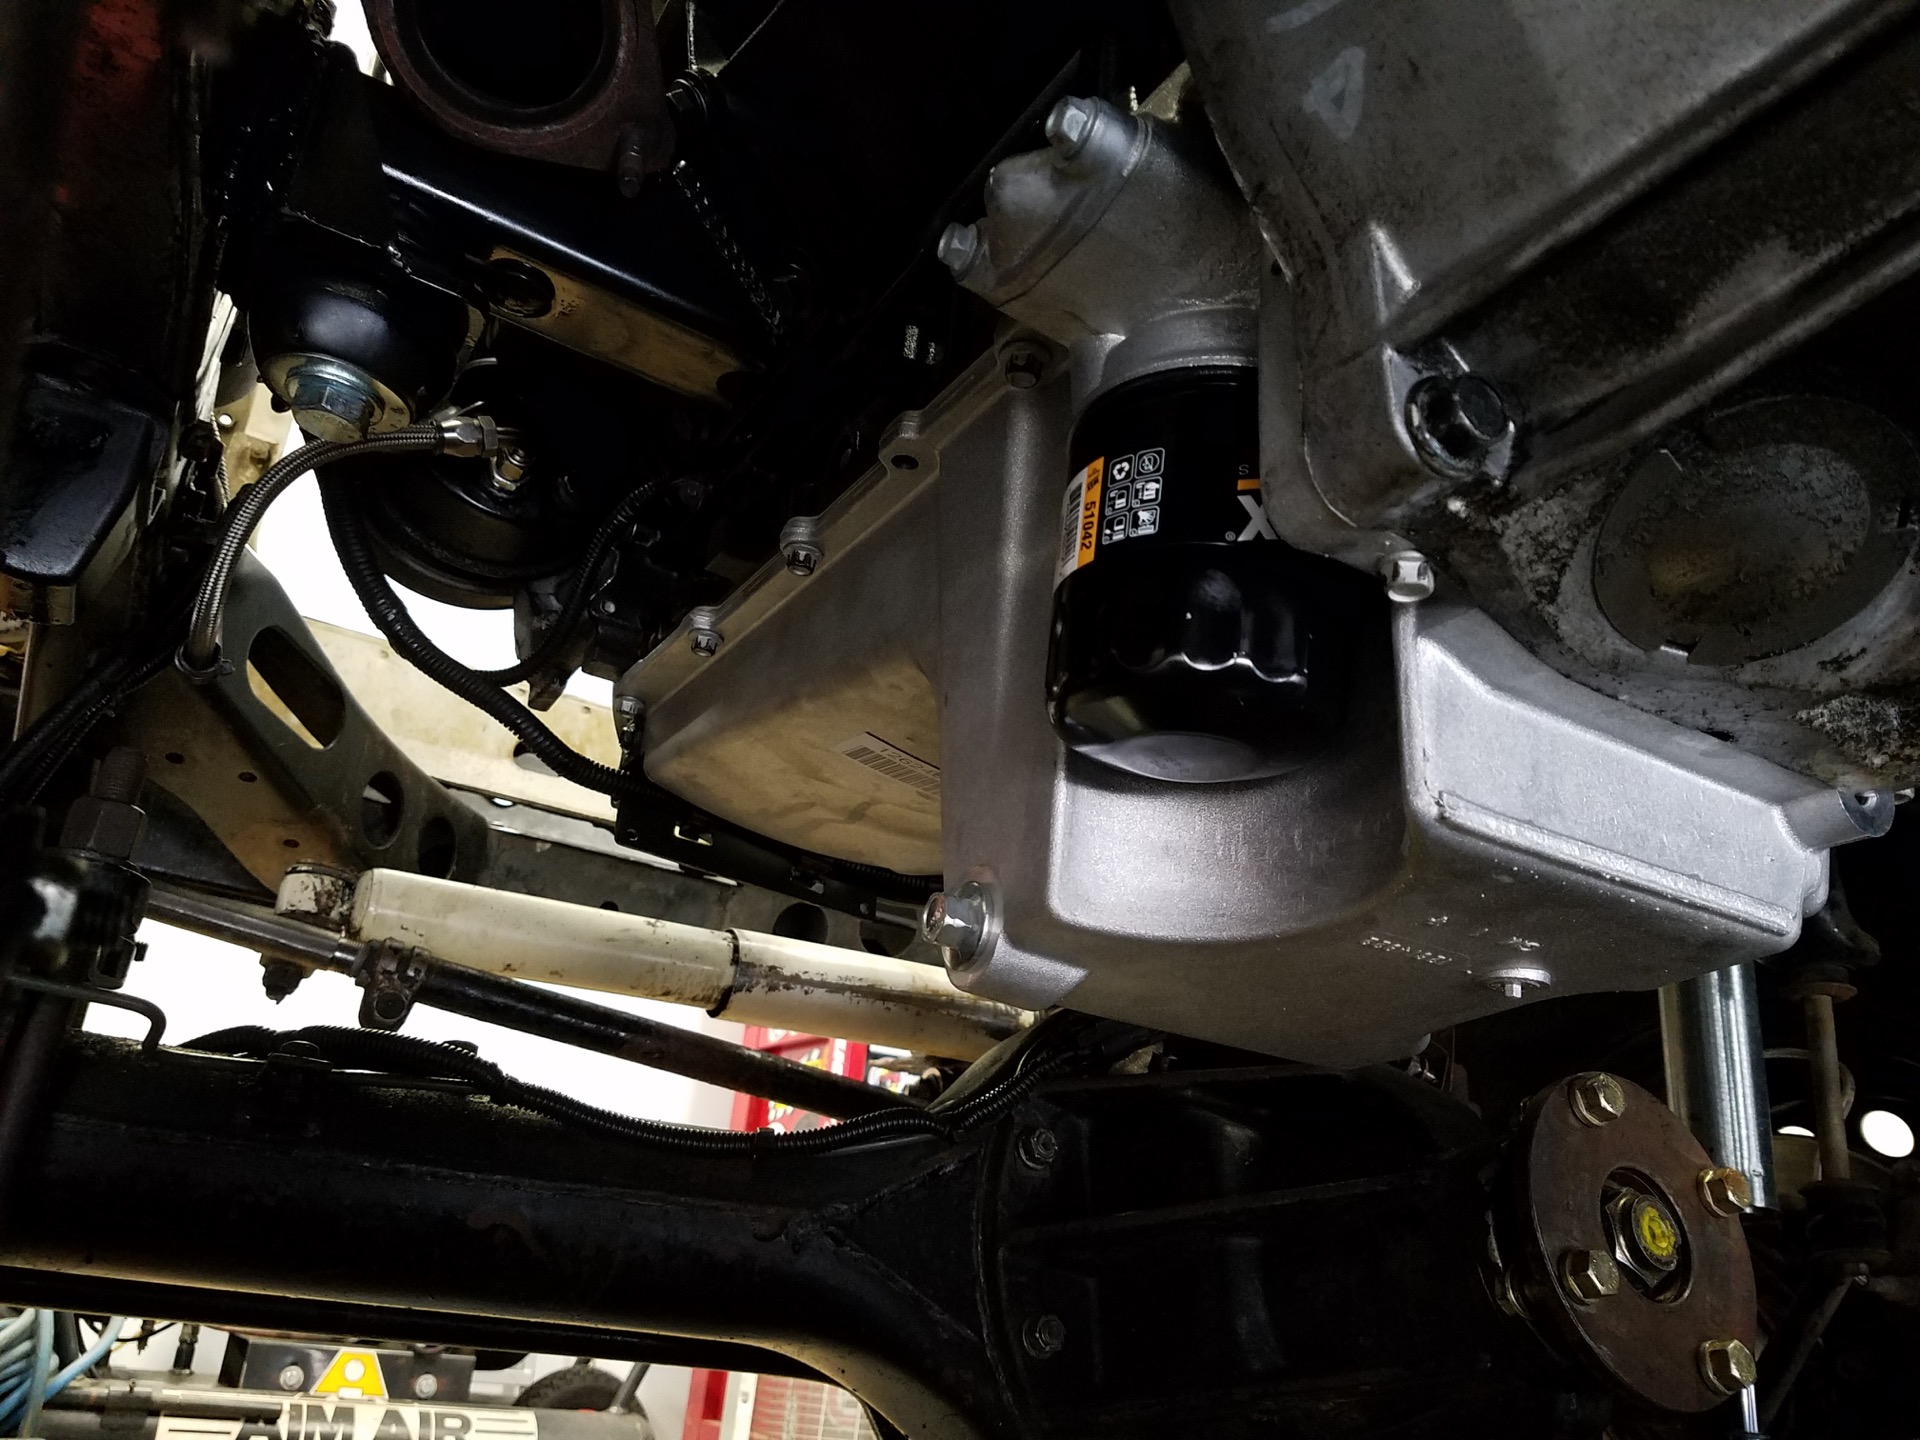
So I've owned my 1987 FJ60 for 5 years now. I bought it locally, and someone other than him had swapped out the 2F and 4 speed for a 5.7l 350 TBI injected motor, mated to a 700R4 transmission and adapted to the stock split case transfer case using the typical Advance Adapters hardware.

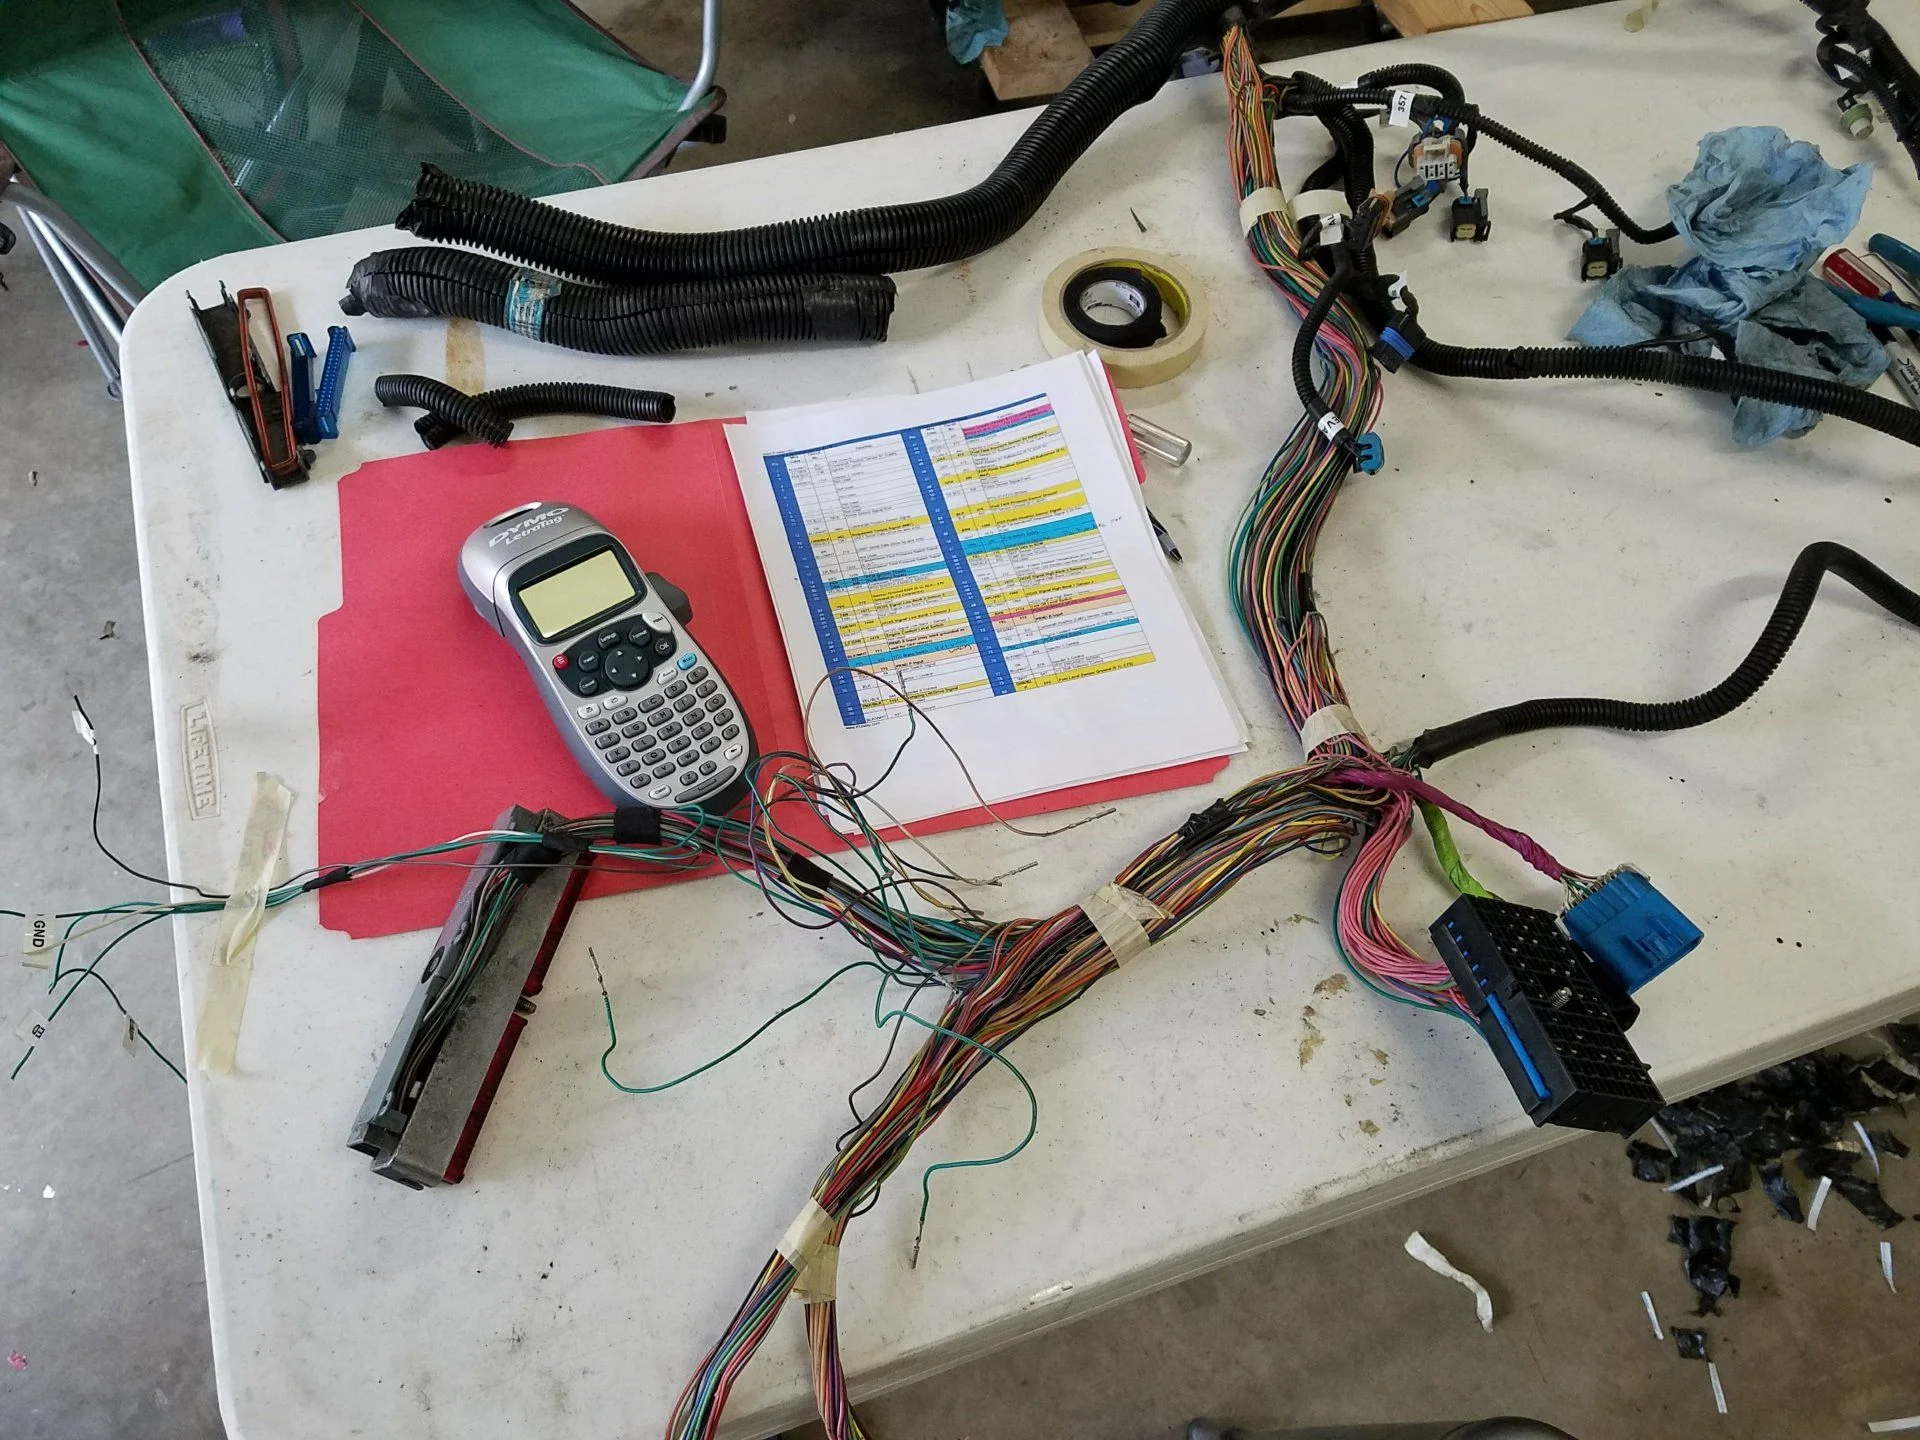
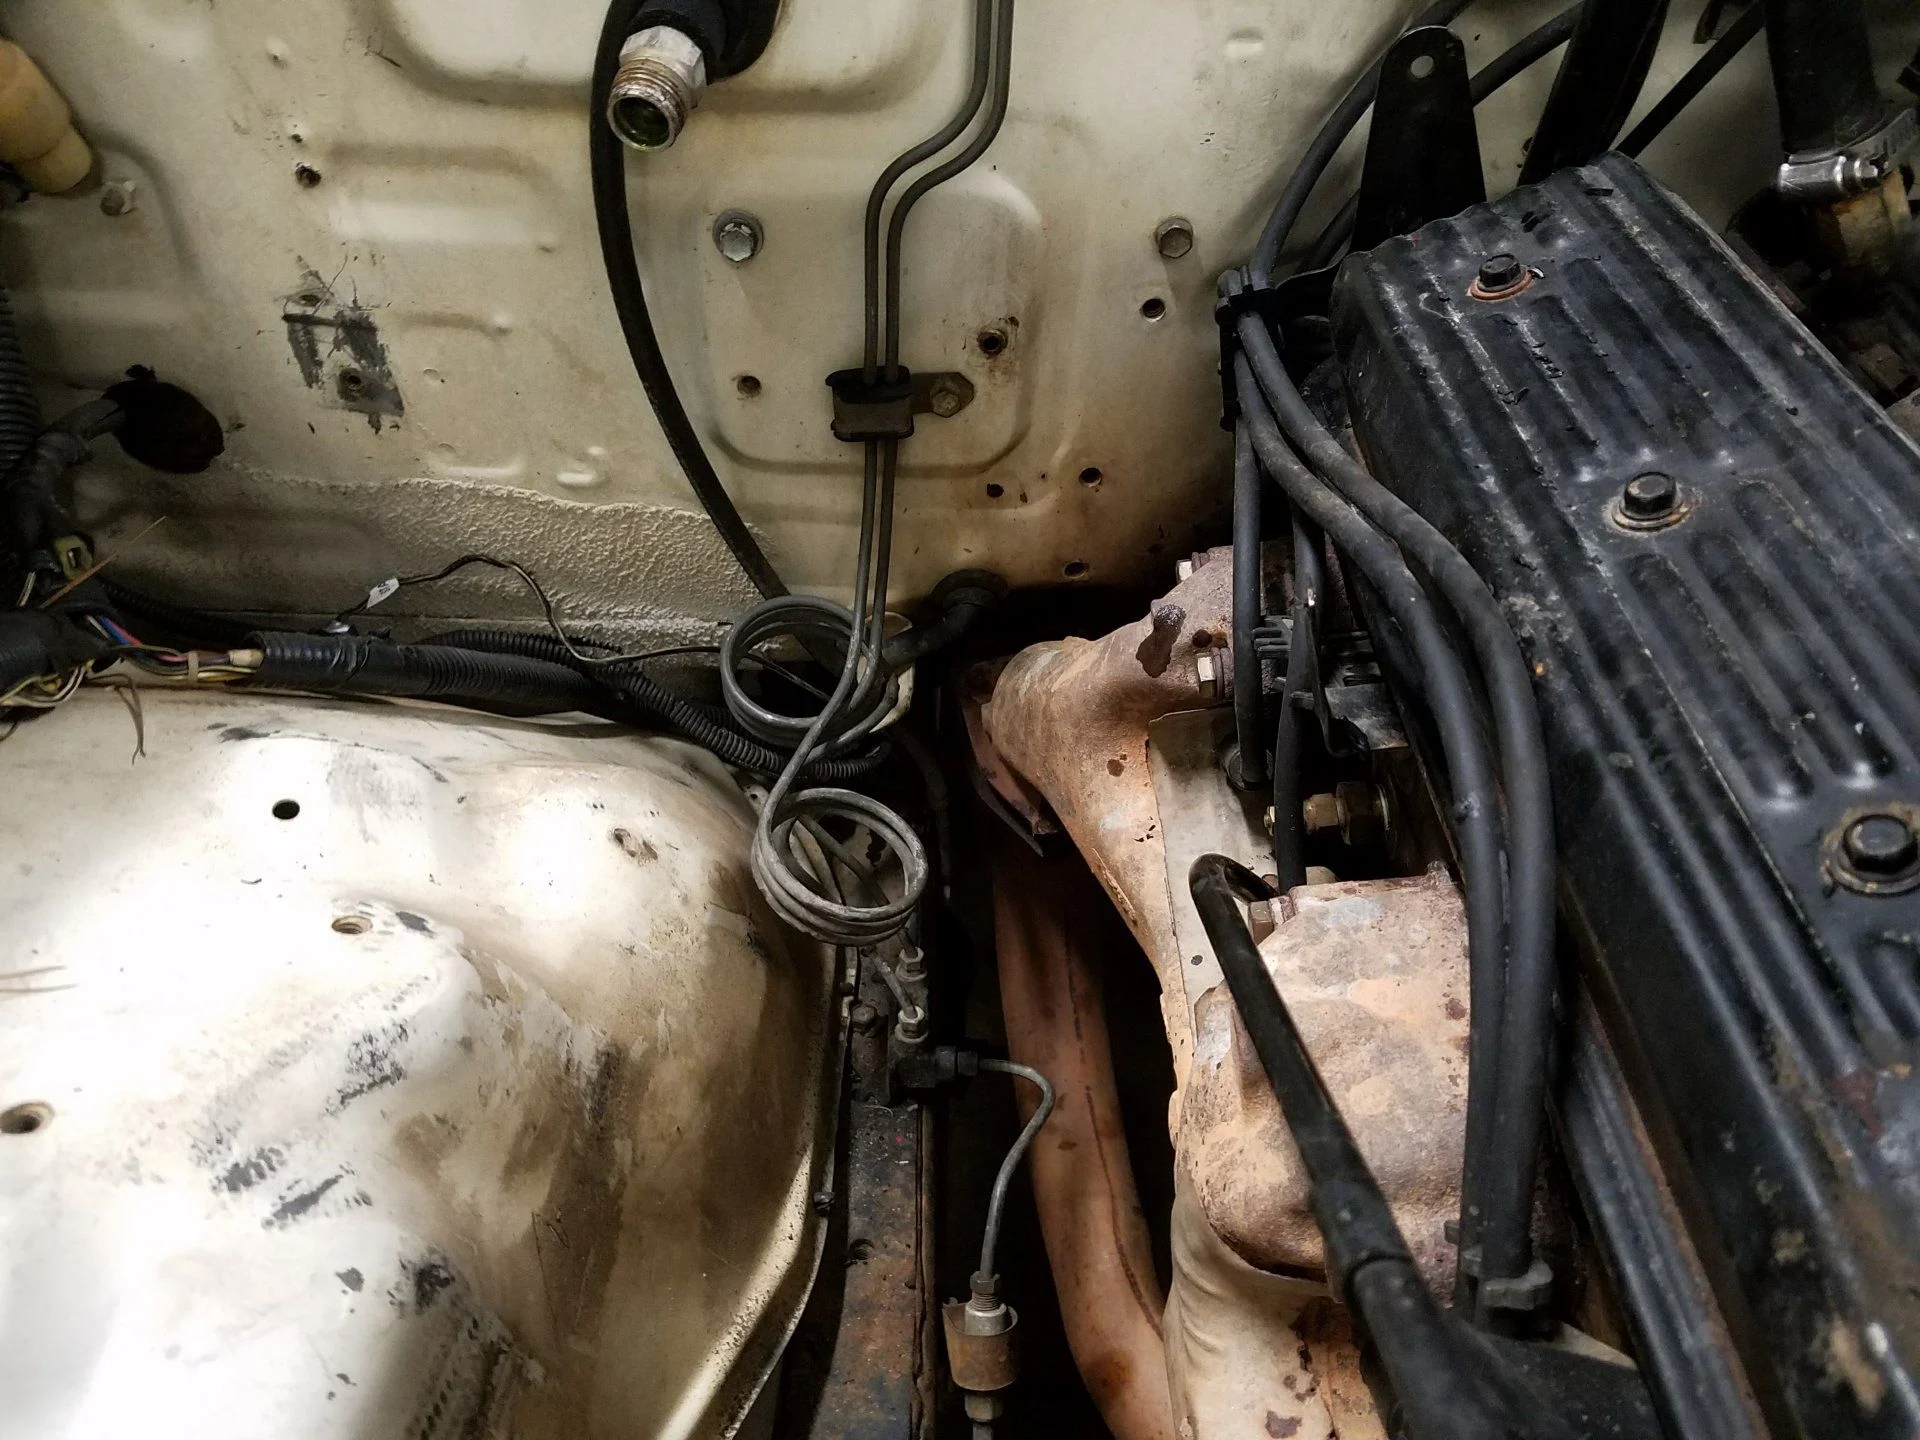
All in all, it was a great combo to start with. There were lots of little things with the swap I was never happy with. The engine sat too high, the wiring harness was not done correctly, or routed well on the engine. The exhaust was restrictive. And somebody got creative and used all the "power tricks" from the 90's to try and squeeze more power out of it. Like a fuel pump pushing 40 psi (TBI needs 12ish), a fuel regulator set all wrong, timing bumped up way to high, an Ebay ECM "chip" with terrible tuning, and a few other things. Once I changed one thing, the whole system pretty much failed and I had to take it all back to stock.

In the 5 years I've daily driven it (yep, it's my daily driver, and I have 3 kids!), I've been toying with an engine rebuild or swap. I priced out a rebuilt crate engine from Summit to just replace what I have, and it was around $1700, before I started doing the "while I'm in there" stuff. And I would probably not break 200HP out of it.

Being a Cruiser junkie, I watch craigslist like a hawk. I've been expanding my searches for mid 2000's Chevy trucks, Tahoe's, and Suburbans to snatch the running gear out of. One day a 2002 Tahoe that had been rolled popped up for $1200. I went to look at it (at a local junkyard) and someone beat me to it, but they had another one.

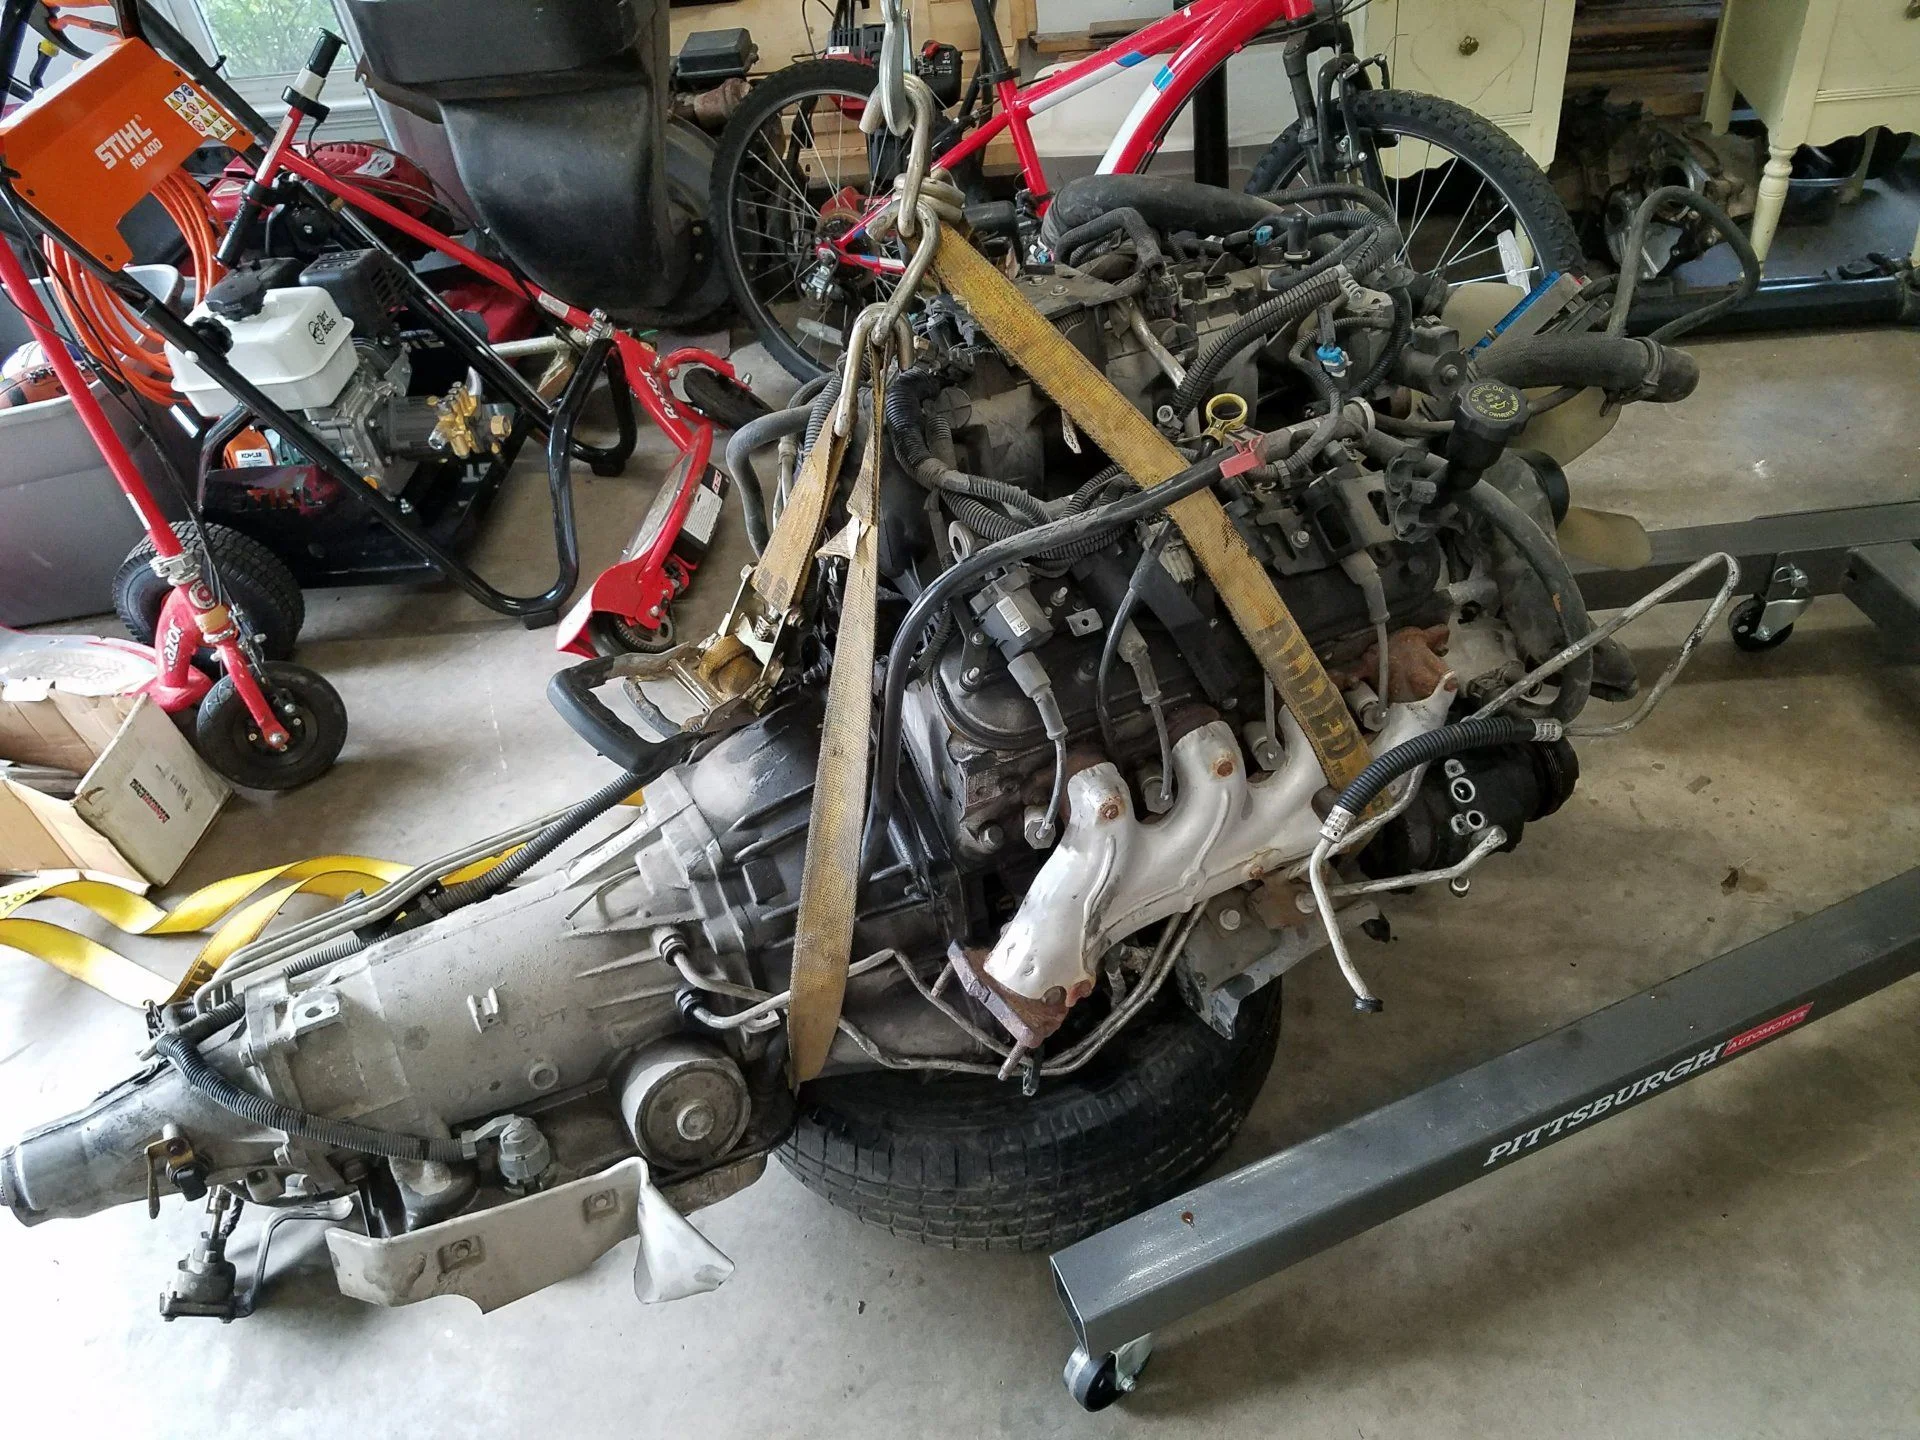
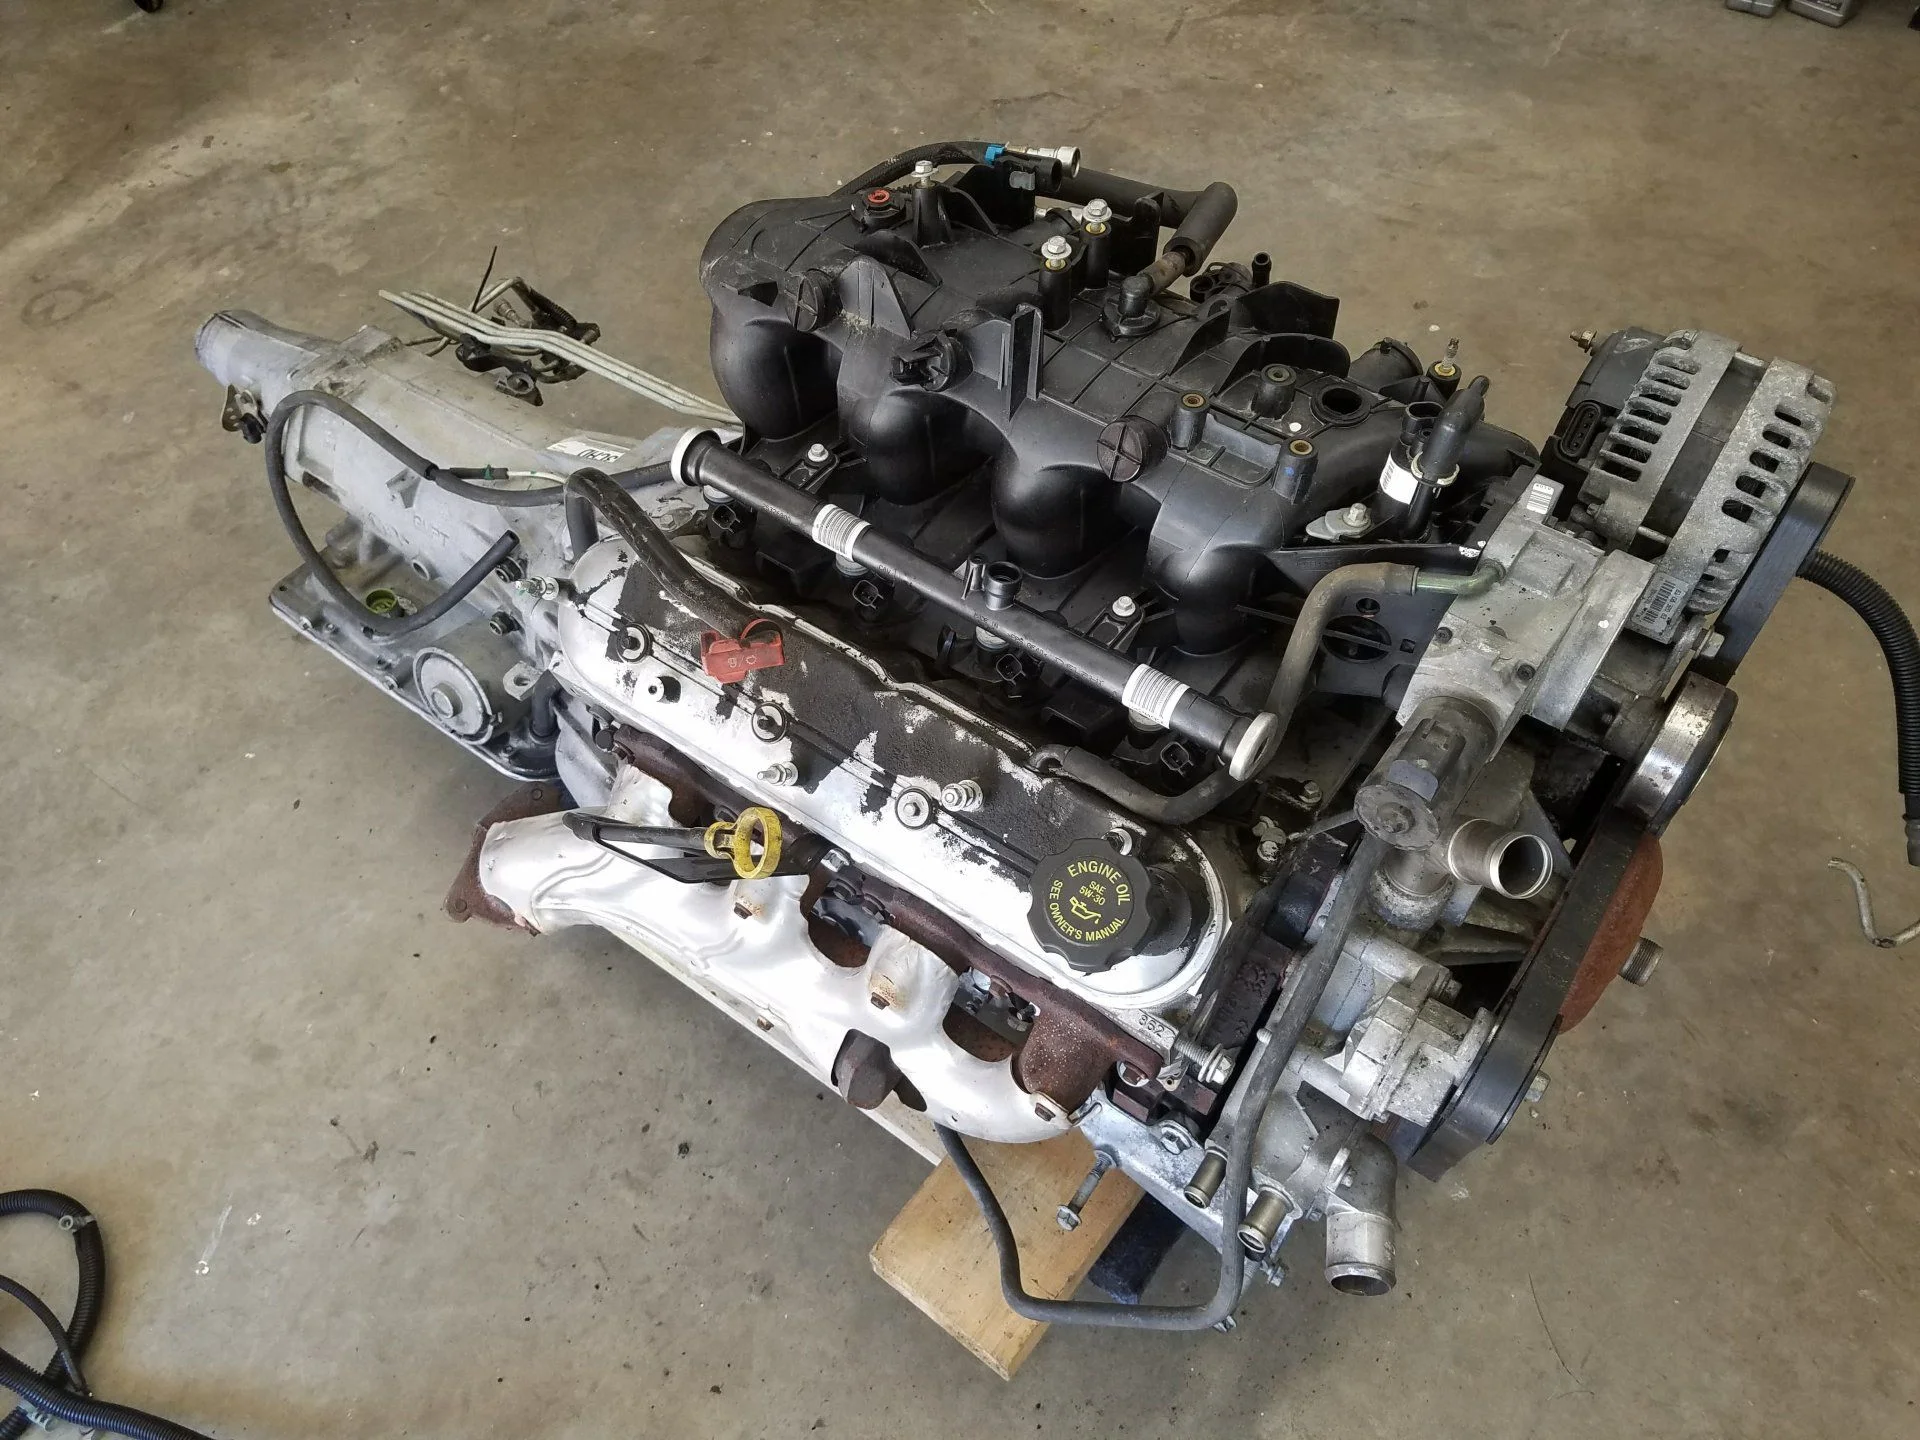
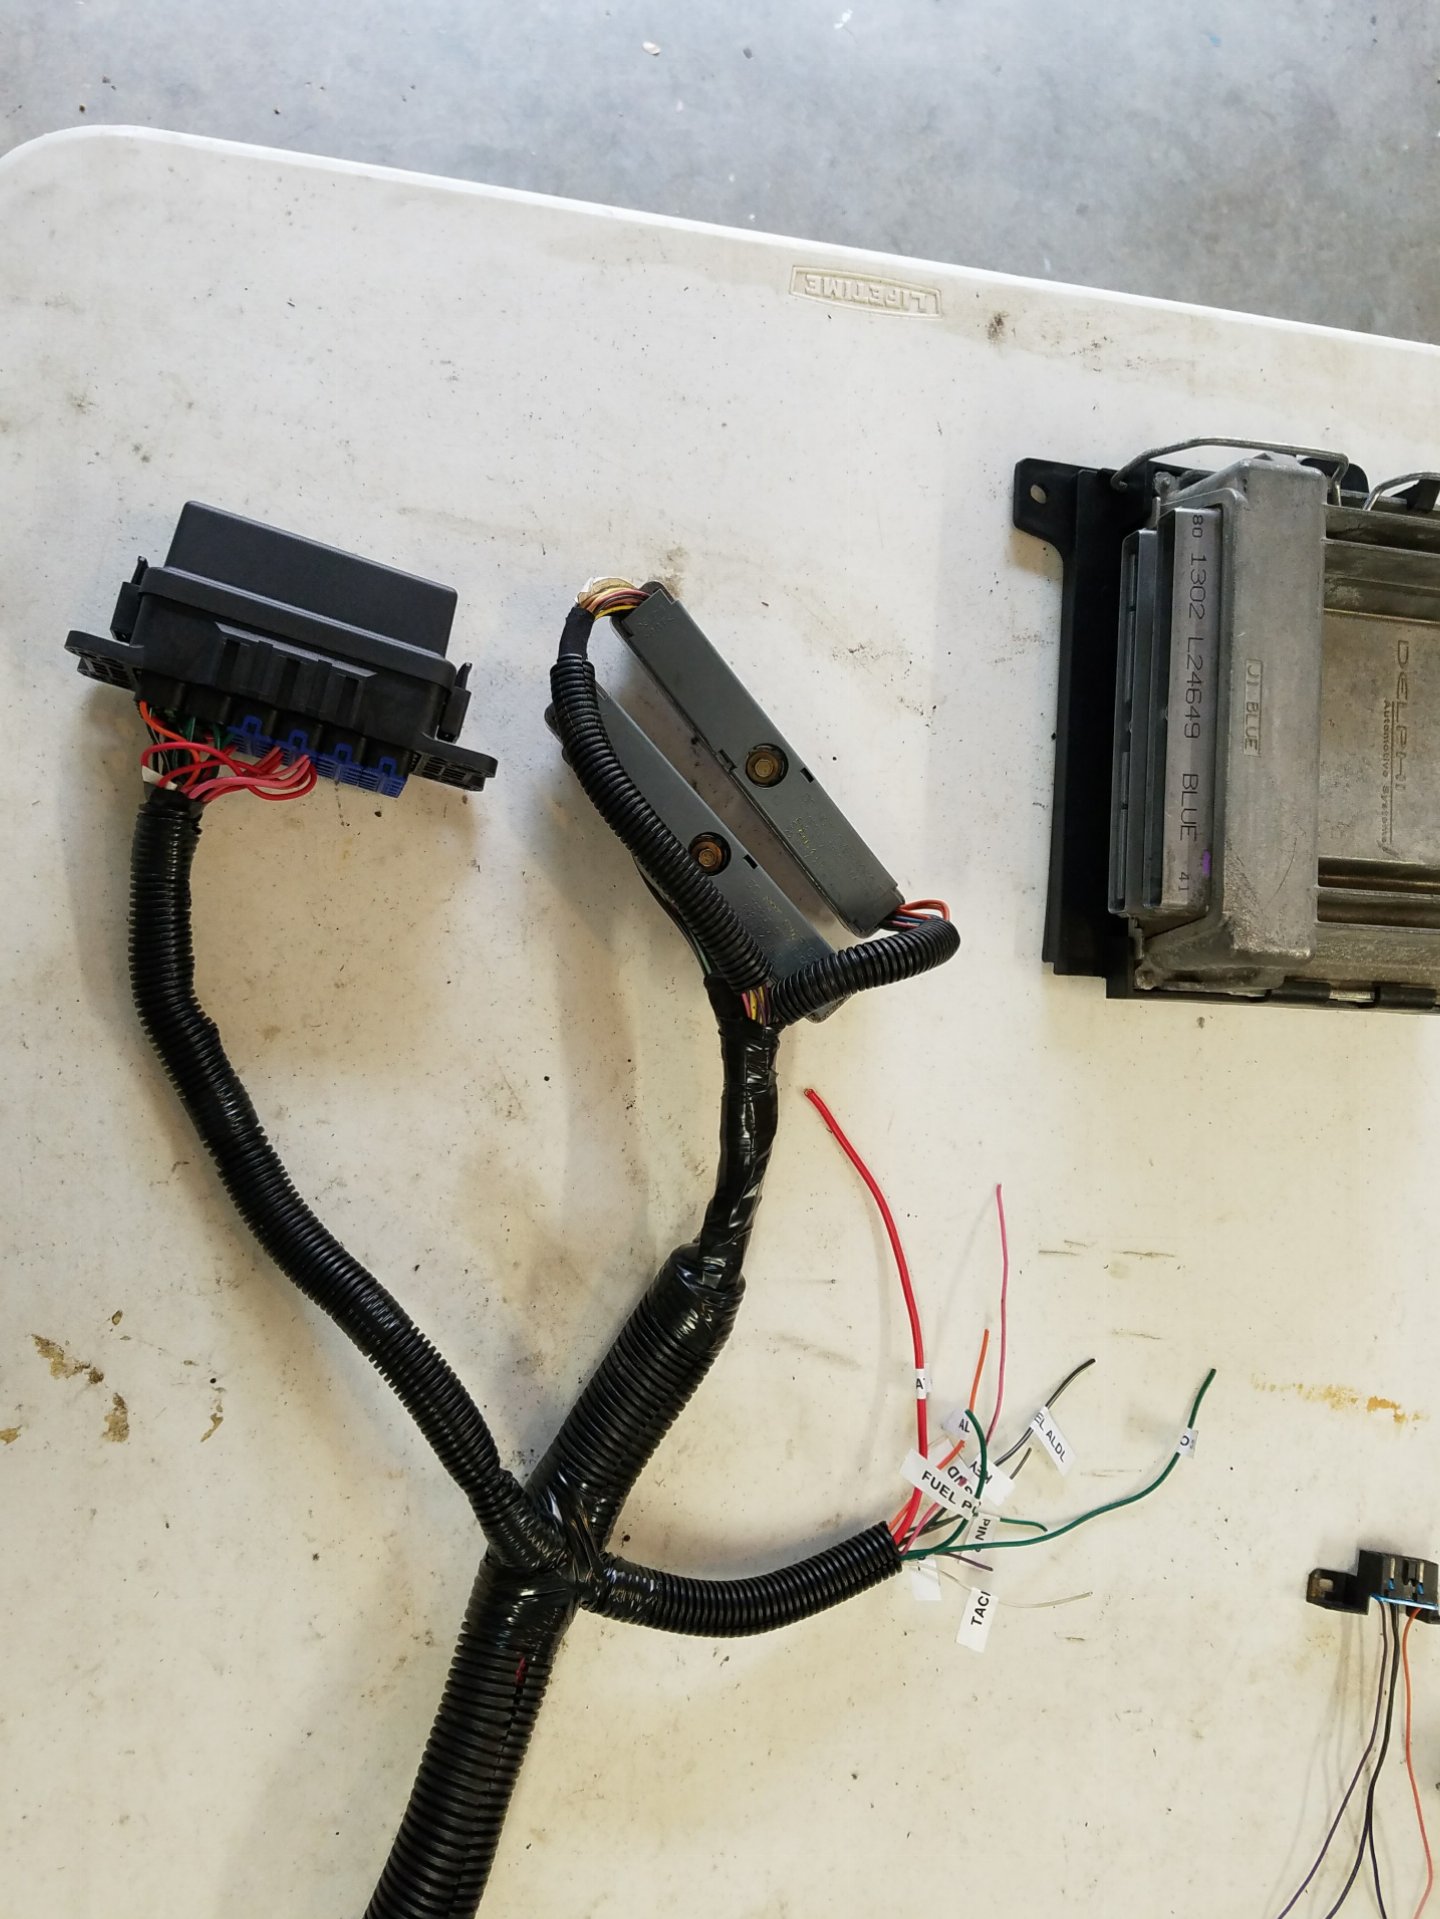
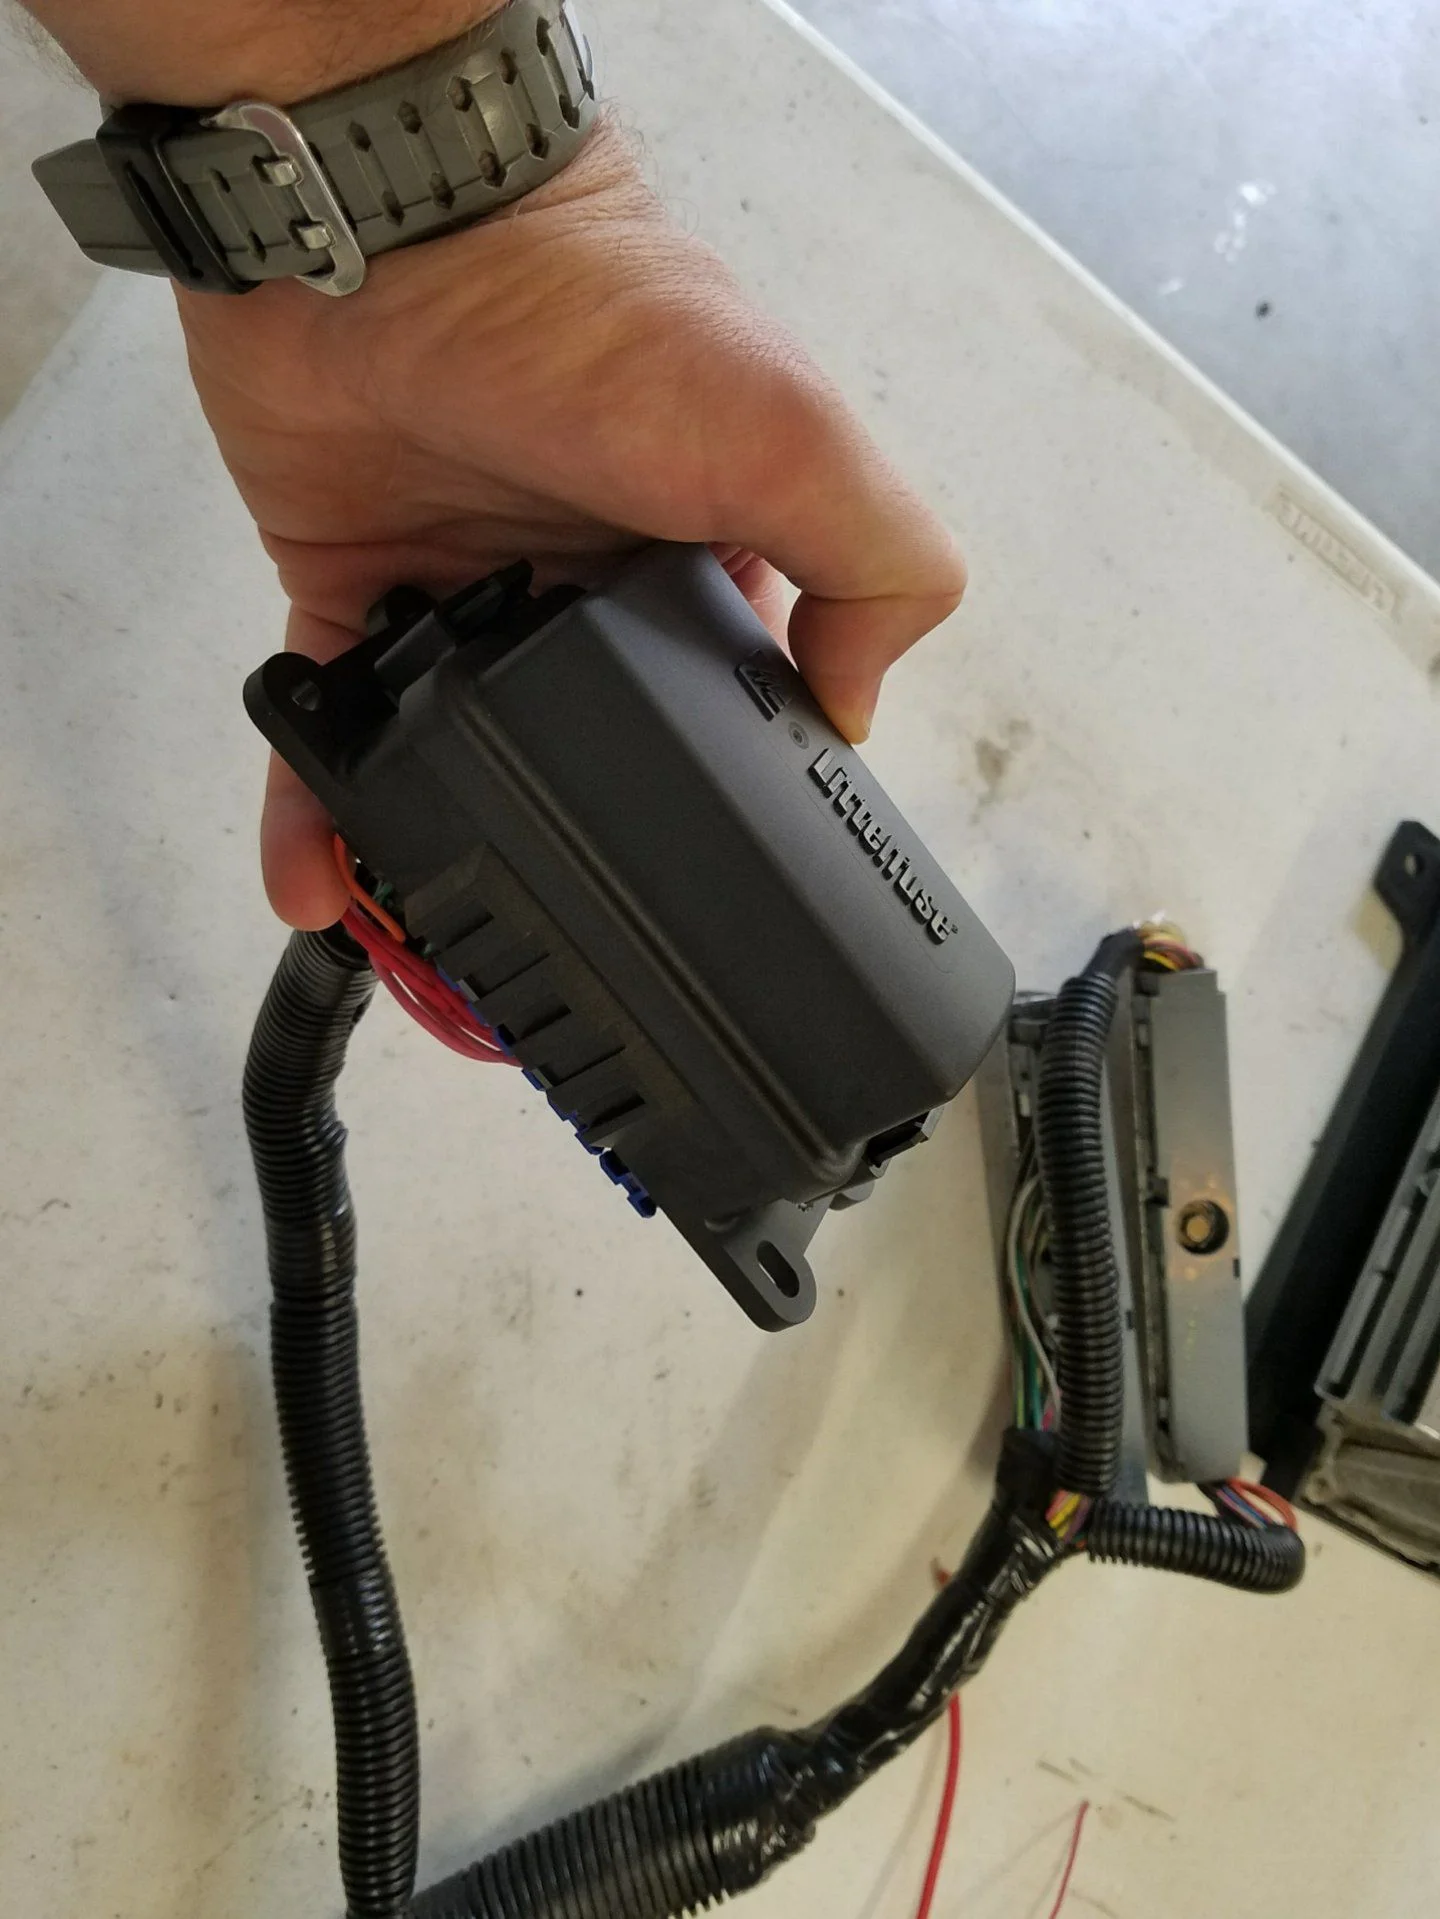
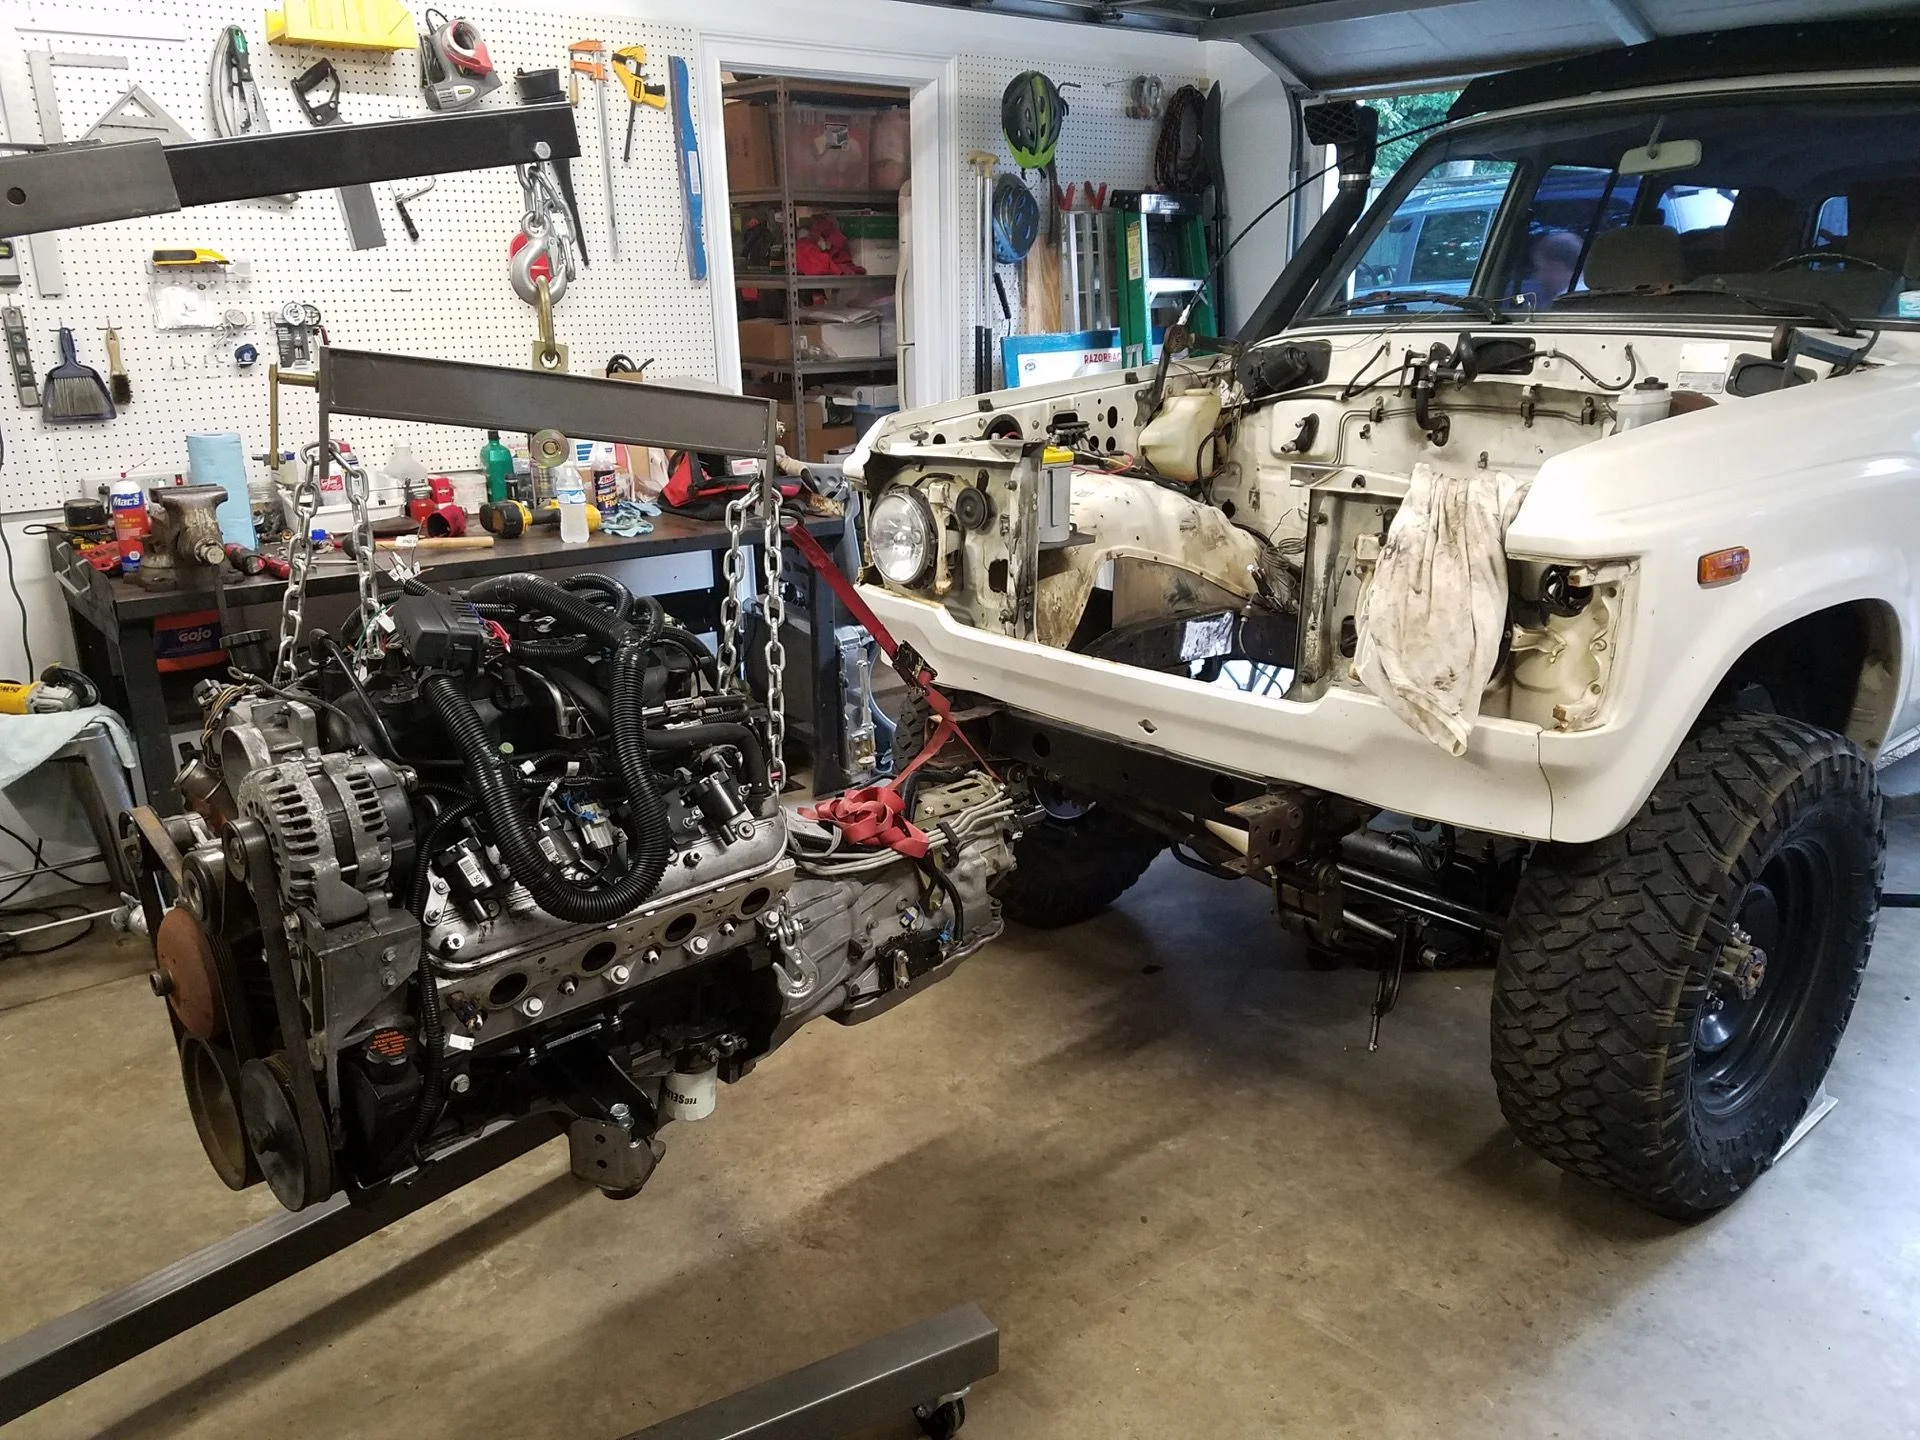
The one they pointed me at ran and drove. It had some front damage that they were hoping to repair and flip it, but money talks and parts started selling off of it. But the engine and trans were complete. I traded them a Toyota 3.0 V6 auto trans and tcase and got the engine, trans, ECM, and wiring for $1000. :)

The downside to the good price is the Tahoe no longer could be started as the steering column had been removed and other dash components. So I didn't hear it run, nor do I know the exact mileage. I was told 160,000 or so. And the truck did lot drive just fine. So I'm working on good faith here...

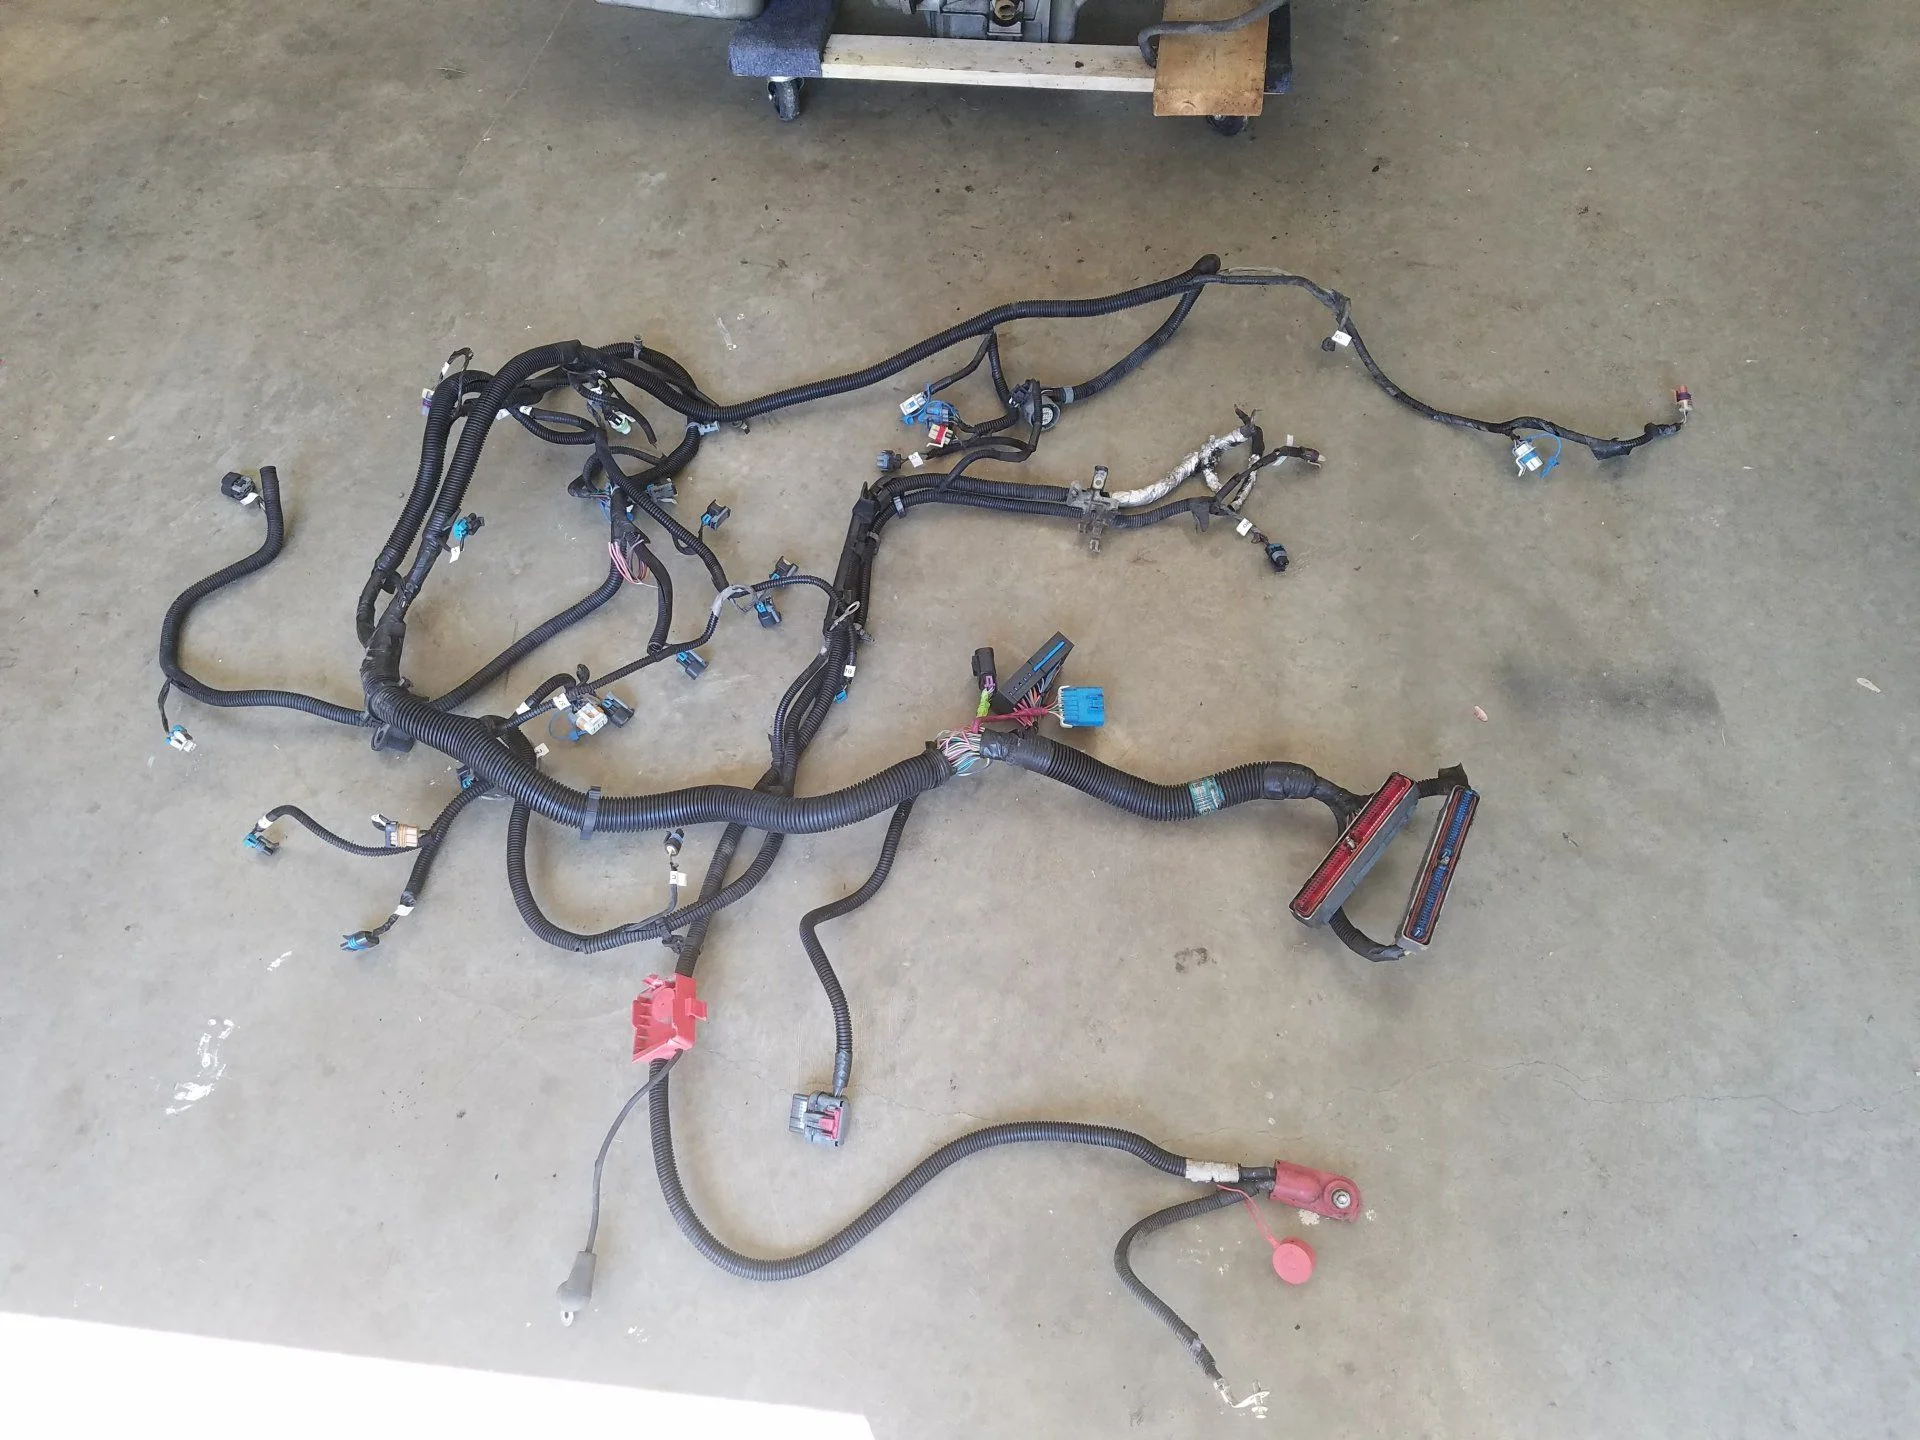
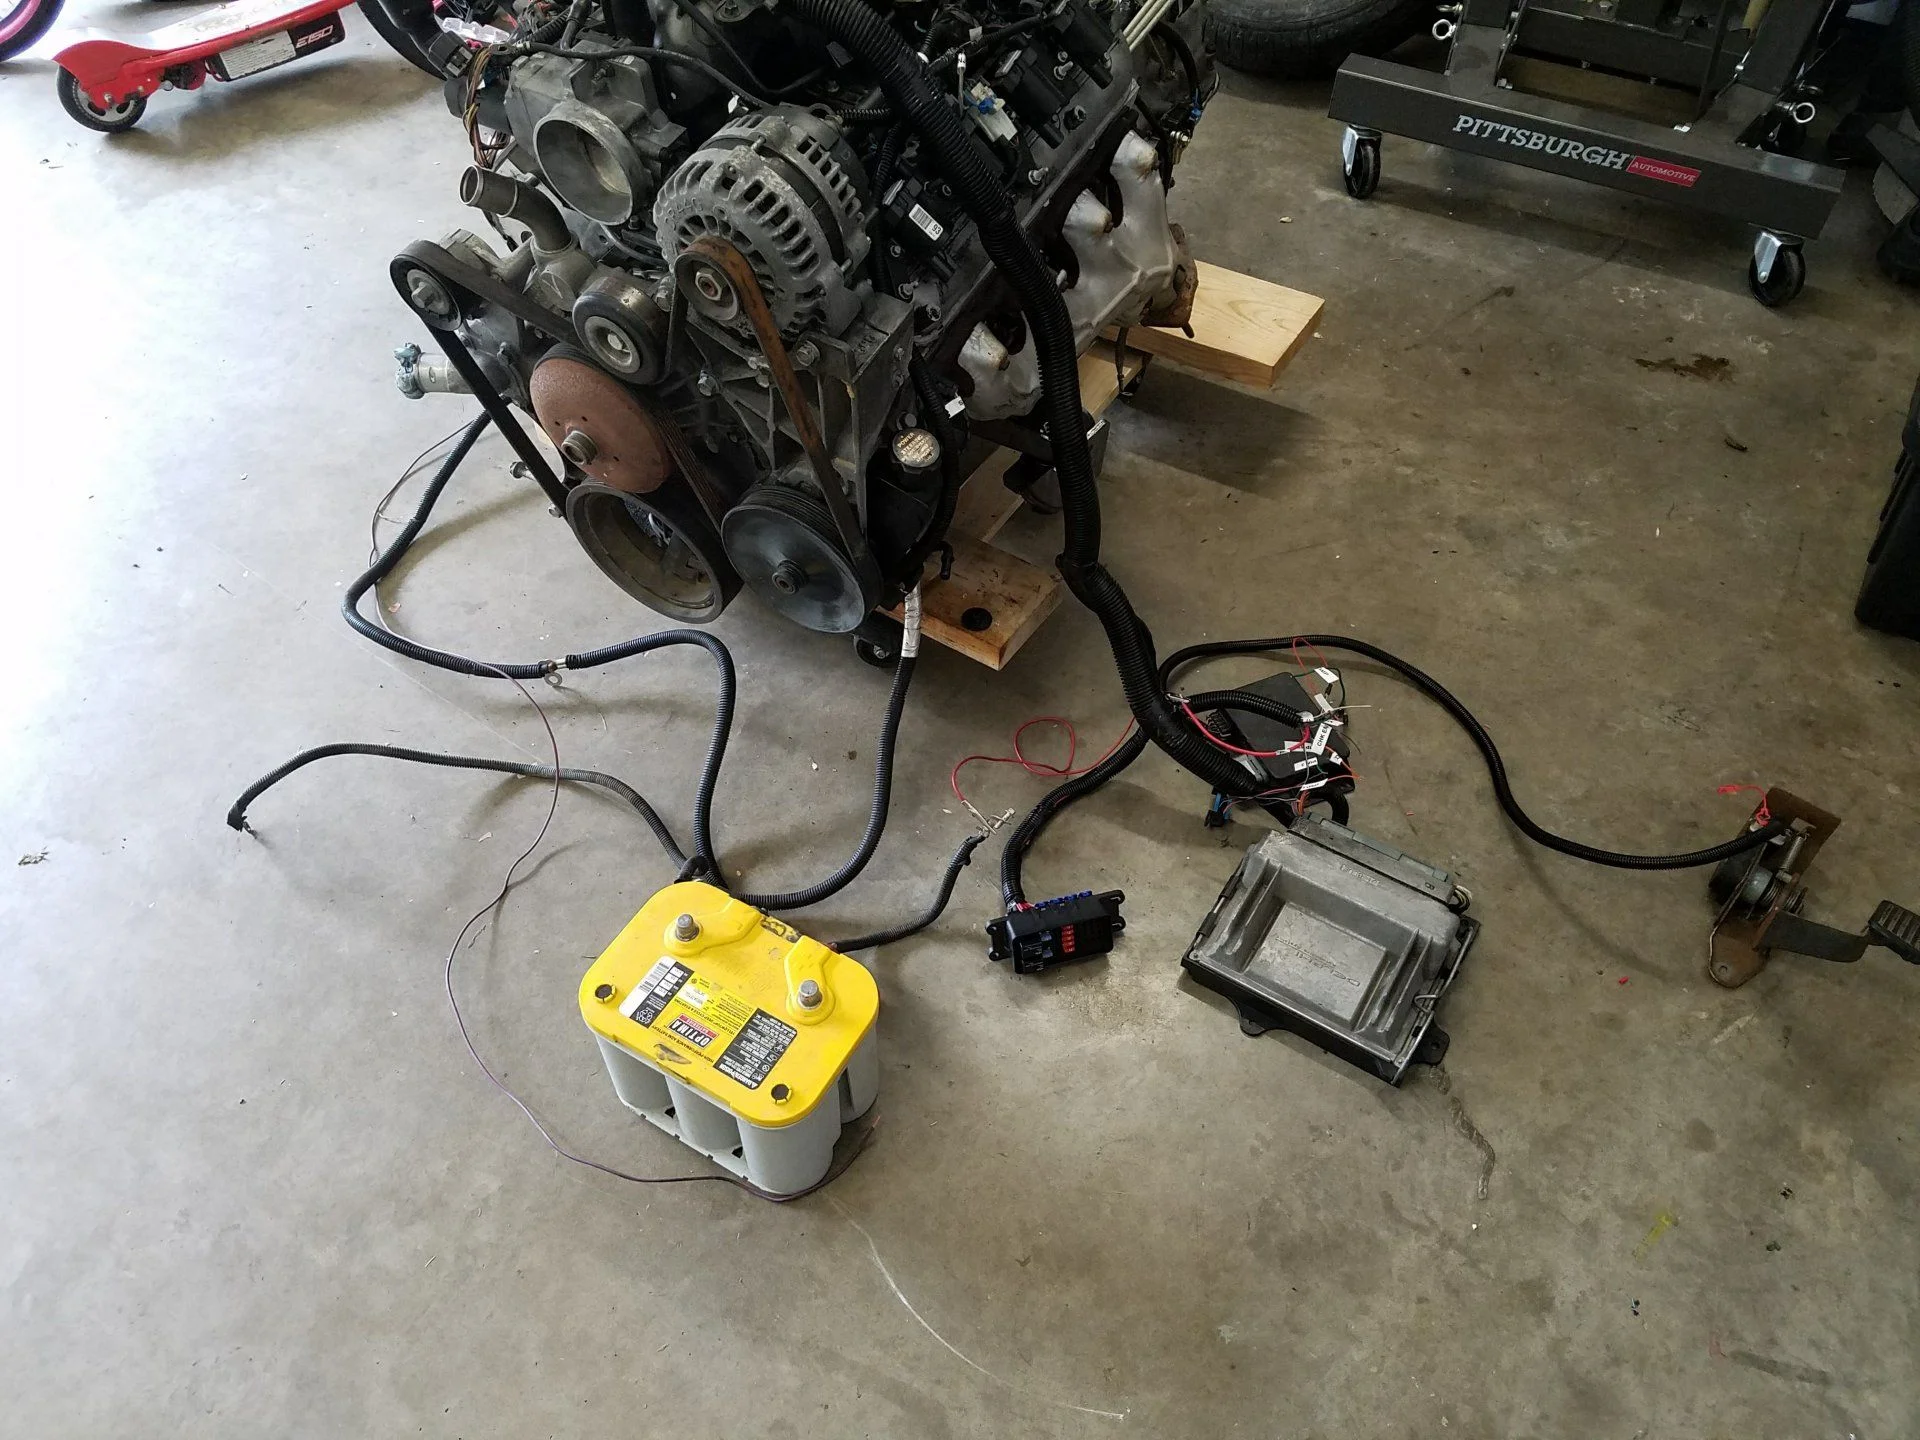
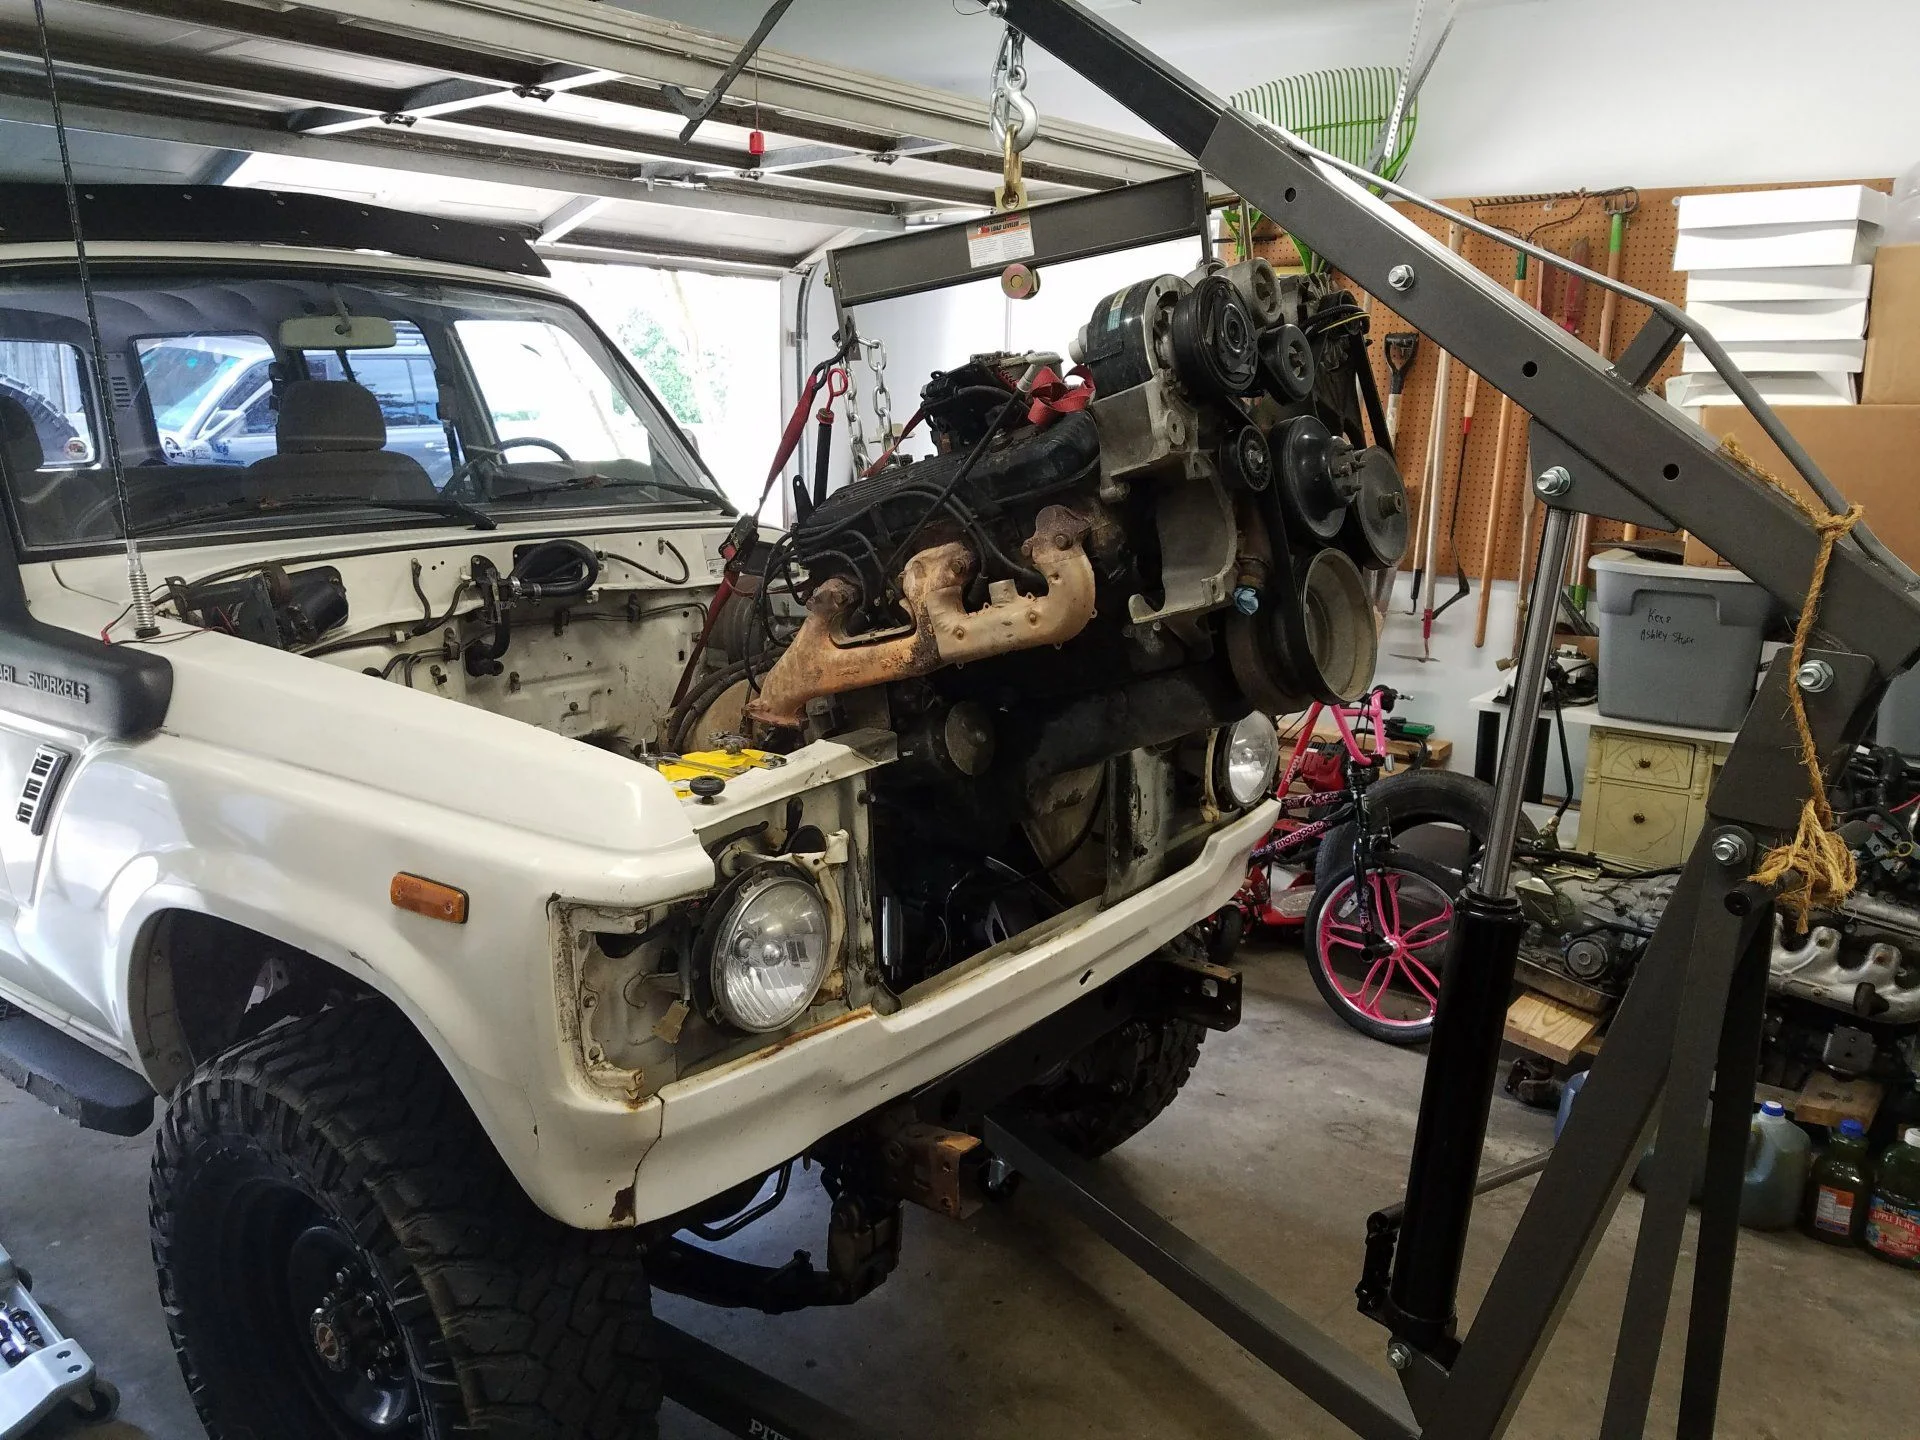
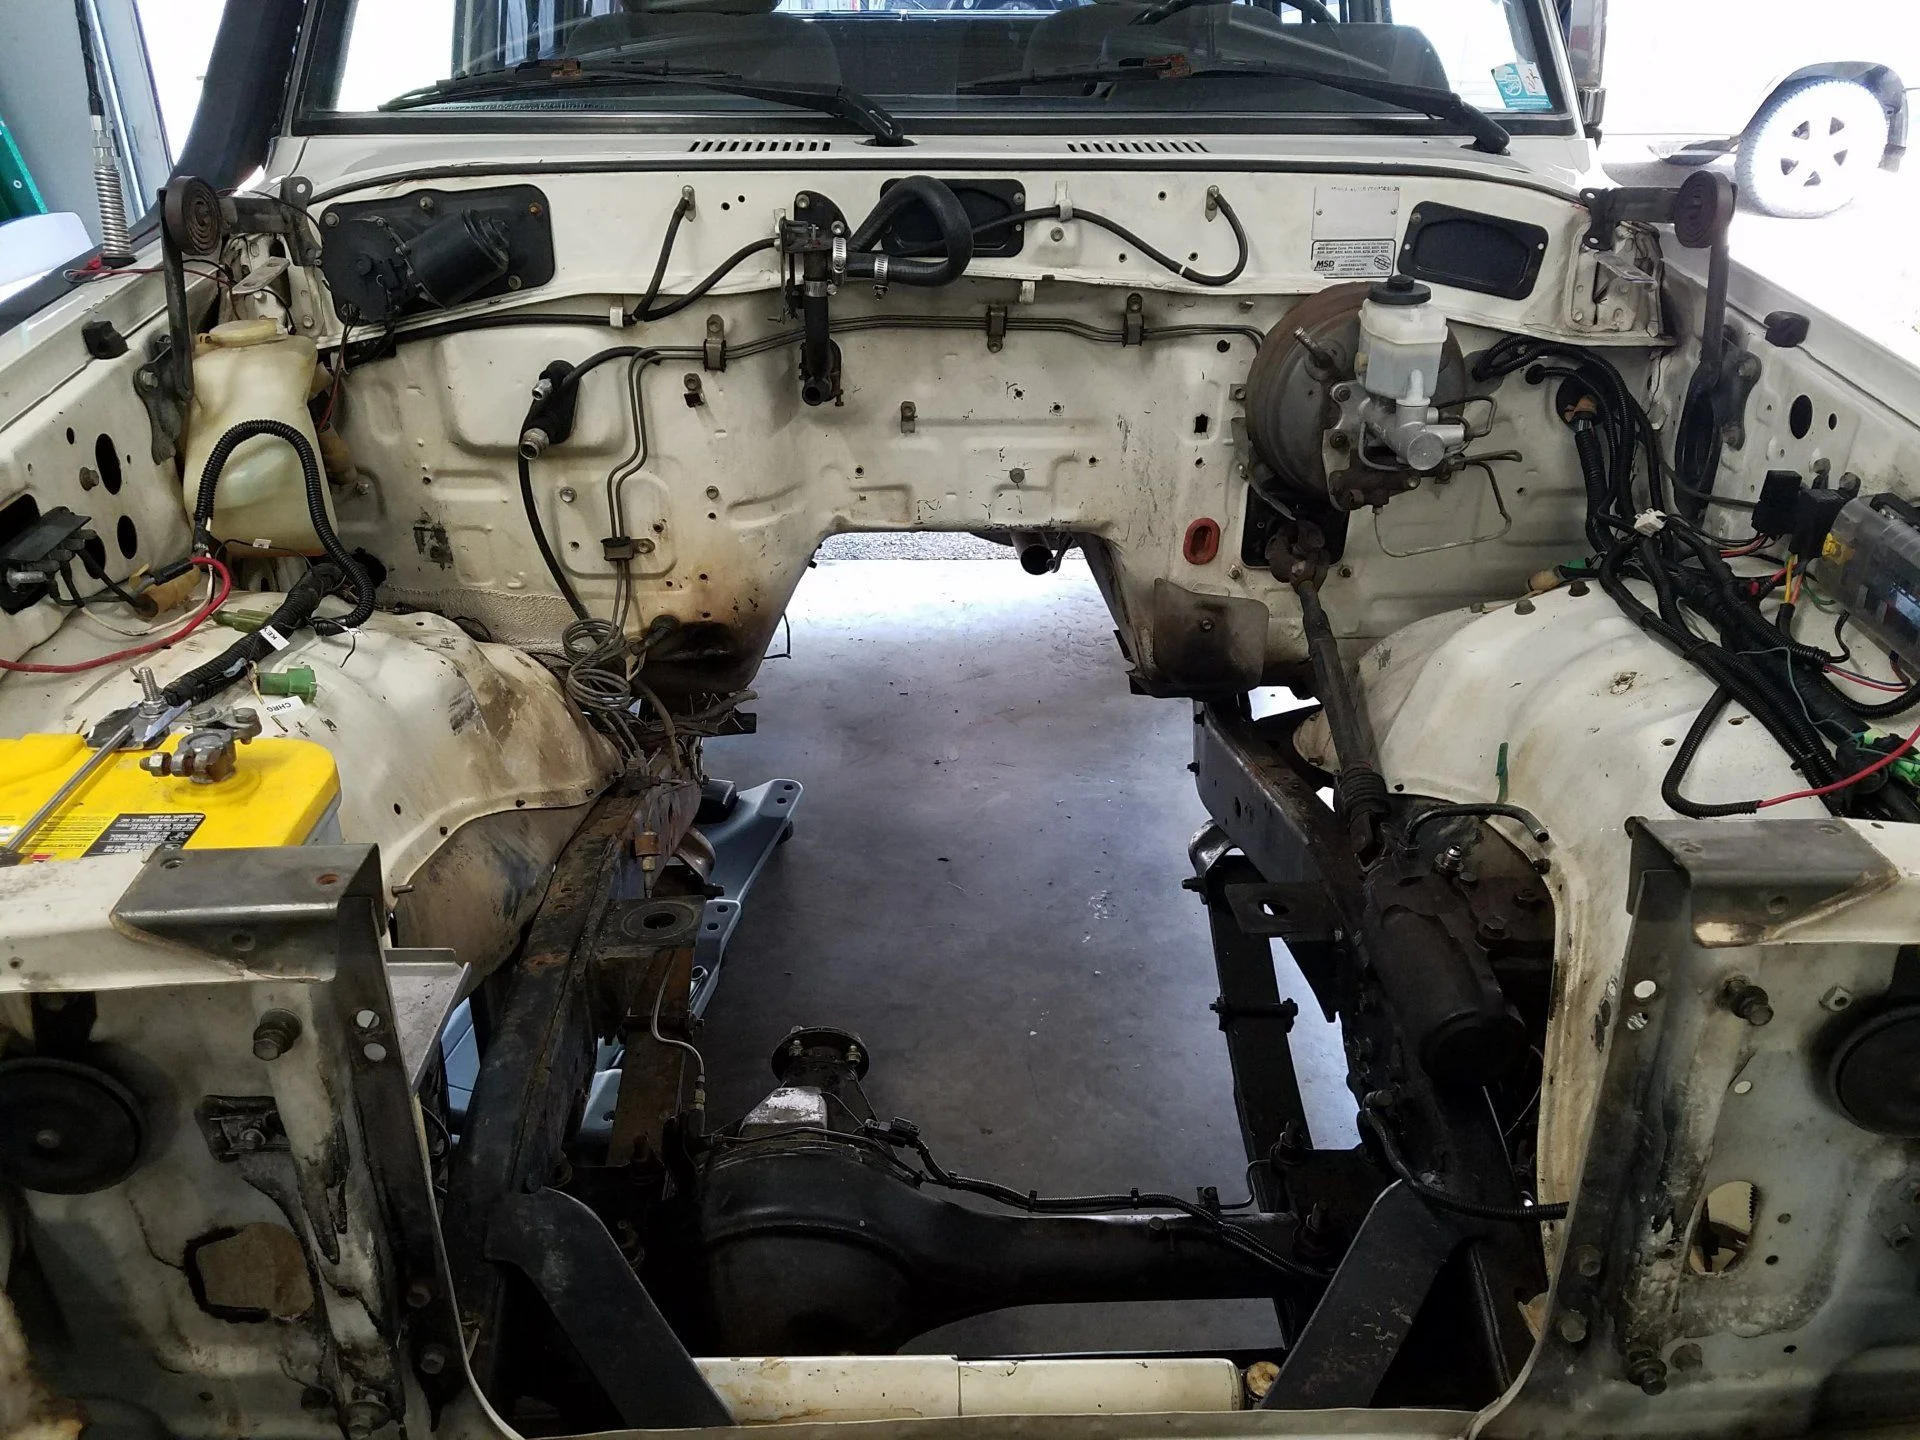
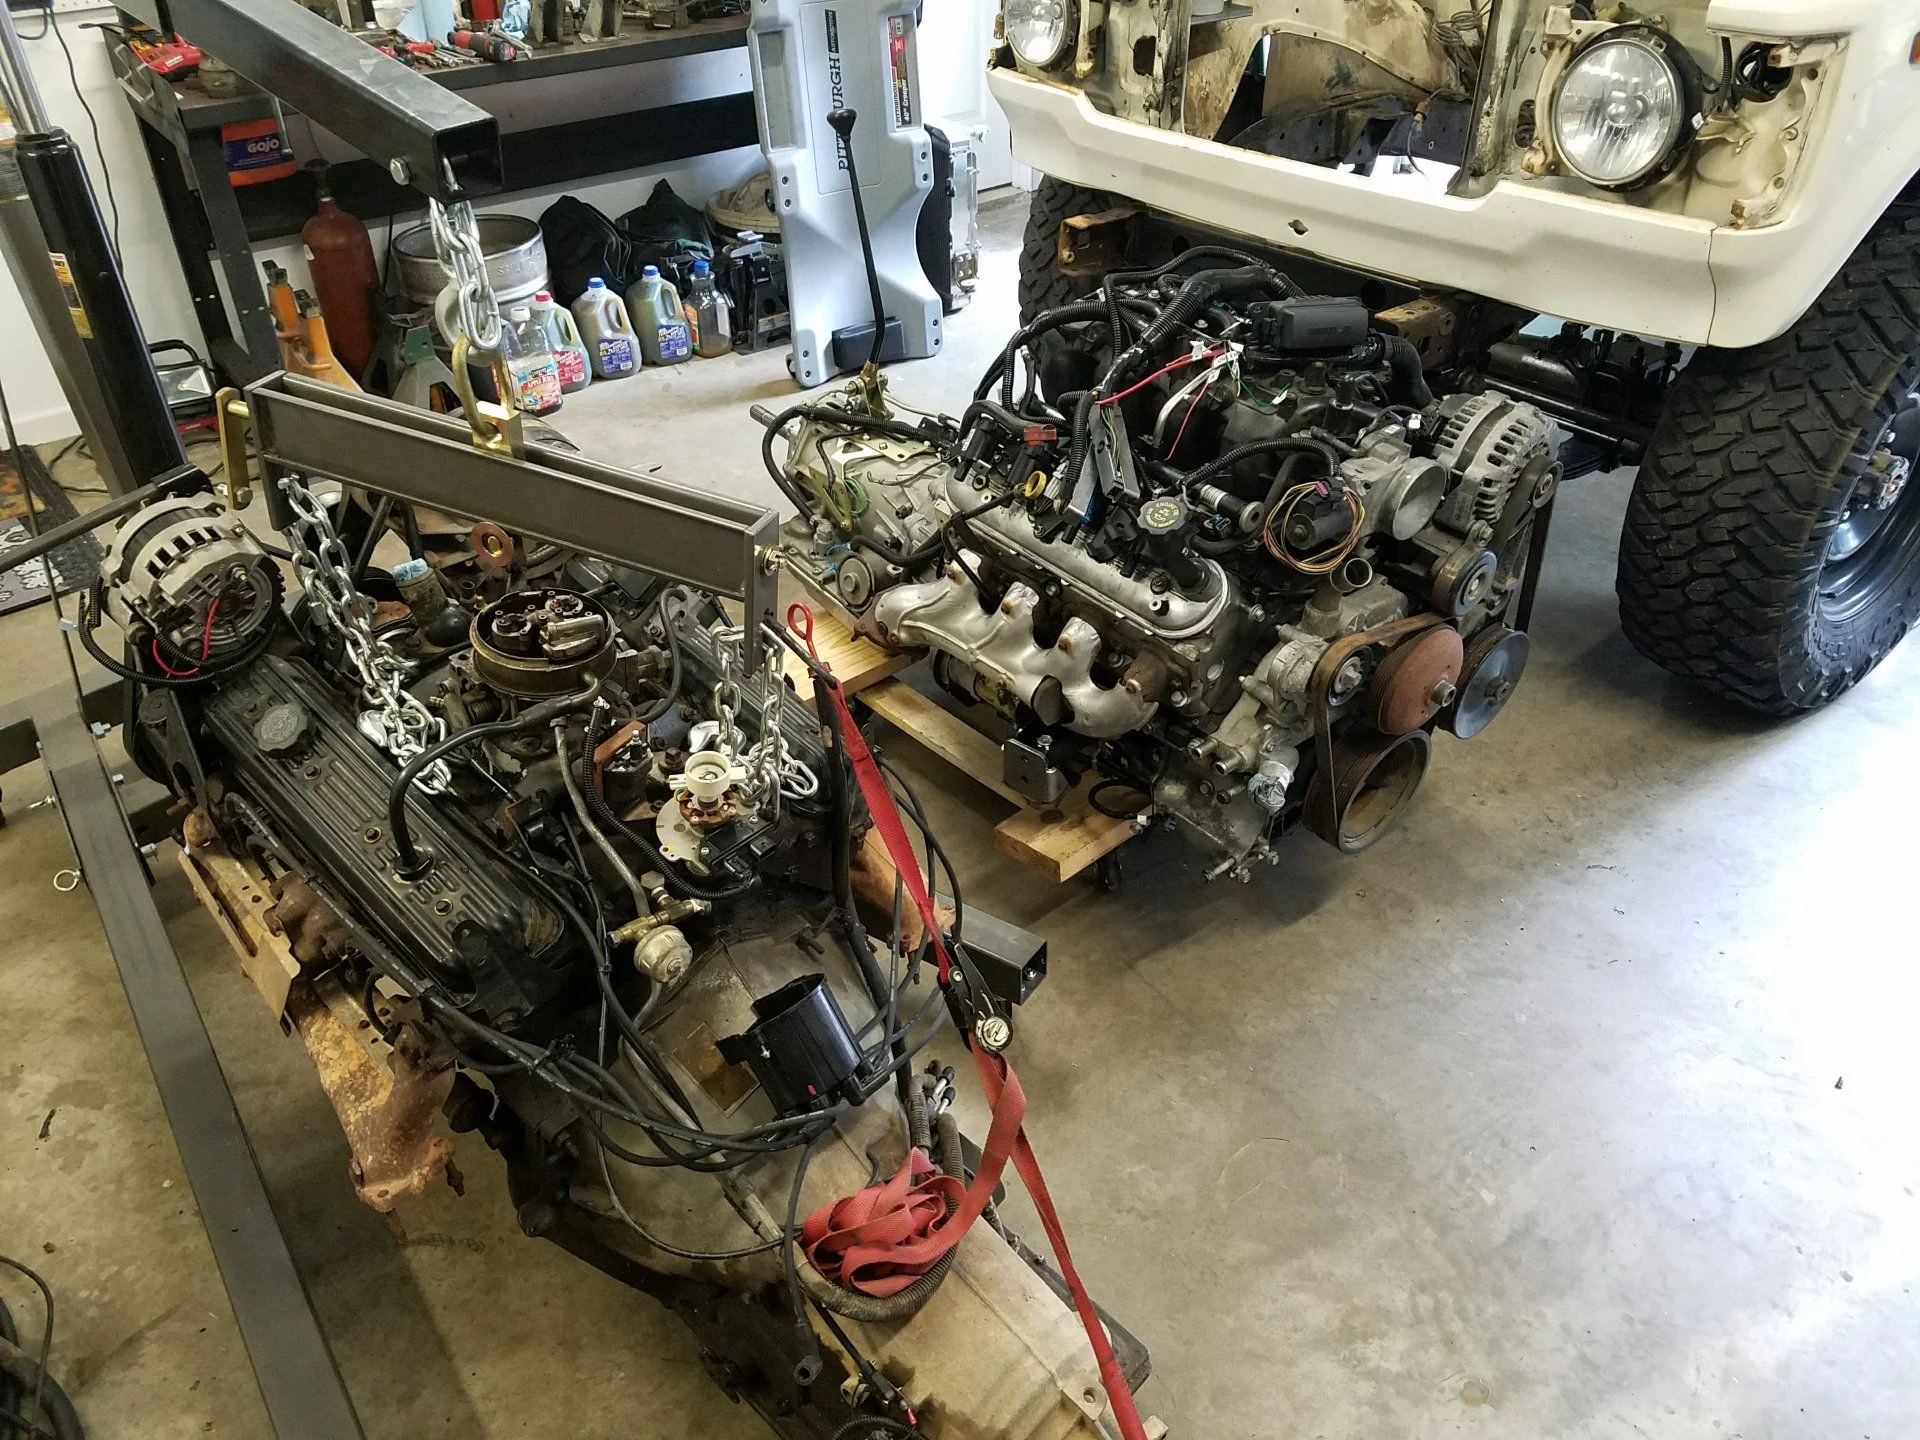
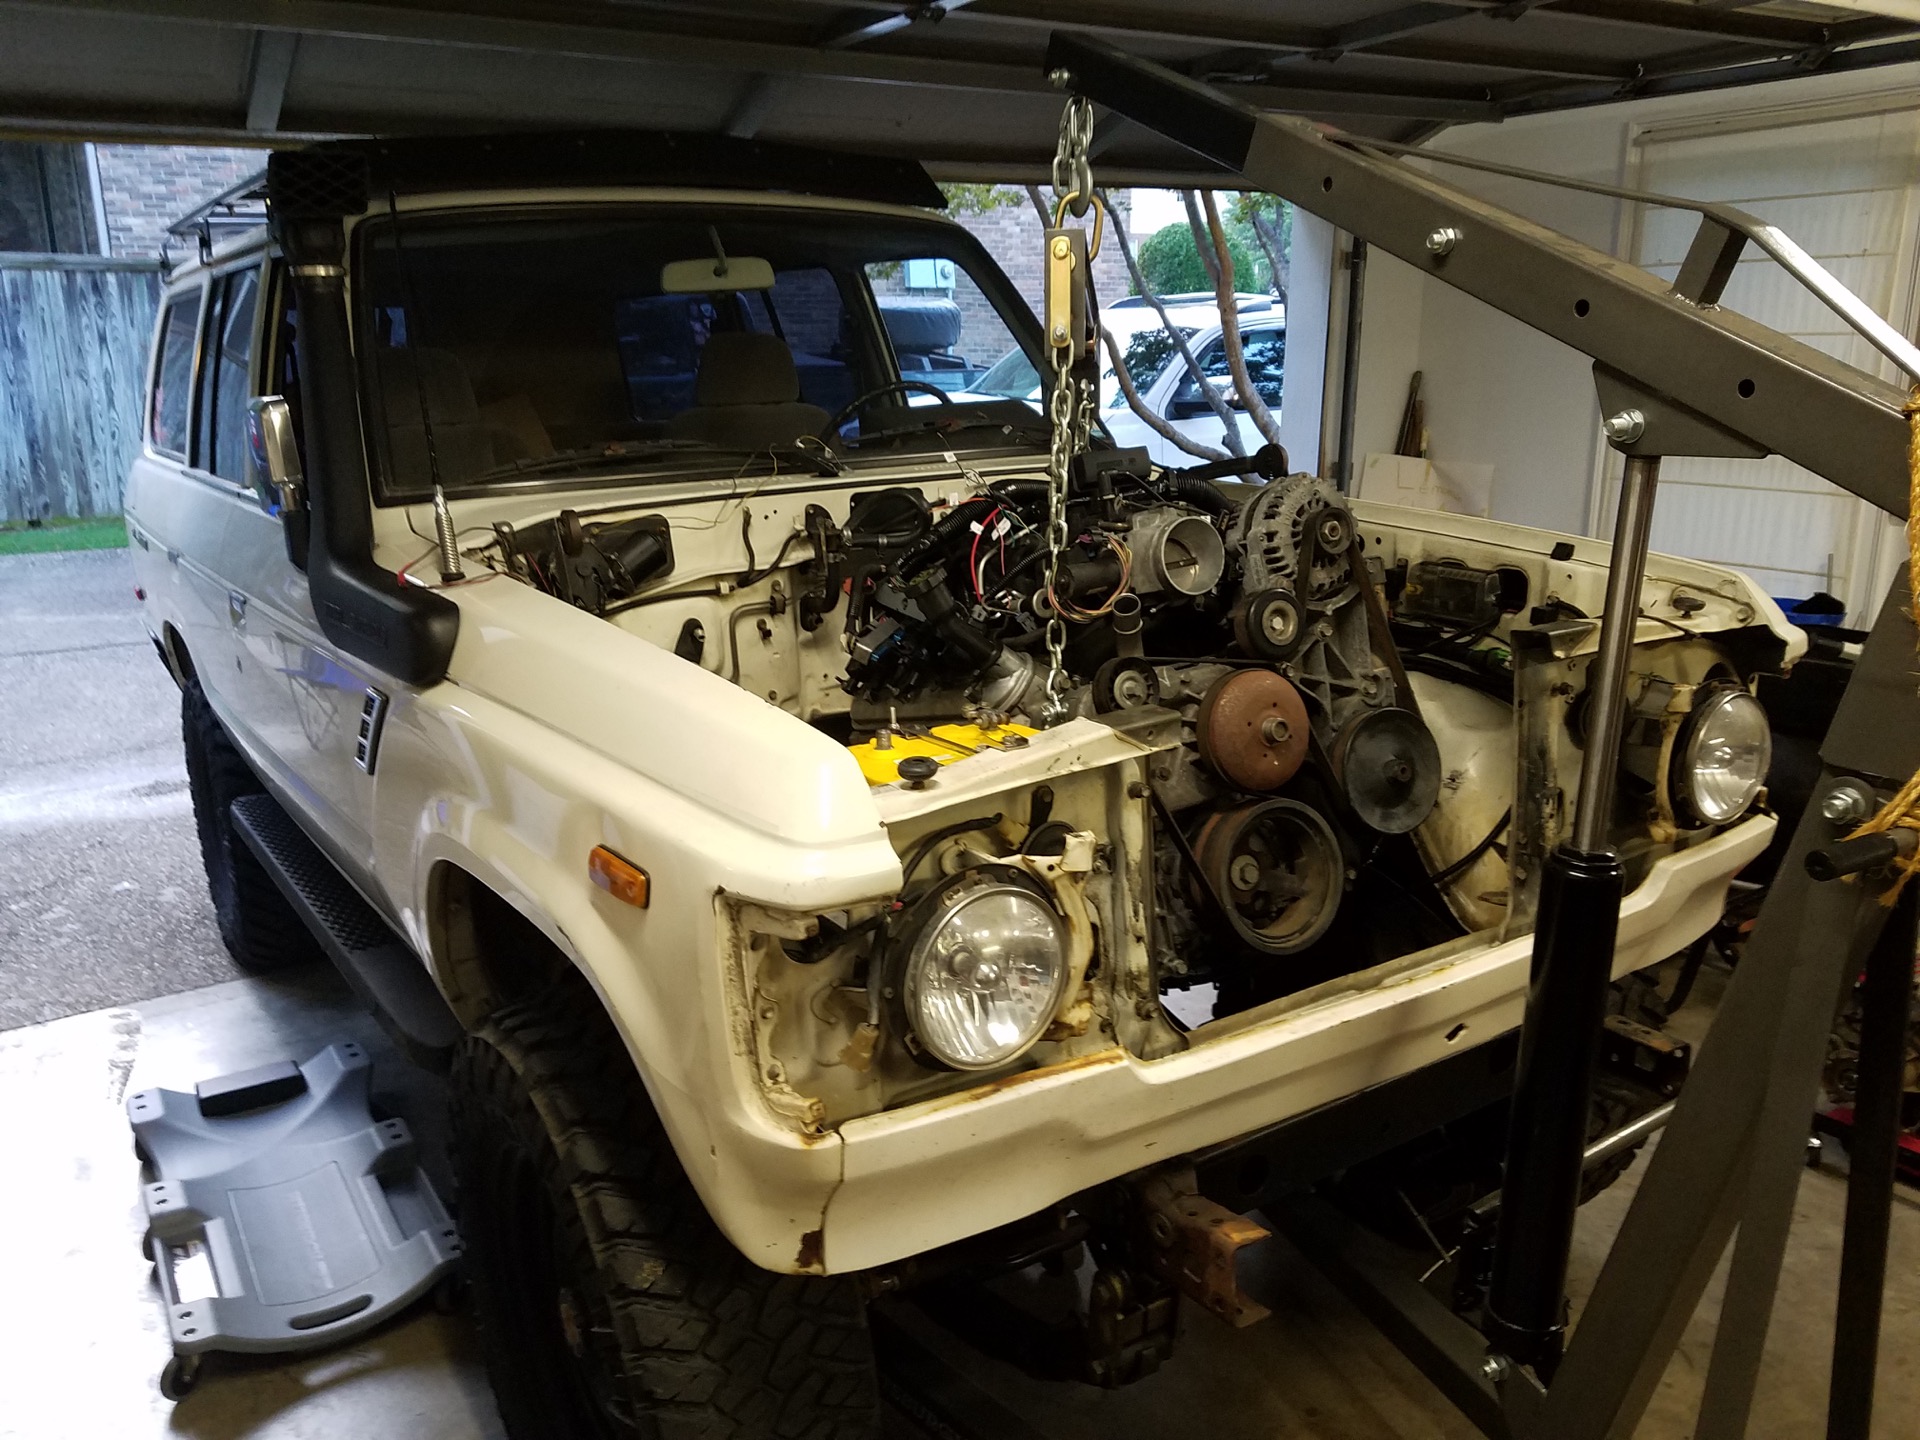
So out with the tired 1991 5.7l TBI and in with the 2002 5.3l L59!

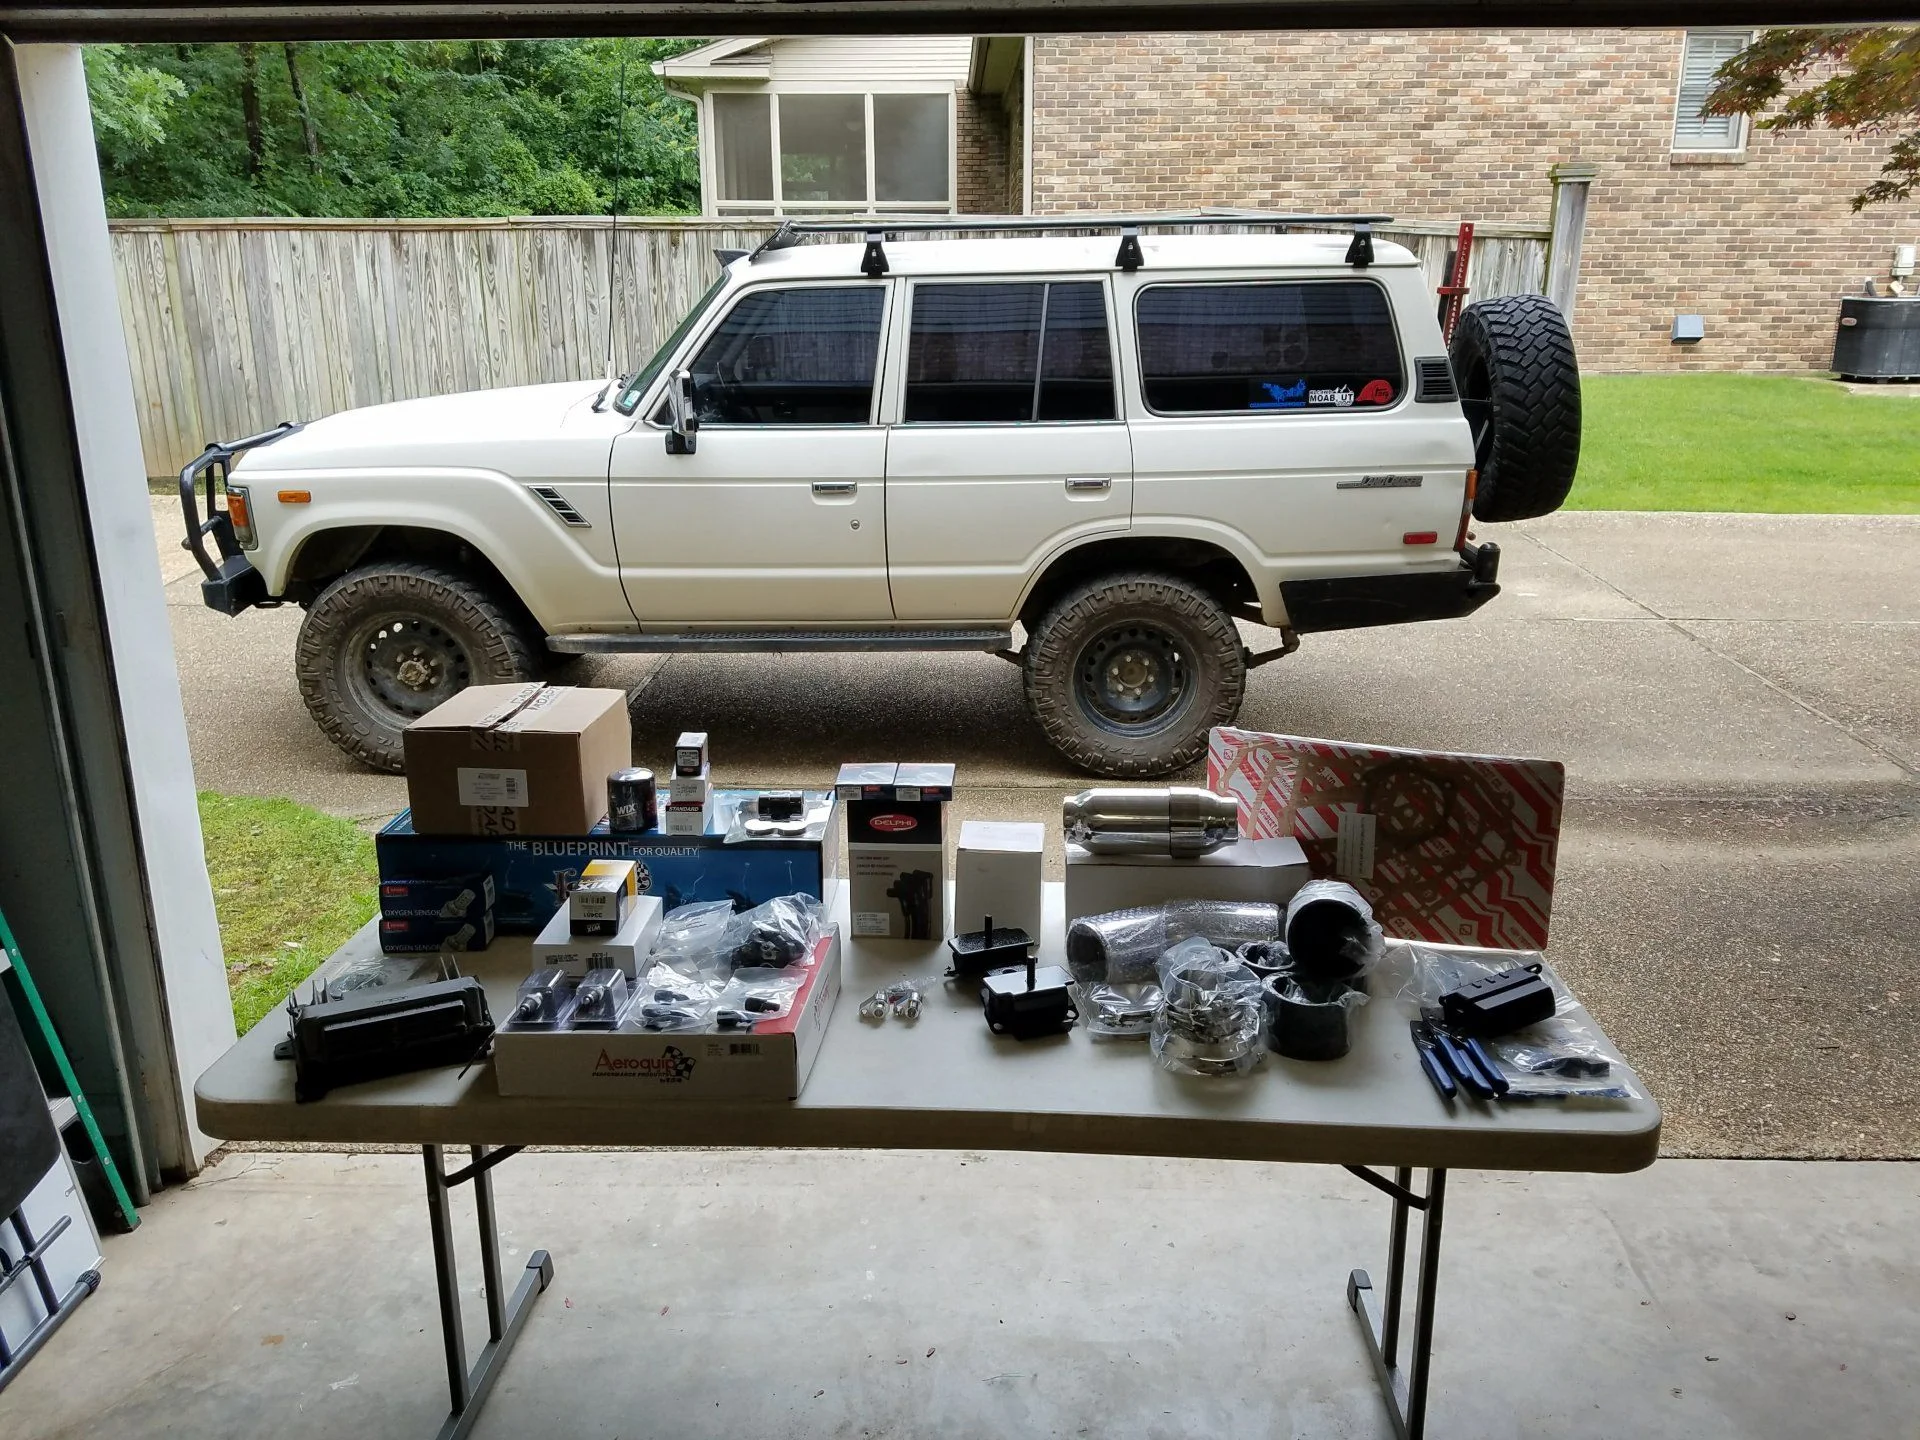
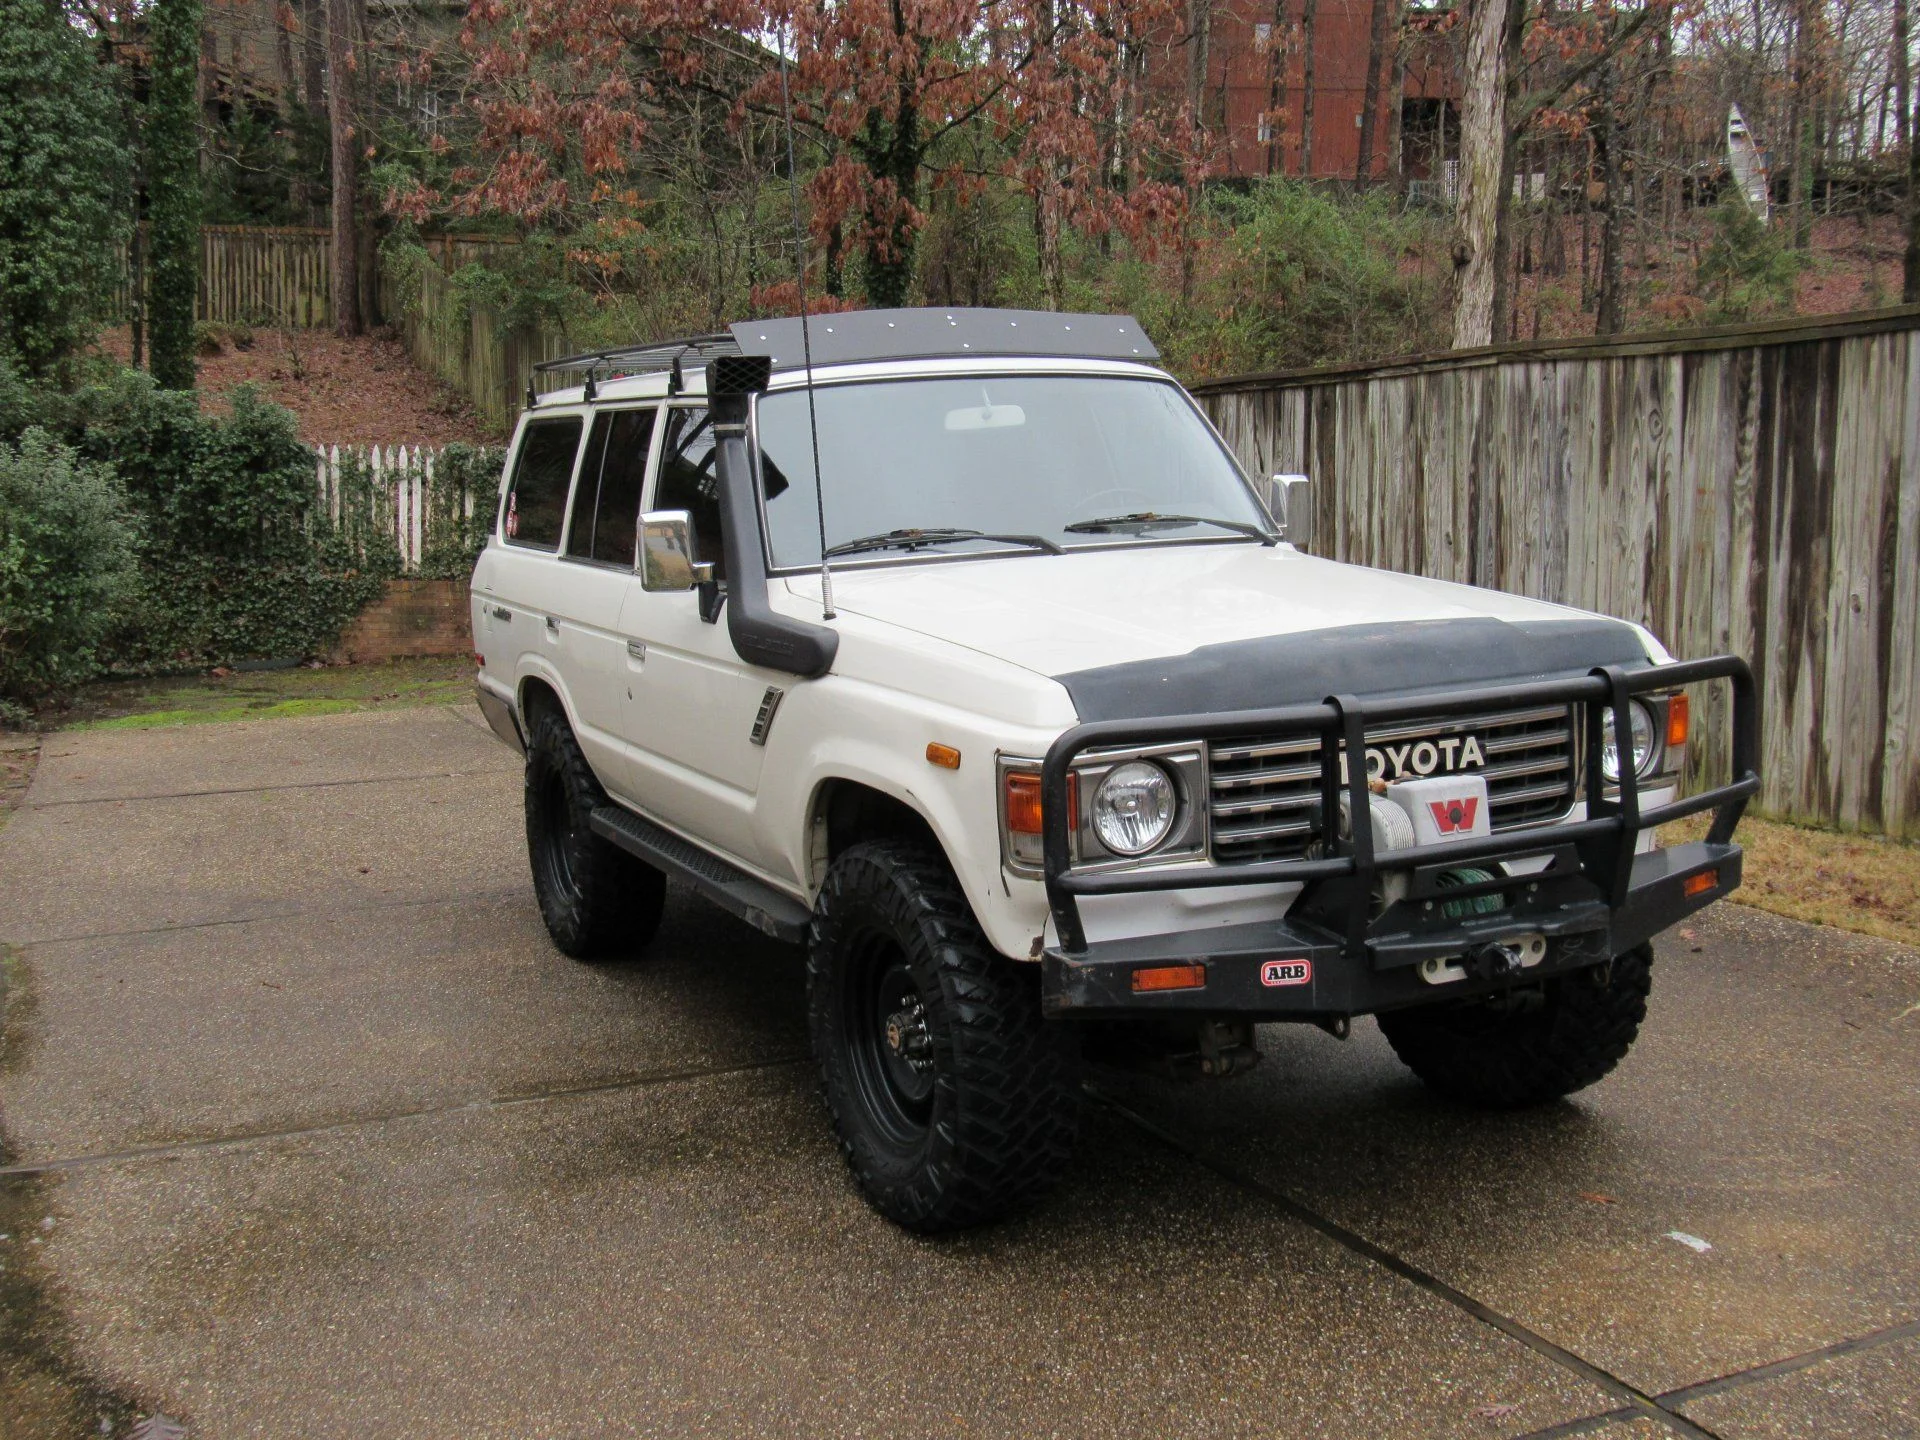
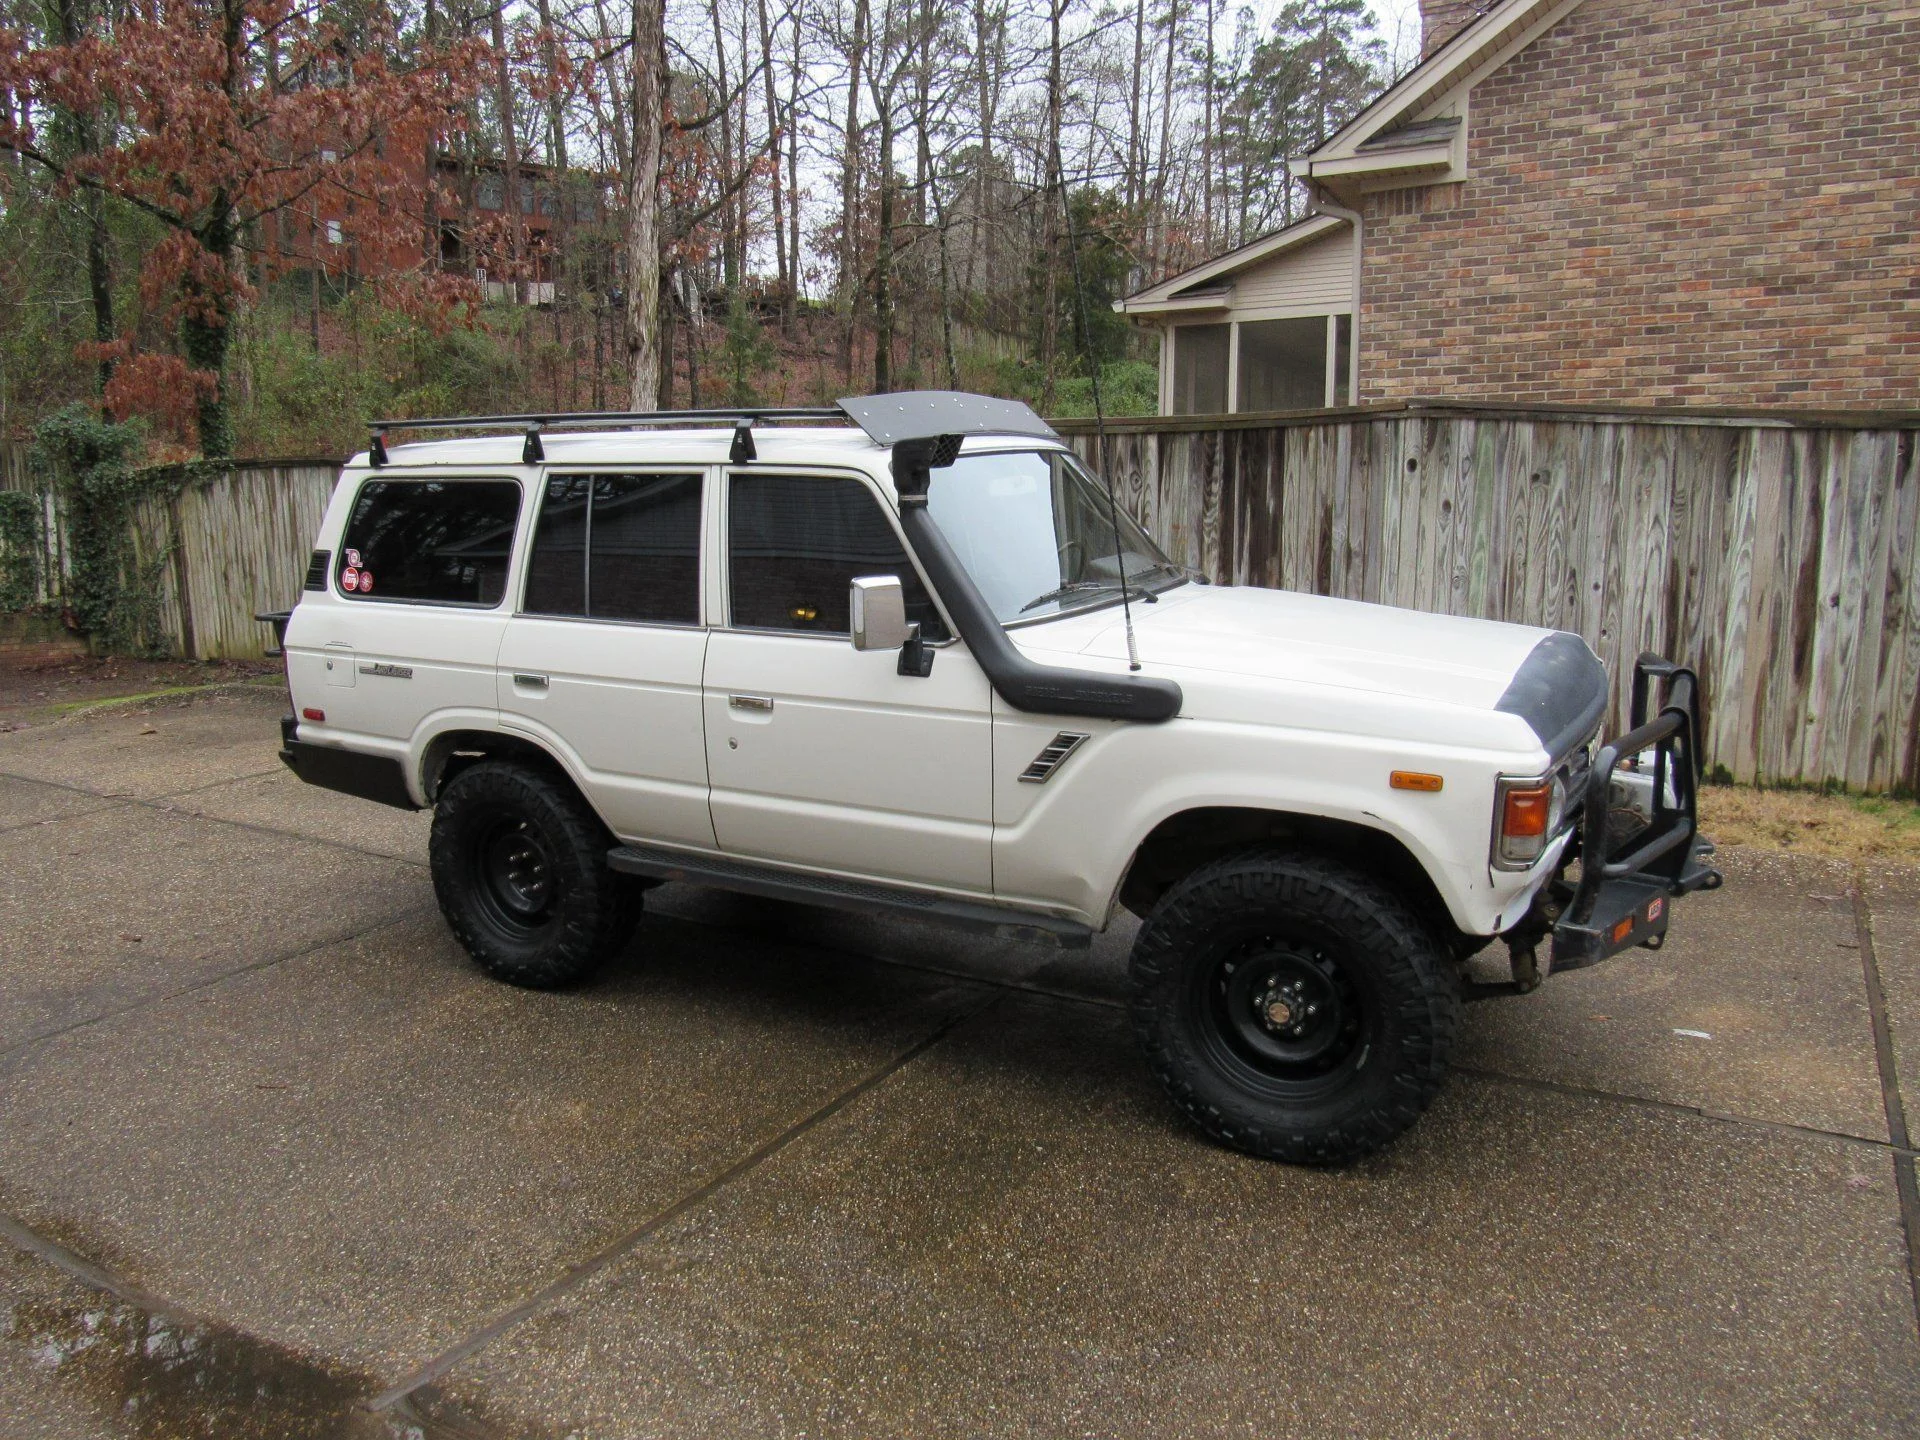
Oh, and this my FJ60. My youngest daughter named it "Wilbur" (after the pig in Charlotte's Web) the day we bought it, but we rarely call it that.

full


full


Fresh from the junkyard. And just an hour before it was sitting in a Tahoe.

full


full
 
Now that I have the motor, I needed to start my research and collecting parts. Cameron Mosley's thread (Cam's FJ60 is Gittin' a Heart Transplant) was the primary thread I referenced the most. These also got read a dozen times: SoCal GenIII Vortec Project and Forge Specialties, An FJ62 gets a 5.3 LS V8

I am a software developer by trade, so when I think of a project, I tend to gravitate towards tools and methods I know. Agile (Agile software development - Wikipedia) is a big part of my work life, so why not use it for a project this size? :) And Kanban boards (Kanban (development) - Wikipedia) are useful for many things, including tracking the TODO's of your engine swap project!

Trello lets you setup free Kanban boards to use how ever you please. I have one to track the parts I ordered and need to order, and one to track the work tasks of the swap.

Parts: Trello
Tasks: Trello

You can follow along at home! :)

I am keeping a detailed log of every dollar I spend, and every hour I spend on it. I find the more data you have, the better.
 
First steps were to get the engine cleaned up and take inventory of what needs attention. After hitting it with my pressure washer, it was a lot easier to deal with. It was filthy!

full


The intake manifold got damaged during removal (bashed the MAP sensor on the firewall/cowl) and some dingus didn't know how to remove the Vortec cover, so they ripped out the standoffs leaving a huge hole. And I cracked the plastic fuel rail with my creative "just throw some straps around it" method to get it unloaded.

Thanks to Ebay, I had a good condition intake manifold and fuel rails. Some good cleaning and new gaskets and the top end was good to go.

full


full
 
I am a lot further ahead than the above shows. I'm slowly catching up with the build thread. More to come so stay tuned!
 
Great story and photos.

The plastic intake manifold probably needed replacing anyway, if it's like other such GM parts, so no loss there.
 
Lookin' good...

I did a similar swap last year (carb'd small block to Gen III Vortec) in my '87...build link is in my signature. Might be a helpful tip or 2 for you in there, if you haven't read it.

...

EDIT: By the way - Are those FJ Cruiser steel wheels with 35s on your rig?

- Brian
 
I love your approach. I have a 5.7 also so may be looking at this down the road. I like how you have organized things with your Trello boards. Though I have to say your "while I'm in there list" only has one thing on it and I think we all know that won't last!

Did you pick up something else to daily drive while you do the swap? Or are you using lack of mobility as a motivating factor?
 
Great story and photos.

The plastic intake manifold probably needed replacing anyway, if it's like other such GM parts, so no loss there.

I'm crossing my fingers the one I installed is good.

Lookin' good...

I did a similar swap last year (carb'd small block to Gen III Vortec) in my '87...build link is in my signature. Might be a helpful tip or 2 for you in there, if you haven't read it.

...

EDIT: By the way - Are those FJ Cruiser steel wheels with 35s on your rig?

- Brian

I'll take a look. Thanks!

Yes, they are 17" FJC steelies. 295/70/17 Trail Grapplers. Roughly rounds out to a 34×12×17 if there ever was such a size.

I love your approach. I have a 5.7 also so may be looking at this down the road. I like how you have organized things with your Trello boards. Though I have to say your "while I'm in there list" only has one thing on it and I think we all know that won't last!

Did you pick up something else to daily drive while you do the swap? Or are you using lack of mobility as a motivating factor?

I had more on the "while I'm in there". Already completed it. :)

A gracious club member is loaning me his 100 series. He has a work truck and a FJ40 that needs driven now that he has it running again. Borrowing it has de-motivated me a bit because its nice and the AC works well. :)

Are you crazy man!!!??? What if the wife finds that!!! :flipoff2:

LOL. She's aware. I tried to buy a 2016 Tacoma a few months ago but we agreed the payments we're a bit much right now. I said that the sales tax we aren't paying on a new truck would do an engine swap in the 60. She didn't say no so I took that as a yes!
 
Last edited:
Before I got too deep in the swap, I figured it would be a good time to do a poser shot. LOL. That pile of parts has grown since that picture.

full


Then it was on to installing the 6 bolt hex style to 4 bolt square style adapter on the back of the transmission. It's kind of a pricey part for what it really is, but it includes a new speed sensor and ring. I plan to reuse my current AA GM to Toyota adapter so this part was necessary to adapt the new GM style to the old GM style.

full


I'm going to run a black Lokar shifter and OEM shift boot. I feel that's a better look, and will clean up my interior a bit. Mocking it up with the trans out of the truck was a no brainer. Looks like I might need to Z bend the linkage rod. I don't like the angles. :(

full


My current setup is a cheap (cheap made, not cheap priced) B&M shifter. I hate it because it takes up too much floorboard space. I'm really looking forward to the Lokar.

full
 
Next came the wiring. I debated on sending to someone or doing it myself. I've done quite a few TBI harnesses, so I figured this wouldn't be much different except for more wires and sensors. After reading all the tech on LT1Swap.com (Vortec 4.8/5.3/6.0 Wiring Harness Info) and a few other decent writeups (GM LS Engine Swap Wiring You Can Do at Home) I decided that I had to do it. I love wiring and challenges (and saving money)!

I went ahead and sent the ECM to Brenden at LT1Swap.com for programming. $75 is hard to beat.

I wanted to do it cleaner than the usual hack job with cheap relays and inline fuses, so I did some research and found this AWESOME writeup on using the Bussman relay and fuse block: DIY Bussmann RTMR Fuse Block, Part 1 – Introduction | Bodenzord. It outlines all the tools and techniques needed. Do yourself a favor and read all 6 parts.

I decided to use a similar fuse/relay box made by Littelfuse. It doesn't have a common bus, and has more terminal cavities, and is cheaper.

So after sending $100 for tools, terminals, fuses, relays, and the fuse box to Waytek Wire, I was ready to start the wiring and I was set for doing 280 style crimping.

Harness removed from motor, with connections labeled:

full


Starting at the ECM connectors, I depinned the wires I didn't need (by using the charts from LT1Swap.com) and worked my way down the harness removing the loose wires and connectors.

full


As I worked down a branch of the harness, I retaped it and reloomed it to keep the factory junction points in the same locations. I ended up moving the MAF connector from the long harness that also contained A/C wiring to the branch that went to the throttle body.

Soon I had it all done and taped up again. It fit the motor just like it did before I removed it, and I had a nice bundle of loose wires to connect to the Cruiser once the motor is in.

full


The fuse/relay box:

full


Inside the fuse/relay box. Room for more if needed. I need to label them, but I have it labeled in my notes. There's a main relay and fuse (energized when the key is on), the fuel pump relay and fuse, and 5 fuses that power the ECM, O2 sensors, coils, transmission, and injectors. Basically all the 10A fuses power all the pink wires in the harness.

full


The wires to go back to the Cruiser. Some are ALDL wires, check engine wire, tach wire, A/C compressor wire.

full


And back on the motor, testing it with a hot battery. Also testing the TAC module and DBW pedal. I have a bluetooth dongle and the Torque app, so I got that out and made sure the sensors were working and no codes were immediatly thrown.

full


I'm pretty confident that the first fire up will be successful. At least regarding the wiring harness. Fingers crossed!
 
Another "while I'm there note---after mine was in, I kept getting a knock sensor code. Of course they are under the intake manifold. Only sensor not easily changed. So I have to pull the whole top off to change the :(;&/ sensor.
 
Another "while I'm there note---after mine was in, I kept getting a knock sensor code. Of course they are under the intake manifold. Only sensor not easily changed. So I have to pull the whole top off to change the :(;&/ sensor.

I wish I would have went ahead and did them. Not super hard to get the intake off again if I need too. I'm just going to wait and see if the ECM throws a code about it or not.
 
Now that I have all the prep work on the LS done, it was time to start tearing down the FJ60 and yank out the 5.7. I took these pics to reference mounts and locations of things.

full


full


full


full


full


full


full


full
 
After a few nights of removing parts and draining fluids, the time came to yank it out.

full


So much room for activities!

full


The meeting of the motors. Sharing wisdom and stories.

full
 
Looking at some of those pictures...I'm having flashbacks from (almost exactly) one year ago from when I pulled my SBC out!

Lookin' good.

Are you going to run the exhaust forward and in front of the oil pan again, or...??? I re-did mine to go back along the trans, then up and over the rear output of the transfer case...and then merged it with the drivers side.

- Brian

I haven't decided yet on exhaust route. That will probably be a game time decision at the exhaust shop.

I know I can't do the loop under the oil pan again since my clearance is less than before.
 
After cutting and grinding out the old motor and transmission mounts (plus some other cleanup), the time came to stab the LS in.

full


full


I bought a new LS motor mount kit from Advance Adapters. Getting it installed was a breeze. I did have to trim some off both ends of the motor side to get the mounts to sit down between the frame rails.

I made a reference mark under the floorboard where the front edge of the transfer case adapter was with my old setup. My goal was to get the new motor positioned so the transfer case landed in the same place. I mostly succeeded. It's now 1" further forward than before. The motor sits better that way, and nothing else really changes. I can reuse my driveshafts as is, but I will take my spare one and get it cut to the proper length.

In researching, I see that everybody does their FJ60 gauge sending units differently. Some remove the plastic on the oil pressure switch and tap it out so the FJ60 sender screws in. Some get a JTR adapter. Etc.

This is what I'm doing. I picked up a set of adapters from Amazon that let me screw in the FJ60 senders into the LS. I like them so far, but the coolant temp sender doesn't seal up well against the tapered opening of the adapter. I had to use a thick rubber washer to seal it up.

full


full


My motor came with exhaust manifolds on it from the junkyard. I was going to try and use them since my 5.7L TBI had similar shaped manifolds. After mocking them up on the motor in the cruiser, they were too wide and dumped into the frame. :( So, a little hunting on Ebay, and I had a set of the popular C6 LS2/LS3 manifolds on the way. Comparison shots (Corvette on left, Truck on right):

full


full


I had to get a set of flanges for the manifolds (because I don't want this to be a problem at the muffler shop). Many people make specific flanges for these manifolds, but they are spendy. I choose to modify cheap ones from Summit instead. :)

full


full


Oh, and my favorite death tool. A free Rotozip with a collar adapter to use a carbide burr bit. :skull:

full
 
Built a transmission/transfer case crossmember using a straight stick of 1x3 rectangle tube. Used some existing right angle brackets from the previous crossmember to attach it to the frame. My old setup used a GM style trans mount and used the 700R4 mounting holes. Currently I'm using a stock FJ60 crossmember trans mount, and bolted that to the holes in the AA adapter, as designed.

I may rework it in the future, but for now the KISS method wins again.

full


Next came the oil pan. As with the manifolds, I was hoping to get away with the truck pan. That will never work. No clearance what so ever near the diff.

full


Sourced the "hot rod LS swap" kit from Summit (Chevrolet Performance Musclecar Oil Pan Kits 19212593) and got it swapped out. I had to reuse the oil filter adapter from the original pan to match the filter I had already bought (for a 2002 Tahoe). Other than that it was and easy job. The clearance all around is much better.

full


full


When I ordered the filter during one of my big RockAuto orders, I accidentally ordered a 12 pack case of oil filters instead of just a single filter (qty = 1 in the cart looks good? go for it). I was surprised when the box came. Needless to say, I'm set for 50,000 miles or so. Hence the reason to swap the oil filter adapter on the pans. :)
 

Users who are viewing this thread

Back
Top Bottom