Split Case Rebuild (1 Viewer)

This site may earn a commission from merchant affiliate
links, including eBay, Amazon, Skimlinks, and others.

I could stand it no longer and cracked open the rebuild kit. I discovered the thrust washers were included. I did not immediately find them before and ended up ordering a pair from Cdan. So if anyone needs extras....

08-01-02 014.jpg

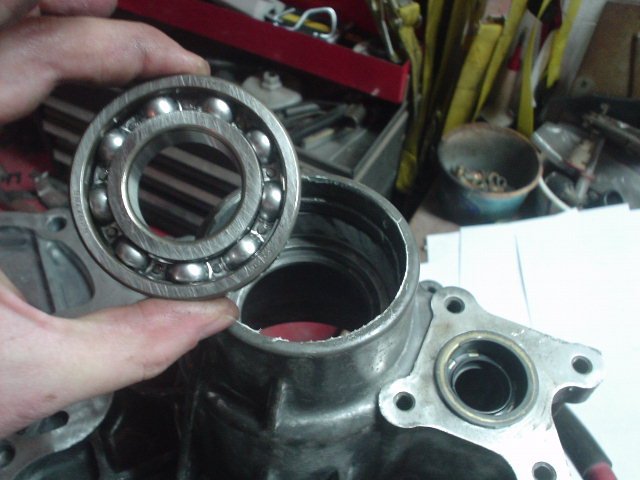
I found the correct bearing race and easily set it in place.

08-01-02 011.jpg

Now this is where I got myself into trouble. I have read the FSM and I had to dis-assemble the case (what had not already been done for me) but the next step in the FSM was to replace the front output shaft oil seal. I could not figure out why since I recalled something was supposed to go in there but, after all, it is the FSM, so I did it anyway all the time knowing I was making a mistake!

08-01-02 012.jpg

Call it hungover, been off work too long, whatever but the FSM tells you to do this before you put in the new bearing. I do not know why I do not listen to myself. I took the seal back out an luckily had not buggered it.
08-01-02 014.jpg
08-01-02 011.jpg
08-01-02 012.jpg
 
Next was the installation of the front drive shift fork shaft oil seal:

08-01-02 015.jpg

With the aid of another "SST":

08-01-02 016.jpg

This was difficult to seat and I am unsure why.

Next was the Transmission rear oil seal. (Notice the 54mm "SST")

08-01-02 017.jpg
08-01-02 015.jpg
08-01-02 016.jpg
08-01-02 017.jpg
 
Last edited:
Next was the intallation of the rear output shaft oil seal. I had two to choose from. the one that came with the rebuild kit or the one with the parking brake kit. I chose the former. Not sure it was a good choice or not. It did not seat as easily as the ones I have done in the past using the metal encase ones.

08-01-02 018.jpg
08-01-02 019.jpg

Next was the installation of the High Low gear selector oil seal.

08-01-02 020.jpg
08-01-02 018.jpg
08-01-02 019.jpg
08-01-02 020.jpg
 
Again with the "SST":hillbilly:

08-01-02 021.jpg

Next, I was supposed to have to replace the seals in the speedometer gear drive but since the housing was broken in the case, I ordered a new one and the seals were already intact. (Once again, if anyone needs an extra seal...)

08-01-02 022.jpg
08-01-02 021.jpg
08-01-02 022.jpg
 
This is where the error in my ways bit me. Step 13 in the FSM says to replace the front output shaft bearing at this point by first, "Removing the oil seal." I knew it:rolleyes: (I should have listend to myself)

I was able to get it back out without damage and dropped the new bearing in. Now this is also where the first shim goes. The FSM says use the thinnest shim. I did as the book said and used the .15mm shim that I borrowed from a Mud member. I know this will also get me in the ass because the one that came out was .50mm! I will have to wait and see. Since this is such a major rebuild and the case was so worn I will have to just go with the FSM (and it is never wrong :rolleyes: )

08-01-02 023.jpg

I was able to easily set the snap wring in place with the 54mm socket.

08-01-02 024.jpg

08-01-02 025.jpg
08-01-02 023.jpg
08-01-02 024.jpg
08-01-02 025.jpg
 
Last edited:
Tah-Dah.

08-01-02 026.jpg

I then drove the seal back in using another "SST" made from some PVC and a PVC cap. The same one works to set the parking brake seal.

08-01-02 027.jpg

Edit: Well I don't know if anyone is paying attention to this but I screwed up here again! I forgot to put the oil slinger in before the seal! This time when I removed the seal I buggered it so I need to replace the darn thing!
08-01-02 026.jpg
08-01-02 027.jpg
 
Last edited:
Now if you think I was doing this in peace and quiet, to coin a phrase, "Ding Dong, You're wrong." I recently replaced my main surround sound with a decent Sony for free with credit card points and brought the old beat system into the shop:

08-01-02 031.jpg

I then hooked up my XM from the car (Thaaat I bought on Mud-Bay) so I could listen to the Bowls - or, in this case, the 80's on 8!

08-01-02 028.jpg
08-01-02 031.jpg
08-01-02 028.jpg
 
Last edited:
So the last thing I took note of before dinner and quitting for the evening to catch the Fiesta Bowl was this. On the 4 speed model out of a 60, normally there is a hole here that needs to be plugged in some way. But because this is from a 62 there is no hole to fill - good.

08-01-02 032.jpg

But at the same time, that transfer case would have a spot for an oiler here:

08-01-02 033.jpg

As you can see there is none. :hmm: Soooo, I will have to think about that and maybe somebody will chime in and tell me either A) I do not need it or B) I will have to drill a hole and tell me where and how big!

EDIT: Check down at post 59 - I figured it out!

And that is where I am at. :princess: says I need to wait on the 5 speed for another pay period:doh: plus I am trying to get a tub from CA so we will see where that leaves the wallet.:flipoff2:
08-01-02 032.jpg
08-01-02 033.jpg
 
Last edited:
A quick PM from Poser stated that setting up the transfer case against any other transmission should be no problem since the transmission will not effect preload. Sooo that means I can carry on without waiting for the H55!
 
So i continued this evening a bit with assembling the output shaft. First was the high gear with bearing, high gear over top (which slid inplace nicely with the new needle bearings) and then I pressed on the front output shaft bearing an the "clutch hub."

Here it in the the press:

08-01-03 001.jpg

Then I flipped it over and installed the clutch sleeve, low gear bearing, low gear and output shaft bearing.

Here are the split needle bearings:
08-01-03 002.jpg

And the gear being slid in place:
08-01-03 004.jpg
08-01-03 001.jpg
08-01-03 002.jpg
08-01-03 004.jpg
 
Once the stack up was complete, I returned the original snap ring in place with my brand new to me snap ring pliers I got for Christmas (All these year fighting those snap wrings with a pair of needle nose:rolleyes:):

08-01-03 005.jpg

And here is the completed stack up:

08-01-03 006.jpg

The FSM then invited me to install the high low shift lever:

08-01-03 007.jpg

I had to coax it in place but it swivelled nicely.

Edit: As you read on, you will discover (as I did) this lever is incorrect for my use.
08-01-03 005.jpg
08-01-03 006.jpg
08-01-03 007.jpg
 
Last edited:
Next I pressed the front output shaft in place. This was not a happy thing to do until I got the bearing braced from below. I think that the shaft was not in a good mood at the time of failure. Here it is seated:

08-01-03 008.jpg
08-01-03 009.jpg

Now this is where I stopped for dinner and am a bit stumped. I had added a shim earlier as directed but the next step shows this and the cut away is perplexing me. What are they showing here?

FSM Shim.jpg

EDIT: You will see in post 64 that this is for the Automatic Transmission only - so disregard it!

Gotta work a bit tomorrow so unsure when I will get back to it. Anybody find description of those 7 bolts in the fische?

:cheers:
08-01-03 008.jpg
08-01-03 009.jpg
FSM Shim.jpg
 
Last edited:
I spoke with LDowney about the gears in this case and he had a great reccomendation. I am a bit too far into it to want to make the change but am still considering it. He addressed the issue of the second and third gears being far apart and uncomfortable for some to operate. Here is part of the discussion:

Me in response to him asking if I am familiar with the driveablility of the 5 speed and the far apart 2nd and 3rd:

I have and am aware of the issue. I had not considered changing the gears but now that you mention it and considering the state of my gears it probably would have been wise. I had looked at the ratios and noticed most were for lowering your gears for crawling, I did not immediately see for the purpose you are referring to. That would have been a good addition. It is also my understanding (maybe wrong) that the gears in the H41 and H55 are the same, just the overdrive in the H55. Is that correct?

Chris

Chris,
Based on my experience driving both, I think that is incorrect. I though 3rd & 4th were the same, but 1st and 2nd were different. Driving trucks with these two transmissions, it certainly appears to be the case. The very low gearing of 1st and easy driving nature of the BJ70 (like a FJ60) is why the older girls learned to drive (& drive a manual) in the 70. 1st gear in the BJ is very tolerant of poor clutch control which helped them to learn. Consequently, I have already started teaching Melissa (our 11 year old) to drive the BJ so she gets an advance start on the mechanics of driving (shifting, steering, braking).

Also, the last time I spoke with Phil about his gears, they were back ordered with SOR. Consequently, I do not know if he got them or if he likes them if he got them installed and what he finally thinks of them. Also, I will have to look in the SOR catalog to see what the details are on this gear kit.

Have a good weekend.
LJD


I probably responded with something unintelligible here but it was lost in cyber space.

Chris,
SOR offers two different ratios. One provides an 8% over drive in hi-2wd and 55% reduction in crawl in 4wd-low over stock. The second set provides an 8% under drive in 2wd-hi and a 68% reduction in crawl ratio in 4wd-low. However, they note that these kits are not meant for automatic tranny vehicles. Your transfer case started out mated to an auto, so you will need to check if this is a physical limitation in the transfer case or a limitation for the shifting and performance of the automatic (which you will not have). The SOR page number is 295 if you want to read up on it.

Good luck
LJD

I felt this was an appropriate issue to mention here for anyone following along.:hmm:
 
Hugh, I am also interested in t-case for my 40…. Why did you choose the 55 (free is a good answer too). Is it stronger? I need something to hook up to my Turbo 350 in my 40 w a Chevy Small Block… Tks

[URL="https://forum.ih8mud.com/40-55-series-tech/197791-chevy-small-block-fj40.html"]https://forum.ih8mud.com/40-55-series-tech/197791-chevy-small-block-fj40.html[/URL]
Well, what I am doing is rebuilding a split case from an FJ62 (and adding some modifications to make it manual vs vacuum shift) to mate to a 5 speed H55 Toyota manual transmission. So this is not what you are looking for. I am not sure what you need for your application as I have all Toyota - engine to drive train to axles to wheels.
 
Niiiiiice work :clap:
 
Just an update.
I decided to wait for the H55 to arrive before I went further. I will be mounting and completing the case once it arrives. Should be here any day. Also, I ordered all new bolts from CDan yesterday. If you are following along, you will know that the case was already disassembled on retrieving it from the driveway where it was in the elements and it had very little hardware. What it did have just was not worth re-using.

Here is a list of them:

90119-12047 x 4
Bolts 12mm x 1.25 x 125
(splitcase to 5 speed)

90119-12235 x 3
Bolts 12mm x 1.25 x 170mm
(splitcase to 5 speed)

91651-61030 x 3
Bolts 10mm x 1.25 x 30-30
(t-case halves)

91651-61040 x 8
Bolts 10mm x 1.25 x 40-30
(t-case halves)

91611-61020 x 6
Bolts 10mm x 1.25 x 20-20
(for PTO cover)

90119-08353 x 2 <<<<<<THESE ARE DISCONTINUED
Bolt
(splitcase insp cover)

91651-60830 x 4
Bolt
(splitcase insp cover)

90119-10262 x 6
Bolt
(speedometer gear housing to splitcase)

91611-60610 x 6
Bolt
(oil receiver bolts)

The ones that do not list a size are because I do not know the exact size or length. Upon receiving the shipment I will update this post.
 
Back in post 48 you have a pic and an arrow showing where the 5th gear oil nipple would go. It actually goes on the other side of that half, ie flip it over and see if the casting is there. The oiler faces the transmission and the side you show is the trasfercase inside.
 
Back in post 48 you have a pic and an arrow showing where the 5th gear oil nipple would go. It actually goes on the other side of that half, ie flip it over and see if the casting is there. The oiler faces the transmission and the side you show is the trasfercase inside.

Rookie mistake. I had it in my head that this was a pass through.

Here are two pics showing the casting (oiler is sitting next to it)...

Oiler 001.jpg

and then one with the oiler snapped snugly in place.

Oiler 002.jpg

Thanks Drew. And thanks for your thread in the 60 section. It was helpful in tracking down the proper bolts.
Oiler 001.jpg
Oiler 002.jpg
 
That's good info. Now it is confirmed that the FJ62 split case does have the proper casting for the oiler. Glad you got it figured.
 

Users who are viewing this thread

Back
Top Bottom