Here comes the Walrus - my 87 FJ60 build thread (1 Viewer)

This site may earn a commission from merchant affiliate
links, including eBay, Amazon, Skimlinks, and others.

finally got some work accomplished. Back quarters are done...it the weather improves hoping to get the doors done this weekend... panel prog #3.JPG panel prog #6.JPG panel prog #4.JPG panel progress.JPG quarter Panel #1.JPG

Thanks to Reevesci for all your advice.....J you rock.
 
Well after over a month I finally get to get back to work on the Walrus (hate it when life gets in the way of a project). Next up is getting the doors back together. Before I put the panels back on I'm going to install some hushmat...and shoot some ATF down in the pinchwelds as Kevin at Wagongear always likes to recommend (installing a rear lid as well). My question is that at the bottom of the doors (on this inside) there's a ton of sludge/dirt stuck in the pinch welds. I had noticed that water was getting trapped in there. Spent a 1-2 hrs today trying to clean it out...got most of it with a screw driver, putty knife, etc just scoping it out...used some Acetone (carefully as well)....anyone else have luck in using something to really get all of this type of crud out? Better type of cleaner to hit it with (afraid the acetone could jack up the paint if it got on the outside. Living up in the PNW there will obviously be lots of rain...really want to make sure the water is able to drain out as good as possible.

Thanks.

inner door#2.jpg inner door.jpg

Best pictures I could get...doesn't give the amount of crud its due.
 
That job sucks K... I had an old WaterPik I used for things like that, but its long gone now. Maybe try one of those small brushes with brass bristles. I think they are about 4 bucks for a 3 pack at HF.. I'd start at one end and sweep everything to the other.. shop vac it out, repeat until happy and then apply the oil/solvent for rust maintenance...

Just my .02¢

J
 
I haven't done this on a 60, but on an 83 tercel I used warm water with dish soap and a pressure to clean crud out of a door I got from a junk yard. I plugged the holes and let it soak a while then blew it out with a pressure washer. Afterwards I used compressed air to dry it.
 
I just the some clean out on my rear panels. I used a screw driver to breach up the dirt clog and vacuumed the dirt up with a shop vac. Used a damp cloth to get the residual dust out.

Jason
 
ok, doors are as clean as they've ever been...or at least as clean as they're ever going to be...I'm done with it. i hit them quickly with a shop towel sprayed with degreaser to cut through the tough crap..plus used a flat head screw driver to scrape out the heavy stuff as well. Then i hit them with some warm soapy water and scrubbed with small wire brush...then hosed it out with a pressure washer. Tried to dry them up with the shop vac..then left it out in the sun all day (we actually hit 90 in Seattle today) to evaporate any remaining water/moisture.

Next planning to hit the interior panels with some ATF as KRowland always suggests. Then i'm not sure...was thinking about putting some por15 down there after the oil has soaked into the seams for extra protection. Good idea? Don't want to have these rust ever. other option would be to add some seam sealer, looks like there was some original seam sealer down there.

door_interior#7.JPG door_interior#8.JPG door_interior#5.JPG door_interior#4.JPG door_interior#2.JPG
 
Leads me to this question. on the rear hatch the weep holes were seam sealed up. Am I better off cutting the seam sealer out of that area or just leaving it as is and adding the ATF then Por15 to the interior of the panel?

Hatch#1.JPG Hatch#3.JPG Hatch#1.JPG Hatch#2.JPG
 
Weep holes are there for a reason IMO. If any moisture gets in there it will sit until it "burns off"/evaporates. I always make sure the weep holes are clear and can pass water. You can POR the panels and then run a toothpick in the weep holes to make sure they are not sealed completed off and still gives you a coated open port/drain so to speak.

Others may disagree with me, but the cruiser weather stripping isn't that great and allows water to pass into all the doors and hatches at some point, if not always. I say get water out as fast as you can..

Hope this helps.

J
 
Thanks J. I agree I've been driving the walrus around some with the interior totally ripped out....a decent amount of moisture does get in there...even with brand new seals. Going to go with my plan then, cut the seam seal away from the weep holes, ATF all the seams, then por 15 on the interior for it...at least on the base of the panels. couldn't believe how much crud came out of the doors (degreaser really cut through the slime level nicely)...it' was 1/4" deep in some areas Amazing to me that all the panels are so clean in there, not even a hint of rust. I'll get the por 15 done next weekend...just switching jobs at work - hoping the new role has a better WLB vs the old one....I went from Mid May until 7/19 without having a day off...barely got to touch the walrus during that time... I need to get this thing done and out in some real dirt and trails.

Away from the things of man...that's where i need to go for a while.
 
K, That is one of the things I'll miss about WY. I can go for days on BLM trails and never see another person. An Antelope, rabbit or coyote from time to time. Some think the BLM trails are too easy and boring, but man they can take you to see some beautiful scenery and the seclusion factor they offer is priceless...

Good plan on doors. Whats next?

J
 
ok....this will be a weekend of WORK on the Walrus...gotta get this done! Here's the plan
1. finish off the rest of the panels (inserts, cover with the vinyl)
2. Clean the interior of all the remaining dirt and grime. Any recommended products for getting the old jute padding glue off? Looking for the best cleaner to use.
3. sound deaden the doors, get the plastic back up. Curious, I'm a little surprised how much water gets in the doors even with the new seals...i know some can come through the door handles (since I can see light through this area. anything that can be done to reduce this further, or is it just key to make sure the weep holes are clear....the thought of any water sitting on the inside of the metal scares the crap out of me.
4. POR-15 a few areas on the interior just to be safe. See a little rust on the latch areas (attached to the wheel well) that I want to hit just to be safe.
5. Squirt some ATF on all the interior seams before buttoning up the doors and starting to cover the interior up. Not sure if it would be a good idea to put some POR-15 over the seams after the ATF has soaked in there.
6. Then I have the fun of having to pull the crank sensor....looks like mine's bad, she won't start :bang:
7. Have a new fusible link on order from Dan...going to replace that as well as the old battery cables...like the idea of having some new ones on there - and wanted to get the link before those go the way of the dodo like all the other parts.

Hopefully I'll have a ton of photos to add by the end of Monday with all the progress I've made. This summer SUCKED for having time to work on the rig...need to get movin' on it.

Cheers
 
Progress, here was step on in the attempt to make it more quiet. I'll be posting some more shots tonight of my sound deadening, grille blackout, and carpet install. Also installed the new rear hatch stays (thanks CDan). No more using my head to keep the upper hatch open.

hushmat#4.JPG hushmat#3.JPG hushmat#2.JPG husmat#1.JPG
 
Also installed the Wagongear tailgate lid. Probably overkill but put POR on the edge of the cutout area to seal up the bare metal. This thing is just PURDY Rear hatch lid.JPG
 
Sound deading step 2. Closed cell foam. Two layers in the footwells, then one full one to cover the entire floor.

IMG_3830.JPG IMG_3838.JPG IMG_3834.JPG
 
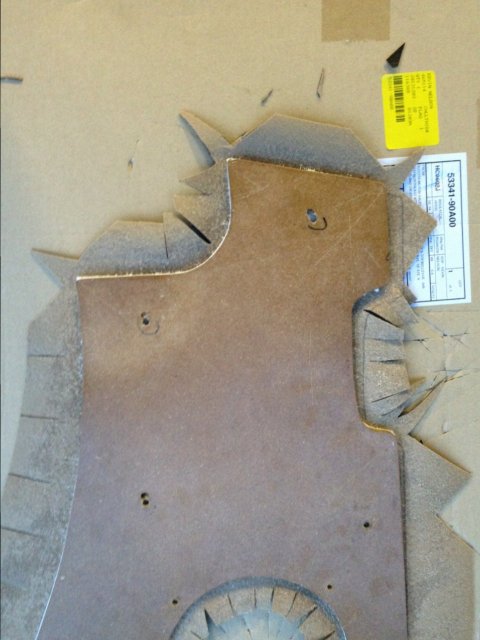
Then comes the MLV. Stuff is heavy....not too tough to work with when you get the cuts right...it doesn't do compound curves. For the front footwells (only real trouble spot) I made some paper templates to get a good layout so that when it was installed gave me 100% coverage. (1st pic is the passenger side, little trickier than the driver's side....felt like a form of oragami with all the crazy cuts....at least it worked for me. :)

IMG_3832.JPG IMG_3850.JPG IMG_3849.JPG

IMG_3850.JPG


IMG_3849.JPG
 

Users who are viewing this thread

Back
Top Bottom