Finally started it (1 Viewer)

This site may earn a commission from merchant affiliate
links, including eBay, Amazon, Skimlinks, and others.

I hate steering columns. They are a bitch to rebuild. Had to add a slip to the column to get rid of some flex in the firewall. Took 2 friggin days! Between parts and and having to machine everything. Its the little things that take so damn much time!
 
Got the new brake booster mounted up and had to check for clearance so we flexed it up again.

179261_4544496092506_813818279_n_zps5762991c.jpg


Brake booster and master cylinder cleared by 2 1/2" and the orbital cleared great as well.

859298_4544501292636_924518123_o_zps8fd769ec.jpg


62163_4544500052605_679047068_n_zps1c0a6216.jpg


Got to get the t case brake mount made up and then got it all mounted up. We had to machine some small spacers to mount to the rear output housing because the flange on it isn't machined flat. Just the mounting spaces for the bolt heads are. Kind of a pain but it worked out good. We will probably dress the mount up a little before we paint it all.

5643_4544487292286_980193669_n_zps7b755bc1.jpg

528094_4544484452215_74020964_n_zps096b8897.jpg
 
Got the front fenders roughed in today. The existing fender flares were cut way into to make room for the tires at full stuff but we needed to fill in some since we moved the front axle forward and there was no way to make the fender look good without fabbing up some patch panels.

Remains of fender before starting:

IMAG1175_zps66cdafeb.jpg


Last of the flare being chopped out:

IMAG1177_zps4fbf8dd9.jpg

IMAG1180_zps9a2d4fd4.jpg

IMAG1182_zps4d54297c.jpg


Patch panel being bent up:

IMAG1176_zpsad4ac54d.jpg


Trimmed up:

IMAG1184_zps0eb0131d.jpg


Formed a little:

IMAG1195_zpsf87251dd.jpg


Tacked in and stitch welded up:

IMAG1188_zps78554909.jpg

IMAG1193_zps8e76d3ab.jpg


Some shots of the other side bent up:

IMAG1198_zpsa1630321.jpg

IMAG1197_zps57546594.jpg


And the other side in place:

IMAG1201_zps506783b9.jpg

IMAG1200_zpse668f506.jpg


We still need to trim them up and do the radius as well as adding the tube work underneath for support but it's nice to get them this far in one long afternoon.
 
I'll just bring .pictures!

White Trash of the Elwood Chapter, TORC4x4.org, Cottonland Cruisers.
 
We got the front fenders all fitted.


ForumRunner_20130409_173624.jpg


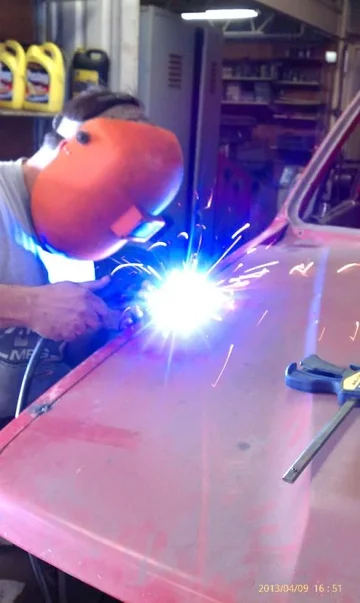
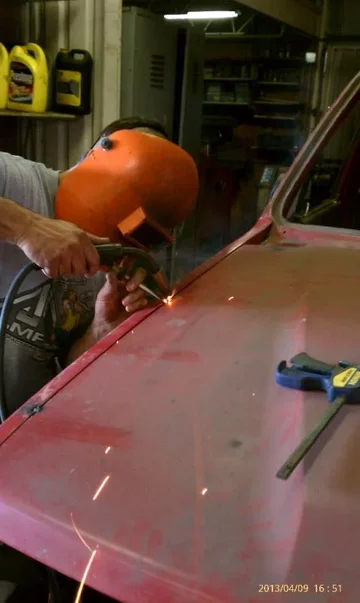
Then I came back into the shop and found Devin doing this:


ForumRunner_20130409_174055.jpg


ForumRunner_20130409_174119.jpg

Guess I pissed him off, he done welded my hood shut.

White Trash of the Elwood Chapter, TORC4x4.org, Cottonland Cruisers.

ForumRunner_20130409_173624.jpg


ForumRunner_20130409_174055.jpg


ForumRunner_20130409_174119.jpg
 
You need to buy that boy some gloves...
 
He doesn't need gloves, he can aim the sparks pretty good. At least it seems that way. I always walk away with several burns and burn holes in my clothes while I "hold these so I can tack 'em."

White Trash of the Elwood Chapter, TORC4x4.org, Cottonland Cruisers.
 
We had a few hours this evening to work on it so we got after the fenders. Had to cut them up higher and get the clearance right at the rear. We then started adding some tube!


Then we cut the front of the fender and part of the hood and got the tube bend put in there:


Filled in the rest of the tube and smoothed the welds and this is what we ended up with:


We still need to weld the skin to the tube.

And this is the front view. Tube will come around the front edge of the hood and tie the fenders together and some sort of grill will get fabbed up!

 
81 1/2 rear and 83 1/2 front. It will be able to back onto a standard width trailer.

White Trash of the Elwood Chapter, TORC4x4.org, Cottonland Cruisers.
 
Nice work, Fireman, keep it up! Can't wait to see this beast on the trails!
 
Holding the floor down.
 
We'll I blew my knee out at the station last week and am immobile so Devin took advantage of me not being able to help by starting on the new headers. Sent a few teaser pics so I had to load my gimpy ass up and head out there to check it out. Going to be a great solution to the problem of routing the exhaust. Will run under the front of the harmonic and join up with the driver side. Will be ceramic coated back to at least the muffler.View attachment 1255340 View attachment 1255341 View attachment 1255342 View attachment 1255344 View attachment 1255344
 

Users who are viewing this thread

Back
Top Bottom