Dumpinthegutters BLACK BETTY (1 Viewer)

This site may earn a commission from merchant affiliate
links, including eBay, Amazon, Skimlinks, and others.

Joined
Mar 4, 2011
Threads
5
Messages
96
91 Toyota Truck
-wheelbase is 125" and the width is 90" outside of tire to outside of tire.
-Fully Tig welded Exo Cage

Drive Train
-350 motor
-350 trans
-Lokar shifter
-203/205 doubler twin sticked
-Brand new GOTPROPANE system with 2 used aluminum forklift tanks - need to revamp the cage to get them protected.

Front
-Dana 60
-5.13 gears
-Detroit
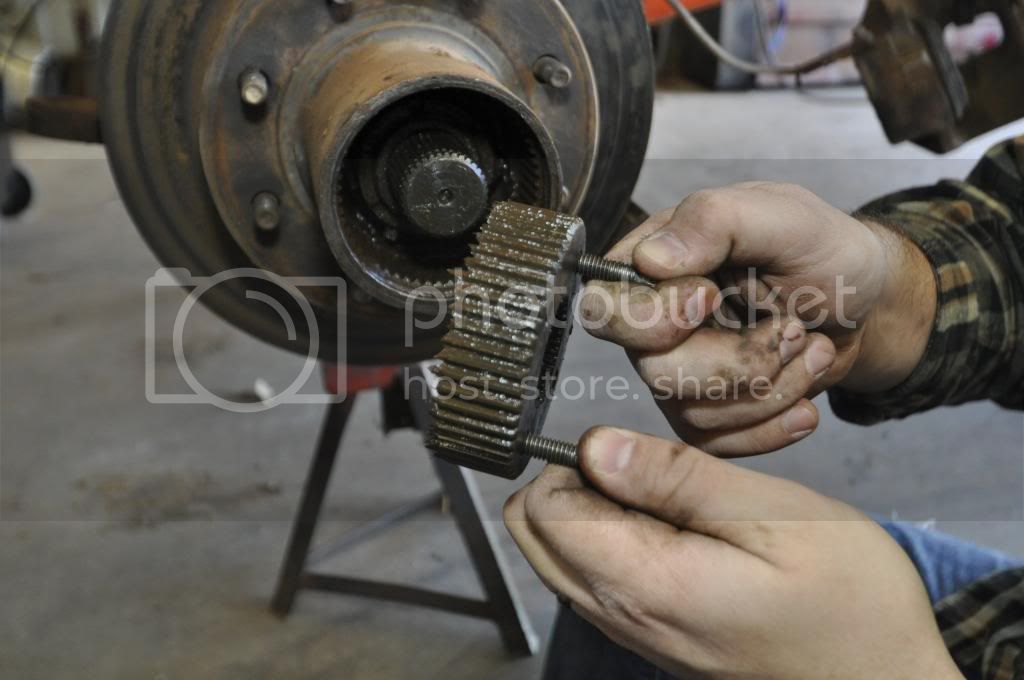
-Full Yukon 4340's with Super Joints
-RPM 35 spline drive flanges
-coil springs
-rancho shocks
-3 link with track bar

Rear
-14 bolt
-5.13 gears
-detroit
-disc brakes
-coil springs
-ranch shocks
-grader ball suspension

Misc.
-rock lights
-Mastercraft Harnesses. lap belts installed, need to get a brace welded in for the shoulder straps.
-custom tube doors
-9500# winch
- 5 - 42" Iroks on 15" black steel wheels
-Crawlfab weld on beadlocks not installed yet
- Full Hydro steering
- Spare PSC SE ram
-CD player

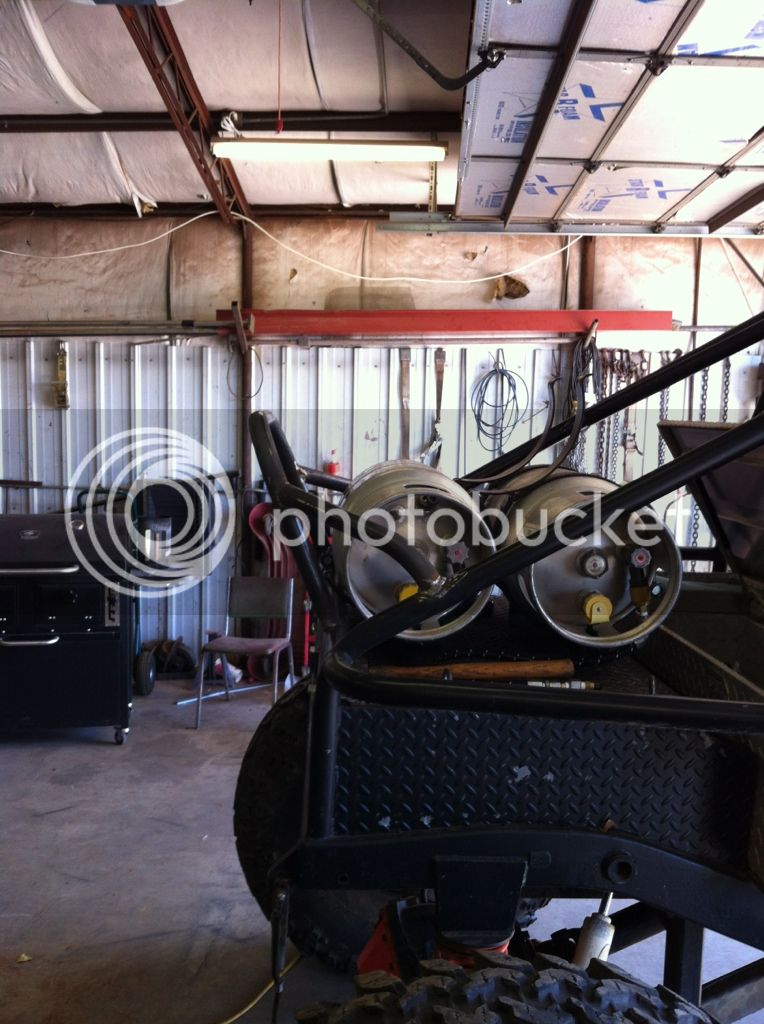
That's the important stuff, but now what everyone wants... PICS

_DSC0263.jpg


_DSC0347.jpg


_DSC0504.jpg


_DSC0473.jpg


_DSC0265.jpg


and the Tundra Tow rig

68af31cf.jpg
 
Last edited:
Thanks! It was dead in the water for the last month with a bad tranny. Finally got it back in over the holiday weekend trying to prepare for all the events coming up and thought I'd make a build page.
 
Tundra gets 13 daily driving in town. Gets a little better on the highway. It gets 10.7 pulling Betty. I drive with a heavy foot and It's got quite a bit of extra weight with the 5 - 35" Trail Grapplers, Expedition One front and rear, and the winch. My dad averages 3-4 mpg better in his stock Tundra.

I'm not too sure on the truggy since it's not street legal. Most times it lasts the whole weekend. Depends on how much time I'm in low.
 
Fabbed a rear stinger to protect my propane tanks. I think it turned out pretty good.

BCEB9C00-AA99-4B50-9E15-2ACBC3B4961F-259-0000004222477811.jpg

EED2E234-0F20-428C-AA44-9C6583DEB8D4-259-000000420F6494EF.jpg

156B73A6-482A-4478-8B23-72DDC71258AD-259-00000041FF301055.jpg


Also got tabs welded and installed some IPFs that used to be on my FJC.

0842291F-E527-4552-8F14-035C20E5A99C-259-00000041F6F0789B.jpg

258E6968-4F69-4164-A796-2C94852491AF-248-0000000F73BAC4AA.jpg
 
Some pics from last months trans rebuild. I lost the Sprag in 2nd.

Towed it to shop with our wrecker.
948c1481.jpg


Home made trans jack since it is too tall for a real one. 203/205 out.
e3b252ee.jpg


All torn apart.
858e476c.jpg

0b35fe14.jpg


The trans had a TCI 3k stall converter. I was told this is to keep the truck from pushing through the brakes at idle. One thing it definitely did was help the trans overheat on long runs. I went back with a 1k stall, no more heating and no pushing through brakes.
 
Slowly making the transition. Welded beadlocks on this weekend. I can make a DIY post if anyone is interested.

Clayton is this coming weekend.
 
As you know purchasing beadlocks can get expensive quick. For those of you out there that want the benefits of a beadlock with out the price tag, this thread is for you. This is not for everyone though. If you have no experience with welding I wouldn't recommend trying this. You don't need to be a professional but the welds do need to be pretty air tight. We'll get into checking that later.

0D1E024F-2FF2-4C71-83D7-A6EF2FAA599B-15810-000003029D6FE6A6.jpg


Step One - Prep:
Break down your wheels and tires. My dad has a tire machine so this was a pretty easy task. Once your wheels are broken down. Use a flapper disc on a grinder to clean the paint around the lip to receive the beadlock. If you are like me and have very used wheels you'll also need a crescent wrench to straighten out any bends or dents from crawling.

Once the beads are clean and down to bare metal take your inner ring and chamfer the outer edge that will be welded. I used the same flapper and grinder for this step. Doing this will make it easier when you start burning it in.

6F9DF22F-755C-461E-97F3-88ABBCCB1004-21466-0000041C2F2FDDA6.jpg


Step Two - Welding:
Now that all your prep work is done, this is the point of no return. Take your inner ring and center in the lip of your wheel. There should be about a 1/16" gap all the way around. If your vehicle is a daily driver this is a very important step as it can cause your wheel to not balance properly.

Once centered clamp the ring to the wheel. I then put 4 tac welds around the wheel at 12, 6, 9, and 3. Moving right along, It's now time to put some good beads in. I worked counter clockwise around the wheel with ~1" beads for the first round.

4EEF60DF-3BB5-4D82-B2C9-952C990251A4-21466-0000041C57BC2573.jpg


0587A8A3-C6D1-4ACD-949B-3B0E25A2850C-21466-0000041C47B3E119.jpg


Starting at 12 moving to 6, 9, and then 3. This pattern will help to disperse heat around the wheel and prevent it from warping.

FA762C8D-5839-4FA7-912B-1034BA5E7C55-21466-0000041C509E0138.jpg


Staying with the pattern above I moved to ~5" beads until I had welded the entire wheel.

Step 3 - Checking your welds

At this point I ground down the welds flush with the inner ring. Then take sidewalk chalk and generously go around the entire edge. Set the wheel up right and pour in a small amount of mineral spirits to the inside lip of the ring. Be careful not to put so much so that it spills out of the bolt holes. Roll the wheel slowly. If there are any holes in your weld, the chalk will let you know and it will look like this.

71B24CEE-3A54-42C5-8BA9-FC8031439170-21466-0000041C5E714D83.jpg


I went ahead and tac'd the hole, but I've heard using silicone when seating the tire will fill small holes such as the one above.

Step 4 - Paint

Easy enough...

Step 5 - Outer-ring

Old Cruiser did a great right up on this - HERE

DONE!!! Go have a beer and pat yourself on the back for a job well done! :cheers:
4A97CC25-7E8C-41A4-8469-C9CE0E8D9C4C-21466-0000041C67F27AC0.jpg

CF12EFE3-EE79-42E1-8C8A-19A35AECF1AA-21466-0000041DF7517419.jpg
 
Last edited:
So, This probably isn't very applicable here but since I went through the effort to make it I thought I'd share for those interested, I'll show you how to breakdown a Chevrolet Dana 60 (or 1ton) front axle. Let the fun begin.

First step is getting your vehicle on a level surface, placing the axle on jack stands, and removing the tires.
_DSC0468_zpsdb9b41c3.jpg

_DSC0473_zps2b32c902.jpg

_DSC0475_zpsf124ae97.jpg


Now that your tires are pulled you'll move to the break calipers. The nut that holds the caliper together will be removed with a 1/4" allen wrench. Once it's free use a bungee to hang it out of the way with out over extending the brake lines.
_DSC0477_zpsc297a310.jpg

_DSC0480_zps6102a121.jpg

_DSC0482_zps4cf57a2f.jpg


The drive cap will be removed with the same 1/4" allen wrench.
_DSC0484_zps7113024d.jpg

_DSC0485_zpscce86930.jpg


With the cap off just keep pulling the drive flange parts. Once the snap ring is off, you'll use the screws from the caps to pull the flanges.
_DSC0487_zps5e33cfcd.jpg

_DSC0489_zps12283066.jpg

_DSC0490_zps46d16031.jpg

_DSC0492_zps6d8a14f1.jpg

_DSC0493_zps0e34bae9.jpg

_DSC0495_zpsa0657a4f.jpg


With the flanges out of the way, the next step is removing the hub. You'll need a 6pin 2.6" socket to pull the spindle nuts.
_DSC0498_zps3e4d36c5.jpg

_DSC0503_zps65014bb7.jpg

_DSC0504_zps23055d41.jpg

_DSC0506_zps8bb4f776.jpg

_DSC0507_zpsedbb2f6c.jpg
 
Now that the hub is off, you'll use a 3/4" socket to free the spindle.
_DSC0509_zpscbd6fc9f.jpg

_DSC0511_zpsc134fd86.jpg

_DSC0513_zpsb8c92ee1.jpg


Now the spindle and seals will pull off.
_DSC0514_zps3fe834a3.jpg

_DSC0516_zps73a27713.jpg


Now the axles will slide right out.
_DSC0517_zps0894b560.jpg

_DSC0520_zps6d0b70a6.jpg


Pieces, and empty.
_DSC0522_zpsc9da8e05.jpg

_DSC0525_zps738ab1fe.jpg

_DSC0526_zps3e8cdffb.jpg


The other side will come apart exactly the same. Except you'll likely be doing this to remove or change a broken axle. In this case it tis the passenger inner axle that is broken. We will resume at that step from above.

Using a drop light you'll see your broken axle shaft. Clean debris.
_DSC0574_zps04726487.jpg

_DSC0569_zpsd89849c2.jpg

_DSC0575_zpsb2080e68.jpg


Pull the diff cover and check for debris. Diff cover will pull with the 1/4" allen wrench.
_DSC0558_zps6fcc2f5c.jpg

_DSC0563_zps944e2e93.jpg


If you are running a Detroit locker you can use a 3/8" solid rod and drive the axle out from the opposite side.
_DSC0578_zps704aa31c.jpg

_DSC0581_zps77016571.jpg


With the broken shaft out, The spring for the inner seal was wrapped tightly around the end of the shaft. So I have to pull the ring, pinion, and locker. WHen you pull the carrier bolts BE SURE to keep them on their exact side and orientation. Meaning they are side and orientation specific. YOU DO NOT want to mix them up from side to side or flip them over. They need to be put back on in EXACTLY the same place and orientation.
_DSC0584_zps435f4975.jpg

_DSC0588_zps9eceee13.jpg

_DSC0590_zpsef39e1df.jpg
 
You will need a pry bar or slide hammer to get them out, and an extra set of hands as they are heavy.
_DSC0598_zps03a5ff43.jpg

_DSC0603_zps610cf2a2.jpg

_DSC0607_zps238e76cb.jpg

_DSC0610_zps86384cd4.jpg


Stay tuned next week for rebuild.
_DSC1597_zps51cc3fea.jpg
 
Thanks. It's kinda basic stuff. I mainly wanted to post this to show people that you could do this entire thing on the trail with basic tools except for the 6pin 1ton socket (if it was level enough). In your case runnin 43's you'll probably bind and break at some point if you've got stock axles.
 
Thanks. It's kinda basic stuff. I mainly wanted to post this to show people that you could do this entire thing on the trail with basic tools except for the 6pin 1ton socket (if it was level enough). In your case runnin 43's you'll probably bind and break at some point if you've got stock axles.

Yeah I'm pretty muck expecting that to happen.
I'll upgrade to some 35 spline yukons when it does.
 

Users who are viewing this thread

Back
Top Bottom