Builds A few mods from 7-25-06 (1 Viewer)

This site may earn a commission from merchant affiliate
links, including eBay, Amazon, Skimlinks, and others.

Engel Wireless Thermometer and tent shelf installed 7-10-2009

Two mods today, been busy all morning.

First up is the new Engel Wireless Thermometer that I bought from Wil at Sierra Expeditions.

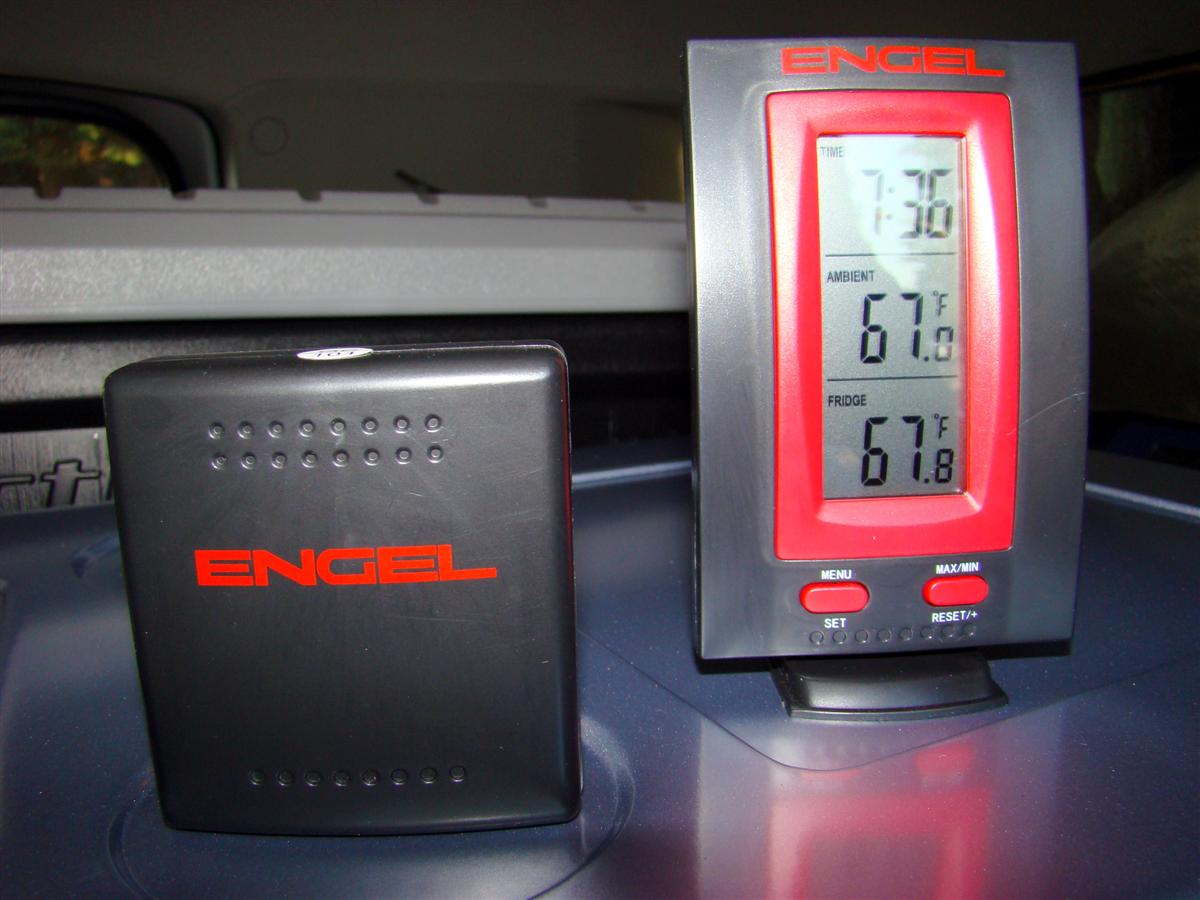
First pictures shows the transmitter next to the receiver for size comparison.
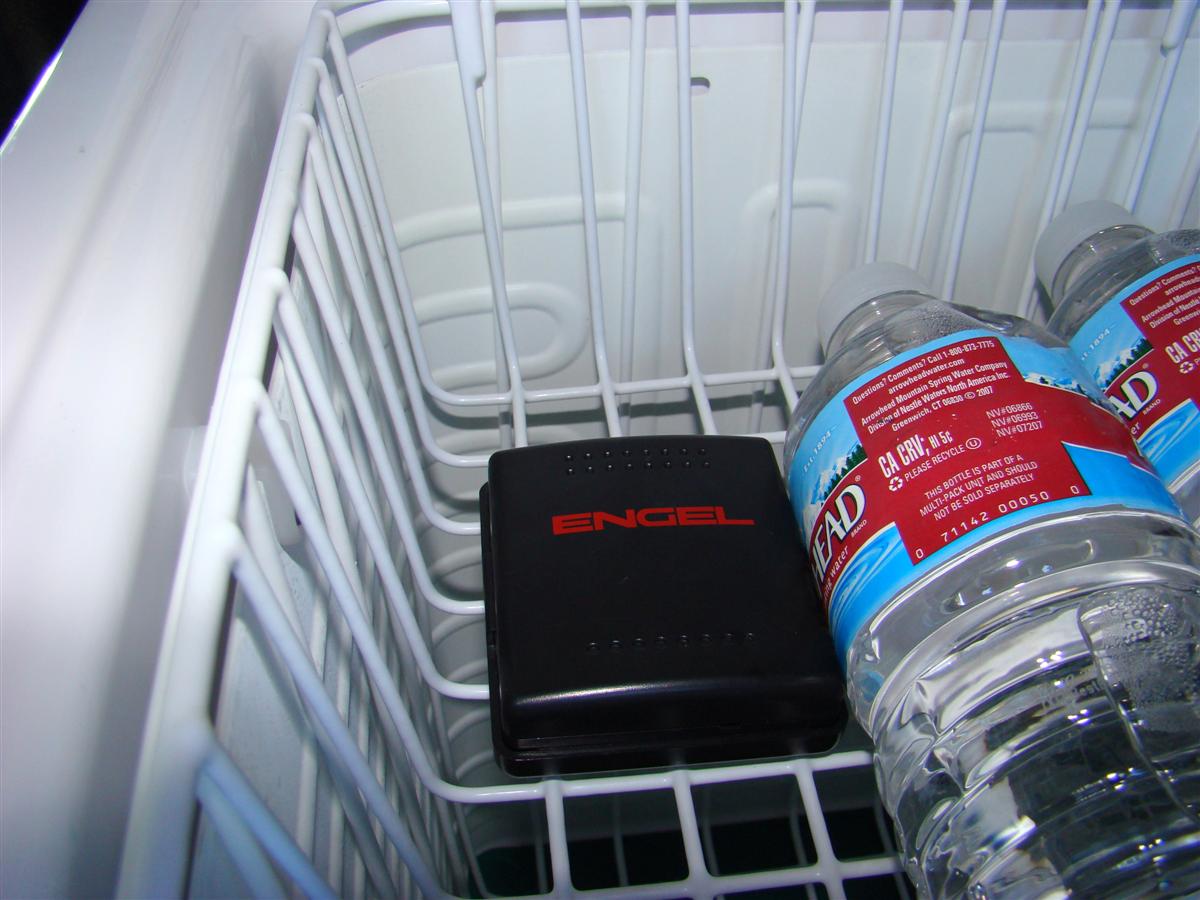
Second picture shows the transmitter sitting in the fridge.
I did not use the supplied Velcro to attach it anywhere, as I want the option of putting it where I want once the grub is packed inside the fridge.
Third picture shows the receiver that can display the time, outside temperature, and the fridge temperature.

It is off by a few degrees (higher on the Engel unit) compared to the readout that comes stock on the ARB fridge.
Not sure which is the more accurate, I guess I could get one of these dial gauge thermometers and set it inside to check it out.

I find the range on this though is not eighty feet like they claim, in fact when I had the receiver up on my dash it would not pick up the temp of the fridge, it showed the old temp from when sitting in my home.
These need to be real close, hence why I used the Velcro and stuck the receiver onto the fridge.


Links:
Engel Wireless Thermometer

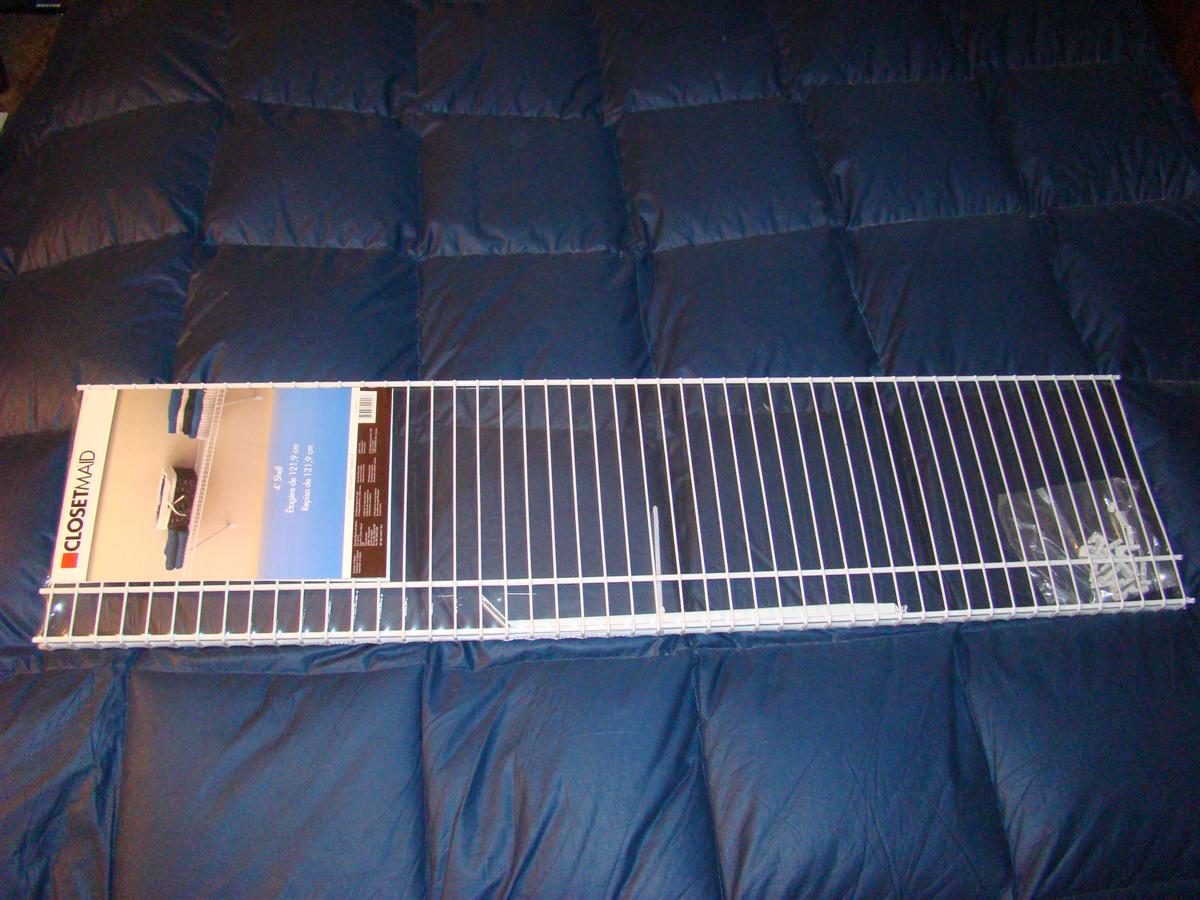
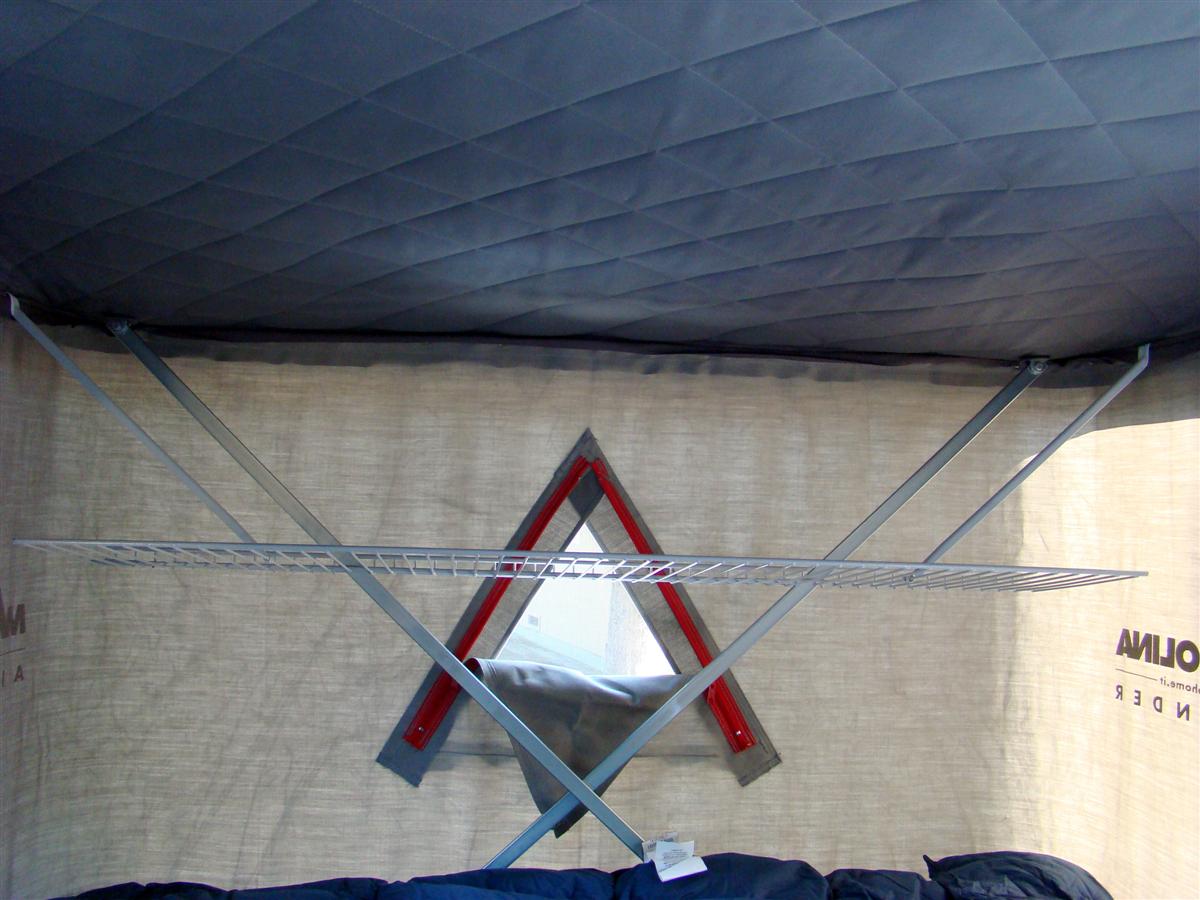
Next up is the "Bjorno Maggiolina roof top tent mod.

Saw a thread over on fjcruiserforums.com by Bjorno who has the exact same tent model I do, the AutoHome Maggiolina AirLand medium.

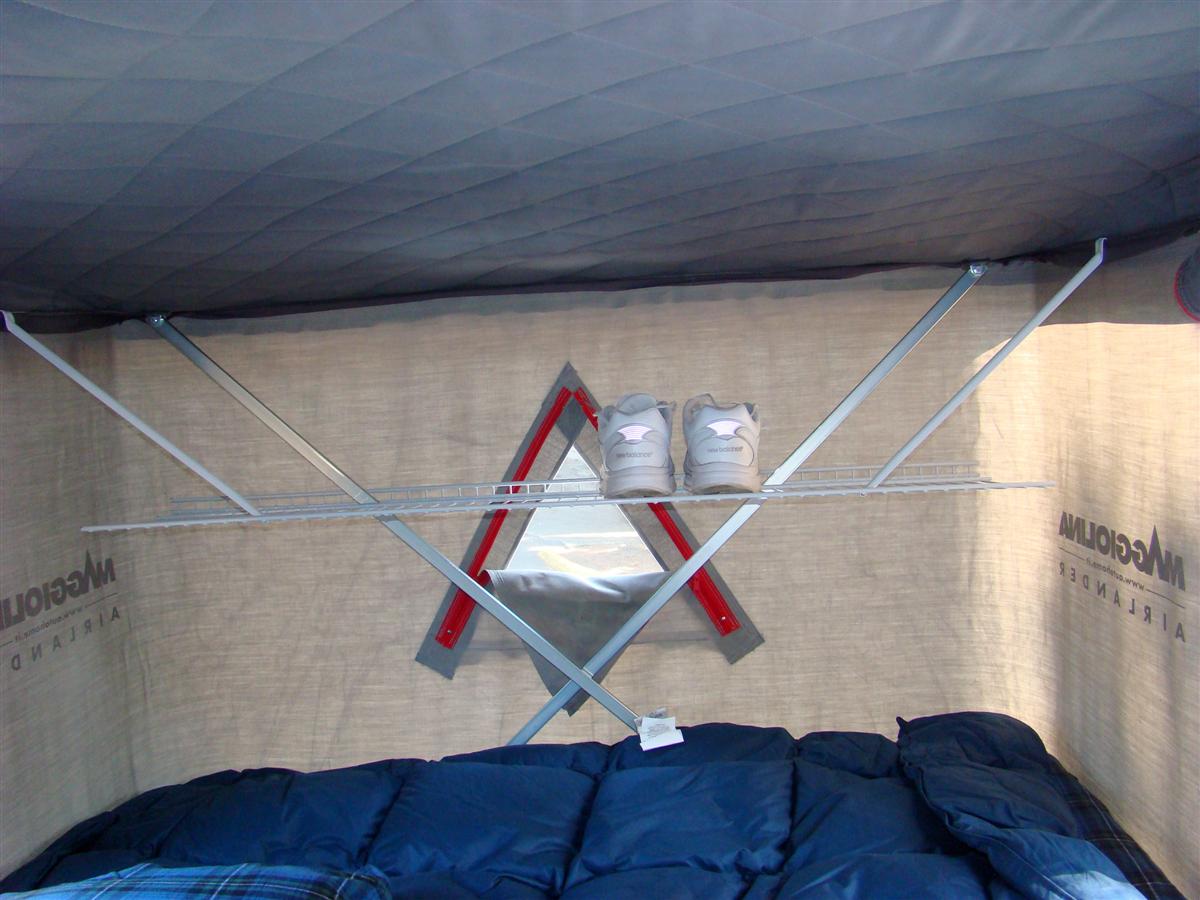
I found camping in mine last year there is no storage space in the tent, and having a shelf like this is nice to put your shows up on.
The shelf is to small to put my BadBags duffel on, and way to heavy too.
But it can be used to store other stuff besides shoes/boots.

I was gong to try and install mine without cutting out the thirteen ribs like he did, but I would have had to tie the shelf with something to the lifting mechanism of the tent, and that would be kind of a pain.

His method worked out pretty good.
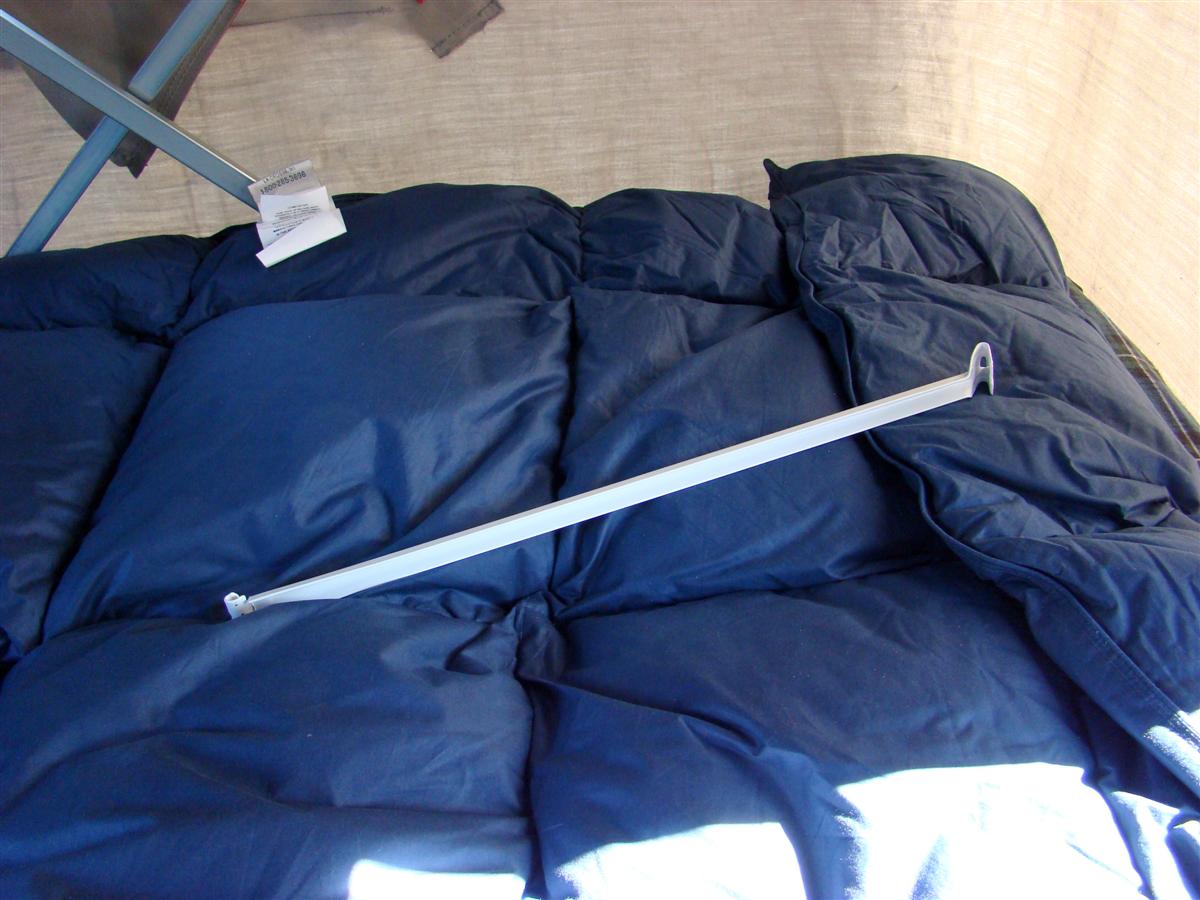
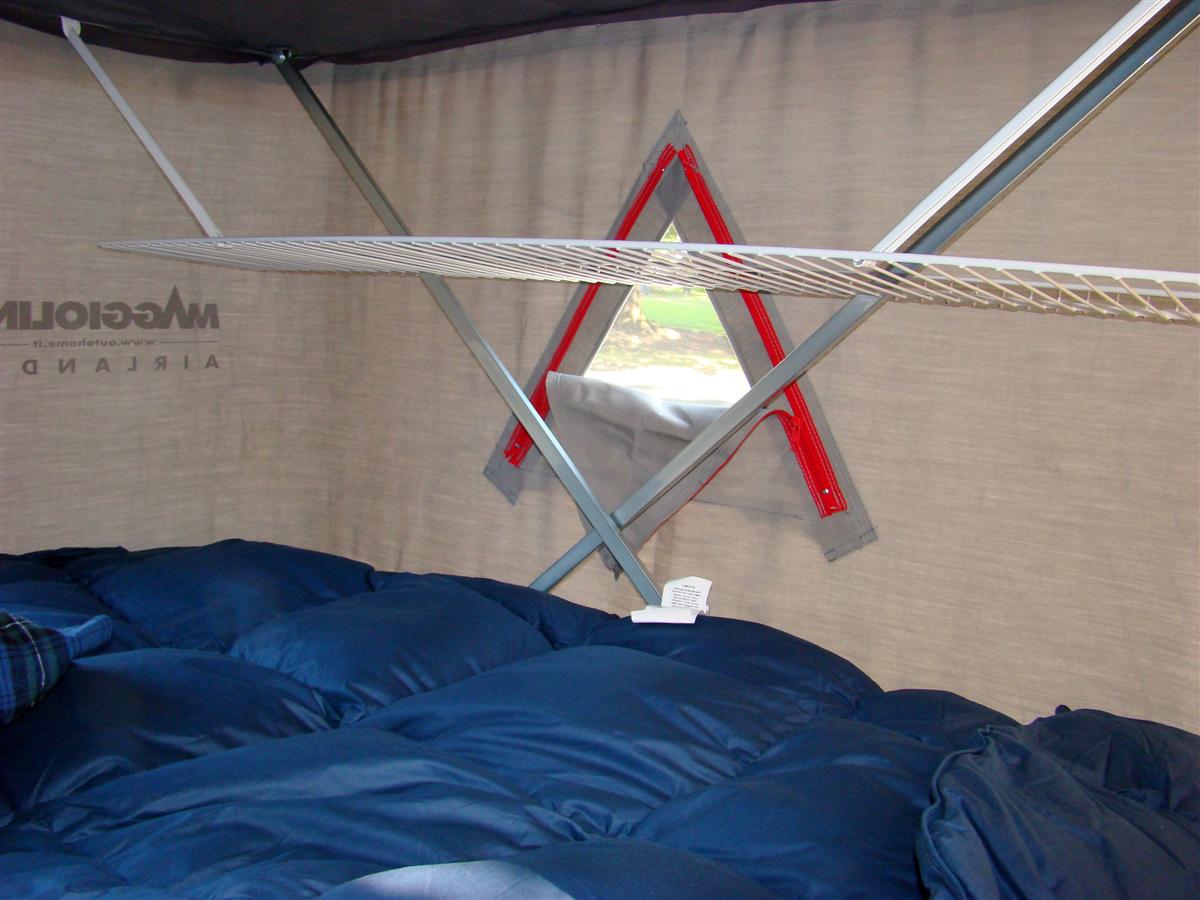
I cut the thirteen ribs out, and set the 16" arms along the tenth inward support rib.
This puts it at an almost level position.

Pretty simple to do, you just bend the tabs over with some adjustable pliers so they will anchor into the top of the roof top tents area which is made that way to hold the custom pockets that AutoHome sells (comes stock on the higher priced Maggiolina models) to put up there to use as pockets to hold stuff in.

Before I put my dirty shoes into a dishpan and stored it on the bed.
Kind of in the way while I slept, this will be nicer not bumping into it during the night.

I can put my Cabelas LED lantern up there, a box of nosewipes, flashlight, or other stuff up there that normally lays on the bed and gets kicked around.

Here are a few pictures of the installation.


Links:
Bjorno's thread on how he made the shelf
ClosetMaid shelf model 51041 from Lowe's
Bjorno's was a different part number, but it appears to be the exact same one as his.
 
Much of this info is already in a separate thread for the new rack, but I need to update my buildup thread with the info.

Been running my Maggiolina AirLand roof top tent for a little over two years on the stock FJ Cruisers rack.
While it works, it is not the best as in the COG is very high, and I get buffeted around on the freeway at speeds over 50 MPH when there is any amount of wind.

Last year we had a discussion at fjcruiserforums.com about a possible rack made just for the Maggiolina and Columbus style tents from Autohome.
Others have come up with ideas to get the tent lowered, but I wanted a specific off the shelf rack you could buy instead of fabbing one up to do this.

BajaRacks out of California stepped up last year and came up with a design.
It is all flat with no basket setup to contain any cargo on top, its sole purpose is to carry an AutoHome fiberglass shell tent which takes up most of the length and width of the rack.

In March of this year I decided it was time to jump on a new rack to make my rig safer while driving, and also to have the tent look more streamlined on the rig.
The new rack fulfills both criteria for me.
I ordered the new rack through Mike at AutoHome tents who is a reseller for BajaRacks.
The rack and awning brackets were shipped directly from BajaRacks though.
Mike will be stocking these new "MG" (Maggiolina) style racks shortly for both FJ Cruiser owners, and also for Land Cruiser 80 series owners.

Here are a few shots of the old set, and a few shots of BajaRack's owner Sergio's FJ Cruiser with the naked rack and a Maggiolina Extreme borrowed from Frenchie, a member over at expeditionportal.com.
His tent was used to design the new rack.

corey5a.jpg


corey1.jpg


sergio1.jpg


sergio2.jpg


Also ordered from BajaRack was a set of three awning brackets made to mount an awning that has tracks on the back of the case like my Campinglab and the ARB style ones have.

Here are a few pics from BajaRack of them.

Awning%20Mount-1%20%28Custom%29.jpg


BR-AWNMNT6-EXP-0%20%28Custom%29.jpg


I had the rack and awning brackets shipped to my dealer, Doxon Toyota of Auburn, WA.
If I had a home with a garage I would have attempted the installation myself, but since I live in an apartment complex, I am somewhat limited on what I can accomplish here.

I dropped my rig off at Toyota on Tuesday and they provided me with a free loaner car.
The next day I called around 11 am to inquire how the installation was going, and the tech had hit a snag.
They wanted me to come down, so I left work a few hours early, and I just caught the tech as he was going to lunch.
The service manager and I walked over to their new service bay (talk about nice!) and Scott the tech who was working on my rig showed me the front two hinges for the lid were hitting a front horizontal bar right behind the wind deflector when you tried to release the hinges.

He went to lunch and I called up BajaRack's who suggested we try moving the tent back some.
The service manager and I went back to the service area and slid it back some.
No good, as they just hit the other bar one position back.
A tech in the next bay said they already tried that.
Of course they did, I would have done the same.

Another call to BajaRacks and they asked me to snap a picture for them from my Droid.
As soon as they saw it they knew what was going on.
My latches are more than an inch longer than Frenchie's latches.
A call into Mike at AutoHome's US distributor here in the US resulted in me learning that some latches are different lengths for various models.
No way BajaRacks could have known this.

After lunch Scott and I discussed a plan.
We did not want to cut out that horizontal bar, so he suggested grinding down the latches.
This would solve the problem and the latches would still work, even without the little curved area which you would normally grab to swing the latch down to unlock it.

A little over an hour later my rig pulled up to the service waiting area where I was, and it looked great!
The only thing I had to redo later was the rear awning bracket mount.
It was up against the rear foot pad mount for the rack, thus not letting its vertical tab to stick out like the other two, so it was very close to the fiberglass shell of the tent, and would have thrown off the alignment of the three mounts when the awning was attached by me later.

I was able to on Sunday to unbolt the bottom half of the bracket and move it out of the way, then twist the upper part sideways with the bolt in it still to remove it from between the racks tubing.
It was a good thing I could get it out this way.
The only other alternative would have been to loosen the tent mounts in their tracks and jack the tent up a few inches so I could pull the bolts out.
The way I did it was a timesaver for sure.

Once I repositioned the awning bracket, I used the old 10mm bolts and nuts from the Campinglab awning brackets to insert into the awnings tracks.
I did pick up six new stainless steel flat washers to go behind the nut.
This way the nut would not grind off any of the brackets powdercoating.

I hope the info here can provide FJ Cruiser owners a good design now to mount a roof top tent lower to their roof.
I see no reason why this would not work with other tents too, although if you wanted to carry other cargo on top of the rack, you would need sides on it somewhere.

Below are some pictures from the time it rolled out of the shop at Toyota, and also at my home.

First up is showing the unmodified latch hitting the bar.
In a later picture you can see the latch after it has been shortened.

1.jpg


2.jpg


3.jpg


4.jpg


5.jpg


6.jpg


Awning mounted to the brackets

7.jpg


8.jpg


Links:
BajaRack
AutoHome US site
Doxon Toyota
 
New Optima Redtop Installed 11-17-2010

My Yellowtop Optima (installation detailed earlier in this thread) crapped out on me more than a year back, and with winter fast approaching and a darn messy winter at that thanks to La Niña, I thought it was time to get a new battery for my dual setup in case the stock Toyota one dies on me.

I had gone to Sears last weekend to have a Platinum Diehard installed where the Optima was, but no battery Sears had would fit my Blue Torch Fab battery tray.
I emailed BTF and heard back from them, and the tray was only designed to hold an Optima battery.

Reading all the negativity on how the Optima batteries have gone downhill over the years and my own experience with a fairly new Yellowtop tanking on me, I was hesitant to go with another one.

I called up Les Schwab Tire who I have dealt with for a very long time to see if they still carry the Optimas and they still do.
I explained to the guy how with my Painless Wiring dual battery hit it is recommended to not hook any accessory such as a fridge, lights, and communications equipment to the second battery, but it should only be used to start the rig in case the main battery is worn down to far.

He then said that I had the wrong Optima installed right now, as the Yellowtop is a deep cycle battery meant to be discharged and brought back up.
The ideal battery in my case would be the Redtop which is a starting battery only.
Optima Batteries, Inc.RedTop Group 34/78 Starting

When the time comes to replace the stock battery, I will go with the DieHard Platinum P-5 - Group Size 35 which is a drop in replacement for the stock FJ Cruiser battery.
Speaking with Les Schwab today though he said a deep cycle is not the best to use for a starting battery, as the power it released at a slower rate than a starting battery such as the Redtop I got today.
A starting batteries power is released like a "bam" of energy burst.
I should be fine with the Platinum Diehard as I do not think it is considered a true deep cycle battery.

I am hoping to get a lot longer life out of the new Redtop than I did the Yellowtop.
The factory battery is getting a little sluggish, probably from doing duty running the ARB fridge on camping trips before I got setup with Solar for recharging it starting in the 2009 camping season.

The new Redtop has a seven year warranty through Les Schwab Tires with the first two years having free replacement provided should it die.
That should give me plenty of time to see how this new one works out for me.

He was very impressed with the dual battery setup and the Painless Wiring kit being able to switch over to the Redtop to start the rig in case I run down the stock one.
I do not see that happening really though using the solar setup to keep the stock battery topped off, but it is always better to safe than sorry, hence why I run a dual setup in my rig.

Here is a picture of the Yellowtop verses the new Redtop installed today.
Yes, it is much filthier under the hood today, rainy season and pine needles are the norm right now.

3.jpg


9.jpg
 
I started reading this morning & thought, well just a post or two, heck, I couldn't wait til I was done so I could see what 'new' thing you added ;) I have thoroughly enjoyed your write-ups! Eager anticipation I guess.

Thank you for sharing :clap:
 
Ham Radio Setup Finally Completed 9-13-2011

Been a long time since I have done a mod to the rig.
Actually this is an old mod from fall of 2008 that was just completed yesterday.

My ham radio setup:
Yaesu 857D
ATAS-120 antenna
Diamond Duplexer MX62M for the antenna
Diamond GLP58 mount for the antenna
I had the faceplate for the 857D mounted long ago, and the antenna mount, but not the rest.

On vacation this week and took the time to have Cartoys put the main unit and duplexer underneath the passenger seat, wire up the power, run the coax for the antenna, and solder the ends of the coax to their connections.
I do not solder well, and after watching some YouTube vids on how to solder up the coax ends, I gave up, so I had the pros do this.

Now its time to get back to studying again for my Technician Class ham license, and then onto my General Class license as well.

This Yaesu radio has more features than I would ever use for quite awhile, but the same guy who talked me into spending the extra bucks on my roof top tent also talked me into getting the radio.
His motto?
Do it right, buy it once.
This radio will grow with me as I get higher up in license classification.

A few pictures.

Faceplate mounted on dash, looks better than the old photos posted earlier in this thread since there is now power :D

14.jpg


Did not have to drill for the mic mount, as I just used the left side of my Cobra 29 CB to mount the mic, and I added the mic mount that came with the Yaesu to the right side of the CB to hang the CBs mic from.

15.jpg


Shot of the ATAS-120 antenna.
This antenna is made specifically for the Yaesu 857D, and it raises/lowers the whip automatically when you change frequencies on the radio, pretty trick.
You need to run the duplexer though and takes its two ends and put them in the radio for the VHF and UHF sides, and then the ATAS-120 plugs into the end of the duplexer.
This way one antenna does the job of two antennas.

16.jpg


Rear view of the radio and duplexer.
Both are mounted with heavy duty Velcro to the floor.

17.jpg


Side view of the radio.

18.jpg


Not seen in the pictures is a Big Mouth external speaker that is used with the radio.
It is mounted to the right of the CB underneath the dash.

I also like how the radio displays your battery voltage so you can keep an eye on it if using the radio with the engine off.
Fire up the engine, and the voltage immediately goes up.

Now back to my studying...
 
Springtail Solutions MPAC Side Rack For Powertank Installed 12-3-2011

For years now the Powertank and one of my fire extinguishers has been mounted to the top of the cargobox as seen in the first picture.

1.jpg


While this has worked out good, it takes up a lot of room there for valuable space for camping gear when the rig is loaded with it.
Springtail Solutions has had for quite some time now a side rack (click here to view it) for mounting a Powertank and other items via holes for Molle straps, Quick Fist mounts, and other methods.
This newly designed side rack I installed is just for the Powertank only, and also made to use the Super Bracket from Powertank that is linked at the end of this article.

This will allow me to have more space for my 7 gallon drinking water jug, a large propane tank, and my chuckbox.
Depending on how much space this opens up, it will be much easier to load my camping gear back there now.
You can see by this older picture with the chuckbox back there that there is not much room on top of the cargobox for other gear with the Powertank there.

2.jpg


Please note this new rack is a prototype that I am testing for Springtail Solutions, so there is no URL for it yet on their website at the time of this writing.
This rack may not even get manufactured by Springtail Solutions unless they hear from other potential customers that there is a demand for these.
Hopefully after readers here see mine there will be enough interest warrantied for them to bring this into full production, and if so, it will be priced around $20 cheaper than their current side rack.
So if there is, please contact Doc at Springfield Solutions and let them know there is a desire to have these built.

My old large fire extinguisher bracket I have had since around 2000 or so for a Powertank in the 4Runner and then the FJ Cruiser is to big for the new rack, so Doc at Springtail Solutions suggested the Super Bracket from Powertank is the one I wanted to pick up, plus Doc's side rack is pre-drilled for the Super Bracket from Powertank.
I ordered the black Super Bracket one from Steve Sasaki owner of Powertank, and it arrived in a two days.
Steve, you guy's rock ;)

Below is a picture of all the parts spread out.

3.jpg


Here is a picture of the side of the FJ Cruiser showing the grocery hooks in place from the factory where the new rack will go.
Remove the stock bolts with a 10mm socket.

4.jpg


Here is a picture of the black billet aluminum mounts that replace the stock grocery hooks.
They install with 45mm stainless steel bolts and an included Allen wrench.

5.jpg


Here is a picture of the side rack and the Powertank Super Bracket in place.
The side rack is held to the billet mounts with 6mm bolts and washers.

If mounting a heavy item such as a Powertank or a fire extinguisher the below step should be taken.
There are two holes on the bottom of the side rack, and you drill two 15/64 holes through the plastic wheel well.
You then secure it with 6mm button head bolts and fender washers/locking nuts with another (smaller) included Allen wrench and a 10mm socket.

6.jpg


Here is a picture with the Powertank now in its new location.

7.jpg


Another picture showing how much room was opened up by relocating the Powertank to its new position.

8.jpg


I will mount the Quick Fist mounts at a later time when I can do some more measuring and figure out what will be mounted with them.

Doc has an excellent installation guide over at fjcruiserforums site, and the install is the same for the new prototype rack I have.
The link to it is at the end of this article/post.

I will update this at a later date when I have the rig loaded up with camping gear to show you what it looks like with the gear and the new rack installed to the side now.
Here is a picture from 2010 showing how much valuable room the Powertank and fire extinguisher is taking.

I want to also add that this rack is beefy.
It is not going to flex on you, it is very well constructed, just like my MPAC rear door rack I have.

Links to parts used:
Springtail Solutions
Quickfist Mounts for the racks available from Springtail Solutions
Powertank Super Bracket part # BKT-2260-BK
Doc's installation guide for the regular style side rack over at fjcruiserforums
 
Looks good. Quick question, how have you kept the inside plastic looking like new with all of the adventures that you have been on. We use our truck a lot and the interior is starting to look worn.

Thanks
 
Looks good. Quick question, how have you kept the inside plastic looking like new with all of the adventures that you have been on. We use our truck a lot and the interior is starting to look worn.

Thanks
I try to dust the whole interior once a week or two with a small California Duster, then once a month it gets wiped down inside with Griots Interior Cleaner, and then followed up with 303 Products Aerospace Protectant.
The 303 stuff is like SPF 40 for anything you put it on, thus preventing damage from the sun which can weaken the plastic.
It goes on everything inside except for the floormats and seats.
All the plastic gets a healthy does of it, and it does not shine like ArmorAll which is bad stuff.

I would say my interior looks almost as good as the day I picked it up, July 24th of 2006.

Just installed the new molle pack.
Once it is mounted via its two straps, you can grab the bag and separate it from its Velcro backing, thus leaving just the mount hooked to the rack, and you take the bag with you which has a carrying strap on top of it.

9.jpg


10.jpg
 
HalGuard HG250R Fire Extinguisher Relocated 12-31-2011

Since I moved the Powertank earlier this month I lost my location for my HalGuard HG250R fire extinguisher.
I decided I did not need the el cheapo Kidde in the rig anymore since it is only for outside fires, you never want to use that type on your rig as it is bad for your wiring inside the rig and underneath the hood.

I am going to throw the Kidde into my camping gear footlocker to battle outside fires with.

I ended up putting the HalGuard in the same location as the Kidde one was.
I just had to take out the plastic tray over the wheel well and drill new bigger holes, and used the old hardware from when the HalGuard was mounted to the old Powertank bracket.

The HalGuard one is for battling fires inside of your rig and underneath of the hood since it is a "clean agent", and will not ruin your wiring.

1.jpg


2.jpg
 
Pioneer AVIC Z140 DVD/Navigation headunit installed 4-28-2012

Went to Cartoys today to get my Sirius tuner diagnosed as it was only playing out the right channel.
I suspected a loose connector, and I was right.

While I was there I looked at the newest GPS/DVD offering from Pioneer, and I decided to replace my Pioneer AVIC D3 from 2007 with the much improved Z140 which has built in bluetooth for phone calls, transferring Pandora music from my Droid Bionic to the stereo, voice recognition for playing songs off of the iPod, making phone calls, and entering an address into the GPS/Maps system.

Since the older Pioneer did not have voice recognition, you had to enter an address manually if you wanted to navigate somewhere.
My Droid Bionic with Google Maps does a much better job since I just have to tell the phone where I want to go, and it tells me how to get there.
Now with this new Pioneer AVIC Z140, it can do the same.

This deck is a huge improvement.
For a complete listing of what the deck can do so I do not have to type it all out here, here is the link from Cartoys page.
Pioneer AVIC-Z140BH DVD w/Built-In Nav, iPod & BT - Pioneer - Car Toys

Here are a few pictures, and also a 1080 video I shot using my GoPro HD 2 camera.

1.jpg


2.jpg


Video

https://vimeo.com/41210885
 
ArkPak Installed 9-14-2013

A few years back I bought the Goal Zero Ranger 350 Battery/Inverter kit and it worked out great.
Bought five of their three watt LED lanterns too that you can daisy chain off of each other where you just plug one light into the battery only.

This year the Goal Zero battery would no longer hold a charge.
As soon as you take it off of the charger, it would start to discharge, and it would be dead within a few days, not good.
I looked on Amazon to source a new one, and a lot of the reviews said the same thing, the batteries did not last very long.

I was reading in one of my Overland Journals about a new system out of Australia that was basically a nice battery box with charge ports built into it, 150 watt inverter, and you supply your own group 31 battery.
AGMs seem to be the favor since they do not spill, and I bought an Exide marine one listed in the links below after seeing that was the one ArkPak was using in their videos.

When the ArkPak was first introduced, it was for 240V overseas, but they started to produce 120V versions for us on this side of the world.
You can read up on all of the specs right here.
http://www.arkportablepower.com/ArkPak#features_benefits

This was installed in my rig on top of the cargobox, and it can charge when it is in the vehicle by plugging in the optional 12V to 12V charger I bought, or from 110V at home, and you can if you want leave it hooked up at home all the time since it has a built in Smart Charger to keep from frying the battery.

With Goal Zeros products you do not need a charge controller since their batteries have one built in, but you do with the ArkPak if you are going to charge it up via your solar panel(s).
I went with the Goal Zero Guardian 12V Charge Controller since it will hook up to my Powerfilm 60W foldable solar panel, and the other end had large battery clips on it that you can hook to the ArkPak or even your own battery in your rig.
My rigs main battery is charged up by another charge controller I installed a few years back when using solar when camping to keep the battery topped off when using the ARB fridge/freezer for extended times when out camping.

Links For ArkPak
Both sites have some very cool videos to watch too of the ArkPak in action.
Main Australian site
US site to order from

Exide XMC-31 MEGACYCLE AGM-200 Sealed Maintenance Free (AGM) Marine Battery from Amazon

Goal Zero Guardian 12V Charge Controller
Guardian 12V Charge Controller from Amazon (where I bought mine from)

Cable to mate a Powerfilm solar panel to the Goal Zero Guardian-12V Charge Controller from Expedition Off Road
I do not believe Goal Zero offers this cable, only Expedition Off Road where I bought mine from.

71DcffLUxmL._SL1500_.jpg


Here are some pictures from the installation in my FJ Cruiser earlier this morning.

All parts laid out showing the battery, ArkPak, 12V and 110V chargers, and the Guardian Charge Controller.

1.jpg


Installed on the brackets/mounting kit.

2.jpg


You can see the green LED on the 12V plug that powers the charger for it.

3.jpg


4.jpg


12V cable plugged into the charging port.

5.jpg


One bracket at each end of the box.

6.jpg


You loosen a screw on the mounting plates and slide its tongue into the bracket on the ArkPak, then retighten it.

7.jpg


Comparison of the Goal Zero Extreme Ranger 350 battery/inverter and the ArkPak.
One is considerably bigger, abut also way more powerful.

8.jpg


Three of Goal Zeros LED lamps hooked up to the ArkPak.

9.jpg


LED panel showing battery voltage and indicating a full charge.
The battery I received from Amazon last night was shipped from Exide this month, so it has not been sitting in a warehouse discharging for a long time.

10.jpg


Mock setup (notice the covered wingnuts on the ArkPaks external battery connections) showing how you would connect the Guardian Charge Controller to the ArkPak and to my Powerfilm 60 watt foldable solar panel.

11.jpg


This is a very well built unit, and I like that you can replace the battery should it ever go bad.
The whole package including the Exide battery and ArkPak is pushing over 80 lbs, I can feel it when I lift it :D

This will be great for running the LED lamps in camp, charging up batteries for my various electronics, and having a third backup battery.
 
Springtail Folding Rear Door MPAC Molle Rack Installed 11-16-2013

I have a few other Springtail products in my FJ Cruiser, and a while back I saw on fjcruiserforums site that Doc had released a new rear door rack that now can fold down into a table.
Doc comes up with the coolest ideas for our FJ Cruisers, so thanks Doc for another cool product!

This is perfect for setting a small camp stove on to cook with if you take a short trip to the mountains without taking your main cook stove you would use when camping.
Or if you are a minimalist camper who likes to pack light, this can serve as your kitchen prep/cook area, and also as an area to eat at.

I like to do day trips sometimes to explore to find new areas to camp at, and this will come in handy if I want to cook up some Top Ramen, Mountain House freeze dried, etc.
A nice hot meal would beat out a cold sandwich any day, especially if it is cold outside.

I was able to get on all four bags like my old rack, but they interfere (you just have to move the sides of the bags inwards) with the knobs you turn to let the rack down to turn it into a table.
I will more than likely just use the two bigger bags and one of the small ones.

Here are a few pics of the new setup.

Folded up, knobs are hidden since I still have four bags on it

1.jpg


Down in the table position

2.jpg


I may look for a narrower cutting board, as there is room to store one inside of the racks recessed area

3.jpg


My other Springtail products.

My first Springtail MPAC rack

6.jpg


My Springtail side mount rack for my Powertank

12.jpg


Links

FJ Cruiser Rear Door Folding MOLLE Rack Combo

FJ Cruiser Rear Door Folding MOLLE Rack
 
ARB 12V Twin Air Compressor And Springtail MPAC Molle Side Rack Installed 11-27-2013

ARB 12V Twin Air Compressor And Springtail MPAC Molle Side Rack Installed 11-27-2013

And power hooked up on 11-30-2013

This is a two part mod, as I installed another one of Doc's side racks to hold the ARB CKMTA12 compressor.
The only other item I had to buy was a brass 1/4" NPT male universal coupler from Lowes so my Powertank air hose would mate with the ARB unit.
ARB does not supply this part unless you also buy their hose kit which I did not since the Powertank one will work just fine.

I had to remove two items where the new side rack goes, and they were my fire extinguisher and Maglight.
I will not be remounting the Maglight as I now own several of the small Surefire lights and a Fenix PD35 lights that blows the doors off of the Maglights, and they fit in the palm of my hand.
The fire extinguisher is now mounted to the new rack beside the ARB compressor.

Only hitch mounting the new side rack was I put in the billet blocks with the logo upright, and since this is on the passenger side, you need to turn the billet blocks upside down.
Also with the compressor on there it is heavy, and I found removing the billet mount from where the stock FJs grocery bag mount was and mounting the billet block loosely to the back of the side rack allowed me to align up the mount/rack into the hole back there and mount it.
I was then able to use a small tool as a fulcrum to lift up the rack and align it up with the front billet mount and insert the two bolts there.
Had there not been any weight on the rack I could have mounted it much easier like the drivers side one, but then there would be no way to mount the compressor on it.

I thought it turned out pretty good, and the fire extinguisher is in a very easy spot to grab should the need ever arise to grab it.
The new compressor is very powerful, and I am glad I went with this model over the one you can buy from them that comes in the case and has a one gallon air tank with it too.
Since I will not be running airtools off of the ARB unit and only filling tires, it will work out great.
The CO2 tank excels with running airtools since it can run at a much higher output than the ARB unit.

All the parts laid out with the exception of the Cobalt airhose fitting

1.jpg


A few shots with airhose hooked up/and without, and a closeup of the lighted switch
The blue wire seen in one of the pics is a 4 gauge amp wire running to a distribution amp block, and the two big power wires coming off of the ARB's wiring harness go directly to the distribution block


2.jpg


3.jpg


Rear shot showing both side rack with Powertank and ARB dual compressor

4.jpg


Stinger 100 amp circuit breaker below wired up to my auxiliary battery, an Optima Red Top
Pump is live all the time without needing the key turned on once the ARB switch is energized


5.jpg


There is a distribution block in there somewhere, could not capture it with the camera

6.jpg


7.jpg


Closeup with the switch lit up

8.jpg


Links

ARB On-Board High Performance 12 Volt Twin Air Compressor (CKMTA12)

FJ Cruiser Side Rack with Mounts


Kobalt 1/4-in Brass Universal Coupler
Lowes Item #: 129967 | Model #: SGY-AIR27


Video shot with my Sony DCS-H9 showing fan noise, then when pulling the trigger to fill the tires the pump kicks in.
Wanted to use my GoPro Hero 2 HD, but the battery was dead, and it takes forever to charge via USB.
What is really nice is when you are not squeezing the air trigger, the pump shuts off all the way, but the fans keep running as long as the switch is on.
Pull the trigger again to fill the tires, the pump then kicks on.
This compressor is frackin' cool :D

http://www.youtube.com/watch?v=ZRVR3O6-pS4
 
Corey,

Great write-up. small question. That Cabela's coffee/thermos in the pic of your cooking setup;
I've been looking for something to use instead of the decanter that comes with my small Cuisinart coffee maker and wondering if that would fit. So. If/when you have a minute could you measure the height of it for me? And tell me where you got it. Thanks.

Steve
 

Users who are viewing this thread

Back
Top Bottom