Builds 1FZFE Engine Rebuild + Power Up (2 Viewers)

This site may earn a commission from merchant affiliate
links, including eBay, Amazon, Skimlinks, and others.

Joined
Sep 17, 2007
Threads
26
Messages
400
Location
Skippy's Wonderland (OZ)
Most of the work on this is already done but considering how helpful this site and it's members have been to me, I thought it appropriate I bring you up to speed on what I've been up to.

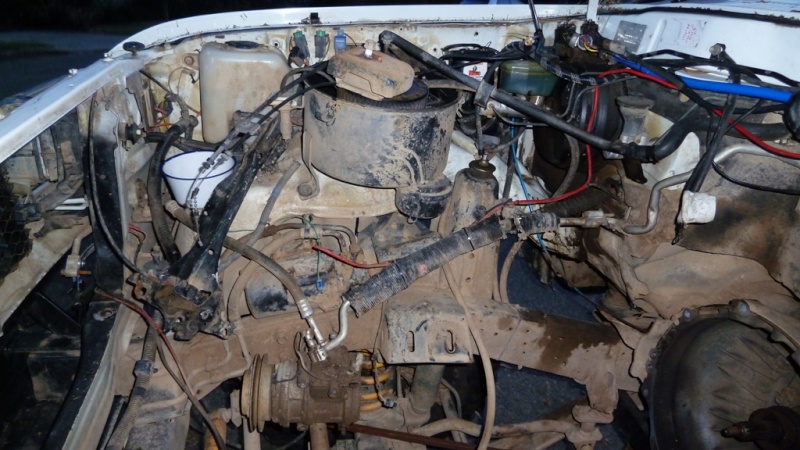
Just a bit of background info - my 80s had 245K km on the clock when this project took off and current circumstances at the time made for less than ideal timing but, I guess there never really is a good time for expensive repairs. I've been wanting to yank the engine for some time now to rebuild it appropiately for a reliable turbo application and, as it turned out, the opportunity arose sooner rather than later. Here's the lead up to the engine getting yanked...

After not driving the old girl for several months, I decided to take it for a spin around the block yesterday arvo. All was going well until I pulled into a round-about and the engine lost a heap of power and was farting something fierce out the exhaust. I limped the few K's to home and checked under the oil filler cap only to find a fine film of milky residue. Nothing in the rad water or sump but I did a compression test today and I think it's confirmed my suspicions. Funny thing is I checked under the cap only a few days ago (force of habit) and it was all good. But, you get that sometimes. With the engine in neutral and at fast idle, the exhaust was sucking and blowing in quick succession which was a decent indication I also have exhaust valve issues.

Here's the results of the compression test. Spec as per Toyota FSM (DRY) - Max psi: 170.8, Min psi: 128
Allowable Variance psi: 14.2

Test Results (PSI)
CYL DRY WET Possible Issue
1 145 162 = well worn rings
2 145 162 = well worn rings
3 152 165 = well worn rings
4 112 130 = Head gasket
5 160 165 = Good
6 135 132 = Stuffed exhaust valve

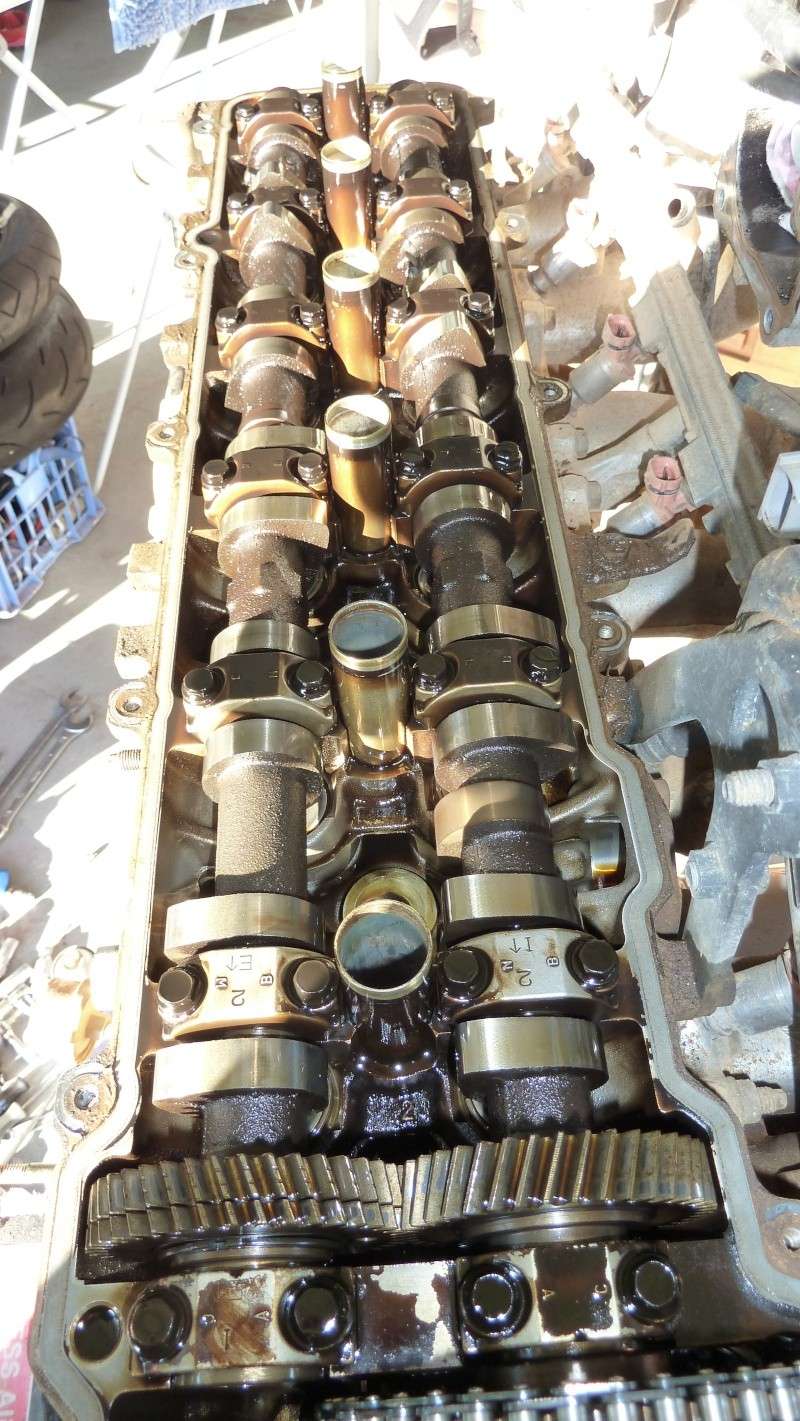
While a compression test is only a guide to what is specifiaclly wrong, if nothing else I think it's clearly obvious I at least have a compression issue. And with the syptoms of a damaged exhaust valve, the best long term option is to yank the engine and give it a good going over.
 
With the engine out and resting precariously on the engine stand it was time to pull it down - I pity any poor bastard that has or chooses to do this in the vehicle. The 1FZFE is a heavy SOB and your average engine stand will not like having a complete engine bolted to it for too long.

During the strip down, I didn't find anything glaringly out of place but I still have to remove the crank and pistons. But, given what I've seen so far, I believe it will be just the piston rings that need any attention.

After removing the rocker cover I was surprised to see such little deposit buildup for an engine that had done quite a few thousand Ks. I've always changed the oil and filter every 5-7000km but I bought it with 100k on the clock and I had no idea of its service history up to that point - so I was happy to see it in such good nick. The cam bearing caps and cam followers also look to be in good condition.


With the head off, I was again surprised to see the head gasket in such good condition - as if it had already been replaced by the previous owner. Since I've owned it, this engine has seen the red side of the temp gauge a few times due to failed cooling component along the way but they have always been replaced straight away. Also, while I've always serviced and maintained it religiously, it has had its fair share of floggings along the way too. Other than an bit of debri or scale covering some of the coolant holes. The piston bores still have sufficient hatching and there is no lipping of the bore at all.


With the No1 sump off, I did find a few pieces of hard plastic on the inside but the pickup and everywhere else were pretty clean considering.


The throttle body and inlet manifold has the pollution system recirculate through it so, over time, you end up with a decent build up of crap inside. Heres the before and after pics of the throttle body after I'd given it a good clean with boiling water, degreaser and a tooth brush. The photos don't do any justice to just how much crud covers all the walls and orifices. The water was pitch black within a few minutes of cleaning.


I've already decided that having it fully rebuilt is the best long term option. So, once it's all apart, I'll take it to the machine shop and get them to do their stuff. In the meantime, I have a lot of cleaning to do, even on an engine with no oil leaks , the amount of dirt and grime buildup is amazing. Oh, there is one oil leak coming from the rear main seal - funny that considering I paid someone bloody good money to fix it about a about a 18months ago. As they say, want something done properly, do it yourself.
 
The pistons came out easy enough and while I don't claim to know exactly what I'm looking at regarding bearing wear, they looked to be 'acceptable' for how far they've travelled. The crankshaft bearing caps were, what I think, a different story.

I asked the engine builder about these marks and he said it was typical of an engine that had so many Ks. Aparently nothing to be concerned about but still not ideal.
This is #7 crankshaft bearing face. Nice deep scratch all the way round.


This is CS bearing cap #5. not pretty either I think. and #6 looks about the same too. The other bearing faces were much better by comparison.


Once I removed the timing chain cover I noticed 2 small keys sitting in the oil at the bottom. After looking everywhere to see where they came from I realised they weren't keys but actually teeth. 2 in fact off the crankshaft cog of the timing chain


Also noticed the top of the timing chain guide had been chewed out at some time too. That explains the plastic bits in the sump.


Maybe someone can explain what would cause the timing chain to hack out the guide and rip off 2 teeth the way it has.
 
Looks like you're off to a good start. Good luck, I'll be watching this to see how a pro does it.
 
Subscribed.

I'll be watching this with great interest. My truck has about 245,000 miles (394,289 km) and decision time is fast approaching on whether to rebuild the 1FZFE or swap with a Cummins. Though she is running well with regular maintenance, I fear that I'll be in your shoes before long.

:wrench::wrench::wrench:Keep the updates coming and nice work so far :wrench::wrench::wrench:
 
I to will be reading in anticipation on your build. I just replaced my rod and crank bearings this weekend and hope they last for a bit til I find another engine to rebuild.
 
Nice! You are already blowing me out of the water as far as timing is concerned. I've been lazy with mine.
 
I've read here on mud about problems with the original plastic timing chain slippers fracturing early in their lives; wonder if when that broke it could somehow cause the chain to break the teeth? IDK, just guessing.
 
about the torn up slipper guide, i'm wondering if that didn't happen while you were disassembling the motor? I think i took a little chunk out of the timing cover while taking mine apart. Perhaps the timing chain got bound up while you were turning the crank or trying to loosen the bolts off the rear of the crank? Just throwing out suggestions.
 
I shall be watching this with great interest. my 91 has 256k miles and has been loosing antifreeze. mechanic did a pressure check on the coolant system and found no leaks so I am afraid it could be the HG. with that many miles I could just install a new HG but it seems to only make sense to either do a rebuild or an engine swap....
 
As is typical with these projects, I got a little distracted and have neglected to keep this updated. So here's a bit more...

There was a bit of a delay getting the new pistons, but they've finally turned up after being imported on a 3 legged camel. As mentioned in LandTank's rebuild thread, the Opel headstud kit that worked perfectly in his and out US 80s engines did not even come close to working in mine. As LT suggested, it is possible I may have been sent an incorrectly packaged set of bolts. There is also the possibility there may be subtle design differences in the cylinder head mounting points between US ans AUS 80s models. Either way, the ARP headstuds to suit the Supra Turbo are on their way. These have been tried and tested by MS-75 in his turbo'd Crown and that is pumping out some serious power.

The Block has been decked 20thou to clean up 2 points of damage on the corner of the block and piston bore #1. Looks to be some residual damage of a previous head gasket failure prior to my ownership, but it's all good now. The bores have been bored 0.5mm oversize and honed. The bottom end has been assembled and the pistons checked for deck height and CC'd and the Cometic headgasket has been ordered.

There was a nice twin turbo charged 454 big block sitting in the corner of the workshop- it'd be tight but I recon it'd fit in the 80s engine bay. :D

Anyway, with nothing to do other than wait, I spent a bit of time cleaning and painting all the bolt on brackets and other bits and pieces. It will all be ruined on the first mud hole but it'll be nice to see the engine and engine bay looking presentable after 14 years of crud.

After a soak in the hot tank, the rocker cover came up looking like new so it was perfectly prepped for a lick of paint. I was originally going to go with Toyota red but that doesn't work in the overall scheme of things so 'easy to clean' gloss black it was. 3 coats of hi temp engine enamel - good for 300degC


And here's the finished product after a quick rub with some wet and dry :wink:
 
These are the new pistons. They are Hypatec pistons with HPC coated crown and Teflon coated skirts. These have been balanced along with the OEM conrods that are being reused.


They have a bit more meat in them compared to the OEM pistons, especailly in the shoulders.


Here's the block fully machined, bored and honed and 2 pistons installed to check deck height - perfect


Crank has been crack tested, cleaned, micro polished and installed with new bearings


While giving the engine bay an over night soak with degreaser, I though I might as well clean the engine mounts. I didn't get too far before I realised I better call My Toyota for some new ones.
Passenger side engine mount - pretty stuffed...


Drivers side engine mount - well and truly rooted


I've since taken delivery of some gear I ordered from Frozen Boost :bounce: images to come...
 
With the engine out, I figured now's a good time to get some long over due cleaning done. After an overnight soak in several cans of Export degreaser followed by another the next day along with a thorough blast with the gernie, 14years of dirt and grime was blasted away. I'll let the pics do all the talking...

Firewall - before:eek:


Firewall - after :)
I got a bit close to the insulation with the gernie and blew a few holes in it. Oh well, good excuse to install something with greater heat control capabilites - watch this space.


DS inner guard & chassis - before :eek:


DS inner guard & chassis - after :)


PS inner guard & chassis - before :eek:


PS inner guard & chassis - after :)


Also, while Ihave no pics, I also got soaked to the bone in mud after taking to the underside with the gernie as well. Considering the amount of crap that came off, hopefully my hard work will be rewarded with improved fuel economy :lol:

Now I just have to tidy up the wiring $hit fight :crybaby:
 
With the long engine all bolted together, it's time to start fitting all the ancillaries back on. Luckily, I've taken a significant amount of photos of where everything is or was connected to and kept them on file for future reference. Unless you have a photographic memory, doing so is a very important aspect of a project like this - you might think you'll remmeber but as the weeks turn into months the old memory soon fades and you'll be left with a bucket of bit that you have no idea where they go or how.

Brand new long block ready for a lick of paint...:bounce:


While it's not seen, a new timing chain, guides and modified tensioner have been installed - along with a lower time chain gear as the original had less teeth then my granddad. A new harmonic balancer is waiting to be installed too.


2.5mm Cometic head gasket installed - I didn't have my camer with me at the time of install but this thing is a work of art. I don't think this will be failing any time soon. Comp is set at 8.37:1 :cool:


All that's left to do now is sort out the gasket kit, which seems to have given me more gaskets than I removed, find all the nuts and bolts and fit all the ancillaries.... I hope I took enough pics :eek:
 
Very nice work. That thing is a work of art looking at in on the stand all cleaned up. I just finished up the headgasket as PM and glad that I did. We do a lot of travelling and wouldn't have wanted the thing to blow while far from home.

You are right about it looking like there are too many gaskets for the job, but they do end up having their places - mostly!:p

Great work you are doing. Wondering how the "seat of your pants" ride will change when that thing is put back in a you press the long skinny pedal on the right!
 
I think the gasket kit also has parts for the 3FE as well so there were some WTF moments when I realised I had a few left over. Also, on some components, I chose to scrap the supplied gasket and fit OEM. I did this for the oil cooler, thermostat housing and water pump.

I was going to do it for the heater pipe that exits out the top of the water pump but decided not to - that wasn't a great idea as it now has a very slow weep. No worries though as I have to pull it soon anyway to fit the turbo manifold. I was a little dubious about he paper gaskets for the inlet manifold but they've not had any issues. However, when I pull the inlet manifold to fit larger injectors later on, I'll most likely fit OEM gaskets to this as well.

I guess the thing with these projects is all the hidden costs and extra things you want to do. For the most part I did the extra bits simply because it was the ideal time to them, but that is a major reason why these projects get blown out of the water cost and time wise.
 
I guess the thing with these projects is all the hidden costs and extra things you want to do. For the most part I did the extra bits simply because it was the ideal time to them, but that is a major reason why these projects get blown out of the water cost and time wise.


So true! At first i kept having to go to the local dealership to order "a gasket" that i had gotten to and the gasket kit didn't have. And, the dealer would tell me "i don't have that in stock, i'll order it and it will be in within a day or two". So i would wait for the gasket, get it, install it and keep moving to find another part i needed. That happened over and over to me. Then i would start to get burnt out on it and would walk away for a few weeks. Then dig back in and need a few hoses, or.. oh yea i need a thermostat.... oh, and i need new spark plugs. Wait, i need antifreeze now.... :eek:
 
So true! At first i kept having to go to the local dealership to order "a gasket" that i had gotten to and the gasket kit didn't have. And, the dealer would tell me "i don't have that in stock, i'll order it and it will be in within a day or two". So i would wait for the gasket, get it, install it and keep moving to find another part i needed. That happened over and over to me. Then i would start to get burnt out on it and would walk away for a few weeks. Then dig back in and need a few hoses, or.. oh yea i need a thermostat.... oh, and i need new spark plugs. Wait, i need antifreeze now.... :eek:

Yep...that's why I bought a whole truck...with a motor...so I can rebuild at my leisure :)
 
I've no doubt anyone who undertakes an engine rebuild or even a HG R&R can appreciate the joy I felt finally getting it all back together - and running. Damn, it's good to hear it running after such a long time.

As soon as it started, the first thing I noticed was how quiet it ran compared to before - it really sounded like an old truck back then. When driving it, the main thing I notice is how smooth and quiet the engine runs now. Also, with the compression now at 8.37:1, I was expecting it to be a bit doughy down low but it wasn't even remotely noticable. In fact, it felt more responsive than I ever recall it before the rebuild. I've done about 2500km so far and it's been issue free, as I'd expected considering the effort and expense.


Before I started it, I drained the main tank and refilled it with fresh fuel. Glad I did as the fuel I drained out sure didn't look too healthy. Also managed to flush a bit of crud out of the tank too which is a good thing.
 

Users who are viewing this thread

Back
Top Bottom