
Navigation
Install the app
How to install the app on iOS
Follow along with the video below to see how to install our site as a web app on your home screen.
Note: This feature may not be available in some browsers.
More options
You are using an out of date browser. It may not display this or other websites correctly.
You should upgrade or use an alternative browser.
You should upgrade or use an alternative browser.
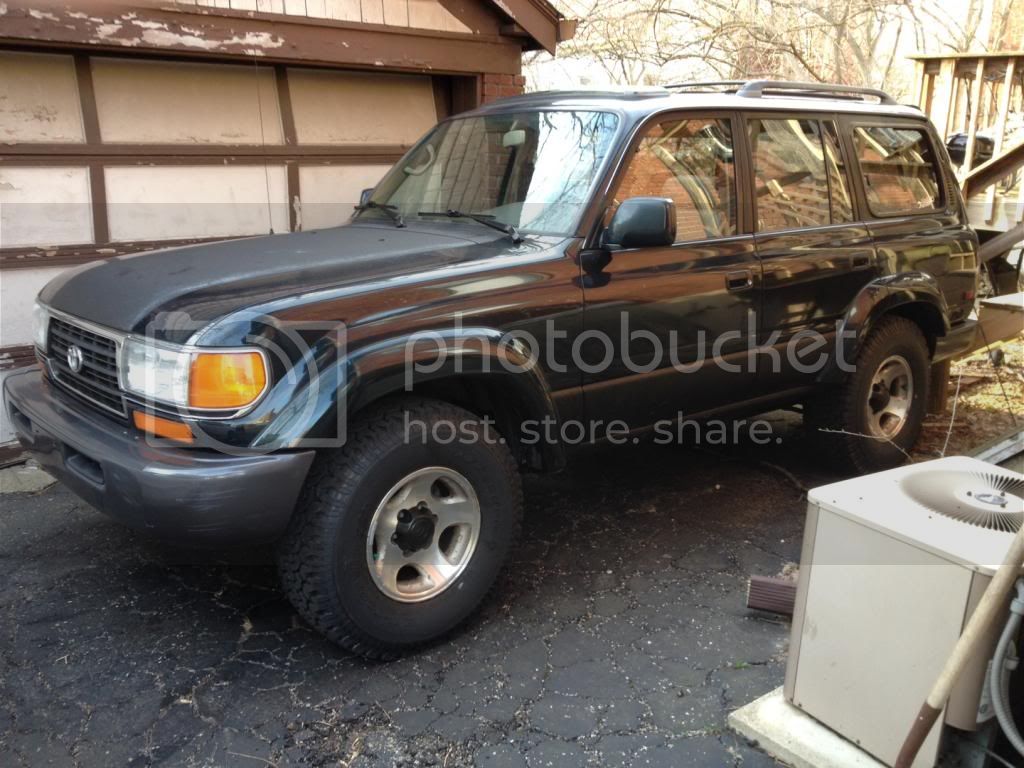
ToyBOATa (1 Viewer)
- Thread starter BGMachine
- Start date
This site may earn a commission from merchant affiliate
links, including eBay, Amazon, Skimlinks, and others.
More options
Who Replied?


BGMachine
Working on cars I can't afford
- Thread starter
- #22
so I noticed that my rear sway bar linkage bushings were getting worn out super fast (< 1 yr) so I figured it was due to the suspension lift and stock links. I decided to get some extended links from man-a-fre and was impressed with the quality. They were very well made and powder coated. I put them on the rear and I'll be making some spacers for the front later.


Hey man just found your thread. I'm just up in Columbus and picked up my first cruiser right before xmas. Maybe we can meet up sometime. Keep up the good work.
BGMachine
Working on cars I can't afford
- Thread starter
- #24
So over the winter my fog lights cracked from thermal stress. I believe when I was going through some snow, some got on the lights and caused the issue. anyways, Ironman4x4 sent me replacements and I installed them today. wasn't too hard. took about an hour since I had to repair some wires for the LEDs that got eaten up over winter.


Watching this build. Nice truck!
Where did you purchase your bumper? I like it.
Where did you purchase your bumper? I like it.
BGMachine
Working on cars I can't afford
- Thread starter
- #27
Small update. Just did some maintenance today. The engine threw the P0116 code and I was planning on replacing the thermostat anyway (to one that opens at 170*) so I replaced the thermostat and temp sensor today. When I was refilling the radiator, I saw some weird material float to the cap. I pulled it out with pliers and it looked like the old thermostat's rubber seal or diaphragm. yikes! at least it's all out now and back to normal.
BGMachine
Working on cars I can't afford
- Thread starter
- #28
Today I went to the local junkyard with a friend of mine to help him find a new mirror for his carolla when I stumbled upon a wrecked diamond in the rough, an 80! I went up to the poor thing (missing it's engine and front frame looked like it had been in a bad crash) and saw that the interior was immaculate, so I decided to update my interior. haha. Someone had already taken the front seats so I just took the door panels. I think they look much better than my original ones that were rough and torn up from years of abuse. Also go a new tail light to replace one that a tree damaged. Was a good day at the junkyard.
my old panel is on the right
my old panel is on the right


BGMachine
Working on cars I can't afford
- Thread starter
- #29
So I was helping a friend work on his cherokee yesterday and I decided to do a bit of work on the 80. I had wanted to remove the hitch for ages because it was driving me nuts how much it reduced my departure angle. I also removed the top runners that were left from my broken roof rack. Lastly, a vibration showed up recently that was some sort of resonance. I determined it was either the roof rack or my exhaust shields on top of the exhaust manifold as some of the screws had rotted holes into the shield. I replaced the screws with new ones and fender washers to hold down the shields better. I also painted the shields while they were out with ceramic paint.
Next is to start work on the rear bumper (integrated hitch, tire carrier, integrated trailer harness) and replace the front passenger CV joint.
Anchor's Away!!!
Next is to start work on the rear bumper (integrated hitch, tire carrier, integrated trailer harness) and replace the front passenger CV joint.
Anchor's Away!!!


BGMachine
Working on cars I can't afford
- Thread starter
- #31
Ok update time! So I've been struggling with the dreaded P0401 engine code and trying to figure out the cheapest way to solve the issue. The code would only come on once on the highway after the first start of the day. I would then clear it with the scan gauge and it wouldn't come back until the next day. After some digging I decided to pull of the EGR valve and modulator and thoroughly clean them out. The modulator's air filter was full of carbon so I shook it out and cleaned out the rest on the modulator body with throttle body cleaner. For the EGR valve, it was rather gummed up with soot. The small pipe barely let any air through. I sprayed it out and used a drill to clear out the small bit 100%. As an extra boost I soaked all but the diaphragm in some carb cleaner that I had left over from my old bug. The diaphragm itself seemed fine. I moved the valve with a screwdriver and could hear air moving. After bolting it all back on and driving a while, No CEL! Hopefully it stays that way.
I've also started work on my integrated hitch. I bought some 2.5" box steel and 4"x3" angle and handed them off to a friend who is a professional welder and has access to a shop. He's currently fabing it up and sent me some pics. The next hurdle for me it to figure out how to get bolts all the way through the rear crossmember. I'm not sure if I should sleeve them either. I'll cross that bridge when I get there.
All the hitch needs now are the chain holes, the pin hole, and some paint. Almost done!
Hopefully it stays that way. 

I've also started work on my integrated hitch. I bought some 2.5" box steel and 4"x3" angle and handed them off to a friend who is a professional welder and has access to a shop. He's currently fabing it up and sent me some pics. The next hurdle for me it to figure out how to get bolts all the way through the rear crossmember. I'm not sure if I should sleeve them either. I'll cross that bridge when I get there.


All the hitch needs now are the chain holes, the pin hole, and some paint. Almost done!
BGMachine
Working on cars I can't afford
- Thread starter
- #32
So I decided in a further attempt to keep the truck cool and to look cool to add hood vents! I bought a pair of aluminum for $30 and painted them black then mocked it up, cut it out, and bolted them on. I like them. But because of the humidity today, the paint feels kinda funny (soft in texture). I hope it cures more over night.


Love the build. I'm sick of how dim my domes are, so am really looking into upgrades. Too bad Pfran doesn't do his any more. It always seems that when I come across a mod I could really use, by the time I come across it it's no longer being made
Do the lights seem to be holding up well? What sort of modifications did you have to make for them to go in?
Thanks,
Kyle
Do the lights seem to be holding up well? What sort of modifications did you have to make for them to go in?
Thanks,
Kyle
BGMachine
Working on cars I can't afford
- Thread starter
- #35
Love the build. I'm sick of how dim my domes are, so am really looking into upgrades. Too bad Pfran doesn't do his any more. It always seems that when I come across a mod I could really use, by the time I come across it it's no longer being made
Do the lights seem to be holding up well? What sort of modifications did you have to make for them to go in?
Thanks,
Kyle
I bought that bunch of lights from amazon. they were something like 4 for $5. To put them in, I bent the springs back and drilled a new hole in one of the springs. They stay in pretty well. Although, one kept falling out on the last wheeling trip. But after I rebent the spring, it didn't fall out anymore so I guess it's fixed. I hope that helps.
BGMachine
Working on cars I can't afford
- Thread starter
- #36
So recently I had noticed the truck running hotter than normal (normal being last year). In the past it usually cruised around 186 according to my scan gauge but recently it was running around 200 and hit 215 the other day with the AC on. I already had replaced the thermostat and flushed the system so I new those weren't the culprit. After doing some reading, I decided that the fan clutch was worn out. It's the original at 240,000miles so it's well past it's service life. So I took it out and drained it in the oven and refilled it according to all the great articles on this forum with 20,000cst oil from the hobby shop. After bolting everything back up, the truck was running at ~186 again with temps peaking at 193 with the AC on (and the fan roared on start up. I never heard it before). much better.

BGMachine
Working on cars I can't afford
- Thread starter
- #37
So I recently noticed my driver's side birf leaking some of it's famous soup so I rebuilt the steering knuckle this weekend. Luckily I had all the parts since I bought the kit to do both sides and only did the passenger side last winter. Anyway, it all went smoothly except that one of the studs that holds on the outer flange stripped so I currently have 5/6 nuts holding it on. Any known easy fixes?
Fix me!!!
The soup of the day:
Ewwwww
The good news is that this job christened the new garage!
Fix me!!!

The soup of the day:

Ewwwww

The good news is that this job christened the new garage!

Hey all,
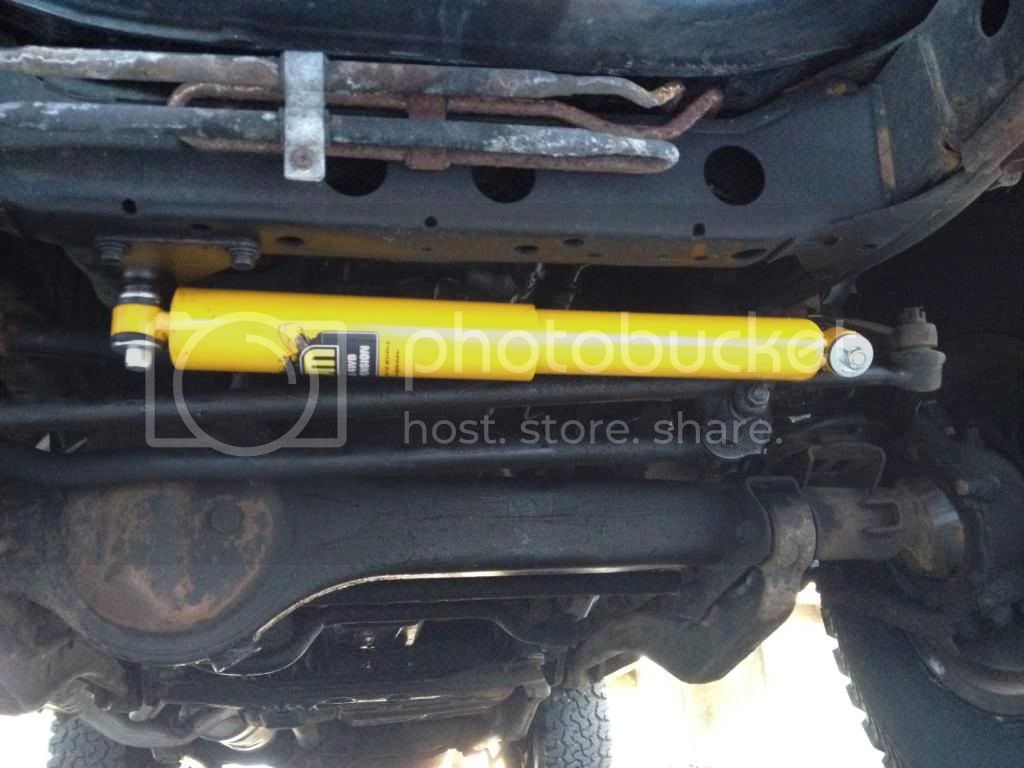
so here's a quick update. My favorite tires were on sale so I got myself a set of 33" BFG AT/S!. It put up a bit of a fight getting the old damper off, but a tie rod fork did the trick. I've got my TJM 2" lift springs and am just waiting on the shocks and bushings so I can install the lift. Hopefully they get to me before May. On a different note, does anyone know of someplace to get the CDL switch for less than $100? thanks
Hi @BGMachine how do you like the tires? Do you have a link to this exact tire online? I ike the setup with the height. You think the OME 2.5? is comparable to the TJM?
Thanks
BGMachine
Working on cars I can't afford
- Thread starter
- #39
Brooklyn, I don't have a link to the exact tire. I love my KO's. They offer plenty of grip whenever I'm off road and are great in the snow. BFG doesn't make the KO anymore. They've been replaced by the KO2 which is supposed to be even better. I'm not sure how the OME and TJM lifts compare since I've only owned the TJM lift. I think they're equivalent though. I have the TJM 90mm lift with Man-a-fre 30mm coil spacers. I personally think the TJM kit is the better buy for your money. You get adjustable shocks, but one of the adjustment knobs got broken off on a rock. I hope this helps.
BGMachine
Working on cars I can't afford
- Thread starter
- #40
Hey all,
I haven't posted in a while and this week has been a busy one for the cruiser. First off, I found another 80 in a local junkyard here and decided to exploit that opportunity. It had the same interior as the other 80 that I had pulled my door panels from so I decided to get the matching seats. I had originally wanted to recover my leather electric seats with the carpet covers (the leather is held together with duct tape in a lot of places) but I quickly discovered that the bottom foam was a different size. So I went on my fall back plan and converted the truck to the new manual carpet seats in their entirety. So Far I haven't missed the electric seats since not all of the functions worked. The second thing is that my front right CV joint has worn out to the point of making a lot of noise so I pulled the CV joint from the junkyard 80. When I went to replace it this week I discovered that apparently the stub axles on a 93 and 97 80 are differently lengths by ~1/4". I couldn't use my junkyard part unfortunately so I ordered a new CV joint from rock auto and should be installing it today. Hopefully after that I'll be done wrenching on the toyota for a while.
The "new" seats
stripped for cleaning
making a mess for the neighbors
the installed seats
I haven't posted in a while and this week has been a busy one for the cruiser. First off, I found another 80 in a local junkyard here and decided to exploit that opportunity. It had the same interior as the other 80 that I had pulled my door panels from so I decided to get the matching seats. I had originally wanted to recover my leather electric seats with the carpet covers (the leather is held together with duct tape in a lot of places) but I quickly discovered that the bottom foam was a different size. So I went on my fall back plan and converted the truck to the new manual carpet seats in their entirety. So Far I haven't missed the electric seats since not all of the functions worked. The second thing is that my front right CV joint has worn out to the point of making a lot of noise so I pulled the CV joint from the junkyard 80. When I went to replace it this week I discovered that apparently the stub axles on a 93 and 97 80 are differently lengths by ~1/4". I couldn't use my junkyard part unfortunately so I ordered a new CV joint from rock auto and should be installing it today. Hopefully after that I'll be done wrenching on the toyota for a while.
The "new" seats

stripped for cleaning


making a mess for the neighbors

the installed seats

Users who are viewing this thread
Total: 2 (members: 0, guests: 2)