Builds Shipwreck (3 Viewers)

This site may earn a commission from merchant affiliate
links, including eBay, Amazon, Skimlinks, and others.

I'd like to thank you, I've now got another project to my DD, hunting rig, on board air out of an air compressor.
I aim to please... or is it, misery loves company? that compressor was something I was looking for at the swap meet and it really was 200 feet from the gate on my way out for the day and at a price I couldn't refuse... point is, I was coerced.
 
yupdate

ride height

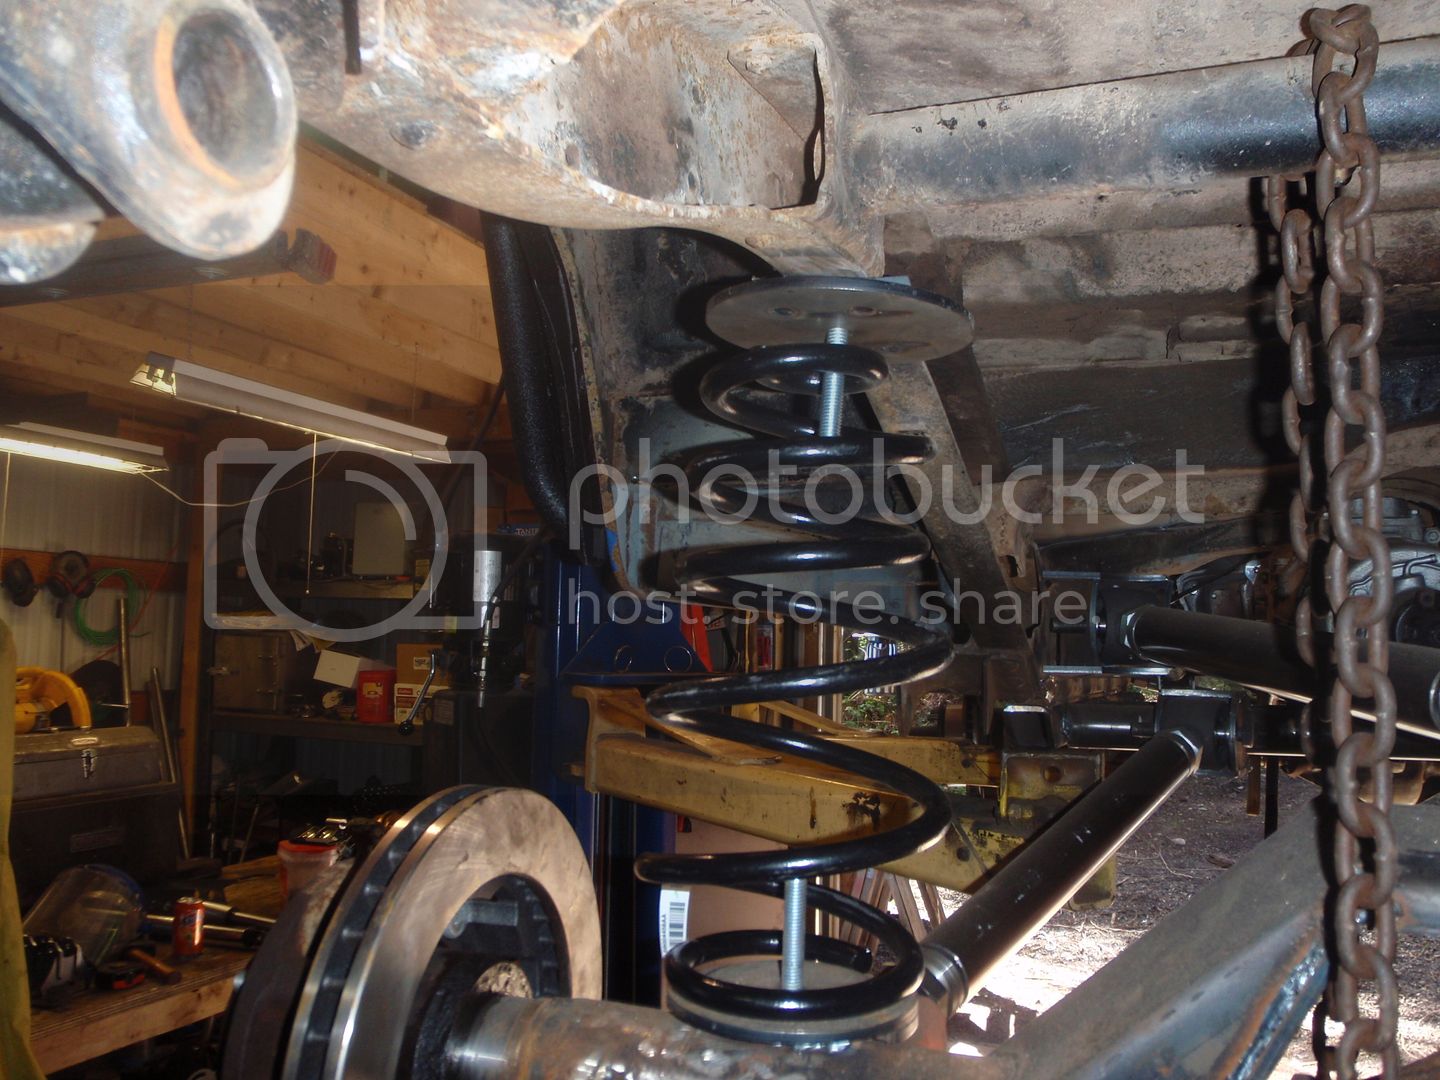
here's where things started... note the spring is upside down

after a bunch of cutting and changing, here's where it ended


I still have to put a plate under the bottom of the spring, but that adjusts/fine tunes ride height, and until the front is completely done... I don't know exactly what that is.

and I tacked the brakes on

flex

now to the front


for about 10 reasons, these brackets don't work


so time to build some hoops


kind of sort of where it needs to be


this is round 2


mounting tubes


round 3 (note the kick in on the bottoms)


tight, yet plenty of clearance


I have a friend who works at a laser cutting shop - I had him cut these out for me


an entire sheet of them.... quite handy


there we go, using the air shock as mockup


and someone needs to mention to the seller that 8" is not 12" .... they're 8" air shocks (which I figured when I bought them, but for the price, why argue?)
You need to take those tubes off of the frame, weld on some scab plates with 3x the surface area of the tube diameter, and reattach them. They WILL tear off the frame otherwise.
 
that would be quite the trick since those tubes go all the way through holes I drilled in the frame and will be welded to scab plates on the inside of the boxing of the frame once I pull this thing apart...

looking closely at this picture, where the rear tube is at - you'll see there is a hole that's been drilled in the frame... the tube goes all the way through


seriously? you don't drill through the frame when you attach weight-bearing items? nothing I build is in tension, it's all in shear because it's a whole lot stronger... in this case, it's doubly so since I'm going to do the same method on the inside of the frame.
 
there's no point to scabbing the front, behind where they go through the frame are the access/lightening/sandtrap holes... if I really wanted to be thorough, I'd weld to the back side then weld the plate to the inside frame rail.... but again, there's no point, even if dropped from 10' the stress on that mount is 50% of (calculating in my head) maybe 2500 lbs. Since the 1 5/8 DOM tube is good to 70,000 lbs, I'm already pretty good in the strength department.
 
so some thought process must occur... I'm not sure how, or if I'm going to attach the fender to the new shock mount
the Toyota design is quite clever in that it allows for keeping a light or two on your motor

in actuality, it's a lot easier to vise grip it in place this way to start fitting


I'm not sure I'm going to attach the fenders to the uprights.... maybe simply move the bracket towards the back...


no, they're not the same distance from each fender, they will be when I'm done...
 
I ordered the coil overs for the front today... this will be a long 3 week wait. Fortunately, there's a lot I can do between now and them arriving. I also think I've come up with a solution for the cross bar I want to build... and no, don't ask who I bought them from - I don't advertise until after I've bought (and generally) tested them.

For those curious about the air shocks - I have a couple thoughts about them.... a) sell them, b) use them in the back, or c) stuff them on the shelf next to the unused brackets for the next project... at this point, I'm leaning towards using them to mock up the rear shock mounts.
 
You nailed it, projection was the first. I then installed quadrajet and it ran great until it did not. After that I bought a setup from affordable fuel injection. It took them 4 tries to get a base map I could run and then I developed an issue at altitude due the MAP pulling double duty. If I keyed off and back on again, it would again run adequately (it never ran great). I installed some large heads and gave up on the tbi and went propane. It ran well, but I knew that some was being left on the table and the tanks took up a lot of room. The mass flow system was awesome but not everyone has been frustrated enough to spend $5k on engine management.

I suggest that you do some more research on your front shock angles. It is best to keep the shock with a mechanical advantage over the axle by having your upper mount inboard 10-15 degrees, with a minimum of a vertical shock at full droop articulation. Your shock appears to be vertical at ride or the upper may be slightly outboard of the bottom. This can cause quirky suspension movement.
 
I know why you're saying the 10-15 degrees, and they are, despite the picture, 5 degrees inboard, there simply isn't room to get more... that said, when I get the new shocks, the angle could change depending on space. With that said, there's reasons to move the shock off vertical and reasons not to such as side loading of the shock. Also the farther you get off vertical the more inconsistent the spring rates since as the angle increases so does the amount of resistance to the force. It's that reason that I stay close to vertical - it's easier to tune a shock when the resistance to force is linear rather than graphable on a bell curve. There is, of course, benefit to a bell curve as well, you can run a smaller shock than you could vertically.

For those who haven't read the book, Chassis Engineering, by Herb Adams - I can't recommend it enough. It also informs on what Wilson and I are talking about.
 
there's another consideration that needs to be mentioned you need to consider when doing a suspension - while side to side is kind of limited for angle (and it's really not that important on a solid axle); on a short-wheelbase vehicle, when you hit your brakes hard, the more vertical the shock, the less resistance to dive you have. You can adjust that dive, to some extent, with the valving but that creates other ride-quality issues. Moving the shock back (in my case, the angle is in the 80* range) means that when you stab the brakes, that bell curve of resistance that I talked about before is actually helpful because it requires more force thus increasing weight transfer to the front axle and less dive. This is all a balancing act - and the point that I'm interested comes from the location of the bottom mount. Normally speaking I'd put the shock mount on the front of the axle (and the lower control arm on the bottom of the axle) so that its resistance to change increases as the forces load on the front axle when you hit the brakes. That's not the case here, in fact both the pivot and the mount is on the bracket that is behind the axle centerline.... while that shouldn't make a difference, it certainly could make a difference...

anyway, I still highly recommend you own Chassis engineering and read it... there's simply so much there that the paragraph I just wrote doesn't even begin to hit the high points of considerations for both shocks and mounting...

and to remind - and hopefully forestall an argument - I don't know it all, as matter of fact, the more I learn the less I actually know, but I do know a fair share.
 
it never ceases to amaze me the steps required for each thing... the reality of these pictures? I want to put the seats in, but where they go is determined by where the shifter is...


which requires you to cut off a tab


which requires you to cut the floor


which makes you realize that the arm won't move


which led me to a screw it and a reversal of the shifter


and I don't like it... but I'm not feeling clever tonight so I finished with an awfukit.
 
first job tonight... geyser hole


still have to locate the transfer case shifter - but I've got some concerns so until I figure those out, they stay uncut

onto these

the line represents the wheel tub


5" of travel, 7" of clearance


I haven't decided how to attach them yet - I think I'm going to weld them on because those can be a jack point for the high lift


and I took the coating off the top, I'll paint the flare body color to the seam


other side done too
 
you bastards, with your driving land cruisers and summer weather coming up. My plan is to have this finished by October (painted, everything done)... but now I'm thinking, well, if I don't take the body off and I don't paint the frame I could have this driving in a month. Worst part is I don't hate the faded paint.... aaaaarrrrrggggghhhhhh!!!!!

I suppose that means I just have to suffer in my Corvette. :mad::bang:
 
Make sure everything works before you paint it.

I'd make it what you think is functional and run it for a month and THEN take it back apart and prep for paint if everything is what you want.
 
Make sure everything works before you paint it.

I'd make it what you think is functional and run it for a month and THEN take it back apart and prep for paint if everything is what you want.

I know this is sound advice, however, for me personally, if I wait for perfect - it'll never get done.
 

Users who are viewing this thread

Back
Top Bottom