Builds '74 FJ40 Build: My 1st Cruiser (1 Viewer)

This site may earn a commission from merchant affiliate
links, including eBay, Amazon, Skimlinks, and others.

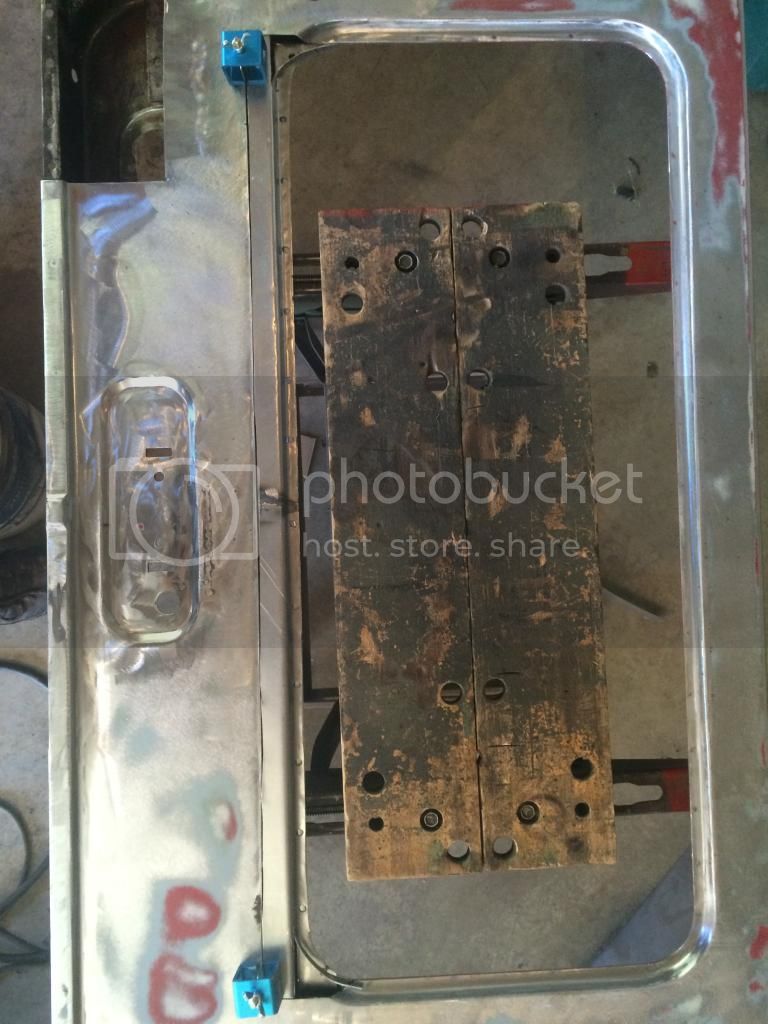
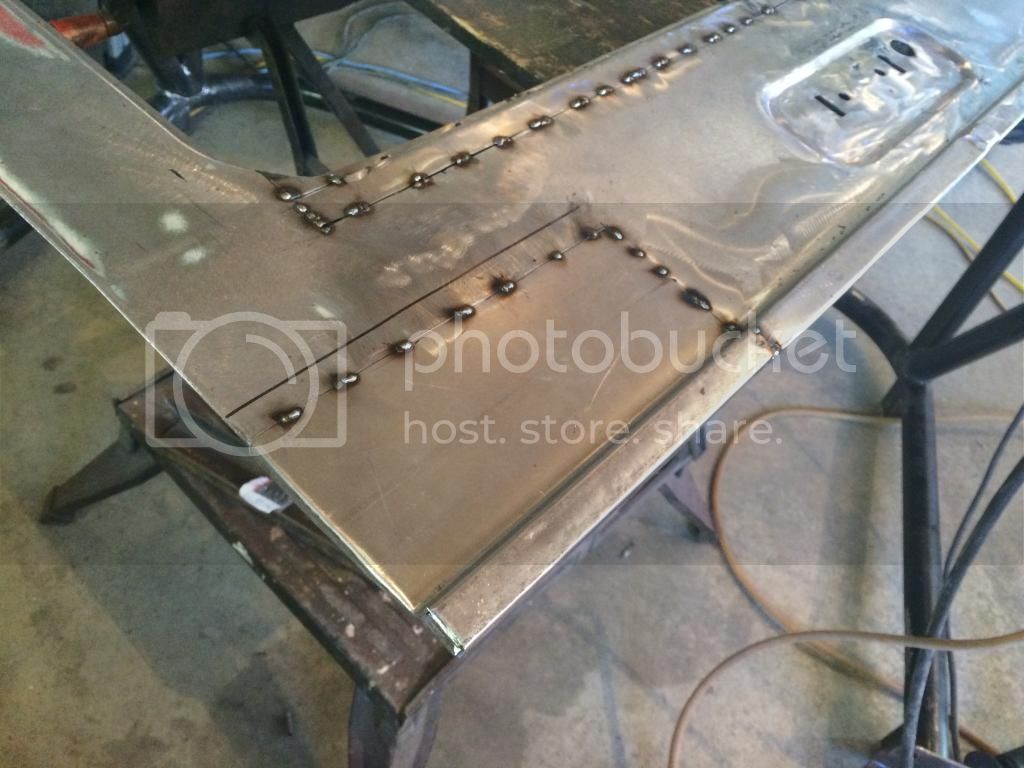
More rear hatch sheet metal work. I can now see how useful a shop press would be after faking my way through this particular repair with C clamps and an elcheapo 30” sheet metal break. The hatch is ready for a little body filler then paint.

9EDECD70-B87C-4DC2-ADED-EBEF613398D2_zps708tk0nw.jpg

C89221F8-F3FD-49E2-9ABF-F3B227D58545_zpsyyapmhyz.jpg

4124CFD8-7F98-4507-9A04-FB796A60CB39_zpsn5bxvtrg.jpg

3080770C-3D2E-4B18-B9F2-C0585D62C8FF_zpsdb0sfh0q.jpg

94058B7E-9CF9-48AA-8D92-93544B8E6825_zpsqngbnqrq.jpg

2F70BD86-3D11-4C3C-91B2-C4A8162C7CBD_zps7pjljtar.jpg

B83EA41B-5A3D-42A6-B8B5-EC36A3C05558_zpsse1hwgtq.jpg
 
Finally finished the sandable build primer stage, it took longer than expected for a variety of reasons. The key things I learned was not to use small inline air dyers as they kill air flow and cause a rough paint surface due to the low flow. I now use a larger shop sized version and went from a 1.8mm to 2.3mm tip HVLP gun. These 2 changes made the coat go on smoother and thicker. I started wet sanding the build primer with 400, but ended up preferring 220 with a final sanding with 320 for sake of speed. Spraying freeborn red (with a 1.4mm gun) was quick and easy now that I have a larger shop sized dryer in my air system.

E17EA5B2-EBBB-429F-89B8-9AC1C7B499A0_zpsmfvjih2s.jpg

D659CBF4-988A-421F-ACBF-24E25918162F_zpsvtpbeasv.jpg
 
The tub is finished and unmasked. Today I put a coat of Als HNR on the inside of the tub as well as second coat on the firewall and front floor. Then I sprayed Upol raptor liner tinted to a light grey, I used a whole kit plus 16 ounces of tint to do what you see in the pic below. No where near the coverage suggested in the instructions, but I wanted to be sure to not have any thin spots. I’m pretty happy with how it looks.

Up next is to finish cleaning and reorganizing my garage, and do the following:

Sheet metal/body work on the doors and bib.

Paint black: roll bar, rear seat mounts and grill mesh.

Paint Freeborn Red: hatch, tail gate, windshield frame, bib, doors, front fenders and all the hardware and hinges.

4124B668-A19B-4C27-A588-E7CFB73DCF7F_zpsnmb99sex.jpg

171C4ECA-3301-4CB3-9856-295430E11BBB_zpswluj4bn1.jpg
 
This week I finished all of the body work on the bib and sanded the fenders so they are ready to paint. The bib took a full day, the bottom 2 inches, including the back reinforcing sheet metal was rotted right through. I removed the inner reinforcement by drilling out the spot welds and beating on it with a hammer/chisel. Then I cut out a 2 inch by full width rectangle and welded in a patch. To reinforce it I welded a piece of 1/8 inch angle behind the patch. There was 3 other PO holes to fill, I used my mig with a flat copper piece in behind to fill the them. The original mesh grill was bent to crap so I made a new one out of 1/2 inch extended mesh, which I shaved in to the bib a little to give me enough room for future PS/trans cooler or AC condenser between the bib and grill. Then I ground, wire wheeled and sanded the rest of it, and gave it a coat of rust converter anywhere that still looked like there may be some rust. Then put a skim coat of body filler on the the bib.

Since the body work is done for now I pulled the 43 out of the booth and parked it in the other side of the garage. I primed the roller bar, rear seat brackets and grill, hoping to spray black tomorrow. Hopefully I have a busy week painting the rear hatch/gate, windshield frame, fenders and bib.
B0EE6EA5-8139-47C7-8A99-5803574CD79E_zpseox5ha0q.jpg

FF72AB01-3F9A-4A96-9CE3-144A2B33E207_zpsplxbvz6o.jpg

DFC1F2DE-3764-4779-9F1C-67ADC85705B2_zpsu0n3bnml.jpg

3683AC63-1E48-4594-81E7-D28BAD893926_zpsvokvfkru.jpg

AFA4802C-7775-444C-BD55-C2ADEB47F8FB_zpsqqcjrqqe.jpg
 
Lots has happened since my last update. Most of the freeborn red is sprayed now, except the cowl grill and hood latch bolts which I forgot to spray, and the doors which I haven't tackled yet. I also sprayed grey Raptor Liner on the inside of the hatch and tailgate. Once the painting was complete I started reassembling the hard top then the front end. It was a little frustrating at first because I was tripping over and banging my head on all of the painted but unmounted panels in my far too small garage. I also finished an 'on the cheap' dash pad repair I started this past summer with short strand fibreglass filler by spraying black Raptor Liner on the it and the gauge cluster/glove box door. Somewhere here on MUD I read about swapping in gas hatch lift struts, which I did using the stock brackets by attaching 10mm balls purchased at Napa with 2x 20" 50lb gas lift struts. Others have bought shorter struts and stuffed them in the chrome spring lifts, but this project is far from a numbers matching restoration, I chose function over the original look. Mounting the glass in the hatch and windshield was as much of a pain as removing them, as expected, but lots of windex and gentle perseverance got both installed in the frames without breaking them. Overall the last few days worth assembly has been pretty rewarding as my cruiser is starting to come together and I'm pretty happy with how it looks.
F403DC56-F949-4A5F-9493-4EEC8730382B_zpsbtc6qpjg.jpg

FA15A07F-12F3-48FB-B050-8982B1631FCD_zpszojrhwul.jpg

3785034E-3ABA-4764-9EC5-E2813E2D7723_zpserix6rfz.jpg

9574F1FB-DB14-4AD0-A60D-208F0B42CE58_zpskqzb9vnl.jpg

E908D995-B6EA-4F02-8160-ECDEE90BBF1E_zps9jt90oj4.jpg

5D9A8324-E889-4319-B569-E88184736557_zps3llbzdr7.jpg

D251BBD0-FD31-48C5-9550-3512CF577E0F_zpsmabtkds3.jpg

421F89C4-CA5C-4DE3-95DA-EAB2EAB23946_zpspwfeuwr3.jpg

7F56EE4F-3923-4A54-A4AE-13C648E6883B_zpssystroik.jpg
 
Wow. Great build.

Was thinking of doing locked 80 axles under my 40.
 
The final batch of painting is now complete. I completely disassembled the doors to do the painting so I could see how they looked inside. Overall there wasn't too much rust, 2 small parts of the inner skin needed to be cut out and replaced along the bottoms, and some surface rust on the outer skins and under hinges. I was going to cut out and replace the rusted skin under the hinge until I realized how thick the door skin sheet metal is; I was able to grind out all for the rust without breaking through. In order to save some cash I opted to skip new original door limits and welded in some nuts in to the inner skin to anchor a webbing door limit strap. I ended up ordering all new weather stripping and fasteners from SOR to compete the job. I have yet to redo the interior door panels, my plan includes new panels, felt and vinyl. The grey parts are painted with a rustoleum rattle can.

B20D97B9-050D-48F1-9737-3FC9619AE4CD_zpsgagasr2a.jpg

628DEDC3-42E0-4B21-B163-00D2C25E19A6_zps4zbydv71.jpg

5B95453F-EEB8-46D7-A278-7A4D4BFD341F_zpsac0pzy2z.jpg

F69E5EB2-DA67-4287-8FDE-2D509466831F_zpsgscpixl1.jpg

FC493C65-A464-4534-8334-2D524D27145F_zpsjjho76oe.jpg

824BA3FC-92AA-443F-B3FA-2C248AA8037A_zpsqk8xfa9c.jpg
 
Wow. Great build.

Was thinking of doing locked 80 axles under my 40.

Thanks. It has been quite a bit of work, but a good learning experience. I did it for the width, 4 wheel disc brakes and coils up front to make it more drivable. If I would have been able to purchase factory e-lockers with the axles I would have, I will be adding ARB air lockers in the future.
 
The cooling system was not working well this summer, I found it would boil over after about 30 min on a +25 C day. I looked into getting the rad refreshed at a rad shop but they said if I can get a new one for $300 you are better off so I ordered a champion 3 core aluminum rad with auto trans cooler fittings. The rad is rated for 500hp and the trans cooler will come in handy in the future.

While I had the rad out I took the time to install 3 things: an albright winch solenoid, a steering stabilizer and a upper pan hard/track bar cross brace.

The cross brace was suggested by several people, and it seemed to me if they include it on an 80 Series (which is the whole basis of my from end) then I should too. I used a piece of .250 wall round tubing I had in laying around, I welded a scab plate to the frame on the PS and welded the tube directly to the .250 wall square tube on the DS. Sorry about the dark pics.
53343B0B-DC9C-428B-84E1-8F4B30E0B8EB_zpspbdi9qce.jpg

C52C7A13-B736-47CD-A3C6-1FEB0208A8C8_zpsd7fqysgb.jpg


The steering stabilizer was suggested to take the play up in the steering box. I moved the stock 40 series stabilizer mount over 6 inches to the PS and tacked it in place. The other side was attached to the drag link with a rancho bracket and u bolts. I cycled the suspension to full stuff and side to side, it appeared ok so I welded the bracket to the cross member.

9E87326D-A38A-4D72-95D2-8EEAB1D18589_zpsjrvifxp6.jpg


As part of the cooling system resto I did a full resto on the heater which included a new aftermarket core from the same rad shop that said not to both trying to fix my rad. He said he’d had that core on this shelf for 20 years and didn’t think he’d ever sell it, he gave it to me for $72!! what a deal!! I also installed a tranny cooler for a power steering cooler while it was apart. I also upgraded the blower motor by retrofitting one out of a older chrysler based on a thread I found here on mud. It seems to blow far more air. I just used 5/8” heater hose to go from the engine compartment to the heater on the interior. Eventually I’ll make some hard lines but I want to see how it preforms first.
078B070E-03B5-45EC-B577-0A75F6B53F3A_zpsc4lvd1gp.jpg

E3F5483A-6095-4B96-9A74-96811DEDCF26_zpsuad1asta.jpg

73B6DFA0-6406-4BBD-B2DF-542C4009EA36_zpslzab4zyw.jpg

E91FF777-2326-4131-9380-74780291C64C_zpsfok7isdk.jpg


The albright solenoid may be overkill but from what I read these little 2x 100amp warn units are bound to fail and since this a ’84 used 8274 winch I wanted to start fresh with more modern tech. Time will tell if that was the right choice. I chose to leave to standard solenoid cover on the winch but modified it to fit a round 4 pin trailer plug as it didn’t come with a control. For a control I picked up a 2 momentary button wired remote from Princess Auto for cheap.

2B59DC61-D203-4291-AA00-8234C797424B_zpspzkjooyw.jpg


I took it for a short drive on a -25C day, but not long enough to determine if the heater is going to be good enough. Cooling system held pressure and the steering stabilizer was a noticeable improvement in steering wheel play.
3784D8F3-9E1E-4A27-92D0-59AEBFF38681_zpsavlnlwyp.jpg


NEXT UP:
If I can get this engine/tranny/harness out of this truck, cut down the harness to a 3 wire hook up on my own and make the engine run on a stand I may put it in my cruiser. Originally I had hoped to swap a toy diesel in it but after a year of looking they are too hard to find in this part of Canada and anything worth buying is >$5000. I have about $150 in this whole running donor truck, all I need now is an AA adaptor, walbro in tank fuel pump/regulator and some welding. The donor truck is a ’01 2wd 4.8L Chev LS V8, cable throttle, with 350k KM on the odo, the auto tranny has been rebuilt in recent years and the engine fires up right away after sitting for 6 months. I realize that may be a little high in milage to put this much work into, but these LS truck engines are a dime a dozen up here in Alberta, and the price was right on this complete running donor truck with what I hope is a decent tranny, which are a little harder to find in good shape. The real challenge I’m looking forward to is the modifying the harness to make it run on it’s own. The internet is a wonderful thing!
0D4C1201-60A5-4CA7-A321-39E048390C97_zpsbu1ymfji.jpg

 
0D4C1201-60A5-4CA7-A321-39E048390C97_zpsbu1ymfji.jpg

[/QUOTE]
NEXT UP:
If I can get this engine/tranny/harness out of this truck, cut down the harness to a 3 wire hook up on my own and make the engine run on a stand I may put it in my cruiser. Originally I had hoped to swap a toy diesel in it but after a year of looking they are too hard to find in this part of Canada and anything worth buying is >$5000. I have about $150 in this whole running donor truck, all I need now is an AA adaptor, walbro in tank fuel pump/regulator and some welding. The donor truck is a ’01 2wd 4.8L Chev LS V8, cable throttle, with 350k KM on the odo, the auto tranny has been rebuilt in recent years and the engine fires up right away after sitting for 6 months. I realize that may be a little high in milage to put this much work into, but these LS truck engines are a dime a dozen up here in Alberta, and the price was right on this complete running donor truck with what I hope is a decent tranny, which are a little harder to find in good shape. The real challenge I’m looking forward to is the modifying the harness to make it run on it’s own. The internet is a wonderful thing!

---------------------------------------------------------------------------------------------------------------------------------------------------------------------------

If this motor is anything like the 4.3 Vortec in my 97 and 98 Astro vans it is like the Eveready bunny, it just keeps on going, and going, and going. The 97 has about 230K miles, while the 98 has over 260K miles. The 98 gets driven several times a week, and still gets somewhere around 2000 miles per quart of oil.

Don
 
$150 truck with a LS in it?

Actually paid $500 for the truck, sold a good pair of tires and rims off it for 225 and it had 125 worth of gas in it so it was a net $150. It also had a new battery and new alt but every thing else is shot: 2 tires, all brakes, u joints, front end bushings ball joints tres etc and a really rough body/interior. You can buy 5.3 and 6.0L engines with 150k km from wreckers in Albera for well under $1000 with a harness and ECU. Everyone drives a truck here. Used trannys are not worth buying cause most give up after 150k km so you have to buy or get a rebuild for $1000-1500. It does seem pretty cheap but this is the land of the new pick up so nobody wants the old stuff, at least not up until recent drop in oil prices…..
 
Last edited:
Can i see some more pics of this out in the open? Nice build btw!

Haven’t had it outside much since reassembling it, here is a pic my wife took:

B5E4BB12-476A-42A2-8534-F8CF6D701818_zps0ptaurku.jpg


The rear fender flares have not been installed yet and I need to put the rear leaf I removed back in the spring pack as it has sagged since installing the top. I also expect the front to sit a little taller on the coils after the LS takes the place of the 1.5F.
 
The LS and auto trans are out of the donor truck. I stripped the wires out of the harness I won’t be needing based mostly on LT1swap.com and watching Alaska Resto Mod’s LS swap u tube videos. No more A/C, EGR, Evap, or rear O2 sensors. Also mailed my ECU to LT1swaps for a reflash. I ordered and in tank pump from Tanks Inc and will buy the fuel line and fittings from Napa. I purchased a fuse block and relays locally as well so with in a week or two I should have what I need to get it running on the stand. So far so good, it all seems pretty straight forward. The only issue I’m unsure of is how to hook up a few of the park/neutral position sensor wires off the trans but I should be able to figure that out once I wire up the mock ignition etc.

F2D8B9A0-7D68-4A5E-8DA8-AF41BAB0A353_zpszg8tqw5q.jpg


62FE83FD-03E0-41E0-965A-3C48B5B3101F_zpsz9h8xwhl.jpg


11DABE9A-6C83-4B1F-928E-D42CCFA03F06_zpspagnnpwv.jpg


D354E09A-0FB4-4372-94C0-51C8E2251A77_zpsfmpfo65v.jpg
 
Last edited:
While I wait patiently for my fuel system parts and the reflashed ecu to arrive I spent 3 hours today building a swing out spare tire carrier. The pics show before and a couple steps on the way to where I’ve gotten to so far. The 1.5” spindle is from ruffstuff IIRC and the tubing is 2x2 .120 wall. I am still working out how to make a spring loaded pin latch system and a stop that will prevent it from swinging around and contacting the PS rear fender. If possible I will include a hilift jack mount as well on the swing out.

40A37131-1C8A-4977-B408-6728948407A8_zpsm0ktkncs.jpg

422C14D8-35FF-417A-A3B2-4CF242443774_zpslw0xzqqo.jpg

386B3E1A-153F-4F77-A1F6-72D1A673B958_zpsoxinol7d.jpg

4DDB0ED5-833F-4013-AA1C-F41B537BA823_zpsld8rgulp.jpg
 
Here are some pics of the spare tire swing out mocked up and tacked. The latch includes a 1/2” hitch pin, a small spring and some 3/4” npt fittings. The pipe fittings retain the pin/spring and are there in case I need to remove the pin in the future. The plan is to box in the 2 open ends of the square tube. In hind sight I would have skipped the removable pin option because it was such a PITA, and just plan to cut it open if the pin or spring needs work. The pics don’t show the 2 weld nuts I’ve put on the round lug plate which will allow a hi lift to be bolted on to the backside of the tire through the hub hole when it is needed.

LS swap update(no pics): fuel fittings are in hand, ecu is enroute back from a reflash, picking up efi fuel hose this week and I’m not sure when the fuel pump will arrive as it has been 3 weeks since ordering, should have just ordered it from summit. I was able to remove the 2 broken exhaust manifold studs by welding a nut on them. The fuse/relay box for the swap is in the works too.

DDA144D2-DB81-44D8-A2FD-6ACA9B46E3A1_zpsd35pbghc.jpg

358CFBC1-AFA6-4418-A6E5-F08E6A401A3F_zpszgeamq9n.jpg

77172F8C-8B5C-4870-B404-B98D8993A0FA_zpsojxjkbyl.jpg
 

Users who are viewing this thread

Back
Top Bottom