Vel's '76 resto-mod (1 Viewer)

This site may earn a commission from merchant affiliate
links, including eBay, Amazon, Skimlinks, and others.

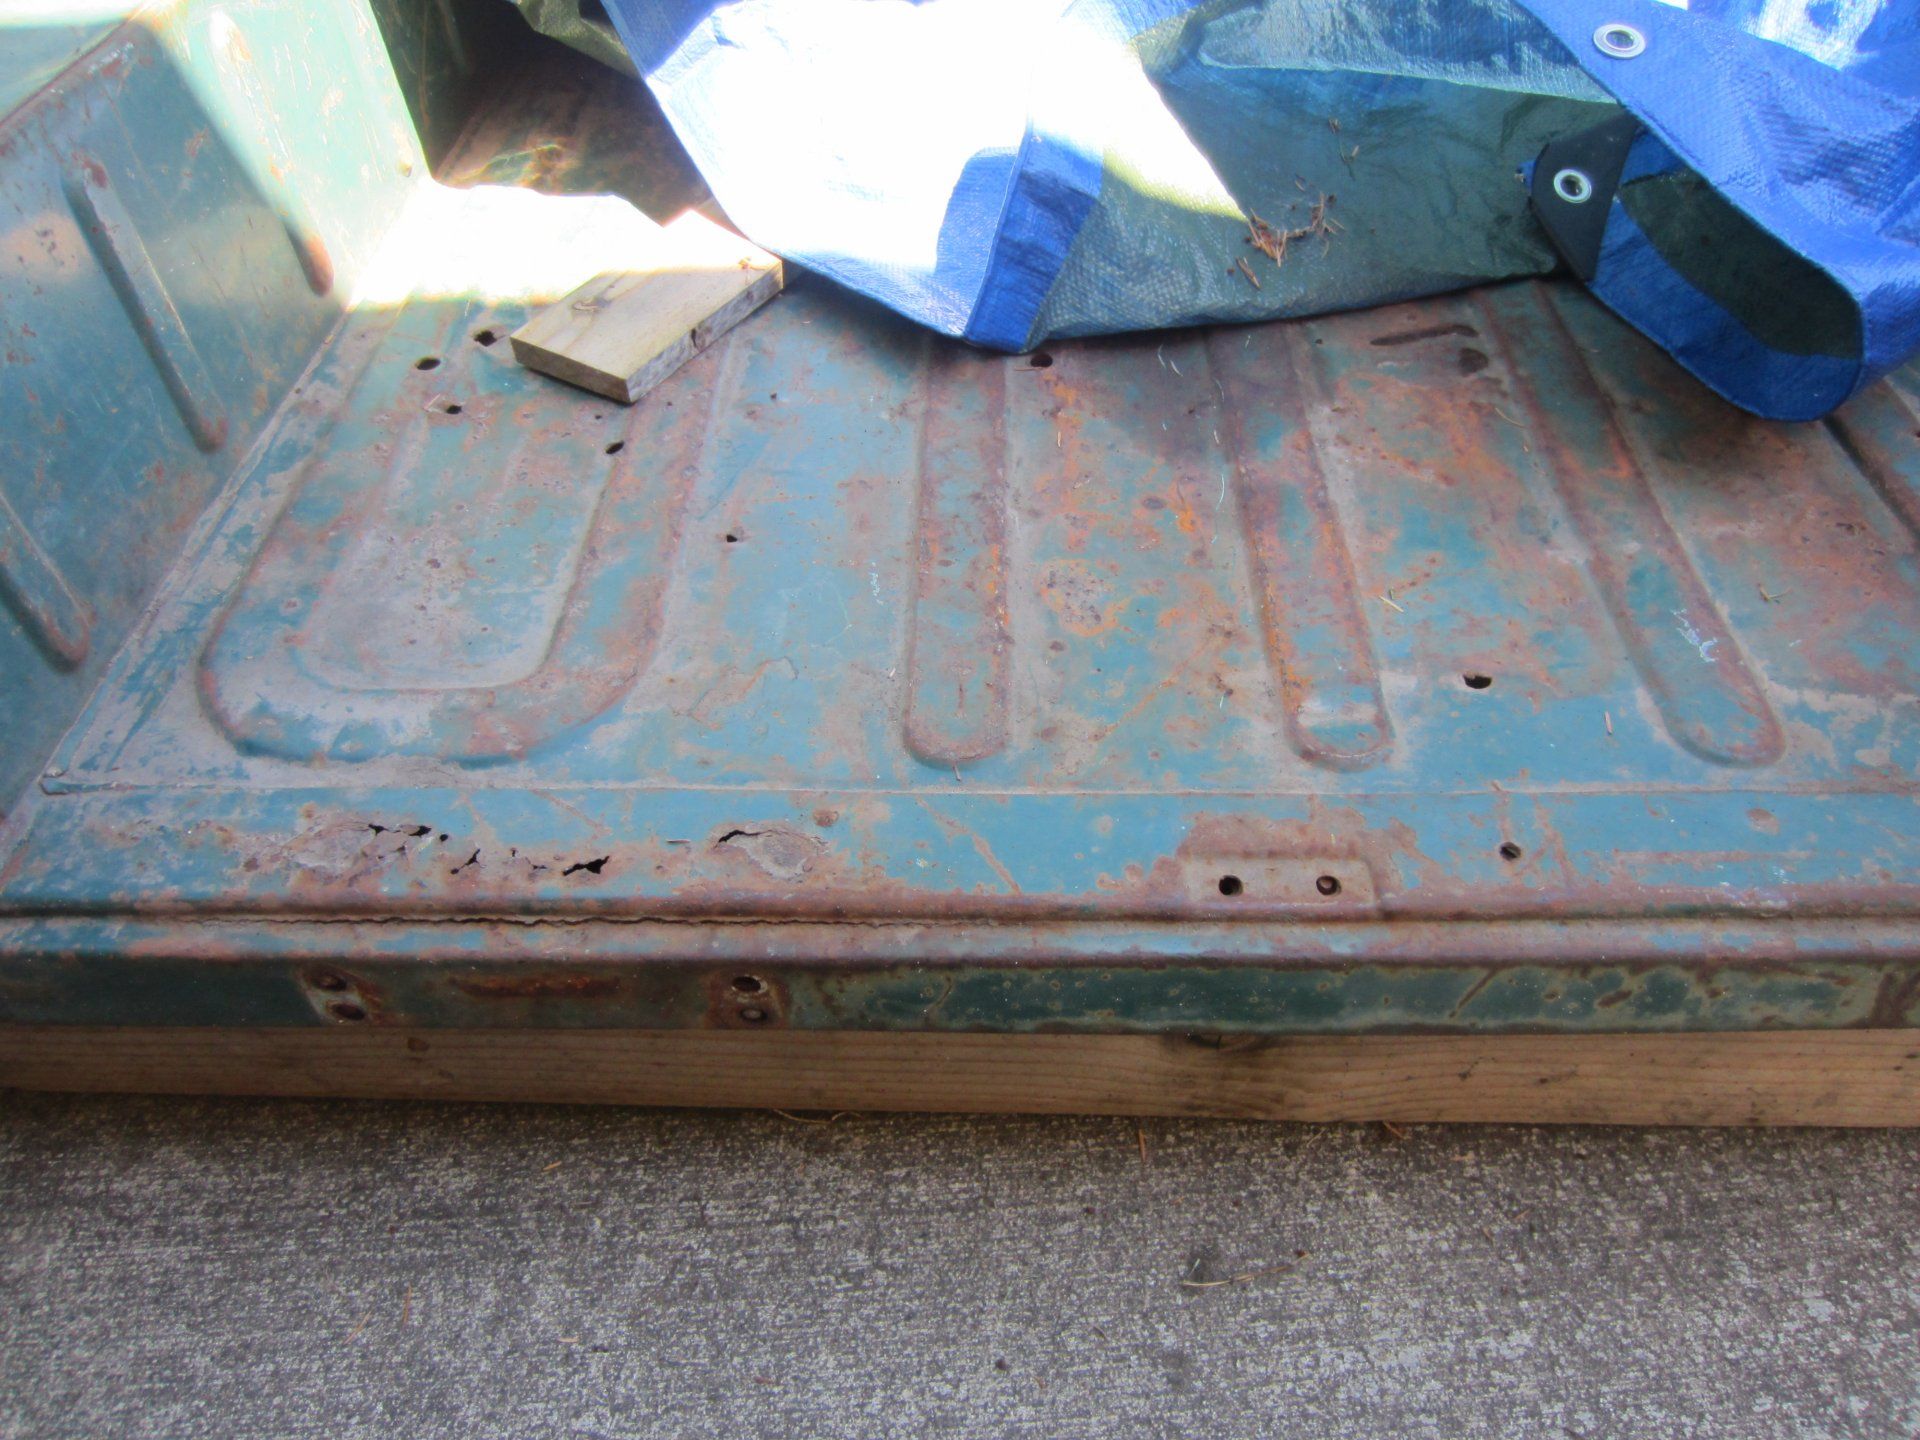
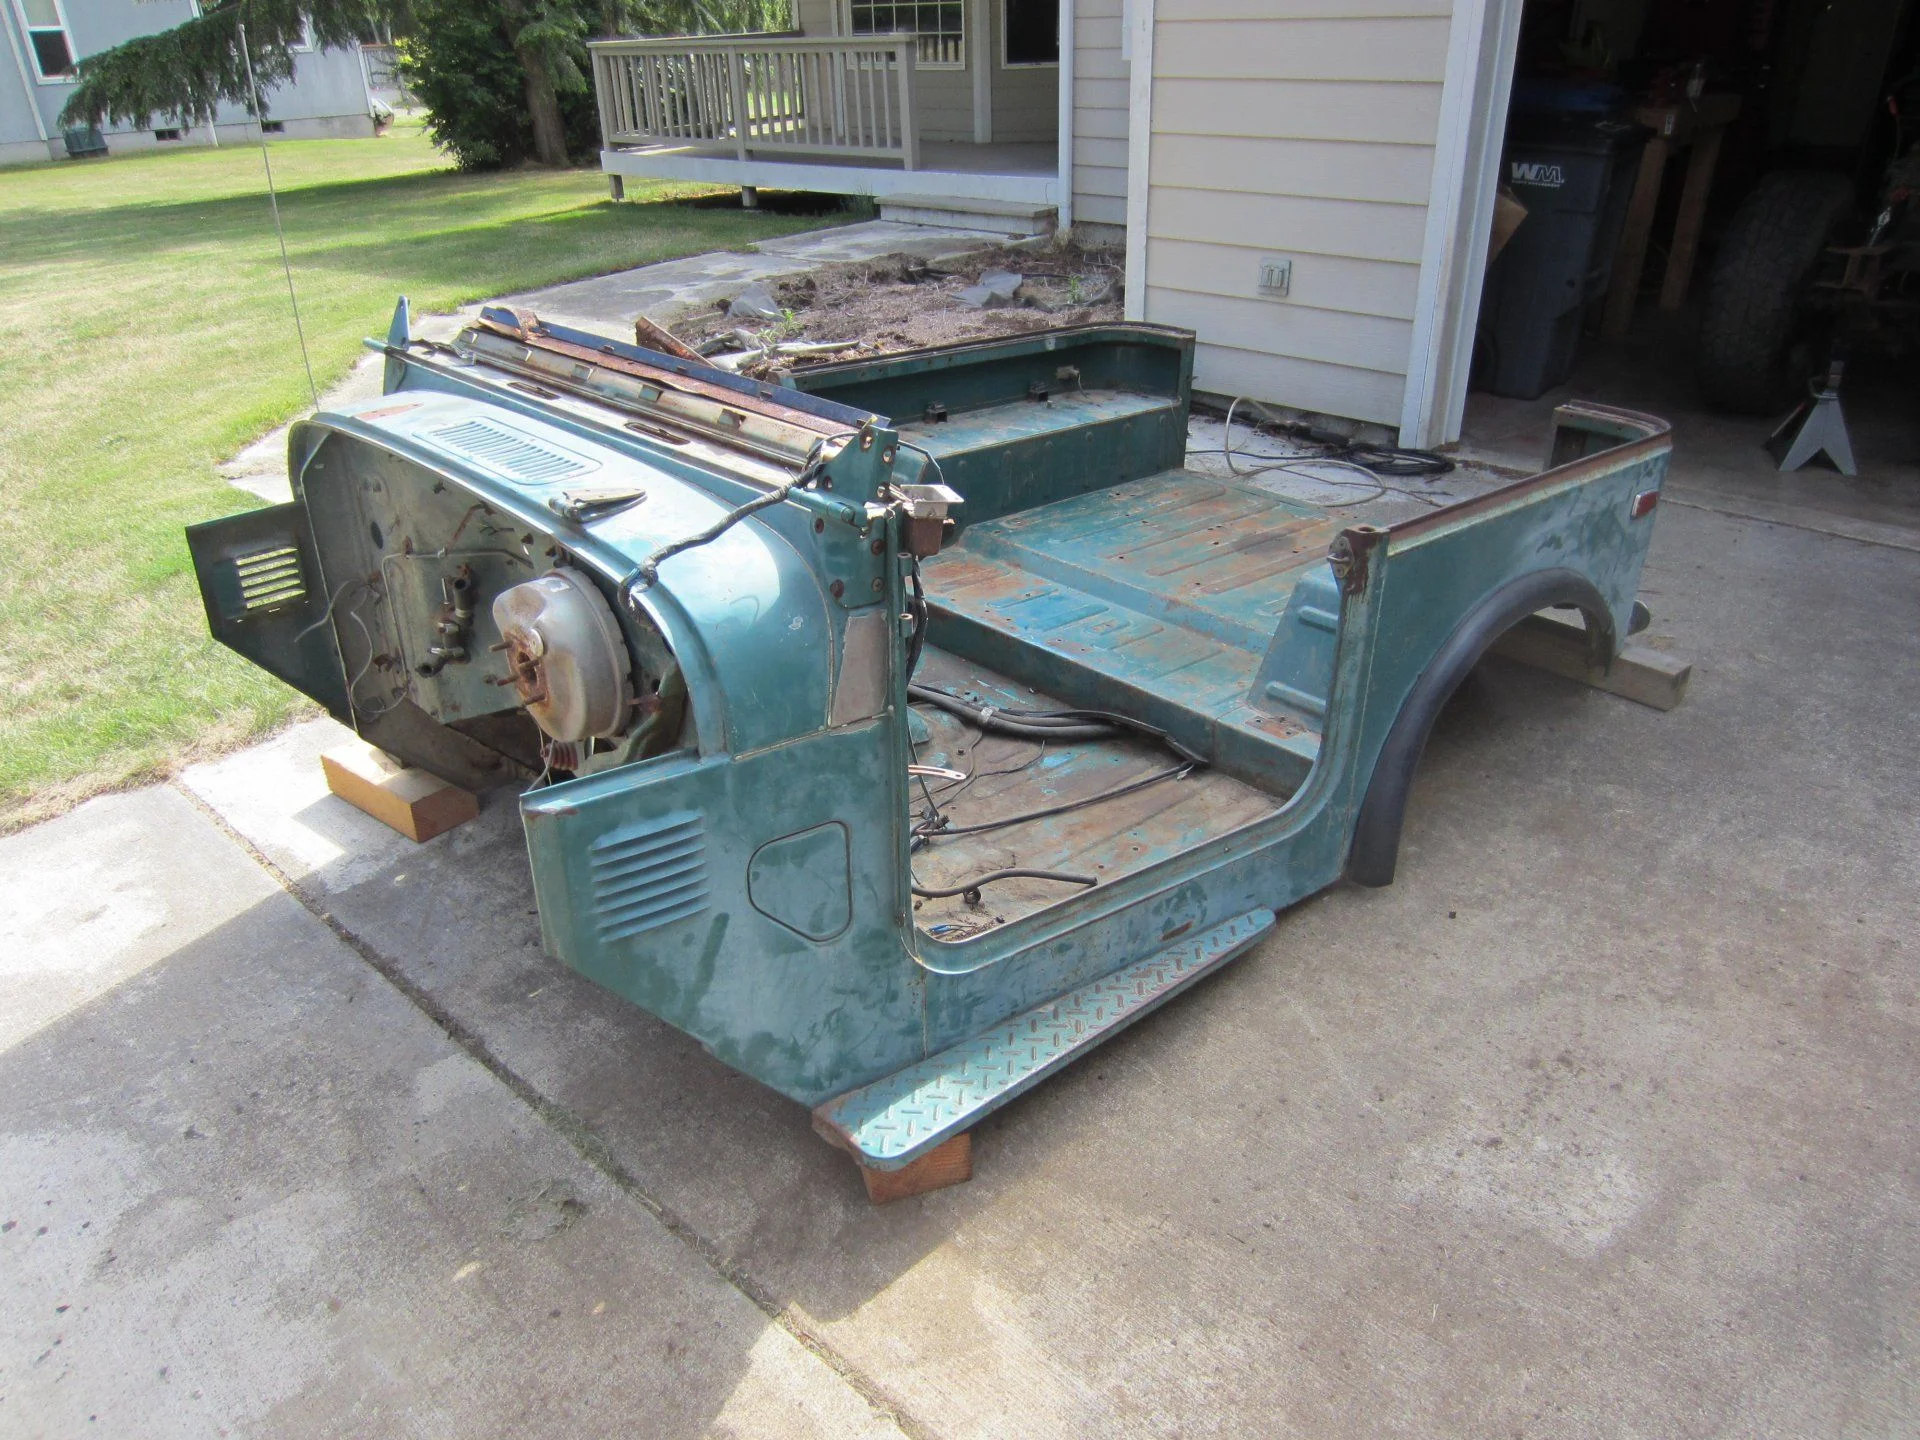
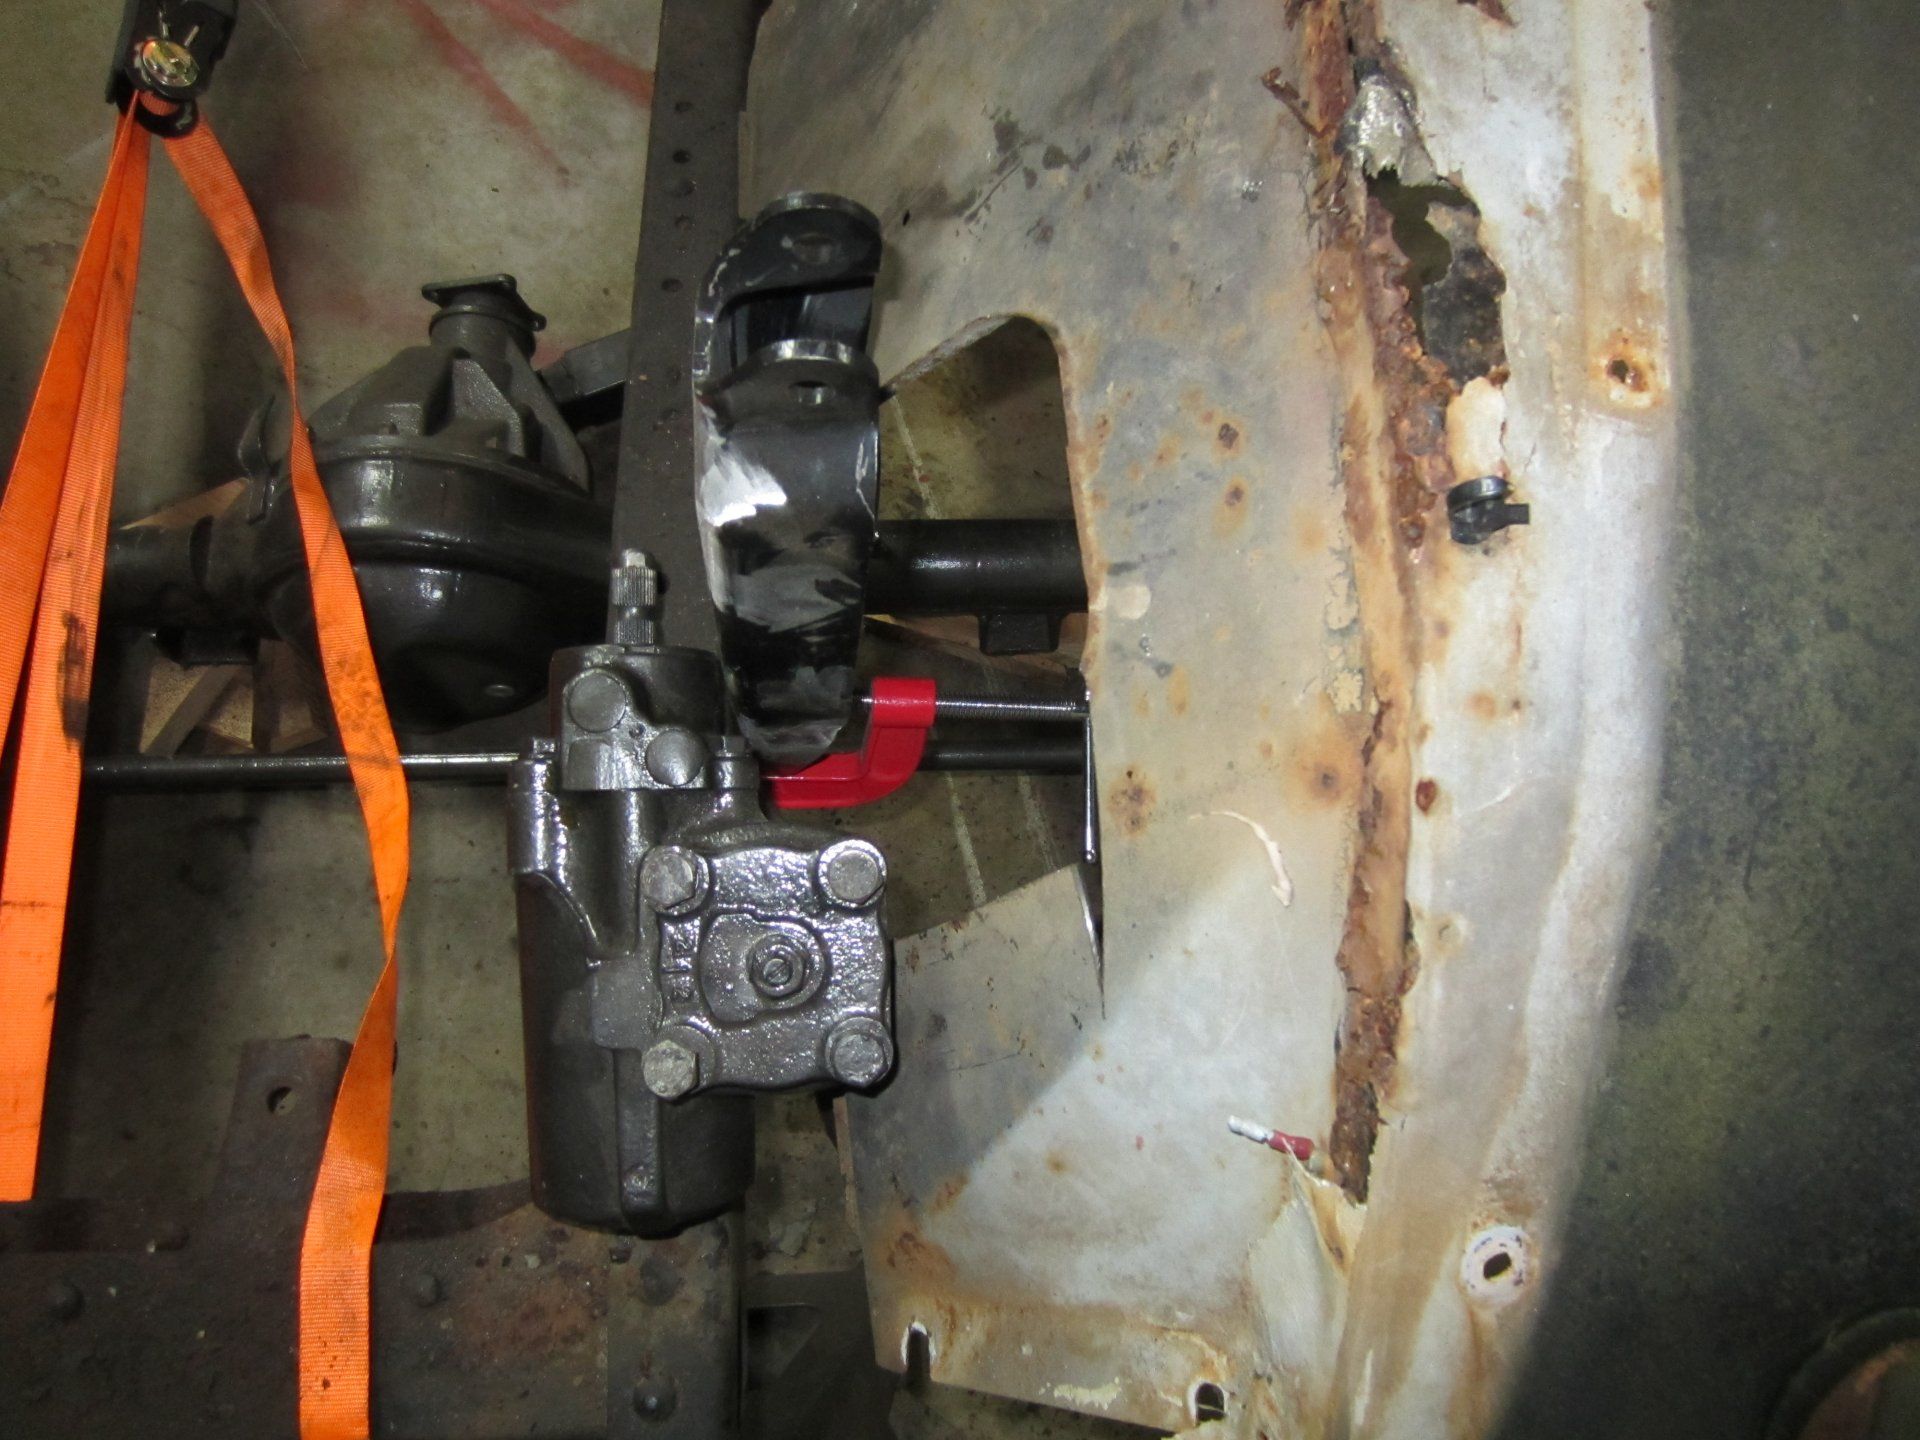
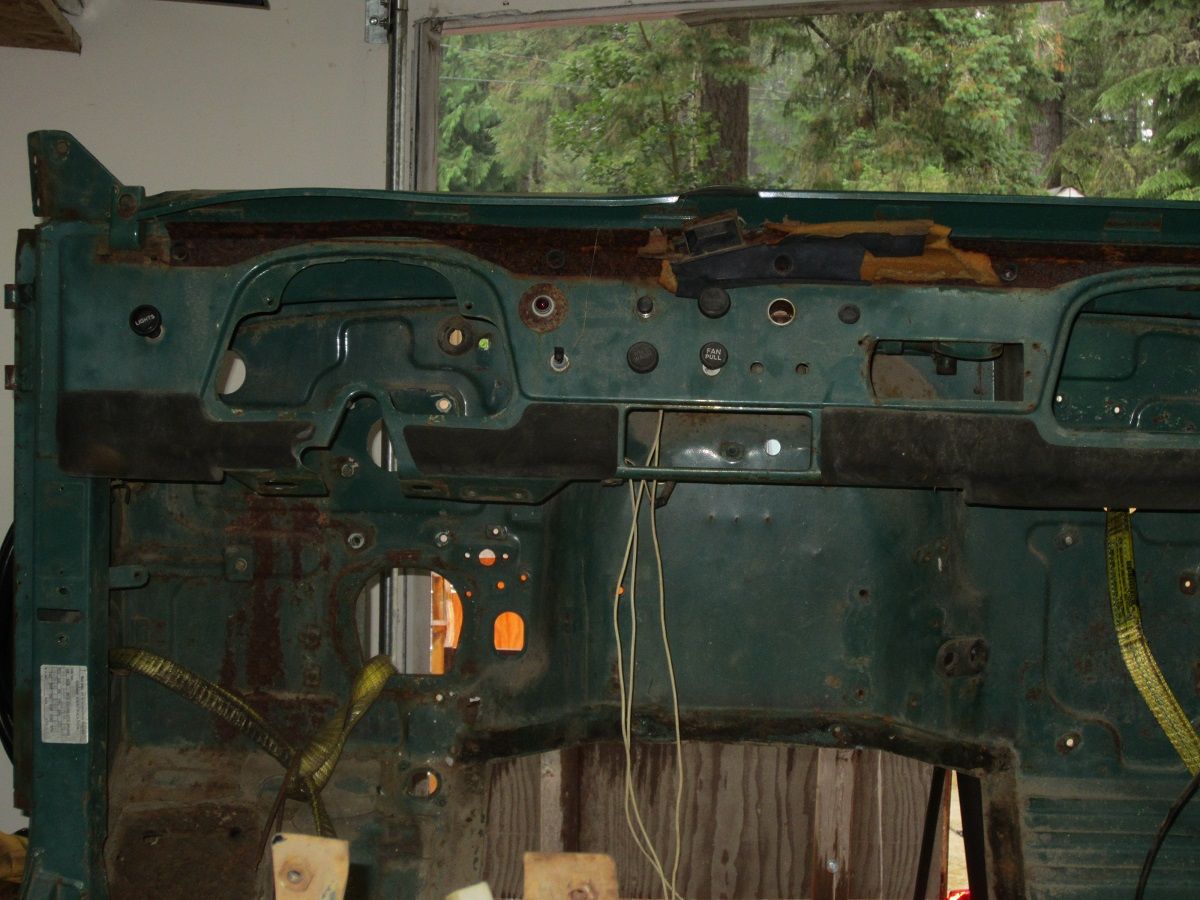
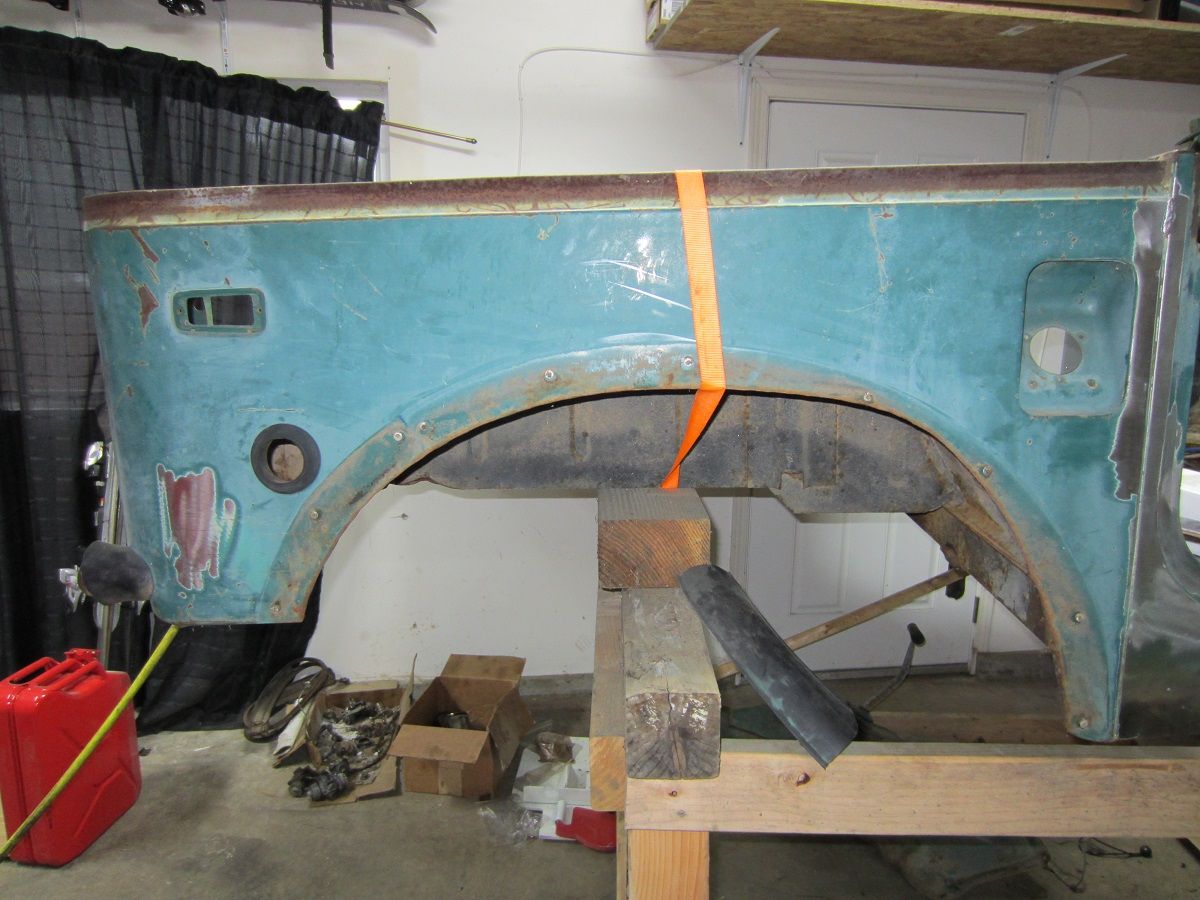
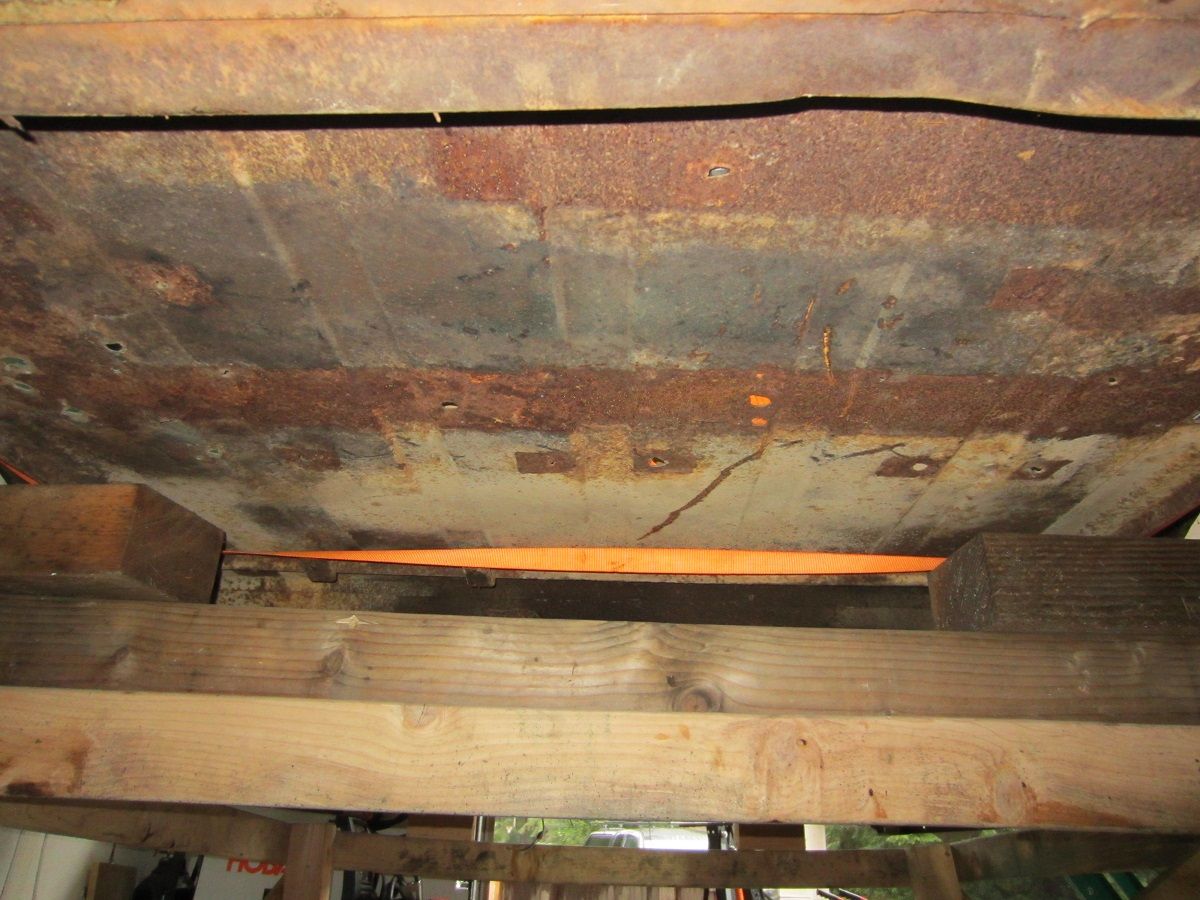
Wow that thing is RUSTED! I'll leave whatever wiring is in the tub to help out with time if you want.

Up to you on the wiring. If you leave it great. If you pull it that's fine too. Whatever works for you as so far the harness I have is in slightly rough shape but that's mostly do to poor splicing and can be pretty easily fixed.

And yeah this tub is a mess. Which surprised both my gf and I since we actually did a pretty through look and even had looked at some of the spots and they appeared just fine. Just shows fiberglass cloth and bondo can really hide things so lesson learned on my end

I'll send you a text Tuesday to see on shipping. If we haven't heard from your lady I have an idea but I'll run it past you first. But after the holiday

Budget is important, but you need passion and perseverance. Also known as a little crazy. Lots of fun, satisfaction AND swearing ahead. Enjoy. Welcome.

Haha I did the swearing already after seeing the tub in its true state there was plenty of swearing. Everything else so far has been huh, what the hell, and that's weird :)
 
This is where a magnet is real handy when looking at a vehicle. Using a magnet can help find bondo real quick.

Don
 
This is where a magnet is real handy when looking at a vehicle. Using a magnet can help find bondo real quick.

Don

Actually had one. Just didnt do a thorough enough job I suppose. A magnet would still have attraction everywhere i checked. I just didnt go over it well enough i guess. O well live and learn.


The tub is almost ready to come. Just need to get my steering wheel puller that i ordered (and shows up tomorrow) and disconnect the transmission cable.

Then the real challenge is figuring out what the heck is up with the wiring harness. Just a couple wires run in weird ways that prevent pulling the harness out of the cab. Then figuring out what some connectors ended up going to previously and arent used anymore. Least on a positive the wiring in the cab is pretty much all stock. Only one place I see that was spliced into for a aftermarket wire.

I did notice the trans support looks ot have been moved (which would make sense with the TH350) but the welds looks a bit...interesting so once the tub is off ill look at them closer. Could have just been the dirt caked on the frame.

Hopefully next update will be pictures of the tub off.
 
And progress! The tub is off. So I took the time and pressure washed things (just a quick wash) so i could pull it back in the garage in a somewhat clean state. Thankfully the frame is nice and solid. Also found that theres an electric fuel pump (well im like 90% sure) which I might switch out for a mechanical one since it should be super easy on a SBC engine.


and a quick wash.


I REALLY dont like how the PO ran the exhaust. Its in the way of pretty much everything. Oil drain plug, Tranny bolts, and just run funky IMO. Its dual pipes and for some reason rather than running the passenger side straight back they crossed it under the engine and ran it next to the drivers side and then split it out in the rear. Just funky but it does keep it away from the fuel line i guess.

And now before i move on its clean up time. Pretty much every bolt take out was shaking things and causing rust to fall. So nice to be able to finally be done with that! Then i need to build shelving in the new shed and move parts out to it. Hopefully by end of Monday Ill have the frame and engine back in the garage and be able to pull my truck in too.
 
Got some more done. Mostly been waiting for parts than anything. The carb lift plate for the 283 that was supposed ot take 2 days (thanks amazon!) ended up taking 9 days to arrive (boo UPS). Then i decided i wanted an engine cradle to put it in so now i am waiting for that to show up.

But got the transmission and TC out. All thats left is a little bit of lines (fuel, brakes, and rear harness) and the engine. Then i can take the axles off and start working on them!

full


On another note I received a new tub from @hopdup95! Its leaps and bounds above my old one. Most of the repair is pretty small and really is just holes here and there. The rear sill and bed being the worst and those arent even that bad really.

full

full


Also discovered the exhaust the PO put on.....though it sounded nice its going to have to be chopped up. The PO welded the exhaust directly to the hangers and also to the headers. I also dont like how he ran it so cutting it out isnt the end of the world it just went from a "maybe" item to a "definitely" item.

But it adds another thing ot do before i get the frame blasted and painted/powdercoated/e-dipped (whatever i decide). Im already switching to a manual tranny so need to mock that up and see if the supports need moving or not. Then mock up the exhaust so i know where to move hangers to (if needed)


Hopefully I can keep plugging away on this but the Tacoma needs to have some projects done to it first. But its coming along slowly
 
Well got more free time and got the 40 take down to just the axles.


Got the rear on stands and ended up taking it all apart (funny how just 15 more minutes turns into an hour of working)
full


I did run into something im not sure about. Which is the front spring hangers. Both sides look a bit off compared to other pics and the random "tab" sticking up with a hole im not sure what its for. The fram reinforcing looks different but based on other pics looks like its normal? (in relation to the just "L" on passenger side vs the "c channel" on drivers)
full

full


Then i started playing with the parts washer and painting a bit. The parts washer worked great (so far at least). The parts painting box has already been replaced. Built a stand so i could stand up and paint instead of being hunched on my knees.

I also picked up some POR-15 in grey and am glad i went grey. The first coat goes on nicely, the second coat is easy to tell where it has been applied. Then top coating with real paint is nice and easy with black paint.


And lastly....apparently the tires and rims the PO had didnt quite work spacing wise. SO rather than use 1 spacer....he used two small ones. Only real problem i had was this didnt leave enough threads on the wheel studs for my comfort level.
full


And thats where I sit. I placed a rather large order with Kurt (cruiseroutfitters) so once that comes in the axle work really begins. For the time being its mostly just cleaning parts
 
I can't tell from your photos - but looks like you might have a fixed fan with a short spacer, and not a lot of room where the radiator sits.

I made the mistake of assuming the person who put the SBC in my frame (in the 70s) had done it right. For me that has caused a lot of additional work, time, parts to resolve running hot issues.

Take the time to make sure the engine is where it should be.

The fan is a fixed fan (ie no clutch). Im not sure if there is a space or not but what is there, needs to be there to clear the pulley for the power steering.

The radiator is the stock radiator and sits in the stock position. With the engine installed the fan was ~3-4" from the radiator. I might end up with a different radiator in the future as the stock one did have a leak...and id love to get one with AN fittings. The engine also had a few inches to the firewall so it seemed pretty well centered in the bay.

The engine seems to be mounted right the best I can tell which was just measuring the mounts to make sure the engine was centered but other than radiator clearance and making sure its centered I dont know what to look for to be honest.
 
I did run into something im not sure about. Which is the front spring hangers. Both sides look a bit off compared to other pics and the random "tab" sticking up with a hole im not sure what its for. The fram reinforcing looks different but based on other pics looks like its normal? (in relation to the just "L" on passenger side vs the "c channel" on drivers)

Your frame has had a shackle reversal done to the front springs. Those front mounts were the rear hangers that were rivited to the frame rails. The ear that sticks up was attached to the outside of the frame rail originally. Also what do the rear shackle mounts on the frame look like now? Were they recessed into the rails? If not you may have pretty bad caster angles in the front end...
HTH,
Will

Now that you mention it it makes a lot more sense. Here is what the drivers side rear hanger looks like (the passenger side is the same)

It really looks like the PO just removed the hangers and swapped them and welded them back in in the same places (for the most part)

looking outwards
full


Looking in
full


Looks like they just flipped locations on them and that was it. Looks like something else Ill be fixing....
 
Yep they just flipped the spring mounts front to rear. From what I understand when you flip the fixed mount to the front the upper shackle mount is recessed in the frame rail to maintain caster angles. The kits sold by LCAH/Man-a-Fre have a front tower that extends down from the frame and use a standard shackle at the rear. As a result of this there is a 1.5/2" lift built in to the shackle reversal... I had one from Man-a-Fre 20 years ago but have since removed it
 
Yep they just flipped the spring mounts front to rear. From what I understand when you flip the fixed mount to the front the upper shackle mount is recessed in the frame rail to maintain caster angles. The kits sold by LCAH/Man-a-Fre have a front tower that extends down from the frame and use a standard shackle at the rear. As a result of this there is a 1.5/2" lift built in to the shackle reversal... I had one from Man-a-Fre 20 years ago but have since removed it


Good to know and the little bit of googling for pictures I see what you mean. Seems like 75% of the reversals put the rear mount up into the frame a bit. The other 25% seemed to just do what this PO did.

Ill have to do some research on how i want to do the springs now. I had planned on just getting the OME kit so id need redo the perches if i go that route. Which shouldnt be to hard...just a matter of cutting them and rewelding them.
 
The front shock mount built into the FJ60 box is, um, different.

cool project though
 
Progress finally! Well been slowly working on it but some mistakes on my end had me waiting for parts/fasteners.

But the rear axle was rebuilt, new pads, and new wheel cylinders from NAPA. The front was rebuilt and is like 80% done. Went ahead and got new front brake calipers cause it wasnt much more than a rebuild kit anyways and saves time.

Just need to get the drivers side brake calpier on and finish cleaning up/painting the warn hub end cap portion and then its on the the steering stuff and then onto the frame!

full
 
Contact me if you're interested in a Champion 2 row aluminum radiator that does have lower AN fittings for the built in trans cooler. It didn't work for me, and very few miles.... however that may be a little small (you may decide to go 3 row). I am in WA...

Looks like the work is coming along though...
 
@toyotaspeed90 Sorry i never responded back! Thought I did but apparently not. Sometimes the work computers act funny so i blame them! But i wont be needing the radiator.


As for me....progress has been made again! No pictures as it is nothing major as of yet. Just cleaning up things for the most part. The frame itself is pretty much ready. I spent the last two nights grinding off all the extra tabs and exhaust hangers from both the PO and the stock ones. Im going to have to redo the whole setup anyways. Also got some of the extra stuff off like the motor mounts and brake line brackets off.

I also got rid of the shackle reversal in the front. Picked up BTB products new spring hangers and am pleased they line up with the old rivet holes. So be easy to bolt them on (with grade 10.9 bolts). Nice product but will say bit disappointed in the shipping from BTB. Easily could have shipped out in a USPS medium flat rate box but instead cost a lot more. But o well cant complain to much!

So all that is left frame wise is stuff I might wait till after powder coating the frame. I need to move my FJ60 power steering box forward a bit inorder to fit the Ford Shock tower. Both PS and DS ford shock towers need to be installed....after researching Ill probably just bolt them on as others have done so with good results. Then the last major thing is to move the transmission support if needed. I think it is going to be to far to the rear now but wont know.

I did pick up a H42 4 speed so I will be going back to a manual. Which is what I really wanted. Got it for a good price. Was supposedly rebuilt and driven under 10k miles and then has sat for a few years. Ill probably open it up and take a look at it then replace the seals and gaskets. I also need to figure out exactly what route I want to go to mate the SBC to the 4 speed.

Placed another order with cruiser outfitters for all new gaskets and seals for the transfer case and transmission plus a few other small things so Ill have plenty of things to keep me busy in the next few weeks.

And now Im all caught up. It is funny Ill go through periods of not really caring to work on it, then spend a day looking at other peoples builds and get excited again.
 
Had some more free time so worked on more things. The frame is almost ready to head to blasting. Just need to grind off the old power steering reinforcement that will no longer work and also remove the t-case cross member mount since itll be different with the new driveline.

I straightened out the ford shock towers and got them welded up. Not attached to the frame yet but i did put the old fenders on and mocked up how itll look (very roughly mind you) with the shock tower and the FJ60 PS box. The fender will need some trimming/massaging to get the box to fit. I put the steering wheel on and the u-joint just barely clears the shock tower. Since Ill have to redo this anyways Ill see if there is a better option there as the u-joint currently there is huge

full


I then felt like staying somewhat clean so I tore into the transmission. I was told it was rebuilt in 2002 and only used till ~08 with under 15k miles on it. I still ordered new seal and gaskets and wanted to get a look inside just to see. It looks to be in good shape overall. I didnt notice anything worn out really. So pretty happy with this purchase!

full
 
Its sad to look and see I sort of stopped updating here 10 months ago. But lots of overtime, crappy hours at work, new floors in the house, a new fence for the back yard, and a new puppy took up a lot of the free time.

But Im back at it finally!

First...heres the punk who took up alot of my time...and add lots of unplanned projects (new flooring and the fence)
full


But during the winter i managed to get the old 283 cleaned up and give it a "polishing the turd" paint job. I replaced most of the gaskets but didnt do the head gaskets or touch the oil pan. New water pump as well.

full


Things sat for a few months after than. This past July i picked up a sand blaster and started really get after things....starting with the frame.
full


Once i finished blasting the frame, it got two coats of POR-15, a coat of POR-15 tie coat, then two coats of rustoelum farm implement gloss black (i mistakenly bought the gloss and not low gloss but dont mind the gloss).

After painting I got both the front and rear axles under the frame and the OME springs attached. For some reason i couldnt find the front u-bolt plates so had to order news ones of those. Also got the engine mounted to the frame.

From there i put the advanced adapter bellhousing on and put the H42 in place ot see where the mounts would need ot be placed....only to discover the stock bellhousing support bracket is in the way...D'oh! O well be easy to fix and i still saw where the new brackets would go.

Latsely i worked on the brake lines a bit. First time doing them so bit of learning involved but got most of the short, tight bending lines done and just have the lines going from the union on the frame to the soft lines and the lines going accross the axles to do.


So not to much to go before I move onto the body. I have to say it felt awesome actually putting things together. Definitely a motivation giver. I might actually save some of the smaller stuff (like the radiator support) for when I need a sort of "pick me up"
 
Well wanted to get more done today but still spent a few hours working on the FJ40.

First time ever working with a clutch so was a bit of a learning experience. Refereed to pictures on here and a couple youtube videos so think it is all correct. Its definitely engaged as I cant spin the transfer case anymore. I just cant test the disengaged (or more commonly known as pushing the clutch in) to know for sure.

I got the flywheel and clutch installed. Used a well reviewed, cheapish flywheel off summit racing. Then used the centerforce clutch and pressure plate that are recommended by Advanced Adapters with their kit. Used all new ARP bolts. Also got to buy a new socket set since the flywheel bolts are 12 point and i didnt own any 12 point. I do enjoy a reason to buy more tools so dont mind!


After the clutch I put the AA beelhousing on. Then used my engine hoist and some muscle to get the transmission in. Also picked up some 5" long bolts to use as a "guide". If i were to do it again I'd have picked up all thread so I could have "walked" the transmission into place but tightening nuts. But really it wasnt to bad.

I did have to make my own dowels. Not sure why but the H42 i bought didnt have them. So it was a bit of an adventure to get something that would work. Meant to take a picture but forgot.

The AA bellhousing also left me slightly disappointed. Id still give it a 8/10 but the holes for mounting the transmission had gunk in them and also were rough threading in the bolts. I ran the thread chaser through a couple times and they cleaned right up. Just a bummer to have to do that one something brand new. My other complaint was with the directions. Honestly they are pretty worthless. Its more just a parts list and a diagram. No torque specs or something. For a first timer it was a bit of a bummer to have to go research things like bellhousing to engine bolt torque specs. (the engine mount and transmission mount directions include torque specs)

full


And one last look from below. Hopefully nothing looks wrong lol. Ill need to find an inspection cover at some point but that can be down the road.

full


And im done for the day....or least for now. Might go tackle some small things later but its getting to hot and the sun directly overhead so time to call it quits
 
Well always fun going from highs (getting engine mounted and all that) to coming back to reality lol. Spent a while just evaluating and looking the tub over. Overall its in decent shape. But i did identify five areas Ill need to fix.

1) Rear sill. I think the sill isnt actually bad, just the metal "cap". But figure safest bet would be to replace it with all new. So already ordered a new one.

2) Is a bunch of random holes. Previous owner had a roll cage that bolted to the floor so gott fill those holes. Same holes got cut to access the front body mount bolt. Then just some other random holes

3) The dash area. Overall its not to bad but going to need some work. Will need all new dash pads. The upper dash pad support is bent and going to need straightening. So have to figure something out for that. The ash tray also has been cut so might need a small patch there to make it rectangular again. Then it should only be plugging a couple of the added holes the PO used.

full


4) Is the quarter panels. The PO cut them to fit larger tires. So I will need to fix them. It kind of sucks cause the rest of the quarter panels are in good shape (ie no real rust). But i fear the cut the PO did is going to be to much to use something like the real steel wheel well patch. So itll either be full rear quarters or the wheel cut out patches with some extra patches to go with them.

full


5) Lastly is with the bed. I always felt like it was a bit to flexy in some spots. Well noticed a piece is missing all together. You can see the rusty spots where for some reason the PO cut out the support and also the brackets for the "skid plate" thingy. Thankfully my old tub has them so i should be able to salvage them. It also explains some of the holes in the bed. Whoever cut them out probably just drilled out the spots weld and straight through the bed. So be a double whamming sort of fix being able to weld the brackets back and plug the holes in the bed lol.

full


More body work than I had in my mind to accomplish....but overall not to bad either.
 

Users who are viewing this thread

Back
Top Bottom